Skip to content
DisclaimerTerms Of UseGDPR PolicyCookie Policy

Foodish Talk

  • Home
  • Drinks
  • Appetizers
  • Dinner
  • Dessert
  • About
  • Contact
  • Privacy Policy
DisclaimerTerms Of UseGDPR PolicyCookie Policy

Ava

To make Mediterranean cod with tomato basil sauce, gather these fresh ingredients: - 4 cod fillets (about 6 oz each) - 1 can (14 oz) crushed tomatoes - 2 tablespoons olive oil - 1 small onion, finely chopped - 2 garlic cloves, minced - 1 teaspoon dried oregano - 1 teaspoon smoked paprika - Salt and pepper to taste - 1/4 cup fresh basil, chopped (plus extra for garnish) - Zest and juice of 1 lemon - Fresh mozzarella, sliced, for topping (optional) - Cooked quinoa or couscous, for serving These ingredients work together to create a dish that is bright, fresh, and full of flavor. Fresh cod is a great choice because it cooks quickly and turns flaky when done. The crushed tomatoes form a rich sauce that pairs perfectly with the fish. Olive oil adds a smooth touch, while garlic and onion bring depth. Using fresh herbs like basil gives the dish a vibrant taste. Lemon zest and juice add a nice brightness that balances the flavors. If you want to make it even more special, top the cod with fresh mozzarella. It melts beautifully and adds a creamy texture. Make sure to have quinoa or couscous ready for serving. They soak up the sauce and complete this meal. You can find the full recipe to guide you through the cooking process. Enjoy making this delightful dish! To start, I heat 2 tablespoons of olive oil in a medium saucepan over medium heat. Once hot, I add 1 finely chopped onion. I sauté it for about 5 minutes until it turns soft and clear. Next, I stir in 2 minced garlic cloves and cook for another minute. This step adds a lovely aroma to my sauce. After that, I pour in 1 can of crushed tomatoes, 1 teaspoon of dried oregano, and 1 teaspoon of smoked paprika. I season with salt and pepper to taste, then bring the mix to a gentle simmer. I let it cook for about 10 to 15 minutes until it thickens slightly. This simmering helps the flavors blend well. Once the sauce thickens, I mix in 1/4 cup of chopped fresh basil, the zest, and juice of 1 lemon. I taste it and adjust the seasoning if needed. With that, my fragrant tomato-basil sauce is ready! Now, I preheat my oven to 375°F (190°C). In a baking dish, I season 4 cod fillets with salt and pepper on both sides. This simple step adds great flavor to the fish. Then, I pour half of the tomato-basil sauce over the cod, ensuring each fillet is well covered. If I want a cheesy touch, I place a slice of fresh mozzarella on top of each fillet. I cover the baking dish with foil and slide it into the oven. I bake the cod for 20 minutes, which helps it cook through. After that, I remove the foil for an additional 10 to 15 minutes. This step allows the top to brown slightly. I know the cod is done when it turns opaque and flakes easily with a fork. Once the cod is cooked, I spoon the remaining sauce over the fish. To finish, I garnish with extra fresh basil, adding color and flavor. This dish looks beautiful and tastes even better! For the full recipe, check out the details shared earlier. For the best Mediterranean cod, cook it at 375°F (190°C). This temperature helps keep the fish moist. Bake it covered with foil for the first 20 minutes. Then, remove the foil and bake for another 10-15 minutes. The cod is done when it turns opaque and flakes easily with a fork. This ensures a tender and juicy fillet. If you cannot find cod, try using halibut or tilapia. Both options work well with the sauce. For a vegan or vegetarian twist, swap the cod with firm tofu or chickpeas. Make sure to adjust the cooking time to suit these substitutes. Serve the Mediterranean cod on a bed of quinoa or couscous. This adds texture and flavor. For garnish, sprinkle fresh basil on top. You can also add lemon zest for a bright touch. A drizzle of olive oil enhances the dish's look and taste, making it more inviting. For more details, refer to the Full Recipe. {{image_2}} Adding vegetables to your Mediterranean cod makes it even better. You can toss in some bell peppers and spinach. They add color and nutrition. You can also use seasonal veggies like zucchini or cherry tomatoes. Just chop them up and mix them in. If you want to change the sauce, try a pesto variation. This gives a fresh twist. Blend basil, pine nuts, and olive oil for a rich flavor. For a creamy tomato alternative, stir in some heavy cream. This makes the sauce smooth and rich. To enhance flavors, consider adding olives or capers. Both bring a salty kick that pairs well with the cod. You can also experiment with spice blends. Try adding cumin or coriander for a warm touch. These variations let you personalize your dish. You can explore different tastes and textures. For the full recipe, check out the earlier section. To store leftovers, let the cod cool to room temperature. Place it in an airtight container. This keeps moisture in and prevents odors. You can enjoy your Mediterranean cod within three days. After that, the fish might lose its freshness. For long-term storage, freezing works well. Wrap the cod tightly in plastic wrap or foil. Place it in a freezer-safe bag. Make sure to remove as much air as possible. This helps prevent freezer burn. When ready to eat, thaw it overnight in the fridge. To reheat, bake it at 350°F for about 15 minutes until warm. You can prepare the sauce in advance. Store it in the fridge for up to three days. Mix it with cooked cod just before serving. You can also use leftover cod in salads or wraps. It adds a tasty twist to any dish. Yes, you can use frozen cod fillets. Just thaw them before cooking. Place the fillets in the fridge overnight to defrost. If you're short on time, you can also place them in a sealed bag and submerge them in cold water for about an hour. Once thawed, pat them dry with a paper towel. This helps the seasoning stick better. Yes, this recipe can be gluten-free. The main ingredients do not contain gluten. If you serve it with grains, use gluten-free options like quinoa or rice. Always check labels for any hidden gluten in sauces or other ingredients. This way, you can enjoy a safe and tasty meal. You can serve Mediterranean cod with many tasty sides. Here are some great options: - Quinoa or couscous for a fluffy base - A fresh green salad with lemon vinaigrette - Roasted vegetables like zucchini or bell peppers - Garlic bread for a crunchy side These sides complement the flavors of the cod and tomato sauce well. For more ideas, check out the Full Recipe. This Mediterranean Cod with Tomato Basil Sauce is simple to make and full of flavor. We covered the key ingredients and steps, from sautéing vegetables to baking the cod. I shared tips for perfecting the dish, alternative ingredient options, and even creative variations. Remember, experimenting with herbs and spices can elevate your meal. Whether it’s a weeknight dinner or a special occasion, this recipe can impress. Enjoy cooking, and savor each bite of this delicious seafood dish. Your taste buds will thank you!

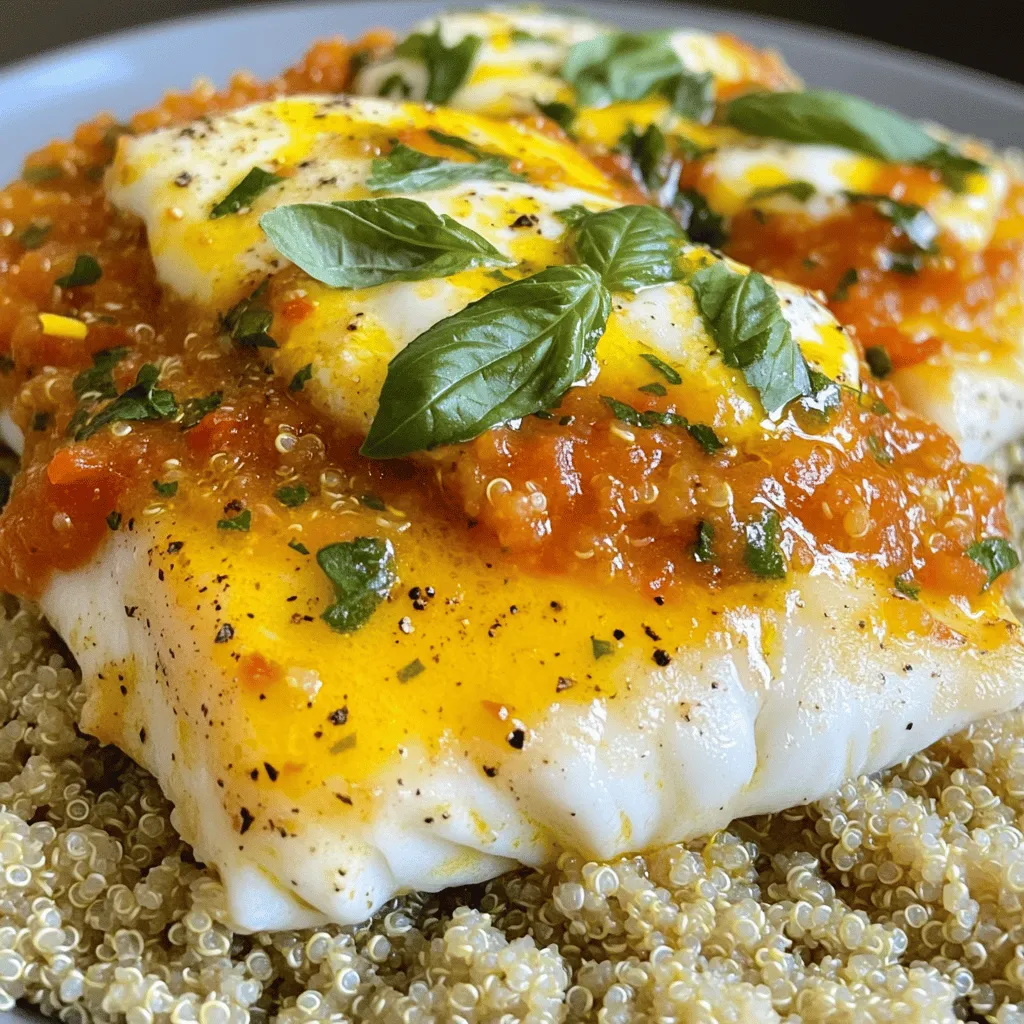
Mediterranean Cod with Tomato Basil Sauce Delight

Welcome to a culinary journey where fresh flavors meet simple cooking! In this post, I’ll guide you through making Mediterranean

To make these irresistible chicken bombs, you need a few simple ingredients. Gather the following: - 2 cups cooked chicken, shredded - 1 cup cream cheese, softened - 1 cup shredded mozzarella cheese - 1/2 cup diced green onions - 1 teaspoon garlic powder - 1 teaspoon onion powder - Salt and pepper to taste - 1 package refrigerated crescent roll dough - 1 egg, beaten (for egg wash) Each ingredient plays a key role in the flavor and texture of the chicken bombs. The cream cheese makes it creamy and rich. The mozzarella adds a cheesy stretch that everyone loves. The green onions give a fresh crunch, while garlic and onion powders boost the taste. Make sure your chicken is cooked well. You can use leftovers or rotisserie chicken. This recipe is quick and easy, perfect for a weeknight meal. For those who want the full experience, check out the Full Recipe to see how these tasty treats come together! - In a mixing bowl, combine: - 2 cups cooked chicken, shredded - 1 cup cream cheese, softened - 1 cup shredded mozzarella cheese - 1/2 cup diced green onions - 1 teaspoon garlic powder - 1 teaspoon onion powder - Salt and pepper to taste - Mix all the ingredients until fully incorporated. Use a fork or spatula for even blending. - Unroll the crescent roll dough. Separate it into triangles. - Take one triangle and place about 2 tablespoons of the chicken mixture in the center. - Fold the sides of the dough over the filling. Roll it up to form a secure bundle. Pinch the seams tightly to seal. Repeat this for each triangle. - Preheat your oven to 375°F (190°C). Prepare a baking sheet with parchment paper. - Place the filled chicken bombs on the baking sheet, spaced apart. - Brush the tops with a beaten egg for a golden finish. - Bake in the oven for 15-20 minutes. Look for a golden brown color on the dough. For the full recipe, check out the details above. Enjoy your tasty treat! - Ensure chicken is fully cooked before shredding. This step helps keep your bombs safe and tasty. - Experiment with different cheeses for variety. Try cheddar, pepper jack, or feta for new flavors. - Garnish ideas for an appealing look include fresh parsley or a sprinkle of paprika. These add color and flair. - Serve cheesy chicken bombs on a platter with ranch or BBQ sauce for dipping. This gives a fun twist to each bite. - To prevent filling from leaking, pinch the seams tightly. This keeps all the cheesy goodness inside. - Ensure even baking for a crispy texture by spacing the bombs apart on the baking sheet. This allows hot air to circulate and crisp up each one. For the full recipe, refer back to the ingredients and steps outlined above. Enjoy these tips to make your chicken bombs a hit! {{image_2}} You can easily switch ingredients in this recipe. Try using turkey instead of chicken. Ground turkey gives a lighter twist. For a vegetarian option, use cooked mushrooms, lentils, or a mix of veggies. You can also change up the spices. Use smoked paprika for a smoky flavor. Add cumin for a warm touch. Fresh herbs like basil or cilantro can brighten the dish. Dipping sauces make chicken bombs even better. Ranch dressing is a classic choice. It adds creaminess and coolness. BBQ sauce brings a sweet and tangy kick. For heat, try spicy mayo. You can make it at home by mixing mayo with hot sauce. Store-bought sauces are great too. They save time and still taste good. Need to adjust for dietary needs? Use gluten-free dough instead of crescent rolls. Many brands offer tasty options. For dairy-free diets, choose a dairy-free cream cheese. Nutritional yeast can add a cheesy flavor, too. These swaps help everyone enjoy chicken bombs without worry. To keep your chicken bombs fresh, use airtight containers. Glass or plastic containers work well. Let them cool down first. Place a paper towel inside to absorb excess moisture. This helps keep the texture nice. When reheating, the oven is best for keeping the crunch. Preheat it to 350°F (175°C). Place chicken bombs on a baking sheet and heat for about 10-15 minutes. If using a microwave, put them on a microwave-safe plate. Heat for 30 seconds to 1 minute. The texture may not be as good, but it saves time. Yes, you can freeze chicken bombs! To freeze, wrap each bomb in plastic wrap. Then, place them in a freezer bag. This keeps them fresh for up to three months. When you are ready to eat, thaw them in the fridge overnight. You can then reheat them as described above. Chicken bombs are tasty bites filled with shredded chicken and cheese. They are wrapped in flaky crescent dough. This dish is popular for parties and family dinners. People love them for their cheesy goodness and crunch. Each bite is a burst of flavor that keeps you coming back for more. Chicken bombs can last about 3 to 4 days in the fridge. Keep them in an airtight container to keep them fresh. Always check for signs of spoilage before eating. If they smell off or look strange, it’s best to toss them. Food safety is key for enjoying your leftovers. Yes, you can make chicken bombs ahead of time. Prepare the filling and fill the dough, but do not bake them yet. Store the uncooked bombs in the fridge for up to 24 hours. When ready to eat, bake them straight from the fridge. This saves time and keeps your meal simple. Many sides go well with chicken bombs. Here are some tasty options: - Fresh salad with a light dressing - Crispy fries or sweet potato fries - Veggie sticks with ranch dip - Garlic bread for extra flavor - Steamed broccoli or green beans These sides add color and balance to your meal. Enjoy mixing and matching for a fun dining experience. For more ideas, check out the Full Recipe! You now know how to make delicious chicken bombs. We covered the ingredients, step-by-step instructions, and tips to ensure perfect results. You can customize them with different proteins and sauces to fit your tastes. Store leftovers properly to keep them fresh, and feel free to prep ahead for convenience. Enjoy your cooking journey and impress your friends and family with this fun dish. Chicken bombs are easy and fun to make, perfect for any occasion!

Irresistible Chicken Bombs Recipe for a Tasty Treat

Craving a savory snack that packs a punch? You’re in for a treat with this irresistible Chicken Bombs recipe! Imagine

- 1 cup green or brown lentils - 2 tablespoons olive oil - 1 medium onion, chopped - 3 cloves garlic, minced - 2 medium carrots, diced - 2 stalks celery, diced - 1 cup mushrooms, sliced - 1 can (14 oz) diced tomatoes - 4 cups vegetable broth - 2 teaspoons dried thyme - 1 teaspoon smoked paprika - 1 bay leaf - Salt and pepper to taste - Fresh parsley for garnish Every ingredient plays a key role. Lentils form the base, adding protein and fiber. Olive oil gives a rich flavor. Onion and garlic create a savory aroma. Carrots and celery add sweetness and crunch. Mushrooms bring umami, making the stew hearty. Diced tomatoes give it a nice tang, while vegetable broth adds depth. Dried thyme and smoked paprika fill the stew with warmth. A bay leaf subtly enhances the taste. Seasoning with salt and pepper balances everything. Finally, fresh parsley brightens the dish and adds a pop of color. For the full recipe, check out the details above. Enjoy crafting this comforting dish! Preparing the vegetables Start by gathering all your veggies. Chop the onion into small pieces. Mince the garlic. Dice the carrots and celery into bite-sized pieces. Slice the mushrooms. Fresh vegetables make the stew taste great. Rinsing the lentils Next, take 1 cup of lentils. Rinse them in cold water. Use a fine mesh strainer to wash away any dirt or dust. This step is important. Clean lentils help the stew taste better. Sautéing the onion and garlic In a large pot, heat 2 tablespoons of olive oil over medium heat. Add the chopped onion. Sauté it for about 5 minutes until it softens. Then, add the minced garlic. Cook for another minute. The smell will be amazing! Adding other vegetables Now, toss in the diced carrots and celery. Stir them for about 5 to 7 minutes. You want them to start softening. After that, add the sliced mushrooms. Cook for 4 to 5 minutes until they become brown and juicy. Combining all ingredients and simmering Add the rinsed lentils, undrained diced tomatoes, and 4 cups of vegetable broth to the pot. Mix everything together well. Sprinkle in 2 teaspoons of dried thyme, 1 teaspoon of smoked paprika, and 1 bay leaf. Bring the stew to a boil over high heat. Once it boils, lower the heat to a gentle simmer. Cover the pot and let it cook for 30 to 35 minutes. Check if the lentils are tender. Don’t forget to remove the bay leaf before serving. Ladling into bowls Once cooked, grab a ladle. Scoop the delicious stew into bowls. Each bowl should be full of hearty goodness. Garnishing with parsley Finally, sprinkle some chopped fresh parsley on top. This adds color and a fresh taste. Serve your Hearty Vegan Lentil Mushroom Stew with crusty bread for dipping. Enjoy every bite! For the full recipe, refer to the earlier sections. Checking lentil doneness is key. After simmering for about 30 minutes, taste a few lentils. They should be tender but not mushy. If they need more time, keep simmering and check every few minutes. To adjust flavors with spices, you can be creative. If you want more heat, add a pinch of chili flakes. For a bolder taste, boost the smoked paprika or thyme. Always taste before serving. This helps you find the perfect balance. Serving styles can make your stew shine. Use rustic bowls for a cozy feel. Spoon the stew in and leave some space at the top. This looks inviting and allows for garnishes. Ideal accompaniments like crusty bread are a must. A slice of bread makes it easy to scoop up the stew. You might also try adding a side salad for some crunch. A sprinkle of fresh parsley on top not only looks great but also adds a pop of color. For the full recipe, check out the detailed steps in the main article. {{image_2}} You can switch up the lentils in this stew. Try red lentils for a softer texture. Black lentils give a nice bite. Each type adds its own charm. You can also add more veggies. Consider zucchini, bell peppers, or sweet potatoes. These choices boost nutrition and flavor. You can even toss in some leafy greens like spinach or kale. They cook down nicely and add vibrant color. To elevate the taste, think about herbs and spices. Fresh thyme or rosemary can brighten your stew. You can also add cumin for warmth. A dash of red pepper flakes adds a nice kick. For extra brightness, add a splash of vinegar or lemon juice. This simple trick balances out the stew's richness. It makes each bite pop with flavor. For the full recipe, check out the detailed steps to guide you through this delicious dish. You can store your Hearty Vegan Lentil Mushroom Stew in the fridge for up to five days. Use an airtight container to keep it fresh. Make sure it cools down before sealing. This helps lock in the flavors and prevents spoilage. When you're ready to eat, just reheat the stew on the stove or in the microwave. To freeze the stew, let it cool completely first. Pour it into freezer-safe bags or containers. Remove as much air as possible to avoid freezer burn. The stew will last for about three months in the freezer. When you're ready to enjoy it again, thaw it overnight in the fridge. For reheating, warm it gently on the stove to keep the taste intact. Add a splash of vegetable broth or water if it seems too thick. Can I make this stew in a slow cooker? Yes, you can. Just sauté the onion and garlic. Then add all the ingredients to your slow cooker. Cook on low for 6-8 hours. For a quicker option, cook on high for about 3-4 hours. What can I serve with Hearty Vegan Lentil Mushroom Stew? This stew pairs well with crusty bread or rice. You can also serve it with a fresh salad. The bread is great for dipping into the stew. How do I thicken the stew if it's too watery? If your stew is too watery, try mashing some lentils. You can also stir in a bit of cornstarch mixed with water. Let it simmer for a few more minutes until thickened. Are lentils gluten-free? Yes, lentils are naturally gluten-free. They are a great choice for those avoiding gluten. They provide protein and fiber while being very filling. Can I use fresh herbs instead of dried? Absolutely! Fresh herbs add bright flavors. Use about three times the amount of fresh herbs as dried. For example, if the recipe calls for one teaspoon of dried thyme, use three teaspoons of fresh thyme. Can I use vegetable broth from a store-bought mix? Yes, store-bought vegetable broth works well. Just check that it is low in sodium if you want to control salt levels. Homemade broth is also a great option if you have it. What other vegetables pair well with lentils and mushrooms? You can add sweet potatoes, zucchini, or spinach. These vegetables add flavor and texture. They also boost nutrition and make the dish even heartier. You now have all the steps to make a hearty vegan lentil mushroom stew. You learned what ingredients to use, how to prepare them, and tips for perfecting your dish. Remember, you can make this stew your own by experimenting with different vegetables and spices. It’s not just a meal; it’s a warm hug in a bowl. Enjoy the rich flavors and healthy goodness as you share it with friends or family. Cooking should always be fun and rewarding. Happy stewing!

Hearty Vegan Lentil Mushroom Stew Comfort Dish

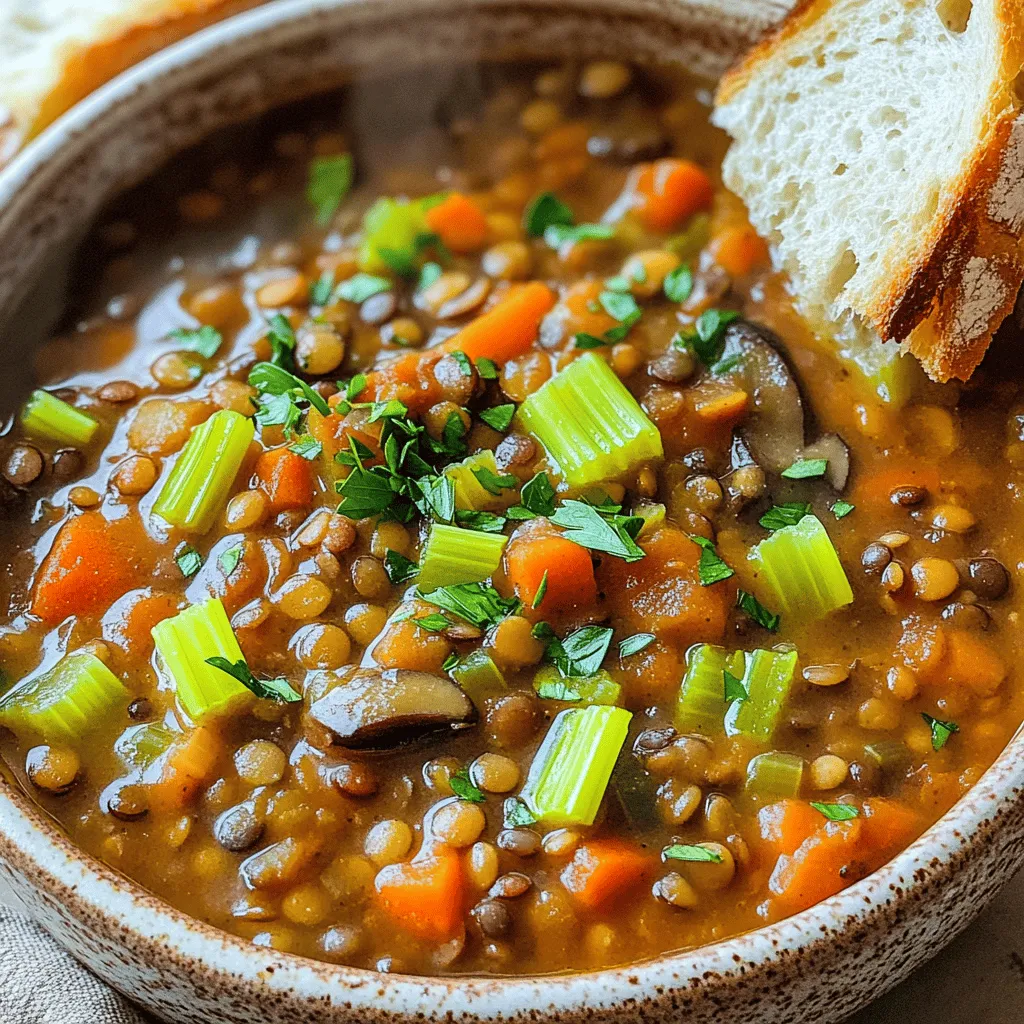
Craving a warm, filling meal that’s 100% plant-based? Look no further! My Hearty Vegan Lentil Mushroom Stew is packed with

For this creamy vegan lentil tortilla soup, gather the following: - 1 cup green or brown lentils, rinsed - 1 medium onion, chopped - 2 cloves garlic, minced - 1 bell pepper (any color), diced - 2 medium tomatoes, diced - 4 cups vegetable broth - 1 can (15 oz) coconut milk - 1 teaspoon ground cumin - 1 teaspoon smoked paprika - ½ teaspoon chili powder - Salt and pepper to taste - 1 tablespoon olive oil - 1 lime, juiced - Fresh cilantro, for garnish - Tortilla chips, for topping These ingredients blend well to create a rich, hearty soup. The lentils add protein and fiber. The coconut milk gives creaminess without dairy. The spices bring warmth and flavor. Each serving of this soup is packed with nutrients. Here’s a quick look at the nutritional info: - Calories: Approximately 320 - Protein: 14 grams - Carbohydrates: 40 grams - Dietary Fiber: 12 grams - Total Fat: 15 grams This soup is not only tasty but also healthy. It provides essential nutrients while being plant-based. You can easily swap some ingredients if needed. Here are a few common substitutions: - Lentils: Use canned lentils for a quicker option. - Coconut Milk: Almond milk or any plant-based milk can work, but the soup won’t be as creamy. - Vegetable Broth: Water or homemade broth is fine if you’re out of store-bought. - Tomatoes: Use canned diced tomatoes if fresh ones aren’t available. - Bell Pepper: Any color or type of pepper works well. These substitutions help you adapt the recipe to what you have on hand. Enjoy customizing your creamy vegan lentil tortilla soup! For the full recipe, check out the instructions above. To make this creamy vegan lentil tortilla soup, I use simple techniques that help build flavor. First, I sauté the onion and garlic in olive oil. This step brings out their sweetness. Next, I add the bell pepper and tomatoes, letting them soften. This mix creates a robust base for the soup. Finally, I blend part of the soup to make it creamy while keeping some lentils whole for texture. This adds depth to every bite. - Prep Time: 15 minutes - Step 1: Sauté onion (5 minutes) - Step 2: Cook garlic (1 minute) - Step 3: Add bell pepper and tomatoes (5 minutes) - Step 4: Combine all ingredients and bring to a boil (5 minutes) - Step 5: Simmer the soup (30-35 minutes) - Step 6: Blend part of the soup (2-3 minutes) - Step 7: Stir in lime juice and adjust seasoning (1 minute) For the best texture in your soup, consider these tips: - Don’t over-blend: Only blend part of the soup. This keeps lentils whole and adds a nice bite. - Use fresh ingredients: Fresh vegetables enhance the flavor and texture. - Simmer gently: A low simmer allows the lentils to cook evenly without breaking apart. - Adjust liquid: If you want a thicker soup, reduce the broth slightly. For a thinner soup, add more broth. By following these steps and tips, you will create a creamy, comforting soup that warms both the heart and the stomach. For more details, check the Full Recipe. To boost the flavor of your creamy vegan lentil tortilla soup, use fresh herbs. Fresh cilantro adds a bright taste. Squeeze some lime juice right before serving. This adds freshness and brightness. You can also add a splash of hot sauce for extra heat. If you like a smoky flavor, try adding chipotle peppers in adobo sauce. This will enhance the depth of the soup. One common mistake is overcooking the lentils. Keep an eye on them as they cook. You want them tender but not mushy. Another mistake is skipping the blending step. Blending part of the soup makes it creamy and rich. Lastly, don’t forget to season well. Taste your soup before serving and adjust the salt and spices. To store leftovers, let the soup cool completely. Then, transfer it to an airtight container. It will keep well in the fridge for up to three days. To freeze, use freezer-safe containers. Make sure to leave some space at the top for expansion. The soup can last in the freezer for up to three months. When you’re ready to eat, thaw it overnight in the fridge. Reheat on the stove until warmed through. Check out the Full Recipe for more tips on making this dish! {{image_2}} You can easily boost the protein in your creamy vegan lentil tortilla soup. Here are a few ideas: - Chickpeas: Add one can of rinsed chickpeas for extra protein and fiber. - Tofu: Cube firm tofu and sauté it with the onions for a hearty option. - Quinoa: Stir in half a cup of cooked quinoa. It adds texture and protein. These options make your soup not only tasty but also filling. Garnishes can take your soup to the next level. Here are some fun options: - Avocado: Sliced or diced avocado adds creaminess. - Vegan Sour Cream: A dollop of this makes it rich and tangy. - Chopped Green Onions: Sprinkle them on top for a fresh crunch. Feel free to mix and match these garnishes. It makes each bowl unique! Not everyone likes the same spice level. Here’s how to adjust it: - Mild: Skip the chili powder for a soft flavor. - Medium: Use the recipe as is. It has a nice kick. - Spicy: Add sliced jalapeños and extra chili powder. You can tailor the heat to fit your taste. Experiment until you find your perfect blend! For the full recipe, check out the complete guide. To store your creamy vegan lentil tortilla soup, let it cool first. Use a clean container with a tight lid. Glass or BPA-free plastic works well. Make sure to store it in the fridge within two hours of cooking. This keeps the soup fresh and safe to eat. You can freeze this soup for later enjoyment. Pour cooled soup into freezer-safe bags or containers. Be sure to leave some space at the top, as the soup will expand when frozen. Label the bags with the date. You can freeze it for up to three months. When ready to eat, thaw it in the fridge overnight or use the microwave. In the fridge, your creamy vegan lentil tortilla soup will last for about four to five days. If you freeze it, it can stay good for three months. Always check for any off smells or changes in texture before serving. Enjoy your delicious soup whenever you're ready! For the full recipe, refer back to the main section. To add heat to your soup, you can use several methods. First, consider adding more chili powder or a splash of hot sauce. You can also include diced jalapeños or crushed red pepper flakes for extra spice. Adjust the amount based on your taste. If you want to balance the heat, serve it with avocado or a dollop of vegan sour cream. Yes, you can prepare this soup in advance. It stores well in the fridge for up to three days. To reheat, simply warm it on the stove over low heat. If it thickens, add a little vegetable broth to reach your desired consistency. This soup often tastes better the next day as the flavors blend. Absolutely! Dried lentils can work well in this recipe. Just remember to rinse them before use. Soak them for a few hours to help them cook faster. If you use dried lentils, increase the cooking time to about 40-45 minutes. You can find the Full Recipe for detailed steps on how to prepare it perfectly. This post covered essential ingredients, cooking steps, and tips for making great soup. We explored variations, storage tips, and answered common questions. Remember, you can adjust flavors to fit your taste. Use fresh ingredients for the best results. Avoid common mistakes to ensure satisfaction. With these tips, you can make a yummy soup every time. Enjoy the process and share your success!

Creamy Vegan Lentil Tortilla Soup Flavorful Comfort

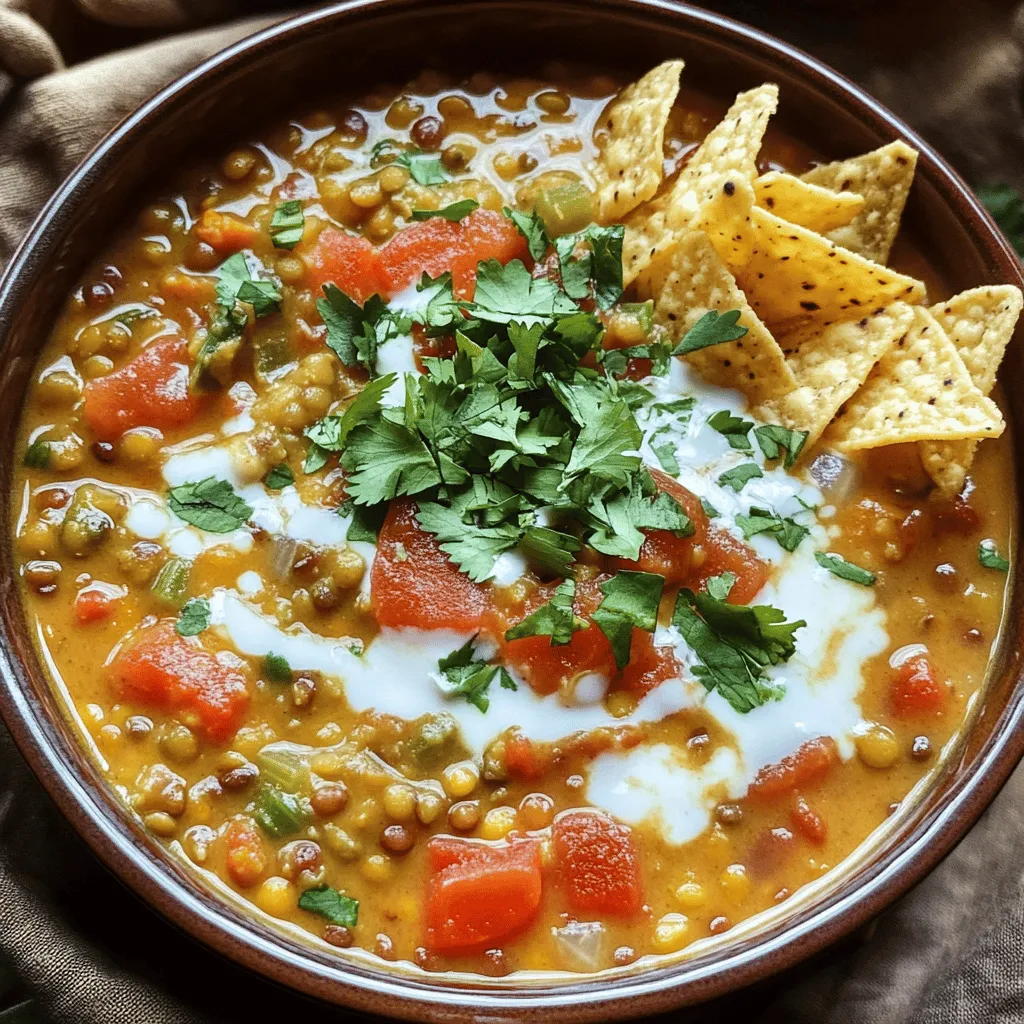
Looking for a warm, cozy dish that packs a flavor punch? You’ve found it! This Creamy Vegan Lentil Tortilla Soup

- 1 cup red lentils, rinsed - 1 can (14 oz) coconut milk - 1 medium onion, finely chopped - 2 cloves garlic, minced - 1-inch piece ginger, grated - 1 medium carrot, diced - 1 red bell pepper, diced - 2 cups vegetable broth - 1 tablespoon curry powder - 1 teaspoon turmeric powder - 1 teaspoon cumin seeds - Salt and pepper to taste - 2 tablespoons olive oil - Fresh cilantro, for garnish - Lime wedges, for serving Gather these ingredients before you start cooking. They create a rich, creamy flavor that is perfect for any weeknight. The red lentils will cook quickly, making this dish a great choice for busy nights. Coconut milk adds a velvety texture, while spices like curry and turmeric bring warmth. Fresh cilantro and lime add the perfect touch at the end. You can find the full recipe linked in the article. These ingredients will help you make a delicious, satisfying meal that everyone will enjoy! - Step 1: Sauté cumin seeds Start by heating olive oil in a large pot over medium heat. Add the cumin seeds. Sauté them for about 30 seconds until they smell great. This step unlocks the spice's flavor. - Step 2: Cook onions, garlic, and ginger Next, add the chopped onion, minced garlic, and grated ginger. Cook this mix for about 5 minutes. You want the onions to be soft and clear. The aroma will fill your kitchen. - Step 3: Add diced vegetables Stir in the diced carrot and red bell pepper. Cook these for another 5 minutes. This helps the veggies soften and blend with the spices. - Step 4: Stir in spices Now, add the curry powder and turmeric powder. Stir everything for about a minute. Toasting the spices adds depth to the dish. - Step 5: Combine lentils and liquids Pour in the rinsed lentils, coconut milk, and vegetable broth. Stir well to mix all the ingredients. This creates a creamy base for the curry. - Step 6: Simmer until ready Bring everything to a gentle simmer. Reduce the heat to low, cover the pot, and let it cook for about 20 minutes. Check on it occasionally to stir. The lentils should be tender when done. - Step 7: Season and adjust consistency Once the lentils are cooked, taste the curry. Add salt and pepper to your liking. If it feels too thick, mix in a little more broth or water to reach the right texture. - Step 8: Remove from heat and garnish Take the pot off the heat. Let it sit for a few minutes. Garnish with fresh cilantro before serving. This adds a pop of color and flavor. Serve with lime wedges for a zesty touch. You can find the Full Recipe linked here for more details. - Use fresh spices for enhanced flavor. Fresh spices make a big difference. - Adjust salt and pepper to taste. This step personalizes the dish for you. - To prevent lentils from sticking, stir them well during cooking. This keeps them loose. - Simmering covered helps the curry cook evenly and keeps it moist. - Fresh cilantro works well. It adds a nice touch and flavor. - You can serve this curry with rice or naan. Both options are tasty and filling. {{image_2}} You can switch up the veggies to boost nutrition. Try adding spinach, sweet potatoes, or zucchini. These veggies add color and great taste. You can also use green or brown lentils instead of red lentils. They have a firmer texture and will change the look of your dish. Want a milder curry? Just cut back on the curry powder. For a spicier kick, add chili peppers or red pepper flakes. You can also use fresh jalapeños for heat. Always taste as you go to find your perfect spice level. If you want a vegan dish, this recipe is already vegan! It uses coconut milk for creaminess. For gluten-free needs, check your broth for gluten. Most vegetable broths are safe, but always read the label. Enjoy your curry without worry! After making Creamy Coconut Lentil Curry, let it cool down. I place it in the fridge within two hours. Use an airtight container to keep it fresh. Glass containers are great for this. They are easy to clean and do not stain. You can also use plastic containers, but make sure they seal well. For long-term storage, freezing is a good option. First, let the curry cool completely. Then, pour it into freezer-safe bags or containers. Make sure to leave some space at the top. This allows the curry to expand while freezing. To thaw, move it to the fridge overnight. This way, it keeps its texture and flavor. To reheat your curry, use a stovetop or microwave. For the stovetop, place it in a pot over low heat. Stir often to prevent sticking. For microwave reheating, use a microwave-safe bowl. Heat on medium for two to three minutes. Check and stir halfway for even heating. This keeps the flavor bright and tasty. What can I serve with Creamy Coconut Lentil Curry? You can serve this curry with rice or naan. Both pair well with its rich flavor. For a fresh touch, add a side salad. This balance adds crunch and freshness to your meal. Can I make this recipe ahead of time? Yes, you can make it ahead of time. Just store it in the fridge. It tastes great after resting, as the flavors mix more. How long does Creamy Coconut Lentil Curry last in the fridge? It lasts about 4 to 5 days in the fridge. Just keep it in a sealed container. Can I use dried lentils instead of red lentils? You can use dried lentils, but adjust the cooking time. Dried lentils take longer to cook. Soak them for a few hours if possible. This helps them cook faster and softer. Is coconut milk essential for this recipe? Yes, coconut milk is key for creaminess. It adds rich flavor and texture. If you need a substitute, try almond or soy milk, but the taste will be different. How healthy is Creamy Coconut Lentil Curry? This curry is quite healthy. It is rich in protein and fiber from lentils. Coconut milk adds healthy fats, which help your body absorb nutrients. What are the health benefits of lentils? Lentils are great for your heart and digestion. They help lower cholesterol and keep you full. Plus, they are packed with vitamins and minerals. Creamy Coconut Lentil Curry is a nutritious and tasty dish. We covered the key ingredients, simple steps, and helpful tips. You learned how to adjust flavors and storage methods. Remember, you can use different veggies and spices to make this recipe yours. It’s a versatile meal for any diet. Enjoy making it and have fun experimenting! Your kitchen adventures await, and delicious food is just a cook away.

Creamy Coconut Lentil Curry Delightful Weeknight Meal

Are you searching for a simple, delicious dish to brighten your weeknight dinners? Look no further than this Creamy Coconut

To make crispy Bang Bang salmon bites, you need a few key items. Here’s what you’ll need: - 1 lb salmon fillet, skinless and diced into bite-sized pieces - 1 cup panko breadcrumbs - ½ cup all-purpose flour - 2 large eggs, beaten - Oil for frying (vegetable or canola) The right seasonings make all the difference. For this recipe, use: - 1 teaspoon garlic powder - 1 teaspoon paprika - ½ teaspoon salt - ¼ teaspoon black pepper These spices create a flavorful crust that enhances the salmon. The Bang Bang sauce adds a tasty kick. Gather these ingredients: - ⅓ cup mayonnaise - 2 tablespoons sweet chili sauce - 1 tablespoon sriracha (adjust for heat preference) - 1 teaspoon lime juice - Fresh cilantro, chopped (for garnish) Mixing these ingredients gives you a creamy, spicy, and tangy sauce. It pairs perfectly with the crispy salmon bites. For the full recipe, check the details above. Start with a fresh salmon fillet. Cut it into bite-sized pieces. Make sure to remove the skin. Dry the salmon with paper towels. This helps them get crispy when cooked. Patting them dry is key to a great texture. Set up your breading station. In one bowl, mix the flour with garlic powder, paprika, salt, and black pepper. This gives the salmon a nice flavor. In another bowl, beat the two eggs. In a third bowl, spread out the panko breadcrumbs. This is what gives your bites that crunchy finish. To coat the salmon, take a piece and dip it in the flour mixture. Then, move it to the egg and coat it well. Finally, roll it in the panko breadcrumbs. Make sure each piece is fully covered. Repeat this for all the salmon pieces. Heat oil in a deep skillet or frying pan. You want about half an inch of oil. Heat it over medium-high heat until it shimmers. This means it’s hot enough to fry. Carefully add the salmon bites to the oil. Don’t overcrowd the pan; this keeps them crispy. Fry each side for about 3-4 minutes. You want them golden brown and crispy. Use a slotted spoon to take them out. Place them on paper towels to drain extra oil. Grab a small bowl for the sauce. Combine mayonnaise, sweet chili sauce, sriracha, and lime juice. Mix all the ingredients until smooth and creamy. This sauce adds a kick and balances the flavors of the salmon bites. Arrange the crispy salmon bites on a serving platter. Drizzle the Bang Bang sauce over them or serve it on the side. For an extra touch, sprinkle some chopped cilantro on top. This adds freshness and looks great. For the full recipe, check the details above. To make your salmon bites super crispy, follow these steps. First, dry the salmon well with paper towels. Any moisture can make them soggy. Second, use panko breadcrumbs. They are lighter and crispier than regular breadcrumbs. When frying, ensure the oil is hot. If the oil is too cool, the bites will absorb oil and become greasy. A good temperature is around 350°F (175°C). Fry in small batches. This helps keep the oil hot and the bites crispy. One common mistake is overcrowding the pan. If too many salmon bites are in the oil, they won’t fry evenly. Also, don’t skip the breading steps. Each layer adds flavor and crunch. Missing any step can make the bites less crispy. Another issue is not letting the oil heat enough. Always wait until it shimmers before adding the salmon. Finally, avoid turning the bites too soon. Let them develop a golden crust before flipping. For frying, use a deep skillet or a heavy pan. These can hold the oil temperature better. A slotted spoon is great for removing the bites once cooked. It lets excess oil drain off easily. Consider using a thermometer to check the oil temperature. This tool helps you avoid guesswork. If you want to prepare the Bang Bang sauce, a small bowl and whisk are all you need. This simple setup makes cooking fun and easy! Try making these crispy Bang Bang salmon bites at home. You will love how easy and tasty they are! For the full recipe, check the earlier section. {{image_2}} You can switch up the salmon for shrimp or chicken. Both options work well and taste great. If you want a plant-based dish, try using tofu. Make sure to press it to remove excess moisture. For a twist, add some grated cheese to the panko. This gives a nice flavor and crisp. For a lighter version, bake instead of frying. Brush the salmon bites with olive oil and bake at 400°F for about 15 minutes. You can also use whole wheat flour and breadcrumbs for added fiber. To cut calories, use Greek yogurt in place of mayonnaise in the sauce. It still tastes creamy and delicious. You can easily adjust the heat of the Bang Bang sauce. For a mild version, use less sriracha. You can even skip it altogether if you want. If you love spice, add more sriracha or a pinch of cayenne pepper. A dash of fresh lime juice brightens the sauce too. This simple change makes it even tastier. For the full recipe, check the earlier section for details. To keep your crispy Bang Bang salmon bites fresh, store them in an airtight container. Lay a paper towel at the bottom to absorb moisture. This helps keep the bites crispy. Place the container in the fridge. They will last for up to 2 days. If you have more leftovers, consider freezing them. When you want to enjoy the salmon bites again, reheating is key. Preheat your oven to 350°F (175°C). Place the salmon bites on a baking sheet. Bake for about 10-15 minutes. This method keeps them crispy. You can also use an air fryer. Set it to 350°F (175°C) and heat for around 5-7 minutes. To freeze salmon bites, let them cool completely first. Arrange them in a single layer on a baking sheet. Freeze until solid, then transfer them to a freezer-safe bag. Remove as much air as possible. They can stay frozen for up to 2 months. When ready to eat, thaw in the fridge overnight before reheating. The best salmon for this dish is wild-caught salmon. It has great flavor and a firm texture. You can use sockeye or king salmon. Both types work well for crispy bites. Farmed salmon can be used too, but may be less flavorful. Yes, you can bake the salmon bites. Preheat your oven to 425°F (220°C). Place the breaded bites on a baking sheet lined with parchment paper. Bake for 12-15 minutes until they are golden and crispy. Spray a little oil on top for extra crispiness. To kick up the heat, add more sriracha to your Bang Bang sauce. You can also mix in a pinch of cayenne pepper or red pepper flakes. Start with a small amount, then adjust to taste. This way, you can find the perfect heat level for you. Absolutely! Use gluten-free flour, like almond flour or rice flour. For breadcrumbs, try gluten-free panko or crushed gluten-free crackers. These swaps keep the recipe safe for those avoiding gluten while still tasting great. These bites pair well with many sides. You can serve them with a fresh salad or steamed veggies. Try them with rice or quinoa for a hearty meal. For a fun twist, serve with sweet potato fries or a dipping sauce like extra Bang Bang sauce. This blog post covered all you need to know about making crispy Bang Bang salmon bites. We explored ingredients, step-by-step instructions, and tips for perfect results. I shared serving ideas and variations to keep things fresh. Remember to store leftovers properly for future enjoyment. Now you can impress friends and family with this tasty dish. Enjoy the cooking adventure and the delicious bites!

Crispy Bang Bang Salmon Bites Easy and Flavorful Snack

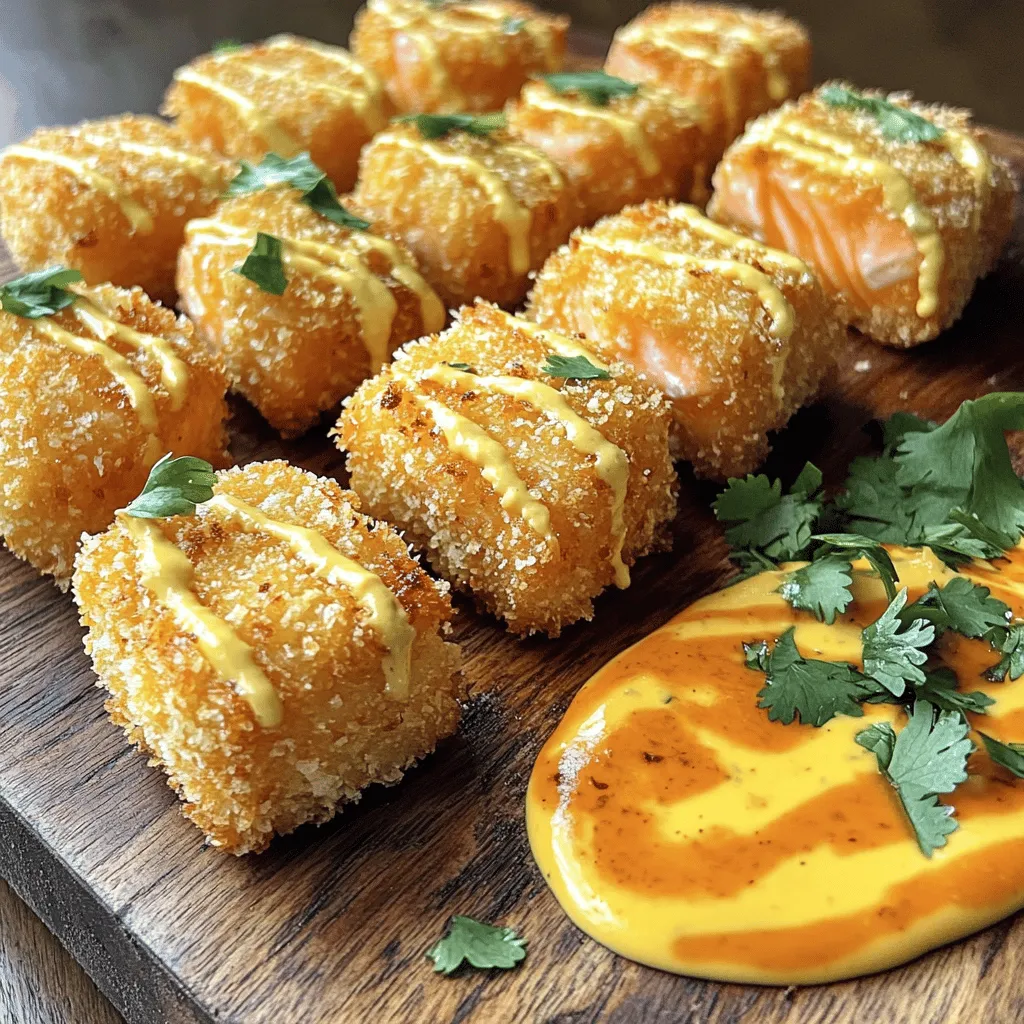
Looking for a snack that packs a punch? My Crispy Bang Bang Salmon Bites are easy to make and bursting

To make this easy orange chicken, you need just three main items: - 1 pound boneless chicken thighs, cut into bite-sized pieces - 1 cup orange marmalade - 2 tablespoons soy sauce These ingredients work together to create a tasty dish. The chicken thighs give a tender bite, while the orange marmalade adds sweetness. Soy sauce brings a nice saltiness to balance the flavors. To make your dish look even better, consider adding these garnishes: - Thinly sliced green onions - Sesame seeds These garnishes add color and a fresh taste. You can sprinkle them on right before serving. You will need a few tools to make this dish: - Large mixing bowl - Separate bowl for the sauce - Large skillet or pan - Cooking spoon With these tools, you’ll find it easy to prepare and cook the orange chicken. Enjoy making this simple yet delicious meal! First, gather your chicken thighs. Cut them into bite-sized pieces. This helps them cook evenly. Place the chicken in a large bowl. You want enough space to mix well. In a different bowl, combine one cup of orange marmalade with two tablespoons of soy sauce. Stir until smooth. This sauce adds a sweet and tangy flavor. It will coat the chicken nicely. Pour the orange sauce over the chicken pieces. Mix well to cover each piece. Let the chicken marinate for 15 to 20 minutes. This step is key for great flavor. Heat a large skillet over medium-high heat. Add the marinated chicken and all of the sauce to the pan. Cook for 8 to 10 minutes. Stir occasionally to make sure it cooks evenly. The chicken should reach an internal temperature of 165°F (75°C). Once it’s done, remove it from the heat. Serve your orange chicken over steamed white rice. Add thinly sliced green onions and sesame seeds on top for a nice touch. For the full recipe, check out the [Full Recipe]. To get the best flavor in your orange chicken, focus on the marinade. The orange marmalade gives a sweet and tangy taste. Soy sauce adds a nice salty touch. Mix these two well before adding chicken. Let the chicken sit in this mix for at least 15 minutes. This allows the flavors to soak in. If you can, marinate longer for a stronger taste. Cook the chicken over medium-high heat. This helps it brown nicely. Stir the chicken often. This ensures even cooking. You want the chicken to reach 165°F (75°C) inside. Use a meat thermometer to check. This keeps the chicken juicy and safe to eat. If you want a bit of crunch, let it sizzle a little longer in the pan. Look for a bright plate to serve your orange chicken. Place a bed of steamed white rice on the plate. This adds color and makes the meal more filling. Top the chicken with thinly sliced green onions. Add sesame seeds for a nice touch. This makes your dish pop and look gourmet. Serve it hot for the best experience. If you want more details, check the Full Recipe. {{image_2}} You can switch up the protein in this dish. If you want, try using shrimp or tofu. Both options cook quickly and soak up the orange flavor well. For shrimp, use large, peeled shrimp. Make sure to cook them for just a few minutes until they turn pink. If you choose tofu, press it first to remove excess water. Cut it into cubes and cook until golden brown. Want to add more zest? Try adding fresh ginger or garlic to the sauce. Just a little bit can boost the flavor. You can also swap orange marmalade for apricot or peach jam. This change will give you a new twist on the taste. If you like heat, add some red pepper flakes to the sauce. It brings a nice kick to the dish. Serving styles can change your meal’s look and feel. Serve your orange chicken over steamed rice for a classic touch. You can also use quinoa or cauliflower rice for a healthier option. If you want to make it a full meal, add steamed vegetables on the side. Broccoli or snap peas work great. For a fun twist, try making lettuce wraps. Just spoon the chicken into large lettuce leaves and roll them up. For the full recipe, check out the complete guide! To keep your leftover orange chicken fresh, place it in an airtight container. Make sure to let it cool down first. This helps avoid steam build-up, which can make the chicken soggy. Store it in the fridge for up to three days. If you want to keep it longer, freezing is a good option. When you are ready to eat the leftovers, reheating is easy. You can use the microwave or a skillet. For the microwave, place the chicken in a safe bowl. Heat it for one to two minutes, stirring halfway through. If using a skillet, add a little water to it. Heat over medium until hot. Stir often to prevent burning. If you want to freeze the orange chicken, use a freezer-safe bag. Squeeze out as much air as you can before sealing. This helps to avoid freezer burn. You can freeze it for up to three months. When you are ready to eat it, thaw it in the fridge overnight. Reheat as mentioned above for best results. For the full recipe, check out the previous sections. Yes, you can use frozen chicken for this recipe. Just make sure to thaw it first. Thawing allows the chicken to cook evenly. You can thaw the chicken in the fridge overnight or use the microwave. After thawing, cut the chicken into bite-sized pieces as usual. This will help the chicken absorb the flavors better. If you do not have orange marmalade, use a different fruit jam. Apricot or peach jam works well. You can also mix orange juice with sugar. This blend gives a similar sweet and tangy flavor. For a more complex taste, try adding a splash of vinegar. This adds brightness to the dish. To spice up this recipe, add red pepper flakes. Start with a pinch and taste as you go. You can also use spicy sauce, like Sriracha or chili paste. Mix this into the orange marmalade and soy sauce. Another option is to add fresh ginger or garlic for a kick. These ingredients enhance the flavor and heat. This blog post showed you how to make easy, tasty orange chicken. You learned about the main ingredients and kitchen tools you need. I shared step-by-step instructions for cooking and serving. I also included helpful tips for flavor and presentation. You discovered variations and storage tips to keep your dish fresh. Remember, cooking is fun and creative. Enjoy making this dish your own!

Savory 3 Ingredient Orange Chicken Easy Recipe Today

Craving a quick and tasty meal? You’re in the right place! This Savory 3 Ingredient Orange Chicken recipe is easy,

- 1 lb ground beef (or turkey) - 1 onion, diced - 2 cloves garlic, minced - 1 bell pepper, diced - 1 packet taco seasoning - 1 can (14 oz) diced tomatoes with green chilies - 2 cups beef broth (or chicken broth) - 8 oz pasta (shells or rotini) - 1 can (15 oz) black beans, rinsed and drained - 1 cup corn (frozen or canned) - 1 cup shredded cheddar cheese - Salt and pepper to taste - Fresh cilantro, chopped - Sour cream for serving I love using simple ingredients in my One Pot Taco Pasta. You need just a few basic items. Ground beef or turkey gives it a great base. The diced onion, minced garlic, and bell pepper add flavor and texture. A packet of taco seasoning brings all the spices together nicely. Diced tomatoes with green chilies add a nice kick. The broth helps the pasta cook perfectly. You can use shells or rotini, whichever you prefer. Black beans and corn are great for fiber and taste. Finally, don’t forget the cheese! It melts beautifully on top. A sprinkle of fresh cilantro adds color and freshness. To serve, a dollop of sour cream gives creaminess. These ingredients work together for a tasty meal. Start by heating a large pot or Dutch oven over medium heat. Add 1 pound of ground beef or turkey. Cook until it turns brown, stirring often. If there is extra fat, drain it. This keeps the dish light and tasty. Next, stir in 1 diced onion, 2 minced garlic cloves, and 1 diced bell pepper. Cook this mix for about 3-4 minutes. It will smell great as the vegetables soften. Now, sprinkle in 1 packet of taco seasoning. This step boosts the flavor a lot. Cook for another minute to blend the spices well. Now it’s time to add the heart of the dish. Mix in 1 can of diced tomatoes with green chilies, 2 cups of beef broth, and 8 ounces of pasta. Make sure the pasta is fully submerged in the liquid. This is key for even cooking. Bring the mixture to a boil. Once it bubbles, reduce the heat to low. Cover the pot to trap the steam. Let it simmer for about 10-12 minutes. Stir it occasionally until the pasta is al dente. If it looks dry, add a splash of broth or water. After the pasta cooks, stir in 1 can of black beans and 1 cup of corn. Cook for an additional 3-5 minutes. This warms everything through and adds great texture. Remove the pot from heat. Sprinkle 1 cup of shredded cheddar cheese on top. Cover for a couple of minutes until the cheese melts. It will create a creamy topping. Add salt and pepper to taste. Garnish with chopped cilantro and a dollop of sour cream if desired. Enjoy your one pot taco pasta! - Use a non-stick pot to avoid sticking. - Keep stirring occasionally to prevent pasta from clumping. These simple tips will make your cooking easier. A non-stick pot helps the food slide out smoothly. Stirring the pasta stops it from sticking together. This way, each bite remains delightful. - Substitute ground meat for a vegetarian option. - Add chopped jalapeños for extra heat. You can easily change this dish to fit your taste. If you want a veggie meal, replace meat with beans or lentils. For a spicy kick, toss in some jalapeños. This adds a nice heat that many enjoy. - Serve with tortilla chips on the side. - Pair with a fresh side salad. Taco pasta pairs well with crunchy tortilla chips. They add a fun texture. A fresh side salad complements the dish. It brings a nice balance with its crisp greens. Enjoy your meal with these tasty sides! {{image_2}} You can easily change some ingredients in One Pot Taco Pasta. For a healthier option, use whole grain or gluten-free pasta. This choice adds fiber and keeps the dish light. You can also mix in different vegetables. Zucchini and spinach work well. They add color and nutrition to your meal. Adding a splash of lime juice can really brighten the dish. The tangy flavor lifts the taste and makes it pop. You can also top your pasta with avocado slices. This adds a creamy texture that balances the spices. Both of these enhancements make the dish even better. Cheese makes everything better! You can experiment with different types. Pepper jack adds a spicy kick, perfect for those who love heat. If you prefer a milder flavor, go for mozzarella. It melts beautifully and gives a nice stretchy texture. Mixing and matching cheeses can change the whole feel of the dish. Store any leftover One Pot Taco Pasta in an airtight container. It will stay fresh in the fridge for up to 3 days. Make sure it cools down before sealing the container. This keeps the pasta from getting mushy. You can freeze One Pot Taco Pasta in individual portions. It will last for up to 3 months. To thaw, simply place it in the refrigerator overnight. This way, it warms up slowly and retains its flavor and texture. Reheat your pasta in the microwave or on the stovetop. When using the stovetop, add a splash of broth. This restores moisture and keeps the pasta from drying out. Always check the temperature before serving to ensure it’s hot all the way through. Yes, use a plant-based meat substitute or omit the meat entirely. Many tasty options exist. You can also add more beans or mushrooms for a hearty feel. Pasta is al dente when it is cooked but still firm to the bite. Taste a piece to check. It should have a slight resistance, not be mushy. Yes, you can prep the ingredients ahead but cook it fresh for best texture. If you cook it too early, the pasta can get too soft. Chopping veggies and measuring spices saves time. A mix of cumin, chili powder, paprika, and garlic powder can be used as a substitute. Adjust the amounts to fit your taste. You can also add some onion powder for extra flavor. Absolutely! It stores well and is easy to reheat for quick meals. Keep it in an airtight container in the fridge. It tastes great for lunch or dinner later in the week. For the complete preparation steps, refer to the Full Recipe for One Pot Taco Pasta. One Pot Taco Pasta is an easy and tasty dish. We covered the main ingredients, tools, and steps. You can customize it to fit your taste. Don’t forget tips for storage and reheating. This meal is great for busy nights or meal prep. Enjoy cooking your savory, one-pot creation. It's sure to become a family favorite!

One Pot Taco Pasta Flavorful and Easy Meal Idea

Looking for a quick yet flavorful meal? One Pot Taco Pasta is your answer! This easy recipe combines ground beef,

- 1 cup unsalted butter, melted - 1 1/4 cups brown sugar, packed - 1/2 cup granulated sugar - 4 large eggs - 1 cup all-purpose flour - 1/2 cup cocoa powder - 1 teaspoon vanilla extract - 1/4 teaspoon salt - 1 cup chocolate chips - 1/2 cup unsalted butter, softened - 1/2 cup granulated sugar - 1/2 cup brown sugar, packed - 1 large egg - 1 teaspoon vanilla extract - 1 1/2 cups all-purpose flour - 1/2 teaspoon baking soda - 1/2 teaspoon salt - 1 cup chocolate chips The brownie layer has rich flavors. It starts with melted butter and sugars. The mix becomes smooth with eggs and vanilla. I love how the cocoa powder adds depth. The chocolate chips provide a nice texture. For the cookie layer, we use softened butter and two sugars. Creaming these makes it light. The egg and vanilla mix in well. The flour, baking soda, and salt create a perfect dough. More chocolate chips add sweetness. This recipe combines two favorites: brownies and cookies. You can find the full recipe in the earlier section. These ingredients make a treat everyone will enjoy. Start by preheating your oven to 350°F (175°C). This step is key for even baking. Next, grab a 9x13-inch baking pan. You can grease it with butter or line it with parchment paper. Lining makes it easier to lift the brookies out later. In a large bowl, combine 1 cup of melted unsalted butter with 1 1/4 cups of packed brown sugar and 1/2 cup of granulated sugar. Mix these until smooth. Then, add 4 large eggs, one at a time, stirring well after each addition. Stir in 1 teaspoon of vanilla extract next. In another bowl, whisk together 1 cup of all-purpose flour, 1/2 cup of cocoa powder, and 1/4 teaspoon of salt. Slowly add these dry ingredients to the wet mix. Fold in 1 cup of chocolate chips for extra fudginess. In a new bowl, cream together 1/2 cup of softened unsalted butter with 1/2 cup of granulated sugar and 1/2 cup of packed brown sugar. Mix until it looks light and fluffy. Then, beat in 1 large egg and 1 teaspoon of vanilla extract. In another bowl, mix together 1 1/2 cups of all-purpose flour, 1/2 teaspoon of baking soda, and 1/2 teaspoon of salt. Gradually add the dry mix to the wet ingredients, blending well. Finally, stir in 1 cup of chocolate chips. Pour the brownie layer into your prepared pan. Spread it evenly across the bottom. Next, dollop the cookie dough on top of the brownie layer. Use a knife to lightly swirl the two layers together. This creates a beautiful marbled look. Once you’re done layering, place the pan in the preheated oven. Bake for 25 to 30 minutes. Keep an eye on it! A toothpick inserted into the center should come out with moist crumbs, but not wet batter. This shows your brookies are done. After baking, let the brookies cool in the pan on a wire rack for about 20 minutes. This cooling time helps them set. Once cool, cut them into squares. Enjoy these fudgy chewy delights! For more details, check the Full Recipe. To get that rich, fudgy texture, choose high-quality chocolate. Dark chocolate works great. You can also mix semi-sweet and milk chocolate for a balanced flavor. Another tip is to melt your butter gently. This keeps your brookies moist. If you want more depth, add a pinch of espresso powder to the brownie mix. Overbaking can ruin your brookies. Start checking them at 25 minutes. Use a toothpick to test doneness. Insert it into the center; it should come out with a few moist crumbs. If it’s clean, they may be overbaked. Always trust your oven, as baking times can vary. Serve your brookies warm for the best taste. A scoop of vanilla ice cream on top makes it even better. Drizzle some chocolate sauce or caramel for extra sweetness. You can also sprinkle sea salt on top for a fun twist. Enjoy with friends or family for a delightful treat. For the full recipe, check out the detailed guide included. {{image_2}} You can make fudgy chewy brookies even better by adding nuts or mix-ins. Try chopped walnuts or pecans for a nice crunch. If you love caramel, swirl in some caramel sauce before baking. You could also toss in some shredded coconut or candy pieces. These add fun flavors and textures. To make gluten-free fudgy chewy brookies, swap regular flour for gluten-free flour. Use a blend that works well for baking. Check that your chocolate chips are also gluten-free. This way, everyone can enjoy these tasty treats without worry. Follow the same steps from the Full Recipe for the best results. You can change the flavors of your brookies by using different extracts. Instead of vanilla, try almond or peppermint extract for a twist. You can also mix different cocoa types. Dark cocoa gives a richer taste, while white chocolate chips can add a sweet contrast. Experiment with flavors to find your favorite! To keep your brookies fresh, use an airtight container. This will lock in moisture and flavor. Store them at room temperature for best results. If you want to keep them longer, place a slice of bread in the container. The bread helps absorb moisture and keeps the brookies soft. For extra protection, you can wrap them in plastic wrap before placing them in the container. Freezing brookies is easy and great for later treats. Start by cutting them into squares. Place the squares on a baking sheet and freeze for about an hour. This step prevents them from sticking together. Once frozen, wrap each piece in plastic wrap. Then, place the wrapped brookies in a freezer bag. To thaw, simply take them out and let them sit at room temperature for about 30 minutes. You can also warm them in the microwave for a few seconds. When stored properly, brookies stay fresh for up to one week at room temperature. If you freeze them, they can last for about three months. Just remember to check for any signs of freezer burn before eating. Always trust your senses; if they smell or look off, it’s best to toss them. Enjoy your fudgy chewy brookies anytime with these easy storage tips! Yes, you can use dark chocolate. Dark chocolate has a richer taste. It will make your brookies less sweet. However, you might want to adjust the sugar. Use a little less sugar for a balanced flavor. This will keep your brookies fudgy and chewy. If you don’t have parchment paper, no worries! You can grease the pan with butter. Use a light coat to help the brookies release easily. You can also use aluminum foil. Just grease it well, too. This will help prevent sticking. To check if the brookies are done, use a toothpick. Insert it into the center of the brookies. If it comes out with moist crumbs, they are ready. If it has wet batter, bake a bit longer. Keep an eye on them to avoid overbaking. Yes, you can make the dough ahead of time. Prepare the brownie and cookie layers separately. Cover them tightly and refrigerate. This keeps the dough fresh. When you're ready, bake them together. Just let the dough sit at room temperature for a bit before baking. Brookies are a fun mix of brownies and cookies. They likely started in the United States. People wanted to enjoy both treats at once. This tasty treat became popular in bakeries. Now, many love to make brookies at home. They are a hit for parties and gatherings! You learned how to make delicious brookies, a mix of brownies and cookies. We covered ingredients, mixing methods, and baking tips. Colorful variations and smart storage ideas ensure you can enjoy these treats anytime. With the right techniques, you’ll impress everyone with your baking skills. Remember, making brookies should be fun and tasty. Create your own perfect batch and share it with friends and family. Enjoy your sweet creation!

Fudgy Chewy Brookies Delightful Dessert Recipe

If you love brownies and cookies, prepare for a sweet surprise! Fudgy Chewy Brookies blend both treats into one delightful

To make a tasty Mediterranean pasta salad, gather these key items: - 8 oz. farfalle pasta (or your favorite pasta shape) - 1 cup cherry tomatoes, halved - 1 cup cucumber, diced - 1/2 cup Kalamata olives, pitted and sliced - 1/2 cup feta cheese, crumbled - 1/4 cup red onion, finely chopped - 1/4 cup fresh parsley, chopped - 1/4 cup extra-virgin olive oil - 2 tablespoons fresh lemon juice - 1 teaspoon dried oregano - Salt and pepper to taste Each ingredient adds flavor and color. The farfalle brings a fun shape, while the olives offer a salty kick. The feta cheese brings a creamy texture that balances perfectly with the fresh veggies. You can make this salad your own by adding extras. Here are some ideas: - Bell peppers for crunch - Artichoke hearts for a tangy twist - Avocado for creaminess - Grilled chicken or shrimp for protein Feel free to mix and match based on what you have or what you love. This flexibility makes the salad fun and personal. This Mediterranean pasta salad is not just tasty; it’s also healthy. Here’s a simple breakdown: - Calories: About 250 per serving - Protein: 8g - Carbohydrates: 30g - Fat: 12g - Fiber: 3g The fresh veggies provide vitamins, while the healthy fats from olive oil and feta support heart health. This balance makes it a great choice for a meal or side dish. You can find the full recipe in the article to start your cooking adventure! Start by boiling water in a large pot. Add a pinch of salt to the water. Once it's boiling, add 8 oz. of farfalle pasta. Cook it until it's al dente, which takes about 8-10 minutes. Drain the pasta in a colander and rinse it with cold water. This cools the pasta and stops the cooking. Set the pasta aside while you prepare the other ingredients. In a big mixing bowl, add the fun colors of your salad! Chop 1 cup of cherry tomatoes in half. Dice 1 cup of cucumber into small pieces. Slice 1/2 cup of Kalamata olives and add them to the bowl. Crumble 1/2 cup of feta cheese for a creamy touch. Finely chop 1/4 cup of red onion and 1/4 cup of fresh parsley. Toss all these ingredients together to blend their flavors. Grab a small bowl to make your dressing. Pour in 1/4 cup of extra-virgin olive oil. Add 2 tablespoons of fresh lemon juice for zing. Sprinkle in 1 teaspoon of dried oregano, along with salt and pepper to taste. Use a whisk to mix everything until it looks smooth and well combined. This dressing will tie all the flavors together. Now, it’s time to bring it all together! Pour the cooled pasta into the bowl of fresh veggies and cheese. Drizzle the dressing over the top. Gently toss everything until it’s all coated evenly. Taste your salad and add more salt or pepper if needed. Cover your salad and refrigerate it for at least 30 minutes. This helps the flavors mix well. When serving, place it in a large shallow bowl. You can add extra parsley and lemon slices on the side for a pretty look. A drizzle of olive oil on top makes it shine. Enjoy your Mediterranean Pasta Salad! For the complete recipe, check the Full Recipe. To make your Mediterranean Pasta Salad even more tasty, think about adding fresh herbs. Basil and mint give a nice twist. You can also try sun-dried tomatoes for a rich flavor. They mix well with olives and feta cheese. Adding a pinch of red pepper flakes can give it a little kick. For extra crunch, toss in some toasted pine nuts or walnuts. These small changes can make a big difference in taste. If you need to make swaps, it’s easy! For gluten-free options, use gluten-free pasta. You can pick chickpea or lentil pasta for added protein. If you’re dairy-free, try using a vegan feta or skip the cheese altogether. For a lower-carb dish, spiralized zucchini can replace pasta. If you want a different flavor, swap Kalamata olives for green olives. Always feel free to adjust the recipe to fit your needs. When serving your Mediterranean Pasta Salad, choose a large, shallow bowl. It looks great and lets everyone dig in easily. Garnish with extra parsley for color. You can also add lemon slices on the side for a fresh touch. A drizzle of olive oil right before serving makes it shine. For a picnic, pack it in a mason jar for easy transport. This salad can be a showstopper at any gathering! {{image_2}} You can add proteins to your Mediterranean Pasta Salad to make it heartier. Chicken, shrimp, or tuna work well. Grilled chicken adds a nice smoky flavor. Shrimp adds a touch of sweetness. Tuna gives it a nice, salty bite. Just cook your protein and chop it into bite-sized pieces. Mix it in with the salad for a filling meal. Change the ingredients with the seasons for fresh tastes. In spring, add asparagus or peas for a bright crunch. Summer calls for grilled zucchini or bell peppers. In fall, try roasted butternut squash or Brussels sprouts. In winter, add roasted root veggies like carrots or sweet potatoes. These changes keep the salad exciting all year long. You can easily make this salad vegan or gluten-free. For a vegan option, skip the feta cheese or use a dairy-free alternative. Use gluten-free pasta to make it suitable for gluten-free diets. Quinoa or brown rice can replace pasta for a different texture. These swaps make the dish friendly for many diets while keeping it tasty. For the complete recipe, check the [Full Recipe]. To keep your Mediterranean Pasta Salad fresh, store it in an airtight container. Make sure the lid seals tightly. This helps prevent air from getting in, which can make the salad soggy or spoil faster. If you have any extra dressing, keep it separate. Add it just before serving for the best taste. When stored properly, Mediterranean Pasta Salad can last up to three days in the fridge. After that, the veggies may start to lose their crunch. The flavors will still be good, but the texture might change. Always check for any signs of spoilage before eating. If it smells off or looks strange, it's best to toss it. Freezing Mediterranean Pasta Salad is not the best option. The pasta and veggies can become mushy when thawed. If you still want to freeze it, leave out the fresh veggies and cheese. Instead, freeze just the pasta and dressing. When you're ready to eat, cook fresh veggies and add them back in. This way, you can enjoy a fresh-tasting salad! For the full recipe, check out the Mediterranean Pasta Salad details above. To make Mediterranean Pasta Salad from scratch, start by cooking 8 ounces of farfalle pasta. Follow the package directions and cook it until it is al dente. Once done, drain and rinse the pasta under cold water. This stops the cooking. Then, in a large bowl, combine 1 cup of halved cherry tomatoes, 1 cup of diced cucumber, 1/2 cup of sliced Kalamata olives, 1/2 cup of crumbled feta cheese, 1/4 cup of finely chopped red onion, and 1/4 cup of chopped fresh parsley. In a small bowl, whisk together 1/4 cup of extra-virgin olive oil, 2 tablespoons of fresh lemon juice, 1 teaspoon of dried oregano, salt, and pepper. Add the cooled pasta to the bowl and drizzle the dressing over it. Toss gently to mix everything well. Cover and refrigerate for at least 30 minutes to let the flavors blend. This is how you create the perfect Mediterranean Pasta Salad. The best add-ins for Mediterranean Pasta Salad include artichoke hearts, roasted red peppers, or even grilled chicken. You can also try adding different cheeses like mozzarella or goat cheese. For extra crunch, consider bell peppers, carrots, or radishes. Fresh herbs like basil or mint can boost the flavor too. Feel free to mix and match to suit your taste! Yes, you can prep Mediterranean Pasta Salad ahead of time. In fact, it tastes even better after chilling in the fridge for a few hours. You can make it a day in advance. Just keep it covered in the fridge until you are ready to serve. This allows the flavors to blend nicely. The serving size for Mediterranean Pasta Salad is about 4 to 6 people. This recipe yields enough for a small gathering or a family meal. If you want to serve more people, you can easily double the recipe. For the full recipe, check out the detailed instructions provided earlier. Mediterranean Pasta Salad is a versatile dish with endless possibilities. We explored the key ingredients, how to make it, and tips for great flavors. Remember to customize it with your favorite add-ins. Store leftovers properly to enjoy them later. This salad is perfect for gatherings or a simple meal at home. With so many variations, it fits every taste and diet. You can now create a delicious, fresh dish that brings joy to your table. Enjoy making your perfect Mediterranean Pasta Salad!

Mediterranean Pasta Salad Simple and Flavorful Dish

Looking for a bright and tasty dish that’s easy to make? You’ve found it! This Mediterranean Pasta Salad is packed

Older posts
Newer posts
← Previous Page1 … Page55 Page56 Page57 … Page62 Next →

dsad

© 2025 Foodish Talk • Built with GeneratePress

Our Policies

  • Copyright Policy
  • Cookie Policy
  • GDPR Policy
  • Privacy Policy
  • Disclaimer
  • Terms Of Use

More Information

  • Home
  • About
  • Contact
  • Appetizers
  • Dessert
  • Dinner
  • Drinks
©2025, Foodish Talk About Back To Top