Skip to content
DisclaimerTerms Of UseGDPR PolicyCookie Policy

Foodish Talk

  • Home
  • Drinks
  • Appetizers
  • Dinner
  • Dessert
  • About
  • Contact
  • Privacy Policy
DisclaimerTerms Of UseGDPR PolicyCookie Policy

Ava

To make this tasty dish, you need some key items: - 12 oz (340g) penne pasta - 2 tablespoons olive oil - 4 cloves garlic, minced - 1 medium onion, finely chopped - 1 can (14 oz) diced tomatoes, with juices - 2 cups vegetable broth - 1 cup heavy cream - 1 teaspoon dried basil - 1 teaspoon dried oregano - Salt and pepper to taste - 1 cup freshly grated Parmesan cheese - Fresh basil leaves, for garnish These ingredients create a creamy, rich sauce that coats the pasta perfectly. To boost the flavor, consider adding: - Red pepper flakes for a kick - Spinach or kale for greens - Mushrooms for an earthy taste - Lemon zest for brightness These extras can make your dish even more exciting and delicious. If you don’t have an ingredient, you can swap it out. Here are some ideas: - Use whole wheat or gluten-free pasta instead of penne. - Swap heavy cream for coconut milk for a dairy-free option. - Replace Parmesan with nutritional yeast for a vegan choice. Make sure to taste as you go. Adjust the spices and cream to fit your taste. For the full recipe, check out the complete guide. Start by gathering all your ingredients. You need: - 12 oz (340g) penne pasta - 2 tablespoons olive oil - 4 cloves garlic, minced - 1 medium onion, finely chopped - 1 can (14 oz) diced tomatoes, with juices - 2 cups vegetable broth - 1 cup heavy cream - 1 teaspoon dried basil - 1 teaspoon dried oregano - Salt and pepper to taste - 1 cup freshly grated Parmesan cheese - Fresh basil leaves, for garnish Chop the onion and mince the garlic. This makes it easy to add them to the pan later. 1. Heat the olive oil in a large pan over medium heat. 2. Add the chopped onion and sauté for about 3-4 minutes until soft. 3. Stir in the minced garlic and cook for one more minute. 4. Pour in the can of diced tomatoes with their juices and the vegetable broth. 5. Add the penne pasta and bring everything to a gentle boil. 6. Reduce the heat to low, cover the pan, and let it simmer for 12-15 minutes. Stir it a few times. 7. Check the pasta. It should be just right, not too soft. 8. Stir in the heavy cream, dried basil, and oregano. Mix until creamy. 9. Add salt and pepper to taste. 10. Fold in the grated Parmesan cheese until it's melted. 11. Serve hot, garnished with fresh basil leaves and extra cheese if you like. To get the best pasta texture, remember these tips: - Use a large pan to give the pasta room to cook. - Stir occasionally to prevent sticking. - Make sure to check the pasta a minute or two before the timer goes off. - If the pasta absorbs too much liquid, add a bit more broth. This recipe is quick and easy. It’s perfect for a weeknight meal or a cozy dinner. For the full recipe, just refer to the earlier sections. Enjoy your cooking! When making One Pan Creamy Tomato Pasta, you might face some common errors. First, don’t rush the onion cooking. Sauté it until it's soft. This step builds a good base flavor. Secondly, avoid overcooking your pasta. It should be al dente, not mushy. Lastly, don’t skip seasoning. Taste as you go. A little salt or pepper can make a big difference. To boost the flavor, use fresh herbs. Fresh basil adds a bright taste. You can also add a splash of lemon juice for zest. A pinch of red pepper flakes gives a nice kick. If you want, try adding a little balsamic vinegar for depth. These small changes can elevate your dish. Using the right tools makes cooking easier. A large skillet works best for this recipe. It gives enough space for the pasta to cook evenly. A good wooden spoon helps stir without scratching the pan. If you have a lid, use it! Covering the pan speeds up cooking. Lastly, a cheese grater is key for fresh Parmesan. It melts nicely into the sauce. For the Full Recipe, check the previous section for all the details. {{image_2}} You can boost your One Pan Creamy Tomato Pasta by adding protein. Chicken is an easy choice. Just cut chicken breasts into small pieces. Cook them in the pan before adding the onions. Shrimp is another great option. Add peeled shrimp in the last few minutes of cooking. Tofu is perfect for a vegetarian twist. Use firm tofu, diced, and cook it until golden. This way, you add flavor and texture to your meal. If you want a vegetarian version, skip the meat but keep the flavor. Use vegetable broth and add more veggies like bell peppers or zucchini. For a vegan option, swap the heavy cream with coconut milk or cashew cream. Replace Parmesan cheese with nutritional yeast for that cheesy taste. These changes keep your dish rich and creamy while fitting your diet. You can make this dish shine with seasonal veggies. In spring, add asparagus or peas for a fresh taste. Summer is great for zucchini or cherry tomatoes to enhance flavor. Fall brings butternut squash or spinach that pair well with the sauce. In winter, think of roasted Brussels sprouts or kale. Adding these vegetables makes your meal colorful and healthy. To store your One Pan Creamy Tomato Pasta, let it cool first. Place it in an airtight container. This keeps it fresh. You can keep it in the fridge for up to three days. Make sure to seal the container well to avoid any odors. When you’re ready to enjoy the leftovers, reheat them on the stove. Place the pasta in a pan over low heat. Add a splash of vegetable broth or water. This helps to bring back the creaminess. Stir often until it’s heated through. You can also use a microwave. Just heat it in a safe dish and cover it. Heat in short bursts, stirring in between. If you want to save some for later, freezing is a great option. First, cool the pasta completely. Then, scoop it into freezer-safe bags or containers. Label them with the date, so you remember when you made it. It can last in the freezer for about three months. To thaw, place the frozen pasta in the fridge overnight. Reheat it gently as mentioned above. This will keep the flavors intact for your future meals. Yes, you can use many types of pasta for this dish. Bowtie, fusilli, or even spaghetti work well. Just check the cooking time on the package. Adjust the cooking time if needed. A shorter pasta may cook faster, while a thicker one might need more time. The key is to cook it until it's al dente. This means it should be firm, not mushy. To make this dish dairy-free, swap the heavy cream for coconut milk or cashew cream. You can also use dairy-free cheese for a cheesy flavor. Look for plant-based options that melt well. Use nutritional yeast for a cheesy taste without dairy. You’ll still get a rich, creamy texture that tastes great! This dish pairs well with many sides. A simple green salad adds freshness. Garlic bread is great for dipping, too. You can also serve it with steamed vegetables for a colorful plate. If you want more protein, grilled chicken or shrimp works nicely. Check out the Full Recipe for more ideas! This blog covered all you need for One Pan Creamy Tomato Pasta. We explored key ingredients, easy steps, and tips for perfect results. You learned how to avoid common mistakes and customize your dish. With storage tips, your leftovers will stay fresh for later. Whether you crave meat or want vegetarian options, this dish works for you. My final thought: enjoy making this meal, and share it with loved ones for a simple, tasty treat.

One Pan Creamy Tomato Pasta Flavorful and Easy Meal

Looking for a quick and tasty dinner? You’ve found it! One Pan Creamy Tomato Pasta is simple and packed with

- 2 cups all-purpose flour - 1 tablespoon baking powder - 1/2 teaspoon salt - 1/4 teaspoon black pepper - 1 cup shredded sharp cheddar cheese - 1/2 cup grated parmesan cheese - 1/2 cup cold unsalted butter, cubed - 1/2 cup buttermilk - 1 large egg - Fresh chives, chopped (for garnish) To create these savory cheese scones, start with the main ingredients. All-purpose flour forms the base. You will also need baking powder to help them rise. Salt and black pepper add flavor and balance. For the cheese, I love using sharp cheddar for its bold taste. Parmesan adds a nice depth and richness. You can mix these two or try your favorites. Next, you need some additional ingredients. Cold unsalted butter brings flakiness to the scones. Buttermilk adds moisture and tang. An egg helps bind everything together. Finally, fresh chives give a burst of color and flavor as a garnish. Check the [Full Recipe] for detailed steps and tips to make these cheese scones perfect for any meal! First, preheat your oven to 400°F (200°C). This step helps the scones bake evenly. Next, line your baking sheet with parchment paper. This keeps the scones from sticking and makes cleanup easier. In a large bowl, whisk together the following dry ingredients: - 2 cups all-purpose flour - 1 tablespoon baking powder - 1/2 teaspoon salt - 1/4 teaspoon black pepper Make sure they blend well. The baking powder helps the scones rise. The salt and pepper add flavor. Now, add the cold butter, cut into small cubes. Use your fingers or a pastry cutter to work the butter into the flour mix until it looks like coarse crumbs. This step creates a flaky texture. Next, stir in: - 1 cup shredded sharp cheddar cheese - 1/2 cup grated parmesan cheese Mix well so the cheese spreads evenly throughout the dough. In a separate bowl, whisk together: - 1/2 cup buttermilk - 1 large egg Combine these wet ingredients well. Then, pour them into the dry mix. Gently stir until just combined. Be careful not to overmix, as this can make the scones tough. Turn the dough out onto a lightly floured surface. Pat it into a rectangle about 1 inch thick. Use a sharp knife to cut the dough into squares or triangles. Place them on the lined baking sheet with space between each scone. Bake in the preheated oven for 15-20 minutes. Check for doneness when they turn golden brown on top. Once done, remove them from the oven. Let them cool slightly, then garnish with fresh chives before serving. For the full recipe, check the recipe card. Cold ingredients are key for great scones. Use cold butter and buttermilk. This keeps the scones flaky. If the butter warms up, the dough won’t rise well. Avoid overmixing the dough. Mix until just combined. Overmixing makes the scones tough. You want them light and airy, not dense and chewy. Pair your savory cheese scones with soups or salads. They go well with creamy tomato soup or a fresh garden salad. Enjoy them as a side for brunch too. Serve your scones fresh from the oven. They taste best warm. If you need to reheat, warm them in the oven for a few minutes. Fresh herbs can elevate your scones. Try adding rosemary or thyme for extra flavor. They add a nice touch and make your scones look pretty. Spices can also give your scones a kick. Consider adding a pinch of cayenne or smoked paprika. This adds warmth and depth to the scone's flavor. {{image_2}} You can make your scones pop with fresh herbs. Try adding chopped chives, rosemary, or thyme to the dough. These herbs add flavor and aroma. When pairing herbs with cheese, think about the cheese's strength. For example, chives work well with sharp cheddar. Rosemary shines with creamy goat cheese. Mixing these flavors gives your scones a bright twist. If you love heat, consider adding jalapeños or red pepper flakes. These ingredients create a delicious kick in your scones. For a spicy twist, use pepper jack cheese. This cheese blends well with the heat and adds creaminess. Alternatively, sharp cheddar with red pepper flakes creates a bold flavor. Both options make your scones exciting and full of life. Mixing sweet and savory can create a unique scone experience. Try adding honey or fruit like figs or apples. These ingredients balance well with sharp cheeses like cheddar. Drizzle honey on top before serving for a lovely finish. For a fun twist, serve with a sweet fruit jam. This combination brings new life to your savor cheese scones and makes them hard to resist. For the full recipe, refer to the Savory Cheese Scones section. To keep your savory cheese scones fresh at room temperature, place them in a sealed container. This helps lock in moisture and prevents them from drying out. You can store them this way for up to three days. If you want to enjoy them warm, just pop them in the oven for a few minutes before serving. If you want to save the scones for later, freezing is a great option. First, let the scones cool completely. Then, wrap each scone in plastic wrap. Place them in a freezer bag, and label it with the date. They can last up to two months in the freezer. When you’re ready to eat them, reheat them in the oven at 350°F (175°C) for about 10-15 minutes for the best results. This keeps them soft and tasty. You should check your scones for any signs of spoilage. If they smell off or have an unusual texture, it's best to discard them. Mold is another clear sign that they are no longer good. Always trust your senses; if something seems off, don’t take chances. Enjoy your scones fresh to appreciate their flavor and texture. Savory cheese scones taste best fresh. They last about 2 to 3 days at room temperature. Store them in an airtight container. If you want them to last longer, freeze them. They keep well in the freezer for up to 3 months. To enjoy them later, thaw in the fridge overnight. Reheat in the oven to restore their warmth and crunch. Yes! You can mix and match cheeses. Try mozzarella for a milder taste or feta for a tangy kick. Gouda adds a rich flavor, while blue cheese gives a strong punch. Just keep the total amount of cheese the same as in the recipe. This way, your scones will still rise and stay fluffy. Savory cheese scones pair well with many dishes. Serve them warm with soup for a cozy meal. They also go great with salads, adding a nice texture. Try them with a dollop of cream cheese or butter. For a fun twist, use them as a base for a savory sandwich. Enjoy the flavors of your choice! This article covered how to make savory cheese scones, starting with the must-have ingredients like flour, cheese, and buttermilk. I shared step-by-step instructions to guide you through mixing and baking, plus tips for texture and flavor. Remember, using cold ingredients is key for the best scones. You can customize these scones with herbs or spices for fun twists. With proper storage, you can enjoy them fresh or reheated later. Dive into baking, and enjoy your delicious creations!

Savory Cheese Scones Perfect for Any Meal

Savory cheese scones are my go-to for any meal. They blend rich cheese flavors with a tender crumb. Whether you

- 4 slices of hearty bread (sourdough or whole grain) - 4 large eggs - 1 cup shredded mozzarella cheese - 1/2 cup grated Parmesan cheese - 1/2 teaspoon garlic powder - 1/2 teaspoon dried oregano - 1/4 teaspoon red pepper flakes (optional) - Salt and pepper to taste - 2 tablespoons fresh chives or parsley, chopped - 2 tablespoons olive oil or melted butter You can change up the cheese to fit your taste. Try cheddar or feta for a new flavor. For bread, any crusty loaf works well. You can use gluten-free bread too. If you want a dairy-free option, use a plant-based cheese. To make this dish, you need a baking sheet, parchment paper, and a mixing bowl. These tools help make the process easy and fun! - Preheat your oven to 375°F (190°C) and prepare a baking sheet lined with parchment paper. This makes cleanup easy. - Use a knife to cut a large 'X' into the center of each slice of bread. The cut should not go all the way through. This creates a well for the egg. - Carefully crack one egg into the well of each slice of bread. Be gentle to keep the yolks intact. - In a mixing bowl, combine 1 cup of shredded mozzarella cheese, 1/2 cup of grated Parmesan cheese, 1/2 teaspoon of garlic powder, 1/2 teaspoon of dried oregano, and salt and pepper to taste. Mix everything well. - Now, spoon the cheese mixture over each egg in the bread wells. Let it spill over slightly for a cheesy delight. - Bake in the preheated oven for 15 to 20 minutes. You want the egg whites to be set and the yolks runny while the cheese becomes bubbly and golden. Enjoy the delicious aroma as it bakes! For the full recipe, check out the [Full Recipe]. To get perfectly runny yolks, bake the toast just right. Watch the time closely. You want the egg whites set, but the yolks soft. Start checking at 15 minutes. If they need more time, keep an eye on them. An oven thermometer is key for great results. Ovens can be off by a few degrees. Using a thermometer helps ensure you bake at the right temperature. This makes a huge difference in how your toast turns out. For a lovely presentation, serve your cheesy baked egg toast on a rustic wooden board. It adds a nice touch. You can also use a colorful platter to brighten up your table. Garnish with fresh herbs for added color. Pair your toast with a fresh side salad or sliced avocado. This adds freshness and makes your meal more filling. You can also serve it with a side of fruit for a sweet balance. You can add more flavor with extra seasonings. Try smoked paprika for a smoky taste or chives for a fresh bite. Experiment with herbs like thyme or basil to change the profile. Incorporating veggies is a great way to make it healthier. Spinach, tomatoes, or bell peppers add color and taste. Just chop them finely and sprinkle on top of the egg before baking. This way, you create a tasty and nutritious dish. For the full recipe, check out the recipe link. {{image_2}} To make your cheesy baked egg toast even better, add some veggies. You can mix in fresh spinach, diced tomatoes, or colorful bell peppers. These veggies add flavor and nutrition. Simply sauté them for a few minutes before adding to the bread wells. This small step makes your toast bright and healthy. Want to boost the protein? Add cooked bacon or sausage to the mix. Chop the meat into small pieces and sprinkle them over the egg before adding cheese. This change makes your breakfast heartier and more satisfying. Plus, the smoky flavor pairs well with the eggs and cheese. You can also give your toast a global flair. For a Mexican twist, add sliced jalapeños and creamy avocado. The heat from the jalapeños makes it exciting. The avocado adds a rich, smooth texture that balances the dish. For an Italian version, use pesto and ricotta cheese. Spread a layer of pesto on the bread before adding the egg. Then dollop ricotta on top. This combo brings fresh herbs and creamy goodness, making your breakfast feel gourmet. For the full recipe, check out the detailed instructions. Each variation will make your cheesy baked egg toast unique and delicious. To store uneaten cheesy baked egg toast, let it cool first. Place the toast in an airtight container. Keep it in the fridge for up to three days. Make sure to seal it well to avoid drying out. You can also wrap each piece in plastic wrap for extra protection. The best way to reheat this dish is in the oven. Preheat your oven to 350°F (175°C). Place the toast on a baking sheet. Heat for about 10 minutes, or until warm. This method keeps the bread crispy and the cheese melty. You can also use a microwave, but the texture may change. If using a microwave, heat for 30 seconds to 1 minute. For long-term storage, you can freeze cheesy baked egg toast. Wrap each piece in plastic wrap, then place it in a freezer bag. This will keep it fresh for up to three months. When ready to eat, thaw it in the fridge overnight. Then, reheat in the oven to restore its original taste. Freezing is a great way to enjoy this dish later without losing flavor. Can I make cheesy baked egg toast ahead of time? Yes, you can prepare the bread and cheese mix ahead. Store them separately in the fridge. Then, just add the eggs and bake when ready. What can I substitute for eggs? You can use silken tofu or chickpea flour mixed with water. Both options work well and keep the dish tasty. How do I make it spicier? Add more red pepper flakes or diced jalapeños to the cheese mix. For a smoky flavor, try adding chipotle powder. What to do if the bread is soggy? Make sure to pre-bake the bread for a few minutes before adding the eggs. This step helps it become crispier. How to fix overcooked eggs? If the eggs are overcooked, you can try adding a bit of cream or butter on top. This can help add moisture back. Caloric content and dietary considerations of cheesy baked egg toast One serving contains about 350 calories. It offers protein from eggs and cheese, plus carbs from bread. Adjust ingredients for dietary needs. For a lower calorie option, use whole grain bread and less cheese. In this post, we shared how to make cheesy baked egg toast. You learned about the key ingredients, common substitutions, and helpful tools. We also covered step-by-step instructions, along with tips for cooking and serving. You can customize this dish with veggies or proteins for unique flavors. Remember to store leftovers properly and reheat them to stay tasty. Enjoy experimenting with this dish and make it your own!

Cheesy Baked Egg Toast Quick and Tasty Breakfast Dish

Are you ready to transform your morning routine with a dish that’s both cheesy and satisfying? Cheesy Baked Egg Toast

- 1 cup canned pumpkin puree - 1/2 cup unsweetened applesauce - 1/4 cup honey or maple syrup The base of these muffins is simple and healthy. Canned pumpkin puree gives a rich flavor. Unsweetened applesauce keeps them moist without added sugar. You can choose honey or maple syrup for sweetness. - 1/2 cup whole wheat flour - 1/2 cup rolled oats - 1 teaspoon baking powder - 1 teaspoon baking soda For the dry mix, whole wheat flour adds fiber and nutrients. Rolled oats give a nice texture. Baking powder and baking soda help the muffins rise. - 1 teaspoon pumpkin pie spice (or ground cinnamon) - 1/4 cup chopped walnuts or pecans (optional) Spices bring warmth and flavor. Pumpkin pie spice or ground cinnamon is a must. If you want extra crunch, add walnuts or pecans. They also boost the nutty flavor. These ingredients come together for a tasty treat. Check the Full Recipe for more details on how to make these muffins perfect. 1. Preheat your oven to 350°F (175°C). This helps the muffins bake evenly. 2. Lightly grease a muffin tin with non-stick cooking spray or use cupcake liners. This keeps the muffins from sticking. 3. In a large bowl, combine the canned pumpkin puree, unsweetened applesauce, and honey or maple syrup. Mix them well until smooth. 1. In another bowl, whisk together the whole wheat flour, rolled oats, baking powder, baking soda, pumpkin pie spice, and salt. This mixes the dry items well. 2. Gradually add the dry mixture to the wet ingredients. Stir gently until just combined. Avoid overmixing, as this can make your muffins tough. 3. If you like, fold in chopped walnuts or pecans for a crunchy texture. 1. Divide the batter among the muffin cups. Fill each about three-quarters full. 2. Bake in the preheated oven for 18-20 minutes. Check with a toothpick. It should come out clean when the muffins are done. 3. Let the muffins cool in the pan for 5 minutes. Then, transfer them to a wire rack to cool completely. For the full recipe, check out the complete list of ingredients and instructions! To get fluffy muffins, avoid overmixing the batter. When you mix too much, the muffins can become dense. Stir just enough to combine the wet and dry ingredients. A few lumps are okay! You can swap sweeteners for your taste. If you prefer less sugar, try using stevia or agave syrup. Honey or maple syrup work well too. Each brings a unique flavor to your muffins. Serve your muffins warm for the best taste. You can drizzle them with honey or maple syrup. A sprinkle of cinnamon adds extra flavor and looks nice. For toppings, consider adding a dollop of Greek yogurt. It gives a cool contrast to the warm muffin. You could also pair them with a cup of hot tea or coffee. This makes a perfect snack or breakfast. To ensure your muffins rise well, check your baking powder and soda. They should be fresh for the best results. Also, don't skip the preheating step. An oven that's too cool can cause flat muffins. Prevent sogginess by letting the muffins cool properly. After baking, leave them in the pan for just five minutes. Then, transfer them to a wire rack. This keeps the bottom dry and helps maintain their light texture. For the full recipe, check out the recipe section above. {{image_2}} You can easily add a twist to your pumpkin muffins. Try adding chocolate chips or dried fruit for extra sweetness. Chocolate chips blend well with the pumpkin flavor. Dried fruits like raisins or cranberries give a nice chew. These additions bring new life to a classic recipe. Another great idea is to experiment with spices. While pumpkin pie spice is a favorite, you can use ground ginger, nutmeg, or cardamom. Each spice will change the taste in a fun way. Just add a pinch and see what you like best. Want to make these muffins gluten-free? You can swap whole wheat flour with a gluten-free blend. Many blends work well in baking. Just make sure to check the packaging for directions. If you're watching your sugar, try low-sugar sweeteners. Stevia or monk fruit can replace honey or maple syrup. You may need to adjust the liquid, so keep an eye on the batter. This way, you can still enjoy the muffins without too much sugar. Making mini muffins is a smart idea for snacks. They are perfect for kids or lunchboxes. Just fill the mini muffin tins with the batter and bake for about 10-12 minutes. You can also create muffin bites for easy snacks. Use a mini muffin tin and cut the baking time. They’re great to pop in your mouth and perfect for sharing. These portion control ideas help you enjoy the muffins without overdoing it. To keep your 2-Point pumpkin muffins fresh, store them in an airtight container. This helps maintain moisture and flavor. You can line the container with a paper towel to absorb any extra moisture. Avoid stacking the muffins directly on top of each other to prevent squishing. Use muffin liners if stacking is necessary. Freezing your muffins is easy and a great way to enjoy them later. First, let the muffins cool completely. Wrap each muffin in plastic wrap or place them in a freezer-safe bag. Try to remove as much air as possible. To reheat, thaw the muffins in the fridge overnight. You can warm them in the microwave for about 20 seconds or bake at 350°F (175°C) for 10 minutes. These muffins can last up to three days at room temperature. If stored correctly in the fridge, they can last a week. Look for signs of spoilage, like a sour smell or mold. If they feel dry or hard, it’s time to toss them. Enjoy these muffins fresh for the best taste! For the full recipe, check the earlier sections. Yes, you can use fresh pumpkin. To prepare fresh pumpkin, choose a sugar pumpkin. Cut it into pieces and remove the seeds. Boil or steam the pieces until soft. Let them cool, then mash or blend until smooth. This may take about 30-45 minutes. Canned pumpkin is quicker and easier, but fresh adds a great taste. These muffins contain only 2 points each. They are low in calories and high in flavor. The main ingredients are pumpkin, applesauce, and whole wheat flour. Each muffin offers a good mix of fiber and nutrients. Here’s a quick breakdown: - Canned pumpkin: Low in calories and high in vitamin A. - Applesauce: Adds moisture and sweetness with fewer calories. - Whole wheat flour: Provides fiber and keeps you fuller longer. Yes, you can make these muffins vegan. Simply replace the honey or maple syrup with agave syrup. For the egg, use a flax egg. To make a flax egg, mix one tablespoon of ground flaxseed with three tablespoons of water. Let it sit for five minutes to thicken. This keeps the texture light and moist. Enjoy your vegan 2-point pumpkin muffins! For the full recipe, check out the full recipe link. We covered how to make delicious muffins using simple ingredients like pumpkin puree and applesauce. You learned the steps for mixing, baking, and perfecting these treats. With tips for variations, storage, and common issues, you can bake with confidence. These muffins are fun to make and share. I hope you enjoy experimenting with flavors and adjustments to fit your needs. Happy baking!

2-Point Pumpkin Muffins Recipe Simple and Delicious

Are you looking for a tasty treat that’s easy to make? These 2-Point Pumpkin Muffins are not only delicious but

For roasted Parmesan green beans, you need a few simple ingredients. These fresh flavors come together to create a tasty side dish. Here’s what you will need: - Fresh green beans - Olive oil - Grated Parmesan cheese - Garlic (cloves and powder) - Lemon zest and juice - Optional ingredients (red pepper flakes, salt, and pepper) These ingredients work together to make the green beans crisp and flavorful. Fresh green beans provide a nice crunch. Olive oil adds richness, while garlic and lemon give brightness. Parmesan cheese makes everything creamy and savory. If you like heat, add red pepper flakes for a kick. Salt and pepper help enhance all the flavors. For the full recipe, check the section above. 1. Preheat your oven to 425°F (220°C) and line a baking sheet with parchment paper. This helps the beans cook evenly and makes cleanup easy. 2. In a large bowl, mix the fresh green beans with 2 tablespoons of olive oil. Add 2 cloves of minced garlic, 1 teaspoon of lemon zest, 1 teaspoon of garlic powder, and optional crushed red pepper flakes for heat. Season with salt and pepper to taste. Toss the beans until they are well-coated. 3. Spread the green beans evenly on the baking sheet in a single layer. This allows them to roast well without steaming. 4. Roast the green beans in the preheated oven for 15 minutes. This first phase helps to soften the beans. 5. After 15 minutes, take the baking sheet out of the oven. Sprinkle 1/2 cup of grated Parmesan cheese evenly over the green beans. 6. Return the baking sheet to the oven and roast for an additional 5-7 minutes. The cheese should melt and turn lightly golden. 7. Once finished, remove the baking sheet from the oven and drizzle the juice of 1/2 lemon over the top. This adds a fresh zing. 8. Transfer the roasted green beans to a serving platter. Garnish with extra lemon zest and a sprinkle of Parmesan. Serve warm for the best taste. Enjoy the vibrant colors and inviting aroma! For the full recipe, check out the recipe details above. To roast green beans well, set your oven to 425°F (220°C). High heat helps them cook fast and get crispy. Make sure to coat them evenly in oil and seasonings. This way, each bite bursts with flavor. Too little oil makes them dry. Too much can make them soggy. Find a good balance. To kick up the flavor, think about adding more spices. Try smoked paprika, onion powder, or even some fresh herbs like thyme or oregano. You can also adjust the heat with more red pepper flakes if you like it spicy. Taste as you go. This helps you find the perfect blend for your palate. Use a large bowl for mixing and a baking sheet for roasting. Parchment paper keeps them from sticking. A good pair of tongs is great for tossing the beans. If you have a digital thermometer, use it to check the oven temp. These tools can make your cooking easier and faster. {{image_2}} You can change the cheese for more taste. Pecorino and Asiago are great choices. They add a unique twist. Try mixing in fresh herbs like thyme or rosemary. These herbs bring a fresh flavor to the dish. Parsley also works well for a bright touch. If you want a dairy-free option, use nutritional yeast. It gives a cheesy flavor without the dairy. You can also swap green beans for asparagus or broccoli. Both vegetables roast well and add fresh flavors. To make crispy green beans, try an air fryer. Set it to 400°F (200°C) and cook for 10 minutes. Shake the basket halfway for even cooking. If you need a faster method, try stovetop cooking. Sauté the beans in a pan with olive oil for about 5 minutes. Just make sure they stay bright and crisp. For more details, check the Full Recipe. To store leftover roasted green beans, let them cool first. Place them in an airtight container. This keeps the beans fresh for up to three days. Glass or plastic containers work well. If you have a vacuum sealer, that’s even better. To reheat your green beans, use the oven for the best flavor. Preheat the oven to 350°F (175°C). Spread the beans on a baking sheet and heat for about 10 minutes. This method keeps them crispy. You can also microwave them. Heat in 30-second bursts until warm, but this may soften them. Yes, you can freeze roasted green beans! First, let them cool completely. Then, spread them in a single layer on a baking sheet. Freeze for about an hour. Once frozen, transfer them to a freezer-safe bag. They can last up to three months. To thaw, place them in the fridge overnight or microwave them for a few minutes. How long to roast green beans for perfect texture? Roast green beans for 15 minutes at 425°F. This gives you a nice crunch. After 15 minutes, add the cheese and roast for 5-7 more minutes. The cheese should melt and get golden. Can I use frozen green beans instead of fresh? Yes, you can use frozen green beans. They may need a few extra minutes to cook. Make sure to thaw and drain them first. This helps avoid extra moisture. What can I serve with Roasted Parmesan Green Beans? These green beans pair well with chicken, fish, or pasta. You can also add them to a salad for a tasty crunch. They are versatile and fit into many meals. Are there any easy substitutions for this recipe? You can swap olive oil with melted butter. If you don’t have Parmesan, try Pecorino cheese. You can even use nutritional yeast for a vegan option. What’s the best way to prevent soggy green beans? Make sure the green beans are dry before roasting. Do not overcrowd the baking sheet. This allows hot air to circulate, keeping them crisp. How healthy are Roasted Parmesan Green Beans? Roasted Parmesan green beans are very healthy. They are low in calories and high in fiber. Green beans are full of vitamins and minerals too. Caloric content per serving and nutritional benefits One serving has about 120 calories. You get protein and healthy fats from Parmesan and olive oil. This dish also provides vitamins A, C, and K from the green beans. Enjoy this dish guilt-free! Roasting green beans is easy and delicious. We explored fresh green beans, olive oil, and Parmesan, plus simple steps for perfect roasting. You can adjust flavors with spices, herbs, or different cheeses. Store leftover beans properly to enjoy later. Remember, these green beans are a healthy choice that pairs well with many dishes. I hope you feel ready to try this simple recipe! Enjoy your cooking journey and impress your family with a tasty side.

Roasted Parmesan Green Beans Flavorful and Simple Dish

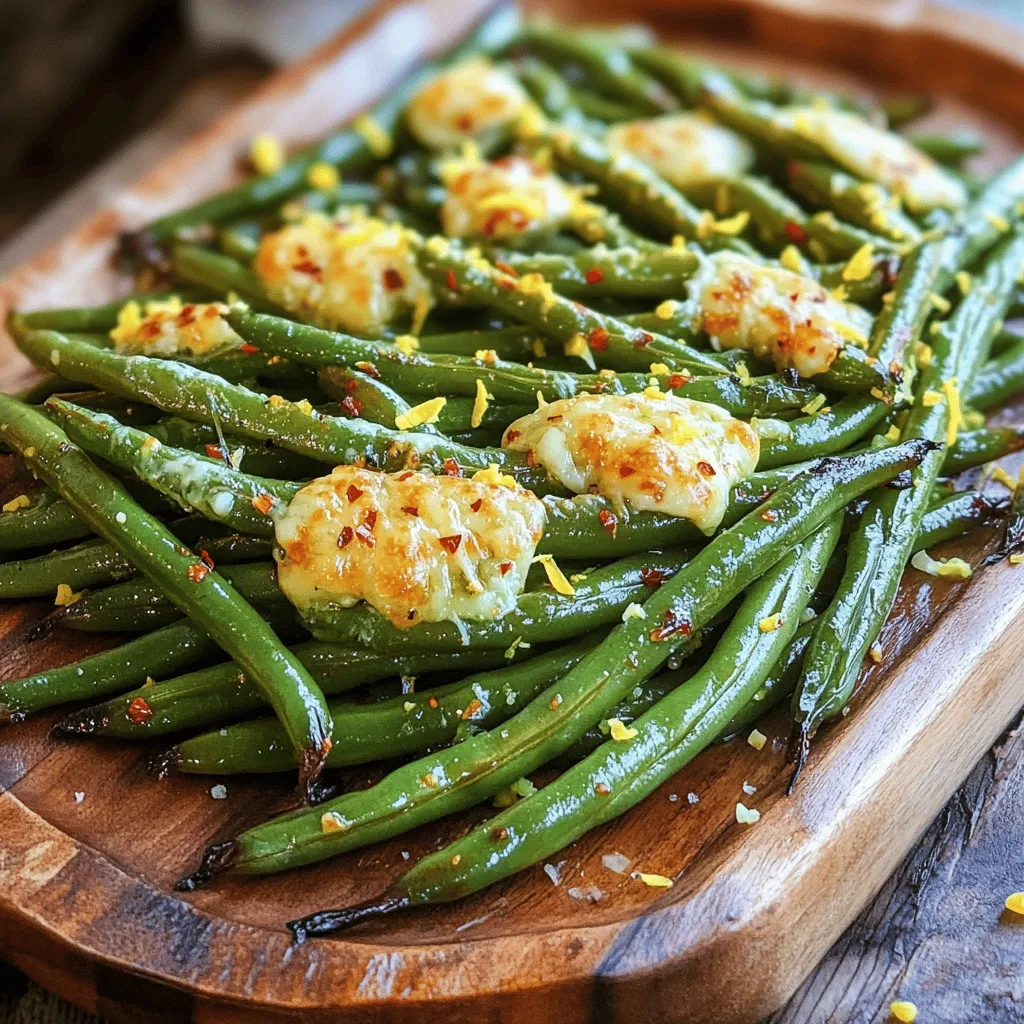
Are you ready to add a burst of flavor to your meals? Roasted Parmesan Green Beans are easy to make

- 1 lb ground beef - 1 small onion, diced - 2 cloves garlic, minced - 1 cup mixed vegetables (carrots, peas, corn) - 1 cup beef broth - 1 tablespoon Worcestershire sauce - 1 teaspoon smoked paprika - Salt and pepper to taste - 1 cup cheddar cheese, shredded - 2 cups biscuit mix - 2 teaspoons garlic powder - 1 teaspoon dried parsley - 1 cup milk - 1/4 cup melted butter - Preheat your oven to 400°F (200°C) before starting. - Use a 9x13-inch baking dish for the cobbler, greased for easy serving. The main ingredients form a hearty base. Ground beef gives protein and flavor. The onion and garlic add depth, while mixed veggies bring color and nutrition. The beef broth keeps everything moist. Worcestershire sauce and smoked paprika enhance the taste. Don't forget salt and pepper for balance. The cheddar cheese melts into a gooey delight. For the biscuit topping, the biscuit mix makes it easy. Garlic powder adds a touch of zest, and dried parsley brings freshness. Milk and melted butter create a rich batter. This combo makes for a fluffy, golden topping that contrasts the savory beef mixture below. With these ingredients, you create a warm, filling dish. You can make it quickly and enjoy every bite. For the full recipe, check the details provided earlier. - Preheat the Oven: Start by preheating your oven to 400°F (200°C). This ensures even baking. - Cook the Ground Beef: In a large skillet, add 1 lb of ground beef. Cook over medium heat for 5-7 minutes. Break it apart with a spatula as it cooks. It should be browned and crumbly. - Add Aromatics and Mix: Stir in 1 small diced onion and 2 minced garlic cloves. Cook for about 3 minutes until the onion is soft and clear. - Mix in Veggies and Season: Add 1 cup of mixed vegetables, 1 cup of beef broth, 1 tablespoon of Worcestershire sauce, and 1 teaspoon of smoked paprika. Season with salt and pepper. Bring the mixture to a simmer. Cook for 5 minutes until hot. - Add Cheese to the Beef Mixture: Stir in 1/2 cup of shredded cheddar cheese. Mix until melted and combined. Remove the skillet from heat. - Prepare Biscuit Mixture: In a separate bowl, combine 2 cups of biscuit mix, 2 teaspoons of garlic powder, and 1 teaspoon of dried parsley. Pour in 1 cup of milk and 1/4 cup of melted butter. Stir until just combined. - Assemble the Cobbler: Pour the beef mixture into a greased 9x13-inch baking dish. Spoon the biscuit batter over the top, covering most of the beef. - How to Bake for Best Results: Place the dish in the oven and bake for 20-25 minutes. You want the biscuit topping to be golden brown. - Checking for Doneness: After baking, remove the dish and sprinkle the remaining 1/2 cup of cheddar cheese on top. Return to the oven for 5 minutes until the cheese melts and bubbles. This recipe is simple and full of flavor. You can find the Full Recipe above for more details. - Cooking Ground Beef Properly To get tender ground beef, use medium heat. Stir it often. This helps it brown evenly. Aim for a nice golden color, about 5-7 minutes. Drain any extra fat. This keeps your cobbler light and tasty. - Ensuring Even Biscuit Cooking When you drop biscuit batter on top, spread it out. Leave some gaps for steam. This helps the biscuits cook evenly. Keep an eye on the oven. The biscuits should turn golden brown, which takes about 20-25 minutes. - Recommended Spices and Seasonings Spice up your cobbler with smoked paprika and garlic powder. These add a warm, rich flavor. You can also try onion powder or Italian herbs. They enhance the overall taste. - Cheese Variations for Extra Flavor While cheddar cheese is great, you can mix it up. Try pepper jack for some heat. Mozzarella gives a nice stretch. Or combine different cheeses for a unique taste. - Side Dishes to Pair With Pair your cobbler with a fresh salad. A crisp green salad balances the richness. You can also serve steamed veggies on the side. They add color and nutrients to your meal. Enjoy your Cheddar Bay Ground Beef Cobbler with these tasty sides! {{image_2}} - Leaner Beef Options You can swap ground beef with turkey or chicken. These meats are lower in fat. They will still cook well and taste great. If you want a plant-based option, try lentils or black beans. Both add protein and texture. - Vegetable Alternatives If you want a twist, use different veggies. Bell peppers, zucchini, or spinach work well. They add color and nutrients. Feel free to mix in what you have on hand. This dish is flexible and fun! - Gluten-Free Biscuit Mix Ideas Use a gluten-free biscuit mix for those who need it. Many brands offer tasty options. Just follow the package directions to ensure a nice rise. This makes the cobbler enjoyable for everyone. - Dairy-Free Ingredient Options For a dairy-free version, choose plant-based cheese. You can also use almond milk or oat milk in the biscuit mix. These swaps keep the flavors rich without dairy. Everyone can savor this dish! - Adding Herbs for Freshness Fresh or dried herbs can brighten up the dish. Try adding thyme, oregano, or basil. They bring a new layer of taste. Just a teaspoon or two can make a big difference. - Spicy Variations with Peppers For those who love heat, add diced jalapeños or crushed red pepper. These will spice things up. They work well in the beef mixture or on top of the biscuit layer. Adjust to your heat preference! After baking your Cheddar Bay Ground Beef Cobbler, let it cool for about 15 minutes. This cooling time helps the filling set. If you cut into it too soon, the filling may run out. Once cooled, cover the dish with plastic wrap or aluminum foil. This keeps it fresh and helps prevent drying. Store it in the fridge for up to three days. When reheating your cobbler, you can use either the microwave or oven. For the microwave, place a portion on a microwave-safe plate and heat for one to two minutes. Check to see if it's hot all the way through. If you prefer the oven, set it to 350°F (175°C). Cover the cobbler with foil to keep the biscuit topping from burning. Heat for about 15-20 minutes or until warmed through. To keep the biscuit topping fresh, avoid reheating it too long. Overheating can make the biscuits tough. You want them to stay light and fluffy. You can freeze leftover cobbler for up to three months. First, let it cool completely. Then, cut it into portions. Wrap each piece in plastic wrap, then place them in a freezer-safe bag. When you're ready to eat, just thaw it in the fridge overnight before reheating. Using prepped ingredients can save you time. You can chop your onions and garlic ahead of time and store them in the fridge. This way, you can whip up a quick meal anytime. Plus, you can mix up the filling on a busy day, and top it with the biscuit mix just before baking. This is a great way to make dinner fast and easy. Can I use different meats for the cobbler? Yes, you can use turkey, chicken, or pork instead of beef. Each meat brings its own flavor. Just make sure to cook it until it is no longer pink. What can I substitute if I don’t have beef broth? You can use chicken broth or vegetable broth as a good substitute. If you want a richer flavor, try using a mix of water with soy sauce. How do I ensure my biscuits are fluffy and soft? To keep biscuits fluffy, don’t overmix the batter. Mix just until combined. Also, make sure your baking powder is fresh for the best rise. How to know when the cobbler is done? The cobbler is done when the biscuit topping is golden brown. You can also check by inserting a toothpick into the biscuits. It should come out clean. Can I make the cobbler ahead of time? Yes, you can prepare the beef mixture and biscuit topping ahead. Just store them separately in the fridge. Bake them when you're ready to serve. What can I serve with Cheddar Bay Ground Beef Cobbler? This dish pairs well with a fresh salad or steamed veggies. You can also serve it with a side of crusty bread for a hearty meal. Is this recipe suitable for freezing? Yes, you can freeze the cobbler. Just let it cool completely. Wrap it tightly in plastic wrap and then foil before freezing. How do I adjust the recipe for fewer servings? To adjust for fewer servings, simply reduce the amounts of each ingredient. Halving the recipe works well for smaller families. This blog post showed you how to make Cheddar Bay Ground Beef Cobbler. From selecting ingredients to baking, every step matters. You learned how to prepare a hearty dish with flavor and comfort. Remember, you can alter ingredients for dietary needs and personal taste. Whether you choose to freeze leftovers or serve with sides, this meal brings joy. Enjoy your cooking journey and share this recipe with others!

Cheddar Bay Ground Beef Cobbler Flavorful and Easy Meal

If you’re searching for a simple, tasty meal that delights your taste buds, you’ll love Cheddar Bay Ground Beef Cobbler.

For a quick and tasty 15-Minute Chicken Stir Fry Noodles, you will need: - 8 oz noodles (e.g., rice noodles or egg noodles) - 1 lb boneless, skinless chicken breast, thinly sliced - 2 tablespoons vegetable oil - 2 cups mixed vegetables (e.g., bell peppers, carrots, snap peas) - 3 cloves garlic, minced - 1 tablespoon ginger, grated - 3 tablespoons soy sauce - 1 tablespoon oyster sauce - 1 tablespoon hoisin sauce - 1 teaspoon sesame oil - 2 green onions, sliced - Toasted sesame seeds, for garnish If you have dietary preferences, here are some swaps you can try: - For gluten-free, use rice noodles and gluten-free soy sauce. - Substitute chicken with tofu or shrimp for a different taste. - Use any mixed vegetables you love, like broccoli or zucchini. To ensure your dish turns out just right, measure your ingredients carefully: - Use a kitchen scale for the chicken for accuracy. - A measuring cup works well for liquids like sauces and oils. - For vegetables, chop them into even sizes for even cooking. These tips will help you create a flavorful and satisfying meal. If you want to see the full recipe, check it out [Full Recipe]. To start, bring a large pot of water to a boil. Add the noodles and cook them based on the package's instructions. This usually takes around 3 to 5 minutes. Stir the noodles gently to prevent sticking. Once cooked, drain the noodles in a colander and set them aside. You can use various types of noodles for this stir fry. Here are some options: - Rice noodles - Egg noodles - Udon noodles - Soba noodles Each type brings its own flavor and texture, so feel free to choose what you like best. Next, heat two tablespoons of vegetable oil in a large skillet or wok over medium-high heat. Add the thinly sliced chicken breast. Cook the chicken for about 5 minutes. Stir often to get a nice brown color. Make sure it’s cooked through before removing it from the skillet. Set the chicken aside. To ensure even cooking, slice the chicken into thin strips. This helps it cook faster and more evenly. A sharp knife works best for this task. Now, let’s add some color and crunch! In the same skillet, toss in your mixed vegetables, minced garlic, and grated ginger. Stir-fry these for about 3 to 4 minutes. You want them to be tender but still crisp. To combine everything, return the chicken to the skillet. Then, add the drained noodles. Drizzle in soy sauce, oyster sauce, hoisin sauce, and sesame oil. Toss all the ingredients together for about 2 minutes. This will let the flavors blend nicely. For the final touch, add sliced green onions and sprinkle toasted sesame seeds on top. This dish is now ready to serve. Enjoy your quick and tasty meal! For the complete recipe, refer to the [Full Recipe]. To save time, prep your ingredients first. Slice the chicken and veggies ahead of time. You can even store them in the fridge. This way, when you cook, everything is ready to go. Cook the noodles while the chicken is browning. This multitasking keeps things moving fast. You’ll have a hot meal in just 15 minutes. Add more depth to your dish with extra sauces. Try adding chili paste for heat or a splash of rice vinegar for tang. Fresh herbs like cilantro or basil can brighten the flavor. For the best stir-fry texture, keep the veggies crisp. Don’t overcook them; they should be tender but still have a bite. Use a large skillet or wok for even cooking. A non-stick pan helps prevent sticking and makes cleanup easier. A sharp knife is crucial for evenly slicing chicken and veggies. To keep your cookware in great shape, hand wash it and avoid metal utensils. This keeps your pans looking new and working well. For the full recipe, check out the complete guide! {{image_2}} You can swap chicken for many other proteins. Tofu is a great choice for a plant-based meal. It adds a nice texture. To use tofu, press it to remove water. Cut it into cubes and sauté it in oil for about 5-7 minutes. Shrimp is another tasty option. Use peeled, deveined shrimp and cook them for 3-4 minutes. They should turn pink and firm. Feel free to get creative with your veggies. Seasonal vegetables like zucchini, asparagus, or broccoli work well. When using hard vegetables like carrots, cook them a bit longer. Soft vegetables like bell peppers need less time. Add them in later to keep them crisp. This way, you enjoy a mix of textures and flavors. Changing the sauce can make your dish new and exciting. You can try teriyaki sauce for a sweet twist. Another option is to use chili garlic sauce for heat. If you prefer homemade, mix soy sauce, vinegar, and a bit of honey. Store-bought sauces are quick and easy, but homemade adds a personal touch. Experiment with different flavors to find what you like best. For the full recipe, check out the details above. To keep your chicken stir fry fresh, store it in an airtight container. This helps keep out air and moisture. It is best to refrigerate your leftovers within two hours of cooking. The dish will last for about three to four days in the fridge. Make sure to label the container with the date, so you know when to use it. When it's time to enjoy your leftovers, the best way to reheat stir fry is on the stove. Use a skillet over medium heat. Add a splash of water or broth to keep it moist. Stir often until it's heated through. If you want to freeze leftovers, make sure they cool completely first. Store them in freezer-safe bags or containers. You can reheat them directly from frozen on the stove or in the microwave. Just add a little water to avoid drying out. Enjoy your meal again! Yes, you can make this dish ahead of time. To do this, cook the chicken and vegetables as stated in the recipe. Then place them in a container. Store the cooked noodles separately. This way, they won’t get soggy. When you're ready to eat, just heat the chicken and veggies, then add the noodles. This keeps everything fresh and tasty. Absolutely! This recipe fits well into a meal prep plan. You can make a big batch and divide it into portions. Store these in containers for easy grab-and-go meals. The dish tastes great for up to four days in the fridge. Reheat a portion for a quick lunch or dinner. For sides, consider a light salad or spring rolls. You can also serve pickled vegetables for some tang. A chilled drink like green tea works well. If you want something fun, try a fruity mocktail. These pair well with the savory flavors of the stir fry. For the full recipe, check out the recipe section above. This blog post provided a clear guide for making Chicken Stir Fry Noodles. You learned about key ingredients, cooking methods, and essential tips. We discussed alternatives for dietary needs and how to store leftovers effectively. Remember, the right timing and equipment can make a big difference. Cooking can be fun and easy with the right approach. Experiment with flavors and share your results. Enjoy your delicious stir fry creations!

15-Minute Chicken Stir Fry Noodles Quick and Tasty Meal

Are you craving a quick and tasty meal? Look no further! This 15-Minute Chicken Stir Fry Noodles recipe will satisfy

Here’s what you need for One-Pot Beef and Cheddar Ranch Pasta: - 1 pound ground beef - 12 ounces penne pasta - 4 cups beef broth - 1 packet (1 ounce) ranch dressing mix - 1 cup shredded sharp cheddar cheese - 1 cup sour cream - 1 tablespoon olive oil - 1 teaspoon garlic powder - 1 teaspoon onion powder - Salt and pepper to taste - Chopped fresh chives or parsley for garnish These ingredients come together to create a rich and creamy pasta dish. The ground beef provides protein, while the ranch dressing mix adds a unique flavor twist. The penne pasta soaks up all the delicious broth and ranch mix, making each bite full of taste. The sharp cheddar gives a nice cheesy finish, and sour cream adds creaminess. Fresh herbs brighten the dish and make it look pretty. When you gather these ingredients, you set yourself up for a fun cooking experience. Cooking should be easy and enjoyable. So, let’s get started with the full recipe! - First, heat 1 tablespoon of olive oil in a large pot over medium heat. - Next, add 1 pound of ground beef. Break it up with a wooden spoon. - Season the beef with salt, pepper, 1 teaspoon of garlic powder, and 1 teaspoon of onion powder. Cook until it is browned, around 5-7 minutes. - After that, drain any excess grease from the pot. - Now, stir in 4 cups of beef broth and 1 packet of ranch dressing mix. Mix this well. - Bring the mixture to a boil. Once boiling, add 12 ounces of penne pasta. - Lower the heat to medium-low and cover the pot. Simmer for about 12-15 minutes. Stir occasionally to keep pasta from sticking. - When the pasta is cooked al dente, stir in 1 cup of sour cream and half of the 1 cup of shredded cheddar cheese. Mix until creamy. - Remove the pot from heat and sprinkle the rest of the cheddar cheese on top. Cover the pot for a few minutes to melt the cheese. - Finally, garnish with chopped chives or parsley before serving. For the full recipe, you can check the earlier section. To make your one-pot beef and cheddar ranch pasta shine, follow these tips: - Ensuring the pasta does not stick: Stir the pasta often while it cooks. This keeps the noodles moving and prevents them from clumping together. Adding a little extra beef broth also helps. - Best practices for browning the beef: Use medium heat and break the meat into small pieces. Don’t overcrowd the pan. This allows the beef to brown nicely without steaming. - Adjusting the seasoning: Taste as you cook. If it feels bland, add more salt or ranch mix. A dash of pepper can also elevate the flavor. Want to take your dish to the next level? Try these ideas: - Adding vegetables for more nutrition: Toss in some chopped bell peppers, spinach, or peas. They add color and nutrients. Add them when you stir in the beef broth for a nice cook. - Alternative cheese options: While cheddar is great, you can swap it for Monterey Jack or pepper jack. These cheeses can add a unique flavor twist to your dish. - Spicy variations with added ingredients: If you like heat, add diced jalapeños or crushed red pepper flakes. Start small, then adjust to your taste. This adds a kick that pairs well with the creamy sauce. For the complete recipe, check out the [Full Recipe]. {{image_2}} You can switch out the ground beef for turkey or chicken. This gives the dish a lighter taste. Ground turkey works well and keeps it juicy. Chicken offers a different flavor that many enjoy. If you want a meatless option, try using lentils or chickpeas. They add protein and fiber while being very filling. If you need a gluten-free option, use gluten-free pasta. Many brands now offer great pasta that cooks just like regular. For those on a keto diet, try using zucchini noodles or shirataki noodles instead. These options cut down on carbs while still being tasty. To keep your One-Pot Beef and Cheddar Ranch Pasta fresh, store leftovers in the fridge. First, let the pasta cool to room temperature. Then, place it in an airtight container. This helps keep the flavors intact and prevents moisture loss. I recommend using glass or BPA-free plastic containers. These materials are safe and durable for food storage. When it's time to enjoy leftovers, reheating is key. You can use the microwave or stovetop for this dish. For the microwave, place a portion in a bowl. Add a splash of beef broth or water to keep it moist. Heat it in short bursts, stirring in between. This keeps the pasta from drying out. If you prefer stovetop reheating, pour the pasta into a pan. Add a bit of beef broth to the pan and heat over low. Stir often and watch for the cheese to melt again. This method keeps the flavor rich and creamy. Enjoy your meal just as tasty as the first time! How long does it take to cook One-Pot Beef and Cheddar Ranch Pasta? It takes about 30 minutes from start to finish. You spend 10 minutes prepping and 20 minutes cooking. This quick meal fits into busy days. Can I use different types of pasta? Yes, you can! Feel free to use any pasta shape you like. Just adjust the cooking time based on the type of pasta you choose. Can I make this dish ahead of time? Yes, you can prepare it ahead. Cook it, let it cool, then store it in the fridge. Reheat when you're ready to eat. What can I use instead of ranch dressing mix? You can make a mix with equal parts garlic powder, onion powder, and dried herbs. This gives you a fresh taste without the packet. Is there a dairy-free option for this recipe? Absolutely! Use dairy-free cheese and replace sour cream with a dairy-free yogurt. This keeps the dish creamy and tasty. What to serve with One-Pot Beef and Cheddar Ranch Pasta? Pair it with a fresh salad or crusty bread. These sides balance the richness of the pasta and add freshness. Can this dish be frozen for later use? Yes, you can freeze it! Portion it into containers and store it. Thaw in the fridge before reheating for the best taste. For the Full Recipe, check above! This One-Pot Beef and Cheddar Ranch Pasta is simple, tasty, and perfect for everyone. We covered easy steps to cook it, from sautéing beef to serving it hot. Remember, you can change ingredients like using chicken or veggies. Store any leftovers correctly and reheat them easily. With this recipe, dinner is quick, fun, and satisfying. Enjoy making it your own and delight your family with something new and delicious.

One-Pot Beef and Cheddar Ranch Pasta Simple Meal

Looking for an easy, delicious meal? I’ve got just the thing! This One-Pot Beef and Cheddar Ranch Pasta is simple

To make Chocolate Chip Mint Greek Yogurt Pops, gather these simple ingredients: - 2 cups plain Greek yogurt - 1/2 cup honey or maple syrup - 1 teaspoon pure peppermint extract - 1/4 teaspoon vanilla extract - 1/2 cup mini chocolate chips - Fresh mint leaves for garnish (optional) Each ingredient plays a key role in making these pops creamy and tasty. The Greek yogurt gives a rich texture. Using honey or maple syrup adds natural sweetness. I love pure peppermint extract for a fresh taste. A touch of vanilla extract rounds out the flavors. Mini chocolate chips add fun and crunch. You can use fresh mint leaves to dress up your pops. You can find the full recipe at the end of this article. Enjoy making these delightful treats! 1. Mixing the yogurt base Start by taking a mixing bowl. Add 2 cups of plain Greek yogurt. Then, pour in 1/2 cup of honey or maple syrup. Next, add 1 teaspoon of pure peppermint extract and 1/4 teaspoon of vanilla extract. Mix everything well until it feels creamy and smooth. 2. Adding chocolate chips Now, it’s time to fold in the fun part! Gently add in 1/2 cup of mini chocolate chips. Stir slowly so the chocolate chips spread evenly throughout the yogurt mixture. This step adds a delightful crunch to your pops. 3. Filling the molds Grab your popsicle molds. Pour the yogurt mixture into each mold, filling them about 3/4 full. This space lets the pops expand as they freeze. Insert sticks into the molds, then tap them gently on the counter. This helps remove any air bubbles for a smoother treat. - Suggested freezing time Place your filled molds in the freezer. Let them freeze for at least 4 hours. This time allows them to become solid and ready to pop out. - Tips for removing pops from molds To get the pops out, run warm water over the outside of the molds for a few seconds. This warms the mold slightly, making it easier for the pops to slide out. Gently tug on the sticks until the pops come free. - Garnishing options For a nice touch, you can garnish your pops with fresh mint leaves. This adds a pop of color and a hint of extra flavor. - Presentation ideas Serve the pops on a pretty plate or stand them upright in a glass. This makes them look enticing and fun. You can even add a drizzle of melted chocolate on top for extra indulgence! For the full recipe, check out the details above on how to make these delightful treats! Using Greek yogurt makes these pops creamy and thick. Regular yogurt can be runny. The higher protein content in Greek yogurt gives your pops a rich taste. For sweetness, adjust honey or maple syrup to your liking. Start with half a cup, then taste. If you want more sweetness, add a bit more. Keep in mind, too much sweetener may change the texture. To keep your pops fresh and tasty, use proper storage techniques. Use airtight containers or freezer bags to seal them. This step helps prevent freezer burn. You can also wrap each pop in plastic wrap. This adds another layer of protection. Store pops in the back of the freezer. This spot stays the coldest. Enjoy your treats without worry! For the full recipe, check our detailed guide. {{image_2}} You can make your Chocolate Chip Mint Greek Yogurt Pops even better. Try adding fruit purees for a fruity twist. Purees from strawberries or mangoes mix well with the mint and chocolate. Just blend the fruit and swirl it into the yogurt mix before pouring into molds. This adds color and flavor. You can also switch up the extracts. Instead of peppermint, use almond or orange extract. These flavors give a new taste and can surprise your guests. Just remember to keep the amount the same. If you're looking to make these pops vegan, it's easy! Use coconut yogurt instead of Greek yogurt. Replace honey with agave syrup or maple syrup. These swaps keep the pops creamy and tasty. To cut calories and sugar, choose a low-calorie sweetener. You can use stevia or erythritol. These sweeteners work well without losing flavor. You can also use yogurt that has less fat for a lighter treat. For the full recipe, visit the section above. Enjoy experimenting with these variations! To keep your Chocolate Chip Mint Greek Yogurt Pops fresh, store them in the freezer. Use a sealed container or a zip-top bag to prevent freezer burn. They can last up to three months if stored correctly. For the best taste and texture, aim to eat them within two weeks. This way, you enjoy their creamy delight at its best. When you're ready to enjoy your pops, remove them from the freezer. Run warm water over the outside of the molds for a few seconds. This helps loosen the pops. Gently pull on the sticks until the pops slide out smoothly. Avoid using a knife or sharp tool, as this may damage the pops. Enjoy them right away, or let them sit for a few minutes to soften slightly. This makes for a perfect treat! To make these tasty pops, start with a bowl. Combine 2 cups of plain Greek yogurt, 1/2 cup of honey or maple syrup, 1 teaspoon of peppermint extract, and 1/4 teaspoon of vanilla extract. Mix well until it’s creamy. Then, gently fold in 1/2 cup of mini chocolate chips. Pour the mix into popsicle molds, filling them about 3/4 full. Then insert sticks and freeze for at least 4 hours. When they're solid, run warm water over the molds to remove the pops. You can garnish with fresh mint leaves if you want. If you need a substitute for Greek yogurt, you can use regular yogurt or coconut yogurt. Regular yogurt is thinner, so your pops may be less creamy. Coconut yogurt gives a nice flavor but may change the taste. Both options work, but they will alter the texture and taste of your pops. Yes, these pops are gluten-free! All the ingredients, like Greek yogurt and mini chocolate chips, do not contain gluten. Always check the labels on your chocolate chips to ensure they are gluten-free. This recipe is great for those with gluten allergies or sensitivities. Enjoy your pops without worry! You can create fun and tasty Chocolate Chip Mint Greek Yogurt Pops with just a few ingredients. We detailed everything from mixing the yogurt to adding chocolate chips and freezing. You can enhance flavors or adjust for diets too. With proper storage and serving tips, these pops will be a hit. Enjoy experimenting with your own ideas! Dive in and enjoy the cool taste of your homemade treats!

Chocolate Chip Mint Greek Yogurt Pops Delightful Treat

Indulge in a cool treat that’s both delicious and healthy! These Chocolate Chip Mint Greek Yogurt Pops are perfect for

- 1 pound ground chicken - 1 cup puff pastry (thawed) - 4 cloves garlic, minced - 1 small onion, finely chopped - 1/2 cup ricotta cheese - 1/4 cup grated Parmesan cheese - 2 tablespoons fresh parsley, chopped - 1 teaspoon Italian seasoning - 1 egg, beaten (for egg wash) - Salt and pepper to taste - Cooking spray or parchment paper for baking For these garlic chicken puffs, we start with the main ingredients. Ground chicken gives a nice protein base. Puff pastry provides that flaky, buttery texture we all love. Garlic and onion add layers of flavor that make your taste buds dance. Next, we have our dairy and seasonings. Ricotta and Parmesan cheeses bring creaminess and a slight tang. Fresh parsley brightens the dish, while Italian seasoning adds depth. Each bite bursts with flavor. The additional ingredients finish our recipe. The egg wash helps the puffs turn golden brown in the oven. Salt and pepper are essential for taste. Using cooking spray or parchment paper ensures easy cleanup and prevents sticking. This blend of flavors and textures makes garlic chicken puffs a tasty and simple snack idea. For the full recipe, check out the instructions in the next section! - Preheat your oven to 400°F (200°C). Line a baking sheet with parchment paper or spray lightly with cooking spray. - In a skillet, heat a drizzle of olive oil over medium heat. Add minced garlic and chopped onion. Cook until the onion turns soft and clear. - Add the ground chicken to the skillet. Stir and cook until the chicken is no longer pink. Break it apart with a wooden spoon. Season it with salt, pepper, and Italian seasoning. - Remove the skillet from heat and let it cool for a few minutes. In a bowl, mix the cooked chicken with ricotta cheese, grated Parmesan cheese, and chopped parsley. Stir until well combined. - Roll out the thawed puff pastry on a floured surface. Cut it into squares, about 4x4 inches in size. - Spoon a generous amount of the chicken filling onto each puff pastry square. Be careful not to overfill. - Fold the pastry over to create a triangle. Press the edges to seal. Use a fork to crimp the edges. Brush the tops with the beaten egg for a nice golden color. - Place the puffs on the baking sheet. Bake them for 15-20 minutes until they are golden brown and puffed. - Once baked, let the garlic chicken puffs cool slightly before serving. Enjoy your tasty snack! If you're ready to dive deeper into the flavors, don't forget to check out the Full Recipe for detailed cooking steps! How to avoid overfilling the pastry Keep the filling to a spoonful. If you add too much, the puffs spill. This can lead to a messy bake and less crunch. Just enough filling gives a nice balance. Cooking chicken to the right doneness Cook the chicken until it’s no longer pink. Use a meat thermometer if needed. Chicken must reach 165°F (74°C) for safety. This also keeps the meat juicy and tasty. Plating ideas for presentation Serve the garlic chicken puffs on a big, colorful platter. Sprinkle fresh parsley on top for a nice look. Use small bowls for dipping sauces, making it fun. Best dipping sauces for garlic chicken puffs Pair the puffs with marinara or garlic aioli. Both add great flavor. For a kick, try a spicy ranch. These dips make the snack even better. Recommended utensils for ease of preparation Use a sharp knife for cutting pastry. A mixing bowl helps combine the filling well. A fork is great for sealing the edges. These tools make the process smooth. Importance of using quality ingredients Choose fresh chicken and good cheeses. Quality ingredients give the best flavor. Fresh garlic and herbs add depth. Always pick the best for a great dish. For the full recipe, check the details above! {{image_2}} You can easily switch ground chicken with ground turkey or beef. Both options work well and bring unique flavors. If you want a lighter dish, use ground turkey. For a richer taste, beef adds depth. When it comes to cheese, ricotta and Parmesan are fantastic, but you can try others. Cream cheese adds a nice creaminess. Feta brings a tangy twist. Feel free to experiment with your favorites. For a spicy kick, add jalapeños to your mix. Chop them finely and include them with the garlic and onion. This addition gives the puffs a fun heat. You can also play with fresh herbs. Try basil or thyme for a fragrant touch. You can mix and match herbs to discover new flavors. If you want a healthier option, use an air fryer. Set it to 375°F (190°C) and cook for 12-15 minutes. Check for golden brown puffiness to know they're done. You can also explore different pastry types. Use phyllo dough for a lighter, crispier bite. Alternatively, biscuit dough creates a fluffy texture. Each choice offers a new twist on garlic chicken puffs. After you enjoy your garlic chicken puffs, store any leftovers in the fridge. Place them in a shallow, airtight container. This keeps them fresh and tasty. They last about 3 to 4 days in the fridge. Make sure they cool down before sealing. This helps avoid sogginess. To freeze garlic chicken puffs, let them cool first. Then, arrange them on a baking sheet. Freeze them for about 1 to 2 hours until firm. Once frozen, transfer them to a freezer bag. Remove as much air as you can from the bag. They can stay good in the freezer for up to 2 months. To reheat, preheat the oven to 375°F (190°C). Bake them for about 20 to 25 minutes. Check that they are heated through. Use glass or plastic containers for storage. Look for ones that have airtight seals. These containers keep your puffs fresh longer. Airtight seals prevent air and moisture from ruining your snacks. This way, you can enjoy them later without losing flavor. Garlic chicken puffs cook quickly. The prep time is about 20 minutes. Baking takes 15 to 20 minutes. So, from start to finish, you need around 40 minutes. This makes them a great snack or appetizer for any gathering. Yes, you can prepare garlic chicken puffs in advance. Make the filling and fill the pastry squares. Then, cover them with plastic wrap and chill them in the fridge. You can bake them later when you’re ready. This method saves time and keeps everything fresh. Garlic chicken puffs pair well with many sides. Here are some great options: - Marinara sauce for dipping - A fresh salad with lemon vinaigrette - Garlic aioli for a creamy touch - Steamed veggies for a healthy side These choices add flavor and fun to your meal. For the full recipe, check out the detailed steps above. Enjoy your cooking! In this blog post, we covered how to make tasty garlic chicken puffs. You learned about essential ingredients like ground chicken, puff pastry, and cheeses. We also explored step-by-step instructions from prep to baking. I shared tips for cooking and serving these puffs, including fun variations. These easy yet delicious bites are perfect for any occasion. Try different ingredients to make the recipe your own. Enjoy cooking and sharing these puffs with friends and family!

Garlic Chicken Puffs Tasty and Simple Snack Idea

Looking for a quick and tasty snack? These Garlic Chicken Puffs are your answer! With just a few simple ingredients,

Older posts
Newer posts
← Previous Page1 … Page53 Page54 Page55 … Page62 Next →

dsad

© 2025 Foodish Talk • Built with GeneratePress

Our Policies

  • Copyright Policy
  • Cookie Policy
  • GDPR Policy
  • Privacy Policy
  • Disclaimer
  • Terms Of Use

More Information

  • Home
  • About
  • Contact
  • Appetizers
  • Dessert
  • Dinner
  • Drinks
©2025, Foodish Talk About Back To Top