Skip to content
DisclaimerTerms Of UseGDPR PolicyCookie Policy

Foodish Talk

  • Home
  • Drinks
  • Appetizers
  • Dinner
  • Dessert
  • About
  • Contact
  • Privacy Policy
DisclaimerTerms Of UseGDPR PolicyCookie Policy

Ava

For the best roasted garlic hummus, gather these ingredients: - 1 cup canned chickpeas, drained and rinsed - 4 tablespoons tahini - 4 tablespoons fresh lemon juice - 3 tablespoons olive oil - 1 head of garlic - 1 teaspoon ground cumin - Salt, to taste - 2-3 tablespoons water (as needed) - Fresh parsley and paprika (for garnish) You can make your hummus even better with these garnishes: - Drizzle extra olive oil on top. - Sprinkle fresh parsley for color. - Add a dash of paprika for a pop of flavor. - Serve with pita bread, veggie sticks, or crackers. Choose the best chickpeas for your hummus. Here are some tips: - Look for canned chickpeas that are firm and not mushy. - Check the expiration date to ensure freshness. - If you prefer, use dried chickpeas. Soak and cook them before use. - Always rinse canned chickpeas well to remove excess sodium. These tips help you create a creamy and flavorful dip that everyone will love. Enjoy your roasted garlic hummus! For the full recipe, check the details above. To start, you need to roast the garlic. Preheat your oven to 400°F (200°C). Take a head of garlic and slice off the top. This lets the heat reach the cloves. Drizzle the exposed garlic with a teaspoon of olive oil. Wrap it tightly in aluminum foil. Place it in the oven for about 30 to 35 minutes. The garlic will become soft and sweet. Let it cool a bit before you handle it. Once cool, squeeze the cloves out of their skins. Now, it’s time to blend all the ingredients. In a food processor, add the roasted garlic cloves, drained chickpeas, tahini, fresh lemon juice, and ground cumin. Pour in the remaining olive oil and a pinch of salt. Blend the mixture until it is smooth. You may need to scrape down the sides to mix everything well. The key to great hummus is its texture. If your hummus feels too thick, add water slowly. Start with one tablespoon at a time. Blend again until you reach your desired smoothness. Taste your hummus and adjust the salt and lemon juice as needed. When you are happy with the flavor and texture, transfer it to a bowl. Garnish with fresh parsley and a sprinkle of paprika for a lovely finish. Enjoy your creamy and flavorful dip! For the full recipe, refer to the earlier section. To make creamy hummus, start with well-cooked chickpeas. You can use canned chickpeas for ease. Rinse them well to remove the canning liquid. Then, blend them with tahini, olive oil, and lemon juice. The key is to add water slowly. If your hummus is too thick, add 1 tablespoon of water at a time. Blend until smooth. Scraping down the sides helps mix everything well. You can adjust the flavor in many ways. Consider adding roasted red peppers for a sweet twist. A spoonful of spicy harissa adds heat. Fresh herbs like basil or cilantro give bright notes. For a smoky flavor, try adding smoked paprika or chipotle. Each variation can give your hummus a new life, so feel free to experiment. One common mistake is over-blending. If you blend too long, the hummus can become warm and lose its fresh taste. Another mistake is not seasoning well. Salt and lemon juice balance the flavors. Make sure to taste and adjust as needed. Lastly, avoid skipping the tahini. It adds creaminess and depth to your hummus. Follow these tips for a perfect batch every time! {{image_2}} To spice up your roasted garlic hummus, add some heat. You can mix in 1-2 teaspoons of cayenne pepper or red pepper flakes. This adds a nice kick without overpowering the rich garlic flavor. For a smoky touch, try adding smoked paprika. Blend it all together for a delicious, spicy dip that pairs well with fresh veggies or pita chips. Herbs can take your hummus to new levels. Adding fresh herbs like basil, cilantro, or dill can give it a bright taste. Simply chop your chosen herbs and mix them in. You can also blend in dried herbs like oregano or thyme for a different twist. Each herb changes the flavor and adds freshness. For extra creaminess, consider adding yogurt or avocado. A few tablespoons of plain yogurt make the hummus rich and tangy. If you prefer avocado, mash one ripe avocado and blend it in. This not only adds creaminess but also gives a lovely green color. Both options enhance the texture, making your hummus even more enjoyable. You can find the full recipe [here](#). To keep your roasted garlic hummus fresh, store it in an airtight container. This helps prevent it from drying out or absorbing other odors from the fridge. If possible, add a thin layer of olive oil on top before sealing. This extra layer helps keep the hummus moist and adds flavor. Properly stored, roasted garlic hummus lasts about five to seven days in the fridge. Make sure to check for any signs of spoilage, like an off smell or mold. If you freeze it, hummus can last up to three months. Just remember to thaw it in the fridge before using. Hummus is best served at room temperature. To refresh leftovers, remove them from the fridge and let them sit for about 30 minutes. If it seems thick, add a little water or olive oil and stir until smooth. This simple step revives the creamy texture of your delicious dip. For more details, check the Full Recipe for the best results. Yes, you can use fresh garlic. However, fresh garlic has a strong taste. Roasting garlic makes it sweet and smooth. This change in flavor is key for hummus. If you use fresh, start with one clove. Taste as you blend. Add more if you like a stronger garlic flavor. To boost flavor, try adding spices or herbs. You can mix in smoked paprika for a smoky kick. Or add fresh herbs like cilantro or basil. A splash of vinegar can add a nice tang. Experiment with different flavors to find what you love. Don't forget to use high-quality olive oil; it makes a big difference! Yes, roasted garlic hummus is healthy. It is made from chickpeas, which are high in protein and fiber. The tahini adds healthy fats while the garlic has many health benefits. Plus, it’s a great dip for veggies. You can enjoy it guilt-free while savoring its rich taste. This post covered all you need for roasted garlic hummus. You learned about the best ingredients, steps for preparation, and handy tips to get it creamy. Variations can make your hummus exciting, while storage tips help you keep it fresh. Remember, avoiding common mistakes leads to the best results. Now, you can enjoy delicious, homemade hummus that impresses. Embrace your creativity and make this recipe your own!

Roasted Garlic Hummus Creamy and Flavorful Dip

If you love rich flavors and creamy dips, you’ll adore this Roasted Garlic Hummus recipe! This easy guide shows you

To make Caprese salad skewers, you'll need these key items: - 10 cherry tomatoes - 10 fresh basil leaves - 10 small mozzarella balls (bocconcini) - 2 tablespoons balsamic glaze - 1 tablespoon extra virgin olive oil - Salt and pepper to taste - 10 small wooden skewers These ingredients create a fresh and vibrant snack full of flavor. The cherry tomatoes bring sweetness, while the mozzarella adds creaminess. The basil gives a nice herbal note, and the balsamic glaze adds a tangy finish. You can easily swap some ingredients if needed: - Use grape tomatoes instead of cherry tomatoes for a similar taste. - If fresh basil is not available, try using fresh mint. - For a different cheese, use feta or goat cheese. - Substitute balsamic glaze with lemon juice for a brighter flavor. - If you want a lighter version, skip the olive oil. These substitutions keep the spirit of the dish while adding your own twist. You don't need fancy tools to make these skewers. Here’s what you will need: - A cutting board for chopping. - A sharp knife for slicing tomatoes and cheese. - A serving platter to display your skewers. - Small wooden skewers for assembling the ingredients. With just a few simple pieces of equipment, you can whip up these delicious Caprese salad skewers in no time. For the full recipe, check [Full Recipe]. Start by gathering all your ingredients. You need: - 10 cherry tomatoes - 10 fresh basil leaves - 10 small mozzarella balls (bocconcini) - 2 tablespoons balsamic glaze - 1 tablespoon extra virgin olive oil - Salt and pepper to taste - 10 small wooden skewers First, wash the cherry tomatoes and basil leaves. Use cold water to rinse them well. After washing, gently pat them dry with a kitchen towel. This step keeps the ingredients fresh and clean. Grab a wooden skewer. Slide on one cherry tomato first. Next, add a fresh basil leaf. After that, place a mozzarella ball on the skewer. Repeat this process until you have three sets of each ingredient on the skewer. You can mix the order for fun! Lay the finished skewers on a serving platter. Next, drizzle balsamic glaze and olive oil over the skewers. This adds flavor and makes them look fancy! Finally, sprinkle salt and pepper on top to enhance the taste. Serve these skewers right after making them. They taste best fresh! You can also chill them in the fridge for a short time if needed. For a fun twist, serve with a small bowl of extra balsamic glaze for dipping. These Caprese salad skewers are perfect for parties or picnics. Enjoy the fresh flavors! For the full recipe, check out the earlier section. To make great Caprese salad skewers, pick fresh ingredients. Look for bright red cherry tomatoes. They should feel firm and smell sweet. Choose basil leaves that are vibrant and green. They should also feel soft to the touch. For mozzarella, go for small balls called bocconcini. These should be creamy and fresh. When you mix these flavors, it creates a bright and tasty experience. You can prep the skewers in advance. Just keep the assembly simple. Wash your tomatoes and basil ahead of time. You can also prepare the mozzarella. Assemble the skewers up to two hours before serving. Store them in the fridge to keep them fresh. This way, you save time when guests arrive. Just drizzle with balsamic glaze before serving for extra flavor. Make your skewers look fun and appealing. Use a nice platter to display them. Arrange the skewers in a circle or in rows. Drizzle balsamic glaze over the top for a glossy finish. Add some extra basil leaves around the platter for color. This makes the dish pop and draws the eye. You want your guests to be excited to try them! Try the Full Recipe for more details on making these tasty bites. {{image_2}} You can mix up the classic Caprese salad to suit your taste. Try adding different veggies or fruits. Think about using bell peppers or cucumbers for a crunch. You can also swap mozzarella for feta cheese for a tangy twist. If you want a sweet touch, try using strawberries or peaches. Each new ingredient adds a unique flavor to your skewers. The way you stack your ingredients can change the look and taste. Start with a tomato, then basil, and end with mozzarella. You can create layers by alternating ingredients. For a fun twist, try a rainbow pattern with different colors. This makes your skewers pleasing to the eye and fun to eat. Remember to leave a bit of space between items for better flavor. Dipping sauces can take your Caprese skewers to the next level. While balsamic glaze is a classic, consider trying pesto or a spicy aioli. A simple olive oil and lemon mix works well too. Each sauce adds a new layer of flavor. To make it even more fun, serve multiple sauces on the side. This way, everyone can pick their favorite. For the full recipe, check out my quick guide to Caprese salad skewers. After enjoying your Caprese salad skewers, store any leftovers in the fridge. Place them in an airtight container. This keeps the flavors fresh and prevents them from drying out. If you have extra balsamic glaze, store it separately to avoid soggy skewers. Caprese skewers are best served cold. If you want to refresh them, drizzle a little extra olive oil and balsamic glaze. This adds moisture and brightens the flavors. Avoid reheating them, as it can change the texture of the cheese and basil. The ingredients in your Caprese skewers have different shelf lives. Cherry tomatoes last about one week in the fridge. Fresh basil will stay good for about three days. Mozzarella balls should be used within five days after opening. Always check for freshness before using them in your next batch. For the full recipe, check the detailed instructions to ensure you're using the best ingredients. Yes, you can prepare Caprese Salad Skewers ahead of time. Make them a few hours before your event. Just keep them in the fridge. This way, they stay fresh and tasty. I suggest waiting to drizzle the balsamic glaze until right before serving. This keeps the skewers looking nice and bright. You can switch up the ingredients for fun flavors. If you want, use grape tomatoes instead of cherry tomatoes. For cheese, try feta or goat cheese; both give a nice twist. You can also add slices of avocado or use arugula instead of basil. These changes can create unique bites while keeping that fresh taste. Serving Caprese Salad Skewers at a party is easy and fun. Arrange them on a big platter to catch eyes. Add some fresh basil leaves around them for color. You can also offer small bowls of extra balsamic glaze or pesto for dipping. Guests will love these tasty bites, and they’re easy to grab and enjoy! Check out the [Full Recipe] for more tips. This guide covers everything you need to know about making Caprese Salad Skewers. You learned the essential ingredients, how to prepare and assemble them, and creative tips for serving. I shared useful storage advice and answered common questions to help you succeed. Enjoy experimenting with variations and unique dips to impress your guests. With these insights, you can make a delicious and fun dish that everyone will love. Get ready to enjoy your tasty skewers!

Caprese Salad Skewers Flavorful and Simple Snack

If you’re looking for a fresh, easy snack, Caprese Salad Skewers are perfect! They blend juicy tomatoes, creamy mozzarella, and

To make easy chicken fajitas, you need fresh, simple ingredients. Here’s what you will need: - 2 large chicken breasts, sliced into thin strips - 1 red bell pepper, sliced - 1 green bell pepper, sliced - 1 medium onion, sliced - 3 cloves garlic, minced - 2 tablespoons olive oil - 1 tablespoon chili powder - 1 teaspoon cumin - 1 teaspoon smoked paprika - Salt and pepper to taste - Juice of 1 lime - 8 small flour tortillas - Optional toppings: Sour cream, guacamole, shredded cheese, salsa These ingredients come together to create a tasty, colorful dish. I prefer fresh vegetables for chicken fajitas. They have a better taste and crunch. Fresh bell peppers and onions add vibrant colors to your meal. If you are short on time, frozen veggies work too. They are convenient and can still taste great if cooked well. Just make sure to thaw and drain them before cooking. This helps keep your fajitas from getting soggy. For tortillas, I suggest using small flour tortillas. They are soft and easy to fold. You can also try corn tortillas for a gluten-free option. Both types work well with the chicken and veggies. If you want something different, look for whole wheat or spinach tortillas. They add flavor and extra nutrients to your meal. To start, gather your ingredients for the chicken fajitas. You will need: - 2 large chicken breasts, sliced into thin strips - 1 red bell pepper, sliced - 1 green bell pepper, sliced - 1 medium onion, sliced - 3 cloves garlic, minced - 2 tablespoons olive oil - 1 tablespoon chili powder - 1 teaspoon cumin - 1 teaspoon smoked paprika - Salt and pepper to taste - Juice of 1 lime - 8 small flour tortillas - Optional toppings: sour cream, guacamole, shredded cheese, salsa In a large bowl, mix the sliced chicken with olive oil, garlic, chili powder, cumin, smoked paprika, lime juice, salt, and pepper. Make sure the chicken is fully coated. This marinade adds great flavor to the dish. Now, heat a large skillet over medium-high heat. Once the skillet is hot, add the marinated chicken. Cook for about 5-7 minutes. Stir it occasionally until the chicken turns golden and is fully cooked. Next, remove the chicken and set it aside on a plate. In the same skillet, add the sliced onions and bell peppers. Sauté them for around 5 minutes until they become tender and slightly charred. This step brings out their natural sweetness. After that, return the chicken to the skillet with the vegetables. Stir everything together and cook for an additional 2-3 minutes. This helps all the flavors blend well. While the chicken and veggies are cooking, warm the tortillas in another skillet or microwave until soft. This makes them easier to fold. To assemble your fajitas, take a tortilla and place a generous amount of the chicken and vegetable mixture in the center. You can add optional toppings like sour cream, guacamole, shredded cheese, and salsa. Fold or roll up the tortilla to enjoy! These easy chicken fajitas are perfect for a quick meal. You can find the full recipe [here](#). To make your chicken fajitas shine, focus on the marinade. Use fresh lime juice to add zest. Let the chicken soak in the mix for at least 30 minutes. The longer, the better! This step helps the flavors seep into the meat, making it tender and tasty. Also, don't skip the garlic; it adds a rich flavor. While cooking, use high heat. This gives your chicken a nice sear. It also creates those beautiful brown bits that taste great. When you add the veggies, keep them crisp. Don't overcook them; a little char is perfect. One common mistake is overcrowding the pan. If you add too much chicken or veggies, they will steam instead of sear. Cook in batches if needed. Another mistake is not seasoning enough. Make sure to taste and adjust the salt and spices. Don't forget to warm your tortillas! Cold tortillas can ruin the dish. Heat them in a pan or microwave until soft. Finally, avoid skipping the toppings. They add flavor and texture to your fajitas. Fajitas are fun to serve! Create a fajita bar with toppings. Use sour cream, guacamole, shredded cheese, and salsa. You can also add fresh cilantro or jalapeños for extra flavor. Serve them with lime wedges for a fresh burst. Pair with a side of rice or beans for a heartier meal. You can even offer chips and salsa as a starter. For a drink, try a light Mexican beer or a refreshing limeade. For the full recipe, check out the complete details above. Enjoy your cooking! {{image_2}} You can easily make fajitas without chicken. Use veggies like mushrooms or zucchini. They add a nice texture and soak up flavors well. For a vegan option, swap chicken for tofu or tempeh. Marinate them with the same spices as the chicken. This keeps the taste bold and fun. Spice it up! Add more spices for a kick. Try cayenne pepper or chipotle powder for heat. You can also add fresh herbs like cilantro or parsley. A splash of soy sauce or a dash of liquid smoke adds depth. A good marinade makes a huge difference. Let your chicken or veggies soak in those flavors for at least an hour. Grilling gives fajitas a smoky flavor. You can grill chicken and veggies on skewers. This method is fun and makes for great presentation. Baking is another option. Just spread everything on a baking sheet and roast at 400°F. This method is hands-off and saves time. Both grilling and baking bring out sweetness in the veggies. For the full recipe, check out the Flavorful Chicken Fajitas section. You can store leftover fajitas in an airtight container. Let the fajitas cool down first. Once cool, place the chicken and veggies together. Keep them separate from the tortillas. This helps keep everything fresh. Store them in the fridge for up to three days. To reheat your fajitas, use a skillet on medium heat. Add a splash of water or oil to keep them moist. Cook for about five minutes, stirring often. You can also use a microwave. Just place the chicken and veggies in a safe dish. Heat in 30-second bursts until warm. If you want to freeze fajitas, wrap the chicken and veggies tightly in plastic wrap. Then, place them in a freezer bag. Make sure to squeeze out excess air. You can freeze them for up to three months. When ready to eat, thaw them in the fridge overnight. Reheat following the guidelines above. Enjoying your fajitas later is easy with these steps! For the full recipe, check out the delicious details in the earlier section. Yes, you can use chicken thighs. They add a richer flavor and stay juicy. Thighs have more fat, which keeps them moist. This makes them a great choice for fajitas. Just slice them thinly like breasts. Cook them the same way, and enjoy the taste! Many toppings work well with chicken fajitas. Here are some tasty options: - Sour cream - Guacamole - Shredded cheese - Salsa - Fresh cilantro - Sliced jalapeños Feel free to mix and match. Each topping adds its own flavor. Use what you love best! To spice up your chicken fajitas, add more chili powder or fresh jalapeños. You can also try hot sauce for extra heat. Another option is to use spicy salsa. If you want, marinate the chicken longer with spices. This will enhance the flavor and heat. Enjoy your fiery fajitas for a bold kick! For the complete recipe, check out the Full Recipe section. You now know how to make tasty chicken fajitas from start to finish. We covered the best ingredients, cooking steps, and tips to avoid common mistakes. You also learned ways to vary your dish and store leftovers effectively. Remember, these fajitas are easy to customize based on your taste. Try different veggies or spices for unique flavors. Enjoy your cooking and share your delicious fajitas with others! You’ll surely impress everyone at the table.

Easy Chicken Fajitas Flavorful and Quick Meal Prep

Get ready to spice up your weeknight dinners with my Easy Chicken Fajitas! With just a few simple ingredients and

To make savory veggie stuffed peppers, gather these fresh ingredients: - 4 large bell peppers (any color) - 1 cup quinoa, rinsed - 2 cups vegetable broth (or water) - 1 can (15 oz) black beans, drained and rinsed - 1 cup corn kernels (fresh, frozen, or canned) - 1 cup diced tomatoes (fresh or canned) - 1 small onion, finely chopped - 2 cloves garlic, minced - 1 teaspoon cumin - 1 teaspoon chili powder - 1 teaspoon oregano - Salt and pepper to taste - 1 cup shredded cheese (like cheddar or Mexican blend) - Fresh cilantro for garnish (optional) Feel free to swap ingredients based on what you have. For quinoa, rice works well. Use lentils instead of black beans for a different protein. If you want a cheesy flavor without dairy, try nutritional yeast. For a spicy kick, add jalapeños or hot sauce. If you prefer other veggies, consider zucchini or spinach. These swaps keep the dish tasty and fun. These stuffed peppers are not only delicious but also healthy. Each serving packs protein, fiber, and vitamins. Here’s a quick breakdown: - Calories: About 350 - Protein: 15g - Carbohydrates: 50g - Fat: 10g - Fiber: 12g These numbers can change based on your ingredient choices. Always check labels for precise info. For the full recipe, you can refer back to the ingredient list above. Start by gathering your ingredients. You will need bell peppers, quinoa, black beans, corn, and diced tomatoes. I love using colorful bell peppers for a vibrant look. Preheat your oven to 375°F (190°C). Cut the tops off the bell peppers and scoop out the seeds. Place them upright in a baking dish. Next, rinse the quinoa under cold water. In a medium saucepan, combine it with vegetable broth. Bring this to a boil. Once boiling, lower the heat, cover, and let it simmer for about 15 minutes. The quinoa should be fluffy when done. While the quinoa cooks, chop your onion and garlic. Heat a skillet over medium heat. Add a splash of olive oil and the chopped onion. Cook until it turns soft, about 3-4 minutes. Add the minced garlic and cook for one more minute. In a large bowl, mix the cooked quinoa, sautéed onion, and garlic. Add the black beans, corn, diced tomatoes, cumin, chili powder, oregano, salt, and pepper. Stir until everything is well combined. Now, fill each bell pepper with the veggie mixture. Pack it down gently to make room for more filling. Top with shredded cheese. Cover your baking dish with aluminum foil and bake for 25 minutes. After that, remove the foil and bake for another 10-15 minutes. The peppers should be tender, and the cheese should be bubbly and slightly golden. To ensure even cooking, try to cut the tops of the peppers evenly. Make sure they stand upright in the baking dish. This helps them cook uniformly. If you notice some peppers are larger, cut them to the same height. Checking the peppers halfway through cooking is a smart move. If they look too firm, cover them again to help steam them. This way, you'll get tender, delicious stuffed peppers every time! For the full recipe, refer to the section above. Start with fresh, firm bell peppers. They hold their shape well. Cut the tops off and remove the seeds. This step is key for easy stuffing. Pre-cook your quinoa in vegetable broth. This adds rich flavor. Mix your filling well, making sure every bite has a bit of everything. Pack the filling snugly into the peppers. This ensures they bake evenly. Don’t skip the seasoning. Salt and pepper make a big difference. Avoid overcooking the quinoa. It should be fluffy, not mushy. If your peppers are too soft, they can fall apart. Bake them just long enough to become tender. Using too much cheese can mask the other flavors. A light sprinkle is all you need. Add fresh herbs to your filling. Cilantro, parsley, or basil brightens the dish. Consider a splash of lime juice for zing. It balances the richness of the cheese. You can also mix in cooked veggies like zucchini or spinach. They add color and nutrition. For a spicy kick, add jalapeños or hot sauce. These little tweaks make a big impact. For a complete guide, check out the Full Recipe. {{image_2}} You can easily swap ingredients in your stuffed peppers. If you want a different taste, try brown rice instead of quinoa. You can also add chopped mushrooms for a meaty texture. Swap black beans with kidney beans for a change. Adding olives can give a salty punch too. You can use any cheese you like, such as feta or goat cheese. Each swap brings its own flavor and charm to the dish. To make the stuffed peppers vegan, skip the cheese or use a plant-based option. You can also replace the vegetable broth with water. For gluten-free options, ensure your quinoa is certified gluten-free. Most beans and veggies are naturally gluten-free, so they fit right in. This way, everyone can enjoy this dish, no matter their diet. Do you like spice? Add chopped jalapeños or a pinch of cayenne pepper to your stuffing. For a milder flavor, leave out the chili powder. You can also add sweet bell pepper pieces for a touch of sweetness. Adjusting the spice level helps cater to your taste buds. Enjoy experimenting with the heat to find your perfect mix. For the full recipe, check out the Colorful Veggie Stuffed Peppers! To keep your veggie stuffed peppers fresh, place them in an airtight container. You can store them in the fridge for up to four days. Make sure they cool down to room temperature before sealing. This step helps to keep the peppers from getting soggy. If you want to keep them longer, consider freezing. Reheating your stuffed peppers is simple. Preheat your oven to 350°F (175°C). Place the peppers in a baking dish, cover them with foil, and heat for about 20 minutes. You can also use a microwave. Just place a pepper on a microwave-safe plate and heat for about 2-3 minutes. Check if it's warm throughout before serving. To freeze the stuffed peppers, wrap each one tightly in plastic wrap. Then, place the wrapped peppers in a freezer-safe bag. They can stay frozen for up to three months. When you’re ready to eat, thaw them overnight in the fridge. Reheat as mentioned above. This way, you’ll have a quick meal ready anytime! You can prep the filling a day early. Cook the quinoa and mix it with the other ingredients. Store this mixture in the fridge. When you're ready to eat, stuff the peppers and bake them. This method saves time and keeps your meal fresh. Yes! You can use any bell pepper color. Green, yellow, or red all work well. You can also try poblano or jalapeño peppers for a twist. They add unique flavors and heat. Just ensure they are large enough to hold the filling. Veggie stuffed peppers pair well with many sides. A simple green salad adds freshness. You can also serve it with rice or a grain bowl. For a hearty meal, try corn on the cob or garlic bread. - Full Recipe: Colorful Veggie Stuffed Peppers 🫑 In this blog post, we covered how to make delicious veggie stuffed peppers. We discussed the needed ingredients, their substitutes, and key nutritional facts. You learned step-by-step instructions for prepping and cooking, along with tips for the best results. We explored variations, like vegan options and flavor swaps, as well as proper storage methods. Using this guide, you can create tasty, healthy meals that fit your needs. Happy cooking!

Savory Veggie Stuffed Peppers Quick and Easy Meal

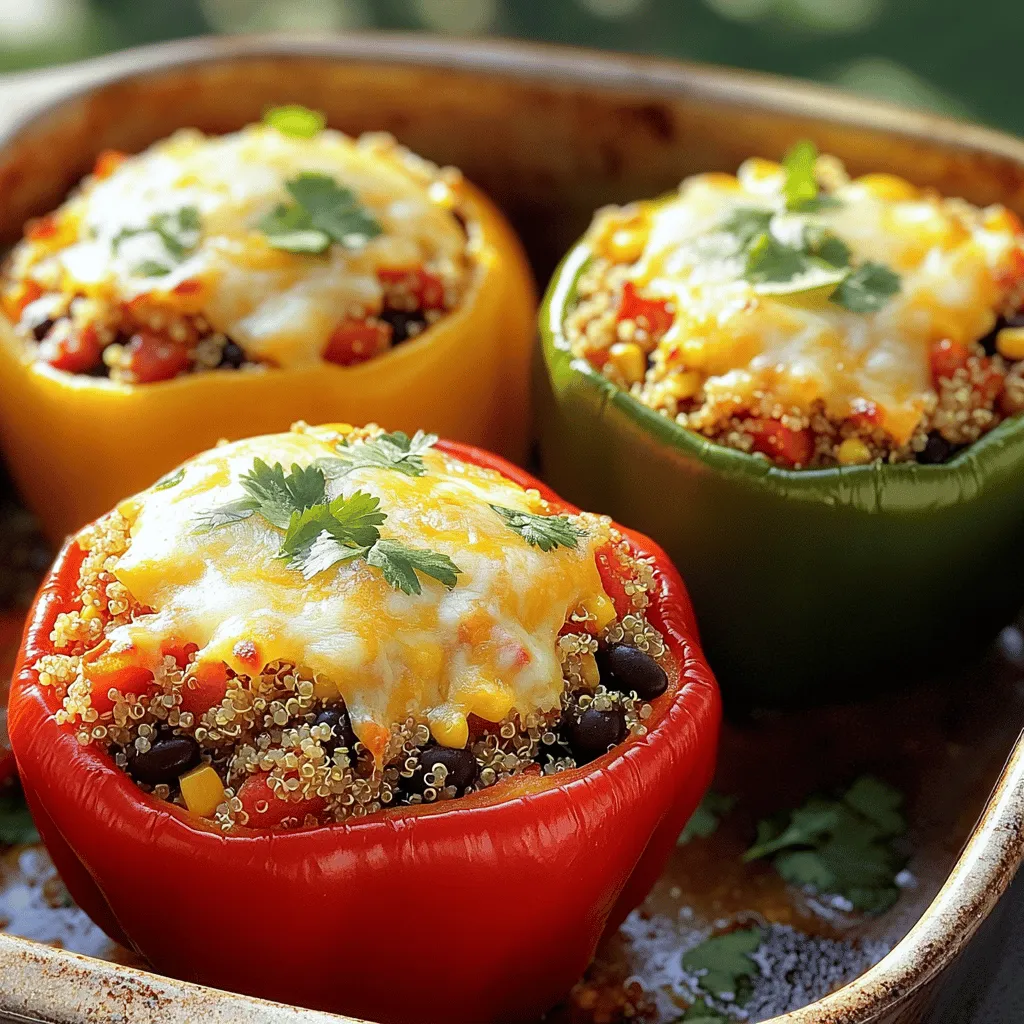
If you’re searching for a quick meal that’s both tasty and healthy, look no further! Savory Veggie Stuffed Peppers are

- 1 cup mixed berries (strawberries, blueberries, raspberries) - 1 cup coconut milk (canned for a creamier texture) - 2 tablespoons honey or maple syrup - 1 teaspoon vanilla extract - 1 tablespoon lime juice - A pinch of sea salt The main ingredients for your berry coconut popsicles are simple and fresh. The mixed berries give the popsicles a vibrant color and a sweet-tart flavor. You can choose any combination of berries you like. I often use strawberries, blueberries, and raspberries for a good balance of taste. Coconut milk adds a creamy texture. I recommend using canned coconut milk for an extra rich taste. The honey or maple syrup serves as the sweetener, but you can adjust it to your taste. The vanilla extract enhances the flavor, while lime juice adds a bright zing. A pinch of sea salt rounds it all out. - Whole berries for texture - Shredded coconut for serving For added fun, consider using whole berries as an add-in. They create little surprises in each bite. Shredded coconut can be a great topping when you're ready to serve. It adds a nice crunch and visual appeal. - Alternative sweeteners (agave syrup, stevia) - Dairy-free options for coconut milk If you want to change the sweetness, feel free to use agave syrup or stevia. Both work well in this recipe. You can also find dairy-free coconut milk options at most stores if you prefer those. This berry coconut popsicle recipe is flexible and allows you to get creative. You can find the full recipe for easy reference. First, rinse your mixed berries under cold water. Use strawberries, blueberries, and raspberries for the best flavor. After rinsing, pat them dry with a clean towel. Next, measure out 1 cup of coconut milk. Canned coconut milk gives a creamy texture. Then, get your sweeteners ready. You can use either 2 tablespoons of honey or maple syrup, depending on your taste. Now, it's time to blend! Combine the berries, coconut milk, sweeteners, 1 teaspoon of vanilla extract, 1 tablespoon of lime juice, and a pinch of sea salt in your blender. Blend it all together on high speed until you achieve a smooth consistency. After blending, taste the mixture. If you want it sweeter, add more honey or maple syrup. Get your popsicle molds ready. Pour half of the berry mixture into the molds, filling them halfway. Insert wooden sticks into each mold. Freeze this first layer for 1-2 hours until it starts to set but is not completely frozen. While that layer freezes, pour the remaining mixture into a separate bowl. You can add whole or sliced berries to this mix for fun texture. Once the first layer is set, pour the remaining mixture over it. Fill the molds to the top and return them to the freezer. Freeze for 4-6 hours until the popsicles are solid. To remove them, run warm water over the molds for a few seconds. Gently pull the popsicles out and enjoy! To achieve a creamy texture, always use canned coconut milk. This type has more fat, which gives your popsicles a rich feel. Blend the coconut milk well with the berries. This step breaks down any clumps and helps mix the flavors. Layering is key for great taste. Pour half of the berry mixture into the molds, then freeze it for a short time. This creates a nice base. When you add the second layer, you get a fun visual and flavor mix. For a fun presentation, serve the popsicles on a bright plate. Scatter fresh berries around them for color. A sprinkle of shredded coconut adds a nice touch, too. You can also wrap the base of the popsicle in parchment paper. This gives a playful look and makes it easy to hold. Pair your popsicles with more fresh fruits. Slices of bananas or mangoes work well. You can also drizzle honey or yogurt on top for extra flavor. To stop popsicles from sticking in the molds, run warm water over the outside. This helps loosen them. Make sure to freeze them long enough, too. Aim for at least six hours. If they are not frozen enough, they may break when you try to remove them. Always check the freezing time. If you want firm popsicles, let them freeze overnight. This way, you will have a solid treat ready for hot days. {{image_2}} You can get creative with flavors in your Berry Coconut Popsicles. For a tropical twist, add pineapple or mango. These fruits blend well with coconut milk, giving you a refreshing treat. If you want something richer, try a chocolate coconut swirl. Simply melt some dark chocolate and swirl it into the berry mixture before freezing. This adds depth and a delightful surprise. If you follow a vegan diet, swap honey for maple syrup. This keeps the popsicles sweet without any animal products. For those watching sugar intake, use a low-sugar sweetener like stevia. Remember to adjust the amount based on your taste. These small changes make the popsicles suit your diet without sacrificing flavor. Using seasonal fruits can take your popsicles to the next level. Fresh strawberries in summer or apples in fall can enhance the taste. You can also add herbs like mint or basil for a fresh kick. Just chop them finely and mix them in. This adds an exciting layer of flavor that makes your popsicles unique and delicious. For the complete recipe, check out the [Full Recipe] and enjoy experimenting with these variations! To freeze your berry coconut popsicles properly, follow these simple steps: - Use high-quality molds. Silicone molds work best. - Pour the mixture into the molds, leaving a little space at the top. - Insert sticks when the mixture is partially frozen. This helps them stay upright. - Freeze for at least 4 to 6 hours. They will stay fresh for up to 2 months in the freezer. When you want to enjoy your popsicles, defrost them safely. Here’s how: - Run warm water over the outside of the molds for a few seconds. - Gently pull the popsicles out. This method keeps the texture smooth and creamy. - Avoid using a knife or any tool to pry them out. That can ruin the shape. Taking care of your popsicle molds is easy. Here are some tips: - Clean them with warm soapy water after each use. - Let them dry completely before storing. - Get creative! Use leftover molds for yogurt bites or mini ice cubes for drinks. These easy storage tips will help you enjoy your berry coconut popsicles longer and keep your kitchen tools in great shape. For the full recipe, check out the earlier section. Berry coconut popsicles should freeze for about 4 to 6 hours. This time ensures they become firm and solid. If you want a softer texture, you can check them after 4 hours. For best results, leave them in the freezer overnight. This way, they stay ready for a hot day. Yes, you can use fresh berries. Fresh berries add a bright taste and lovely texture. However, frozen berries make it easier to blend smoothly. If you use fresh berries, they might not create the same creamy texture. To compensate, you may need to add a little more coconut milk for smoothness. To remove popsicles easily, run warm water over the outside of the molds. This warms the sides, loosening the popsicles. Make sure to do this for a few seconds. After that, gently pull the popsicles out. If they stick, give them a little twist while pulling. You can make these popsicles healthier by reducing the sweetener. Try using less honey or maple syrup. You can also add more berries to increase fiber and vitamins. Another option is to use unsweetened coconut milk. This keeps the flavor rich without extra sugar. Making berry coconut popsicles is simple and fun. You only need a few key ingredients, like mixed berries and coconut milk. I shared steps to blend, mold, and freeze to create creamy treats. You can even personalize your popsicles with different flavors or toppings. Explore seasonal fruits and swaps to fit your diet. Remember, freezing them properly ensures a smooth texture. Enjoy trying new variations, and soon you’ll have delicious popsicles ready in your freezer!

Berry Coconut Popsicles Tasty and Refreshing Treat

Are you ready for a cool and fruity treat? These Berry Coconut Popsicles are not just delicious; they’re also easy

- 2 cups fresh blueberries (or frozen, thawed) - 1/4 cup maple syrup (or honey) - 2 tablespoons chia seeds - 1 tablespoon lemon juice - 1 teaspoon vanilla extract - Pinch of salt - Other berries (strawberries, raspberries) - Spices (cinnamon, nutmeg) - Additional sweeteners (agave, coconut sugar) You need some simple ingredients to make blueberry chia seed jam. The main stars are fresh blueberries. You can also use frozen ones if needed. You will mix them with maple syrup for sweetness. If you prefer, you can swap it with honey. Chia seeds are the magic ingredient here. They help thicken the jam as they soak up liquid. Lemon juice adds a tangy touch, while vanilla extract brings out the blueberry flavor. A pinch of salt balances everything perfectly. Feel free to get creative! You can add other berries like strawberries or raspberries. Spices like cinnamon or nutmeg can enhance the taste too. If you want more sweetness, consider using agave or coconut sugar. This mix of ingredients makes your jam not only tasty but healthy too. For the full recipe, check out the instructions above. Enjoy making your homemade blueberry chia seed jam! 1. First, take 2 cups of fresh blueberries. You can also use frozen blueberries, just make sure they are thawed. 2. Place the blueberries in a medium saucepan. 3. Use a fork or a potato masher to gently mash the blueberries. This takes about 3-4 minutes. You want them to break down and release their juices. 4. Now, add in 1/4 cup of maple syrup or honey, 1 tablespoon of lemon juice, and a pinch of salt. Stir it all together. 1. Next, bring the mixture to a gentle boil over medium heat. 2. Once it boils, reduce the heat and let it simmer for about 5 minutes. Stir occasionally to keep it from sticking. 3. Remove the saucepan from the heat after simmering. 4. Stir in 2 tablespoons of chia seeds and 1 teaspoon of vanilla extract. This is where the magic begins! 1. Let the mixture sit for about 10 minutes. During this time, the chia seeds will absorb liquid and thicken the jam. 2. Taste the jam. If you want it sweeter, add more maple syrup. 3. Once it has thickened to your liking, transfer the jam to a clean jar. 4. Allow it to cool completely before sealing the jar. 5. Store your blueberry chia seed jam in the fridge for up to two weeks. Enjoy making this easy and healthy jam! Check out the Full Recipe for more details. - Adjusting chia seeds for thickness: If you want a thicker jam, add more chia seeds. Start with 2 tablespoons. If it's too runny, mix in another half tablespoon. Let it rest to see the change. - How to prevent burning: Cook over medium heat. Stir often to avoid sticking. If the jam begins to stick, lower the heat. - Experimenting with sweetness: You can adjust the sweetness by adding more maple syrup. Taste as you go. This way, you’ll find the perfect balance for your jam. - Alternative flavor profiles: Try adding spices like cinnamon or nutmeg for warmth. You can also mix in other fruits, like raspberries or strawberries, for a fun twist. - Best pairings: This jam tastes great on toast or warm scones. Spread it on your favorite breakfast items for a sweet start to your day. - Creative uses: Use the jam as a topping for yogurt or desserts. It also works well in oatmeal or as a filling for pastries. There are many ways to enjoy blueberry chia seed jam! For the full recipe, check out the details above. {{image_2}} You can easily change this jam by using other fruits. - Mixed berry chia seed jam: Combine blueberries with strawberries or raspberries. This mix gives a colorful jam with bright flavors. - Citrus-infused blueberry jam: Add a bit of orange or lemon zest for a fresh taste. The zest brightens up the blueberries and adds a nice twist. You can switch up the sweetener for a different flavor. - Using different natural sweeteners: Try honey, agave nectar, or coconut sugar. Each sweetener gives the jam a unique taste. - Sugar-free options: Use stevia or monk fruit sweetener for a low-calorie jam. These options keep the flavor while cutting sugar. Making a low-sugar version is simple and tasty. - Reducing sweetener without affecting taste: Start by cutting the maple syrup by half. Taste the jam and adjust as needed. You can still enjoy the fruit's natural sweetness. - Substitutes for low-sugar diets: Use erythritol or allulose as sweeteners. These options can keep the jam sweet without adding sugar. Feel free to explore these ideas to make your own twist on blueberry chia seed jam! For the full recipe, check out the main article. To keep your blueberry chia seed jam fresh, store it in the fridge. Use a clean glass jar with a tight lid. This helps keep air out and prevents spoilage. Make sure the jar is dry before filling it. I recommend using a 12-ounce mason jar for easy pouring and serving. You can freeze blueberry chia seed jam for up to six months. Just pour the jam into a freezer-safe container, leaving some space at the top. This space helps the jam expand as it freezes. When you're ready to use it, thaw it in the fridge overnight. For quick thawing, place the container in a bowl of warm water. The jam lasts about two weeks in the fridge. If you see any mold or off smells, it’s time to toss it. Freshness is key to enjoying this tasty treat. Always check for signs of spoilage before using. Homemade blueberry chia seed jam lasts about two weeks in the fridge. Store it in a clean jar with a tight lid. After that time, it may spoil. Always check for any off smells or changes in color before using it. Yes, you can use frozen blueberries! Just thaw them before cooking. They work well and still give great flavor. This is a handy option if fresh blueberries are not available. Yes, chia seed jam is safe for kids. Chia seeds are rich in fiber and healthy fats. If your child has allergies, check with a doctor first. Always watch for choking hazards with small seeds. You can use leftover chia seeds in many ways! Add them to smoothies, oatmeal, or yogurt. They boost nutrition and add a nice crunch. You can also use them in baking or as a thickener for soups. Yes, you can can blueberry chia seed jam for longer storage. Follow proper canning procedures for safety. Make sure to sterilize jars and lids. Canned jam lasts for up to a year when stored in a cool, dark place. Making blueberry chia seed jam is simple and fun. You need fresh or frozen blueberries, sweetener, chia seeds, and a few extras. The steps are easy: mash, mix, boil, and cool. There are many ways to customize your jam with spices and other fruits. Proper storage keeps it fresh, and you can even freeze it. This jam is a great treat on toast or yogurt. Experiment with flavors and enjoy the process! Your jam will taste better than store-bought, and you made it yourself.

Blueberry Chia Seed Jam Easy and Healthy Recipe

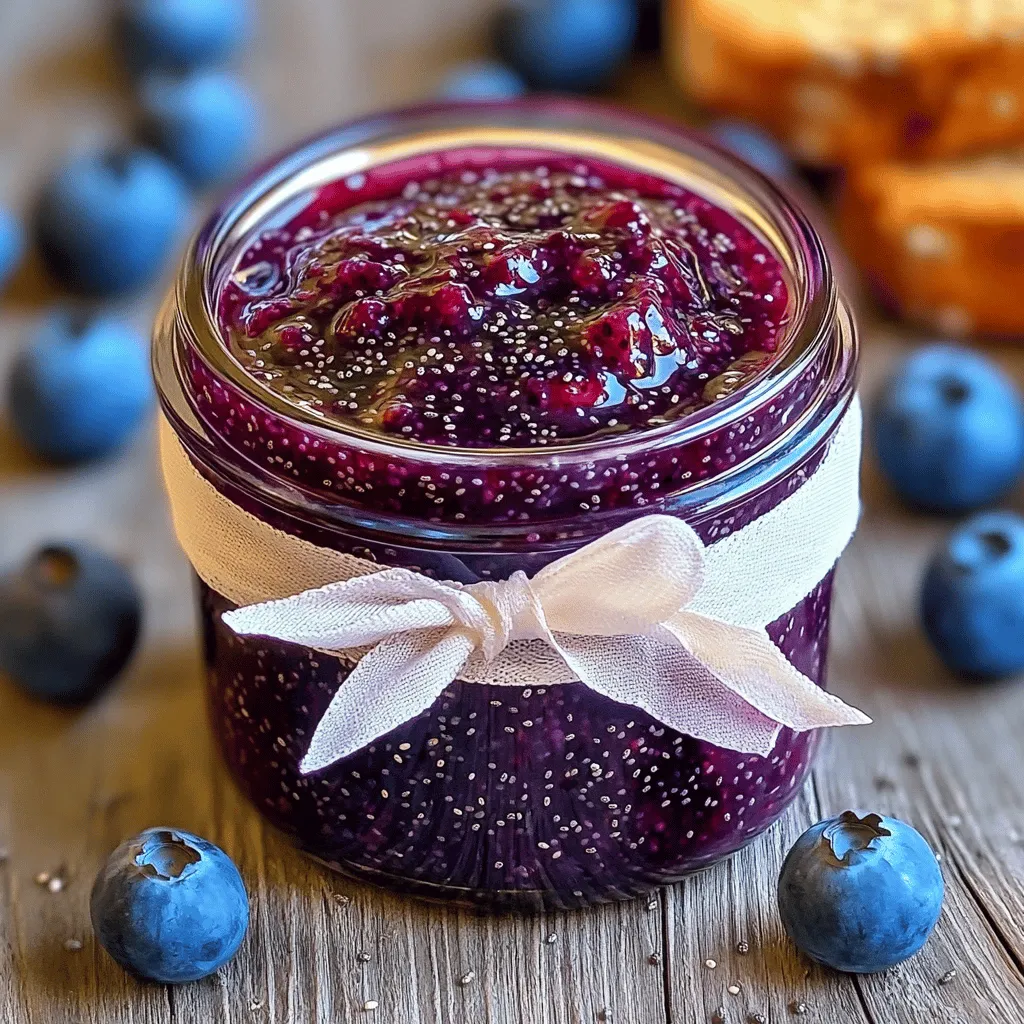
Looking for a healthy and easy jam recipe? You’ve found it! This Blueberry Chia Seed Jam is not only delicious

- 1 cup all-purpose flour - 1/2 cup unsalted butter, softened - 1/2 cup brown sugar, packed - 1/4 cup granulated sugar - 2 tablespoons cream cheese, softened - 1 teaspoon vanilla extract - 1/4 teaspoon salt - 1/2 cup mini chocolate chips - 1/2 cup whipped topping (or whipped cream) The ingredients for chocolate chip cookie dough dip are simple and easy to find. Each ingredient plays a key role in making this dip sweet and creamy. The flour gives it texture, while the butter and sugars create a rich flavor. Cream cheese adds a creamy element that makes it smooth. - Alternatives for unsalted butter: You can use margarine or coconut oil if you prefer. Both options work well to keep the dip creamy. - Vegan options for cream cheese: Look for cashew-based cream cheese or tofu cream cheese. They will keep the dip rich without dairy. - Gluten-free flour options: Use almond flour or a gluten-free flour blend. Both will keep the dip tasty and gluten-free. Feel free to mix and match these substitutes based on your needs or what you have at home. The dip will still turn out delicious! For the full recipe, check the section above. 1. Mixing the sweet ingredients Start with a mixing bowl. Add the softened butter, brown sugar, and granulated sugar. Beat them together until creamy. This makes a smooth base for your dip. 2. Incorporating wet ingredients Next, add the cream cheese, vanilla extract, and salt. Beat this mixture until it is smooth and fluffy. This step adds richness and flavor to your dip. 3. Adding flour and chocolate chips Gradually add the all-purpose flour to the bowl. Stir until it all mixes well. Make sure to scrape the sides of the bowl. Once mixed, gently fold in the mini chocolate chips. This gives you that sweet chocolatey goodness. - Importance of refrigerating the dip Refrigerating the dip is key. It helps the flavors blend well and makes the dip thick and creamy. - Recommended chilling time Chill the dip for at least 30 minutes. This allows it to set up nicely. - Serving tips for the best presentation Serve the dip in a colorful bowl. Surround it with fun dippable treats like graham crackers, fresh fruit, or pretzels. This makes it look great and taste even better! For the full recipe, check the earlier section. To ensure a smooth texture, start with soft butter. This helps blend the sugars easily. After mixing the butter, brown sugar, and granulated sugar, beat them well. You want it creamy and fluffy. When folding in whipped topping, do it gently. Use a spatula to fold it in. This keeps the dip light and airy. If you mix too hard, it can lose its fluffiness. Adjusting sweetness is easy. Taste the dip before serving. If you want it sweeter, add more sugar. Mix it in well to keep the texture smooth. For the best dippable items, use graham crackers, sliced fruit, or pretzels. They all add fun flavors and crunch. You can even try cookies for an extra treat! For a creative serving platter, use a colorful bowl. Surround it with your dippable items. This makes a beautiful display for guests. Pair the dip with drinks like milk or coffee. It also goes great with other desserts. Try it alongside brownies or cupcakes to impress your friends. If you want the full recipe, check out the Chocolate Chip Cookie Dough Dip details! {{image_2}} You can easily change the flavor of your cookie dough dip. Here are some fun ideas: - Peanut Butter or Nutella: Swapping in peanut butter or Nutella gives a nutty twist. Just add half a cup to the mix. This will make the dip creamy and rich. - Different Types of Chocolate Chips: You can use dark, milk, or even white chocolate chips. Each type adds a unique taste. Feel free to mix them for extra fun. - Seasonal Variations: For a festive touch, try pumpkin spice in fall or peppermint in winter. A teaspoon of either will add warmth or a cool flavor to the dip. If you need to make the dip fit your diet, here are some easy swaps: - Low Sugar Options: Use sugar substitutes like stevia or erythritol. These can cut down on sugar without losing sweet flavor. - Gluten-Free Recipes: You can replace all-purpose flour with almond flour or a gluten-free blend. This keeps the dip safe for those avoiding gluten. - Nut-Free Versions: For a nut-free dip, simply skip nut butter and stick to plain chocolate. This way, everyone can enjoy it without worry. These variations make the cookie dough dip fun and adaptable. You can match it to any taste or need! To keep your chocolate chip cookie dough dip fresh, store it in the refrigerator. I recommend placing it in a sealed container. This helps prevent any odors from other foods in the fridge. A glass or plastic container works well. Just make sure the lid fits tightly. If you are planning to eat it within a few days, this method works great. You can also freeze the cookie dough dip for later. First, scoop it into an airtight container. Leave some space at the top, as the dip may expand when frozen. Seal the container tightly. When you're ready to enjoy it, take it out and place it in the fridge overnight to thaw. This helps it regain its creamy texture. Give it a good stir before serving. Enjoy it with your favorite dippers! Is cookie dough dip safe to eat? Yes, cookie dough dip is safe to eat. We use heat-treated flour, which makes it safe. You can find heat-treated flour at stores or online. If you want to bake your dip, you can add it to baked goods, too. How long does the cookie dough dip last? The cookie dough dip lasts about 3 to 5 days in the fridge. Make sure to store it in an airtight container. Keep it cool, and it will stay fresh. You can also check for any change in texture or smell before eating. Can I make this dip ahead of time? Yes, you can make this dip ahead of time. It tastes even better when the flavors mix. Just chill it for at least 30 minutes before serving. You can prepare it a day in advance for a party or gathering. What to do if the dip is too thick? If your dip is too thick, add a bit of milk. Start with one tablespoon, then mix well. Keep adding until you reach your desired consistency. This will make the dip smooth and easy to scoop. How to fix a grainy texture? To fix a grainy texture, beat the dip again. Use a mixer to whip it until smooth. If it still feels grainy, add a bit more cream cheese or whipped topping. This will help achieve a creamy texture. Can I reconstitute if it separates? Yes, you can reconstitute if it separates. Simply stir it well to combine. If it still looks off, add a little cream cheese or whipped topping. This will help bring it back together. This blog post covers how to make a delicious cookie dough dip. We discussed the key ingredients, offered substitutes, and shared step-by-step instructions for easy prep. You learned tips for perfecting the dip and ideas for serving it well. We even explored tasty variations and storage options. Enjoy creating this fun treat. With simple steps and tasty options, you can impress your friends and family. Your new cookie dough dip is sure to be a hit!

Chocolate Chip Cookie Dough Dip Simple and Sweet Treat

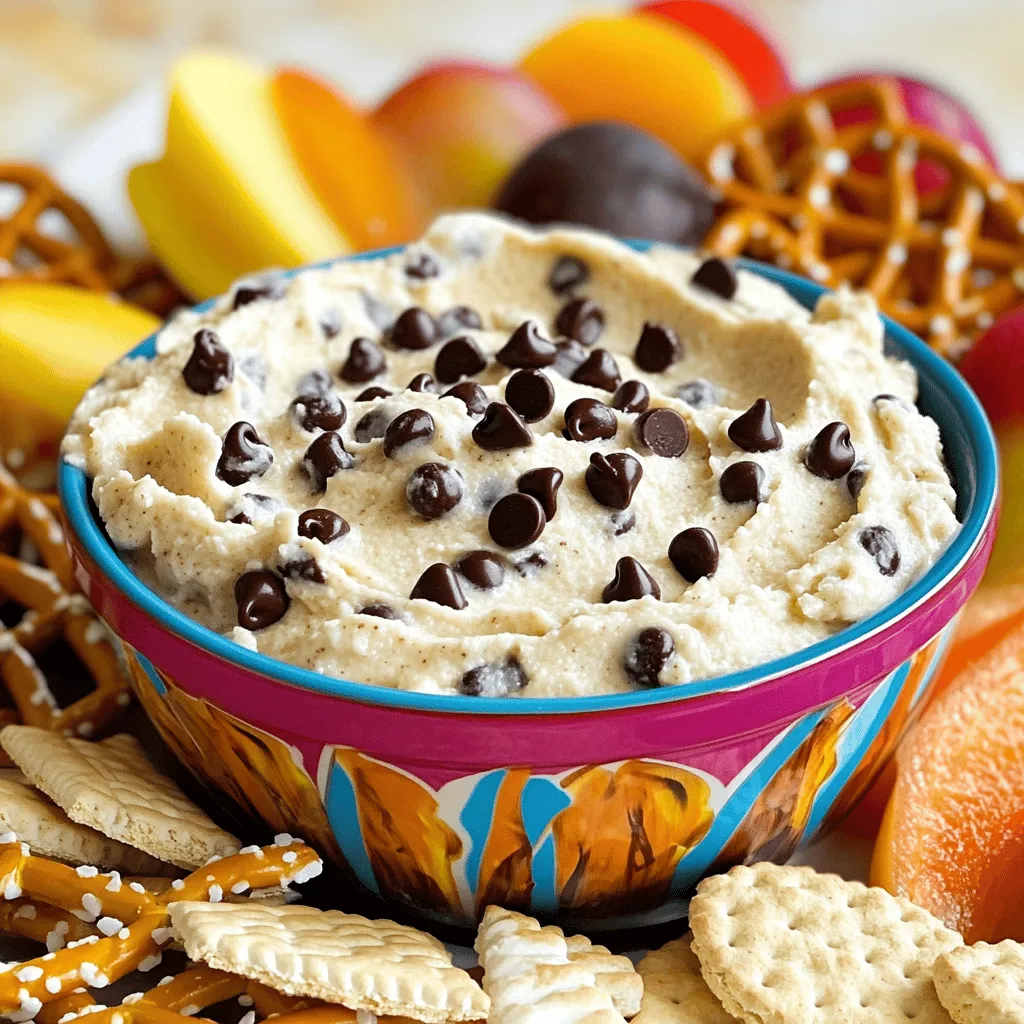
Are you ready for a sweet treat that will wow your friends and family? This Chocolate Chip Cookie Dough Dip

To make a tasty veggie burger, you need these key ingredients: - 1 cup cooked quinoa - 1 can (15 oz) black beans, rinsed and drained - 1/2 cup breadcrumbs - 1/4 cup finely chopped red onion - 1/2 red bell pepper, finely chopped - 2 cloves garlic, minced - 1 teaspoon ground cumin - 1 teaspoon chili powder - 1/2 teaspoon smoked paprika - 1/4 cup fresh cilantro, chopped - Salt and pepper to taste - 2 tablespoons olive oil (for cooking) - Whole grain burger buns These ingredients give your burger a great flavor and texture. The quinoa and black beans form a hearty base. The spices add warmth and depth. You can customize your veggie burger with these optional add-ins: - Grated carrots for sweetness - Chopped spinach for extra greens - Diced jalapeños for heat - Mushrooms for an earthy taste - Nutritional yeast for a cheesy flavor These add-ins can help you create a burger that suits your taste. Mix and match to find your favorite combo! Don't forget the toppings! Here are some tasty options to try: - Crisp lettuce for crunch - Juicy tomato slices for freshness - Creamy avocado for richness - Your favorite condiments like ketchup or mustard Toppings make each bite exciting and add a burst of flavor. Enjoy experimenting with different combinations! For more details, check out the Full Recipe. Start by mashing the black beans in a large mixing bowl. Use a fork or potato masher. Aim for a mostly smooth blend, but keep some chunks for texture. This gives the burger a hearty bite. Next, add your cooked quinoa. Quinoa boosts protein and adds a nice texture. Now, add the breadcrumbs, chopped red onion, and red bell pepper to the bowl. These ingredients add crunch and flavor. Next, mix in the minced garlic, ground cumin, chili powder, smoked paprika, and chopped cilantro. Don't forget to add salt and pepper to taste. Stir everything together until well mixed. Let it sit for about 10 minutes. This helps the mixture firm up. Divide the mixture into four equal portions. Shape each portion into a patty. If the mix is sticky, wet your hands with water. This step makes shaping easier. Heat olive oil in a large skillet over medium heat. Once hot, add the patties. Cook them for about 5 to 6 minutes on each side. You want them golden brown and heated through. If you like, toast whole grain burger buns while cooking. Assemble your burgers with toppings like lettuce, tomato, and avocado. Enjoy your homemade veggie burger! For the full recipe, check out the Ultimate Quinoa Black Bean Veggie Burger . To get the best texture, use both black beans and quinoa. Black beans give a firm bite, while quinoa adds fluffiness. When mashing the black beans, leave some chunks for a better feel. If your mixture feels too wet, add more breadcrumbs. This helps bind the patties. Letting the mix sit for ten minutes also helps firm it up. Adding spices makes a big difference. Ground cumin and chili powder add warmth and depth. You can also experiment with fresh herbs like cilantro. For a bit of heat, try adding diced jalapeños or crushed red pepper flakes. Mixing in a splash of soy sauce or Worcestershire sauce can also boost flavor. You can pan-fry, bake, or grill these patties. Pan-frying gives a nice brown crust. To pan-fry, heat olive oil over medium heat. Cook for about six minutes on each side. If you bake, cook at 375°F for about 25 minutes. For grilling, use a well-oiled grill to prevent sticking. Always make sure the patties are heated through before serving. {{image_2}} You can use many types of beans for your veggie burger. Black beans work well, but you can also try chickpeas or kidney beans. Each bean adds a unique taste and texture. For a creamy burger, use white beans. They blend smoothly and taste great. Just remember to rinse and drain canned beans to reduce sodium. Spices and herbs can change the flavor of your burger. Try adding Italian herbs like oregano and basil for a fresh twist. For a spicy kick, add cayenne pepper or crushed red pepper flakes. You can also use fresh herbs like parsley or dill to brighten the taste. Mix and match to find your favorite flavor. If you need a gluten-free option, swap out regular breadcrumbs for gluten-free ones. You can also use ground oats or almond flour. These options help bind the burger and keep it tasty. Make sure to check labels to ensure all ingredients are gluten-free. Enjoy your veggie burger without worries! For the full recipe, follow the Ultimate Quinoa Black Bean Veggie Burger directions. To keep leftover veggie burgers fresh, place them in an airtight container. Store them in the fridge for up to three days. Make sure they cool down before sealing. This helps keep the burgers tasty and safe to eat. If you want to enjoy them later, freezing is a great option. To freeze the veggie burgers, first, let them cool completely. Then, wrap each patty in plastic wrap or foil. Place the wrapped patties in a freezer bag or container. Label it with the date. These burgers freeze well for up to three months. When you're ready, you can thaw them in the fridge overnight before cooking. To reheat, you have a few options. You can use the skillet method: heat a small amount of oil in a pan over medium heat. Cook the patties for about 5 minutes, flipping them halfway. You can also bake them in the oven. Preheat your oven to 350°F (175°C) and bake for 10-15 minutes. Just watch them closely to avoid burning. Homemade veggie burgers can last about 3 to 5 days in the fridge. Store them in an airtight container to keep them fresh. If you want to keep them longer, freezing is a great option. Yes, you can prepare these burgers ahead of time. You can shape the patties and store them in the fridge for a day or two. For longer storage, freeze the patties. Just remember to thaw before cooking. You can serve homemade veggie burgers with many sides. Here are a few ideas: - Sweet potato fries - Coleslaw - Fresh salad - Grilled vegetables - Pickles These sides add flavor and nutrition. Pairing them with your veggie burger creates a complete meal. Enjoy experimenting to find your favorite combinations! For the full recipe, check out the Ultimate Quinoa Black Bean Veggie Burger. In this blog post, we explored making delicious homemade veggie burgers. We covered key ingredients and optional add-ins to boost flavor. I shared step-by-step instructions for preparing the bean mixture and shaping the patties. You learned tips for texture and flavor, plus cooking methods. We discussed variations, storage tips, and answered common questions. Now, you can confidently create tasty veggie burgers that fit your taste and needs. Happy cooking!

Homemade Veggie Burger Flavorful and Simple Recipe

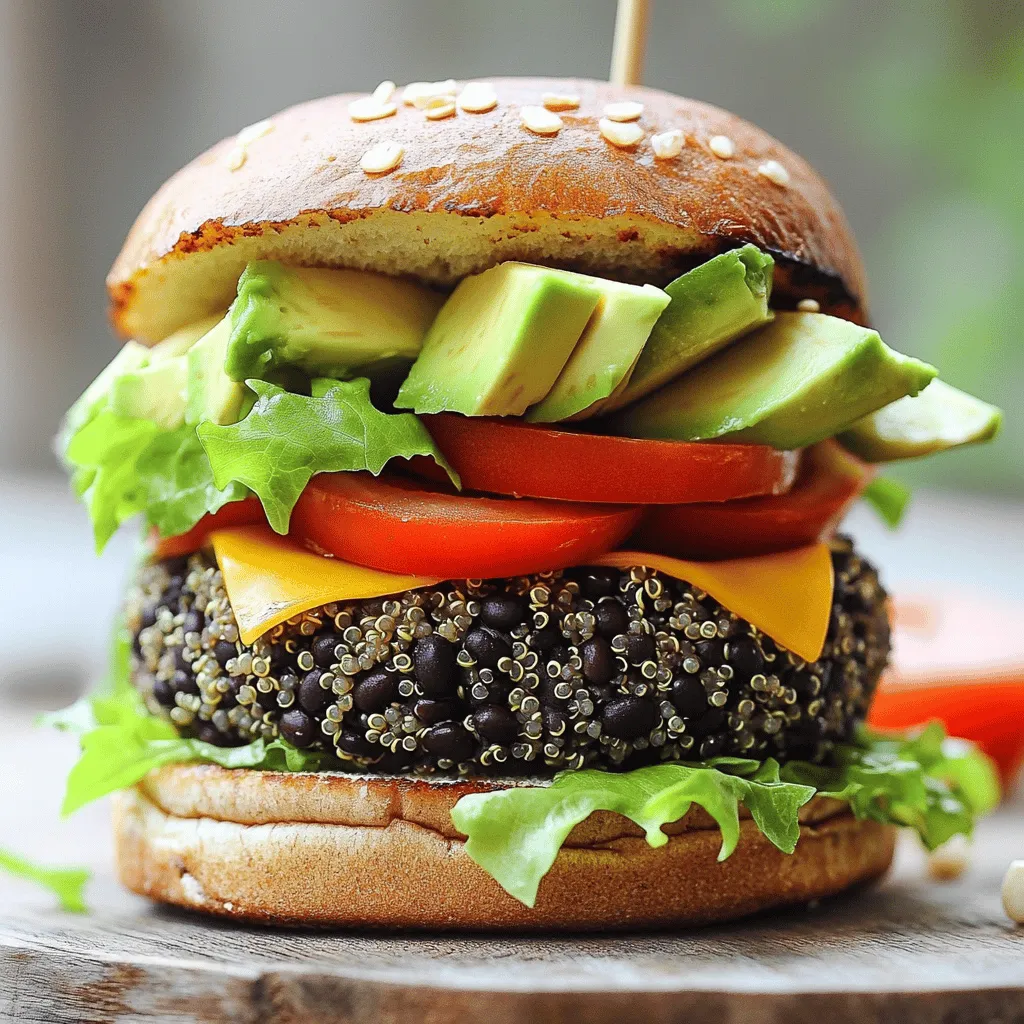
Are you ready to enjoy a tasty homemade veggie burger? This simple recipe is packed with flavor and healthy ingredients.

Carrot Cake Energy Bites are a fun, tasty snack. They are easy to make and nutritious. This recipe uses simple ingredients you might already have. You can enjoy them any time of the day. - 1 cup rolled oats - 1 cup almond flour - 1/2 cup grated carrots - 1/4 cup honey or maple syrup - 1/4 cup shredded coconut - 1/2 teaspoon cinnamon - 1/4 teaspoon nutmeg - 1/4 teaspoon allspice - 1/4 cup chopped walnuts (optional) - 1/4 cup raisins - A pinch of salt You can change this recipe to fit your taste. If you want more flavor, add vanilla or ginger. You can swap almond flour for oat flour if needed. For a nut-free version, skip the walnuts. Try dried cranberries instead of raisins for a twist. These changes keep the bites fun and fresh! Start by gathering all your ingredients. You will need rolled oats, almond flour, grated carrots, honey or maple syrup, shredded coconut, and spices. Don't forget the walnuts and raisins if you want them. It helps to have everything ready to go. This makes the process smooth and quick. In a large mixing bowl, combine the rolled oats and almond flour. Then, add the grated carrots and shredded coconut. Mix these dry ingredients well. Use a spoon or your hands to ensure they blend together nicely. This step is key for a good taste and texture. In a separate bowl, whisk together honey or maple syrup with cinnamon, nutmeg, allspice, and a pinch of salt. This mixture adds flavor to your bites. Once it’s smooth, pour it into the dry ingredients. Add in chopped walnuts and raisins if you like. Stir everything until it forms a sticky mixture. It should hold together well. Now, using your hands, scoop small portions and roll them into bite-sized balls. Aim for about one inch in diameter. Place these on a parchment-lined baking sheet. Refrigerate them for at least 30 minutes to help them set. Enjoy these tasty bites right away or store them in an airtight container for later. You can find the full recipe in the earlier sections. To get the right texture for your Carrot Cake Energy Bites, use rolled oats. They give a great base. Almond flour adds a nice softness. Make sure to mix well. This helps bind everything together. If your mix feels too dry, add a touch of honey or maple syrup. You want a sticky feel that holds together easily. Sweetness can vary based on your taste. If you like it sweeter, add more honey or maple syrup. You can also try using mashed bananas or applesauce. These options add sweetness and moisture. Remember to taste your mix before rolling it into bites. Adjust as needed to match your sweet tooth. Carrot Cake Energy Bites are great for snacks or breakfast. You can serve them fresh from the fridge. Pair them with yogurt for a nice treat. They also work well with a cup of tea or coffee. For a fun twist, roll them in crushed nuts or coconut before chilling. This adds a nice crunch and makes them look fancy. Enjoy these bites anytime for a tasty and healthy boost! {{image_2}} You can easily change the nuts and seeds in your energy bites. Try using pecans, hazelnuts, or sunflower seeds. Each nut brings a unique flavor and crunch. If you like a bit of extra protein, add pumpkin seeds. Simply swap them in for the walnuts. You can mix and match to find your favorite blend. Adding extra flavors makes these bites even tastier. Consider adding a splash of vanilla extract. This gives a warm and sweet note. You can also try a sprinkle of ground ginger for a spicy kick. Other options include adding a bit of orange zest or nutmeg. Each addition can change the flavor profile and keep things exciting. Making your energy bites vegan is easy. Just replace honey with maple syrup or agave. For a gluten-free option, make sure to use certified gluten-free oats. This ensures that you can enjoy these bites without worry. You can also use coconut flour instead of almond flour if needed. These changes help everyone enjoy this tasty treat. For the full recipe, check out the detailed instructions above. To keep your carrot cake energy bites fresh, store them in an airtight container. This helps prevent them from drying out or absorbing other smells. You can place them in the fridge for up to a week. If you plan to eat them later, freezing may be a better option. Freezing is a great way to keep your energy bites longer. After you roll them into balls, place them on a baking sheet. Make sure they are not touching. Freeze them for about two hours. Once firm, transfer them to a freezer-safe bag. They can last for up to three months in the freezer. Just remember to label the bag with the date. Carrot cake energy bites stay good in the fridge for about a week. If you freeze them, they can last much longer. Always check for any signs of spoilage, like off smells or mold. When you want a snack, take out a few from the fridge or freezer. Let them sit for a few minutes to soften before enjoying. Yes, you can make these energy bites ahead of time. They stay fresh for about a week in the fridge. Just store them in an airtight container. This makes them a great snack for busy days. You can use agave syrup or brown rice syrup instead. Both work well and add sweetness. If you prefer a less sweet option, try mashed banana or unsweetened applesauce. Adjust the amount based on your taste. To boost nutrition, add seeds like chia or flaxseed. They add fiber and healthy fats. You can also include protein powder for an extra protein kick. Mixing in dried fruit like cranberries or apricots adds flavor and nutrients. In this post, I shared a complete guide to making Carrot Cake Energy Bites. You learned about the key ingredients, step-by-step instructions, and helpful tips to get great texture and flavor. I also covered creative variations and storage tips to keep your bites fresh. These energy bites are easy to customize and perfect for snacks. Enjoy experimenting with flavors and share them with friends!

Carrot Cake Energy Bites Tasty and Nutritious Snack

Looking for a tasty snack that fuels your day? Try these Carrot Cake Energy Bites! They blend sweet, wholesome ingredients

To make delicious cinnamon sugar churros, gather these key items: - 1 cup water - 2 tablespoons granulated sugar - 1/2 teaspoon salt - 2 tablespoons vegetable oil - 1 cup all-purpose flour - 2 large eggs - 1 teaspoon vanilla extract - 1 cup granulated sugar (for coating) - 2 teaspoons ground cinnamon - Oil for frying These ingredients will give your churros that perfect balance of flavor and crunch. You can add some fun twists to your churros by using these optional ingredients: - Cocoa powder for a chocolate flavor - Nutmeg for a warm spice - Cardamom for a unique taste - Chocolate or caramel for dipping These additions can make your churros even more exciting. For making churros, it's helpful to have the right tools: - Medium saucepan for boiling the dough - Mixing bowl for combining ingredients - Piping bag with a star-shaped nozzle for shaping the churros - Deep frying pan or pot for frying - Slotted spoon for removing churros from oil - Paper towels for draining excess oil With these tools, you will create churros with ease. Check out the Full Recipe for detailed steps. To start, grab a medium saucepan. Add 1 cup of water, 2 tablespoons of granulated sugar, 1/2 teaspoon of salt, and 2 tablespoons of vegetable oil. Place the pan over medium heat and bring it to a boil. Once it boils, take the pan off heat. Now, stir in 1 cup of all-purpose flour until the dough is smooth. Let the dough cool for a few minutes. Then, add 2 large eggs and 1 teaspoon of vanilla extract. Mix well until everything is fully combined and smooth. You'll want to feel proud of your dough! Next, heat oil in a deep frying pan or pot. Aim for a temperature of about 350°F or 175°C. While the oil heats, transfer your dough into a piping bag with a star-shaped nozzle. Once the oil is hot, pipe strips of dough, about 6 inches long, directly into the oil. Use scissors to cut the dough as you go. Fry the churros until they turn golden brown, about 2-3 minutes on each side. Use a slotted spoon to remove them and place them on a plate lined with paper towels. This helps absorb any extra oil. Now comes the fun part! In a shallow dish, mix 1 cup of granulated sugar with 2 teaspoons of ground cinnamon. Roll the warm churros in this sweet mixture until they are well coated. This step makes them irresistible! Serve your churros right away for the best taste. Enjoy the crispy, sweet goodness you just made! For a complete guide, check the Full Recipe. To get that dreamy churro texture, focus on your dough. You want it thick but smooth. After you mix in the flour, let the dough cool a bit. Adding eggs to hot dough can cook them. Mix until the dough is fully formed. It should hold its shape when piped. Frying is key to the churro's crispiness. Make sure your oil is hot, around 350°F. If the oil is too cool, your churros will soak up oil and turn soggy. Fry churros in small batches. This keeps the oil temperature steady. Flip them halfway for even cooking. Avoid overmixing the dough. This can make churros tough. Also, don’t skip the cinnamon sugar coating. It adds flavor and crunch. Lastly, don’t let churros sit too long after frying. Serve them warm for the best taste. For the full recipe, check out the instructions above! {{image_2}} You can make chocolate-filled churros for a rich twist. To do this, add melted chocolate to your dough. You can also inject chocolate filling after frying. Use a piping bag with a narrow tip to do this. Just remember to coat the churros in cinnamon sugar after filling them. The warm chocolate inside will melt in your mouth! Want to mix things up? You can add nutmeg and cardamom to your churro dough. This will give your churros a warm, cozy flavor. Use about half a teaspoon of each spice. The nutmeg adds warmth, while cardamom gives a sweet, floral note. Make sure to balance these spices with the cinnamon in the sugar coating for a unique taste. If you need a gluten-free option, you can use rice flour or almond flour. Rice flour will give you a light and crispy churro. Replace all-purpose flour with an equal amount of rice flour in the recipe. The measurements stay the same. Your churros will be just as tasty and crispy as the classic ones. Check out the Full Recipe for all the steps to make these variations! To store leftover churros, let them cool completely. Place them in an airtight container. This keeps them fresh for about two days. If you want to keep them longer, consider freezing. For the best taste, reheat churros in an oven. Preheat your oven to 350°F (175°C). Place the churros on a baking sheet and warm them for about 5-7 minutes. This will help them regain some of their crunch. Avoid the microwave, as it can make them soft and chewy. You can freeze churros for up to two months. First, let them cool. Then, place them in a single layer on a baking sheet. Freeze them for about an hour. After that, transfer them to a freezer bag. When you want to eat them, just follow the reheating tips for fresh taste. Enjoy your crispy treat anytime! For the full recipe, check out the earlier sections. You can serve churros with many tasty dips. Chocolate sauce is a top choice. It adds rich flavor and pairs well with the churros. Caramel sauce or dulce de leche also works great. For a fruity twist, try a berry sauce. You can even serve churros with whipped cream for extra fun. Yes, you can make churros in advance. Fry them and let them cool completely. Then, store them in an airtight container. They will stay fresh for about two days at room temperature. For best taste, reheat them in the oven. This will keep them crisp and delicious. Churros likely come from Spain. They first appeared in the 19th century. They were inspired by a type of fried dough from China. Today, churros are enjoyed in many countries. You can find them in Mexico, where they are often served with hot chocolate. Each place adds its own twist to this beloved treat. For the full recipe, check the provided link. Making cinnamon sugar churros is fun and easy. We covered the key ingredients, tools, and step-by-step instructions. I shared tips for crispiness and avoiding common mistakes. You can even try variations like chocolate-filled or gluten-free churros. For storage, I included how to keep them fresh and tasty. Now, you can enjoy making churros at home. Get ready for sweet treats that everyone loves! Happy frying!

Cinnamon Sugar Churros Irresistible Dessert Recipe

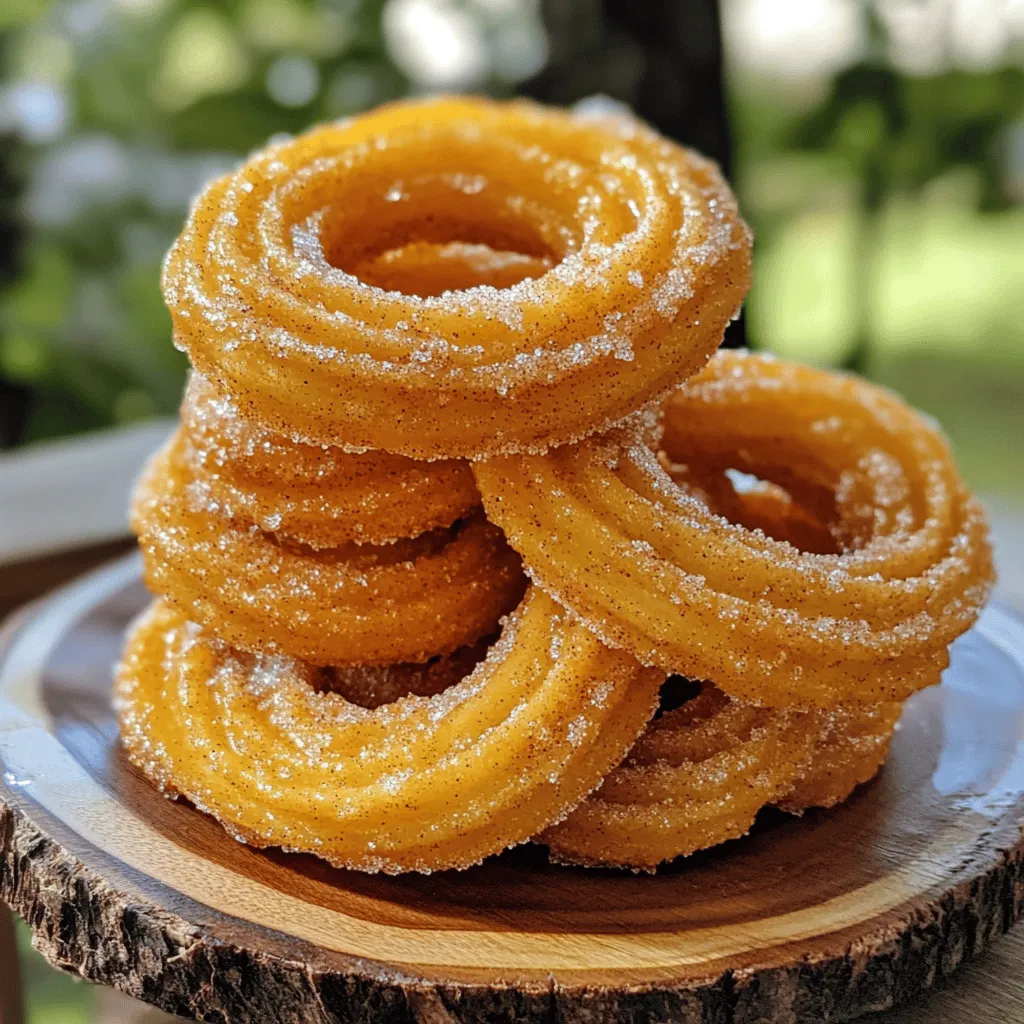
Are you ready to indulge in the sweet, crispy world of cinnamon sugar churros? In this easy-to-follow recipe, I’ll show

Older posts
Newer posts
← Previous Page1 … Page45 Page46 Page47 … Page64 Next →

dsad

© 2025 Foodish Talk • Built with GeneratePress

Our Policies

  • Copyright Policy
  • Cookie Policy
  • GDPR Policy
  • Privacy Policy
  • Disclaimer
  • Terms Of Use

More Information

  • Home
  • About
  • Contact
  • Appetizers
  • Dessert
  • Dinner
  • Drinks
©2025, Foodish Talk About Back To Top