![- 4 cups mixed greens (arugula, spinach, and romaine) - 1 cup cherry tomatoes, halved - 1 cucumber, diced - 1 bell pepper (red or yellow), diced - 1 cup corn (fresh or canned) - 1/4 cup fresh herbs (basil and cilantro), chopped I love to start with mixed greens. They add a fresh, crisp base. I use arugula, spinach, and romaine. Each green brings a unique taste. Next, I add cherry tomatoes for a sweet burst. Their bright color makes the salad pop. Diced cucumber adds crunch, while bell pepper adds a mild sweetness. For a fun twist, I toss in corn. Fresh herbs like basil and cilantro bring a lovely aroma. They enhance the salad's flavor and make it vibrant. - 1 avocado, diced - 1/2 cup feta cheese, crumbled For protein, I choose avocado. Its creamy texture balances the crisp greens. Dice it gently so it stays intact. Feta cheese adds a salty bite. Its crumbles sprinkle nicely over the salad. Together, these ingredients make the dish filling and tasty. - 3 tablespoons olive oil - 2 tablespoons lemon juice - Salt and pepper to taste Now, let's talk about dressing. I mix olive oil and lemon juice for a tangy taste. This dressing is simple yet bright. A pinch of salt and pepper adds flavor. I whisk it well until it blends. This dressing is the final touch to our summer salad. It brings all the flavors together. You can find the complete recipe in the [Full Recipe]. Enjoy creating this easy summer dinner salad! 1. Start by washing and drying your mixed greens. I like to use arugula, spinach, and romaine for a tasty base. 2. Place the clean greens in a large salad bowl. This step is key to a fresh salad. 3. Now, add the halved cherry tomatoes and diced cucumber. Mix them gently to blend the flavors. 4. Next, incorporate the diced bell pepper and corn. Stir everything together for a burst of color. 1. Carefully fold in the diced avocado and crumbled feta cheese. Be gentle to keep the avocado intact. 2. Sprinkle the thinly sliced red onion and chopped fresh herbs over the salad. This adds freshness and a nice crunch. 3. In a small bowl, whisk together the olive oil, lemon juice, salt, and pepper. This dressing brings everything together. 4. Drizzle the dressing over the salad just before serving. Toss lightly to coat all the ingredients evenly. 1. For a beautiful presentation, serve the salad in wide, shallow bowls. 2. Garnish with an extra wedge of lemon and a sprig of fresh basil on top. This adds a pop of color and flavor. 3. Enjoy your Easy Summer Dinner Salad, bursting with fresh flavors and vibrant colors! Check the Full Recipe for more details. You can easily make this salad your own. Adding protein is a great choice. Grilled chicken, shrimp, or even beans are tasty options. If you want a vegetarian twist, chickpeas or lentils work well, too. For a heartier meal, toss in some quinoa. You can also swap in seasonal veggies. Try using zucchini, radishes, or snap peas based on what's fresh. You can mix and match these vegetables to keep things fun and exciting. To amp up the flavor, play with your dressings. A balsamic vinaigrette or a creamy ranch can change the whole vibe. You might also try a yogurt-based dressing for a creamy touch without the heaviness. Add spices to boost taste. A sprinkle of chili flakes can add some heat. Fresh herbs like dill or parsley can also brighten the salad. Experiment with these options to find your favorite combo. Meal prep saves time. Chop your veggies ahead of time and store them in the fridge. You can make the dressing and keep it in a jar for easy access. This way, you can whip up your salad in minutes. Think about using pre-cooked proteins. Grilled chicken strips or canned beans are quick and easy. With these shortcuts, you'll enjoy a fresh salad without the fuss. If you want the full recipe, check out Easy Summer Dinner Salad. {{image_2}} You can easily adjust this salad for different diets. For a vegetarian option, skip the feta cheese or use a plant-based cheese. If you want a vegan salad, leave out the cheese and add more avocado or nuts for creaminess. To make it gluten-free, ensure your dressing is gluten-free. Most oils and vinegars are safe, but always check labels. You can change the theme of your salad with different ingredients. For a Mediterranean twist, add olives, artichokes, and roasted red peppers. Use a lemon-oregano dressing for extra zest. If you prefer a Southwest style, mix in black beans, corn, and diced jalapeños. A honey-lime dressing matches well with these flavors. Using fresh, seasonal produce makes your salad even better. In summer, use juicy heirloom tomatoes and sweet corn. In the fall, swap the greens for kale and add roasted squash. Winter salads can include citrus fruits like oranges and grapefruits. Always think about what’s in season for the best taste and nutrition. To keep your mixed greens fresh, store them in the fridge. Use a clean, dry container. Wrap the greens in a damp paper towel to maintain moisture. Place the towel and greens in a sealed bag. For veggies like cucumbers and bell peppers, keep them in the crisper drawer. Store cherry tomatoes at room temperature for the best flavor. Avoid washing them until you’re ready to use them. You can prepare your Easy Summer Dinner Salad in advance. Mix the greens and veggies, but skip the dressing. Store the salad in a sealed container in the fridge for up to two days. When you're ready to eat, add the dressing to keep everything crunchy. If you want to make it even fresher, add avocado just before serving. If you have leftover salad, get creative! Toss it with cooked pasta for a quick meal. You can also use the salad as a filling for wraps or sandwiches. Another option is to blend the salad with some broth to make a refreshing soup. Don't waste those tasty ingredients! You can store the Easy Summer Dinner Salad for up to three days. Freshness depends on several factors. First, how you store it matters. Keep it in an airtight container. This helps prevent wilting. Second, the ingredients you use affect shelf life. For example, tomatoes can spoil faster. If you want to keep it fresh longer, avoid mixing in the dressing until you serve it. To make the salad more filling, consider adding protein-rich toppings. Grilled chicken is a great choice. You can also use chickpeas or black beans. They add texture and flavor. Another option is hard-boiled eggs. They give a nice creamy taste. If you prefer seafood, shrimp or tuna can work well too. Adding these ingredients can turn your salad into a complete meal. Yes, you can use different greens for this salad. If you want a spicier taste, try arugula instead of mixed greens. Kale is another healthy choice. It adds a nice crunch. You can also use spinach for a softer feel. Each type of green brings its own flavor and texture. Experiment to find what you enjoy most! This blog post shared easy steps to create a fresh and tasty salad. We explored the best produce, proteins, and dressings to use. You learned how to prepare, combine, and serve your salad for any occasion. Plus, we covered customization options and storage tips. Salads can be simple yet full of flavor. Try different ingredients and have fun with it. Enjoy experimenting to find your favorite mix!](https://foodishtalk.com/wp-content/uploads/2025/07/d8b75529-6c93-4876-97e9-34d15824a6ce.webp)
Easy Summer Dinner Salad Fresh and Flavorful Dish
Summer nights call for light and refreshing meals, and there’s nothing better than a delicious salad! In this post, I
Summer nights call for light and refreshing meals, and there’s nothing better than a delicious salad! In this post, I

Are you craving something quick, tasty, and easy to make? Let’s talk about Egg Roll in a Bowl! This flavorful
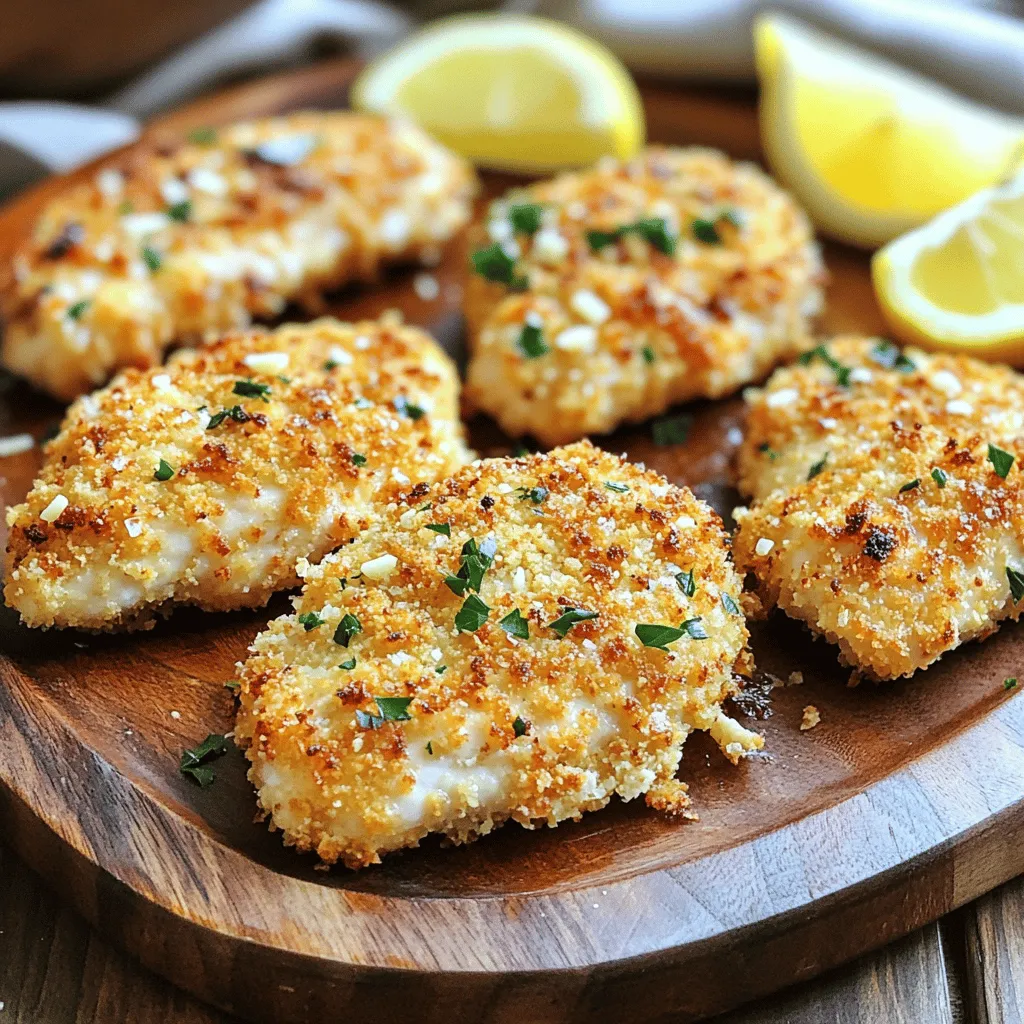
Looking for a tasty and quick dinner idea? Garlic Parmesan Chicken is your answer! This dish is simple to make
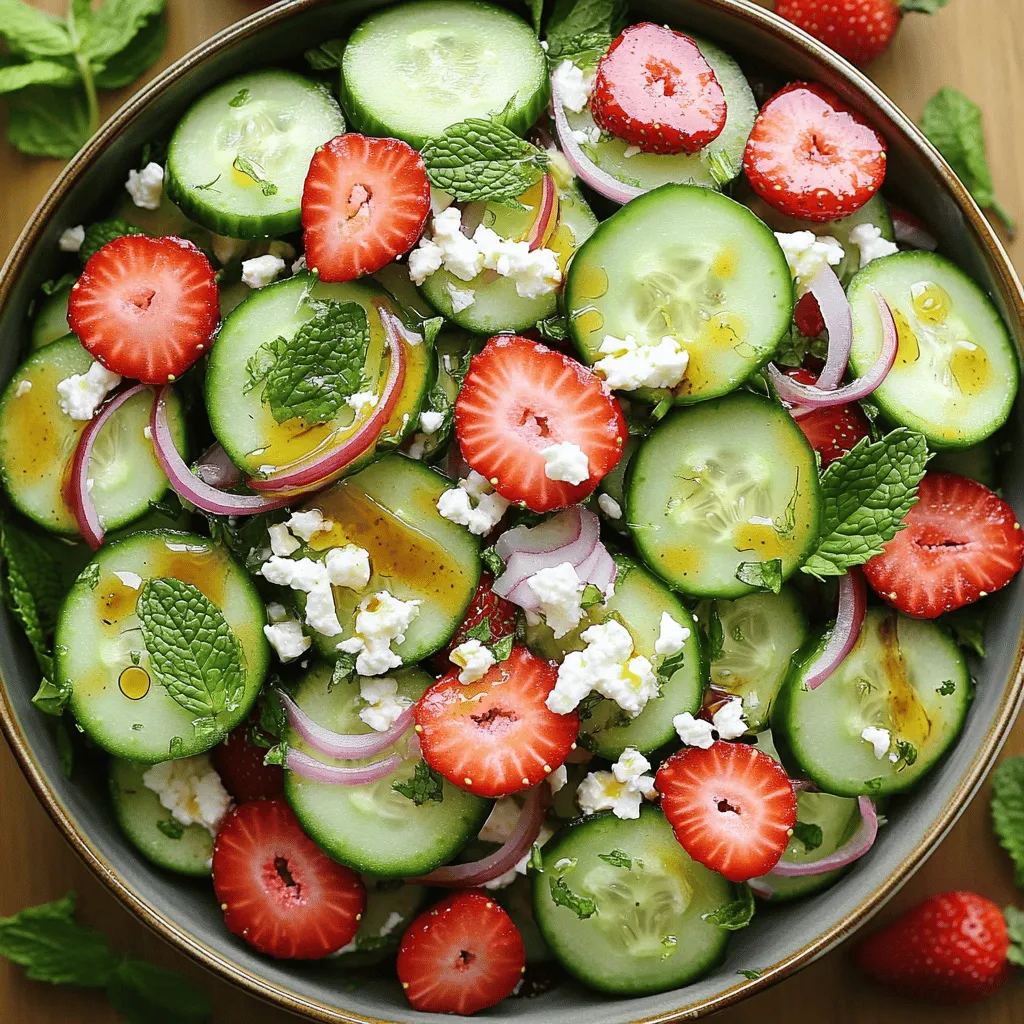
Looking for a fresh and tasty dish to impress your family or friends? Try my Cucumber Strawberry Salad! It blends
![When making lemon blueberry cupcakes, you need a few key ingredients. Each one plays a big role in the taste and texture of the cupcakes. - 1 ½ cups all-purpose flour - 1 teaspoon baking powder - ½ teaspoon baking soda - ¼ teaspoon salt - ½ cup unsalted butter, softened - 1 cup granulated sugar - 2 large eggs - Zest of 1 lemon - 2 tablespoons fresh lemon juice - 1 teaspoon vanilla extract - ½ cup buttermilk - 1 cup fresh blueberries (plus extra for garnish) - 1 tablespoon flour (for dusting blueberries) These ingredients work together to create a light and fluffy cupcake. The flour gives structure, while the butter and sugar add richness. The eggs help bind everything, and the buttermilk ensures moisture. The lemon zest and juice bring a bright flavor, balancing the sweetness of the sugar. Blueberries add a juicy burst in every bite. Dusting the blueberries with flour helps them stay suspended in the batter and not sink to the bottom. For the full recipe, check out the details above! First, preheat your oven to 350°F (175°C). This step is key for even baking. Next, line your cupcake tray with paper liners. This makes it easy to remove the cupcakes later. In a medium bowl, whisk together the dry ingredients. Combine 1 ½ cups of flour, 1 teaspoon of baking powder, ½ teaspoon of baking soda, and ¼ teaspoon of salt. This mix gives the cupcakes their structure. In a large bowl, beat ½ cup of softened butter and 1 cup of granulated sugar. Use an electric mixer on medium speed. Mix until the mixture is light and fluffy, about 3-4 minutes. This step adds air and helps your cupcakes rise. Add 2 large eggs, one at a time. Make sure to beat well after each addition. Then, mix in the zest of 1 lemon, 2 tablespoons of lemon juice, and 1 teaspoon of vanilla extract. Adding flavors in this order helps them blend better. Gradually add the dry mix to the butter mix. Alternate with ½ cup of buttermilk. Start and end with the dry mix. Mix until just combined. Avoid overmixing, or your cupcakes may turn out tough. Take 1 cup of fresh blueberries and toss them with 1 tablespoon of flour. This coating helps keep them suspended in the batter. Gently fold the floured blueberries into the batter without over-mixing. Divide the batter among the cupcake liners, filling them about 2/3 full. Bake in the preheated oven for 18-20 minutes. Check if they are done by inserting a toothpick in the center. If it comes out clean, they are ready. Let the cupcakes cool in the pan for 5 minutes before moving them to a wire rack to cool completely. For the complete recipe, check the [Full Recipe]. - Ensure proper ingredient temperature: Always use room temperature butter and eggs. This helps the batter mix better and rise well. Cold ingredients can lead to dense cupcakes. - Avoid overmixing the batter: Mix just until you see no dry flour. Overmixing can make the cupcakes tough. Gently fold in the blueberries for the best texture. For these lemon blueberry cupcakes, I love using cream cheese frosting. It balances the sweet and tart flavors perfectly. Here are my top picks for frosting: - Classic cream cheese frosting: It’s rich and creamy, with a slight tang. - Lemon cream cheese frosting: Adding lemon zest brightens the flavor even more. - Blueberry cream cheese frosting: Blend in pureed blueberries for a fruity twist. Garnishing adds a lovely touch to your cupcakes. Here are some ideas to make them pop: - Top each cupcake with a fresh blueberry. It adds color and a burst of flavor. - Sprinkle lemon zest on top. It gives a nice visual and boosts the lemon taste. - Use edible flowers for a fancy look. They make your cupcakes feel special and elegant. For the full recipe, check out [Full Recipe]. {{image_2}} You can switch up the flavor of these cupcakes by using different berries. Try raspberries, strawberries, or blackberries. Each berry brings its own sweet taste. You can also add more citrus flavors. Lime or orange zest can brighten the cupcakes. Mix lemon and lime for a fun twist. This keeps your cupcakes fresh and exciting! If you need a gluten-free version, use almond flour or coconut flour. These flours add different tastes. You can also mix gluten-free all-purpose flour with a binder like xanthan gum. This helps the cupcakes hold their shape. Make sure to check the packaging for the right measurements. Gluten-free baking can be tricky, but it's worth the effort! To make these cupcakes vegan, replace eggs and butter. Use flaxseed meal mixed with water for eggs. Just mix one tablespoon of flaxseed with two and a half tablespoons of water. Let it sit for five minutes to thicken. For butter, try coconut oil or vegan butter. This keeps the cupcakes moist while being completely plant-based. Enjoy your vegan lemon blueberry delight! For the full recipe, check out my Zesty Lemon Blueberry Bliss Cupcakes. You can store lemon blueberry cupcakes at room temperature or in the fridge. For room temperature, keep them in an airtight container. This way, they stay soft and fresh. If your kitchen is warm, use the fridge. Just make sure to cover them well. Cold cupcakes can lose some flavor but will stay fresh longer. To keep your cupcakes moist and tasty, avoid exposing them to air. If you have leftover cupcakes, seal them tightly. You can also place a slice of bread in the container. This tip helps keep them soft! For added flavor, enjoy them within three days. If you want to save some for later, freezing is a great option. First, let the cupcakes cool completely. Then, wrap each one in plastic wrap. Place the wrapped cupcakes in a freezer bag. This method keeps them fresh for about three months. When you're ready to eat, thaw them in the fridge overnight. Enjoy them as if they were just baked! For the full recipe, check out the Full Recipe section. Yes, you can! Using frozen blueberries changes the texture and flavor a bit. Frozen blueberries might make your batter a little wetter. This can lead to a denser cupcake. To help with this, toss the frozen blueberries in a bit of flour before adding them to the batter. It will help them stay whole and not sink. If you don't have buttermilk, no problem! You can use regular milk mixed with a bit of lemon juice or vinegar. Just add one tablespoon of lemon juice or vinegar to a cup of milk. Let it sit for about five minutes. This will mimic buttermilk's tangy taste and help your cupcakes rise. You can tell the cupcakes are done by checking a few signs. First, look for a golden-brown color on top. Next, gently press the center with your finger; if it springs back, they are ready. Finally, insert a toothpick in the center. If it comes out clean or with a few crumbs, your cupcakes are baked perfectly. You now know the key ingredients for delicious cupcakes, like flour, blueberries, and zest. I shared step-by-step instructions to help you bake perfectly fluffy treats. You learned important tips and handy storage methods to keep them fresh. Feel free to explore flavor variations or adapt the recipe for different diets. Baking is fun, and these cupcakes are sure to please everyone! Enjoy the process and share your tasty results.](https://foodishtalk.com/wp-content/uploads/2025/07/d20c041f-c978-498b-946c-f617e74e8fff.webp)
Are you ready to indulge in a sweet treat that brightens your day? These Lemon Blueberry Cupcakes are just what

If you love the sweet and tangy combo of blueberry cheesecake, you’re in for a treat! I’ll show you how
![To create a tasty Mediterranean baked fish, you need some fresh and vibrant ingredients. Here’s what you’ll need: - Fresh fish varieties (cod, sea bass) - Additional flavor enhancers (olive oil, garlic, lemon) - Vegetables and seasonings (cherry tomatoes, Kalamata olives, dried oregano, paprika, salt, and pepper) Using fresh fish is key. I love cod and sea bass for their mild flavor and flaky texture. They soak up the other flavors well. Olive oil adds richness. It helps keep the fish moist. Garlic brings a wonderful aroma and a punch of flavor. Lemon brightens the dish and makes it lively. For the veggies, cherry tomatoes add sweetness. Kalamata olives bring a salty burst that contrasts nicely with the fish. Oregano and paprika give depth to the dish, while salt and pepper enhance all the flavors. This blend of ingredients creates a beautiful, colorful dish. You can see the Mediterranean influence in every bite. For the complete recipe, check out the [Full Recipe]. To start, you need fresh fish fillets. Look for firm, clean fillets with a mild scent. Cod and sea bass are great options. Ask your fishmonger for the freshest catch. Next, preheat your oven to 400°F (200°C). While it heats, grab a large baking dish. Drizzle 1 tablespoon of olive oil on the bottom to prevent sticking. This step helps keep the fish moist. Now, it’s time to season your fish. Place the fillets side by side in the baking dish, skin side down. Drizzle the remaining olive oil over them. Sprinkle salt, pepper, paprika, and oregano evenly on top. Squeeze the juice of one lemon over the fish. Lay lemon slices on each fillet. In a bowl, mix halved cherry tomatoes, Kalamata olives, minced garlic, and a pinch of salt and pepper. Pour this mixture over the fish, making sure to spread it out. Cover the baking dish with aluminum foil. This helps steam the fish and keeps it tender. Bake in the preheated oven for 20 minutes. After 20 minutes, carefully remove the foil. Bake for an extra 10 minutes to let the top brown slightly. The fish should flake easily with a fork when done. To be sure, check that it reaches an internal temperature of 145°F (63°C). Once cooked, take it out and garnish with fresh parsley. Enjoy your Mediterranean baked fish with your favorite sides. For the full recipe, refer back to the earlier section. To keep your fish moist, I suggest using fresh fillets. Fresh fish has a better texture and flavor. When you season, use salt and pepper generously. This helps enhance the fish's natural taste. Drizzling olive oil over the fillets locks in moisture. Cover the dish with foil while baking. This traps steam and keeps the fish tender. After baking, let it rest for five minutes. This step allows the juices to settle. Your fish will taste better when served warm. When serving Mediterranean baked fish, think of bright colors. Pair it with roasted vegetables or a fresh salad. A light Mediterranean salad adds crunch and flavor. You can also serve lemon wedges on the side for zest. Presentation matters, so use a large platter. Sprinkle fresh parsley on top for a pop of color. This makes the dish look even more inviting. Mediterranean baked fish is packed with nutrients. A serving provides lean protein, omega-3 fatty acids, and vitamins. Fish like cod and sea bass are low in calories. They help maintain heart health and brain function. The cherry tomatoes add antioxidants. Olives bring healthy fats to the dish. This combination makes it a nutritious choice for meals. Enjoy your delicious fish while knowing it's good for you. {{image_2}} You can switch up the fish in this recipe. Try salmon or tilapia if you want. Both types have great flavor. You can also use frozen fish fillets. Just make sure to thaw them first. For veggies, you can add bell peppers or zucchini. They add color and taste. Feel free to leave out any ingredients you don’t like, too. Want to add some zing? Toss in capers or fresh basil. These give great flavor bursts. You can also use fresh thyme or dill for a nice twist. If you like heat, add red pepper flakes. Just a pinch can wake up the dish. Grilling gives a nice smoky flavor. If you prefer, you can grill the fish instead of baking. Just make sure to watch the time. Fish cooks fast on the grill. If you're short on time, use a skillet. Heat some olive oil and cook the fish for a few minutes on each side. This method is quick and still tasty. You can use the same seasonings and veggies as in the oven method. Explore the [Full Recipe] for more details on making this dish. To keep your Mediterranean baked fish fresh, store it in an airtight container. This helps to prevent moisture loss and keeps the flavors intact. Use glass or plastic containers with tight-fitting lids. Make sure to let the fish cool to room temperature before sealing. For best taste, eat leftovers within two days. When reheating, avoid drying out the fish. Preheat your oven to 350°F (175°C). Place the fish on a baking sheet and cover it with foil. This keeps it moist while it warms. Heat for about 10 to 15 minutes. Check for warmth in the center before serving. You can freeze Mediterranean baked fish to enjoy later. Wrap it tightly in plastic wrap, then place it in a freezer-safe bag. Be sure to remove as much air as possible. For best results, use within three months. When you're ready to eat, thaw it in the fridge overnight. Reheat it in the oven as described above for best flavor and texture. To check if your fish is done, look at its internal temperature. The fish should reach 145°F (63°C). Use a meat thermometer for accuracy. The flesh should look opaque and flake easily with a fork. Another good sign is the edges will be slightly golden. Yes, you can prepare this dish ahead of time. Season the fish and place it in the baking dish. Cover it and store it in the fridge for up to 24 hours. This lets the flavors blend well. When ready to bake, just add the tomato and olive mix. For storing, make sure to use an airtight container. If you have leftovers, place them in the fridge. To reheat, do it gently in the oven at 350°F (175°C) for about 10-15 minutes. This dish goes well with many sides. Here are some tasty options: - Roasted vegetables, such as zucchini and bell peppers - A light Mediterranean salad with cucumber and feta - Quinoa or couscous for a filling option For drinks, consider a crisp white wine or sparkling water with lemon. These pair nicely with the flavors of the fish. You can find the full recipe in this article. Enjoy! In this article, we explored the key ingredients for Mediterranean baked fish, from fresh fish to flavorful seasonings. I shared step-by-step instructions to prepare, season, and bake the dish perfectly. You learned valuable tips for serving and storing leftovers. Don't hesitate to experiment with variations, like different fish or spices. This dish is not only tasty but also packed with health benefits. Now, you have everything you need to create a delightful Mediterranean meal at home. Enjoy your cooking adventure!](https://foodishtalk.com/wp-content/uploads/2025/07/590f75b3-1258-4868-9876-0e44b12dfcf7.webp)
Craving a healthy dish that’s bursting with flavor? Look no further! This Mediterranean Baked Fish recipe is both quick and

Are you ready to whip up a delicious meal in just 30 minutes? The Creamy Tuscan Chicken Skillet is your

Looking for a cool treat that’s both delicious and easy to make? Greek yogurt ice cream is your answer! This

Looking for the perfect summer treat? Look no further! My Strawberry Lemonade Layer Cake combines sweet strawberries and zesty lemon
