Skip to content
DisclaimerTerms Of UseGDPR PolicyCookie Policy

Foodish Talk

  • Home
  • Drinks
  • Appetizers
  • Dinner
  • Dessert
  • About
  • Contact
  • Privacy Policy
DisclaimerTerms Of UseGDPR PolicyCookie Policy

Ava

To make Quick Garlic Parmesan Knots, you need fresh and simple ingredients. Gather the following: - 1 pack of refrigerated pizza dough (16 oz) - 3 tablespoons unsalted butter, melted - 4 cloves garlic, minced - 1/4 cup grated Parmesan cheese - 1 teaspoon dried Italian herbs (oregano, basil, thyme) - 1/2 teaspoon salt - 1/4 teaspoon black pepper - Fresh parsley, chopped (for garnish) Using these ingredients, you can create a tasty treat that your family will love. The pizza dough saves time and effort, making this recipe quick and easy. Garlic and Parmesan cheese are a classic combo. They bring rich flavor to every bite. The herbs add a lovely aroma and taste. With just a few simple steps, you can whip up these knots in no time. Perfect for snacks, parties, or family dinners, they are sure to impress. For the full recipe, check out the instructions in my other section. - Preheat your oven to 400°F (200°C) and prepare a baking sheet with parchment paper. - Roll out the pizza dough on a floured surface. Cut it into strips, about 1 inch wide. - Take each strip and form a knot. To do this, make a loop, wrap the ends around, and tuck them underneath. Place each knot on the baking sheet. - In a small bowl, combine melted butter with minced garlic, dried Italian herbs, salt, and black pepper. Stir the mixture well to blend the flavors. - Brush the garlic butter mixture over each knot, ensuring they are evenly coated. - Bake the knots in the preheated oven for 12-15 minutes, or until they turn golden brown. - Once baked, immediately brush with any leftover garlic butter. Garnish with chopped parsley for a fresh touch. To check out the full recipe, simply visit the section above. Enjoy your delicious garlic Parmesan knots! To make your garlic knots pop, add herbs. You can use fresh basil or dill. Just chop them finely and mix them into the garlic butter. This small change can give your knots a fresh taste. You can also try different cheeses. Instead of Parmesan, use mozzarella for a gooey center. Or add feta for a tangy kick. These choices can change the whole dish. For a crispy outside, bake your knots until golden brown. Keep an eye on them in the last few minutes. You want that perfect crunch! To ensure a fluffy inside, do not overbake. The knots should rise nicely. This balance gives you a great bite. Pair your garlic knots with dipping sauces. Marinara sauce is a classic choice. You can also try ranch or garlic aioli for a twist. For a fun presentation, arrange the knots on a wooden board. Add a small bowl of sauce in the center. This makes a great centerpiece for any meal. For the full recipe, check the [Full Recipe]. {{image_2}} You can change up the flavor of your Quick Garlic Parmesan Knots with some fun variations. Let’s explore cheese and seasoning options that will make these knots even more exciting. - Mozzarella knots: Swap out the Parmesan for fresh mozzarella. Cut it into small cubes. Place a cube inside each knot before baking. The gooey cheese melts and adds a delightful stretch. - Feta and herb twists: Crumble feta cheese and mix it with fresh herbs like dill or parsley. Add this mixture to the dough before forming knots. This gives a tangy flavor that pairs well with garlic. - Spicy garlic knots: Add red pepper flakes to the garlic butter mixture. This will give your knots a nice kick. If you enjoy heat, this is a great option. - Pesto-infused knots: Instead of garlic butter, brush the knots with basil pesto. This adds a fresh, herby taste. You can also sprinkle some grated cheese on top for extra flavor. Feel free to mix and match these ideas. Experimenting with flavors can make your garlic knots even more special. For the full recipe, check out the details above. To keep your garlic parmesan knots fresh, use airtight containers. Glass or plastic containers work best. Make sure they seal tightly to lock in moisture. Place the knots in a single layer if possible. This helps avoid squishing them. Store the knots in the fridge for up to three days. If you want to keep them longer, freezing is an option. When reheating, the oven is best for keeping that fresh taste. Preheat your oven to 350°F (175°C). Place the knots on a baking sheet. Heat for about 10 minutes or until warm. This method keeps the knots crispy. If you're in a hurry, use the microwave. Heat for 15-20 seconds. Microwaving is quick, but it may make the knots soft. For the best result, choose the oven. Enjoy your warm and tasty garlic knots again! Garlic knots will stay fresh for about three days in the fridge. Store them in an airtight container. This keeps them soft and tasty. If you need them to last longer, consider freezing them. Yes, you can freeze garlic parmesan knots! Let them cool completely, then place them in a freezer-safe bag. They can last up to three months in the freezer. When ready to enjoy, just bake them straight from the freezer. Garlic knots taste great with various dips. Marinara sauce is a classic choice. You might also try ranch dressing or garlic butter for extra flavor. A zesty pesto can add a fun twist, too. Absolutely! You can use your favorite homemade dough recipe. Just roll it out like the refrigerated dough. Follow the same steps to form knots and bake them. Homemade dough adds a personal touch! Yes, you can prepare garlic knots ahead of time. Form the knots and place them on the baking sheet. Cover them and store them in the fridge for up to a day. When ready, bake them fresh for a warm treat. For the full recipe, check out the details above. These garlic knots are easy and tasty. You now know the ingredients, steps, and tips. Try different cheeses or spices for fun twists. Store leftovers properly to keep them fresh. Enjoy them with dips or at any meal. I hope these ideas inspire your cooking. Happy baking!

Quick Garlic Parmesan Knots Savory and Simple Treat

Are you craving a tasty, easy snack? Look no further! My Quick Garlic Parmesan Knots are here to save the

To make a tasty Easy Chicken Enchilada Casserole, you need some simple ingredients. Here is the list of what you will need: - 2 cups cooked chicken, shredded - 1 can (10 oz) enchilada sauce - 1 can (15 oz) black beans, drained and rinsed - 1 cup corn kernels (fresh, frozen, or canned) - 2 cups shredded cheese (cheddar and Monterey Jack blend) - 8 corn tortillas, cut into quarters - 1 small onion, finely chopped - 1 teaspoon garlic powder - 1 teaspoon cumin - 1 teaspoon chili powder - Salt and pepper to taste - Fresh cilantro, chopped (for garnish) - Sour cream (for serving) These ingredients mix well to create layers of flavor. The cooked chicken brings protein and texture. The enchilada sauce adds a nice kick, while the black beans and corn give you extra fiber and taste. The cheese melts beautifully, making every bite creamy. The tortillas hold everything together, giving it that classic casserole feel. When I cook this dish, I love using fresh cilantro as a garnish. It adds a burst of color and freshness. You can also serve it with a dollop of sour cream on top. This dish is great for family dinners or a fun gathering with friends. For the full recipe, check out the details above. 1. Preheat your oven to 350°F (175°C). This step gets your oven ready for baking. 2. In a large bowl, combine the shredded chicken and other ingredients. Add half of the enchilada sauce, black beans, corn, chopped onion, garlic powder, cumin, chili powder, salt, and pepper. Mix it all well. 3. Create the casserole layers. Start by spreading a thin layer of the remaining enchilada sauce on the bottom of your 9x13 inch baking dish. Next, layer half of the tortilla pieces evenly over the sauce. Then, spread half of the chicken mixture over the tortillas and sprinkle one-third of the cheese on top. Repeat this layering process with another layer of tortillas, the rest of the chicken mixture, and half of the remaining cheese. Finally, top with the last layer of tortilla pieces. 1. Cover and bake for 25 minutes. Use aluminum foil to cover the baking dish to keep it moist. 2. Uncover and finish baking for an additional 15 minutes. This step allows the cheese to become bubbly and golden brown. 3. Let your casserole cool for about 5 minutes. Once it cools, garnish with fresh cilantro. Serve slices on plates with a dollop of sour cream for a yummy touch. For the full recipe, check out Easy Chicken Enchilada Casserole. For the best chicken in this dish, I recommend using rotisserie chicken. It’s tasty, tender, and saves time. You can also use grilled chicken if you prefer. Just shred it well before mixing. To keep your casserole creamy, add some sour cream to your chicken mixture. This makes it rich and smooth. Be sure to cover the casserole with foil while baking to lock in moisture. This helps all the flavors blend well. Pair your enchilada casserole with some fresh sides. A simple green salad goes well. You can also serve it with rice or some tortilla chips. For a nice presentation, serve slices on plates. Add a dollop of sour cream on top. Sprinkle fresh cilantro for a bright touch. This not only looks great but adds a pop of flavor to each bite. {{image_2}} You can easily swap beans or vegetables in this dish. If you want a twist, try black-eyed peas or pinto beans. You can also add diced bell peppers or zucchini for extra veggies. These changes add color and nutrition to the casserole. For cheese, consider using pepper jack or feta. Both offer unique flavors. You can mix cheeses for a richer taste. I often use a blend of sharp cheddar and mozzarella for a nice melt. If you need a gluten-free option, use corn tortillas. They work just as well as regular tortillas. Always check the labels. They should say gluten-free. For a vegetarian version, skip the chicken and add more beans or veggies. You can use mushrooms for a hearty texture. This way, you still get a filling meal without meat. You can adapt this dish to fit your needs easily. To keep your Easy Chicken Enchilada Casserole fresh, store leftovers in an airtight container. Make sure it cools to room temperature first. You can keep it in the fridge for up to four days. If you plan to eat it later, avoid adding toppings like sour cream until you’re ready to serve. This helps keep the flavors fresh! If you want to save some for later, freezing is a great option. First, let the casserole cool down completely. Then, wrap it tightly in plastic wrap and foil. This prevents freezer burn. You can freeze it for up to three months. When you’re ready to enjoy it again, transfer the casserole to the fridge to thaw overnight. Reheat it in the oven at 350°F (175°C) for about 30-40 minutes. Cover it with foil to keep it moist. Check for warmth in the center before serving. Enjoy the same yummy taste as when it was fresh! Yes, you can use store-bought enchilada sauce. Many brands offer tasty options. This saves time and still gives great flavor. Just make sure to choose a sauce that you like. You can also add your own spices to boost the taste. Reheating leftovers usually takes about 20 minutes. Preheat your oven to 350°F (175°C). Place the casserole in a baking dish and cover it with foil. This keeps it moist while it warms. If you use a microwave, heat it in short bursts, stirring often. Yes, you can make this casserole ahead of time. Assemble it and cover it tightly. Store it in the fridge for up to 24 hours. When ready to bake, take it out, let it sit for a few minutes, and then bake it as directed. It’s a great way to save time on busy nights! For the full recipe, check out Easy Chicken Enchilada Casserole. This blog post covered a tasty chicken casserole recipe. You saw each ingredient and learned how to make it. I shared preparation steps, baking tips, and smart storage advice. You found ways to customize your dish with variations and answered common questions. In conclusion, this casserole is both simple and flexible. It works well for any meal. Trust me; your family will love it. Enjoy making it your own and sharing it with others!

Easy Chicken Enchilada Casserole Tasty Family Dish

Are you searching for a simple, tasty dish that your whole family will love? Look no further! My Easy Chicken

- 1 large head of broccoli - 4 cloves garlic - 2 tablespoons olive oil - Zest of 1 lemon - 2 tablespoons lemon juice - 1 teaspoon red pepper flakes - Salt and pepper to taste - 2 tablespoons grated Parmesan cheese (optional) - Fresh parsley for garnish Gathering the right ingredients is key to making Zesty Lemon Garlic Roasted Broccoli. First, you need a large head of broccoli. Look for fresh, bright green florets. Next, grab four cloves of garlic. Fresh garlic packs a big flavor punch. You will also need two tablespoons of olive oil. This oil helps the broccoli roast nicely. Now, let’s talk about flavor enhancers. The zest of one lemon is a must. It adds a fresh, bright note. You will also need two tablespoons of lemon juice for a bit of tang. One teaspoon of red pepper flakes gives a nice kick. Adjust the amount to match your spice level. For seasonings, use salt and pepper to taste. These simple spices bring out the flavors. If you want, sprinkle two tablespoons of grated Parmesan cheese on top. It adds a creamy finish. Finally, don’t forget fresh parsley. It makes a lovely garnish and adds color. You can find the full recipe for Zesty Lemon Garlic Roasted Broccoli above. Enjoy the vibrant flavors! To begin, cut the broccoli into florets. Place the head of broccoli on a cutting board. Slice off the thick stem. Then, break or cut the broccoli into smaller pieces. Aim for even sizes to ensure they cook the same. Next, prepare the garlic. Take four cloves and peel them. Mince the garlic with a knife. Minced garlic gives the dish a strong flavor that pairs well with the broccoli. In a large mixing bowl, combine the broccoli florets and minced garlic. Add two tablespoons of olive oil for richness. Then, add lemon zest and lemon juice for that zesty kick. Sprinkle in one teaspoon of red pepper flakes for heat. Season with salt and pepper to taste. Toss the mixture well to coat the broccoli evenly. Make sure every piece gets some oil and seasoning. This step is key for great flavor. Preheat your oven to 425°F (220°C). This high heat helps the broccoli roast nicely. Next, spread the broccoli mixture on a baking sheet. Make sure it’s in a single layer to roast evenly. Place the baking sheet in the oven. Cook for 20-25 minutes. Stir the broccoli halfway through to ensure it cooks on all sides. You want the broccoli to be tender and slightly crispy on the edges. If you like cheese, sprinkle grated Parmesan cheese during the last 5 minutes. This adds a tasty finish. After roasting, garnish with fresh chopped parsley before serving. For the full recipe, check the complete instructions above. To get your broccoli just right, aim for a roasting temperature of 425°F (220°C). This heat makes the edges crisp while keeping the inside tender. Roast for about 20 to 25 minutes. Stir halfway through cooking to ensure even roasting. To avoid soggy broccoli, make sure to dry the florets well after washing. Excess water causes steam, which leads to mushy results. Toss the broccoli in olive oil and seasonings right before roasting for the best texture. Want more flavor? Try adding extra minced garlic or spices. You can use smoked paprika or even cumin for a different taste. These spices add depth and warmth to your dish. When it comes to oils, stick with high-quality olive oil. It has a rich flavor that enhances the dish. You can also try avocado oil for a lighter taste. Both options work well for roasting and add healthy fats. Zesty Lemon Garlic Roasted Broccoli pairs wonderfully with grilled chicken or fish. It also works great as a side for pasta dishes. For a nice touch, garnish with fresh parsley or a sprinkle of lemon zest. This adds color and brightness to the dish. If you want, you can also serve it with a wedge of lemon for extra zing. For the full recipe, check out the details above. {{image_2}} You can enhance the taste of Zesty Lemon Garlic Roasted Broccoli by adding other vegetables. Bell peppers and carrots work well. They bring extra color and flavor. You can also mix in some cherry tomatoes for a burst of sweetness. Exploring different citrus flavors is fun too. Try lime or orange for a unique twist. Each citrus can change the dish’s profile and make it exciting. If you want a vegan version, simply skip the Parmesan cheese. It still tastes great without it. For gluten-free options, ensure your ingredients are certified gluten-free. You can also reduce sodium by using fresh herbs instead of salt. This keeps it tasty and healthy for everyone. Incorporating seasonal herbs like thyme or rosemary adds a fresh touch. These herbs can elevate the taste, making it perfect for any season. You can also use spices like paprika or cumin for a warm flavor. This dish is great for holiday meals or gatherings. Serve it alongside your favorite main dishes to impress your guests. For the full recipe, check the earlier section. To keep your zesty lemon garlic roasted broccoli fresh, follow these tips: - Let the broccoli cool down to room temperature before storing. - Use airtight containers to prevent moisture loss. - Store in the refrigerator for up to four days. To enjoy your leftovers, reheating is key. Here’s how to do it well: - Use an oven for the best texture. Preheat it to 350°F (175°C). - Spread the broccoli on a baking sheet and heat for about 10 minutes. - You can also microwave it; just cover it with a damp paper towel. This keeps it moist. - Adding a splash of lemon juice while reheating enhances the flavor. Yes, you can freeze roasted broccoli! Here’s how: - Allow the broccoli to cool completely before freezing. - Place it in a single layer on a baking sheet to freeze. - Once frozen, transfer it to a freezer-safe bag or container. - To thaw, place the bag in the fridge overnight. You can also cook it straight from frozen. - Freezing may change the texture slightly, but the taste remains delicious. For detailed steps on making this dish, check the Full Recipe. To make Zesty Lemon Garlic Roasted Broccoli, follow these simple steps: 1. Preheat your oven to 425°F (220°C). 2. Cut the broccoli into small florets. 3. Mince the garlic into tiny pieces. 4. In a large bowl, mix the broccoli florets, minced garlic, olive oil, lemon zest, lemon juice, red pepper flakes, salt, and pepper. 5. Toss well to coat every piece of broccoli evenly. 6. Spread the mixture in a single layer on a lined baking sheet. 7. Roast for 20-25 minutes. Stir halfway through for even cooking. 8. Add cheese during the last 5 minutes if you want. 9. Garnish with fresh parsley before serving. This method gives you crispy, tasty broccoli with a zesty kick. Yes, you can use frozen broccoli. It’s a great time saver. Just keep these tips in mind: - Thaw the broccoli first. You can do this in the fridge overnight or in the microwave. - Drain any excess water after thawing. This prevents sogginess. - Roast for a few extra minutes. Frozen broccoli may need more time to cook than fresh. By following these steps, you will still get a delicious dish. Roasted broccoli pairs well with many dishes. Here are some ideas: - Grilled chicken offers a nice protein balance. - Pasta with lemon sauce complements the flavors well. - Quinoa or rice makes a great base for a healthy meal. - Steak or fish adds richness and works well with the freshness of the broccoli. These pairings will make your meal colorful and delicious! Roasted broccoli can transform your meals with its simple yet bold flavors. We covered the key ingredients, step-by-step cooking methods, and tips for success. Encouraging flavor variations and dietary options adds versatility to this side dish. Remember to store leftovers properly and consider reheating to preserve taste and texture. With these insights, you can enjoy delicious roasted broccoli that suits your taste and style. Explore these ideas and elevate your cooking today!

Zesty Lemon Garlic Roasted Broccoli Flavorful Dish

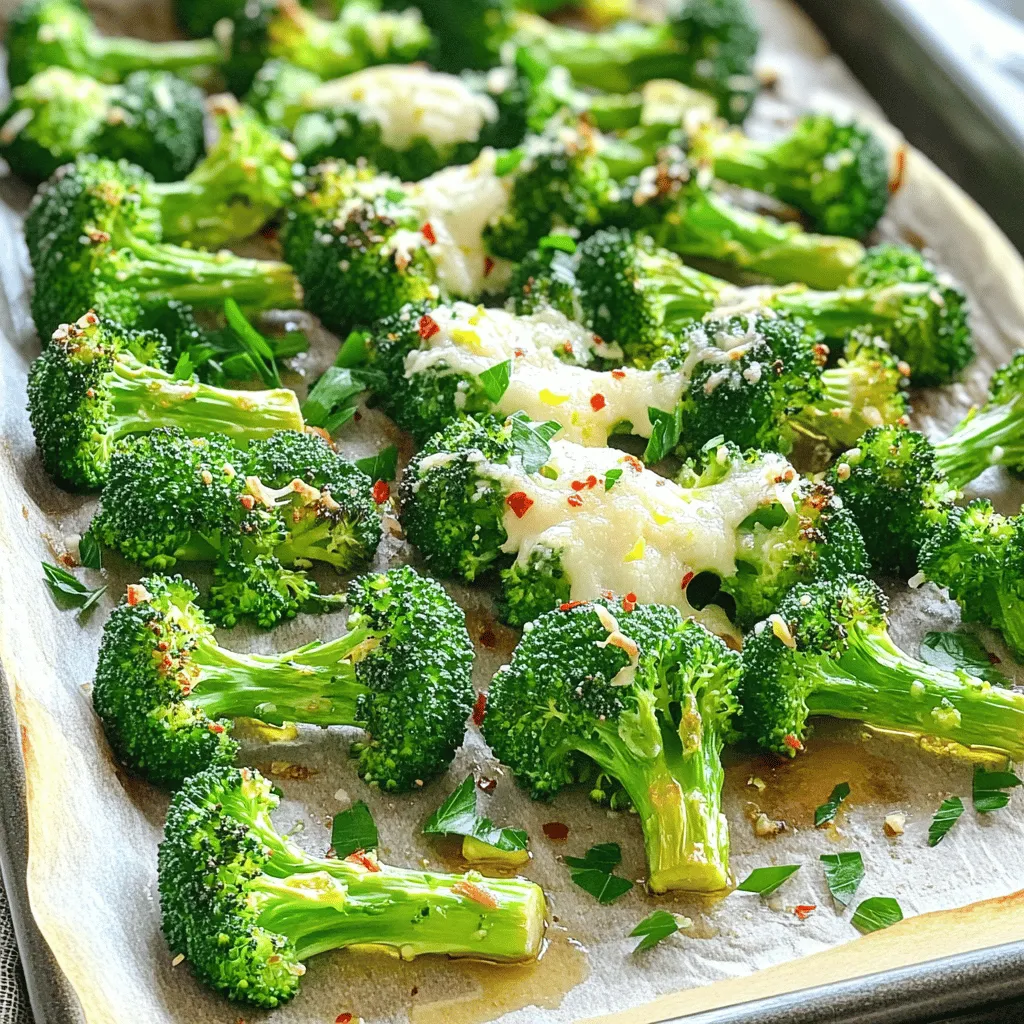
Are you ready to elevate your vegetable game? Zesty Lemon Garlic Roasted Broccoli is packed with flavor and super easy

- 4 cups all-purpose flour - 2 tablespoons active dry yeast - 1/4 cup granulated sugar - 1/4 cup unsalted butter, melted - 1 cup pecans, chopped The main ingredients form the backbone of the sticky buns. All-purpose flour gives the dough structure. Active dry yeast makes the dough rise, while sugar adds sweetness. Melted butter keeps the buns moist, and chopped pecans bring a lovely crunch. - 1/2 cup brown sugar - 1/2 cup maple syrup - 1 tablespoon ground cinnamon The topping is what makes these buns sticky and sweet. Brown sugar adds a deep flavor. Maple syrup enhances the sweetness, and ground cinnamon brings warmth to each bite. - Mixing bowls - Rolling pin - Baking dish - Oven You'll need these simple tools to prepare the buns. Mixing bowls help combine ingredients. A rolling pin flattens the dough. The baking dish holds the sticky topping and buns while they bake. Finally, the oven cooks everything to perfection. For the full recipe, check out the detailed steps to create these delicious treats! First, we need to activate the yeast. In a large bowl, combine warm milk, granulated sugar, and active dry yeast. Let it sit for about 5 to 10 minutes. You want it to get bubbly and frothy. This means the yeast is working well. Next, mix the dry ingredients. In another bowl, combine all-purpose flour and salt. Make a well in the center and add the yeast mixture, melted butter, eggs, and vanilla extract. Stir until you see a sticky dough form. Kneading comes next. Turn the dough out onto a floured surface. Knead it for about 5 to 7 minutes until it feels smooth and elastic. This step is key for great texture. Now, let’s proof the dough. Place it in a greased bowl and cover it with a clean kitchen towel. Let it rise in a warm place for 1 to 2 hours. You want it to double in size. A good spot could be near a warm oven or in a sunny window. While the dough rises, prepare the sticky topping. Melt some softened butter, brown sugar, and maple syrup in a small saucepan over low heat. Stir until it’s smooth and combined. Pour this mixture into a greased 9x13 inch baking dish. Then, stir in the chopped pecans. This topping will give your buns that sweet, sticky flavor. Once the dough has risen, it’s time to shape the buns. Roll it out on a floured surface into a rectangle, about 14 by 10 inches. Spread softened butter over the dough. Sprinkle brown sugar and ground cinnamon evenly across the surface. Now, roll the dough tightly into a log. Cut it into 12 equal pieces. Place these cut-side up in your baking dish, right over the sticky topping. Cover the dish with a towel again. Let the rolls rise for another 30 to 45 minutes. This final proofing is important for fluffy buns. Preheat your oven to 350°F (175°C). Once the rolls have risen, bake them for 25 to 30 minutes. You want them golden brown on top. To serve, invert the baking dish onto a serving platter. This lets the sticky topping drip down over the buns. You can dust them with powdered sugar and drizzle more maple syrup on top. This makes for a beautiful presentation! Enjoy your Maple Pecan Sticky Buns warm for the best experience. For the complete recipe, check out the Full Recipe. To get the best dough, look for a few signs. A well-kneaded dough feels smooth and elastic. When you poke it, it should spring back gently. Avoid adding too much flour during kneading. This can make the dough dry. If your dough feels too sticky, try adding just a little flour. You can change the toppings and flavors to match your taste. For a fun twist, try using chocolate chips or dried fruit. If you want a nut-free option, skip the pecans. Instead, use seeds like sunflower or pumpkin for crunch. You can also mix in other nuts, like walnuts or almonds, for a different texture. Adding spices can boost the flavor of your sticky buns. Try mixing in nutmeg or cardamom for extra warmth. A splash of almond extract adds a nice touch too. Pair your sticky buns with coffee or chai for a perfect morning treat. You can also serve them with a glass of milk for a sweet finish. For the Full Recipe, make sure to follow the steps carefully for the best results! {{image_2}} You can switch up the nuts in your sticky buns. Walnuts make a great alternative. They add a rich, buttery taste. If you have nut allergies, you can skip the nuts entirely. The buns still taste amazing without them. Maple syrup is sweet and delicious, but you can replace it. Honey or agave syrup works well. Both options bring a unique flavor to the dish. If you use honey, it might taste a bit different, but still sweet. Just remember to adjust the sweetness to your liking. Want to add more flavor? Try a cream cheese glaze on top. It adds a nice tangy twist. You can also experiment with other coatings. A simple vanilla glaze or a sprinkle of powdered sugar can elevate your sticky buns. These options make your buns look and taste even better. For the full recipe, check out the detailed instructions above. Enjoy the process of making these delightful treats! I always let my maple pecan sticky buns cool completely on a wire rack. This step helps them keep their shape and texture. If you leave them in the pan, they can get soggy. Sogginess happens when steam builds up. The wire rack allows air to flow around the buns, keeping them light and fluffy. For leftovers, I suggest storing the buns in an airtight container. They stay fresh for a few days this way. If you want to freeze them, wrap each bun tightly in plastic wrap. Place them in a freezer bag to avoid freezer burn. To reheat, take them out and let them thaw in the fridge overnight. You can warm them in the oven at 350°F for 10-15 minutes. This keeps them soft and gooey. These tasty buns can last about 3 days at room temperature. In the fridge, they stay fresh for about a week. If you notice any mold or an off smell, it’s time to toss them. Always trust your senses; they usually tell you if something isn’t right. You can store these buns in two ways: short-term and long-term. For short-term storage, keep them in an airtight container at room temperature. They will stay fresh for about 2-3 days. For long-term storage, wrap the buns tightly in plastic wrap and place them in the freezer. They can last up to 2 months in the freezer without losing flavor. Just remember to let them cool completely before wrapping. Yes, you can make the dough in advance! If you want to prepare it the night before, follow these steps. After kneading the dough, place it in a greased bowl and cover it. Then, refrigerate the dough overnight. When you're ready, take it out and let it rise on the counter for about 1-2 hours before shaping. This gives the dough great flavor and texture. If your sticky buns come out undercooked, don’t worry! You can fix this easily. Just return the buns to the oven. Cover them with foil to prevent burning. Bake for an additional 5-10 minutes at 350°F (175°C). Check for doneness by inserting a toothpick; it should come out clean when the buns are finished. Absolutely! To make gluten-free Maple Pecan Sticky Buns, use a gluten-free all-purpose flour blend. Look for a blend that includes xanthan gum. This will help the dough rise and keep it fluffy. You can also use gluten-free oats in place of nuts if needed. To find delicious Maple Pecan Sticky Buns, check local bakeries and cafes. Many places offer fresh, homemade versions. You can also use apps like Yelp or Google Maps to find nearby spots. Look for places with good reviews to ensure you find the best buns. Yes, these buns can be made ahead and frozen! After baking, let them cool completely. Then, wrap each bun in plastic wrap and place them in a freezer bag. When you're ready to enjoy them, thaw overnight in the fridge. Reheat in the oven at 350°F (175°C) for about 10-15 minutes to warm them up and restore their gooey goodness. In this post, we've covered all you need for delicious Maple Pecan Sticky Buns. You learned about key ingredients like flour and pecans, and necessary tools for baking. I provided step-by-step instructions, handy tips, and variations to suit your taste. Remember, baking is about fun and creativity. Don't be afraid to experiment and make it your own. Enjoy the joy of baking these tasty buns and share them with loved ones!

Maple Pecan Sticky Buns Irresistible and Sweet Delight

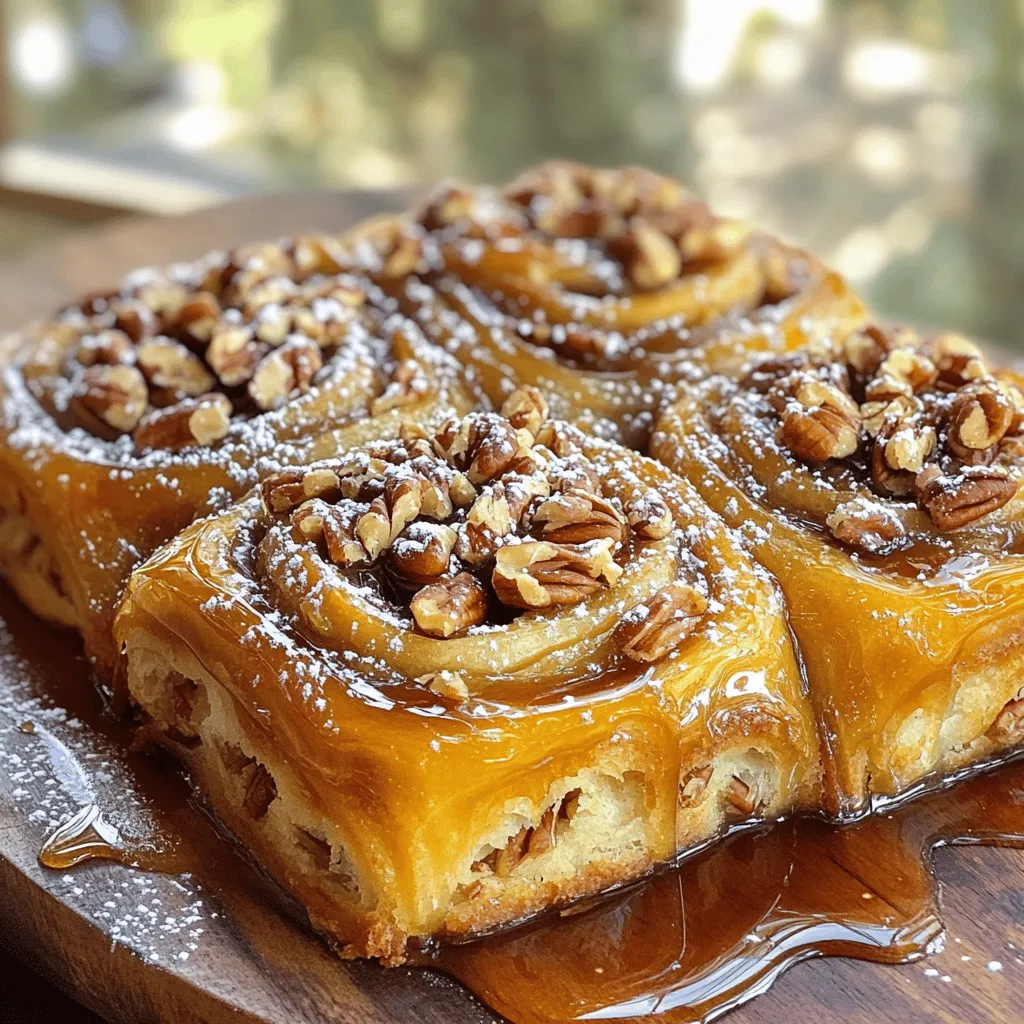
Are you ready to treat yourself to the ultimate sweet indulgence? These Maple Pecan Sticky Buns are not just a

- 2 medium zucchinis, grated - 1 teaspoon salt - 1 cup all-purpose flour - 1/2 cup grated Parmesan cheese - 2 large eggs - 1/4 cup chopped fresh parsley - 1/2 teaspoon garlic powder - 1/4 teaspoon black pepper - Olive oil for frying - Optional: Sour cream or yogurt for serving I love using fresh zucchini for these fritters. Choose firm zucchinis with smooth skin. Look for ones that feel heavy for their size. Fresh zucchinis have a bright color and should not have blemishes. The salt will help draw out excess moisture. This step is key to crisp fritters. The ingredients blend together to create a tasty mix. The grated Parmesan adds a savory kick. Fresh parsley brings a pop of color and flavor. Garlic powder gives a warm, aromatic touch. Feel free to swap in your favorite herbs for a fun twist. For a healthier option, consider using whole wheat flour. This will change the flavor and texture a bit. You can also mix in grated carrots or corn for added sweetness. You can find the full recipe above for more details on how to prepare and cook these delightful fritters. Start by grating the zucchinis using a box grater. Place the grated zucchinis in a bowl and sprinkle them with salt. This step is vital. The salt draws out excess water, which helps keep the fritters crispy. Let them sit for about 10 minutes. After that, take a clean kitchen towel or cheesecloth. Squeeze the zucchini to remove as much moisture as you can. In a large mixing bowl, combine the drained zucchini with the flour, grated Parmesan cheese, eggs, chopped parsley, garlic powder, and black pepper. Mix the ingredients until they are just combined. Do not overmix, as this can make the fritters tough. You want a cohesive mixture that holds together well. Heat about 1/4 inch of olive oil in a large skillet over medium heat until it is hot. Use a tablespoon to scoop out the zucchini mixture. Form small patties by flattening it slightly in your hands. Carefully place the patties in the hot oil. Fry in batches to avoid overcrowding. Cook for 3-4 minutes on each side until they are golden brown and crispy. Once cooked, transfer the fritters to a plate lined with paper towels to absorb any extra oil. Enjoy them warm, and feel free to serve with sour cream or yogurt for added flavor. For the full recipe, refer to the earlier section. To make your zucchini fritters crispy, start by salting the grated zucchini. This helps draw out extra water. Let it sit for about 10 minutes. Once time is up, squeeze the zucchini with a clean towel to get rid of excess moisture. This step is key for crispy fritters. Use enough oil in the pan. A 1/4 inch layer works well. Let the oil heat up before adding the fritters. If the oil is not hot enough, they will absorb too much oil and become soggy. Fry them in small batches to keep the heat steady. You can boost the taste of your fritters easily. Add fresh herbs like chives or dill for a bright flavor. A bit of red pepper flakes can add a nice kick. For a twist, try adding a dash of lemon zest. This will give your fritters a fresh zing. Experiment with different cheeses too. Feta cheese can offer a tangy flavor, while cheddar adds richness. Mix and match to find your favorite combo. If your fritters fall apart, it might be due to too much moisture. Ensure you squeeze all the water from the zucchini. If they are too dry, add a little more egg or a splash of water to the mix. For uneven cooking, ensure your fritters are the same size. Use a spoon to measure and form them. If they are browning too fast, lower the heat a bit. Following these tips will help you create perfect zucchini fritters every time. For the complete recipe, check out the [Full Recipe]. {{image_2}} You can change the flavor by using different herbs and spices. Fresh dill or chives work great. You might also try adding cumin or paprika for a warm kick. Feel free to mix and match until you find what you love. Adding fresh herbs makes your zucchini fritters unique and fresh! While Parmesan is my go-to, other cheeses can add tasty twists. Feta cheese gives a salty bite. Cheddar can bring a rich and creamy flavor. You can even use goat cheese for a tangy touch. Each cheese adds its own character, so experiment to find your favorite. If you need a gluten-free choice, replace all-purpose flour with almond flour or oat flour. Both options work well and keep the fritters light. Ensure that your chosen flour has a fine texture for best results. These swaps make your zucchini fritters easy for everyone to enjoy. For the full recipe, check out the [Full Recipe]. You can store leftover zucchini fritters in an airtight container. Make sure they are cool before sealing. They will stay fresh for about 2-3 days in the fridge. If you notice any moisture, place a paper towel in the container to absorb it. This will help keep your fritters crispy. To reheat, I recommend using an oven or skillet. Preheat your oven to 350°F (175°C). Place the fritters on a baking sheet. Heat them for about 10-15 minutes until warm and crispy again. If using a skillet, add a little olive oil and heat over medium. Cook each side for 2-3 minutes until they are hot. Yes, you can freeze zucchini fritters! After they cool, place them in a single layer on a baking sheet. Freeze them for about an hour. Once frozen, transfer the fritters to a freezer bag. They can last for up to 2 months. When ready to eat, thaw in the fridge and reheat as mentioned above. Enjoy your crispy and flavorful delight anytime! For the full recipe, refer to the earlier section. You can pair zucchini fritters with many tasty items. They go well with sour cream. You can also use yogurt as a dip. A fresh salad adds a nice crunch. Try a simple tomato salad or a green salad. These sides balance the fritters' flavor and texture. You can serve them as a snack or a main dish. Yes, you can make these fritters ahead of time. After frying, let them cool completely. Then, store them in an airtight container in the fridge. They will stay fresh for about three days. You can also freeze them for longer storage. Just place them in a freezer bag. When you are ready to eat, reheat them in the oven or a skillet. This keeps them crispy and delicious. You can tell the fritters are done by their color. They should be golden brown on both sides. Use a fork to check the center. It should feel firm and cooked through. If the outside is brown but the inside feels soft, cook them a bit longer. Aim for about 3-4 minutes on each side. Enjoy your crispy zucchini fritters! For the full recipe, check out Zucchini Fritters Delight. You now know how to make tasty zucchini fritters. We covered all the key steps, from choosing fresh zucchinis to frying methods. You can customize your fritters with herbs or different cheeses. Remember to store leftovers well and reheat them to keep them crispy. Enjoy them with sour cream or yogurt for dipping. With these tips and tricks, you’re ready to impress everyone with your cooking skills!

Zucchini Fritters Crispy and Flavorful Delight

Are you looking for a tasty snack that’s both crispy and packed with flavor? Zucchini fritters are the perfect solution!

To make chocolate chip banana bread, you need these ingredients: - 3 ripe bananas, mashed - 1/2 cup unsalted butter, melted - 3/4 cup brown sugar - 1 large egg, beaten - 1 teaspoon vanilla extract - 1 teaspoon baking soda - 1/4 teaspoon salt - 1 1/2 cups all-purpose flour - 1 cup semi-sweet chocolate chips - 1/2 cup chopped walnuts (optional) These ingredients create a rich and moist loaf that everyone loves. You can swap some ingredients if you're missing something. Here are a few ideas: - Use coconut oil instead of butter for a dairy-free option. - Replace brown sugar with white sugar or honey if you prefer. - For a vegan version, use flaxseed meal mixed with water instead of the egg. - You can use whole wheat flour for a healthier twist. These substitutions can still give you a tasty banana bread. Want to make your banana bread even better? Try these add-ins: - Chopped nuts like pecans or almonds for crunch. - A sprinkle of cinnamon or nutmeg for warm spice. - Use dark chocolate chips instead of semi-sweet for a richer flavor. - Dried fruits like raisins or cranberries can add a nice touch. Feel free to mix and match these options to create your perfect loaf. For the full recipe, check out Choco-Banana Bliss Bread. Start by gathering all your ingredients. You need three ripe bananas, butter, brown sugar, an egg, vanilla, baking soda, salt, flour, chocolate chips, and walnuts if you want. Preheat your oven to 350°F (175°C). This step is key for even baking. Grease a 9x5-inch loaf pan to prevent sticking. In a large bowl, mash the ripe bananas until smooth. Add the melted butter and mix them well. Now, stir in the brown sugar, beaten egg, and vanilla extract. Make sure everything blends nicely. Next, sprinkle the baking soda and salt over your mixture. Stir gently to combine. Now, fold in the flour. Mix until just combined. You want to avoid over-mixing, as this can make the bread tough. Finally, add the chocolate chips and walnuts if you like. Gently fold them into the batter. Pour the batter into your prepared loaf pan. Spread it evenly to ensure it bakes evenly. Place the pan in the preheated oven. Bake for 60-65 minutes. To check if it’s ready, insert a toothpick in the center. It should come out clean. If there’s batter stuck to it, bake for a few more minutes. Once done, take the loaf out of the oven. Let it cool in the pan for about 10 minutes. This helps it set and makes it easier to remove. After that, transfer the bread to a wire rack to cool completely. For serving, slice the banana bread and enjoy it warm. A pat of butter or a sprinkle of powdered sugar makes it even better. You can garnish it with extra chocolate chips and banana slices for a lovely look. For the full recipe, check out our complete guide. To keep your banana bread fresh, wrap it well. Use plastic wrap or aluminum foil. Store it at room temperature for up to three days. If you want to keep it longer, freeze it. Slice the bread before freezing. This way, you can grab a piece anytime. To ripen bananas quickly, place them in a paper bag. The gas they emit speeds up ripening. You can add an apple to the bag for even faster results. If you need ripe bananas now, bake them! Place unpeeled bananas on a baking sheet. Bake at 300°F (150°C) for about 15-20 minutes. Let them cool before using. Do not skip the baking soda. It helps the bread rise and gives it a light texture. Also, avoid over-mixing the batter. This can make the bread dense. Mix just until combined to keep it fluffy. Lastly, be sure to check the bread with a toothpick. If it comes out clean, your banana bread is ready! For the full recipe, check our Choco-Banana Bliss Bread section. {{image_2}} You can make banana bread healthier with a few simple swaps. Use whole wheat flour instead of all-purpose flour. This adds fiber and nutrients. You can also cut the sugar. Try using just half the brown sugar or use a sugar substitute. Applesauce can replace some fat, too. This keeps the bread moist and tasty. Want to mix it up? Add peanut butter for a nutty twist. Just fold in half a cup of creamy or crunchy peanut butter. You can also add a teaspoon of cinnamon for warmth. This makes your banana bread taste even better. For a fun touch, toss in some chopped nuts or dried fruit. If you need a gluten-free option, use a gluten-free flour blend. Many brands work well in baked goods. Just replace the all-purpose flour with this blend. You can also add a little xanthan gum to help with texture. This keeps your banana bread soft and fluffy. Enjoy a slice without worry! For more details, check out the Full Recipe. To keep your chocolate chip banana bread fresh, wrap it tightly. You can use plastic wrap or foil. Store it at room temperature for up to four days. If you want to keep it longer, consider refrigerating it. This helps prevent mold and keeps it tasty. Be sure to place it in an airtight container for best results. Freezing banana bread is easy and smart. First, let the bread cool completely. Then, slice it into pieces. Wrap each slice in plastic wrap. Place the wrapped slices in a freezer bag. Remove as much air as you can to prevent freezer burn. You can freeze it for up to three months. When you're ready, just thaw it at room temperature. To enjoy warm banana bread, you can reheat it in the oven or microwave. For the oven, preheat it to 350°F (175°C). Place the slice on a baking sheet and warm it for about 10 minutes. If you're in a hurry, the microwave works too. Heat for about 15-20 seconds. Remember, don't overheat, or it will dry out. Enjoy your delicious treat! You can check doneness by inserting a toothpick into the center. If it comes out clean, your banana bread is ready. It should also look golden brown on top. The edges might pull away from the pan a bit. Trust your senses; a nice smell means it's close! Yes, you can use frozen bananas! Just thaw them first. Drain any extra liquid before mashing. This helps keep your bread from getting too wet. Frozen bananas often taste sweeter, so they work great in banana bread. To slice banana bread, use a sharp bread knife. This cuts through without squishing the loaf. Wait until the bread is cool to slice for clean cuts. If you need to slice it warm, be gentle. If you want to swap chocolate chips, try using nuts or dried fruit. You could use chopped walnuts, pecans, or raisins. These add different flavors and textures. Just remember, they will change the taste a bit! Banana bread lasts for about 3 to 4 days at room temperature. To keep it fresh, wrap it in plastic wrap or foil. You can also store it in an airtight container. If you want to save it longer, freeze it! Yes, banana bread often tastes better the next day. The flavors meld together as it sits. This makes each bite even more delicious. Just remember to store it properly to keep it fresh! For the full recipe, check out the Choco-Banana Bliss Bread that I shared earlier. It’s simple and oh-so-delicious! You have all the tools to make great banana bread. We explored the key ingredients, step-by-step instructions, and helpful tips. Remember, you can customize your bread with various add-ins and healthier options. Storing methods help keep it fresh longer, and simple answers to FAQs clear up common concerns. Enjoy baking and sharing your banana bread with family and friends! Happy baking!

Chocolate Chip Banana Bread Simple and Delicious Recipe

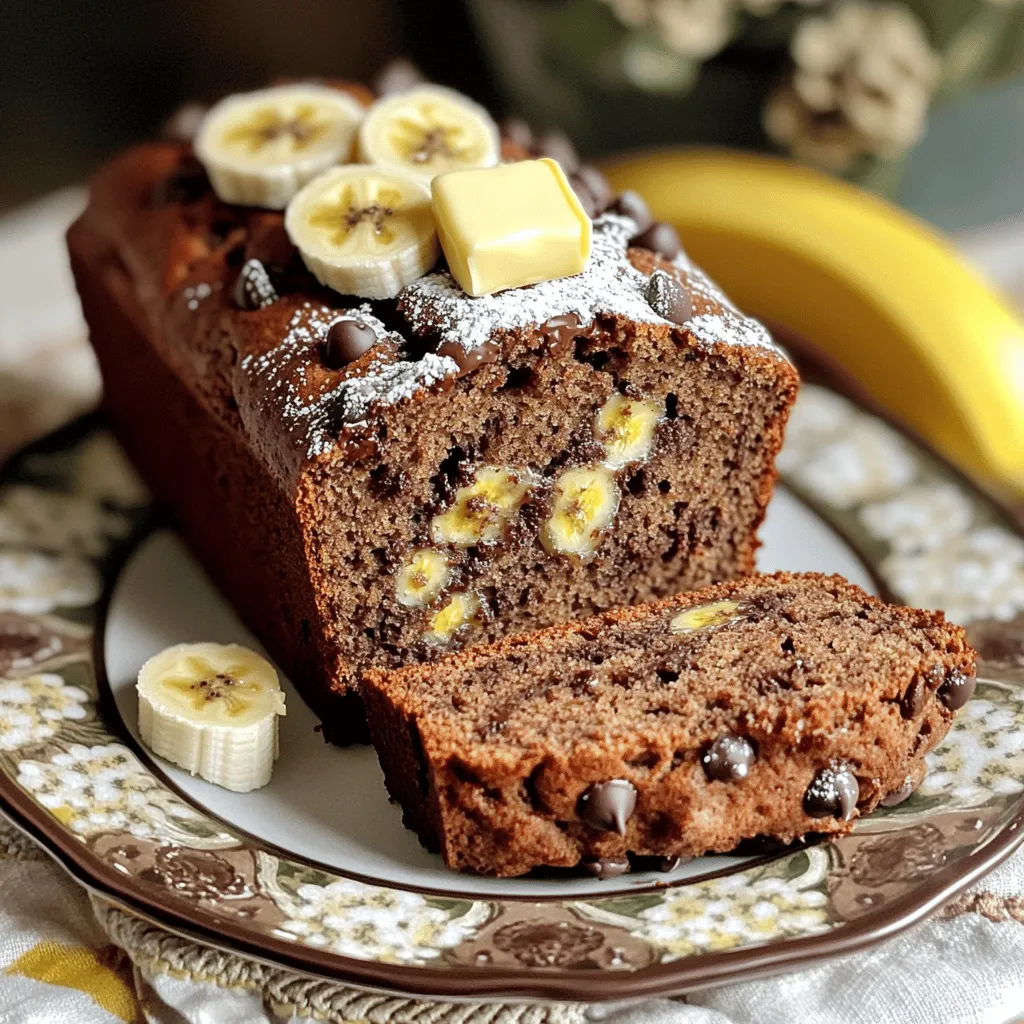
Are you ready to bake the perfect chocolate chip banana bread? This simple and delicious recipe combines ripe bananas with

- 4 large bell peppers (any color) - 1 cup quinoa, rinsed - 2 cups vegetable broth - 1 can (15 oz) black beans, drained and rinsed - 1 cup corn (fresh or frozen) - 1 cup diced tomatoes (canned or fresh) - 1 teaspoon cumin - 1 teaspoon chili powder - Salt and pepper to taste - 1 cup shredded cheese (cheddar or a blend) - 2 tablespoons olive oil - Fresh cilantro for garnish (optional) The main ingredients create a colorful base for your stuffed peppers. The bell peppers add crunch and a sweet flavor. Quinoa gives a nutty taste and fills you up. The vegetable broth adds depth and helps the quinoa cook perfectly. The additional ingredients bring more texture and taste. Black beans add protein and fiber, while corn gives sweetness. Diced tomatoes add juiciness and acidity, balancing the dish. For seasoning, cumin and chili powder provide warmth and spice. Adding salt and pepper enhances all the flavors. The cheese melts beautifully on top, adding creaminess. Olive oil helps the peppers roast nicely. I like to sprinkle fresh cilantro for a bright finish. You can find the full recipe at the end of this article. - Preheat the oven to 375°F (190°C). - Cut the tops off the bell peppers and remove the seeds. Lightly brush them with olive oil. - In a medium saucepan, bring the vegetable broth to a boil. - Add the rinsed quinoa, reduce heat, cover, and simmer until fluffy. - In a large bowl, mix the cooked quinoa, black beans, corn, diced tomatoes, cumin, chili powder, salt, and pepper. - Spoon the mixture into each bell pepper, packing it down gently. - Place the stuffed peppers upright in a baking dish. Cover the dish with foil and bake for 25 minutes. - Remove the foil, sprinkle cheese on top, and bake for another 10 minutes. Look for bubbly and golden cheese. Making stuffed bell peppers is simple and fun. You can add your own twist to the filling. Enjoy this colorful meal! For the complete recipe, check the Full Recipe section. Choosing the right peppers is key. I like to use large bell peppers for stuffing. They hold the filling well and taste sweet. Any color works—red, yellow, or green. Just pick ones that feel firm to the touch. When cooking quinoa, rinse it first. This step removes the bitter coating. For fluffy quinoa, use two cups of vegetable broth for every cup of quinoa. Bring the broth to a boil before adding the quinoa. Then, cover and simmer until all the liquid is gone. Spices can take your stuffed peppers to the next level. I suggest adding cumin and chili powder for warmth. You can also sprinkle in garlic powder or paprika for extra flavor. Using different cheeses can change the taste too. Cheddar cheese is a classic choice. For a creamier texture, try mozzarella or Monterey Jack. Mix and match for a fun twist! For sides, a light salad pairs well with stuffed peppers. A simple green salad with lemon dressing is great. You might also serve some crusty bread on the side. To present your dish, plate the stuffed peppers upright. Drizzle some olive oil on top and add a sprinkle of fresh cilantro. This makes the meal look fresh and inviting. {{image_2}} You can use ground turkey or beef for a hearty meal. These meats add rich flavor and protein. Mix the cooked meat with the quinoa and veggies for a tasty filling. If you like, try other proteins like ground chicken or pork. They work well, too. For a veggie twist, use lentils or tofu. Lentils give a protein boost while keeping it plant-based. Tofu absorbs flavors well, making it a great choice. You can also swap regular cheese for dairy-free cheese. This keeps the dish vegan and still delicious. If you need gluten-free options, use cauliflower rice instead of quinoa. Cauliflower rice is light and low in carbs. You can also try other grain-free fillers like chopped mushrooms or zucchini. These add bulk and flavor without gluten. To keep your stuffed bell peppers fresh, place them in an airtight container. This way, they stay moist and full of flavor. You can safely store them in the fridge for about 3 to 5 days. It’s best to eat them within this time for the best taste and texture. Freezing stuffed peppers is a great option if you want to save some for later. First, let the peppers cool completely. Then, wrap each one tightly in plastic wrap or place them in a freezer bag. Make sure to remove as much air as possible. They can last for up to 3 months in the freezer. When you're ready to eat, thaw them overnight in the fridge. You can reheat your stuffed peppers in a microwave or an oven. If using a microwave, place the pepper on a plate and cover it with a damp paper towel. Heat for 2-3 minutes or until hot. For the oven, set it to 350°F (175°C). Place the peppers in a baking dish, cover with foil, and heat for about 15-20 minutes. This method keeps them moist and prevents dryness. Stuffed peppers take about 35 to 40 minutes to cook. First, you bake them covered for 25 minutes. Then, remove the cover and bake for another 10 to 15 minutes. This method helps the peppers soften and the cheese melt nicely. Yes, you can prepare stuffed peppers ahead of time. You can assemble them and store them in the fridge for up to two days. Just cover them well. When you're ready to cook, bake them straight from the fridge, adding a few extra minutes to the cooking time. You can stuff bell peppers with many tasty options. Try using ground turkey, beef, or even lentils for a hearty meal. You can mix in rice, beans, or even vegetables like spinach and zucchini. The choices are endless! To check if stuffed peppers are done, poke them with a fork. They should feel tender but not mushy. Also, the cheese should be melted and slightly golden. If the peppers resist your fork, they need a bit more time in the oven. Yes, you can use other grains instead of quinoa. Brown rice, farro, or barley work great. You can even try cauliflower rice for a low-carb option. Just make sure to adjust cooking times based on the grain you choose. This recipe makes a bright and tasty dish. It uses bell peppers filled with a healthy mix. You can enjoy them for lunch or dinner. The cooking process is simple, and the flavors are amazing. First, you need these ingredients: - 4 large bell peppers (any color) - 1 cup quinoa, rinsed - 2 cups vegetable broth - 1 can (15 oz) black beans, drained and rinsed - 1 cup corn (fresh or frozen) - 1 cup diced tomatoes (canned or fresh) - 1 teaspoon cumin - 1 teaspoon chili powder - Salt and pepper to taste - 1 cup shredded cheese (cheddar or a blend) - 2 tablespoons olive oil - Fresh cilantro for garnish (optional) Here’s how to make them: 1. Preheat your oven to 375°F (190°C). 2. Boil the vegetable broth in a medium pot. Add the rinsed quinoa and simmer. Cover and cook for about 15 minutes. The quinoa will be fluffy when done. 3. Cut the tops off the bell peppers. Remove the seeds and membranes. Brush the outside with olive oil. 4. In a bowl, mix the cooked quinoa, black beans, corn, diced tomatoes, cumin, chili powder, salt, and pepper. Stir until all ingredients blend well. 5. Spoon the mix into each bell pepper. Pack it down gently. 6. Place the stuffed peppers in a baking dish. Cover with foil and bake for 25 minutes. 7. After 25 minutes, remove the foil. Sprinkle cheese on top of each pepper and bake for another 10 minutes. The cheese should be bubbly and golden. 8. Let the peppers cool for a few minutes before serving. 9. Garnish with fresh cilantro if you like. This full recipe makes four servings and takes about 50 minutes. Enjoy your colorful and nutritious meal! These colorful quinoa stuffed bell peppers are packed with flavor and nutrients. We covered the main ingredients, preparation, and cooking steps. I shared tips for perfecting your stuffed peppers and creative variations. Whether you stick to the original recipe or customize with meat or veggies, these peppers shine at any meal. Don't forget storage tips for leftovers! Enjoy making these meals and impressing your family and friends. Simple, tasty, and healthy food makes every bite worth it. Dive in and start cooking!

Stuffed Bell Peppers Flavorful and Nutritious Meal

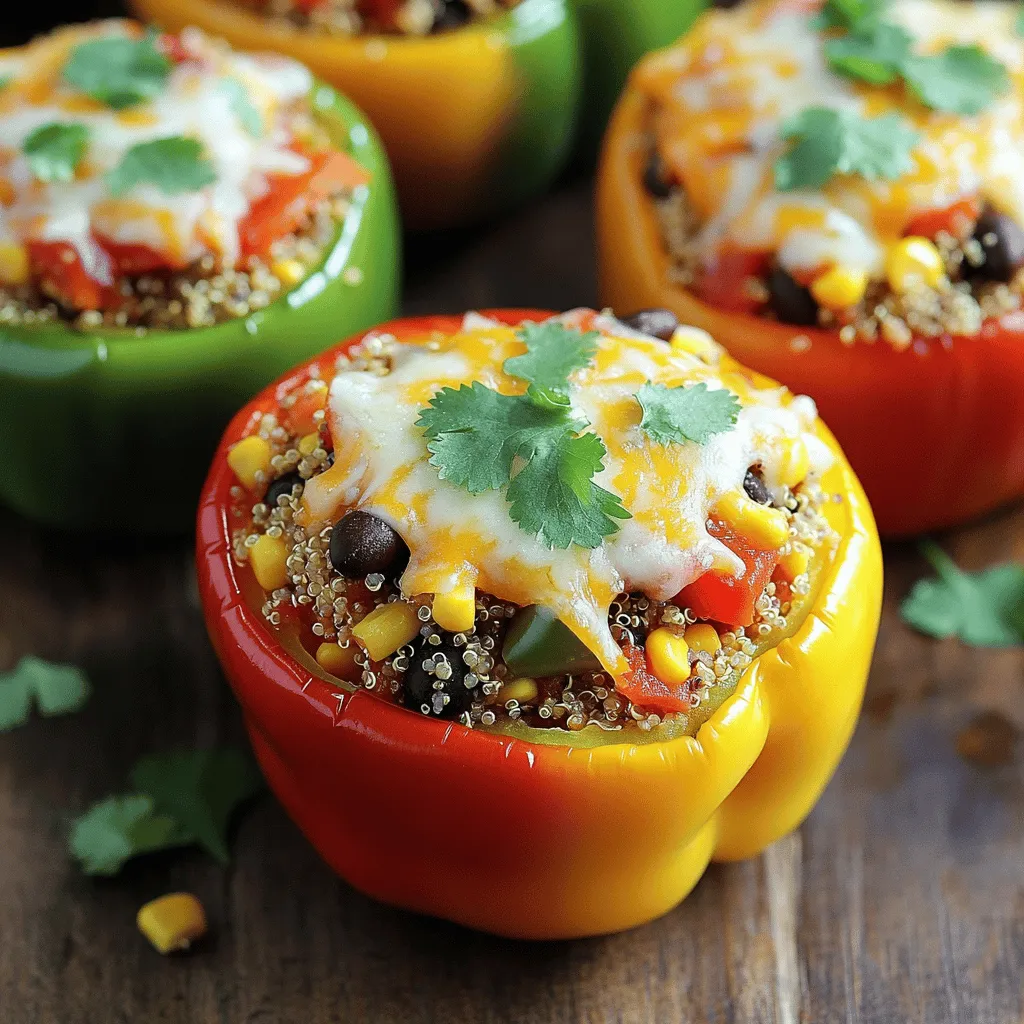
Are you ready to make a meal that’s both tasty and good for you? Stuffed bell peppers are the perfect

- 12 oz fettuccine pasta - 4 tablespoons unsalted butter - 3 cloves garlic, minced - 1 cup heavy cream - 1 cup grated Parmesan cheese - 1/2 teaspoon black pepper - Salt to taste - Chopped fresh parsley In this dish, fettuccine pasta forms the base. It cooks up nice and thick. The unsalted butter gives a rich flavor, while the minced garlic adds a tasty kick. Heavy cream brings that creamy texture we love. Grated Parmesan cheese makes the sauce smooth and cheesy. Black pepper adds a hint of spice. Finally, salt and parsley help to finish the dish right. For the full recipe, check out the detailed steps later. First, fill a large pot with water. Add a good amount of salt to it. This helps the pasta taste better. Bring the water to a rolling boil. Once boiling, add 12 oz of fettuccine pasta. Cook it according to the package directions until it's al dente. This means it should be firm but not hard. It usually takes about 8-10 minutes. Before draining, save 1 cup of the pasta water. This water adds flavor and helps the sauce stick. Drain the pasta and set it aside. In the same pot, melt 4 tablespoons of unsalted butter over medium heat. Once it’s melted, add 3 cloves of minced garlic. Sauté the garlic for 1-2 minutes. You want it fragrant but not brown. Next, slowly pour in 1 cup of heavy cream. Stir to mix it well. Let the mixture simmer for 2-3 minutes until it thickens a bit. After that, add 1 cup of grated Parmesan cheese, 1/2 teaspoon of black pepper, and a pinch of salt. Stir until the cheese melts and the sauce is smooth. Now, it’s time to bring the pasta and sauce together. Add the cooked fettuccine to your creamy sauce. Toss the pasta in the sauce until it’s well coated. If the sauce looks too thick, add some of the reserved pasta water a little at a time. This will help you reach the right consistency. Taste your dish and adjust the seasoning with more salt or black pepper if needed. Serve your fettuccine alfredo right away for the best taste. You can find the complete instructions in the Full Recipe. Choosing the right cheese For a rich flavor, I love using freshly grated Parmesan cheese. It melts well and gives a nice taste. Avoid pre-grated cheese; it often has additives that can change the sauce texture. You can also mix in some Pecorino Romano for an extra kick. Importance of reserved pasta water Always save some pasta water before draining. This water is starchy, and it helps the sauce stick to the pasta. Add it slowly to adjust the sauce's thickness. It helps make a creamy, smooth sauce that clings to each strand of fettuccine. Understanding al dente Cooking your fettuccine al dente means it should be firm when bitten. It should not be mushy. This texture holds up well in the sauce. Check the package for cooking time, but start tasting a minute or two early. Timing for best texture Once your pasta is ready, drain it right away. Don't let it sit too long, as it can become soggy. Combine it with the sauce immediately for the best taste and texture. This makes every bite of your fettuccine Alfredo delightful. Plate presentation ideas When serving, twirl the fettuccine in the center of a plate. This creates a lovely nest. Top it with extra Parmesan and a sprinkle of parsley for color. It makes the dish look fancy and inviting. Best accompaniments Pair your fettuccine Alfredo with a fresh green salad. A light Caesar salad works great. You can also serve garlic bread on the side for a full meal experience. This combination will impress your guests and make your meal special. {{image_2}} You can make your fettuccine Alfredo heartier by adding proteins. Grilled chicken is a classic choice. Just slice it thin and mix it in. Shrimp also works well. Sauté shrimp until pink, then toss with the pasta. If you prefer a vegetarian option, try adding cooked mushrooms or roasted vegetables. Both add great flavor. Herbs and spices can truly elevate your dish. Fresh basil or parsley can add a nice touch. Try a pinch of nutmeg for warmth. You can also use different cheese varieties. Pecorino Romano adds a sharp taste. A mix of cheeses can make the dish even richer. Want to lighten the dish? Use lower-calorie substitutes. Swap heavy cream for half-and-half or whole milk. This change keeps the creaminess but cuts calories. You can also use a cauliflower puree instead of cream. It gives a great texture without the extra fat. After enjoying your Easy Fettuccine Alfredo, you may have leftovers. To store them, follow these tips: - Let the pasta cool to room temperature. - Place it in an airtight container. - Refrigerate within two hours to keep it fresh. - Use it within three days for best taste. When it's time to enjoy your leftovers, you have two main options: the microwave or stovetop. - Microwave: Place the pasta in a bowl, cover it with a damp paper towel, and heat in short bursts. Stir between each burst to heat it evenly. - Stovetop: Put the pasta in a pan over low heat. Add a splash of cream or reserved pasta water for creaminess. Stir gently until warmed through. Can you freeze fettuccine alfredo? Yes, but keep in mind it may change texture. Here are some tips: - Cool the pasta completely before freezing. - Use freezer-safe bags or containers to avoid freezer burn. - Label the container with the date. - To thaw, place it in the fridge overnight. Reheat using the stovetop method for best results. For a complete overview of making this dish, check the Full Recipe for step-by-step guidance. Making Easy Fettuccine Alfredo is quick and simple. It takes about 10 minutes to prep and 10 minutes to cook. In total, you will spend around 20 minutes from start to finish. This makes it a great choice for busy nights when you want a tasty meal fast. Yes, you can prepare Easy Fettuccine Alfredo ahead of time. Cook the fettuccine and sauce, then store them separately. Keep them in airtight containers in the fridge for up to three days. When you're ready to eat, reheat the pasta and sauce together in a pan. Add a splash of reserved pasta water to bring back the creaminess. If you need to skip heavy cream, there are good options. You can use half-and-half for a lighter sauce. Milk with a bit of butter also works well. For a dairy-free choice, try coconut cream or cashew cream. These alternatives will change the flavor a bit, but they can still make your dish creamy and delicious. Easy Fettuccine Alfredo is a simple delight to make. You need fettuccine pasta, butter, garlic, cream, cheese, and spices. Follow the steps to cook and mix everything well. Try tips for better sauce and texture. You can also explore variations for fun flavors. Store leftovers correctly for later, and reheating is a breeze. With these insights, you can master this dish with ease. Enjoy making Fettuccine Alfredo your way. Happy cooking!

Easy Fettuccine Alfredo Quick and Creamy Delight

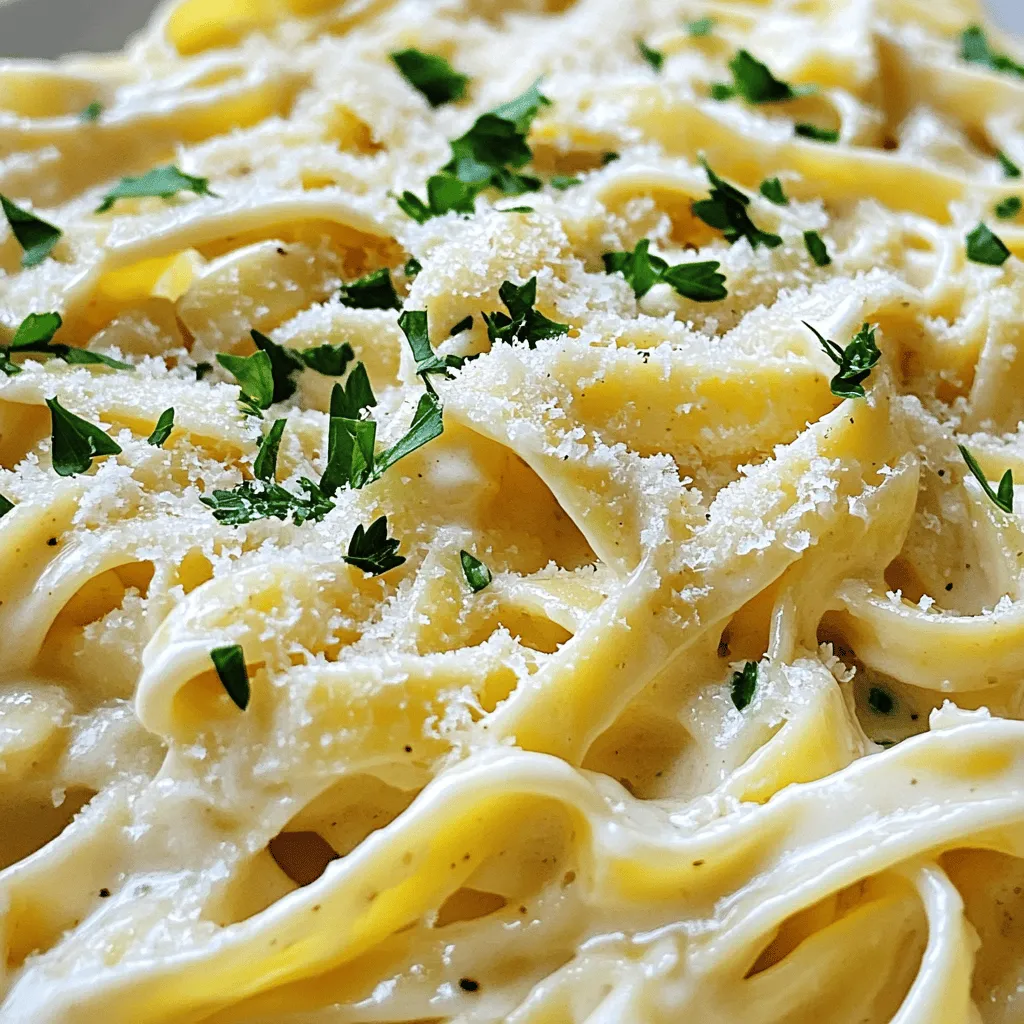
Are you craving a quick and creamy meal? You’ve landed on just the right recipe! This Easy Fettuccine Alfredo is

To create a vibrant Vegan Buddha Bowl, gather these fresh ingredients. Each item adds flavor and nutrition to your meal. Here’s what you need: - 1 cup cooked quinoa - 1 cup chickpeas, drained and rinsed - 1 cup sweet potato, cubed - 1 avocado, sliced - 2 cups mixed greens (spinach, kale, arugula) - 1/2 cup cherry tomatoes, halved - 1/4 cup red cabbage, shredded - 1/4 cup cucumber, diced - 3 tablespoons tahini - 2 tablespoons lemon juice - 1 tablespoon maple syrup - Salt and pepper to taste - Olive oil for roasting These ingredients work well together. They provide a balance of protein, healthy fats, and vitamins. You can find the full recipe in the recipe section. Enjoy mixing and matching these items to suit your taste! 1. Preheat the oven: Start by setting your oven to 400°F (200°C). This helps the sweet potatoes roast well. 2. Roast the sweet potato: Take your sweet potato and cut it into cubes. Toss these cubes in olive oil, salt, and pepper. Spread them on a baking sheet. Roast them for 25-30 minutes. You want them to be golden and soft. 1. Prepare quinoa: While the sweet potatoes roast, cook your quinoa. Use 1 cup of quinoa and 2 cups of water. Bring the water to a boil. Then, let it simmer for about 15 minutes until it’s fluffy. 2. Make the dressing: In a small bowl, mix tahini, lemon juice, maple syrup, and a pinch of salt. If it feels thick, add a bit of water. Keep mixing until it’s smooth. 1. Layering and adding toppings: Start with a large bowl or plate. Add the cooked quinoa as your base. Then, layer on the roasted sweet potatoes, chickpeas, and mixed greens. Next, add cherry tomatoes, red cabbage, and cucumber. 2. Add avocado and dressing: Slice your avocado and place it on top. Finally, drizzle your tahini dressing all over the bowl. 3. Final seasoning: Add a bit more salt and pepper if you like. 4. Serve immediately: Give everything a gentle toss before enjoying your meal. This mixes all the flavors together. You can find the full recipe for this delicious Vegan Buddha Bowl in the recipe section! To cook quinoa perfectly, rinse it first. This step gets rid of bitter flavors. Use two cups of water for every cup of quinoa. Boil it, then let it simmer for about 15 minutes. When done, fluff it with a fork. This brings out its light and airy texture. For your dressing, the right consistency is key. A thick dressing can overpower your bowl. Start with tahini and lemon juice. If it feels too thick, add water slowly. Aim for a pourable texture. This helps it mix well with your fresh ingredients. To boost flavor, add spices or herbs. You can use cumin, paprika, or fresh herbs like cilantro. These can change your bowl's taste with little effort. A sprinkle of nutritional yeast adds a cheesy flavor without dairy. If you have leftover veggies, use them! Roasted or steamed veggies work great. Toss them into your bowl for extra nutrition. They add variety and prevent waste. Mix and match to keep things exciting each time you make your Buddha bowl. For more delicious ideas, check out the Full Recipe. {{image_2}} You can make your vegan Buddha bowl unique. Start with protein. Tofu and tempeh are great choices. Both add texture and flavor. You can grill, bake, or even pan-fry them. Cook them until golden brown. Next, think about vegetables. You can use any veggies you like. Carrots, bell peppers, and zucchini work well. Try roasting them for added flavor. Make it colorful and fun! Now, let’s talk dressings. While tahini is tasty, you can switch it up. Try a peanut sauce for a nutty twist. You can also blend avocado with lime juice for a creamy option. For bold flavors, go spicy! Add some sriracha or chili paste. A simple balsamic vinaigrette can also brighten your dish. Mix and match to find your favorite flavor! For a complete guide, check the Full Recipe. To keep your Vegan Buddha Bowl fresh, refrigerate it right away. Use an airtight container. This prevents moisture and keeps your food tasty. Store the bowl in the fridge for up to three days. The grains and veggies stay good, but the avocado will brown faster. When it's time to eat again, reheating is easy. For grains like quinoa, use a microwave. Heat for about 30 seconds and stir. Check if it's hot enough; if not, heat in 10-second bursts. For vegetables, you can use the microwave too. Alternatively, heat them in a pan. Add a splash of water to keep them moist. Stir often until they warm up. Enjoy your meal just like it was fresh! What is a Buddha bowl? A Buddha bowl is a meal served in one bowl. It combines grains, proteins, and vegetables. The dish is colorful and full of flavors. You can mix and match ingredients based on your taste. Each bowl tells a story through its colors and textures. Are Buddha bowls healthy? Yes, Buddha bowls are very healthy! They pack in nutrients from various food groups. You get proteins from chickpeas and quinoa. The veggies add vitamins, minerals, and fiber. Healthy fats come from avocado and tahini. This balanced meal helps you feel full and satisfied. Best ways to serve a Buddha bowl Serve your Buddha bowl in a wide, shallow bowl. This lets you see all the colors and layers. Start with a base of grains, then add your roasted veggies and proteins. Top it off with fresh greens and a drizzle of dressing. This makes it look appealing and inviting. Pairing ideas for a complete meal You can make your Buddha bowl a full meal by adding sides. Try serving it with a warm soup or a fresh salad. For a drink, a green smoothie pairs well too. You can also add whole-grain bread or wraps for a hearty touch. Check the Full Recipe for more ideas! In this blog post, we explored delicious vegan Buddha bowls. We discussed the key ingredients, like quinoa, chickpeas, and sweet potatoes. I provided step-by-step instructions for preparation and assembly. You learned tips for perfecting your bowl and ideas for tasty variations. Don't forget to store leftovers properly to enjoy meals later. These bowls are not just healthy; they are fun to customize and share. Embrace your creativity and enjoy your tasty, colorful meals!

Vegan Buddha Bowl Nutritious and Flavorful Meal Guide

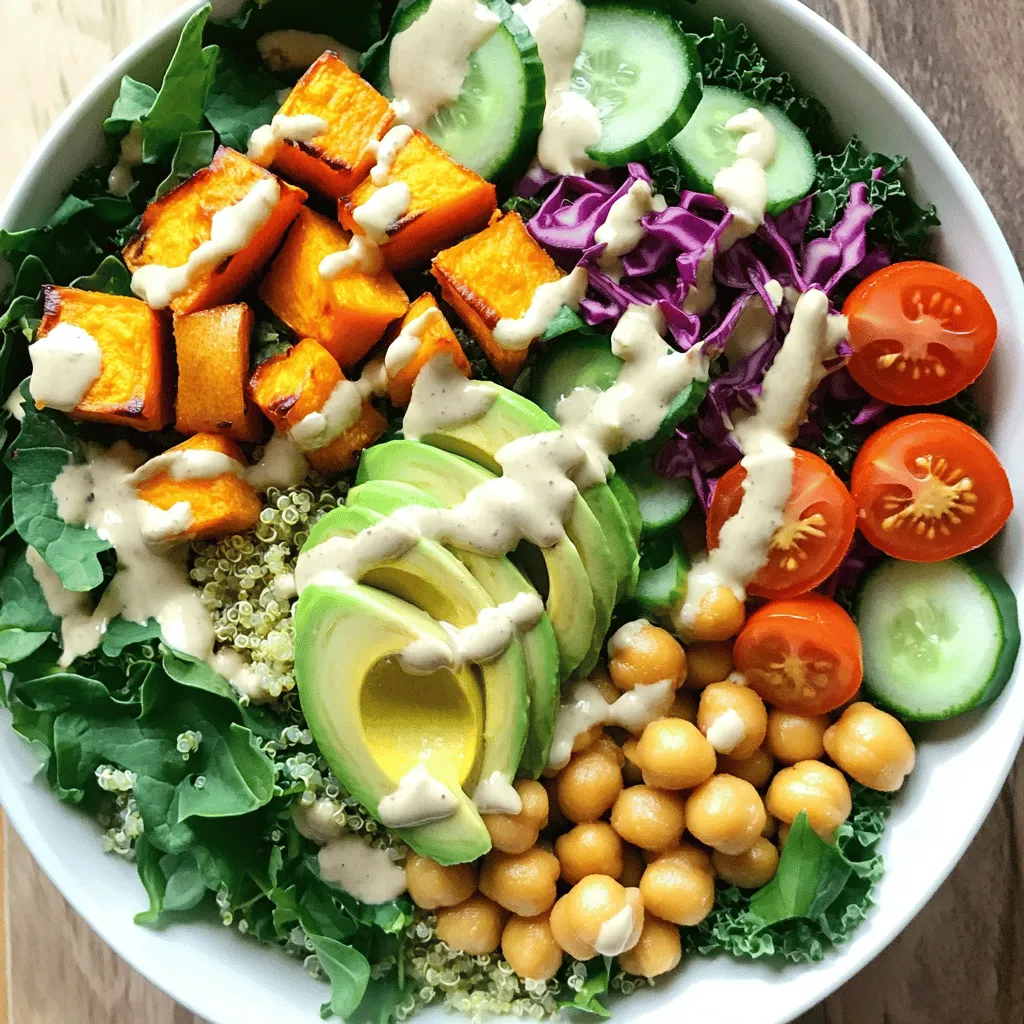
Looking for a nutritious, flavor-packed meal? You’ve found it! In this guide, I’ll show you how to make a step-by-step

- 2 cups green cabbage, thinly sliced - 1 cup purple cabbage, thinly sliced - 1 cup carrots, grated - 1 red bell pepper, thinly sliced - 1 cup sugar snap peas, halved - 1/2 cup green onions, chopped - 1/4 cup cilantro, chopped - 1/4 cup toasted sesame seeds - 1/4 cup almonds, slivered - 1/4 cup rice vinegar - 2 tablespoons soy sauce (or tamari for gluten-free) - 1 tablespoon sesame oil - 1 tablespoon honey or maple syrup - 1 teaspoon fresh ginger, grated - 1 garlic clove, minced - Salt and pepper to taste The key to a great Crunchy Asian Slaw lies in the fresh ingredients. I love using a mix of green and purple cabbage for color and crunch. Both types of cabbage add a nice bite. Grated carrots bring sweetness, while the red bell pepper adds a crisp texture. Sugar snap peas give the slaw a fun snap, and green onions add a mild onion flavor. Cilantro is a must for its fresh taste. I also like to sprinkle in toasted sesame seeds and slivered almonds for added crunch and richness. For the dressing, I use rice vinegar for a tangy kick. Soy sauce or tamari gives it depth. Adding sesame oil brings a nutty flavor that enhances the dish. Honey or maple syrup adds a touch of sweetness. Grated ginger and minced garlic create a flavorful base. Finally, remember to season with salt and pepper to taste. You can find the full guide to this recipe in the [Full Recipe]. Enjoy making your slaw with these fresh and vibrant ingredients! Start by gathering all your fresh veggies. You will need: - 2 cups green cabbage, thinly sliced - 1 cup purple cabbage, thinly sliced - 1 cup carrots, grated - 1 red bell pepper, thinly sliced - 1 cup sugar snap peas, halved - 1/2 cup green onions, chopped - 1/4 cup cilantro, chopped In a large bowl, combine the green and purple cabbage, grated carrots, red bell pepper, sugar snap peas, green onions, and cilantro. Toss them well. This mix adds color and crunch. Next, let’s whip up a tasty dressing. You will need: - 1/4 cup rice vinegar - 2 tablespoons soy sauce (or tamari for gluten-free) - 1 tablespoon sesame oil - 1 tablespoon honey or maple syrup - 1 teaspoon fresh ginger, grated - 1 garlic clove, minced - Salt and pepper to taste In a small bowl, whisk together the rice vinegar, soy sauce, sesame oil, honey (or maple syrup), grated ginger, and minced garlic until smooth. Don’t forget to season with salt and pepper to taste. This dressing packs a punch! Now, pour the dressing over your slaw mixture. Toss it all well so every veggie is coated. Let it sit for about 15 minutes. This resting time helps the flavors meld and softens the veggies a bit. Just before serving, you can sprinkle on some toasted sesame seeds and slivered almonds for extra crunch. You can check out the full recipe for more details. Enjoy your colorful and crunchy Asian slaw! Using fresh vegetables makes a big difference. They add crunch and bright flavor. Look for vibrant colors and firm textures. Avoid wilted or brown parts. Fresh veggies elevate your Crunchy Asian Slaw. Making the slaw a few hours ahead helps the flavors blend. This wait allows the veggies to soak in the dressing. The taste becomes richer and more intense. Just store it in the fridge until you're ready to serve. You can easily adjust this recipe for different diets. For gluten-free, swap soy sauce with tamari. Use maple syrup instead of honey for a vegan option. If you want a low-sugar version, reduce the sweetener or skip it altogether. Play with these choices to fit your needs! {{image_2}} You can mix in more veggies for extra crunch. Broccoli slaw adds a nice bite. Radishes give a peppery flavor, while bell peppers add sweetness. You can also use shredded carrots for more color. Choose what you love and get creative! Want to make your slaw a meal? Add grilled chicken for a hearty touch. Shrimp works great too; it cooks fast and tastes amazing. For a plant-based option, try tofu. Just grill or sauté it first. These proteins will make your slaw filling and tasty. Not a fan of the original dressing? Try a peanut sauce for a nutty twist. A sesame ginger dressing can give it a fresh flavor. You can also use a spicy sriracha vinaigrette if you like heat. Each dressing adds a new layer of taste to your Crunchy Asian Slaw! To keep your crunchy Asian slaw fresh, store it in an airtight container. Make sure to add the dressing only when you’re ready to eat. This way, the vegetables stay crisp and bright. If you have leftover dressing, keep it in a separate jar. It will last for about a week in the fridge. When stored properly, the slaw will last up to three days in the refrigerator. After that, the veggies may lose their crunch. Always check for any signs of spoilage, like an off smell or slimy texture, before eating. I do not recommend freezing the slaw. Freezing can change the texture of the vegetables. If you must freeze it, do so without the dressing. To thaw, place it in the fridge overnight. After thawing, enjoy it as soon as possible for the best taste. For more details, refer to the Full Recipe. To make this Crunchy Asian Slaw vegan, simply swap honey for maple syrup. Maple syrup gives a sweet touch without using animal products. This change keeps the flavors intact while making the dish plant-based. This slaw pairs well with many dishes. Try it with grilled chicken or shrimp for a tasty meal. It also goes great with rice bowls or tacos. The crunch of the slaw contrasts nicely with tender meats. Yes, you can make the slaw a few hours in advance. If you do this, the flavors blend well and taste even better. However, the veggies might soften a bit. For extra crunch, add nuts and seeds just before serving. Each serving of this slaw has about 120 calories. It contains 8 grams of fat, mostly from sesame oil and nuts. This dish is also rich in vitamin C and fiber, thanks to the fresh veggies. For the full recipe, check out the details above. In this article, we explored the ingredients and steps to make Crunchy Asian Slaw. We detailed each fresh vegetable, dressing components, and shared helpful tips. You learned how to store leftovers and variations to try. Crunchy Asian Slaw is fun to make and full of flavor. It pairs well with many dishes. Enjoy this healthy, crunchy slaw in your meals and make it your own! Experiment with different veggies and proteins for added taste. Thanks for reading about this tasty recipe!

Crunchy Asian Slaw Fresh and Flavorful Recipe

Are you looking for a fresh and crunchy side dish that bursts with flavor? My Crunchy Asian Slaw recipe is

Older posts
Newer posts
← Previous Page1 … Page26 Page27 Page28 … Page65 Next →

dsad

© 2025 Foodish Talk • Built with GeneratePress

Our Policies

  • Copyright Policy
  • Cookie Policy
  • GDPR Policy
  • Privacy Policy
  • Disclaimer
  • Terms Of Use

More Information

  • Home
  • About
  • Contact
  • Appetizers
  • Dessert
  • Dinner
  • Drinks
©2025, Foodish Talk About Back To Top