Skip to content
DisclaimerTerms Of UseGDPR PolicyCookie Policy

Foodish Talk

  • Home
  • Drinks
  • Appetizers
  • Dinner
  • Dessert
  • About
  • Contact
  • Privacy Policy
DisclaimerTerms Of UseGDPR PolicyCookie Policy

Ava

- 3 medium zucchinis - 4 large ripe tomatoes - 1 large onion - 3 cloves garlic - 1 cup shredded mozzarella cheese - 1 cup fresh basil leaves - 1 teaspoon dried oregano - ½ teaspoon red pepper flakes - ¼ cup olive oil - Salt and pepper - ½ cup breadcrumbs When I make this Tomato Zucchini Casserole, I find joy in simple, fresh ingredients. Each one plays a role in creating a dish that is both hearty and healthy. The zucchinis add a nice crunch, while the ripe tomatoes bring a burst of flavor. Each serving has about 250 calories. You get 15 grams of fat, 10 grams of carbs, and 8 grams of protein. This makes it a great meal for a light dinner. It offers a good balance of nutrients while staying low in calories. If you want to switch things up, try different cheeses. Feta or goat cheese can add a tangy kick. For veggies, you can use eggplant or bell peppers. Both can change the flavor in a fun way. For the full recipe, check the details above. Enjoy cooking! First, preheat your oven to 375°F (190°C). This step is key. If you skip it, your casserole won’t cook well. Next, prepare the vegetables. Slice the zucchinis into thin rounds. Use a sharp knife for even cuts. Slice the tomatoes and onion the same way. Mince the garlic too. In a large skillet, heat ¼ cup of olive oil over medium heat. Add the sliced onion and garlic. Sauté them for about 5-7 minutes until they are soft. This step builds great flavor. Now, grab a large baking dish. Start with the first layer. Arrange half of the sliced zucchinis in an even layer at the bottom. Next, layer half of the sliced tomatoes on top of the zucchinis. Sprinkle half of the sautéed onion and garlic mixture over the tomatoes. Season this layer with salt, pepper, half of the chopped basil, oregano, and red pepper flakes if you want some spice. Repeat these layers with the remaining zucchinis, tomatoes, onion, garlic, and seasonings. Finish the top layer with 1 cup of shredded mozzarella cheese. Then, sprinkle ½ cup of breadcrumbs over the cheese for a nice crunch. Cover the dish with foil. Bake it for 25-30 minutes. This keeps the moisture in. After that, remove the foil. Bake for another 15-20 minutes. You want the cheese to be bubbly and the top to be golden brown. Check for doneness by poking the casserole with a fork. If the veggies are tender, it’s ready. Let the casserole sit for about 5 minutes before serving. This helps the layers set. Garnish with extra fresh basil leaves for a pop of color. For the full recipe, refer to the complete guide. To get a creamy texture in your Tomato Zucchini Casserole, use fresh ingredients. Fresh zucchini and tomatoes work best. Layer the veggies tightly for a nice hold. You can add a splash of cream or milk if you like it extra creamy. For a crunchy topping, use breadcrumbs. Mix the breadcrumbs with olive oil and some grated cheese. This will give you a lovely golden crust. Bake it until the top is crisp and brown. Don’t skip this step; it makes the dish more fun! Adding herbs or spices can take your casserole to the next level. Fresh basil is a must; it brings out the best in tomatoes. You can also try thyme and rosemary for added depth. Suggested seasonings include oregano and red pepper flakes for some heat. Just a pinch of these will make your dish pop. Taste as you go, and adjust to your liking. Pair this casserole with a fresh salad or garlic bread. A light side dish balances the rich flavors. You can also serve it with grilled chicken for protein. For presentation, serve it in the baking dish for a rustic look. Garnish with extra fresh basil on top. This adds color and makes it inviting. Enjoy every bite of this savory dish! {{image_2}} To make the tomato zucchini casserole dairy-free, you can swap the mozzarella cheese for a plant-based cheese. Look for brands that melt well, so you still get that gooey texture. You can also use a mix of nutritional yeast and cashew cream for a creamy finish. For the shredded mozzarella, try these substitutes: - Vegan mozzarella cheese - Silken tofu blended with nutritional yeast - Homemade cashew cheese If you want to add some protein, you can include cooked chicken or ground beef. Simply brown the meat before adding it to the layers of the casserole. If you prefer vegetarian options, consider these: - Canned chickpeas - Cooked lentils - Quinoa These options will enhance the dish and keep it filling and satisfying. You can change the vegetables based on the season. In spring, try adding asparagus or peas. In the fall, use butternut squash or pumpkin. You can mix in these vegetables for a new twist each time you make the dish. Adapting for seasonal ingredients keeps the casserole fresh and exciting. Feel free to include whatever is ripe in your garden or local market. To store leftovers, let the casserole cool first. Cut it into portions for easy serving. Place each portion in an airtight container. This helps keep the flavors fresh. Use glass or plastic containers with tight lids. They protect the dish from air and moisture. To freeze the casserole, let it cool completely. Wrap it tightly in plastic wrap. Then, cover it with aluminum foil for extra protection. This prevents freezer burn. When you are ready to eat, thaw it overnight in the fridge. Reheat it in the oven at 350°F (175°C) until warm. You can also microwave individual portions, stirring occasionally. For optimal freshness, eat refrigerated leftovers within three days. The casserole lasts about two months in the freezer. Check for signs of spoilage before eating. Look for strange smells or discoloration. If it seems off, it’s best to throw it away. This ensures you enjoy a tasty and safe dish. Yes, you can use frozen zucchini. However, it may change the texture. Frozen zucchini has more water than fresh. It can make the casserole watery if not drained well. To avoid this, thaw the zucchini first and remove excess moisture. This keeps your casserole from becoming soggy. To adjust cooking time, you can scale down the recipe. If you make a smaller casserole, check it sooner. Start with 20 minutes of baking time. Keep an eye on the cheese. It should be bubbly and golden. Use a knife to test if the veggies are soft. Yes, you can prepare this casserole ahead of time. Assemble the layers but do not bake it yet. Cover it tightly with foil and store it in the fridge. You can bake it up to two days later. Just add a few extra minutes to the baking time if it’s cold. This makes busy nights easier and still tastes great. For the full recipe, check out the section above. This blog post covers a delicious zucchini casserole. We talked about key ingredients, nutritional information, and possible substitutions. I shared step-by-step instructions for preparation, layering, and baking. Plus, I included tips for perfect texture and flavor. We explored variations like vegan options and extra protein. Lastly, I discussed storage and answered common questions. Enjoy making and sharing this casserole. It’s tasty and easy!

Tomato Zucchini Casserole Savory and Satisfying Meal

Looking for a dish that’s both savory and satisfying? Tomato Zucchini Casserole might be your new favorite meal! With fresh

To make the perfect cheesy baked zucchini casserole, gather these ingredients: - 4 medium zucchinis, sliced thinly - 1 cup shredded mozzarella cheese - 1 cup shredded cheddar cheese - 1 cup ricotta cheese - 1 large egg - 1/2 cup grated Parmesan cheese - 1 teaspoon garlic powder - 1 teaspoon Italian seasoning - Salt and pepper to taste - 1 cup breadcrumbs (for topping) - 2 tablespoons olive oil - Fresh basil leaves for garnish (optional) When measuring, use a dry measuring cup for solids and a liquid cup for liquids. If you want to change things up, you can swap cheeses. Try gouda or feta for a twist. You can replace ricotta with cottage cheese for a lighter feel. For a vegan option, use plant-based cheeses or tofu instead of the egg and ricotta. I always prefer fresh zucchini for this dish. Fresh zucchini has a better taste and texture. It cooks well and adds moisture. Frozen zucchini can work, but it may release more water. If you use frozen, thaw and drain it well before cooking. Fresh ingredients often lead to a tastier casserole, making it a better choice for this cheesy delight. To start, wash the zucchinis well. I prefer medium zucchinis for this dish. Slice them thinly. This helps them cook evenly. After slicing, sprinkle salt and pepper on them. Let them sit for about 10 minutes. This will help draw out extra moisture. Once they sit, pat them dry with a paper towel. This step is key to keep the casserole from being too watery. Next, grab a large mixing bowl. In it, combine the ricotta cheese, egg, garlic powder, and Italian seasoning. Mix well until smooth. Then, add half of the shredded mozzarella and cheddar cheeses. Stir until everything blends together nicely. Add a pinch more salt and pepper. This cheese mixture is the heart of your casserole. It gives flavor and creaminess. Now, it's time to build your casserole. Take a greased baking dish. Layer half of the zucchini slices at the bottom. Spread the cheese mixture evenly over the zucchini. Add the rest of the zucchini slices on top. Sprinkle the remaining mozzarella and cheddar cheeses over everything. In a small bowl, mix breadcrumbs with olive oil. This adds crunch. Spread the breadcrumb mix over the cheese layer. Finally, top with grated Parmesan cheese for an extra kick. Cover the dish with aluminum foil. Bake it in a preheated oven at 375°F (190°C) for 25 minutes. After that, remove the foil and bake for another 15 to 20 minutes. Look for golden, bubbly cheese. The zucchini should be tender. Let the casserole sit for about 5 minutes before slicing. If you like, garnish with fresh basil leaves. Enjoy your cheesy baked zucchini casserole! For the full recipe, check out the details above. To keep your casserole from being soggy, draining moisture is key. First, slice the zucchinis thinly. Sprinkle them with salt and let them sit for about 10 minutes. This step draws out moisture. After that, pat them dry with a paper towel. This simple method helps keep the casserole creamy and not watery. While I love the classic mozzarella and cheddar mix, you can swap in different cheeses. Try using gouda for a smoky taste or feta for a tangy twist. You can even use vegan cheese if you want a dairy-free option. Mixing up the cheeses adds new flavors and makes the dish your own. Cooking at the right temperature is crucial for a perfect casserole. I recommend preheating the oven to 375°F (190°C). Bake covered for 25 minutes, then uncover and bake for another 15-20 minutes. This method gives you gooey cheese and tender zucchini. Keep an eye on it to avoid overcooking. Enjoy every cheesy bite! Check the [Full Recipe] for complete details on making this delicious dish. {{image_2}} You can add ground meat to your casserole for a boost of flavor. Ground beef, turkey, or chicken works well. Just cook the meat in a skillet until it’s brown. Mix the cooked meat with the cheese mixture before layering. This adds protein and makes the dish heartier. You can also season the meat with spices. This adds extra taste and depth to your casserole. For a vegan version, swap out the cheese and egg. Use plant-based cheese made from nuts or soy. Silken tofu can replace the egg. Blend the tofu until smooth and mix it with your spices. This keeps the creamy texture while making it dairy-free. Nutritional yeast can add a cheesy flavor. It’s a great way to enjoy the casserole without animal products. Feel free to add other veggies based on the season. Spinach, bell peppers, or mushrooms mix well with zucchini. Chop them up and sauté before layering them in the dish. This not only adds color but also boosts nutrition. Using seasonal veggies keeps the meal fresh and exciting. You can even try omitting zucchini for a new twist. Each variation brings its own unique flavor to the casserole. For the full recipe, check the details provided. After enjoying your cheesy baked zucchini casserole, let it cool down to room temperature. Then, place leftovers in an airtight container. Store in the fridge for up to three days. If you have a large portion, divide it into smaller servings. This makes it easy to grab for meals later. To reheat, I recommend using the oven for the best flavor. Preheat it to 350°F (175°C). Place the casserole in an oven-safe dish. Cover it with foil to keep moisture in. Heat for about 20 minutes or until warm. You can also use a microwave, but it may not retain the same texture. If using the microwave, heat in short bursts, stirring in between. If you want to save some for later, freezing is a great option. After cooling, wrap the casserole tightly in plastic wrap. Then, place it in a freezer-safe bag. It can last for up to three months in the freezer. When you're ready to eat, transfer it to the fridge to thaw overnight. Reheat as mentioned above for the best results. Enjoy your cheesy comfort dish anytime! Yes, you can make this casserole ahead of time. Prepare it the day before. Simply follow the recipe until you cover it with foil. Store it in the fridge overnight. When you are ready to bake, just add a few extra minutes to the cooking time. This method helps the flavors blend nicely, making it even tastier. This cheesy baked zucchini casserole pairs well with many side dishes. Here are a few great options: - A simple green salad with a light vinaigrette - Garlic bread for a crunchy side - Roasted vegetables for a healthy touch - A bowl of soup, like tomato or minestrone These sides add variety and complement the flavors of the casserole. Yes, you can use yellow squash instead of zucchini. Both have a similar texture and taste. Yellow squash adds a nice color to the dish. Just slice it the same way as zucchini. You can mix both for more flavor and a colorful plate. Enjoy experimenting with this fun twist! If you want to try making this dish, check out the Full Recipe for all the details. This blog post covered how to make a tasty Cheesy Baked Zucchini Casserole. We looked at ingredients, including fresh and frozen options. I shared step-by-step instructions, tips for the best results, and fun variations. You can even store leftovers easily. My final thought is that this dish can fit any diet and taste. Enjoy creating your perfect casserole!

Cheesy Baked Zucchini Casserole Simple Comfort Dish

Craving comfort food that’s easy yet delicious? You’re in the right place! My Cheesy Baked Zucchini Casserole is a simple

To make a tasty peach cobbler, you need simple ingredients. Here’s what you will gather: - 4 cups fresh peaches, peeled and sliced - 1 teaspoon lemon juice - 1 cup granulated sugar, divided - 1 teaspoon ground cinnamon - 1 cup all-purpose flour - 1 tablespoon baking powder - 1/2 teaspoon salt - 1 cup milk - 1/2 cup unsalted butter, melted - Optional serving suggestions: vanilla ice cream and mint leaves These ingredients work together to create a sweet and warm dessert. Fresh peaches bring a lovely flavor, while sugar and cinnamon add sweetness and spice. The flour and baking powder help the cobbler rise, making it light and fluffy. When you slice the peaches, make sure they are ripe. This will give your cobbler the best taste. The lemon juice adds a bit of tang, which balances the sweetness. When you mix all these key items, you create a dish that feels like a hug on a plate. For the full recipe, you can follow the steps in the next section. Enjoy the process, and don’t forget to make it your own! 1. Preheat your oven to 350°F (175°C). This step is key for even baking. 2. In a bowl, mix 4 cups of sliced peaches with 1 teaspoon of lemon juice, 1/2 cup of sugar, and 1 teaspoon of ground cinnamon. Toss gently until the peaches are coated. Set this mixture aside. 3. In another bowl, whisk together 1 cup of all-purpose flour, 1 tablespoon of baking powder, 1/2 teaspoon of salt, and the other 1/2 cup of sugar. This blend will give our cobbler its nice texture. 4. Gradually add 1 cup of milk and 1/2 cup of melted butter to the dry mix. Stir until just combined. It's okay if there are a few lumps. 1. Pour the batter into a greased 9x13-inch baking dish. Spread it evenly across the bottom. 2. Spoon the peach mixture over the batter. Make sure to pour in all the juices. Do not stir. The batter will rise during baking. 1. Bake the cobbler in your preheated oven for 45-50 minutes. Look for a golden brown top. Use a toothpick to check; it should come out clean. 2. Once baked, let the cobbler cool for a few minutes before serving. This helps the flavors settle. 3. For a special touch, serve warm with a scoop of vanilla ice cream on top. Enjoy your homemade peach cobbler! You can find the full recipe within this section. Choosing the right peaches is key for a great cobbler. Look for ripe, juicy peaches. They should feel firm but yield slightly when pressed. Avoid overripe or hard peaches, as they won't cook well. Fresh peaches work best, but you can also use frozen if fresh ones aren't available. Common mistakes often happen when mixing. Be careful not to overmix your batter. A few lumps are okay; they help create a light texture. Also, remember not to stir the peach mixture into the batter. Let the peaches sit on top; the batter will rise around them while baking. Serve your peach cobbler warm for the best taste. A scoop of vanilla ice cream on top adds a creamy touch. The cold ice cream pairs perfectly with the warm cobbler, creating a delightful contrast. For extra flair, you can add garnishes. A sprinkle of cinnamon or a few mint leaves can brighten the dish. These small touches can enhance flavor and make your cobbler look even more inviting. Enjoy your delicious creation! For the full recipe, check out the Sweet Southern Peach Cobbler 🥧 section above. {{image_2}} You can switch up the fruit in this peach cobbler. Try using berries, apples, or cherries. Each fruit brings a new taste. For example, blueberries add a sweet-tart flavor. Apples give a crisp bite. You can mix fruits too! Seasons also change what fruits you can use. In summer, peaches are ripe and sweet. In fall, apples and pears shine. You can adapt this recipe to match what is fresh. It makes the cobbler fun and unique every time. If you need gluten-free options, you can swap the all-purpose flour. Use a gluten-free flour blend instead. This works well and keeps the cobbler tasty. For sugar substitutes, try using honey or maple syrup. They add a different flavor and sweetness. Just remember to adjust the amount to match your taste. You can still enjoy this dessert without refined sugar. With these changes, everyone can enjoy a slice of homemade peach cobbler. For the full recipe, check out the link provided. To keep your peach cobbler fresh, store it in an airtight container. This helps avoid drying out. You can also cover it tightly with plastic wrap or foil. The best place to store it is in the fridge. For the best flavor and texture, eat leftovers within 3 to 4 days. After this, the cobbler may lose its taste and texture. To reheat peach cobbler, preheat your oven to 350°F (175°C). Place the cobbler in a baking dish. Cover it loosely with foil to prevent burning. Heat for about 20 minutes or until warm. If you want a quick method, you can use the microwave. Heat a slice for 30 seconds. Check if it's warm enough. If not, heat for another 15 seconds. To keep the texture nice, avoid overheating. This way, the topping stays crisp and the filling remains soft. Enjoy your warm peach cobbler with a scoop of vanilla ice cream from the Full Recipe. Can I use canned peaches? Yes, you can use canned peaches. Just drain them well. Canned peaches are sweeter, so cut back on sugar. This keeps the cobbler balanced and tasty. How do I know when the cobbler is done? Check for a golden brown top. A toothpick inserted in the center should come out clean. If it’s wet, bake a little longer. Keep an eye on it for the best results. Can I make it ahead of time? Yes, you can make it ahead. Prepare the cobbler, then cover it and chill. Bake it when you are ready to serve. This saves time and makes it easy for gatherings. What to do if the cobbler is too runny? If your cobbler is too runny, let it cool. This helps it set. You can also bake it a bit longer. If you prefer a thicker filling, use cornstarch next time. Mix it with the peaches before baking. For the full recipe, check out the details above. This blog post covered everything you need to make a tasty peach cobbler. You learned about the key ingredients, step-by-step instructions, and helpful tips for success. We even explored fun variations and storage tips. Now, you have the tools to create a perfect peach cobbler. Enjoy baking and sharing this delicious treat with others. Remember, the best cobbler comes from fresh ingredients and a little practice. Get started!

Easy Homemade Peach Cobbler Simple and Sweet Treat

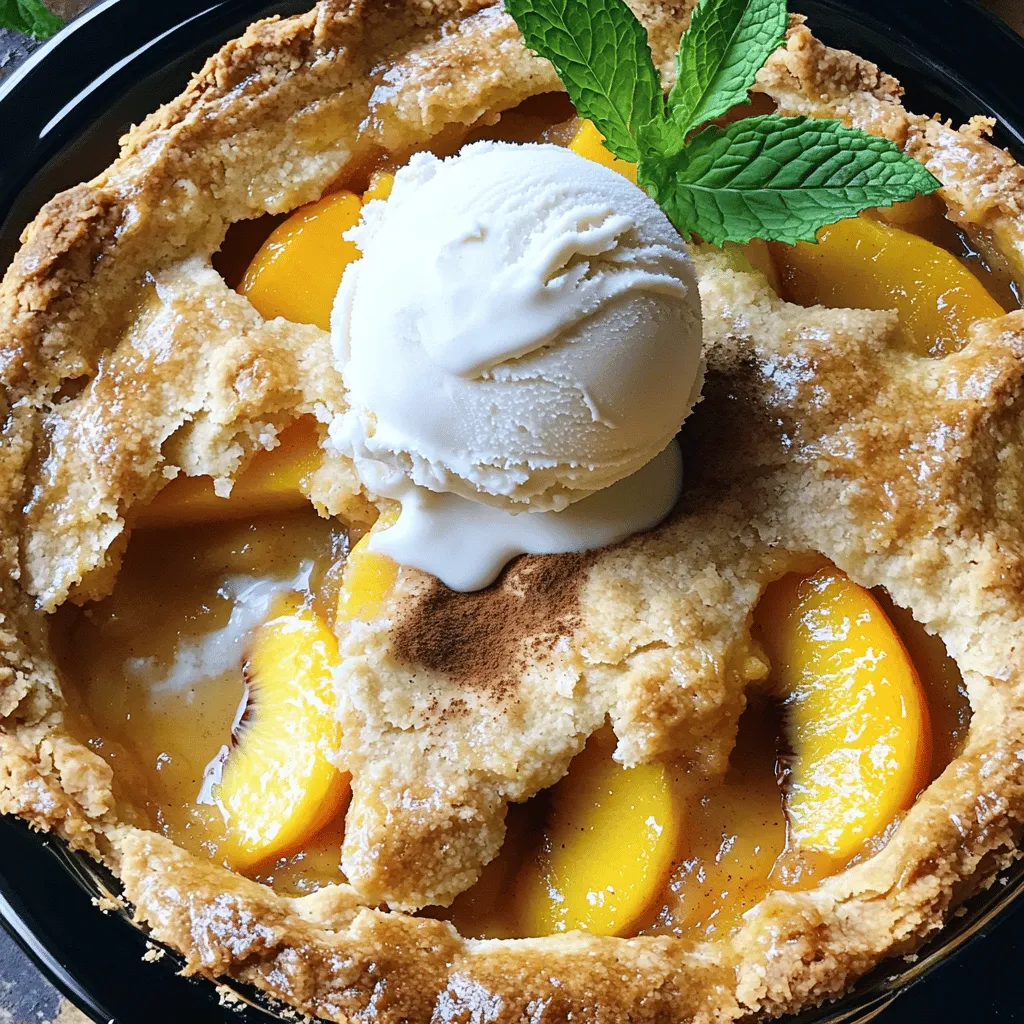
Craving a sweet and easy dessert? You’ve come to the right place! This Easy Homemade Peach Cobbler is a simple

To make the best Southern fried okra, you need fresh ingredients. Here’s what you will use: - 1 pound fresh okra, sliced into 1/2-inch rounds - 1 cup buttermilk - 1 cup cornmeal - 1/2 cup all-purpose flour - 1 teaspoon paprika - 1/2 teaspoon garlic powder - 1/2 teaspoon onion powder - 1/2 teaspoon cayenne pepper (or to taste) - 1 teaspoon salt - 1/2 teaspoon black pepper - Vegetable oil for frying Each of these ingredients adds taste and texture. The buttermilk helps the coating stick. The cornmeal gives that great crunch. You will need some basic kitchen tools to fry your okra: - Large bowl for soaking - Mixing bowl for dry ingredients - Large, deep skillet or pot - Slotted spoon for frying - Paper towels for draining - Cooking thermometer to check oil temperature Using the right tools makes the process easier. A thermometer helps you fry the okra at the right temperature for crispiness. Feel free to play with flavors! Here are some optional seasonings you might like: - 1 teaspoon cayenne for extra heat - 1 tablespoon lemon zest for brightness - 1/2 cup grated cheese for added richness These additions can help you customize your dish. You can adjust spices to suit your taste. For the full recipe, check out the section above. This will guide you to a delicious experience! Start by soaking the sliced okra in buttermilk. This step helps the coating stick better. Let it soak for at least 30 minutes. The buttermilk also adds a nice flavor. In a bowl, mix cornmeal, all-purpose flour, and spices. Use paprika, garlic powder, onion powder, cayenne, salt, and black pepper. Stir the mixture well. This coating gives the okra its crunch. Heat about 2 inches of vegetable oil in a deep skillet. The oil needs to be hot, around 350°F (175°C). Once ready, take the okra from the buttermilk. Shake off any extra liquid. Next, toss the okra in the coating mix until it’s fully covered. Carefully add the coated okra to the hot oil in small batches. Fry for 3-4 minutes until golden brown and crispy. Use a slotted spoon to take the okra out. Place it on a paper towel-lined plate to drain excess oil. Repeat this with the rest of the okra. Serve hot and enjoy your crispy Southern fried okra! For the complete details, check out the Full Recipe. To make your okra crispy, start by soaking it in buttermilk. This step adds flavor and helps the coating stick. After soaking, coat the okra well in the dry mix. Use a mix of cornmeal and flour for the best crunch. The right oil temperature is key too. Aim for 350°F (175°C). When the oil is hot enough, the okra will fry to a golden brown. A common mistake is overcrowding the pan. This can lower the oil temperature and make the okra soggy. Fry in small batches for a crispier result. Another mistake is not shaking off excess coating. Too much flour can make the okra clump together. Lastly, don’t skip the buttermilk soak. It’s essential for flavor and texture. Use oils with high smoke points for frying. Good choices are vegetable oil, canola oil, or peanut oil. These oils can handle high heat without burning. Olive oil is not ideal because it has a lower smoke point. Choose the right oil to get that perfect crunch. For the best results, stick to oils meant for frying. For the full recipe, check out the Crispy Southern Fried Okra . {{image_2}} You can make a gluten-free version of Southern fried okra easily. Just swap the all-purpose flour with a gluten-free blend. Many brands offer great options in stores. Look for one that works well for frying. The taste will stay delicious, and your guests will enjoy it just as much. For a lighter take, try making Southern fried okra in an air fryer. This method cuts down on oil and still gives you a crispy bite. After soaking the okra in buttermilk, coat it as usual. Then, lay the coated pieces in a single layer in the air fryer basket. Set the fryer to 400°F (200°C) and cook for about 10-12 minutes. Shake the basket halfway through for even cooking. You’ll love the crunch with less fat! If you like some heat, add extra cayenne pepper to your coating. A teaspoon or more can spice things up. You can also mix in some chili powder or hot sauce into the buttermilk. This will give your okra an extra kick. The spicy flavor pairs well with the crispy texture for a tasty treat. Enjoy experimenting with the heat level that you like! Check out the Full Recipe for all the details on making this snack. After you enjoy your Southern fried okra, store any leftovers in an airtight container. Let the okra cool to room temperature before sealing it up. Proper storage helps keep it fresh and tasty. You can keep the leftovers in the fridge for up to three days. When you're ready to eat the leftovers, you want them crispy again. You can reheat the okra in a few ways: - Oven: Preheat your oven to 350°F (175°C). Spread the okra on a baking sheet. Bake for about 10-15 minutes until hot and crispy. - Air Fryer: If you have an air fryer, it's great for reheating. Set it to 350°F (175°C) and cook for about 5-7 minutes. - Stovetop: Heat a little oil in a skillet over medium heat. Add the okra and cook for a few minutes until warm and crispy. Freezing Southern fried okra is a great way to save it for later. Here's how to do it: 1. Allow the fried okra to cool completely. 2. Spread the okra in a single layer on a baking sheet. This prevents it from sticking together. 3. Freeze for about 1-2 hours until firm. 4. Transfer the frozen okra to a freezer bag or airtight container. Be sure to remove as much air as possible to avoid freezer burn. You can freeze the okra for up to three months. When you're ready to enjoy it, just reheat as mentioned earlier. This way, you can savor that crispy goodness anytime! For the full recipe, check out the details above. The best way to cut okra is to slice it into 1/2-inch rounds. This size helps it fry evenly. You want each piece to be small enough to get crispy. If the pieces are too big, they may not cook well. Yes, you can prep Southern Fried Okra ahead of time. Soak the okra in buttermilk. Then coat it with the cornmeal mix. You can store this in the fridge for a few hours. Just fry them when you are ready to serve. This helps keep them crispy. Southern Fried Okra pairs well with many dishes. You can serve it with fried chicken or catfish. It also goes great with a fresh salad. Try it with a spicy dipping sauce for extra flavor. Southern Fried Okra makes a perfect side for any meal. For the complete cooking process, check the Full Recipe. We explored the key ingredients, cooking steps, and tips for Southern Fried Okra. We looked at optional seasonings and tricks for perfect crispiness. I shared storage options and variants like gluten-free and air fryer recipes. Try different flavors and methods to make it your own. Enjoying Southern Fried Okra can be fun and tasty. With practice, you’ll serve up delicious meals everyone loves. Dive in and savor your creations!

Southern Fried Okra Crispy and Flavorful Delight

If you crave a crispy and flavorful snack, Southern Fried Okra is your answer. This dish delivers a perfect crunch

- Eggs and Vegetables - 6 large eggs - 1 cup spinach, chopped - 1/2 cup bell peppers (red, yellow, and green), diced - 1/2 cup cherry tomatoes, halved - 1/4 cup red onion, finely chopped - 1/2 cup zucchini, diced - Seasonings and Cheese - 1/4 cup feta cheese, crumbled - Salt and pepper to taste - Fresh herbs (basil or parsley), for garnish - Cooking Oil - 2 tablespoons olive oil To make a great frittata, you need fresh, colorful ingredients. Eggs are the base, and they provide protein. Then, choose your favorite vegetables. Spinach, bell peppers, and zucchini work well together. Cherry tomatoes add sweetness and a pop of color. Feta cheese adds a nice tang. It pairs well with the veggies. Season with salt and pepper to bring out the flavors. Fresh herbs like basil or parsley make a lovely garnish. Using olive oil helps cook the veggies and adds healthy fats. Make sure to use quality oil for the best taste. Each ingredient plays a role in creating a tasty and healthy veggie frittata. For the full recipe, check out the detailed steps I provided. - Preheat the Oven Start by preheating your oven to 375°F (190°C). This makes sure your frittata cooks evenly. - Sauté the Vegetables In a large skillet, heat 2 tablespoons of olive oil over medium heat. Add 1/4 cup of finely chopped red onion and 1/2 cup of diced bell peppers. Sauté for about 3-4 minutes until they become tender. Next, toss in 1/2 cup of diced zucchini and cook for another 2-3 minutes. Then, add 1 cup of chopped spinach and 1/2 cup of halved cherry tomatoes. Cook until the spinach wilts, which takes about 2 minutes. Don’t forget to season with salt and pepper to taste. - Combine Egg Mixture In a large bowl, whisk together 6 large eggs until well mixed. Fold in the sautéed vegetables and 1/4 cup of crumbled feta cheese. This mix adds flavor and creaminess. - Cook on the Stove Pour the egg and veggie mix back into the skillet. Cook it on the stove for 2-3 minutes. This lets the edges set before baking. - Transfer to Oven Carefully transfer the skillet to your preheated oven. This step cooks the frittata all the way through. - Baking Time Bake for 15-20 minutes. The frittata is done when the eggs are fully set and the top is slightly golden. - How to Slice and Serve Once out of the oven, let it cool for a few minutes. Then, slice it into wedges. Each slice is a perfect serving. - Garnishing Ideas Garnish your frittata with fresh herbs like basil or parsley. This adds color and a fresh flavor. Enjoy your colorful veggie power frittata! For the complete recipe, check out the Full Recipe. To cook a great frittata, watch the heat. Cook on medium to avoid burning. Stir the veggies gently to mix flavors. This keeps them tender. Adjust your cooking time based on the size of your skillet. Larger pans need less time. Always check if the eggs are set before serving. Fresh veggies make a big difference. They add color and taste. Look for bright colors and firm textures. Seasonal vegetables taste best. For eggs, choose high-quality options. Organic or free-range eggs often taste richer. Check the sell-by date to ensure freshness. Serve your frittata with a simple salad. A light green salad pairs well. You can add a squeeze of lemon for flavor. For drinks, try fresh juice or herbal tea. A light wine can also work nicely. Enjoy your frittata warm for the best taste. For the full recipe, check out the details above. {{image_2}} You can make your frittata exciting by adding different veggies. Broccoli, mushrooms, and asparagus work great. They add flavor and color. You can also use seasonal veggies. Try squash in the fall or fresh peas in spring. This keeps your meals fresh and fun. Feta cheese is tasty, but there are other options. You can use goat cheese for a creamy twist. If you like sharp flavors, try cheddar or gouda. If you want a dairy-free option, go for almond or cashew cheese. They melt well and taste great, too. Spices can really boost your frittata. Try paprika or cumin for warmth. If you want more kick, add red pepper flakes. For extra protein, add ham or turkey. These meats make the dish filling and hearty. Just make sure to chop them small so they mix well. You can experiment with flavors to find what you love. This is your frittata, so make it your own! For the full recipe, check the section above. After cooking your veggie frittata, let it cool for a few minutes. This helps prevent steam from making it soggy. To store, cut the frittata into wedges. Place the wedges in an airtight container. You can also wrap each wedge in plastic wrap. This keeps them fresh and tasty. How Long They Last When stored in the fridge, your frittata can last up to 3 days. Make sure your fridge is at the right temperature, around 40°F (4°C). If you want to store frittata for longer, freezing is a great option. Cut the frittata into single servings. Wrap each piece tightly in plastic wrap. Then, place them in a freezer-safe bag or container. This way, you can grab a quick meal later. Reheating Instructions To reheat, take a portion out of the freezer. Let it thaw in the fridge overnight. If you're in a hurry, you can microwave it straight from the freezer. Heat on medium power for 2-3 minutes, checking to see if it's warm all the way through. Enjoy your healthy veggie frittata whenever you want! You can cook a frittata both on the stovetop or in the oven. Each method has its perks. The stovetop gives you control. You can watch it cook and avoid burning. Start on medium heat. Cook until the edges set. Then transfer it to the oven to finish cooking. This helps the top brown nicely. The oven method cooks it evenly. Preheat your oven to 375°F (190°C). Pour the egg mixture into an oven-safe skillet. Bake it until the eggs are set and golden. This method is great for larger frittatas. It helps them cook all the way through. Yes, you can make a frittata ahead of time. This dish is perfect for meal prep. You can store it in the fridge for up to 4 days. Just slice it into wedges for easy serving. To reheat, place slices in the microwave or oven. Heat until warm. Enjoy it hot or cold. It makes a quick breakfast or lunch. You can also pack it for picnics. Yes, this recipe is gluten-free. All the ingredients used are naturally gluten-free. Eggs, veggies, and cheese do not contain gluten. This makes it a safe choice for those with gluten sensitivities. Always check labels on processed foods. Some cheeses may have additives. Stick to fresh, whole ingredients for the best results. You can follow the full recipe for a delicious meal. Enjoy this healthy veggie frittata any time! This blog post covered everything you need to know about making a frittata. We explored the essential ingredients, from eggs to fresh vegetables. I laid out clear step-by-step instructions for preparation and baking. You learned tips for perfecting your frittata and how to store leftovers effectively. I also shared variations and ideas for serving. Enjoy creating your own tasty frittata. Use fresh ingredients and try different flavors. Cooking can be fun and rewarding.

Healthy Veggie Frittata Simple and Tasty Recipe

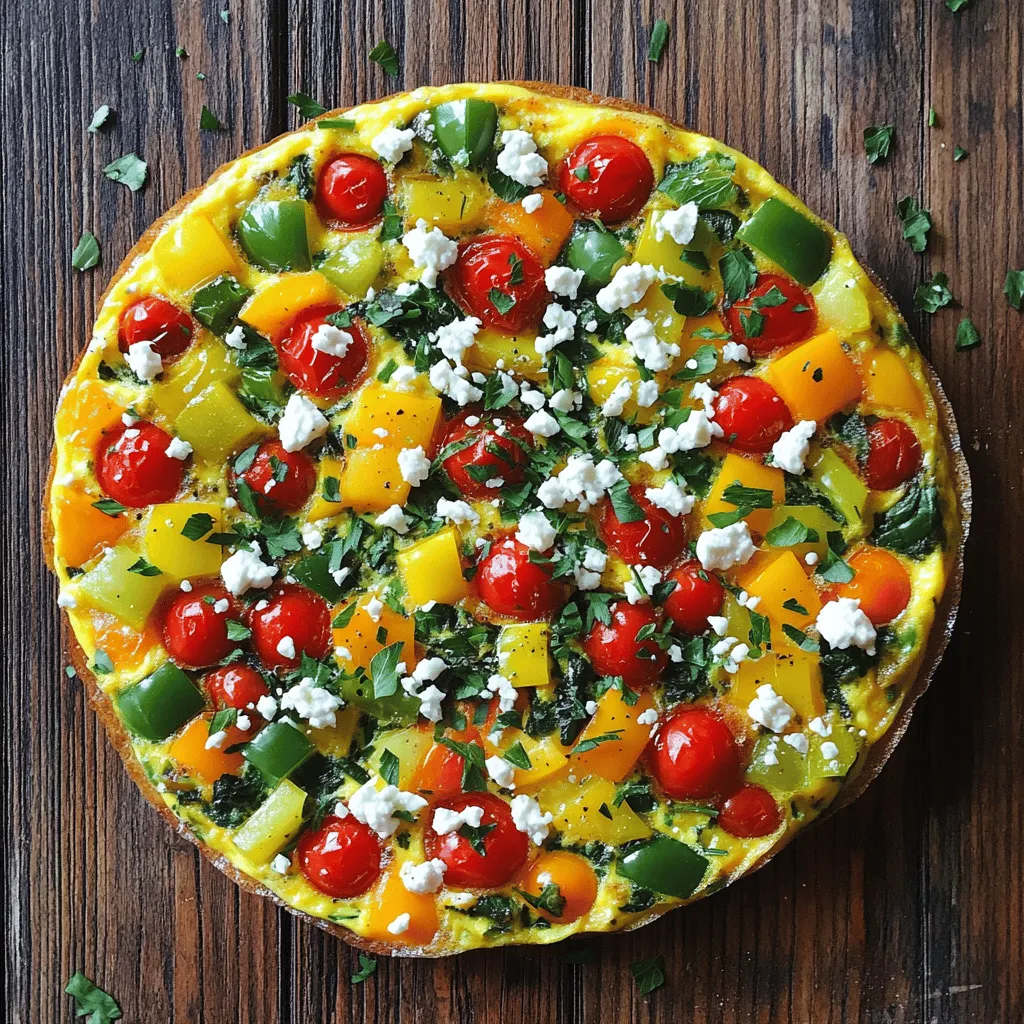
Looking for a delicious way to pack veggies into your meal? This Healthy Veggie Frittata is a game changer! With

To create a delightful orange fig jam, you need: - 2 cups fresh figs, stems removed and quartered - 1 cup fresh orange juice (about 3-4 medium oranges) - Zest of 1 orange - 1 cup granulated sugar - 1 tablespoon fresh lemon juice - 1/2 teaspoon ground cinnamon - 1/4 teaspoon nutmeg - A pinch of salt These ingredients work together to make a sweet and tangy spread. Fresh figs give the jam a rich texture. The orange juice adds brightness and flavor. Sugar balances the sweetness, while spices like cinnamon and nutmeg bring warmth. You can play with flavors by adding ingredients like: - Chopped nuts for crunch - Vanilla extract for a sweet note - Ginger for a spicy kick Experimenting with these optional ingredients can make your jam unique. Each addition creates a new flavor profile. To make your jam, gather these tools: - Large saucepan - Wooden spoon for stirring - Measuring cups and spoons - Sterilized jars for storing Having the right tools makes the process smooth. A large saucepan helps in cooking the mixture evenly. Measuring cups ensure you get the right amounts. Sterilized jars keep your jam fresh longer. For the full recipe, check out the Zesty Orange Fig Jam ! First, gather your fresh figs and oranges. Rinse the figs well and cut off their stems. Then, quarter the figs into small pieces. This helps them cook down better. Next, juice your oranges. You will need about three to four medium-sized oranges for one cup of juice. Don’t forget to zest one orange; this zest adds a bright flavor to the jam. In a large saucepan, mix the quartered figs, fresh orange juice, and orange zest. Turn the heat to medium and cook for 5-7 minutes. Stir occasionally until the figs soften and release their juices. Once the figs are soft, add the sugar, lemon juice, ground cinnamon, nutmeg, and a pinch of salt. Increase the heat to medium-high and bring the mix to a boil. Keep stirring to prevent the mixture from sticking. Once it boils, lower the heat to low. Let it simmer for 30-40 minutes until it thickens to a jam-like texture. To check if the jam is ready, take a spoonful and place it on a cold plate. Let it sit for a minute. Run your finger through it; if it holds its shape, it’s done. Remove the saucepan from the heat and let the jam cool for about 10-15 minutes. After that, transfer the jam into sterilized jars. Seal the jars tightly and allow them to cool completely before putting them in the fridge. This process helps preserve the flavor and freshness of your Orange Fig Jam. For the full recipe, check out the earlier section. Store your orange fig jam in clean, sterilized jars. Make sure the lids seal well. Keep the jars in a cool, dark place. After opening, store the jam in the fridge. It lasts for about two weeks once opened. This jam shines on toast or bagels. Try it on pancakes or waffles, too! It pairs well with cheese, especially creamy varieties. Use it as a topping for yogurt or oatmeal for added flavor. You can even spread it on cakes for a sweet twist. To keep the jam fresh, avoid overcooking it. Stir gently to prevent burning. Always use ripe figs and oranges for the best taste. Adding a pinch of salt enhances sweetness and flavor. For a thicker jam, let it simmer longer, but watch closely! For more detailed steps, check the Full Recipe. {{image_2}} You can change the taste of your orange fig jam by adding spices. Cinnamon adds warmth and a sweet note. Nutmeg brings a lovely earthiness. You might also try cardamom for a unique twist. A hint of ginger gives a little zing. When adding spices, start small. Taste as you go to find your perfect mix. Orange is great, but don't stop there! You can swap oranges for lemons or limes. Grapefruit adds a tangy twist that many love. Blood oranges offer a beautiful color and flavor. Each fruit brings its own charm. Feel free to mix and match citrus fruits for fun flavors. Experimenting will keep your jam exciting! If you want a healthier jam, try using honey or maple syrup. These natural sweeteners add depth and unique flavors. Agave nectar is another option to consider. Just remember, each sweetener might change the jam's texture a bit. Adjust the amount based on your taste preference. Your health goals can guide your choices here. To keep your orange fig jam fresh, use clean, sterilized jars. Fill each jar, leaving some space at the top. Seal them tightly with lids. Store the jars in a cool, dark place. If you open a jar, put it in the fridge. This way, the jam stays tasty for longer. Homemade orange fig jam lasts about one year when stored properly. Once you open a jar, it should be eaten within three weeks. Use it on toast, pancakes, or as a topping for yogurt. It also works well in desserts and as a glaze for meats. You can freeze orange fig jam for up to a year. Pour cooled jam into freezer-safe containers, leaving space for expansion. Seal the containers tightly and label them with the date. When you want to use it, thaw the jam in the fridge overnight. This keeps the flavor fresh and delicious. If you're ready to dive into making this jam, check out the Full Recipe for details. You can use dried figs, but fresh figs are better. Fresh figs have more juice and flavor. Dried figs are sweeter and denser. If you use them, soak them in warm water for 30 minutes first. This helps them soften and rehydrate. To check if your jam is set, use the cold plate test. Place a spoonful of jam on a cold plate. Let it sit for a minute. Then, run your finger through it. If the line holds, the jam is ready. If it runs back together, cook it a bit longer. Orange Fig Jam is great on toast or biscuits. You can also use it in yogurt or ice cream. It works well in dressings or marinades too. Try it with cheese for a nice snack. It’s tasty in baked goods like tarts or cakes. You can find Orange Fig Jam at specialty stores or farmer's markets. Many online shops also sell it. Look for local brands for fresh flavors. Check larger grocery stores in the jam aisle too. Figs are high in fiber, which aids digestion. They help keep your heart healthy. Oranges are packed with vitamin C, boosting your immune system. Together, they offer antioxidants that reduce inflammation. Enjoying this jam gives you a tasty treat with health perks! Making orange fig jam is simple and fun. First, we discussed the main and optional ingredients, plus tools you'll need. Then, I guided you through preparing the figs and oranges, cooking, and canning. You learned tips for storage, serving ideas, and how to enhance flavors. Lastly, we explored variations, storage methods, and answered common questions. Now, you can make fragrant orange fig jam at home. Enjoy this sweet treat on toast or as a gift. With practice, your jam will taste even better. Happy jamming!

Orange Fig Jam Delightful and Easy Homemade Recipe

If you’re looking for a tasty treat that’s easy to make, you’ve found the right place! In this guide, I’ll

- Ripe peaches - Fresh lemon juice - Granulated sugar - Cold water - Fresh mint leaves - Lemon slices - Ice cubes To make the best peach lemonade, you need ripe peaches. Look for ones that feel soft when you gently press them. The juicier the peach, the better your drink will taste. Fresh lemon juice adds a bright flavor. You can squeeze the lemons yourself or use store-bought juice. Granulated sugar helps balance the tartness. Adjust the amount to suit your taste. You also need cold water to mix everything. This keeps your lemonade refreshing and cool. Fresh mint leaves give a nice touch of flavor. Lemon slices can be used for decoration. Finally, ice cubes make your drink icy and perfect for hot days. - Sweeteners alternatives - Flavor enhancements If you want to switch up the sweetness, try honey or agave syrup. These can be good choices for a different taste. You might also add herbs like basil or rosemary for extra flavor. These can make your drink unique and fun. - Caloric information - Vitamins and minerals This peach lemonade recipe serves six people. Each serving has about 150 calories. It is rich in vitamin C from the fresh lemons and peaches. This vitamin helps keep your immune system strong. You also get dietary fiber from the peaches. It helps with digestion and keeps you feeling full longer. 1. Start with ripe peaches. Rinse them well. 2. Cut the peaches in half and remove the pit. 3. Slice the peaches into smaller pieces. 4. In a blender, combine the sliced peaches with 1 cup of cold water. 5. Blend the mixture until it is smooth and creamy. 6. Use a fine-mesh sieve to strain the puree into a large pitcher. 7. Press the puree with a spoon to get all the juice out. 1. Pour the peach puree into the same pitcher. 2. Add 1 cup of fresh lemon juice. 3. Stir in 1 cup of granulated sugar. 4. Mix until the sugar fully dissolves in the juice. 5. Add the remaining 3 cups of cold water to the pitcher. 6. Stir well to combine all the flavors. 7. Taste the lemonade. Adjust sweetness by adding more sugar or water. 1. Place the pitcher in the refrigerator. Chill for at least 30 minutes. 2. Chilling is important for flavor and refreshment. 3. When ready to serve, fill glasses with ice cubes. 4. Pour the chilled lemonade over the ice. 5. Garnish each glass with a fresh mint leaf and a slice of lemon. Choosing the best peaches is key to great flavor. Look for ripe, soft peaches. They should smell sweet and fruity. Avoid hard or bruised peaches. The ideal sweetness comes from adjusting sugar. Start with one cup of sugar, then taste. Add more sugar if you want a sweeter drink. You can enhance flavor with flavored syrups. A splash of vanilla syrup can add warmth. Try adding a little ginger syrup for zest. Incorporating herbs like basil or mint can also boost taste. Muddle the herbs before mixing to release their oils. Serving with garnishes makes your drink pop. Add a sprig of mint to each glass. Lemon slices add a bright touch. Use decorative glasses to elevate your lemonade. Clear glasses show off the beautiful color, making it more inviting. For the full recipe, check the details above. {{image_2}} To make your peach lemonade fizzy, swap some water for club soda. This simple change adds a fun sparkle. You can also mix in flavored sodas like ginger ale or lemon-lime soda. The extra fizz enhances the summer vibe. Combining tea with your lemonade creates a refreshing twist. Brew a strong tea and let it cool before mixing it in. Black tea works well for a classic taste. Green tea adds a light flavor, while herbal teas like peach or mint can boost the peachy notes. Want a fun drink for adults? Try making peach lemonade cocktails! Add vodka or rum for a fruity kick. You can also mix in sparkling wine for a bubbly treat. These drinks are perfect for summer parties or relaxing on the porch. To keep your peach lemonade fresh, store it in a glass pitcher. Glass helps keep the taste intact. You can also use a food-safe plastic container. Make sure it has a tight lid. This prevents any strong smells from your fridge from mixing in. Place your lemonade in the fridge right after making it. It needs to stay cold to taste its best. If you have leftovers, drink them within a few days. Homemade peach lemonade lasts about 5 to 7 days in the fridge. After that, it may not taste good anymore. Signs your lemonade has gone bad include a strange smell or change in color. If you see mold, throw it away. Always trust your senses when checking for freshness. You can freeze peach lemonade for later use. Pour it into ice cube trays or freezer-safe bags. Leave some space at the top of the container. The lemonade will expand as it freezes. When you're ready to enjoy it, take it out and let it thaw in the fridge overnight. You can also thaw it at room temperature for a few hours. Just remember, frozen lemonade will lose some of its fresh taste, but it still makes a great treat! How can I adjust the sweetness? You can adjust the sweetness by adding more or less sugar. Taste the lemonade before serving. If it’s too sweet, add a bit of cold water. If it’s not sweet enough, mix in more sugar. Remember, the sugar will dissolve better when you stir it in well. Can I use frozen peaches? Yes, you can use frozen peaches! Just make sure they are thawed first. This makes blending easy and gives your lemonade a nice peach flavor. You may want to reduce the ice since the peaches will chill the drink. What can I substitute for sugar? You can use honey, agave syrup, or stevia as a sugar substitute. Each option will change the flavor a bit. Start with less and add more if needed. Always taste as you go to find the right balance for your peach lemonade. Are there health benefits to drinking peach lemonade? Yes! Peach lemonade is a great source of vitamins. Peaches are high in vitamin C, which helps your immune system. Lemon juice is also good for digestion and can boost your mood. So, enjoy this drink as a tasty way to support your health! Does lemonade help with hydration? Definitely! Lemonade is mostly water, which helps keep you hydrated. The natural sugars from peaches can give you a little energy boost, too. Drinking peach lemonade on a hot day is a fun way to stay refreshed. What foods pair well with peach lemonade? Peach lemonade goes well with grilled chicken or salads. It also pairs nicely with light snacks like cheese and crackers. You can serve it at summer picnics or barbecues. The fruity flavors complement many summer dishes. Can this recipe be made in large batches? Yes, you can make a large batch of peach lemonade. Just multiply the ingredients by how many servings you need. This is great for parties or family gatherings. Make it a few hours ahead and chill it in the fridge to let the flavors mix. Don't forget to serve it over ice for a cool treat! For the full recipe, check out the Peachy Lemonade Refreshment section. Enjoy your summer drink! In this article, we explored how to make a delightful peach lemonade. We discussed the essential ingredients like ripe peaches and fresh lemon juice. I shared step-by-step instructions for preparing and mixing your drink. Tips for enhancing flavor and presentation were also included. Enjoy making your own variations, such as sparkling versions or cocktails. Homemade peach lemonade is easy to enjoy fresh or store. Remember, the key is to adjust sweetness to your taste. Savor this refreshing drink all summer long!

Peach Lemonade Refreshing Summer Beverage Recipe

Looking for a refreshing drink to cool off this summer? You’re in the right place! In this blog post, I’ll

To make these no-bake chocolate oat bars, you need some basic ingredients. Here’s what you will need: - 2 cups rolled oats - 1 cup almond butter (or peanut butter) - 1/2 cup honey or maple syrup - 1/2 cup unsweetened cocoa powder - 1/4 cup chia seeds - 1/4 teaspoon salt - 1/2 teaspoon vanilla extract - 1/2 cup dark chocolate chips (dairy-free if preferred) These ingredients work together to create a rich, chewy treat. The oats give the bars structure. The nut butter adds creaminess. Honey or maple syrup sweetens without refined sugar. Cocoa powder brings the chocolatey flavor, while chia seeds boost nutrition. You can add a few extra ingredients to enhance the taste: - 1/4 cup shredded coconut (optional) - A pinch of cinnamon or nutmeg for warmth - A scoop of protein powder for an extra boost Adding shredded coconut gives a nice texture. The spices can elevate the taste. Protein powder makes these bars a great post-workout snack! If you need to make substitutions, you have options: - Use sunflower seed butter instead of almond or peanut butter for a nut-free version. - Swap honey for agave syrup if you want a vegan option. - Replace dark chocolate chips with dried fruit for a different flavor. These substitutions keep the bars tasty while meeting your needs. Feel free to get creative! Making No Bake Chocolate Oat Bars is simple. You need basic tools and ingredients. Start with a large bowl and a baking dish. Gather your ingredients first. This helps keep the process smooth and fun. 1. Mix the Dry Ingredients: In a large mixing bowl, combine 2 cups of rolled oats, 1/2 cup of unsweetened cocoa powder, and 1/4 teaspoon of salt. This forms the base of your bars. 2. Add the Wet Ingredients: Next, add 1 cup of almond butter and 1/2 cup of honey or maple syrup. This mix adds sweetness and creaminess. 3. Incorporate Chia Seeds: Toss in 1/4 cup of chia seeds. They give added texture and nutrition. Mix everything until you get a sticky mixture. If it’s hard to mix, use your hands. 4. Flavor It Up: Add 1/2 teaspoon of vanilla extract. Stir well to blend all flavors together. 5. Add Chocolate Chips: Fold in 1/2 cup of dark chocolate chips. If you like, you can also add 1/4 cup of shredded coconut for extra flavor. 6. Prepare the Baking Dish: Line an 8x8-inch square baking dish with parchment paper. Leave some overhang. This makes it easy to lift the bars out later. 7. Press the Mixture: Transfer the mixture into the lined dish. Use a spatula to press it down firmly. Make sure it’s even across the top. 8. Chill the Bars: Refrigerate for at least 2 hours. This helps the bars firm up. They need to be set before cutting. 9. Slice and Serve: Once firm, lift the bars out using the parchment paper. Cut into squares or rectangles. Enjoy your tasty treat! For a visual guide, you can create photos of each step. Take pictures of mixing the ingredients, pressing the mixture into the dish, and the final product. This will help others see how easy it is to make these bars. For the full recipe, refer back to the ingredients and steps mentioned above. To make the best no bake chocolate oat bars, follow these steps: - Use fresh ingredients. Fresh oats and nut butter make a big difference. - Mix well. Ensure that all ingredients blend into a sticky mixture. This helps the bars hold together. - Press firmly. When you put the mixture in the dish, press down hard. This creates a solid base. - Chill thoroughly. Let the bars set in the fridge for at least two hours. This helps them firm up nicely. You can make these bars your own! Here are some ideas: - Try different nut butters. Almond, cashew, or even sunflower seed butter work well. - Add spices. A pinch of cinnamon or nutmeg can add warmth and depth. - Incorporate fruits. Dried fruits like cranberries or apricots add a chewy texture. - Change the chocolate. Use white chocolate chips or even carob chips for a twist. Be aware of these common pitfalls: - Not measuring ingredients. Use measuring cups for accuracy. This ensures the right texture. - Skipping the chilling step. If you don’t chill long enough, the bars may crumble. - Overmixing. Too much mixing can make the bars dry. Mix just until combined. - Using old ingredients. Old oats or nut butter can affect the taste. Always check freshness. By following these tips and tricks, you will create delicious, satisfying no bake chocolate oat bars. For the full recipe, check out the detailed instructions above. {{image_2}} You can switch up the nut or seed in your bars. Instead of almond butter, try cashew or sunflower seed butter. These choices add unique flavors. Feel free to mix in nuts like walnuts or pecans. They add crunch and taste. You can also try different seeds. Pumpkin seeds or hemp seeds work well. They boost nutrition and taste great. Add fun flavors to your bars! For a minty twist, mix in mint extract. You can also use peanut butter instead of almond butter. This gives a rich flavor that many love. Want something fruity? Add dried fruits like cranberries or raisins. They add sweetness and a chewy texture. You can even stir in spices like cinnamon for warmth. Making these bars vegan is easy. Just use maple syrup instead of honey. Also, check your chocolate chips. Use dairy-free ones for a vegan option. For gluten-free bars, ensure your oats are certified gluten-free. These small changes keep the flavor while meeting dietary needs. Enjoy these bars no matter your diet! You can store your No Bake Chocolate Oat Bars in an airtight container. Keep them in the fridge to maintain their firmness. This way, they stay fresh and tasty for a longer time. If you have leftovers, do not worry! These bars hold up well when stored correctly. To freeze these delicious bars, wrap each one in plastic wrap. Place them in a freezer-safe bag or container. When you want to enjoy one, take it out and let it thaw in the fridge for about an hour. You can also eat them straight from the freezer for a cool treat. Just remember, they might be a bit harder to bite into when frozen! These bars will last about one week in the fridge. For the best taste, eat them within this time frame. If frozen, they can last up to three months. Always check for any changes in smell or texture before eating. Enjoy your treats fresh for the best flavor! For the full recipe, refer to the main section of this article. Yes, you can use other nut butters. Options include cashew, sunflower, or even soy nut butter. Each nut butter adds a unique flavor and texture. For example, cashew butter makes the bars creamy. Sunflower butter is great for nut-free diets. Just choose one that you enjoy. These bars need about two hours to set in the refrigerator. This time helps them become firm enough to cut. If you want them to set faster, place them in the freezer for 30 minutes. You can check them after that. They should be firm to the touch. Yes, you can make these bars without chia seeds. The chia seeds help with texture and add some nutrition. If you skip them, try adding more oats. You can also use ground flaxseed as a replacement. This keeps the bars thick and tasty. You now have a complete guide to making no-bake chocolate oat bars. We covered the key ingredients, step-by-step instructions, and helpful tips. You learned how to customize the bars and store them properly. Remember, any nut butter works, and you can skip chia seeds if needed. These bars are fun to make and delicious to eat. Enjoy experimenting with flavors and adjustments to fit your taste. Happy snacking!

No Bake Chocolate Oat Bars Easy and Tasty Treat

Looking for a simple treat? I’ve got you covered with No Bake Chocolate Oat Bars! These bars are quick to

You need these simple items to make fudgy chocolate zucchini brownies: - 1 cup grated zucchini (about 1 medium zucchini) - 1/2 cup unsweetened cocoa powder - 1/2 cup whole wheat flour (or all-purpose flour) - 1/2 cup granulated sugar - 1/4 cup brown sugar, packed - 1/2 cup vegetable oil (or melted coconut oil) - 2 large eggs - 1 teaspoon pure vanilla extract - 1/2 teaspoon baking powder - 1/2 teaspoon baking soda - 1/4 teaspoon salt - 1/2 cup semi-sweet chocolate chips - Optional: 1/4 cup chopped nuts (walnuts or pecans) If you don't have an ingredient, you can easily swap it. For flour, use gluten-free flour. Instead of vegetable oil, try melted coconut oil for a different taste. You can replace granulated sugar with coconut sugar for a lower glycemic index. If you prefer a nut-free option, leave out the chopped nuts. Lastly, if you want less sugar, cut the amounts in half. When picking zucchini, look for these signs of freshness: - Firm and smooth skin - Bright green color without blemishes - Small to medium size (larger ones can be watery) Store zucchini in a cool place or the fridge. Use it within a week for the best flavor. Grate it right before you bake for the best texture in your brownies. For the full recipe, visit the [Full Recipe]. Start by preheating your oven to 350°F (175°C). This step is key to baking perfect brownies. While the oven heats, grab an 8x8-inch baking pan. You can grease it lightly with oil or use parchment paper. The parchment helps you lift the brownies out easily after baking. In a large bowl, add the grated zucchini, vegetable oil, granulated sugar, brown sugar, eggs, and vanilla extract. Mix these until they blend well. It's important to ensure the zucchini is evenly mixed, as it adds moisture and flavor. The zucchini helps keep the brownies fudgy. Take another bowl and sift together the cocoa powder, flour, baking powder, baking soda, and salt. Sifting helps to remove lumps and ensures even mixing. Once sifted, gradually add the dry mix to the wet ingredients. Stir gently until just combined. Avoid overmixing; this keeps your brownies soft and rich. Pour the brownie batter into your prepared pan. Use a spatula to spread it evenly. Then, place the pan in the oven. Bake for 25-30 minutes. To check if they are done, insert a toothpick into the center. It should come out mostly clean with a few crumbs clinging to it. Let the brownies cool in the pan for about 10 minutes, then transfer them to a wire rack. This cooling step helps them set and makes slicing easier. For the full recipe, check the section above. Enjoy baking these delicious fudgy brownies! To get that rich, fudgy texture, keep a few tips in mind. First, don’t overmix the batter. Stir just until the dry ingredients are combined. Overmixing can make the brownies dry. Use high-quality cocoa powder for a deeper chocolate flavor. The right amount of zucchini keeps the brownies moist. Grate the zucchini finely and press out excess water before adding it to the batter. This step helps your brownies stay soft and fudgy. If you want even more fudginess, swap out some flour for more cocoa powder. Store your brownies in an airtight container at room temperature. They will stay fresh for up to three days. For longer storage, place them in the fridge, where they can last for about a week. If you want to enjoy them warm, reheat in the microwave for about 10-15 seconds. This gentle warming will bring back that gooey texture. Be careful not to overheat them, or they may dry out. You can easily tweak the flavor and texture of these brownies. To make them richer, add a touch more oil or butter. If you prefer a cake-like brownie, increase the flour slightly. For a unique taste, try mixing in spices like cinnamon or espresso powder. You can also add different mix-ins, such as nuts or dried fruit, to change the texture. Remember, the key to a great brownie is balance. Adjust only one element at a time, so you can see how it affects the final treat. For the full recipe, check out the earlier sections. {{image_2}} You can make these brownies gluten-free. Just swap the whole wheat flour with a gluten-free blend. Many brands work well, but make sure to check the label for baking. This simple switch keeps the brownies rich and fudgy. You won't miss the gluten at all! Want to make your brownies stand out? Add a splash of flavor! You can mix in a teaspoon of peppermint extract for a minty twist. If you love coffee, add a tablespoon of instant espresso. These flavors enhance the chocolate taste. They bring a fun surprise to each bite, too. If you need to skip nuts, that's easy. Just leave them out of the recipe. You can replace nuts with extra chocolate chips for added sweetness. This keeps the brownies rich and gooey. Plus, it makes them safe for kids or those with nut allergies. Enjoy the same great taste without worry! For a full recipe with all the steps, check out the [Full Recipe]. To keep your fudgy chocolate zucchini brownies fresh, store them in an airtight container. This helps prevent them from drying out. You can store them at room temperature for up to three days. If you want to keep them longer, the fridge works well too. Just make sure they are sealed tight. Cold brownies can last about a week in the fridge. Freezing is a great option if you want to save some brownies for later. First, let the brownies cool completely. Then, cut them into squares. Wrap each square in plastic wrap. After that, place all the wrapped brownies in a freezer-safe bag. This way, they stay fresh for up to three months. When you're ready to enjoy them, thaw them in the fridge overnight or at room temperature for a few hours. The shelf life of fudgy chocolate zucchini brownies depends on how you store them. If kept at room temperature, they last about three days. In the fridge, they last up to a week. If you freeze them, they can stay fresh for three months. Always check for signs of spoilage before eating. If they look or smell off, it's best to throw them away. Yes, you can use frozen zucchini. Just thaw it first and drain extra water. Frozen zucchini works well since it still retains its flavor. This option saves time and reduces waste if you have leftover zucchini. To cut down on sweetness, reduce the sugar by 1/4 cup. You could also use unsweetened applesauce or mashed banana as a substitute for some sugar. Both options add moisture and keep the brownies fudgy. I love serving these brownies warm with vanilla ice cream or whipped cream. You can sprinkle some cocoa powder or powdered sugar on top for a nice touch. If you want more flavor, add a drizzle of chocolate sauce. These brownies have some healthy aspects. They include whole wheat flour and zucchini, which adds fiber and nutrients. However, they do contain sugar and oil, so enjoy them in moderation. You can also add nuts for extra protein and good fats. To check if your brownies are done, insert a toothpick in the center. If it comes out mostly clean with a few crumbs, they are ready. If the toothpick is wet, bake for a few more minutes. Keep an eye on them to avoid overbaking. For the Full Recipe, you can refer back to the ingredients and instructions provided above. In summary, we've explored creating fudgy chocolate zucchini brownies. We covered ingredients, including substitutions, and shared tips for fresher zucchini. The step-by-step instructions guide you through the baking process, ensuring perfect results. We discussed helpful storage methods and answered common questions. Whether you're making them gluten-free or adding unique flavors, these brownies can be adapted to your taste. Enjoy these treats fresh or stored for later. Happy baking!

Fudgy Chocolate Zucchini Brownies Easy and Rich Treat

If you love rich, fudgy brownies, you’re in for a treat! My Fudgy Chocolate Zucchini Brownies steal the show with

- Fresh peaches - All-purpose flour - Granulated sugar - Unsalted butter - Buttermilk The main star of this recipe is fresh peaches. They add natural sweetness and a juicy texture. Use ripe peaches for the best flavor. I recommend peeling and dicing them before adding to the batter. Next, all-purpose flour gives structure to the muffins. It helps them rise and stay fluffy. Granulated sugar sweetens the muffins and balances the tartness of the peaches. Unsalted butter brings richness and moisture. Melting it first helps blend it into the batter smoothly. Buttermilk adds tanginess and makes the muffins tender. If you don’t have buttermilk, you can make a simple version by adding a tablespoon of vinegar to regular milk. - Chopped walnuts - Ground cinnamon Chopped walnuts are a great add-in. They add crunch and a nutty flavor. Ground cinnamon brings warmth to the muffins. It pairs perfectly with the sweet peaches. - Alternative for buttermilk: You can use regular milk with vinegar. - Gluten-free flour options: Use a gluten-free all-purpose blend. - Sugar alternatives: Try coconut sugar or honey for a different sweetness. These swaps help you customize the recipe. You can still enjoy peach muffins even with dietary restrictions. 1. First, preheat your oven to 375°F (190°C). This helps the muffins bake evenly. 2. Line a muffin tin with paper liners. You can also grease it with cooking spray if you prefer. 3. In a large bowl, mix the dry ingredients. Combine 2 cups of flour, 1 cup of sugar, 1 tablespoon of baking powder, 1/2 teaspoon of baking soda, 1/2 teaspoon of salt, and 1/2 teaspoon of ground cinnamon. Whisk them until they blend well. 1. In a separate bowl, mix 1/2 cup of melted butter and 1 cup of buttermilk. Make sure the butter is slightly cooled. 2. Next, whisk in 1 large egg and 1 teaspoon of vanilla extract. This gives the muffins a nice flavor. 1. Pour the wet mixture into the dry ingredients. Use a spatula to fold them together gently. The batter should be lumpy, so don’t overmix. 2. Now, gently fold in 1 cup of diced peaches and 1/4 cup of chopped walnuts if you want. The peaches add a sweet touch. 3. Fill each muffin cup about 2/3 full with the batter. This allows space for the muffins to rise. 4. Bake for 18-22 minutes. Check if they are done by inserting a toothpick. It should come out clean. 5. Let the muffins cool in the pan for 5 minutes before moving them to a wire rack. You can find the full recipe in the earlier sections. To ensure your peach muffins rise perfectly, use fresh baking powder. Check the date on the package. Mix dry ingredients well to combine evenly. This helps the muffins rise without any lumps. Also, remember to not overmix the batter. Stir just until combined. A few lumps are okay. Overmixing can lead to dense muffins. Peach muffins are best served warm. Dust them with powdered sugar for a lovely touch. You can also drizzle honey on top for extra sweetness. Pair your muffins with a glass of cold milk or a cup of tea. This makes for a delightful breakfast or snack option. To know when your muffins are done, look for a golden-brown top. Insert a toothpick in the center. If it comes out clean, they are ready. Let the muffins cool in the pan for about 5 minutes. After that, transfer them to a wire rack. Store in an airtight container for up to three days. For longer storage, freeze them for later use. Enjoy your sweet summer peach muffins anytime! {{image_2}} You can add fun flavors to your peach muffins. A great way is to include spices like nutmeg. Nutmeg adds warmth and depth. Just a pinch brightens the peach flavor. You can also mix in other fruits. Blueberries pair nicely with peaches. They add a sweet and tangy twist. This combination makes every bite a treat. Do you want vegan peach muffins? You can easily swap ingredients. Use flaxseed meal instead of eggs. Replace buttermilk with almond milk and vinegar. This keeps the muffins moist and tasty. If you are cutting sugar, try a low-sugar version. Use ripe bananas or applesauce instead of sugar. Both options keep the muffins sweet and healthy. Want to take your muffins up a notch? Try adding chocolate chips. They melt and create a gooey surprise in each bite. Coconut flakes are another fun mix-in. They bring a tropical twist and chewiness. You can mix these into the batter or sprinkle them on top. Both options make your peach muffins even more exciting. For the full recipe, check out the details above. To store peach muffins at room temperature, place them in an airtight container. This keeps them fresh for about two days. If you want to keep them longer, freeze them. Wrap each muffin in plastic wrap, then place them in a freezer bag. They can last up to three months in the freezer. To reheat muffins, the best method is the oven. Preheat it to 350°F (175°C) and place muffins on a baking sheet. Heat for about 10 minutes. This method keeps them nice and warm. To maintain moisture, you can add a small dish of water in the oven. This creates steam and helps prevent drying out. Peach muffins can last up to two days at room temperature. If stored in the fridge, they can last about a week. Signs of spoilage include a dry texture or a sour smell. If you see mold, throw them away immediately. Enjoy your peach muffins fresh for the best taste! For the Full Recipe, check out the detailed instructions. Can I use canned peaches instead of fresh? Yes, you can use canned peaches in a pinch. Make sure to drain them well. Fresh peaches provide a brighter flavor and better texture. If you choose canned, use less sugar in your batter since they are often sweetened. How do I make the muffins extra moist? To keep your muffins moist, use ripe peaches. They add natural juice. Also, buttermilk helps create a tender crumb. Don't overmix your batter. This keeps air in, making the muffins fluffy and soft. Why are my muffins dense? Dense muffins often come from overmixing or using too much flour. Use a light hand when mixing. Spoon flour into your measuring cup instead of scooping. This avoids adding too much flour to your batter. What to do if my muffins overflow? If your muffins overflow, you may have overfilled the cups. Always fill them about two-thirds full for the best rise. To fix it next time, use a smaller scoop or pour less batter into each cup. Can I make mini peach muffins? Absolutely! Just adjust the baking time. Mini muffins usually bake for 10 to 15 minutes. Keep an eye on them to avoid overbaking. They make great snacks or treats for kids. What’s the best way to store leftover batter? To store leftover batter, cover it and place it in the fridge. Use it within 24 hours. After that, the baking powder loses its power, and muffins won’t rise well. For more ideas, check the Full Recipe. Peach muffins are a delightful treat, and making them is simple. We explored main ingredients like peaches, flour, and buttermilk. Optional add-ins can boost flavor and texture. I shared baking tips to ensure perfect rises and served up fun variations, including vegan options. Lastly, I covered storage methods to keep your muffins fresh. With these steps, you can enjoy tasty muffins anytime. Enjoy baking and share with friends!

Peach Muffins Flavorful and Easy Baking Recipe

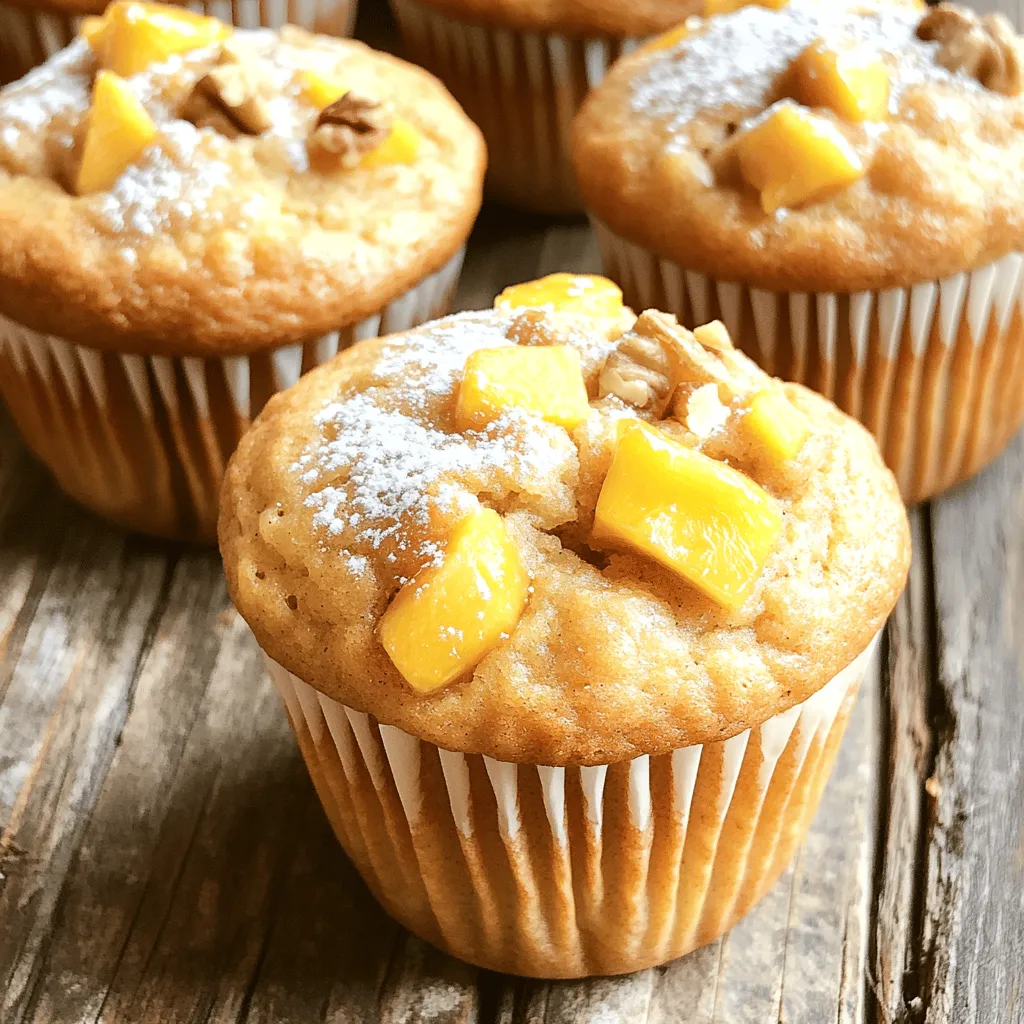
Are you ready to bake something delicious and simple? These peach muffins burst with flavor and bring the taste of

Older posts
Newer posts
← Previous Page1 … Page17 Page18 Page19 … Page64 Next →

dsad

© 2025 Foodish Talk • Built with GeneratePress

Our Policies

  • Copyright Policy
  • Cookie Policy
  • GDPR Policy
  • Privacy Policy
  • Disclaimer
  • Terms Of Use

More Information

  • Home
  • About
  • Contact
  • Appetizers
  • Dessert
  • Dinner
  • Drinks
©2025, Foodish Talk About Back To Top