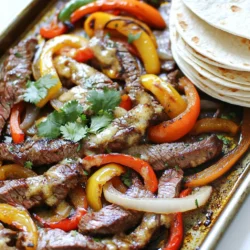
Get ready to elevate your dinner plans with my Sheet-Pan Garlic Butter Steak Fajitas! This tasty dish is packed with bold flavors and comes together in just one pan. You’ll love how easy it is to prep and cook. In this post, I’ll share the secret ingredients, quick instructions, and tips for making your fajitas shine. Let’s dive into the delicious world of garlic butter and juicy steak!
Ingredients
Main Ingredients
– 1 pound flank steak, sliced into thin strips
– 2 bell peppers (any color), sliced
– 1 medium onion, sliced
– 4 tablespoons unsalted butter
– 4 cloves garlic, minced
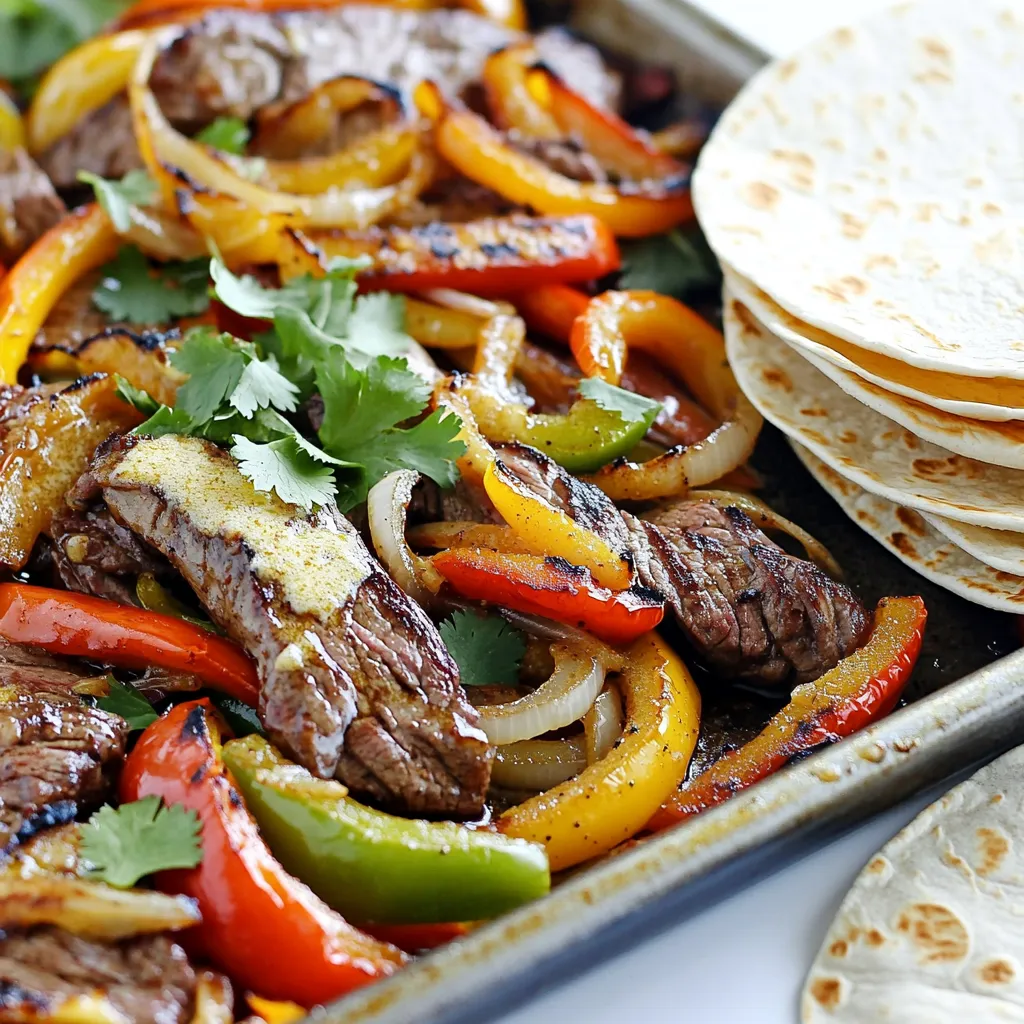
The flank steak is the star here. It is tender and full of flavor. Slice it thinly against the grain for the best texture. Any color bell peppers work well. They add sweetness and color to your dish. The onion adds a nice bite and caramelizes beautifully in the oven. The garlic butter mixture, made with butter and minced garlic, gives these fajitas their rich, savory base.
Seasonings and Garnish
– 2 teaspoons chili powder
– 1 teaspoon cumin
– 1 teaspoon smoked paprika
– 1 lime, juiced
– Salt and pepper to taste
– Fresh cilantro, chopped (for garnish)
Chili powder and cumin bring warmth and depth to your fajitas. Smoked paprika adds a hint of smokiness, enhancing the overall flavor. Fresh lime juice brightens the dish and balances the richness of the butter. Don’t forget to season well with salt and pepper. Finally, a sprinkle of fresh cilantro adds a burst of freshness, tying everything together.
Step-by-Step Instructions
Prepping the Oven and Ingredients
First, I preheat the oven to 425°F (220°C). This high heat helps to give a great sear to the steak and veggies. I line a baking sheet with parchment paper for easy cleanup. Next, I melt 4 tablespoons of unsalted butter in a small saucepan over medium heat. Once the butter is melted, I add 4 cloves of minced garlic. I sauté it for about 1 minute until fragrant. Then, I take it off the heat and stir in the lime juice, chili powder, cumin, smoked paprika, salt, and pepper. This garlic butter mix is key to adding bold flavor to the fajitas.
Assembling the Fajitas
Now, I spread the sliced flank steak, bell peppers, and onion on the lined baking sheet. I make sure to arrange them evenly. This helps everything cook at the same rate. Next, I drizzle the garlic butter mixture over the steak and veggies. I toss everything together with my hands until the steak and vegetables are well-coated. This step ensures each bite bursts with flavor.
Cooking the Fajitas
I place the baking sheet in the preheated oven and bake for 15-20 minutes. Halfway through, I stir the mixture to cook evenly. I check for doneness by ensuring the steak is cooked through and the veggies are tender. After baking, I let everything rest for a few minutes. This resting time helps the juices settle in. Now, the fajitas are ready to serve!
Tips & Tricks
Perfecting the Garlic Butter Flavor
– Garlic sautéing tips: Always use fresh garlic for the best taste. I recommend mincing it finely. This helps release more flavor. Sauté it in melted butter for just one minute. You want it fragrant but not burnt. If it burns, it turns bitter.
– Adjusting spice levels: Start with the base amounts of chili powder, cumin, and smoked paprika. If you prefer more heat, add more chili powder. For a milder taste, cut back on the spices. Always taste as you go. This way, you can find your perfect balance.
Achieving Tender Steak
– Choosing the right cut of steak: Flank steak works great for fajitas. It’s tender and holds flavor well. You can also use skirt steak if you like. Just make sure it’s fresh and high quality for the best results.
– Tips for slicing the meat: Slice the steak against the grain. This means cutting it crosswise rather than with the grain. This makes the pieces more tender and easier to chew. Aim for thin strips for better flavor absorption.
Enhancing the Presentation
– Plating suggestions: Use a large platter for serving. Spread the fajitas out in a colorful way. This makes the dish look more inviting. Add some tortillas on the side for easy access.
– Garnishing ideas: Fresh cilantro adds a nice touch. Sprinkle it on top before serving. You can also add lime wedges for an extra burst of flavor. These simple touches make your dish pop and taste even better.
Variations
Different Protein Options
For a fun twist, swap the flank steak for chicken. Chicken fajitas are just as tasty. Use sliced chicken breast or thighs. Cook them the same way as the steak. You can also try shrimp for a lighter option. Shrimp cooks fast, so keep an eye on them.
If you want a vegetarian version, try using portobello mushrooms or tofu. Both soak up flavor well. You can use the same garlic butter mix. Add more veggies like zucchini or corn for extra color and taste.
Flavor Twist Ideas
To boost the flavor, think about adding citrus. A splash of orange juice works wonders. It adds a sweet and tangy note. You can also mix in lime zest for a fresh kick.
Experiment with different spices to change the taste. Try adding oregano or coriander for a new depth. Smoked paprika gives a nice smoky flavor. A pinch of cayenne can add heat if you like spice.
Serving Suggestions
Serve your fajitas with sides for a complete meal. Rice or beans go well with fajitas. They fill you up and balance the flavors. A fresh salad can add crunch and brightness.
Don’t forget the toppings! Sour cream, guacamole, or salsa make great additions. Fresh cilantro or diced tomatoes add color and freshness. Build your own fajita bar for a fun dining experience.
Storage Info
Refrigeration Tips
To store leftovers, let the fajitas cool first. Place them in an airtight container. You can keep them in the fridge for up to three days. For best results, separate the meat from the veggies. This keeps everything fresh and tasty.
When reheating, use a pan over medium heat. Add a splash of water or broth to keep the moisture. Stir gently until heated through. You can also microwave them if you prefer. Just cover the dish to avoid drying out.
Freezing Instructions
To freeze fajitas for later, ensure they are completely cool first. Place them in freezer-safe bags, removing as much air as possible. You can freeze them for up to two months.
For thawing, move them to the fridge overnight. This allows them to defrost safely. To reheat frozen fajitas, use a pan over medium heat. Add a little olive oil or water to help them warm up evenly. Stir often until heated through.
FAQs
How do I make steak fajitas more tender?
To make steak fajitas tender, you can start with a marinade. A simple mix of lime juice, olive oil, and spices works well. Let the steak sit in this mix for about 30 minutes. The acid in the lime helps break down tough fibers.
When cooking, avoid overcooking the steak. Cook until it reaches medium rare for the best texture. Also, let the meat rest after cooking. This helps the juices stay inside, keeping the steak juicy and tender.
Can I use a different type of steak?
Yes, you can use different cuts. Skirt steak is a great option. It has a similar flavor and cooks well. Other cuts to consider are sirloin or ribeye. These cuts are also tender and flavorful.
If you choose a tougher cut, like chuck, marinating becomes even more important. It helps improve tenderness and flavor.
How can I make this meal prep-friendly?
To make this meal prep-friendly, chop your veggies and slice the steak in advance. Store them in airtight containers in the fridge. You can even make the garlic butter mix ahead of time. Just keep it in the fridge until you are ready to cook.
When it comes to storing, keep leftovers in a sealed container in the fridge. They should last for 3-4 days. For reheating, warm them in a pan over low heat or in the microwave. This keeps the flavors fresh and tasty.
You learned how to make tasty steak fajitas using flank steak, peppers, and some great spices. I shared tips for cooking tender steak and enhancing the flavor with garlic butter. You can also switch up the protein or add citrus for a twist. Remember to store leftovers safely for later. Enjoy your fajitas with fresh cilantro and your favorite sides. With these steps, you’ll impress everyone around the table. Happy cooking!