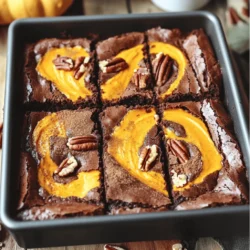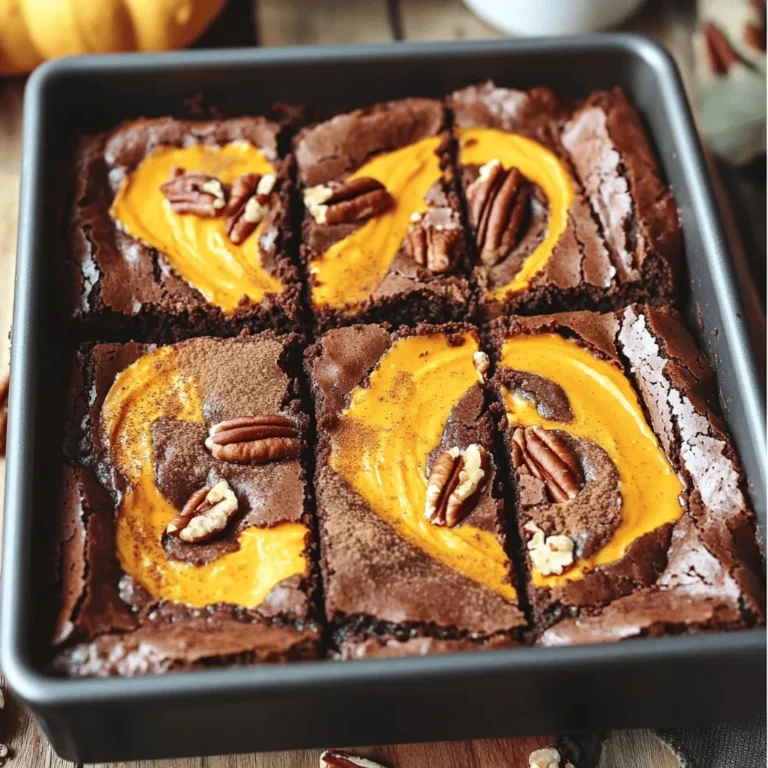
If you love fall flavors, you’ll adore these Pumpkin Cream Cheese Swirl Brownies! They combine rich brownies with creamy pumpkin goodness. In just a few simple steps, you can create a delightful treat that will wow your family and friends. Perfect for gatherings or cozy nights in, these brownies are sure to become a favorite. Let’s dive into the ingredients and start baking this delicious autumn dessert!
Ingredients
Detailed Ingredient List
– 1/2 cup unsalted butter
– 1 cup granulated sugar
– 2 large eggs
– 1 teaspoon vanilla extract
– 1/3 cup unsweetened cocoa powder
– 1/2 cup all-purpose flour
– 1/4 teaspoon salt
– 1/4 teaspoon baking powder
– 1 cup pumpkin puree
– 4 oz cream cheese, softened
– 1/4 cup powdered sugar
– 1/2 teaspoon cinnamon
– 1/4 teaspoon nutmeg
– 1/4 teaspoon ginger
– Optional: Chopped pecans or walnuts for topping
Gathering the right ingredients is key to making these brownies. First, I use unsalted butter for a rich flavor. The granulated sugar gives sweetness and helps with texture. I add large eggs to bind everything together.
Vanilla extract adds a warm note that pairs well with pumpkin. The cocoa powder and all-purpose flour create the brownie base, while salt and baking powder help the brownies rise and taste great.
For the pumpkin cream cheese swirl, I combine pumpkin puree, softened cream cheese, and powdered sugar. The spices—cinnamon, nutmeg, and ginger—bring warmth and depth to the flavor.
If you want a bit of crunch, consider adding chopped pecans or walnuts on top. This will enhance both the taste and texture of your brownies.
Step-by-Step Instructions
Preparation Steps
1. Preheat your oven to 350°F (175°C). Grease an 8×8-inch baking pan or line it with parchment paper. This helps the brownies come out easily later.
2. In a medium saucepan, melt 1/2 cup of unsalted butter over low heat. Once melted, take it off the heat and stir in 1 cup of granulated sugar. Mix until smooth and creamy.
3. Beat in 2 large eggs and 1 teaspoon of vanilla extract. Keep mixing until everything is well blended.
Mixing the Batter
1. In a separate bowl, sift together 1/3 cup of unsweetened cocoa powder, 1/2 cup of all-purpose flour, 1/4 teaspoon of salt, and 1/4 teaspoon of baking powder. This step adds air and helps the brownies rise.
2. Gradually add this dry mixture to the butter mixture. Stir until just combined. Be careful not to overmix; this keeps the brownies moist.
3. In another small bowl, stir together 1 cup of pumpkin puree, 4 oz of softened cream cheese, 1/4 cup of powdered sugar, 1/2 teaspoon of cinnamon, 1/4 teaspoon of nutmeg, and 1/4 teaspoon of ginger. Mix until smooth and creamy.
Assembling and Baking
1. Pour half of the brownie batter into your prepared baking pan. Use a spatula to spread it evenly.
2. Dollop the pumpkin cream cheese mixture over the brownie batter. Gently swirl it using a knife or skewer to create a marbled look.
3. Pour the rest of the brownie batter on top. Spread it out gently to cover the pumpkin mixture.
4. If you like, sprinkle chopped pecans or walnuts on top for an extra crunch.
5. Bake in your preheated oven for 25-30 minutes. Check for doneness with a toothpick. It should come out with a few moist crumbs.
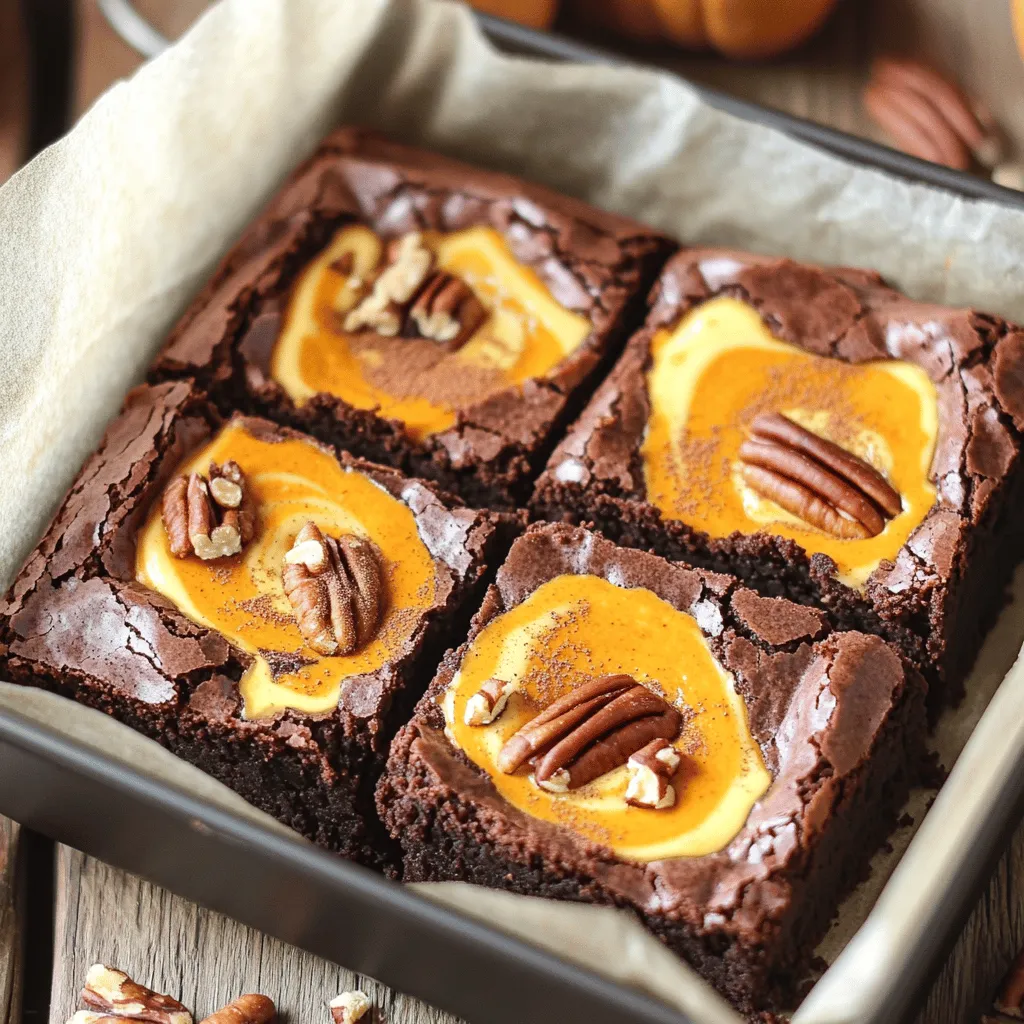
6. Let the brownies cool in the pan for at least 10 minutes. Use the parchment paper to lift them out before cutting them into squares.Enjoy making these delightful treats!
Tips & Tricks
Common Mistakes to Avoid
When making these brownies, two key mistakes can ruin your treat:
– Overmixing the batter: Mix just until combined. Overmixing leads to dense brownies.
– Not measuring ingredients accurately: Use measuring cups and spoons. This ensures the right balance of flavors.
Baking Tips for Perfection
To achieve the best results, follow these baking tips:
– Using room temperature ingredients: Bring eggs and cream cheese to room temp. This helps them blend smoothly.
– Achieving the perfect swirl: When layering the pumpkin cream cheese mixture, use a knife to swirl gently. Don’t overdo it; you want to see both colors.
Presentation Suggestions
A great-looking dessert makes it even better. Here are some ideas:
– Serving warm with whipped cream: A dollop of whipped cream adds creaminess. It also pairs well with the warm brownies.
– Decorating with nuts or spices: Sprinkle chopped pecans or walnuts on top for crunch. A dusting of cinnamon or nutmeg makes it look fancy and tastes great too.
Variations
Alternative Flavors
You can make these brownies even better by adding fun flavors. Try adding chocolate chips or caramel swirls. These add-ins give a nice texture and taste. You can adjust the spices too. For a warmer flavor, add more cinnamon or a pinch of cloves. This lets you play with the taste until it’s just right for you.
Dietary Adjustments
If you need to avoid gluten, swap the all-purpose flour for a gluten-free mix. Many brands offer good options that work well in baking. For a vegan twist, use a plant-based cream cheese. This still gives you that creamy texture without any dairy. You can also use flax eggs or applesauce instead of regular eggs for a vegan version.
Serving Variations
These brownies are great on their own, but you can make them special. Serve them warm with a scoop of ice cream. Vanilla or caramel flavors work really well. You can also drizzle some fruit sauce on top for a fruity kick. If you have a holiday gathering, these brownies make a lovely dessert. They look fancy and taste amazing, making them perfect for any celebration.
Storage Info
How to Store
To keep your pumpkin cream cheese swirl brownies fresh, use airtight containers. After they cool, cut the brownies into squares. Place them in a single layer in the container. If you stack them, place parchment paper between layers. This prevents sticking and keeps them moist. Store your brownies at room temperature for up to three days. If you want to keep them longer, refrigeration is an option. Just remember, cold can dry them out.
Freezing Instructions
You can also freeze these delightful brownies for later enjoyment. Cut the brownies into squares before freezing. Wrap each square in plastic wrap. Then place the wrapped brownies in a freezer-safe bag or container. They can stay in the freezer for up to three months. When you want to enjoy them, take them out and thaw in the fridge overnight. For the best taste, let them come to room temperature before serving.
FAQs
How do I know when the brownies are done?
To check if your brownies are done, use a toothpick. Insert it into the center of the brownies. If it comes out with a few moist crumbs, they are ready. If it comes out wet, they need more time. I usually bake mine for 25 to 30 minutes. Every oven is a bit different, so keep an eye on them!
Can I use a different size pan?
Yes, you can use a different size pan, but be careful. A larger pan will make the brownies thinner, which means they might bake faster. Check them a few minutes early if you use a bigger pan. A smaller pan will make them thicker and may need more baking time. Adjust the time as needed, so they do not overbake.
What’s the best way to reheat brownies?
To reheat brownies, I suggest using the microwave. Place a brownie on a plate and cover it with a damp paper towel. Heat it for about 10 to 15 seconds. This method keeps them soft and moist. You can also use the oven. Preheat to 350°F (175°C) and heat for about 5 minutes. The oven will keep the texture nice.
How to make the brownies less sweet?
If you want to make the brownies less sweet, reduce the sugar. Try cutting the granulated sugar by a quarter cup. You can also add a pinch of salt to balance the flavors. Adding more cocoa powder can help too, as it adds a rich flavor. Adjusting the spices can also make the taste more complex and less focused on sweetness.
This post shared a simple recipe for brownies with pumpkin cream cheese. You learned about essential ingredients and step-by-step directions. I offered tips to avoid common mistakes and improve your baking. You also found variations for flavor and dietary needs.
In the end, baking these brownies is fun and rewarding. Enjoy the process, and don’t hesitate to make them your own!