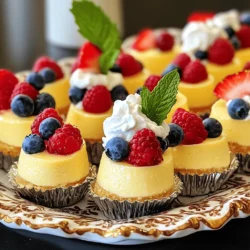
Are you ready to indulge in a sweet treat? Mini cheesecake bites are easy to make and perfect for any occasion. With creamy filling, crunchy crusts, and endless topping options, these little delights will impress everyone. Join me as I guide you through each step, share helpful tips, and inspire you with creative variations. Let’s dive into the world of mini cheesecake bites together! You won’t want to miss this.
Ingredients
Complete Ingredient List
To make mini cheesecake bites, you need the following ingredients:
– 8 oz cream cheese, softened
– 1/2 cup granulated sugar
– 1/2 teaspoon vanilla extract
– 1 large egg
– 1/4 cup sour cream
– 1/4 teaspoon lemon juice
– 1 package of mini graham cracker crusts (12 count)
– Fresh berries (strawberries, blueberries, or raspberries) for topping
– Optional whipped cream for garnish
Each ingredient plays a key role in the flavor and texture of the cheesecake bites. The cream cheese gives a rich and creamy base. Granulated sugar adds sweetness, balancing the tang of the cream cheese. The egg binds everything together. Sour cream adds a nice tang, while lemon juice brightens the flavor.
I love using mini graham cracker crusts because they save time and add a nice crunch. Fresh berries on top not only look great but also add a burst of flavor. If you like, you can add whipped cream for extra creaminess.
This simple list makes it easy to create these delightful treats.
Step-by-Step Instructions
Preparation Steps
Preheating the Oven
First, set your oven to 325°F (160°C). This step is key for even baking.
Mixing the Ingredients
In a mixing bowl, beat 8 oz of softened cream cheese with a hand mixer. Mix until it is smooth and creamy. Gradually add in 1/2 cup of granulated sugar. Keep mixing until it blends well. Next, add 1/2 teaspoon of vanilla extract, 1/4 cup of sour cream, and 1/4 teaspoon of lemon juice. Mix until it’s all smooth again. Finally, beat in 1 large egg. Be careful not to overmix here.
Filling the Crusts
Grab your package of mini graham cracker crusts. Place them on a baking sheet for easy handling. Pour your cream cheese mixture evenly into each crust. Fill them about 2/3 full to avoid spills while baking.
Baking Process
Setting the Timer
Now, it’s time to bake. Place the baking sheet in your preheated oven. Set your timer for 15 to 18 minutes. You want the edges to be set, but the center should still jiggle slightly.
Cooling Instructions
Once the timer goes off, take the cheesecakes out. Let them cool to room temperature first. After that, put them in the fridge. Chill them for at least 2 hours until they are firm.
Final Touches
Adding Toppings
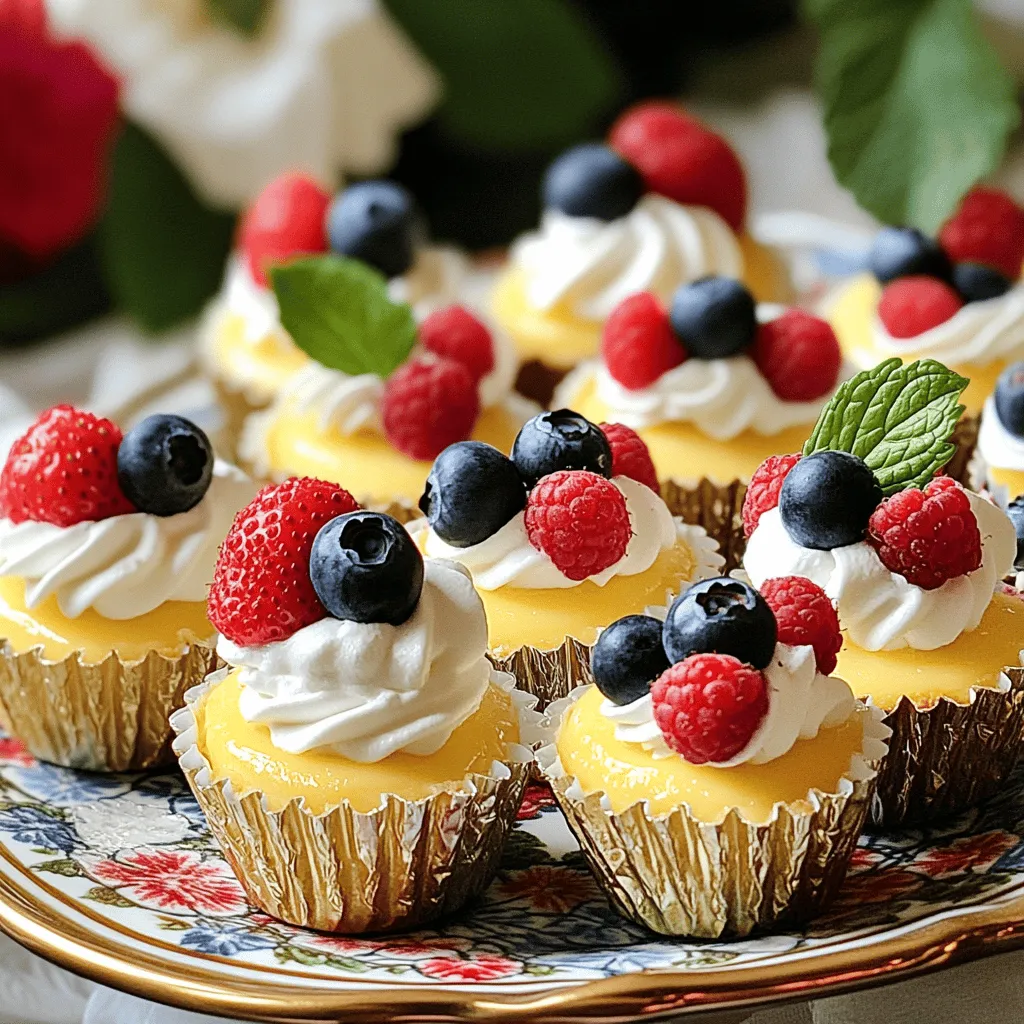
After they are chilled, it’s time to add toppings. Top each mini cheesecake with fresh berries like strawberries, blueberries, or raspberries. A dollop of whipped cream adds a nice finish too.
Serving Suggestions
For a lovely presentation, arrange your cheesecake bites on a decorative platter. You can garnish with a mint leaf for a pop of color. Drizzling with berry coulis makes it look elegant and appetizing.Check out the details!
Tips & Tricks
Achieving the Perfect Consistency
– Cream Cheese Temperature Matters: Start with cream cheese at room temperature. This helps it blend well and makes your batter smooth. Cold cream cheese can cause lumps.
– Mixing Techniques: Use a hand mixer on low speed. Mix until just combined to avoid extra air. Overmixing can lead to cracks in your bites.
Common Mistakes to Avoid
– Overmixing the Batter: Mixing too much adds air and can cause the cheesecake to puff up. This may lead to cracks when cooling. Aim for a smooth texture without overdoing it.
– Undercooking the Bites: Watch the baking time closely. The edges should set, but the center should jiggle slightly. If you underbake, the bites may not hold together when you serve them.
Presentation Tips
– Plating Ideas: Use a decorative platter to show off your mini cheesecake bites. Arrange them in a circle or in rows for a neat look.
– Creative Garnishes: Top with fresh berries for color and flavor. A mint leaf adds a nice touch. You can also drizzle berry coulis on the plate for an elegant finish.
These tips will help you create the best mini cheesecake bites.Enjoy your baking!
Variations
Flavor Variations
You can change the flavor of mini cheesecake bites easily. One popular choice is chocolate. Just melt semi-sweet chocolate and mix it into the cream cheese. This adds a rich taste and a lovely color. You can top these bites with chocolate shavings for extra appeal.
Fruit-flavored variations are also a hit. You can use pureed strawberries, blueberries, or raspberries in the batter. This gives a fresh taste and a vibrant look. You can even swirl fruit puree on top for a fun design.
Alternative Crusts
The crust adds a great texture to your mini cheesecakes. An Oreo crust is a favorite. Crush Oreo cookies and mix them with melted butter. Press this mixture into the bottom of your mini crusts. It adds a sweet and chocolaty flavor.
If you want a nut-based crust, use ground almonds or walnuts. Mix the nuts with melted butter and a bit of sugar. This crust adds crunch and a nutty taste that pairs well with the cheesecake filling.
Topping Ideas
Toppings can make your mini cheesecakes even better. A caramel drizzle is a simple yet tasty option. Just warm up some caramel sauce and drizzle it over the top. This adds sweetness and a nice contrast to the creamy filling.
Flavored whipped cream is another fun idea. You can mix in vanilla, chocolate, or even a hint of mint. Pipe this whipped cream on top of each cheesecake bite for an extra layer of flavor.
Storage Info
How to Store Mini Cheesecake Bites
To keep your mini cheesecake bites fresh, use these simple tips:
– Refrigeration Guidelines: Store the bites in an airtight container in the fridge. They can last up to four days this way. Make sure they cool fully before sealing them. This helps preserve their creamy texture.
– Freezing Instructions: If you want to save some for later, freezing works well. Place the bites on a baking sheet and freeze them for about two hours. Once solid, transfer them to a freezer-safe container or bag. They can last up to two months in the freezer. Just thaw them in the fridge before serving.
Shelf Life
To enjoy your mini cheesecake bites at their best, follow these best practices:
– Best Practices for Freshness: Always check the storage conditions. Keep your bites in a cool, dry place, away from strong odors. If you add toppings like whipped cream or fresh fruit, eat them within a day for best taste.
– Signs of Spoilage: If you notice a change in texture or an off smell, it’s time to toss them. Mold or a sour taste are also clear signs that they have gone bad. Always trust your senses when it comes to food safety.
FAQs
What are mini cheesecake bites?
Mini cheesecake bites are small, bite-sized versions of classic cheesecake. They have a creamy filling and a crunchy crust. Each one offers a perfect balance of sweet and tangy flavors. They are easy to handle and fun to eat. Great for parties, they can be topped with fresh fruit or whipped cream.
How do you make the best mini cheesecake bites?
To make the best mini cheesecake bites, follow these essential tips:
– Use room temperature cream cheese. This helps blend the mixture smoothly.
– Do not overmix the batter. Mix just until combined for a light texture.
– Fill the crusts evenly. Aim for about two-thirds full to allow for rising.
– Monitor the baking time. Bake until the edges set but the center remains slightly jiggly.
– Chill properly. Refrigerate for at least two hours to set the bites.
Where can I buy mini cheesecake bites?
You can buy mini cheesecake bites at local bakeries or dessert shops. Many bakeries offer them fresh or frozen. You can also find them online. Check delivery services or specialty food websites. This way, you can enjoy these treats without making them yourself.
Can these be made gluten-free?
Yes, mini cheesecake bites can be made gluten-free! Use gluten-free graham cracker crusts or other gluten-free options. Almond flour or oat flour can be good substitutes. Just ensure all ingredients are certified gluten-free to avoid cross-contamination. This way, everyone can enjoy your delicious dessert.
You learned how to make mini cheesecake bites from scratch. We covered the ingredients, steps, and tips to perfect your treats. Don’t forget the variations for added fun! Try different flavors and crusts to keep things exciting. Store them properly for the best taste, and remember the signs of spoilage. With these tips, you can impress anyone with these tasty bites. Enjoy the sweet journey of baking and sharing!