Skip to content
DisclaimerTerms Of UseGDPR PolicyCookie Policy

Foodish Talk

  • Home
  • Drinks
  • Appetizers
  • Dinner
  • Dessert
  • About
  • Contact
  • Privacy Policy
DisclaimerTerms Of UseGDPR PolicyCookie Policy

NO-ING-IMG

- 1 lb chicken breast, diced - 1 medium onion, chopped - 3 cloves garlic, minced - 3 medium carrots, sliced - 2 celery stalks, chopped - 8 cups low-sodium chicken broth - 2 cups egg noodles - 1 teaspoon dried thyme - 1 teaspoon dried rosemary - Salt and pepper to taste - 2 tablespoons olive oil - Fresh parsley, chopped, for garnish Chicken is the heart of this soup. It adds protein and richness. I prefer using chicken breast for a leaner option. Dicing it helps it cook faster and blend well with the other ingredients. Onions and garlic form the base of flavor. They create a fragrant aroma that fills your kitchen. Carrots and celery add sweetness and crunch. Together, they create a well-rounded taste and texture. - Broth options: You can use homemade or store-bought broth. Low-sodium broth is best for controlling salt. - Garnishes: Fresh parsley adds color and brightness. You might also try a sprinkle of black pepper. - Alternative noodles: Egg noodles are classic. Gluten-free pasta or whole grain noodles also work well. Choosing the right broth can elevate your soup. Homemade broth gives a rich flavor. However, quality store-bought options save time. For garnishes, fresh parsley makes a simple yet impactful addition. - Caloric breakdown: One serving has about 250 calories. - Key nutrients: This soup is rich in protein, vitamins, and fiber. - Dietary considerations: It can be adapted to fit gluten-free or low-sodium diets. Knowing the nutritional value helps you make informed choices. Chicken provides lean protein. The vegetables add vitamins and minerals. Plus, this soup is comforting without being heavy, making it a perfect meal for any day. First, gather all your ingredients. You need fresh chicken, veggies, and herbs. Here’s what to chop: - 1 lb chicken breast, diced - 1 medium onion, chopped - 3 cloves garlic, minced - 3 medium carrots, sliced - 2 celery stalks, chopped Chop your onion and garlic first. In a large pot, heat 2 tablespoons of olive oil over medium heat. Add the chopped onion and minced garlic. Sauté until the onion turns translucent, about 5 minutes. This helps bring out their flavor. Now, add the diced chicken to the pot. Cook it until it’s no longer pink, which should take about 5 to 7 minutes. Stir it occasionally so it cooks evenly. Then, toss in your sliced carrots and chopped celery. Cook these for another 3 to 4 minutes, allowing them to soften a bit. Next, pour in 8 cups of low-sodium chicken broth. Bring the mixture to a boil. Once boiling, reduce the heat. Add 2 cups of egg noodles, 1 teaspoon of dried thyme, and 1 teaspoon of dried rosemary. Simmer this for about 10 to 12 minutes, or until the noodles are tender. Stir occasionally to prevent sticking. After simmering, taste your soup. Adjust the seasonings by adding salt and pepper as needed. The last step is to remove the pot from heat. Stir in some chopped fresh parsley for a burst of color and flavor. Serve the soup in deep bowls, garnished with extra parsley and a sprinkle of black pepper. Enjoy your comforting bowl of homemade chicken noodle soup! For the full recipe, check [Full Recipe]. To make a perfect broth, start with quality chicken. Use low-sodium broth for a healthier option. Simmer gently to let flavors blend well. Avoid boiling too hard; it can make the broth cloudy. For the noodles, add them near the end of cooking. This keeps them from becoming mushy. Cook them just until they are tender. Remember, they will continue to cook a bit after you remove the pot from the heat. Fresh herbs can bring your soup to life. Consider adding parsley, thyme, or dill. These herbs add brightness and flavor. You can also spice things up! Try adding a pinch of cayenne or black pepper. A dash of paprika can also add depth to your broth. Soggy vegetables can ruin your soup. Add them at the right time. Cook them only until they are slightly tender. Maintaining broth clarity is key. Avoid stirring too much after adding the noodles. This helps keep everything looking nice and clear. For a full recipe, check out the Cozy Chicken Noodle Soup section. {{image_2}} You can make this soup vegetarian. Start by substituting chicken with tofu. Tofu adds protein and absorbs flavors well. Use firm tofu for the best texture. Next, use vegetable broth instead of chicken broth. This keeps the soup rich and tasty. You can also add more veggies, like bell peppers or peas, for extra flavor. If you prefer using a slow cooker, there are easy adjustments. Start by sautéing the onion and garlic in a pan first. This step adds depth to the soup. Then, combine all ingredients in the slow cooker. Set it to low for 6-8 hours. If you're in a hurry, you can set it to high for 3-4 hours. Just make sure to check the chicken for doneness. For a gluten-free soup, choose alternative noodle options. Rice noodles or gluten-free pasta work well. Make sure to cook them separately if needed. Also, ensure your broth is gluten-free. Some broths may contain gluten, so check labels. This way, everyone can enjoy a comforting bowl of soup. For the full recipe, you can refer to the Cozy Chicken Noodle Soup section. After enjoying your homemade chicken noodle soup, store any leftovers in the fridge. Place the soup in airtight containers. Glass or plastic containers work well. Make sure to cool the soup to room temperature before sealing. This helps prevent condensation and keeps the soup fresh. To freeze chicken noodle soup, use freezer-safe containers. Leave some space at the top for expansion. You can also use freezer bags. Just lay them flat for easy stacking. When ready to eat, thaw the soup in the fridge overnight. Reheat it on the stove or in the microwave until hot. Chicken noodle soup lasts about 3 to 4 days in the fridge. If frozen, it can last up to 3 months. Check for signs of spoilage before eating. If the soup smells off or looks discolored, it’s best to throw it away. Always trust your senses when it comes to food safety. Yes, you can use rotisserie chicken. It saves time and adds flavor. Just shred the meat and add it to the pot. This way, you cut down on cooking time by about 15 minutes. Rotisserie chicken is tasty and tender, making your soup rich and hearty. Egg noodles are the best choice for chicken noodle soup. They have a great texture and soak up flavors well. You can also use whole wheat noodles for added nutrients. If you want something different, try rice noodles or gluten-free options. Each type of noodle brings a unique taste to the soup. To spice up your soup, add fresh jalapeños or red pepper flakes. You could also include a dash of hot sauce. For a deeper flavor, mix in curry powder or smoked paprika. Adjust the amount to your heat tolerance. This will give your soup an exciting kick. Homemade chicken noodle soup is simple and satisfying. We covered key ingredients like chicken, vegetables, and seasonings. I shared tips to enhance flavor and create healthier versions. You learned how to prepare and cook the soup step-by-step. Common mistakes were highlighted, helping you avoid issues. Finally, I provided storage options for leftovers. Enjoy your warm bowl of soup, knowing you can adjust recipes to fit your tastes. Cooking can be fun and rewarding.

Homemade Chicken Noodle Soup Comfort in Every Bowl

Nothing beats a warm bowl of homemade chicken noodle soup when you’re craving comfort. In this post, I’ll share my

- Chicken breast or tofu: Choose chicken for a classic taste or tofu for a veggie twist. - Bell peppers and other vegetables: Use red, yellow, or green bell peppers for color. Add zucchini or onions for more flavor. - Essential spices and seasonings: Chili powder, cumin, and paprika are key to a bold taste. Garlic and onion powder add depth. - Extra toppings: Sour cream, guacamole, or salsa can boost flavor. - Different protein options: Try beef or shrimp for variety on your plate. - Tortilla alternatives: Use lettuce wraps for a low-carb option, or corn tortillas for a gluten-free twist. For the full recipe, check out the details above. First, you need to preheat your oven to 400°F (200°C). This step gets your oven ready for cooking. Next, grab a large baking sheet and line it with parchment paper. This makes cleanup much easier. Now, let’s slice your veggies and protein. You should slice 2 bell peppers, 1 red onion, and 1 medium zucchini. For protein, thinly slice 1 pound of chicken breast. If you want a vegetarian option, use firm tofu instead. Next, you’ll make the fajita marinade. In a mixing bowl, whisk together 3 tablespoons of olive oil, 1 tablespoon of chili powder, 1 teaspoon of cumin, 1 teaspoon of smoked paprika, 1 teaspoon of garlic powder, 1 teaspoon of onion powder, salt, and pepper. Then, add the juice of 1 lime. This mix gives the fajitas a great flavor. Now, take a large bowl and put your sliced chicken or tofu, bell peppers, onion, and zucchini in it. Pour the marinade over the top. Toss everything together until it’s well-coated. This step is key for even flavor! Once everything is mixed, it’s time to arrange the ingredients. Spread the marinated chicken and veggies evenly on the baking sheet. Make sure they are in a single layer for even cooking. Now, place the sheet pan in the preheated oven. Bake for 20-25 minutes. Check for doneness by making sure the chicken is cooked through and the veggies are tender and slightly charred. The aroma will be amazing, and you’ll know you’re in for a treat! For the best taste, use a mix of spices. I love using chili powder, cumin, and smoked paprika. These spices bring out the rich flavors. Garlic powder and onion powder add depth. You can also add lime juice for brightness. Marinating the chicken or tofu is key. Let it sit in the marinade for at least 15 minutes. This helps the flavors soak in. For extra flavor, marinate it overnight in the fridge. Just make sure to cover it tightly. Cooking time can change based on the protein you use. If you're using chicken, it usually takes about 20-25 minutes. For tofu, you may need less time, around 15-20 minutes. Always check for doneness. The chicken should be 165°F inside. To get a perfect char on your veggies, spread them out evenly on the pan. Crowding the pan can steam them instead of roasting. If you want more char, broil for a few minutes at the end. Just watch closely so they don’t burn. Fajitas are fun to serve with sides. Try adding a fresh salad or rice. You can also provide toppings like sour cream, guacamole, and salsa. These add creaminess and extra flavor. For a homemade sauce, mix plain yogurt with lime juice and cilantro. This sauce is cool and tangy. Serve it on the side for dipping. It pairs great with the warm tortillas. For the full recipe, check out the details above. {{image_2}} For a tasty vegetarian option, swap chicken for firm tofu. Tofu takes in flavors well. Marinate it just like chicken. This adds great taste. You can also add more veggies. Try mushrooms, broccoli, or corn. Each adds a unique flavor and texture. To adjust spice levels, you can change the spices used. For milder fajitas, reduce chili powder. You can also leave out cumin. If you like heat, add fresh jalapeños or serranos. Hot sauce is another simple way to spice it up. Start with a little, then add more if needed. Get creative and try global flavors! For a southwestern twist, add black beans and corn. For an Asian touch, use soy sauce and ginger. You can even make Mediterranean fajitas. Use olives, feta, and herbs like oregano. These ideas keep your meals exciting and new. For the full recipe, check out the details above. Enjoy making your own unique fajitas! To keep your Sheet Pan Fajitas fresh, first allow them to cool. Once cool, place the fajitas in an airtight container. This helps prevent moisture loss. You can store them in the fridge for up to three days. If you want to keep them longer, consider freezing them. Fajitas can last in the freezer for about three months. Just remember to label the container with the date. When it comes to reheating, you have a couple of good options. The oven works best for keeping the texture nice. Preheat your oven to 350°F (175°C). Spread the fajitas on a baking sheet and heat for about 10-15 minutes. This method brings back the crispiness. If you're short on time, the microwave is quick. Place the fajitas in a microwave-safe dish and cover it with a damp paper towel. Heat in short bursts, about 30 seconds at a time. Stir in between to avoid hot spots. This method is fast but may make the fajitas a bit softer. Choose the method that works best for you! To make Sheet Pan Fajitas quick, prep your ingredients ahead. Slice the vegetables and chicken the night before. Store them in a sealed bag in the fridge. You can also mix the marinade in advance. Just keep it in a jar. When it's time to cook, all you need to do is toss everything together and bake. This saves time and keeps your meal stress-free. Yes, you can use frozen vegetables. However, frozen veggies can release extra water when cooking. This might change the texture. To get a good result, thaw the vegetables first and drain excess water. Adjust the cooking time too. Frozen veggies may need a few extra minutes to cook fully. Keep an eye on them for the best results. Sheet Pan Fajitas go great with many side dishes. Here are some tasty options: - Rice: Cilantro lime rice is a fresh choice. - Salads: A simple corn salad adds crunch. - Beans: Refried or black beans add protein. - Guacamole: Creamy guacamole is always a hit. - Salsa: Fresh salsa brings a zesty touch. These sides will make your meal even more enjoyable. For the full recipe, click here. Sheet pan fajitas are easy and fun to make. We covered key ingredients like protein and veggies. I shared steps to prep, mix, and bake your fajitas to perfection. You learned tips to boost flavor and customize to your taste. Try variations for different diets, spice levels, or global twists. Lastly, storing and reheating tips keep your leftovers fresh. Enjoy your cooking adventure and relish every bite of your delicious fajitas!

Sheet Pan Fajitas Flavorful and Simple Recipe Guide

Ready for a dinner that’s simple, tasty, and fun to make? Sheet pan fajitas are your answer! You can whip

- 1 lb Brussels sprouts, trimmed and halved - 3 tablespoons olive oil - 4 cloves garlic, minced - 1/2 cup grated Parmesan cheese - 1 teaspoon garlic powder - 1 teaspoon paprika - Salt and pepper to taste - Fresh parsley, chopped (for garnish) Alternative oils to use: You can switch olive oil for avocado or coconut oil. Both add their unique flavors. Dairy-free cheese options: If you want a vegan version, try nutritional yeast or plant-based cheese. They give a nice cheesy taste without dairy. Fresh vs. dried herbs: Fresh parsley adds a bright touch. Dried herbs can work too, but fresh is best for flavor. Using the right ingredients makes a big difference. Each one adds to the taste and texture. The Brussels sprouts become crispy and golden, thanks to the oil and careful roasting. Garlic gives a punch, while Parmesan adds richness. The paprika adds warmth and a hint of smokiness. In a pinch, feel free to adjust these ingredients. Cooking should be fun and flexible. Check out the Full Recipe for all the steps and details. Preheating the oven Start by preheating your oven to 400°F (200°C). This step is key for crisp, roasted Brussels sprouts. Preparing Brussels sprouts Take 1 pound of Brussels sprouts, trim off the ends, and cut them in half. Rinse them well and pat them dry with a towel. This helps them roast better and get crispy. Tossing ingredients together In a large bowl, combine the halved Brussels sprouts with 3 tablespoons of olive oil, 4 minced garlic cloves, 1 teaspoon of garlic powder, 1 teaspoon of paprika, and salt and pepper to taste. Toss until every sprout gets a nice coating. This is where the flavor starts to build! Arranging on the baking sheet Spread the coated Brussels sprouts in a single layer on a parchment-lined baking sheet. Make sure they are not crowded. This allows them to roast evenly and turn golden brown. Adding Parmesan After roasting for about 20 minutes, remove the baking sheet from the oven. Sprinkle 1/2 cup of grated Parmesan cheese over the hot Brussels sprouts. The cheese will melt and create a delicious crust. Garnishing with parsley Once the cheese is melted, take out the sprouts and let them cool for a minute. Finish by garnishing with fresh, chopped parsley. This adds a pop of color and freshness to your dish. For the full recipe, check the details above! To make your Brussels sprouts crispy, start with a dry surface. Wet sprouts lead to soggy bites. Trim and halve them, then toss with olive oil and seasonings. Spread them evenly on your baking sheet. Avoid crowding; give them space to breathe and crisp up. For the best flavor, roast them until they turn golden brown. Stir halfway to ensure even cooking. These Brussels sprouts shine as a side dish. They pair well with roasted chicken or grilled steak. You can also toss them in a fresh salad with nuts and cheese. Serve them as an appetizer with a dip. Their texture and flavor make them a hit at parties. I recommend using a sturdy baking sheet lined with parchment paper. This helps with easy cleanup and prevents sticking. A good mixing bowl is essential for tossing your ingredients. Use a sharp knife for cutting the sprouts, and a sturdy cutting board for safety. For exact cooking, a digital thermometer can help check doneness. Check out the Full Recipe for more details. {{image_2}} You can spice up your Garlic Parmesan Roasted Brussels Sprouts in fun ways. Try adding chili flakes for heat. This gives a nice kick. You can also use Italian seasoning. This adds depth and flavor. For a crunch, think about nuts or seeds. Pine nuts or sunflower seeds work great. They add texture and taste. You can make Brussels sprouts in different ways. Air frying them gives a crispy finish. Just toss them with olive oil and spices, then air fry at 375°F for 15 minutes. They turn out golden and delicious. Grilling is another option. Toss the sprouts in olive oil and spices, then grill them for about 10 minutes. The smoky flavor really shines. Do not be afraid to mix in seasonal vegetables. Carrots or sweet potatoes can pair well. Adjust your dish for holiday meals too. Add cranberries for a festive touch. This adds color and sweetness, making it perfect for gatherings. Always think about what is fresh and in season. It makes your dish even better. For more details, check the Full Recipe to explore these ideas! After enjoying your Garlic Parmesan Roasted Brussels sprouts, store leftovers in the fridge. Place them in an airtight container to keep them fresh. I recommend using glass containers, as they don’t absorb odors. You can also use plastic containers if they seal well. Leftovers will stay good for about three days. To reheat your Brussels sprouts, use an oven or an air fryer. Preheat your oven to 350°F (175°C) and spread the sprouts on a baking sheet. Heat them for about 10 minutes or until hot. If using an air fryer, set it to 350°F (175°C) and cook for 5 to 7 minutes. This keeps the Brussels sprouts crispy. Avoid using a microwave, as it makes them soggy. You can freeze cooked Brussels sprouts, but they lose some texture. Allow them to cool completely first. Place them in a freezer-safe bag or container. Make sure to remove as much air as possible. They can last up to three months in the freezer. To thaw, move them to the fridge overnight. Reheat in the oven or air fryer for the best results. Enjoy your flavorful dish again! For the full recipe, check the earlier section. Can I use frozen Brussels sprouts? Yes, you can use frozen Brussels sprouts. However, fresh sprouts give a better texture. If you use frozen ones, thaw them first. Then, pat them dry to remove excess moisture. This helps achieve a nice crisp when roasting. How do I cut Brussels sprouts properly? To cut Brussels sprouts, start by trimming off the tough stem. Then, cut each sprout in half lengthwise. If you have large sprouts, you may want to quarter them. This ensures even cooking and helps them roast well. Can I make this dish without cheese? Absolutely! You can make this dish without cheese. Just skip the Parmesan and add more garlic. A sprinkle of nutritional yeast can add a cheesy flavor. You can also try a vegan cheese alternative if you want a similar taste. What are some vegan alternatives? For a vegan version, use olive oil and garlic as your base. Instead of Parmesan, use nutritional yeast or a dairy-free cheese. You can also add nuts or seeds for extra crunch and flavor. Calorie count per serving Each serving of Garlic Parmesan Roasted Brussels Sprouts has about 150 calories. This can vary based on the amount of oil and cheese used. Health benefits of Brussels sprouts and garlic Brussels sprouts are high in vitamins C and K. They also provide fiber, which helps digestion. Garlic has many benefits, too! It can boost your immune system and add flavor without extra salt. Both ingredients make this dish tasty and good for you. In this post, we explored how to make crispy, flavorful Brussels sprouts. We covered key ingredients, helpful tips, and various cooking methods. You learned smart ways to store and reheat Brussels sprouts, ensuring they stay tasty. Brussels sprouts can be a delicious side or appetizer at any meal. Experiment with flavors and techniques to find your favorite way to enjoy them. Happy cooking!

Garlic Parmesan Roasted Brussels Sprouts Delight

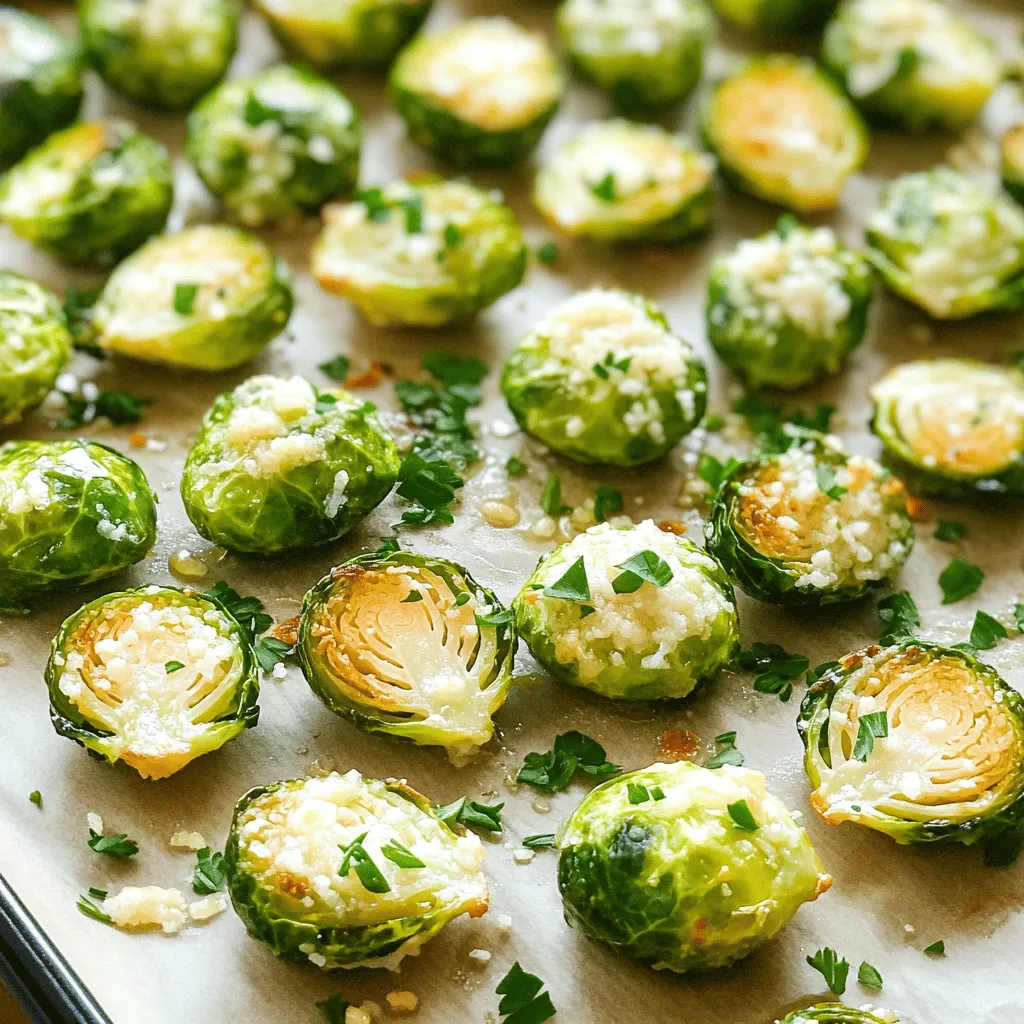
Are you ready to elevate your vegetable game? These Garlic Parmesan Roasted Brussels Sprouts will change how you view this

- Ripe mangoes - Red onion - Red bell pepper - Jalapeño - Fresh cilantro - Limes - Honey (optional) - Salt and pepper To make mango salsa, you need fresh ingredients. Ripe mangoes give the best flavor. Look for mangoes that yield slightly when pressed. Red onion adds a nice crunch and a bit of sharpness. Use a small one, finely chopped. The red bell pepper adds sweetness and color. Dice it small for even bites. For heat, add a jalapeño. Be sure to remove the seeds if you want less spice. Fresh cilantro brings a bright flavor. Use about a quarter cup, chopped. You’ll also need limes for juice. Their acidity balances the sweetness of the mangoes. Honey is optional but adds a nice touch of sweetness. Finally, season with salt and pepper to taste. - Diced mangoes - Finely chopped onion and pepper - Lime juice For this salsa, use two ripe mangoes, diced. This should amount to about two cups. For the onion and bell pepper, aim for one small red onion and one red bell pepper, both finely chopped. You’ll need juice from two limes. This keeps the salsa fresh and zesty. - Calories per serving - Fiber and sugar content - Vitamins and minerals Each serving of mango salsa has about 70 calories. It is low in fat but high in fiber. The mangoes provide natural sugars, around 14 grams per serving. This salsa is rich in vitamins A and C. Mangoes are also a good source of potassium. Eating this salsa adds nutrition to your meal while being tasty and fresh. For the full recipe, check out the section above. Enjoy making this vibrant dip! First, grab a large mixing bowl. Combine your diced mangoes, red onion, red bell pepper, and jalapeño in it. Make sure each piece is cut small. This helps with the salsa's texture. Next, add fresh cilantro and squeeze in the juice of two limes. If you want a hint of sweetness, drizzle in one tablespoon of honey. Finally, season it with salt and pepper to taste. Mixing well is key here. Once everything is in the bowl, gently toss the ingredients together. Let the salsa sit for at least 15 minutes to let the flavors meld. When mixing, be gentle. You want to keep the mango chunks intact. Use a spatula or a wooden spoon. This keeps the salsa fresh and colorful. Toss slowly to ensure all ingredients mix well. You want an even distribution of flavors in every bite. Letting the salsa sit is very important. This time allows the flavors to blend and deepen. Taste the salsa after it sits. You may want to adjust the seasoning. Add more salt, pepper, or honey if you like. This way, you can make the salsa just right for your taste. Enjoy this fresh mango salsa with tortilla chips or as a topping for grilled chicken and fish. For the full recipe, check the main section. To make great mango salsa, you need ripe mangoes. Look for skin that is slightly soft when pressed. A ripe mango also gives off a sweet smell near the stem. You can use several types of mangoes. The Tommy Atkins mango has a nice balance of sweetness and tartness. The Haden mango is juicy and flavorful. Both are perfect for salsa. Mango salsa shines when served with tortilla chips. The crunchy chips contrast with the sweet salsa. You can also use it as a topping for grilled meats like chicken or fish. It adds a fresh burst of flavor and color to tacos. Try it on fish tacos for a delightful twist. Presentation matters! Serve mango salsa in a colorful bowl. Garnish with fresh cilantro leaves on top for a bright touch. You can also pair it with other dishes. Try serving it alongside grilled shrimp or as a side with rice. The vibrant colors and fresh taste will impress your guests. {{image_2}} To make your mango salsa spicy, add more jalapeño or other chilies. You can choose serrano or habanero peppers for a bigger kick. Start with a small amount, then taste it as you go. This way, you can control the heat. Enjoy the burst of flavor and spice that adds excitement to your dish. Incorporate a tropical twist by adding pineapples or avocados. Diced pineapples bring extra sweetness and flavor. They balance the tartness of the lime. Avocados offer creaminess and richness. Simply mix these fruits into your salsa for a fun, new take. This variation is perfect for summer gatherings. For a sweet and tangy version, adjust the honey and lime ratios. Use more honey for a sweeter taste or add extra lime juice for tanginess. This balance creates a unique flavor profile. You can tailor it to your liking. Experiment with these adjustments to find your perfect mix. For the full recipe, check out the Mango Tango Salsa 🥭. To keep your mango salsa fresh, use airtight containers. Glass or plastic containers work well. I prefer glass because it does not retain odors. Store your salsa in the fridge right after making it. Avoid leaving it out for too long. Mango salsa lasts about 3 to 5 days in the fridge. If you notice any liquid pooling at the bottom, that’s a sign it’s starting to spoil. Also, look for changes in color or smell. If it smells off, toss it out. Yes, you can freeze mango salsa! However, the texture may change when thawed. If you want to freeze it, use freezer-safe bags. Make sure to remove as much air as possible. Label your bags with the date to keep track of freshness. To add spice to your mango salsa, use a jalapeño. Deseed and mince it for heat. You can also add more jalapeños for extra kick. If you want more choices, consider using serrano or habanero peppers. Always taste as you go. This way, you control the spice level and keep it perfect for you. Yes, you can use frozen mangoes in your salsa. They offer convenience and save prep time. Frozen mangoes can be just as sweet and flavorful. However, they may be a bit softer. This can change the salsa's texture. If you choose frozen, let them thaw before dicing. Drain any excess liquid to keep your salsa fresh. Mango salsa pairs well with many dishes. It’s great with tortilla chips for a tasty snack. You can also use it as a topping for grilled chicken or fish. Tacos and burritos love a scoop of mango salsa too! Try it on salads or rice bowls for a fresh twist. The vibrant taste brightens any meal. Feel free to explore the Full Recipe for a delightful treat! Mango salsa is fresh, easy to make, and packed with flavor. You learned about key ingredients, how to prepare and mix them, and tips for serving. Remember, using ripe mangoes makes a big difference. You can adjust flavors to suit your taste, whether you like it spicy or sweet. Store your salsa properly for the best taste. I hope you feel inspired to create your own mango salsa and enjoy it with your favorite dishes. Happy salsa making!

Mango Salsa Easy Fresh Flavorful Dip Recipe

Are you ready to spice up your meals with a fresh, vibrant dip? This easy mango salsa recipe is packed

- Cauliflower florets - All-purpose flour - Buffalo sauce Buffalo cauliflower bites start with fresh cauliflower. The florets give a great texture. Use one medium head for the best flavor. Next, you need all-purpose flour. It helps the batter stick. Lastly, choose your buffalo sauce. You can pick mild or spicy. This adds the kick! - Garlic powder - Onion powder - Paprika - Salt and black pepper For added flavor, use garlic powder. It gives a warm taste. Onion powder adds depth, too. Paprika gives a slight smokiness. Don't forget salt and black pepper. They enhance all the flavors. Mix these spices into your batter. This step is key for great taste. - Melted butter - Fresh parsley for garnish If you want a richer flavor, add melted butter to the buffalo sauce. It makes the sauce creamier. Also, consider fresh parsley for garnish. It adds a bright color and freshness. This little touch makes your dish look even better. You can find the full recipe for these bites above. Enjoy making this tasty treat! - Preheat your oven to 450°F (230°C). - Line a baking sheet with parchment paper for easy cleanup. - In a mixing bowl, whisk together: - 1 cup all-purpose flour - 1 cup water - 1 teaspoon garlic powder - 1 teaspoon onion powder - 1 teaspoon paprika - 1/2 teaspoon salt - 1/2 teaspoon black pepper - Mix until you have a smooth batter. - Take each cauliflower floret and dip it into the batter. - Let the excess batter drip off before placing it on the baking sheet. - Arrange the florets in a single layer. This helps them cook evenly. - Place the baking sheet in the oven and bake for 20 minutes. - Flip the florets halfway through to ensure they get crispy on all sides. - In a bowl, mix 1 cup of buffalo sauce with 2 tablespoons of melted butter if you want extra creaminess. - After the first bake, remove the cauliflower from the oven. - Drizzle the buffalo sauce over the baked florets and toss gently. - Return the baking sheet to the oven and bake for another 10-15 minutes. - Look for a crispy, golden brown finish. Enjoy these bites straight out of the oven! For the full recipe, check out the provided link. To get that perfect crunch, batter consistency matters. Your batter should not be too thick or too runny. It needs to coat the florets well. This balance helps create a crispy outer layer. Flipping the florets halfway through baking is key. It ensures both sides crisp up nicely. This simple step can make a big difference in texture. If you prefer an air fryer, here’s how to do it. Preheat your air fryer to 400°F (200°C). Place the coated florets in a single layer. Air fry for about 15 minutes, shaking the basket halfway through. This method gives you a delightful crisp without using much oil. If you want to fry them, heat oil in a deep pan. Fry the florets until golden brown, about 3-4 minutes. Then, drain them on a paper towel. Buffalo cauliflower bites pair well with various dipping sauces. Ranch and blue cheese dressings are great choices. They balance the heat of the buffalo sauce and add creaminess. For plating, arrange the bites on a colorful platter. Add some fresh parsley as a garnish for a pop of color. Serve with your favorite dipping sauce on the side for an appealing look. Enjoy these bites warm for the best flavor! {{image_2}} You can change the spice level in Buffalo cauliflower bites easily. For mild bites, use less buffalo sauce. If you want more heat, add more sauce or use a spicier brand. You can also swap out the sauce for other flavors. Try barbecue sauce for a sweet twist or teriyaki sauce for an Asian flair. Experiment with herbs like thyme or oregano to make it unique. For a gluten-free version, swap all-purpose flour with gluten-free flour. This keeps the bites crispy without the gluten. You can also use chickpea flour, which adds a nice flavor and protein. For vegan options, skip the butter in the sauce. You can use olive oil or coconut oil instead. This keeps the bites vegan while still tasting great. These bites pair well with many side dishes. Serve them with a fresh salad for a light meal. You can also add carrot and celery sticks for crunch. For drinks, iced tea or lemonade works well. If you prefer something stronger, try a light beer or a crisp white wine. These pairings enhance the flavors and make your meal more enjoyable. To keep your Buffalo Cauliflower Bites fresh, use airtight containers. Glass or plastic containers work well. Make sure they are completely cool before sealing. Store in the fridge for up to 3 days. This way, they stay tasty and safe to eat. To reheat your leftovers, the oven is best. Preheat it to 350°F (175°C). Place the bites on a baking sheet for about 10-15 minutes. This keeps them crispy. The microwave is faster but can make them soggy. If you use the microwave, heat them for 1-2 minutes on a plate. If you want to freeze these bites, let them cool completely. Place them in a single layer on a baking sheet. Freeze for 1-2 hours until firm. Then, transfer them to a freezer bag. They can last for up to 2 months. When ready to eat, thaw them overnight in the fridge. Reheat in the oven to restore crispiness. Follow the Full Recipe for serving ideas and tips! You can pair Buffalo Cauliflower Bites with many tasty sides. Here are some great ideas: - Dipping Sauces: Ranch or blue cheese dressing works well. - Veggies: Carrot and celery sticks add a nice crunch. - Salads: A side salad can balance the heat. - Grains: Serve with quinoa or rice for a complete meal. These combinations make the bites even more enjoyable! Yes, you can prepare Buffalo Cauliflower Bites in advance. Here are some tips: - Prepare the batter: Make the batter a day ahead and store it in the fridge. - Cut the cauliflower: You can cut the florets and store them in water to keep them fresh. - Bake and store: Bake the bites, then let them cool. Store them in airtight containers for up to three days. Reheat in the oven for a crispy finish. To adjust the spice level, follow these steps: - Use mild sauce: Choose a mild buffalo sauce instead of a spicy one. - Add butter: Mix in melted butter to the sauce for a creamier, smoother flavor. - Mix with other sauces: Combine buffalo sauce with ketchup or honey for a milder taste. These changes will help you enjoy the bites without too much heat! Buffalo cauliflower bites are a tasty treat that anyone can enjoy. We covered main ingredients, like cauliflower and buffalo sauce, plus the steps to prepare, bake, and serve them. I included tips for achieving that perfect crispy texture and offered fun variations to try. Finally, I shared storage and reheating advice so you can enjoy these bites later. Follow these simple steps, and you'll create a dish that's sure to impress. Dive in, experiment, and enjoy delicious buffalo cauliflower bites any time!

Buffalo Cauliflower Bites Crispy and Flavorful Treat

Looking for a tasty snack that’s both crispy and full of flavor? Buffalo Cauliflower Bites check all the boxes! These

- 1 cup all-purpose flour - ½ teaspoon baking soda - ¼ teaspoon salt - ½ cup unsalted butter, softened The base of our chocolate chip cookie dough bites starts with all-purpose flour. This flour gives the bites structure. Baking soda helps them rise just a bit, while salt enhances the flavors. Softened butter adds creaminess and richness. - ½ cup brown sugar, packed - ¼ cup granulated sugar - 1 teaspoon vanilla extract - 1 tablespoon milk (or dairy alternative) We use both brown and granulated sugar for a perfect balance of sweetness. Brown sugar adds moisture and a hint of caramel flavor. The vanilla extract brings warmth and depth. A splash of milk makes the dough creamy and soft. - ½ cup mini chocolate chips - 1 cup dark chocolate chips (for coating) No cookie dough bites are complete without chocolate! Mini chocolate chips mix into the dough, giving each bite a sweet surprise. For coating, dark chocolate adds a rich layer that complements the cookie dough perfectly. For the full recipe, check out the [Full Recipe]. First, gather your dry ingredients. In a medium bowl, whisk together: - 1 cup all-purpose flour - ½ teaspoon baking soda - ¼ teaspoon salt Make sure everything mixes well. This step helps the cookies rise evenly. Next, focus on the wet mix. In a large bowl, cream together: - ½ cup unsalted butter, softened - ½ cup brown sugar, packed - ¼ cup granulated sugar Beat these ingredients until light and fluffy. This takes about 2-3 minutes. It creates a nice base for your cookie dough. Now, mix in: - 1 teaspoon vanilla extract - 1 tablespoon milk (or dairy alternative) Stir well until everything combines smoothly. Now it’s time to bring it all together. Gradually add the dry ingredients to the creamed mixture. Stir gently until just combined. Be careful not to overmix. Overmixing can make the bites tough. Finally, fold in: - ½ cup mini chocolate chips This adds a delightful burst of chocolate flavor in every bite. Using a small cookie scoop or your hands, form the dough into small balls. Place them on a baking sheet lined with parchment paper. Chill the cookie dough balls in the freezer for about 30 minutes, until firm. You can find the full recipe for more details. To make cookie dough bites, keep a few tips in mind. First, don't overmix the dough. Mixing too much can make them tough. Just stir until you see no dry flour. Also, use a cookie scoop for uniform sizing. This makes each bite the same size, ensuring they cook evenly. When melting chocolate, the key is patience. Microwave the chocolate chips in short intervals of 30 seconds. Stir often between each interval. This helps prevent the chocolate from burning. The goal is smooth, shiny chocolate that coats the bites perfectly. Serving cookie dough bites is a fun part! Present them on a decorative plate. Add a sprinkle of extra mini chocolate chips around them. This not only looks great but also adds a touch of fun. Your guests will love this sweet treat! For the full recipe, check out the detailed steps to create these delicious bites. {{image_2}} You can make chocolate chip cookie dough bites healthier. Swap all-purpose flour for whole wheat flour. Whole wheat flour adds fiber and nutrients. If you're gluten-free, use gluten-free flour blends. Both options keep the dough tasty! Add fun flavors to your bites! Try mixing in chopped nuts like walnuts or pecans. They add crunch and flavor. You can also use different types of chocolate. Dark chocolate, milk chocolate, or even white chocolate work great. Each type brings a new taste. Make your cookie dough bites fit the season! In winter, add peppermint extract to give a fresh twist. For fall, mix in pumpkin spice to warm up the flavor. These seasonal ideas make your bites special for any time of year. You can find the full recipe above to try these variations at home! To keep your chocolate chip cookie dough bites fresh, store them in an airtight container in the fridge. This way, you can enjoy them for up to a week without losing their tasty texture. Make sure the lid is tight to avoid any unwanted moisture. For long-term storage, you can freeze the cookie dough bites for up to 2 months. This method is ideal for meal prep. Just place them in a freezer-safe bag or container. Label the container with the date, so you know when to use them. When you're ready to indulge, let the cookie dough bites sit at room temperature for a few minutes. This step helps them soften and enhances their flavor. Enjoy the rich taste of chocolate and cookie dough with every bite! Yes, you can eat cookie dough bites raw. However, they contain flour, which can have bacteria. To make it safer, you can heat-treat the flour. Spread it on a baking sheet and bake it at 350°F for about 5 minutes. This process kills any harmful bacteria. I always recommend this step to keep your treats safe and tasty. These chocolate chip cookie dough bites last about one week in the fridge. Store them in an airtight container to keep them fresh. If you want to keep them longer, you can freeze them. They can last up to two months in the freezer. Just make sure to wrap them well so they don’t get freezer burn. If you want a dairy-free or vegan option, you can use coconut oil or a vegan butter substitute. Both work well and keep the bites soft. You can also use applesauce for a lower-fat option, but it will change the flavor a bit. Just remember, the texture may be slightly different with these substitutes. Enjoy making these treats with your own twist! For the full recipe, check out the detailed instructions above. In this blog post, we explored how to make delicious chocolate chip cookie dough bites. You learned about essential ingredients like flour, sugars, and chocolate. I shared step-by-step instructions to create the perfect dough. We discussed tips for melting chocolate and storing your treats. You also discovered fun variations and healthy alternatives. Enjoy crafting these bites, and remember, they are perfect for sharing or enjoying on your own!

Chocolate Chip Cookie Dough Bites Irresistible Treat

Are you ready for a sweet treat that hits the spot? Chocolate Chip Cookie Dough Bites are the perfect blend

Newer posts
← Previous Page1 … Page83 Page84

dsad

© 2026 Foodish Talk • Built with GeneratePress

Our Policies

  • Copyright Policy
  • Cookie Policy
  • GDPR Policy
  • Privacy Policy
  • Disclaimer
  • Terms Of Use

More Information

  • Home
  • About
  • Contact
  • Appetizers
  • Dessert
  • Dinner
  • Drinks
©2026, Foodish Talk About Back To Top