Skip to content
DisclaimerTerms Of UseGDPR PolicyCookie Policy

Foodish Talk

  • Home
  • Drinks
  • Appetizers
  • Dinner
  • Dessert
  • About
  • Contact
  • Privacy Policy
DisclaimerTerms Of UseGDPR PolicyCookie Policy

NO-ING-IMG

- 1 whole chicken (about 4-5 lbs) - 4 cloves of garlic, minced - 2 large lemons (1 sliced, 1 juiced) - 1/4 cup olive oil - 2 teaspoons fresh rosemary, chopped (or 1 teaspoon dried) - 2 teaspoons fresh thyme, chopped (or 1 teaspoon dried) - Salt and black pepper to taste - 1 cup chicken broth or vegetable broth - Fresh parsley for garnish In this dish, I focus on simple, fresh ingredients. A whole chicken is the star. I prefer one around 4 to 5 pounds for even cooking. Garlic adds a nice kick. I use four cloves, minced finely, for bold flavor. Lemons bring brightness. I recommend using two lemons: one for juice and one for slices. For the marinade, I combine olive oil, fresh herbs, and seasonings. The olive oil helps keep the chicken moist. Rosemary and thyme add earthy notes. I use fresh herbs when I can, but dried works too. Don’t skip the salt and pepper! They enhance the chicken's taste. I also add chicken broth to the pan. This keeps the chicken juicy and helps make a tasty sauce. Lastly, fresh parsley brightens the plate. It makes the dish look beautiful and fresh. For the full recipe, check out the section above. You'll find all the steps to create this delicious Lemon Garlic Roasted Chicken. - Preheat the oven to 425°F (220°C). - In a small bowl, mix the minced garlic, lemon juice, olive oil, rosemary, thyme, salt, and pepper. - Pat the chicken dry with paper towels. This step helps achieve crispy skin. - Rub the marinade all over the chicken. Make sure to coat the inside of the cavity. If you can, gently separate the skin from the breast meat. Rub some marinade under the skin for more flavor. - Stuff the chicken cavity with lemon slices. - Place the chicken breast-side up on a roasting rack in a roasting pan. Pour the chicken broth into the bottom of the pan to keep it moist. - Roast the chicken for 1 hour and 15 minutes. Baste it with the pan juices halfway through. This keeps the chicken juicy and adds flavor. It is ready when the internal temperature reaches 165°F (75°C) and the skin is golden brown. For the full recipe, refer to the complete instructions to enjoy this simple and flavorful dish. To get that perfect crispy skin on your chicken, start by drying it well. Use paper towels to pat the skin dry. This step is key because moisture makes it hard for the skin to crisp up. Next, gently separate the skin from the meat. This lets the marinade seep in and adds more flavor. For the best taste, marinate the chicken for at least one hour. If you have the time, letting it sit overnight works wonders. Use fresh herbs like rosemary and thyme to boost flavor. Fresh herbs give a brighter taste than dried ones. Basting helps keep the chicken moist. Use a spoon or a brush to apply the pan juices over the chicken. Do this halfway through the cooking time for the best results. It helps lock in moisture and adds flavor. {{image_2}} You can change the taste of your Lemon Garlic Roasted Chicken by using different herbs. Oregano and sage can give it a new twist. Fresh herbs add great flavor, and you can mix them up based on your taste. You might also try adding citrus fruits like oranges. The sweet taste of oranges with lemon makes the chicken even better. If you want to try a different way to cook your chicken, consider a slow cooker. This method makes the chicken very tender. You can set it in the morning and come home to a warm meal. Grilling is another option. It gives the chicken a nice smoky flavor. This method is perfect for summer cookouts. When serving Lemon Garlic Roasted Chicken, think about sides that match well. Roasted vegetables or fluffy rice work great. They soak up the chicken's juices and add color to your plate. You can also use the chicken in a sandwich or a salad. Pull the meat apart and add it to greens for a fresh and tasty meal. For the full recipe, check out the [Full Recipe]. To store leftover chicken effectively, let it cool first. Then, place it in an airtight container. This helps keep it fresh. You can also wrap it tightly in plastic wrap or foil. Make sure to remove as much air as possible. The best containers for preserving freshness are glass or BPA-free plastic. They prevent odors and keep the chicken tasty. Store the chicken in the fridge for up to four days. When you are ready to eat, you can reheat the chicken safely. Use the oven or microwave for best results. To reheat in the oven, preheat it to 350°F (175°C). Place the chicken in a baking dish and cover it with foil. This keeps the moisture in. Heat for about 20-30 minutes or until warm throughout. In the microwave, place the chicken on a microwave-safe plate. Cover it with a damp paper towel to keep it tender. Heat it in short bursts, checking often to avoid dryness. For freezing, cut the chicken into portions. Wrap each piece tightly in plastic wrap. Then place them in a freezer bag. Remove any excess air to avoid freezer burn. To thaw, move the chicken to the fridge the night before you plan to eat it. If you need it fast, use the microwave on the defrost setting. Once thawed, reheat as mentioned above. Following these tips helps keep your Lemon Garlic Roasted Chicken tasty for later meals! The best way to check chicken is to use a meat thermometer. The safe internal temperature for chicken is 165°F (75°C). Insert the thermometer into the thickest part of the chicken, avoiding the bone. This ensures accurate readings. If it reads 165°F, your chicken is safe and ready to eat. Yes, you can use bone-in pieces like thighs or drumsticks. Bone-in pieces cook faster, so you need to adjust the cooking time. Cook them for about 45 minutes to 1 hour. Use the same marinade and seasonings. Make sure the internal temperature still reaches 165°F for safety. If you're missing some ingredients, don't worry! You can use substitutes. For example, if you lack fresh rosemary, use dried rosemary or even oregano. Citrus juice can replace lemon juice, but the flavor will change. Garlic powder works if you don’t have fresh garlic. Get creative with what you have! Lemon Garlic Roasted Chicken goes well with many sides. Roasted vegetables, like carrots and potatoes, are great choices. A crisp green salad adds freshness. Rice or quinoa makes a nice base to soak up juices. You can also serve it with crusty bread for a hearty meal. This blog post covers a tasty lemon garlic roasted chicken recipe. I shared key ingredients, steps, and tips to make it perfect. You learned about different herbs and cooking methods to create your own twist. Plus, I included useful storage and reheating tips. In the end, you can enjoy this dish easily. It’s sure to impress your family and friends. Happy cooking!

Lemon Garlic Roasted Chicken Simple and Flavorful Dish

If you’re craving a simple yet tasty dish, look no further than Lemon Garlic Roasted Chicken. This recipe features juicy

- 1 pound ziti pasta - 2 cups marinara sauce - 1 cup ricotta cheese - 1 cup shredded mozzarella cheese - 1 cup grated Parmesan cheese - 1/2 cup fresh basil, chopped (plus extra for garnish) - 1 teaspoon garlic powder - 1 teaspoon onion powder - 1/2 teaspoon red pepper flakes (adjust according to spice preference) - Salt and pepper to taste - 2 tablespoons olive oil - 1/2 cup breadcrumbs (optional for topping) When I make baked ziti, I focus on the right ingredients. The main ingredients set the base for this dish. Ziti pasta cooks perfectly and holds the sauce well. Marinara sauce adds a rich flavor that pairs well with the cheeses. The combination of ricotta, mozzarella, and Parmesan gives that dreamy, cheesy texture. For added flavor, I love using fresh basil. It brightens the dish and adds a lovely aroma. Garlic and onion powders give depth without being overpowering. Red pepper flakes bring a hint of spice, but you can adjust it to fit your taste. Optional ingredients can elevate your dish. Salt and pepper enhance all flavors. Olive oil adds richness and helps the breadcrumbs crisp up beautifully. Breadcrumbs are not a must, but they can add a nice crunch to the top. For the full recipe, check out the detailed instructions on how to bring all these ingredients together. 1. Preheat the oven to 375°F (190°C). This step is key for the perfect bake. 2. Cook the ziti pasta in boiling salted water until al dente. This means the pasta should be firm but not hard. Drain and set it aside. 3. In a bowl, mix the cheese mixture. Combine ricotta, half of the shredded mozzarella, Parmesan, chopped basil, garlic powder, onion powder, red pepper flakes, salt, and pepper. Stir until smooth and creamy. 4. In a large bowl, combine the cooked ziti with the marinara sauce. Ensure every pasta piece is coated well. This adds flavor and moisture. 5. In a greased 9x13-inch baking dish, layer half of the ziti mixture. Spread it evenly on the bottom. Spoon the cheese mixture over the pasta. Top with the remaining ziti and sprinkle the rest of the mozzarella cheese on top. If you like a crunchy topping, add breadcrumbs. 6. Drizzle olive oil over the top layer. This gives the dish richness and helps the breadcrumbs crisp. 7. Cover the dish with foil and bake for 25 minutes. Remove the foil and bake for another 15-20 minutes. Look for the cheese to bubble and turn golden brown. Follow these steps for a delicious baked ziti with three cheeses, packed with flavor and comfort. For the full recipe, check the earlier section. Enjoy your cooking! To get the best baked ziti, I have two key tips. First, cover the dish with foil while it bakes. This keeps moisture in and makes the pasta tender. After 25 minutes, remove the foil. This step creates a crispy top that everyone loves. Second, let the baked ziti rest for about 10 minutes after baking. This time allows the layers to set. You will find it much easier to slice. For a rich and creamy texture, always use whole milk ricotta. It blends beautifully into the dish. You can also mix different cheeses for fun flavors. Try using provolone or fontina with mozzarella. Each cheese adds its own magic to the dish. Adjust the red pepper flakes based on your spice level. If you like a kick, add more! For a fresh taste, use herbs like oregano or thyme. These herbs brighten the dish and make it pop. Don’t skip these small details; they truly enhance the flavor. {{image_2}} You can make baked ziti even better with veggies. Spinach adds color and nutrients. Mushrooms give a nice texture. Roasted bell peppers add a sweet twist. Just chop them up and mix them in with the ziti. Want more protein? Try mixing in cooked ground beef or Italian sausage. They add a rich flavor. You can also add cooked chicken for a different taste. Just shred it and stir it into the pasta mix. If you need a gluten-free meal, don’t worry! You can use gluten-free pasta instead of regular ziti. It works well and still tastes great. This way, everyone can enjoy the dish. For more details on making baked ziti, check the Full Recipe. After enjoying your baked ziti, store leftovers in an airtight container in the fridge. This keeps it fresh and tasty. It usually lasts up to 3-5 days. Make sure to let it cool down first before sealing it. This helps prevent condensation, which can make it soggy. For longer storage, freeze baked ziti before baking or after cooling. If you freeze it before baking, just wrap it tightly in plastic wrap or foil. This helps prevent freezer burn. If you bake it first, let it cool completely before freezing. Proper storage keeps the flavors intact. To enjoy that cheesy goodness again, I recommend reheating in the oven for the best texture. Set your oven to 350°F (175°C) and heat until warm. This helps the cheese and sauce blend back together. Microwaving is convenient, but it may affect the texture. If you use the microwave, heat in short bursts to avoid overheating. Yes, assemble and refrigerate before baking, then bake when ready. This makes it easy to serve at a busy dinner. Mozzarella, ricotta, and Parmesan are traditional, but other melting cheeses can be used. Feel free to mix it up with gouda or fontina for unique flavors. Typically 3-5 days when stored properly in an airtight container. Make sure to cool it down before sealing it up. Absolutely! Baked ziti can be made vegetarian by using vegetables or keeping it cheese-only. Spinach, mushrooms, and zucchini work great. Servings usually range between 6-8, depending on portion sizes and sides. It’s perfect for a family meal or a fun gathering. For the full recipe, check out the details and get cooking! Baked ziti is a comforting dish that needs simple steps and tasty ingredients. We covered main items like pasta and cheese, added flavorings, and explored fun variations. You can mix in veggies or proteins, plus adjust spices to your liking. Remember to store leftovers properly for later enjoyment. Whether you bake it fresh or reheat, it remains delicious. Don't be afraid to make adjustments to fit your taste. Enjoy your baked ziti adventure!

Baked Ziti with Three Cheeses Perfect Comfort Dish

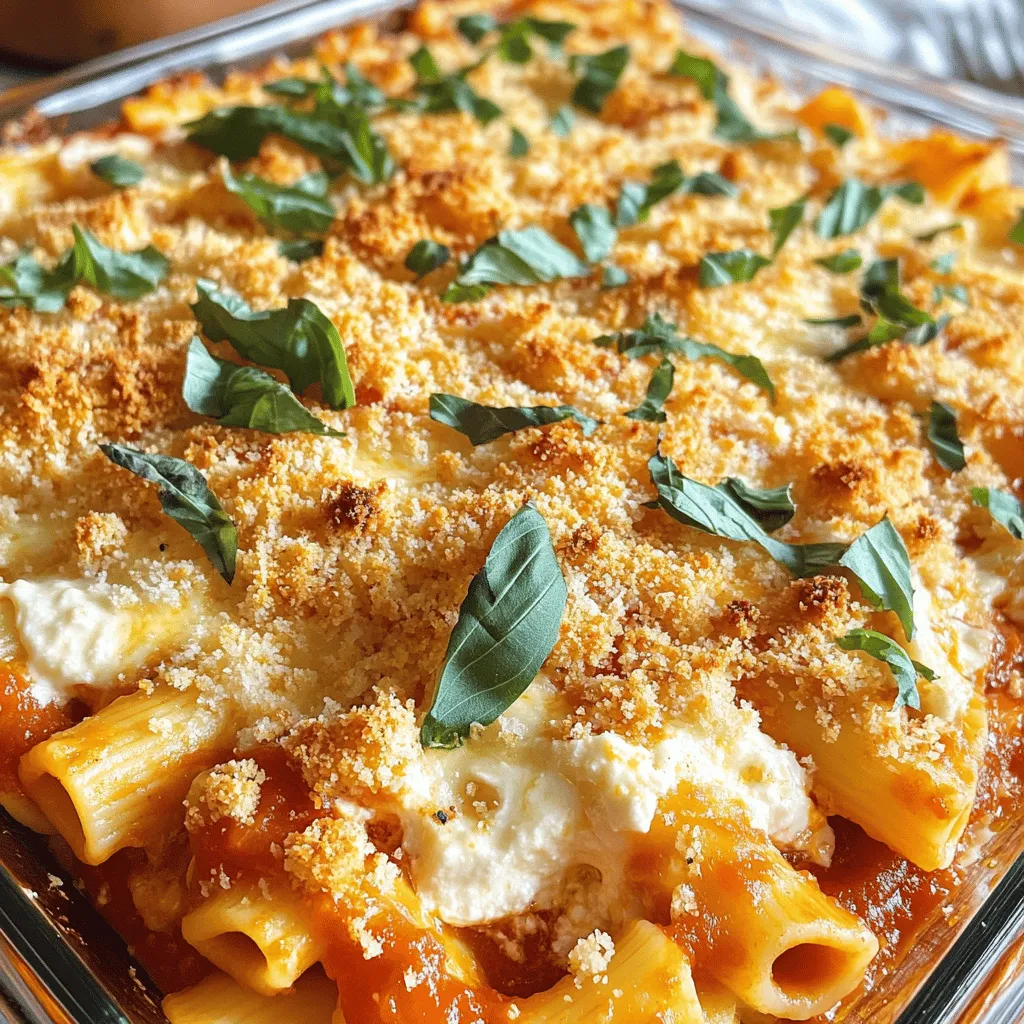
Looking for a dish that warms your heart and fills your belly? Baked Ziti with Three Cheeses is the answer!

Let’s gather the ingredients needed for fluffy buttermilk pancakes. These simple items make a big difference in flavor and texture. - 1 cup all-purpose flour - 2 tablespoons granulated sugar - 1 teaspoon baking powder - 1 teaspoon baking soda - 1/2 teaspoon salt - 1 cup buttermilk - 1 large egg - 2 tablespoons unsalted butter, melted - Cooking spray or extra butter for the skillet These ingredients work together to create a light and fluffy pancake. The buttermilk adds a nice tang and moisture. The baking powder and baking soda help the pancakes rise. You can easily find all these items at your local grocery store. When measuring the flour, make sure to spoon it into the cup and level it off. This method keeps pancakes from becoming dense. Using fresh ingredients, especially the baking powder and baking soda, ensures the best rise and texture. Grab these items and get ready for a delicious breakfast treat. For the full recipe, check out the details above. Start by gathering your dry ingredients. You will need flour, sugar, baking powder, baking soda, and salt. Sift these together in a large mixing bowl. Sifting helps mix the ingredients well. It also adds air, making your pancakes fluffy. In another bowl, measure out buttermilk, an egg, and melted butter. Whisk these together until smooth. This mixes the flavors and makes the batter creamy. Make sure the butter is slightly cooled, or it may cook the egg. Now it’s time to mix the wet and dry ingredients. Pour the wet mixture into the bowl with the dry mix. Fold them together gently. Be careful not to overmix. A few lumps are okay. This keeps your pancakes light and fluffy. Preheat a skillet over medium heat. Lightly grease it with cooking spray or butter. Once hot, pour about 1/4 cup of batter for each pancake. Cook until bubbles form on the surface, about 2-3 minutes. When you see bubbles, flip the pancakes. Cook for another 1-2 minutes until golden brown. Enjoy your pancakes warm! For the full recipe, check the earlier section. To get fluffy pancakes, avoid overmixing the batter. When you mix wet and dry ingredients, do it gently. A few lumps are okay. Overmixing makes the batter tough, which means flat pancakes. Trust me; keeping it simple is key to success. Know when to flip your pancakes by checking for bubbles. As the pancake cooks, bubbles will form on the surface. When you see bubbles, it’s time to flip. Use a spatula to turn the pancake carefully. Cook until golden brown on both sides for the best results. If your pancakes turn out flat, check your baking powder and baking soda. They should be fresh to work well. For uneven cooking, make sure your skillet is at the right temperature. Too hot or too cold will cause issues. Adjust the heat as needed for even cooking. For more details, check the Full Recipe. {{image_2}} You can make your fluffy buttermilk pancakes even more fun. Just add some chocolate chips or fresh blueberries to the batter. Mix in about 1/2 cup of either before you cook them. The chocolate will melt, and the blueberries will burst with juice. Both options add great taste and color to your breakfast. If you want a healthier twist, try using whole wheat flour instead of all-purpose flour. This change adds fiber and nutrients. You can also use lactose-free milk if you are avoiding dairy. Both options keep the pancakes tasty while making them a bit better for you. Want to try something different? Make savory pancakes! Mix in some fresh herbs like chives or spinach. You can also add shredded cheese, such as cheddar or feta. These will give your pancakes a unique flavor and make them great for lunch or dinner, too. For more ideas, check the Full Recipe for fluffy buttermilk pancakes. After making your fluffy buttermilk pancakes, you may have some leftovers. To store them, let the pancakes cool to room temperature. Place them in a single layer on a plate. You can cover them with plastic wrap or foil. If you want to store them longer, stack the pancakes with parchment paper between each layer. Then, put the stack in an airtight container or a freezer bag. This keeps them fresh and prevents sticking. When you're ready to enjoy your pancakes again, reheating them is key. The best way to reheat pancakes is in a skillet. Heat the skillet over medium-low heat. Lightly grease it with a bit of butter. Place the pancakes in the skillet and warm them for about 30 seconds on each side. You can also use a microwave. Just place the pancakes on a plate and cover them with a damp paper towel. Heat in short bursts of 15-20 seconds until warm. This helps keep them soft and fluffy. Fluffy buttermilk pancakes can last in the fridge for about 3 to 4 days. If you freeze them, they can last up to 2 months. Just make sure to seal them well to keep out air. When you're ready to eat them, follow the reheating tips for the best texture. Enjoy your pancakes as if they were just made! You can make buttermilk at home easily. Just mix one cup of milk with one tablespoon of white vinegar or lemon juice. Stir and let it sit for about five to ten minutes. This trick works well in many recipes, including fluffy buttermilk pancakes. If you don't have vinegar or lemon juice, you can use yogurt or sour cream mixed with milk. Yes, you can use self-rising flour for pancakes. This type of flour already contains baking powder and salt. If you choose this option, skip adding baking powder and salt from the recipe. The pancakes may be a bit puffier, so watch them closely while cooking. Toppings make your pancakes even better! Here are some popular choices: - Maple syrup - Fresh berries like strawberries, blueberries, or raspberries - Whipped cream - Sliced bananas - Nut butters, like peanut or almond - Chocolate chips - Greek yogurt - Honey or agave syrup Feel free to mix and match to find your perfect combination! You can also check the Full Recipe for more ideas. You now have all the tools to make fluffy buttermilk pancakes. We covered the key ingredients, prep steps, and cooking methods. Remember to avoid overmixing for the best texture. Experiment with flavors, from fruity to savory, to keep your meals exciting. Store leftovers properly and reheat them for great taste. Enjoy your tasty pancakes with your favorite toppings. Happy cooking!

Fluffy Buttermilk Pancakes Easy Breakfast Delight

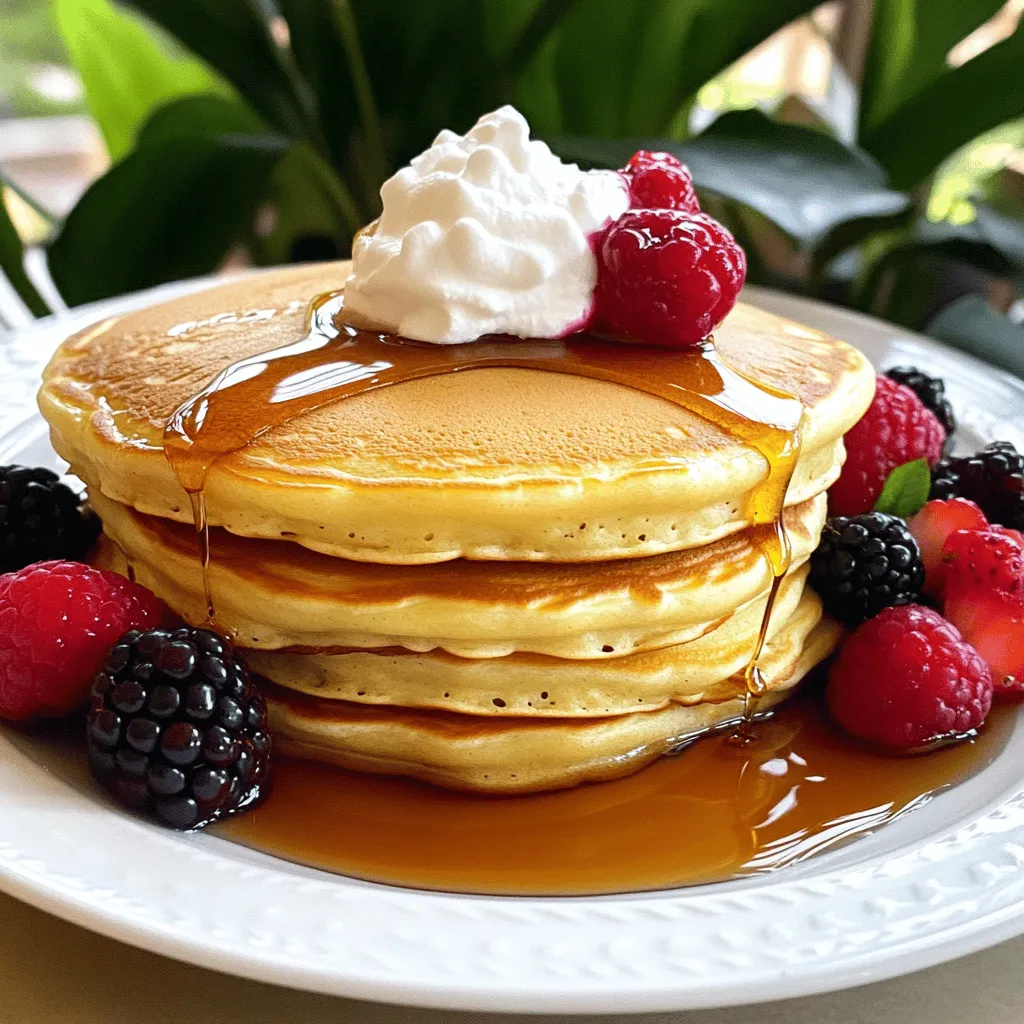
Start your day right with fluffy buttermilk pancakes that are easy to make and fun to eat! In this article,

To make a great chicken pot pie, you need fresh ingredients. Here’s what you’ll need: - 2 cups cooked chicken, shredded - 1 cup carrots, diced - 1 cup peas (fresh or frozen) - 1 cup celery, diced - 1/2 cup onion, diced - 1/3 cup all-purpose flour - 1 cup chicken broth - 1 cup milk - 1 teaspoon garlic powder - 1 teaspoon dried thyme - 1 tablespoon olive oil - Salt and pepper to taste These core ingredients create a rich, savory filling. The chicken gives protein, while the veggies add color and texture. Using the right seasonings makes your pot pie shine. Garlic powder and thyme boost the taste. You can also add: - A pinch of paprika for warmth - A dash of Worcestershire sauce for depth - Fresh herbs like parsley for brightness These extra flavors enhance the overall dish. They make your chicken pot pie more than just comfort food. The crust is key to a great chicken pot pie. You can use: - 1 package refrigerated pie crusts for ease - Homemade pie crust for a personal touch If you want a twist, try using puff pastry. It adds a flaky texture that’s delightful. Whichever crust you choose, make sure to seal it well. This keeps all that yummy filling inside! For the full recipe, check the details in the recipe section. First, set your oven to 425°F (220°C). This step warms the oven for baking. A hot oven helps the crust rise nicely and turn golden. Next, grab a large skillet and pour in the olive oil. Heat it over medium. Add the diced onions, celery, and carrots. Cook them for about 5 minutes. You want the veggies to soften. After that, stir in the peas and let them cook for 2 more minutes. Sprinkle the flour over the veggie mix and stir well. This makes the filling thicker. Cook this for 1 minute. Slowly add the chicken broth while stirring to keep it smooth. Keep cooking until the mixture thickens, about 3-4 minutes. Then, pour in the milk. Add garlic powder, thyme, salt, and pepper. Mix everything well. Finally, add your shredded chicken to the skillet. Stir until it’s all combined. Take it off the heat and get ready to assemble your pie. Roll out one pie crust and place it in a 9-inch pie dish. Pour your chicken filling into the crust. Roll out the second crust and cover the filling. Seal the edges by crimping with a fork or pinching it with your fingers. Don't forget to cut small slits on top. This lets steam escape. Brush the beaten egg over the top crust. This gives it a nice golden color. Bake your pie in the preheated oven for 30-35 minutes. Look for a golden brown crust. Let it cool for 10 minutes before serving. Enjoy this comforting dish! For the full recipe, check out the detailed instructions above. To get a golden crust, start by using a beaten egg wash. Brush it on the top before baking. This adds color and shine. Make sure the oven is hot. Preheat it to 425°F (220°C) before you bake. If you want extra crispiness, place a baking sheet on the bottom rack. It helps catch any drips and adds heat. One common mistake is overfilling the pie. If you add too much filling, it may spill over. Ensure your crust is fully sealed. Crimp edges well, so steam does not escape. Another mistake is not letting the pie cool. Cutting it too soon makes a mess. Let it sit for about 10 minutes before slicing. Herbs and spices can boost the taste of your pot pie. I love using dried thyme and garlic powder for depth. Fresh herbs like parsley or rosemary can also add flair. Try adding a pinch of nutmeg for warmth. Remember, start small with spices and taste as you go. You can always add more, but you can't take it back! For the complete culinary experience, refer to the [Full Recipe]. {{image_2}} You can switch up the protein in your chicken pot pie. Try turkey or diced ham for a tasty change. For a vegetarian option, use mushrooms or lentils. They add great texture and flavor. You can also mix in different vegetables, like corn, green beans, or sweet potatoes. This keeps your dish fresh and exciting. Each variation brings its own twist to the classic recipe. If you need gluten-free options, use gluten-free flour for thickening. You can find gluten-free pie crusts at the store. For a dairy-free version, replace milk with almond or coconut milk. This makes the dish lighter while keeping it creamy. Always check labels to ensure ingredients fit your dietary needs. These options make the dish accessible for everyone. Get creative with your chicken pot pie! Add a splash of white wine for depth. You can also mix in cheese for a rich flavor. Another fun idea is to top it with mashed potatoes instead of a crust. This twist gives you a hearty meal that feels different yet familiar. Experimenting with spices can also change the flavor profile. Try adding curry powder or smoked paprika for a unique kick. Each twist allows you to enjoy this classic dish in new ways. For the full recipe, check out the Hearty Chicken Pot Pie section. To keep your chicken pot pie fresh, let it cool first. Cover the pie tightly with plastic wrap or aluminum foil. You can also use an airtight container. Store it in the fridge for up to three days. If you have leftover filling, store it in a separate container. This helps keep the crust from becoming soggy. When you're ready to enjoy your leftovers, preheat your oven to 350°F (175°C). Place the pie on a baking sheet to catch any drips. Heat it for about 20-25 minutes, or until it's hot all the way through. If the crust gets too brown, cover it loosely with foil. You can also reheat individual slices in the microwave for 2-3 minutes. Freezing is a great way to save extra chicken pot pie. Make sure it has cooled completely before freezing. Wrap it tightly in plastic wrap, then in foil. You can also freeze it in slices. It will last for up to three months in the freezer. To bake from frozen, preheat the oven to 425°F (220°C) and bake for 50-60 minutes. Check for doneness by looking for a golden crust and bubbly filling. For the best taste, thaw in the fridge overnight before baking. For the full recipe, check the link above. Enjoy your comforting chicken pot pie! Classic Chicken Pot Pie lasts about 3-4 days in the fridge. Make sure to store it in an airtight container. This keeps it fresh and helps maintain the flavor. Always check for any signs of spoilage before eating. If you have leftovers, they make a great quick meal later! Yes, you can make the filling ahead of time. Prepare the filling a day in advance and store it in the fridge. This way, you save time when you're ready to bake the pie. Just be sure to let it cool before putting it in a container. When you are ready, assemble the pie and bake as directed in the full recipe. Classic Chicken Pot Pie goes well with many sides. Here are some great options: - A fresh green salad - Steamed broccoli - Mashed potatoes - Roasted vegetables - Garlic bread These sides add nice flavor and texture, making your meal even more comforting! Classic Chicken Pot Pie combines simple ingredients with easy steps for a delicious meal. You learned how to prep the filling, create a golden crust, and explore tasty variations. Plus, I shared key tips for storing and reheating leftovers. Remember, cooking should be fun! Try new flavors and make this dish your own. Enjoy every bite of your homemade pot pie!

Classic Chicken Pot Pie Perfectly Comforting Meal

Warm up your kitchen with a Classic Chicken Pot Pie, the ultimate comfort meal. I’ll show you how to create

For a tasty Tuscan White Bean Soup, you need a few key items. Here’s what you will use: - 1 tablespoon olive oil - 1 medium onion, diced - 2 cloves garlic, minced - 1 carrot, diced - 1 celery stalk, diced - 2 cups vegetable broth - 2 cans (15 oz each) white beans (cannellini or great northern), rinsed and drained - 1 cup chopped kale or Swiss chard These ingredients create a hearty base. The white beans add protein and fiber. The broth brings depth and warmth. Each vegetable adds its own unique flavor. To boost the taste, use these herbs and seasonings: - 1 teaspoon dried thyme - 1 teaspoon dried rosemary - Salt and pepper to taste - 1 tablespoon lemon juice The thyme and rosemary add richness to the soup. Lemon juice brightens the flavors and adds a bit of zing. Don’t skip the salt and pepper; they pull the whole dish together. For a lovely finish, consider these garnishes: - Fresh parsley, chopped Adding chopped parsley gives a fresh touch. It looks nice and adds a bit more flavor. You can also add a drizzle of olive oil on top for extra richness. For the complete recipe, check the Full Recipe section. Enjoy making this warm and cozy dish! Start by gathering your ingredients for Tuscan white bean soup. You will need: - 1 tablespoon olive oil - 1 medium onion, diced - 2 cloves garlic, minced - 1 carrot, diced - 1 celery stalk, diced - 2 cups vegetable broth - 2 cans (15 oz each) white beans (cannellini or great northern), rinsed and drained - 1 cup chopped kale or Swiss chard - 1 teaspoon dried thyme - 1 teaspoon dried rosemary - Salt and pepper to taste - 1 tablespoon lemon juice - Fresh parsley, chopped for garnish Next, prepare your veggies. Dice the onion, carrot, and celery. Mince the garlic. Rinse and drain the beans. Chop the kale or Swiss chard. This makes cooking easier. Now, let’s cook! Heat the olive oil in a large pot over medium heat. Once hot, add the diced onion. Sauté for about 5 minutes until it turns soft and clear. Then add the minced garlic, diced carrot, and diced celery. Cook these for another 5 minutes until they soften. Pour in the vegetable broth. Bring the soup to a boil. This step adds richness to the flavor. When boiling, reduce the heat to low. Add in the white beans, thyme, and rosemary. Let it simmer for about 15 minutes. This helps the flavors come together. Next, stir in the chopped kale or Swiss chard. Allow it to cook for an additional 5 minutes. The greens should wilt nicely. Once your soup is ready, season it with salt, pepper, and lemon juice to taste. The lemon juice brightens the dish. Now, it’s time to serve! Ladle the soup into bowls and garnish with fresh parsley. This adds a lovely pop of color. Enjoy your hearty and simple Tuscan white bean soup! For the full recipe, check the beginning section. For the best texture, use canned white beans. They are soft and creamy. Rinse and drain them well to remove excess salt. This adds a fresh taste. Sauté your veggies until they are soft, but not mushy. This keeps them firm and flavorful. Use fresh herbs when possible. They add depth to the soup. A splash of lemon juice at the end brightens all the flavors. One mistake is not seasoning enough. Taste your soup as it cooks. Add salt and pepper slowly. Too much can ruin the dish. Another error is overcooking the greens. Add them last, and cook just until wilted. This keeps their color and nutrients. Don't skip the lemon juice. It balances the richness of the beans. Make a big batch of soup. It stores well in the fridge for up to five days. Cool it completely before sealing in a container. This helps prevent bacteria growth. You can also freeze it for up to three months. Portion it out for easy meals later. When reheating, add a splash of broth to keep it moist. You can find the Full Recipe for more details on making this soup. {{image_2}} You can easily make this soup vegetarian or vegan. The base of the soup is already vegetarian. To make it vegan, just use vegetable broth. Avoid adding any cheese or cream. This keeps the soup light and plant-based. Feel free to swap ingredients based on what you have. For instance, you can use spinach instead of kale. If you want more protein, add in some diced tofu. You can also switch out the white beans for chickpeas. This change gives the soup a different taste and texture. Want to add a kick? You can make the soup spicy. Just add a pinch of red pepper flakes while cooking. If you prefer a creamy texture, blend half the soup. Then stir it back in for a smooth finish. You can also experiment with herbs like basil or oregano. These can change the flavor profile and give you new tastes to enjoy. For the full recipe, check out the detailed steps above! Store your leftover Tuscan white bean soup in an airtight container. It stays fresh in the fridge for about 3 to 5 days. Make sure the soup cools down before you seal it. This way, it won’t trap steam and cause sogginess. If you want to enjoy it later, the fridge is a great choice. To freeze your soup, use freezer-safe containers. Leave some space at the top. This allows the soup to expand as it freezes. You can keep it frozen for up to 3 months. When you’re ready to eat, just thaw it in the fridge overnight before reheating. Reheat the soup on the stove over medium heat. Stir it often to ensure it warms evenly. If it seems too thick, add a splash of water or broth. You can also microwave it in a bowl. Cover it with a lid or microwave-safe wrap to avoid splatters. For best flavor, make sure it’s hot all the way through. Enjoy your tasty soup again! For the full recipe, check out the earlier sections. The best beans for Tuscan soup are cannellini and great northern beans. They have a creamy texture and mild flavor. Both types hold up well in soup. You can find them in most grocery stores. Rinse and drain them before adding to your soup. This step helps remove extra salt and starch. Yes, you can use fresh herbs instead of dried ones. Fresh herbs give a brighter taste. For this soup, use about three times more fresh herbs. For example, if the recipe calls for one teaspoon of dried thyme, use three teaspoons of fresh thyme. Chop them finely to release their flavor. To make this soup gluten-free, ensure your broth is gluten-free. Many vegetable broths are gluten-free, but check the label. All the other ingredients in the recipe are naturally gluten-free. So, you can enjoy this soup without worry. You can serve Tuscan White Bean Soup with crusty bread. A simple salad can also be a great side. For a heartier meal, add some grilled chicken or sausage. Pairing it with a light wine can enhance the flavors too. Enjoy your meal with family and friends! Tuscan White Bean Soup is simple and full of flavor. We covered the key ingredients and how they come together. You learned about cooking steps and tips to get the best taste. Don’t forget the variations you can try and how to store your soup. With these insights, you can enjoy this dish any time. Experiment and find your favorite way to make it special. Enjoy your delicious creation!

Tuscan White Bean Soup Hearty and Simple Recipe

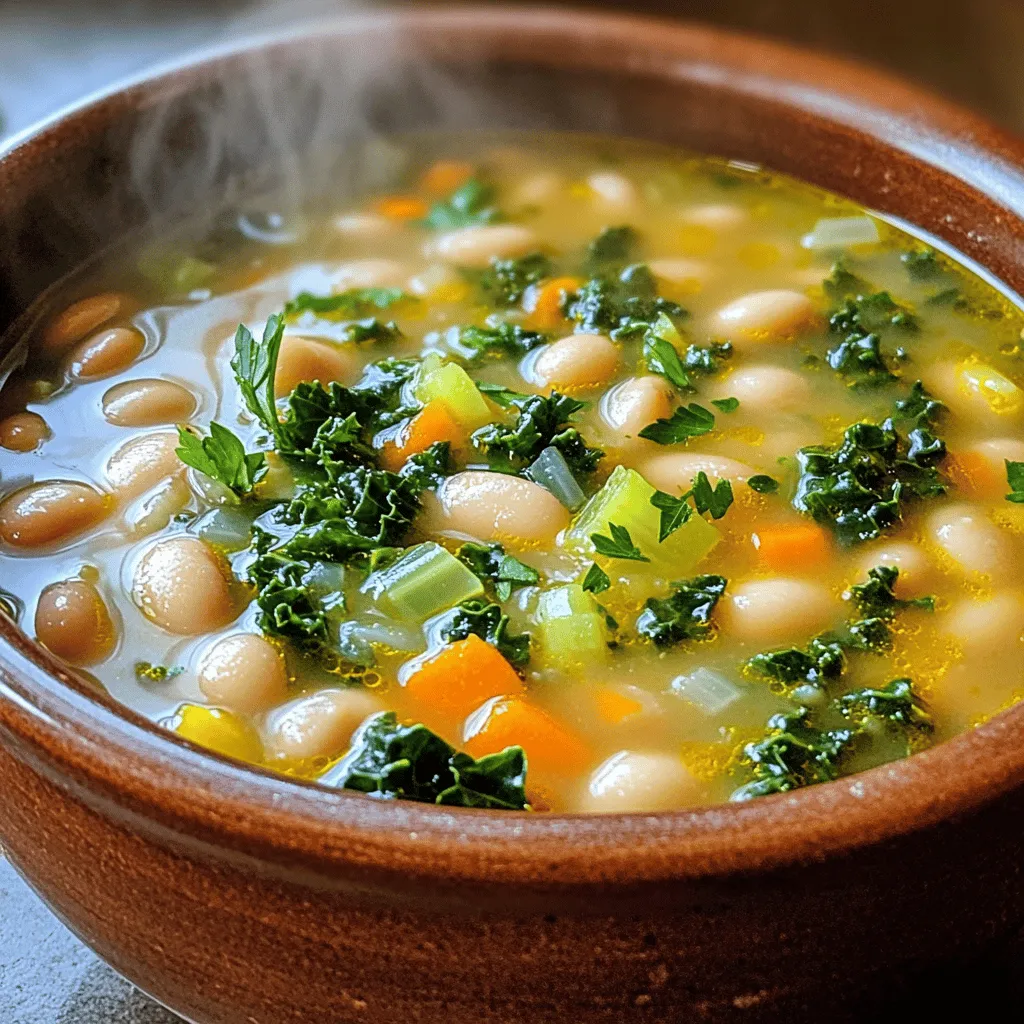
If you’re craving a warm, filling dish, Tuscan White Bean Soup is your answer. This simple recipe is packed with

To make S'mores Cookie Bars, gather these ingredients. Each one plays a key role in creating that dreamy flavor. Here’s what you need: - 1 cup unsalted butter, softened - 1 cup brown sugar - 1/2 cup granulated sugar - 2 large eggs - 2 teaspoons vanilla extract - 2 1/2 cups all-purpose flour - 1 teaspoon baking soda - 1/2 teaspoon salt - 1 cup chocolate chips - 1 cup mini marshmallows - 1/2 cup graham cracker crumbs (plus extra for topping) These ingredients blend together to form a rich, gooey treat. The butter adds moisture, while the sugars give sweetness. Eggs help bind everything for that perfect chewy texture. Vanilla adds a warm note, making each bite delicious. Flour provides the structure, and baking soda helps the bars rise. Salt brightens the flavors, balancing the sweetness. Chocolate chips and mini marshmallows bring the classic s'mores taste to life. The graham cracker crumbs add crunch and make these bars truly special. You can find the Full Recipe above to guide you through the steps. Enjoy making these tasty treats! - Preheat the oven to 350°F (175°C) and grease a 9x13-inch baking pan. - In a large bowl, cream together 1 cup of softened butter, 1 cup of brown sugar, and 1/2 cup of granulated sugar until light and fluffy. - Add in 2 large eggs one at a time, mixing well after each. Stir in 2 teaspoons of vanilla extract. - In a separate bowl, whisk together 2 1/2 cups of all-purpose flour, 1 teaspoon of baking soda, and 1/2 teaspoon of salt. - Gradually mix the dry ingredients into the wet mixture until just combined. - Fold in 1 cup of chocolate chips and 1 cup of mini marshmallows, saving some for the top. - Spread half of the cookie dough mixture into the bottom of the prepared pan, pressing it down evenly. - Sprinkle 1/2 cup of graham cracker crumbs over the dough, then add the reserved chocolate chips and mini marshmallows on top. - Dollop the remaining cookie dough over the s'mores mixture, spreading it out as best as you can. It’s fine if some filling shows. - Top with more graham cracker crumbs for extra crunch. - Bake in the preheated oven for 25-30 minutes, or until the edges are golden brown and the middle is set. - Let the bars cool in the pan for at least 15 minutes before moving them to a cutting board. Cut into squares for serving. This recipe makes 24 sweet, chewy bars for everyone to enjoy. You can find the full recipe above for all the details! - Ensuring even baking and golden edges: I recommend using an oven thermometer. It helps you know the true temperature. Make sure to rotate the pan halfway through baking. This ensures even heat for a perfect golden edge. - How to avoid overmixing the dough: Mix just until you see no dry flour. Overmixing can make your bars tough. Use a spatula to fold in the chocolate chips and marshmallows gently. - Serving warm with chocolate sauce: I love to serve these bars warm. Drizzle melted chocolate sauce over each square. This makes every bite even more indulgent. - Creative garnishing ideas: Try adding a few extra mini marshmallows on top. You can also sprinkle graham cracker crumbs for a nice crunch. A dusting of powdered sugar can add a lovely touch, too! - Using different types of chocolates: I enjoy mixing dark chocolate chips with milk chocolate. This gives a delightful blend of sweet and rich flavors. You can even use white chocolate for a fun twist. - Alternatives to mini marshmallows: If you want a different texture, try using marshmallow fluff. You could also use toasted coconut for a new flavor profile. {{image_2}} You can easily change the flavor of your S'mores Cookie Bars. Here are some fun ideas: - Add nutty flavors by mixing in walnuts or pecans. This gives a nice crunch and richness. - Try adding different chocolates. Peanut butter chips can give a sweet twist. You can mix them with milk or dark chocolate chips. These small changes can make a big impact on taste. If you have dietary needs, you can still enjoy these bars. Here are some simple swaps: - For a gluten-free option, use almond flour or coconut flour. Both can work well and keep the bars tasty. - To make them vegan, replace the butter with coconut oil. Use flax eggs instead of regular eggs. This keeps the texture while being plant-based. These adjustments help everyone enjoy this treat! For the full recipe, check out the details above. To keep your S'mores Cookie Bars fresh, store them in an airtight container. Use parchment paper to separate layers. This keeps them from sticking together. Place the container in a cool, dry place. These bars can stay fresh for up to a week. If you want to enjoy them longer, consider freezing. To freeze S'mores Cookie Bars, first let them cool completely. Cut them into squares, then wrap each piece tightly in plastic wrap. Place the wrapped bars in a freezer bag. This keeps them from getting freezer burn. They can last up to three months in the freezer. When you want to enjoy a bar, take it out of the freezer. Thaw it in the fridge overnight for best results. If you want it warm, place it in the microwave for a few seconds. Enjoy your treat just like fresh! For the complete recipe, check out the Full Recipe section. Can I make these bars ahead of time? Yes, you can make these bars ahead. Bake them, then let them cool. Store them in an airtight container. They will stay fresh for about four days. You can also freeze them. Cut the bars into squares and wrap each piece. They will keep well in the freezer for up to three months. How do I know when the bars are done baking? Check the edges for a golden color. The center should feel firm but still soft. A toothpick inserted in the middle can help. If it comes out clean or with a few crumbs, the bars are done. Don’t overbake, or they will dry out. Can I use different types of sugar? Absolutely! You can mix brown sugar with coconut sugar. This swap adds a hint of caramel flavor. You can also use white sugar, but it will change the taste slightly. Each sugar brings a unique flavor to your bars. What can I substitute for chocolate chips? If you don’t have chocolate chips, use chopped chocolate bars. You can also try white chocolate or butterscotch chips. For a fruit twist, use dried fruit like raisins or cranberries. They will add a nice chew and sweetness. What toppings go well with S'mores Cookie Bars? Top these bars with whipped cream or a drizzle of chocolate sauce. You can sprinkle extra graham cracker crumbs on top for crunch. Mini marshmallows also make a fun addition. For a twist, try adding crushed nuts. How to pair these bars with beverages? These bars go great with milk or hot cocoa. A cup of coffee or tea offers a nice balance too. If you like something fruity, try a cherry or berry soda. Each drink enhances the sweet flavor of the bars. You learned how to make S'mores Cookie Bars using simple ingredients. Prepping, baking, and adding fun twists can enhance flavor. Remember to store leftovers properly to keep them fresh. You can even freeze them for treats later. Try out different variations for a more exciting taste. Enjoy your baking journey and get creative with serving ideas! These bars are perfect for any occasion, from parties to family nights. Now, grab your ingredients and start baking your delicious S'mores Cookie Bars!

S’mores Cookie Bars Irresistible Treat to Enjoy

Get ready to enjoy a sweet twist on a classic favorite! S’mores Cookie Bars combine gooey marshmallows, rich chocolate, and

- 1 cup frozen spinach, thawed and drained - 1 cup canned artichoke hearts, chopped - 1 cup cream cheese, softened - 1/2 cup sour cream - 1/2 cup mayonnaise - 1 cup shredded mozzarella cheese, divided - 1/2 cup grated Parmesan cheese - 2 cloves garlic, minced - 1/2 teaspoon onion powder - Salt and pepper to taste These ingredients create a rich and creamy dip. The frozen spinach and artichoke hearts give it a nice texture. Cream cheese, sour cream, and mayonnaise add creaminess. The mozzarella and Parmesan cheeses make it cheesy and flavorful. Garlic and onion powder bring out the taste. - 1/2 teaspoon red pepper flakes - Fresh herbs for garnish Red pepper flakes add a little heat. You can also add fresh herbs like parsley for color and flavor. These optional ingredients can make your dip even better. You can find the full recipe with all these details to make the perfect dip. - Preheat your oven to 350°F (175°C). This is key for even baking. - Grab a mixing bowl. You want it large enough for all the ingredients. - Start by combining the cream cheese, sour cream, and mayonnaise in your bowl. Mix until smooth. This creates a nice base. - Next, add the thawed spinach and chopped artichoke hearts. Stir well to blend them in. - Now, mix in half of the shredded mozzarella cheese and the grated Parmesan cheese. Add the minced garlic, onion powder, red pepper flakes (if you want some heat), salt, and pepper. Stir until everything is well mixed. - Transfer your mixture to a baking dish. Spread it evenly for even cooking. - Bake in the oven for 25-30 minutes. Look for bubbling edges and melted cheese on top. - Let the dip cool for a few minutes before serving. This helps prevent burns while you enjoy it. For the full recipe, check the earlier section. To make the best spinach artichoke dip, you want the right texture. A creamy dip is key. Mix your cream cheese, sour cream, and mayonnaise until it's smooth. If it feels too thick, add a bit more sour cream. This makes the dip easier to scoop and spread. For flavor, use fresh garlic. It gives a nice punch. You can also add some lemon juice for brightness. If you like a kick, red pepper flakes work well, but use them sparingly. Taste as you go to find your balance. When serving, think about your dippers. I love toasted baguette slices for crunch. Tortilla chips add saltiness. Fresh veggie sticks like carrots or bell peppers add color and freshness. They also make the dip feel lighter. For a great look, serve the dip warm in a nice dish. Top it with a sprinkle of fresh parsley. This adds a pop of color. Arrange your dippers around the dip. It makes a beautiful spread for any gathering. Here’s a quick look at the calories in this dip. Each serving has about 200 calories. This is a rough estimate, so check the exact brands you use. If you have dietary needs, keep these in mind. This dip has dairy, so it isn't vegan. You can use dairy-free cheese for a vegan version. Low-fat options are available too. Just swap in low-fat cream cheese and sour cream. {{image_2}} You can change up the cheeses in this dip. Try using sharp cheddar or creamy goat cheese. Each cheese adds a unique flavor. If you want a fresh taste, you can swap frozen spinach for fresh. Just make sure to wash and chop it well before using. Want to spice things up? Add some diced jalapeños to the mix. This will give your dip a nice kick. You can also add sun-dried tomatoes or olives for a burst of flavor. These can make your dip stand out at any party. If you're vegan, you can still enjoy this dip! Use vegan cream cheese and mayo. You can also replace regular cheese with a nut-based cheese. For a low-fat option, choose low-fat cream cheese and Greek yogurt instead of sour cream. These swaps keep your dip tasty while making it lighter. Explore these variations to make your Spinach Artichoke Dip unique. Check the Full Recipe for detailed steps on creating this delicious dish. After you enjoy your dip, store leftovers in an airtight container. It will last in the fridge for up to three days. If you want to save it for longer, you can freeze it. Place the dip in a freezer-safe container and seal it well. It can stay in the freezer for up to three months. To enjoy your dip again, the best way to reheat it is in the oven. Preheat your oven to 350°F (175°C). Place the dip in a baking dish and cover it with foil. Bake for about 20 minutes, or until it is warm throughout. You can also use the microwave. Heat it in short bursts, stirring in between, until it’s hot. If you have a big gathering, you might want to make more dip. To do this, simply double or triple the recipe. Keep in mind that you may need a larger baking dish. Adjust the bake time if you make a bigger batch. Check for bubbling and golden cheese to know it's ready. You can serve Spinach Artichoke Dip warm or cold. Warm dip tastes best with crusty bread or tortilla chips. Cold dip pairs nicely with fresh veggies. For warm serving, bake it until it bubbles and the cheese melts. For cold serving, chill it for a few hours. Tips for warm serving: - Use toasted baguette slices. - Offer crispy tortilla chips. - Include fresh vegetable sticks like carrots and celery. Tips for cold serving: - Chill the dip for at least two hours. - Serve with colorful veggie platters for a nice look. Yes, you can prepare Spinach Artichoke Dip ahead of time. Make the mixture and store it in the fridge for up to two days. Just bake it before your gathering. You can also freeze it for longer storage. Thaw in the fridge overnight before baking. Preparing ahead of time: - Mix all ingredients as per the recipe. - Place in an airtight container. - Store in the fridge or freezer until ready to bake. You have many options if you need substitutions. If you can’t find frozen spinach, you can use fresh spinach. For a lighter dip, use Greek yogurt instead of sour cream or mayonnaise. Alternative ingredients for dietary needs: - Swap cream cheese for a dairy-free option. - Use nutritional yeast for a cheesy flavor without dairy. - Try using fresh herbs for a flavor boost. To make your dip creamier, add more cream cheese or sour cream. You can also mix in some heavy cream or a touch of milk. Suggestions for increasing creaminess: - Blend in extra cream cheese before baking. - Stir in a splash of heavy cream for richness. - Use a hand mixer for a smooth texture when mixing. For the full recipe, check out the details above. We covered the key steps to make a tasty Spinach Artichoke Dip. We looked at main and optional ingredients, mixing methods, and baking tips. Understanding storage and reheating kept your dip fresh for longer. Plus, I shared variations for flavors and dietary needs. Whether you stick to the classic recipe or make it your own, enjoy every bite! Dip can bring people together, so have fun sharing this dish at your next gathering!

Savory Spinach Artichoke Dip for Every Gathering

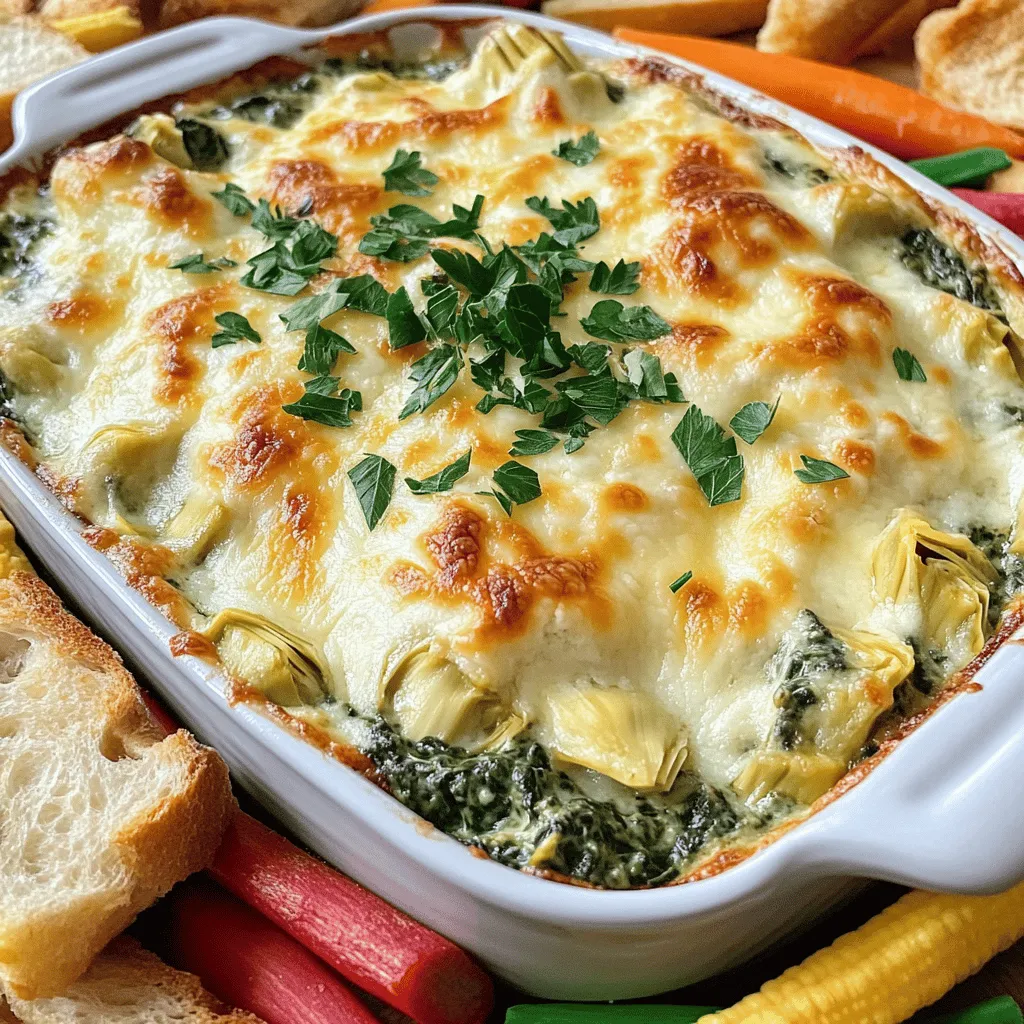
Ready to elevate your gatherings? My savory Spinach Artichoke Dip is the ultimate crowd-pleaser! With creamy textures and rich flavors,

To make Quick Garlic Parmesan Knots, you need fresh and simple ingredients. Gather the following: - 1 pack of refrigerated pizza dough (16 oz) - 3 tablespoons unsalted butter, melted - 4 cloves garlic, minced - 1/4 cup grated Parmesan cheese - 1 teaspoon dried Italian herbs (oregano, basil, thyme) - 1/2 teaspoon salt - 1/4 teaspoon black pepper - Fresh parsley, chopped (for garnish) Using these ingredients, you can create a tasty treat that your family will love. The pizza dough saves time and effort, making this recipe quick and easy. Garlic and Parmesan cheese are a classic combo. They bring rich flavor to every bite. The herbs add a lovely aroma and taste. With just a few simple steps, you can whip up these knots in no time. Perfect for snacks, parties, or family dinners, they are sure to impress. For the full recipe, check out the instructions in my other section. - Preheat your oven to 400°F (200°C) and prepare a baking sheet with parchment paper. - Roll out the pizza dough on a floured surface. Cut it into strips, about 1 inch wide. - Take each strip and form a knot. To do this, make a loop, wrap the ends around, and tuck them underneath. Place each knot on the baking sheet. - In a small bowl, combine melted butter with minced garlic, dried Italian herbs, salt, and black pepper. Stir the mixture well to blend the flavors. - Brush the garlic butter mixture over each knot, ensuring they are evenly coated. - Bake the knots in the preheated oven for 12-15 minutes, or until they turn golden brown. - Once baked, immediately brush with any leftover garlic butter. Garnish with chopped parsley for a fresh touch. To check out the full recipe, simply visit the section above. Enjoy your delicious garlic Parmesan knots! To make your garlic knots pop, add herbs. You can use fresh basil or dill. Just chop them finely and mix them into the garlic butter. This small change can give your knots a fresh taste. You can also try different cheeses. Instead of Parmesan, use mozzarella for a gooey center. Or add feta for a tangy kick. These choices can change the whole dish. For a crispy outside, bake your knots until golden brown. Keep an eye on them in the last few minutes. You want that perfect crunch! To ensure a fluffy inside, do not overbake. The knots should rise nicely. This balance gives you a great bite. Pair your garlic knots with dipping sauces. Marinara sauce is a classic choice. You can also try ranch or garlic aioli for a twist. For a fun presentation, arrange the knots on a wooden board. Add a small bowl of sauce in the center. This makes a great centerpiece for any meal. For the full recipe, check the [Full Recipe]. {{image_2}} You can change up the flavor of your Quick Garlic Parmesan Knots with some fun variations. Let’s explore cheese and seasoning options that will make these knots even more exciting. - Mozzarella knots: Swap out the Parmesan for fresh mozzarella. Cut it into small cubes. Place a cube inside each knot before baking. The gooey cheese melts and adds a delightful stretch. - Feta and herb twists: Crumble feta cheese and mix it with fresh herbs like dill or parsley. Add this mixture to the dough before forming knots. This gives a tangy flavor that pairs well with garlic. - Spicy garlic knots: Add red pepper flakes to the garlic butter mixture. This will give your knots a nice kick. If you enjoy heat, this is a great option. - Pesto-infused knots: Instead of garlic butter, brush the knots with basil pesto. This adds a fresh, herby taste. You can also sprinkle some grated cheese on top for extra flavor. Feel free to mix and match these ideas. Experimenting with flavors can make your garlic knots even more special. For the full recipe, check out the details above. To keep your garlic parmesan knots fresh, use airtight containers. Glass or plastic containers work best. Make sure they seal tightly to lock in moisture. Place the knots in a single layer if possible. This helps avoid squishing them. Store the knots in the fridge for up to three days. If you want to keep them longer, freezing is an option. When reheating, the oven is best for keeping that fresh taste. Preheat your oven to 350°F (175°C). Place the knots on a baking sheet. Heat for about 10 minutes or until warm. This method keeps the knots crispy. If you're in a hurry, use the microwave. Heat for 15-20 seconds. Microwaving is quick, but it may make the knots soft. For the best result, choose the oven. Enjoy your warm and tasty garlic knots again! Garlic knots will stay fresh for about three days in the fridge. Store them in an airtight container. This keeps them soft and tasty. If you need them to last longer, consider freezing them. Yes, you can freeze garlic parmesan knots! Let them cool completely, then place them in a freezer-safe bag. They can last up to three months in the freezer. When ready to enjoy, just bake them straight from the freezer. Garlic knots taste great with various dips. Marinara sauce is a classic choice. You might also try ranch dressing or garlic butter for extra flavor. A zesty pesto can add a fun twist, too. Absolutely! You can use your favorite homemade dough recipe. Just roll it out like the refrigerated dough. Follow the same steps to form knots and bake them. Homemade dough adds a personal touch! Yes, you can prepare garlic knots ahead of time. Form the knots and place them on the baking sheet. Cover them and store them in the fridge for up to a day. When ready, bake them fresh for a warm treat. For the full recipe, check out the details above. These garlic knots are easy and tasty. You now know the ingredients, steps, and tips. Try different cheeses or spices for fun twists. Store leftovers properly to keep them fresh. Enjoy them with dips or at any meal. I hope these ideas inspire your cooking. Happy baking!

Quick Garlic Parmesan Knots Savory and Simple Treat

Are you craving a tasty, easy snack? Look no further! My Quick Garlic Parmesan Knots are here to save the

To make a tasty Easy Chicken Enchilada Casserole, you need some simple ingredients. Here is the list of what you will need: - 2 cups cooked chicken, shredded - 1 can (10 oz) enchilada sauce - 1 can (15 oz) black beans, drained and rinsed - 1 cup corn kernels (fresh, frozen, or canned) - 2 cups shredded cheese (cheddar and Monterey Jack blend) - 8 corn tortillas, cut into quarters - 1 small onion, finely chopped - 1 teaspoon garlic powder - 1 teaspoon cumin - 1 teaspoon chili powder - Salt and pepper to taste - Fresh cilantro, chopped (for garnish) - Sour cream (for serving) These ingredients mix well to create layers of flavor. The cooked chicken brings protein and texture. The enchilada sauce adds a nice kick, while the black beans and corn give you extra fiber and taste. The cheese melts beautifully, making every bite creamy. The tortillas hold everything together, giving it that classic casserole feel. When I cook this dish, I love using fresh cilantro as a garnish. It adds a burst of color and freshness. You can also serve it with a dollop of sour cream on top. This dish is great for family dinners or a fun gathering with friends. For the full recipe, check out the details above. 1. Preheat your oven to 350°F (175°C). This step gets your oven ready for baking. 2. In a large bowl, combine the shredded chicken and other ingredients. Add half of the enchilada sauce, black beans, corn, chopped onion, garlic powder, cumin, chili powder, salt, and pepper. Mix it all well. 3. Create the casserole layers. Start by spreading a thin layer of the remaining enchilada sauce on the bottom of your 9x13 inch baking dish. Next, layer half of the tortilla pieces evenly over the sauce. Then, spread half of the chicken mixture over the tortillas and sprinkle one-third of the cheese on top. Repeat this layering process with another layer of tortillas, the rest of the chicken mixture, and half of the remaining cheese. Finally, top with the last layer of tortilla pieces. 1. Cover and bake for 25 minutes. Use aluminum foil to cover the baking dish to keep it moist. 2. Uncover and finish baking for an additional 15 minutes. This step allows the cheese to become bubbly and golden brown. 3. Let your casserole cool for about 5 minutes. Once it cools, garnish with fresh cilantro. Serve slices on plates with a dollop of sour cream for a yummy touch. For the full recipe, check out Easy Chicken Enchilada Casserole. For the best chicken in this dish, I recommend using rotisserie chicken. It’s tasty, tender, and saves time. You can also use grilled chicken if you prefer. Just shred it well before mixing. To keep your casserole creamy, add some sour cream to your chicken mixture. This makes it rich and smooth. Be sure to cover the casserole with foil while baking to lock in moisture. This helps all the flavors blend well. Pair your enchilada casserole with some fresh sides. A simple green salad goes well. You can also serve it with rice or some tortilla chips. For a nice presentation, serve slices on plates. Add a dollop of sour cream on top. Sprinkle fresh cilantro for a bright touch. This not only looks great but adds a pop of flavor to each bite. {{image_2}} You can easily swap beans or vegetables in this dish. If you want a twist, try black-eyed peas or pinto beans. You can also add diced bell peppers or zucchini for extra veggies. These changes add color and nutrition to the casserole. For cheese, consider using pepper jack or feta. Both offer unique flavors. You can mix cheeses for a richer taste. I often use a blend of sharp cheddar and mozzarella for a nice melt. If you need a gluten-free option, use corn tortillas. They work just as well as regular tortillas. Always check the labels. They should say gluten-free. For a vegetarian version, skip the chicken and add more beans or veggies. You can use mushrooms for a hearty texture. This way, you still get a filling meal without meat. You can adapt this dish to fit your needs easily. To keep your Easy Chicken Enchilada Casserole fresh, store leftovers in an airtight container. Make sure it cools to room temperature first. You can keep it in the fridge for up to four days. If you plan to eat it later, avoid adding toppings like sour cream until you’re ready to serve. This helps keep the flavors fresh! If you want to save some for later, freezing is a great option. First, let the casserole cool down completely. Then, wrap it tightly in plastic wrap and foil. This prevents freezer burn. You can freeze it for up to three months. When you’re ready to enjoy it again, transfer the casserole to the fridge to thaw overnight. Reheat it in the oven at 350°F (175°C) for about 30-40 minutes. Cover it with foil to keep it moist. Check for warmth in the center before serving. Enjoy the same yummy taste as when it was fresh! Yes, you can use store-bought enchilada sauce. Many brands offer tasty options. This saves time and still gives great flavor. Just make sure to choose a sauce that you like. You can also add your own spices to boost the taste. Reheating leftovers usually takes about 20 minutes. Preheat your oven to 350°F (175°C). Place the casserole in a baking dish and cover it with foil. This keeps it moist while it warms. If you use a microwave, heat it in short bursts, stirring often. Yes, you can make this casserole ahead of time. Assemble it and cover it tightly. Store it in the fridge for up to 24 hours. When ready to bake, take it out, let it sit for a few minutes, and then bake it as directed. It’s a great way to save time on busy nights! For the full recipe, check out Easy Chicken Enchilada Casserole. This blog post covered a tasty chicken casserole recipe. You saw each ingredient and learned how to make it. I shared preparation steps, baking tips, and smart storage advice. You found ways to customize your dish with variations and answered common questions. In conclusion, this casserole is both simple and flexible. It works well for any meal. Trust me; your family will love it. Enjoy making it your own and sharing it with others!

Easy Chicken Enchilada Casserole Tasty Family Dish

Are you searching for a simple, tasty dish that your whole family will love? Look no further! My Easy Chicken

- 1 large head of broccoli - 4 cloves garlic - 2 tablespoons olive oil - Zest of 1 lemon - 2 tablespoons lemon juice - 1 teaspoon red pepper flakes - Salt and pepper to taste - 2 tablespoons grated Parmesan cheese (optional) - Fresh parsley for garnish Gathering the right ingredients is key to making Zesty Lemon Garlic Roasted Broccoli. First, you need a large head of broccoli. Look for fresh, bright green florets. Next, grab four cloves of garlic. Fresh garlic packs a big flavor punch. You will also need two tablespoons of olive oil. This oil helps the broccoli roast nicely. Now, let’s talk about flavor enhancers. The zest of one lemon is a must. It adds a fresh, bright note. You will also need two tablespoons of lemon juice for a bit of tang. One teaspoon of red pepper flakes gives a nice kick. Adjust the amount to match your spice level. For seasonings, use salt and pepper to taste. These simple spices bring out the flavors. If you want, sprinkle two tablespoons of grated Parmesan cheese on top. It adds a creamy finish. Finally, don’t forget fresh parsley. It makes a lovely garnish and adds color. You can find the full recipe for Zesty Lemon Garlic Roasted Broccoli above. Enjoy the vibrant flavors! To begin, cut the broccoli into florets. Place the head of broccoli on a cutting board. Slice off the thick stem. Then, break or cut the broccoli into smaller pieces. Aim for even sizes to ensure they cook the same. Next, prepare the garlic. Take four cloves and peel them. Mince the garlic with a knife. Minced garlic gives the dish a strong flavor that pairs well with the broccoli. In a large mixing bowl, combine the broccoli florets and minced garlic. Add two tablespoons of olive oil for richness. Then, add lemon zest and lemon juice for that zesty kick. Sprinkle in one teaspoon of red pepper flakes for heat. Season with salt and pepper to taste. Toss the mixture well to coat the broccoli evenly. Make sure every piece gets some oil and seasoning. This step is key for great flavor. Preheat your oven to 425°F (220°C). This high heat helps the broccoli roast nicely. Next, spread the broccoli mixture on a baking sheet. Make sure it’s in a single layer to roast evenly. Place the baking sheet in the oven. Cook for 20-25 minutes. Stir the broccoli halfway through to ensure it cooks on all sides. You want the broccoli to be tender and slightly crispy on the edges. If you like cheese, sprinkle grated Parmesan cheese during the last 5 minutes. This adds a tasty finish. After roasting, garnish with fresh chopped parsley before serving. For the full recipe, check the complete instructions above. To get your broccoli just right, aim for a roasting temperature of 425°F (220°C). This heat makes the edges crisp while keeping the inside tender. Roast for about 20 to 25 minutes. Stir halfway through cooking to ensure even roasting. To avoid soggy broccoli, make sure to dry the florets well after washing. Excess water causes steam, which leads to mushy results. Toss the broccoli in olive oil and seasonings right before roasting for the best texture. Want more flavor? Try adding extra minced garlic or spices. You can use smoked paprika or even cumin for a different taste. These spices add depth and warmth to your dish. When it comes to oils, stick with high-quality olive oil. It has a rich flavor that enhances the dish. You can also try avocado oil for a lighter taste. Both options work well for roasting and add healthy fats. Zesty Lemon Garlic Roasted Broccoli pairs wonderfully with grilled chicken or fish. It also works great as a side for pasta dishes. For a nice touch, garnish with fresh parsley or a sprinkle of lemon zest. This adds color and brightness to the dish. If you want, you can also serve it with a wedge of lemon for extra zing. For the full recipe, check out the details above. {{image_2}} You can enhance the taste of Zesty Lemon Garlic Roasted Broccoli by adding other vegetables. Bell peppers and carrots work well. They bring extra color and flavor. You can also mix in some cherry tomatoes for a burst of sweetness. Exploring different citrus flavors is fun too. Try lime or orange for a unique twist. Each citrus can change the dish’s profile and make it exciting. If you want a vegan version, simply skip the Parmesan cheese. It still tastes great without it. For gluten-free options, ensure your ingredients are certified gluten-free. You can also reduce sodium by using fresh herbs instead of salt. This keeps it tasty and healthy for everyone. Incorporating seasonal herbs like thyme or rosemary adds a fresh touch. These herbs can elevate the taste, making it perfect for any season. You can also use spices like paprika or cumin for a warm flavor. This dish is great for holiday meals or gatherings. Serve it alongside your favorite main dishes to impress your guests. For the full recipe, check the earlier section. To keep your zesty lemon garlic roasted broccoli fresh, follow these tips: - Let the broccoli cool down to room temperature before storing. - Use airtight containers to prevent moisture loss. - Store in the refrigerator for up to four days. To enjoy your leftovers, reheating is key. Here’s how to do it well: - Use an oven for the best texture. Preheat it to 350°F (175°C). - Spread the broccoli on a baking sheet and heat for about 10 minutes. - You can also microwave it; just cover it with a damp paper towel. This keeps it moist. - Adding a splash of lemon juice while reheating enhances the flavor. Yes, you can freeze roasted broccoli! Here’s how: - Allow the broccoli to cool completely before freezing. - Place it in a single layer on a baking sheet to freeze. - Once frozen, transfer it to a freezer-safe bag or container. - To thaw, place the bag in the fridge overnight. You can also cook it straight from frozen. - Freezing may change the texture slightly, but the taste remains delicious. For detailed steps on making this dish, check the Full Recipe. To make Zesty Lemon Garlic Roasted Broccoli, follow these simple steps: 1. Preheat your oven to 425°F (220°C). 2. Cut the broccoli into small florets. 3. Mince the garlic into tiny pieces. 4. In a large bowl, mix the broccoli florets, minced garlic, olive oil, lemon zest, lemon juice, red pepper flakes, salt, and pepper. 5. Toss well to coat every piece of broccoli evenly. 6. Spread the mixture in a single layer on a lined baking sheet. 7. Roast for 20-25 minutes. Stir halfway through for even cooking. 8. Add cheese during the last 5 minutes if you want. 9. Garnish with fresh parsley before serving. This method gives you crispy, tasty broccoli with a zesty kick. Yes, you can use frozen broccoli. It’s a great time saver. Just keep these tips in mind: - Thaw the broccoli first. You can do this in the fridge overnight or in the microwave. - Drain any excess water after thawing. This prevents sogginess. - Roast for a few extra minutes. Frozen broccoli may need more time to cook than fresh. By following these steps, you will still get a delicious dish. Roasted broccoli pairs well with many dishes. Here are some ideas: - Grilled chicken offers a nice protein balance. - Pasta with lemon sauce complements the flavors well. - Quinoa or rice makes a great base for a healthy meal. - Steak or fish adds richness and works well with the freshness of the broccoli. These pairings will make your meal colorful and delicious! Roasted broccoli can transform your meals with its simple yet bold flavors. We covered the key ingredients, step-by-step cooking methods, and tips for success. Encouraging flavor variations and dietary options adds versatility to this side dish. Remember to store leftovers properly and consider reheating to preserve taste and texture. With these insights, you can enjoy delicious roasted broccoli that suits your taste and style. Explore these ideas and elevate your cooking today!

Zesty Lemon Garlic Roasted Broccoli Flavorful Dish

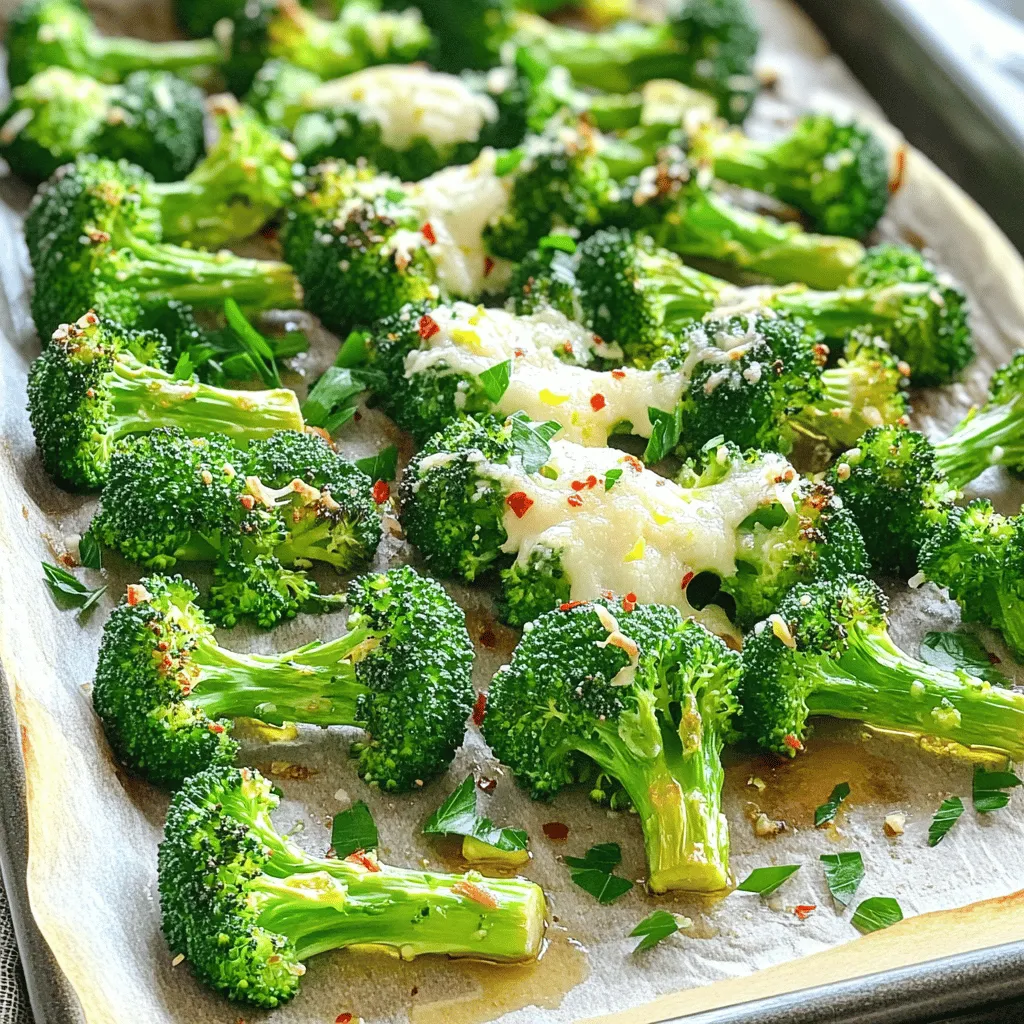
Are you ready to elevate your vegetable game? Zesty Lemon Garlic Roasted Broccoli is packed with flavor and super easy

Older posts
Newer posts
← Previous Page1 … Page81 Page82 Page83 Page84 Next →

dsad

© 2026 Foodish Talk • Built with GeneratePress

Our Policies

  • Copyright Policy
  • Cookie Policy
  • GDPR Policy
  • Privacy Policy
  • Disclaimer
  • Terms Of Use

More Information

  • Home
  • About
  • Contact
  • Appetizers
  • Dessert
  • Dinner
  • Drinks
©2026, Foodish Talk About Back To Top