Skip to content
DisclaimerTerms Of UseGDPR PolicyCookie Policy

Foodish Talk

  • Home
  • Drinks
  • Appetizers
  • Dinner
  • Dessert
  • About
  • Contact
  • Privacy Policy
DisclaimerTerms Of UseGDPR PolicyCookie Policy

NO-ING-IMG

- Bell peppers and their preparation Choose 4 large bell peppers. Any color will work great. Cut off the tops and scoop out the seeds and membranes. Make sure they can stand up straight. A little slice on the bottom helps if they wobble. - Essential ingredients for the stuffing For the stuffing, we need: - 1 cup quinoa, rinsed - 2 cups vegetable broth - 1 can (15 oz) black beans, drained and rinsed - 1 cup corn kernels, fresh or frozen - 1 cup diced tomatoes, canned or fresh - 1 teaspoon of cumin - 1 teaspoon of smoked paprika - ½ teaspoon of garlic powder - ½ teaspoon of onion powder - Salt and pepper to taste - 1 cup shredded cheese, cheddar or a Mexican blend - Optional ingredients for added flavor You can add more flavors if you like. Fresh herbs such as cilantro add a nice touch. A squeeze of lime on top brightens the dish. If you enjoy heat, feel free to add chopped jalapeños or a dash of hot sauce. For a gourmet twist, swap in different grains like rice or couscous. Check out the Full Recipe for more tips! Start by cutting the tops off the bell peppers. Use a sharp knife to slice around the stem. Remove the seeds and membranes inside. This will create a hollow space for the stuffing. If your peppers tip over, slice a tiny bit off the bottom. This helps them stand upright while baking. In a medium saucepan, bring 2 cups of vegetable broth to a boil. Once boiling, add 1 cup of rinsed quinoa. Lower the heat, cover, and let it simmer. Cook for about 15 minutes until the quinoa is fluffy and the broth is fully absorbed. In a large bowl, combine the cooked quinoa with black beans, corn, and diced tomatoes. Add cumin, smoked paprika, garlic powder, onion powder, salt, and pepper. Mix everything well to combine all the flavors. You want the mixture to be colorful and inviting. Preheat your oven to 375°F (190°C). Spoon the stuffing mixture into each bell pepper. Pack it down a bit to fit well. Place the stuffed peppers upright in a baking dish. Top each pepper with a generous amount of shredded cheese. Cover the dish with aluminum foil and bake for 25 minutes. After that, remove the foil. Continue baking for another 10 to 15 minutes until the peppers are tender and the cheese is bubbly and golden. Enjoy your delicious stuffed peppers! For more details, check out the Full Recipe. Choosing the right bell pepper is key. Look for large, firm peppers. Any color works well. Green, red, yellow, or orange peppers all taste great. They should feel heavy for their size and have shiny skin. To ensure even cooking, set your oven to 375°F (190°C). Bake the peppers upright. If they tip over, cut a small slice from the bottom. This will help them stand straight. Cover the dish with foil for the first part of baking. This keeps them moist. Remove the foil later to let the cheese brown. Spices and herbs can really boost flavor. I like to add cumin and smoked paprika to my filling. These spices give a warm, earthy taste. Garlic powder and onion powder also add depth. Try adding a pinch of cayenne for heat if you like it spicy. For cheese, you can switch things up. Cheddar is classic, but feta or goat cheese works well too. If you want a vegan option, skip the cheese or use a plant-based alternative. Nutritional yeast is a great choice for a cheesy flavor without dairy. Presentation matters! Serve the peppers on a colorful plate. Garnish with fresh cilantro for a pop of green. A squeeze of lime adds brightness to the dish. For sides, consider a simple salad or some tortilla chips. You can also pair it with a dollop of sour cream or guacamole. These add creaminess and balance the flavors. Don’t forget to check the [Full Recipe] for more delicious ideas! {{image_2}} You can make stuffed bell peppers for everyone. For a vegetarian option, skip the meat and use more beans or lentils. You can also add nuts or seeds for protein. If you want a vegan option, avoid cheese. Use vegan cheese or skip it altogether. Gluten-free is easy, too. Just make sure you use gluten-free grains like quinoa or rice. Check all your spices and canned goods for gluten, as well. Stuffed peppers can carry many flavors from around the world. For a Mediterranean twist, add olives, feta cheese, and herbs like oregano. An Italian version can include marinara sauce, ground turkey, and mozzarella. You can also change the stuffing. Mix in colorful vegetables like spinach, zucchini, or mushrooms. This makes the dish not only tasty but also healthy and pretty. Using seasonal veggies makes your dish fresh and exciting. In summer, add tomatoes or fresh corn. In fall, try adding roasted squash or sweet potatoes. Adjust your stuffing based on what you find at the market. Each season brings new flavors and textures. You can even use leftover veggies from other meals, reducing waste while making your meal fun. To store leftovers, place them in an airtight container. This keeps the flavors fresh. I recommend cooling the peppers before covering them. You can store them in the fridge for up to three days. If you want to enjoy them later, make sure they are sealed well. Freezing stuffed peppers is easy and keeps them tasty. Wrap each pepper in plastic wrap. Then, place them in a freezer bag or container. This keeps them fresh for about three months. When you're ready to eat, thaw them overnight in the fridge. For best taste, reheat in the oven at 350°F (175°C) until hot. You can also microwave them if you're in a hurry. Prepping ahead saves time on busy days. You can prepare the stuffing and store it in the fridge. This makes it easy to stuff the peppers later. For best results, keep the ingredients separate. This way, your peppers stay fresh and delicious. Enjoy the convenience of meal prep with this delightful recipe! Stuffed bell peppers can last in the fridge for about 3 to 5 days. Make sure to store them in an airtight container. This keeps them fresh and tasty. If you notice any off smells or changes in texture, it's best to toss them. Yes, you can use other grains like rice or couscous. For rice, cook it as you normally would. For couscous, simply add boiling water, cover, and wait a few minutes. Each grain adds a different flavor and texture to your stuffed peppers. Cheddar cheese and Mexican blend cheese work well. They melt nicely and add great flavor. You can also try pepper jack for a spicy kick. For a creamy touch, consider using goat cheese or feta. Mix and match to find your favorite! Absolutely! You can prepare the stuffed peppers a day ahead. Just stuff the peppers and cover them tightly. Store them in the fridge until you're ready to bake. When you're ready, pop them in the oven. They’ll taste just as good! For best results, bake them on the day you plan to eat them. Check the [Full Recipe] for tips on how to make stuffed peppers even more delicious! Stuffed bell peppers are a tasty and versatile dish. We covered the key ingredients and how to prepare them. You learned step-by-step instructions for cooking and baking. I shared tips for perfecting your peppers and ideas for different variations. We also discussed storage and meal prep for convenience. Enjoy experimenting with flavors and ingredients. Remember, cooking is all about creativity and making it your own. Happy cooking!

Stuffed Bell Peppers Delightful Flavorful Recipe

Stuffed bell peppers are a tasty way to enjoy healthy meals! In this delightful recipe, I’ll guide you step by

To make easy Chicken Parmesan, gather these simple ingredients: - 2 boneless, skinless chicken breasts - 1 cup all-purpose flour - 2 large eggs, beaten - 1 cup breadcrumbs (preferably Italian style) - 1/2 cup grated Parmesan cheese - 1 teaspoon garlic powder - 1 teaspoon dried oregano - 1 teaspoon dried basil - Salt and pepper to taste - 1 cup marinara sauce - 1 cup shredded mozzarella cheese - Fresh basil leaves for garnish - Olive oil for frying These ingredients create a dish that is both tasty and satisfying. The chicken breasts provide a great base, while the breadcrumbs and cheese add crunch and flavor. The marinara sauce keeps everything moist and delicious. For a full recipe that guides you through the cooking process, check out the Full Recipe. You can adjust the seasonings based on your taste. Don't forget to have fun while cooking! First, preheat your oven to 375°F (190°C). Next, take two boneless, skinless chicken breasts. Place them between two sheets of plastic wrap. Use a meat mallet to pound the chicken. Aim for an even thickness of about 1/2 inch. This helps the chicken cook evenly. Now, set up your dredging stations. You will need three shallow dishes. In the first dish, put 1 cup of all-purpose flour. In the second, add 2 beaten eggs. In the third, mix together 1 cup of breadcrumbs, 1/2 cup of grated Parmesan cheese, 1 teaspoon of garlic powder, 1 teaspoon of dried oregano, 1 teaspoon of dried basil, and some salt and pepper. Each station will help coat the chicken well. To coat the chicken, take one chicken breast and dip it into the flour. Shake off any extra flour. Next, dip it into the beaten eggs. Make sure it is fully covered. Finally, press it into the breadcrumb mixture. Coat it well on both sides. Repeat this with the second chicken breast. Now, heat olive oil in a large skillet over medium heat. Once the oil is hot, add the chicken. Fry each piece for about 4-5 minutes on one side. Then, flip it over and cook for another 4-5 minutes. The chicken should be golden brown. If your pan feels crowded, fry the chicken in batches. After frying, place the chicken on a paper towel-lined plate to soak up extra oil. To assemble the dish, spread 1/3 cup of marinara sauce on the bottom of a baking dish. Place the fried chicken breasts on top of the sauce. Then, spoon more marinara sauce over each piece. Make sure to cover them well. Now, sprinkle shredded mozzarella cheese evenly over the top. Place the baking dish in your preheated oven. Bake for 20-25 minutes. You want the cheese to be bubbly and golden. The chicken should be cooked through. When it’s ready, take it out and let it cool for a few minutes before serving. Enjoy your Easy Chicken Parmesan! For the complete recipe, check out the Full Recipe. The best frying methods for chicken focus on heat and timing. I recommend using a large skillet and enough olive oil to coat the bottom. This helps to fry the chicken evenly. Always preheat your oil until it's hot but not smoking. A good test is to drop in a breadcrumb; it should sizzle right away. To achieve the perfect crispy coating, make sure your chicken is dry before dredging. This helps the flour stick better. After coating, let the chicken rest for a few minutes. This allows the coating to set, leading to a crunchier bite when you fry. For seasoning variations, try adding a pinch of cayenne pepper for heat or some paprika for a smoky flavor. You can also mix in fresh herbs, like chopped parsley or thyme, into your breadcrumb mix for a burst of freshness. Adding extra ingredients can elevate your dish. Consider placing thin slices of prosciutto on top of the chicken before baking. You can also layer in some sautéed mushrooms or spinach to enrich the meal. The best sides to pair with Chicken Parmesan are simple and fresh. A crisp green salad or garlic bread complements the dish perfectly. You can also serve it with pasta tossed in olive oil and garlic for a heartier meal. For creative ways to serve your Chicken Parmesan, try slicing it and placing it on a toasted baguette for a sandwich. You can also layer it in a bowl with arugula and cherry tomatoes for a fun salad. For the full recipe, check out the recipe section. {{image_2}} To make a lighter Chicken Parmesan, try these swaps: - Use chicken thighs instead of breasts for more flavor. - Substitute whole wheat flour for regular flour. - Try almond flour for a gluten-free option. - Replace breadcrumbs with crushed nuts for crunch. - Use low-fat cheese to cut calories. If you need vegetarian options, consider: - Eggplant slices as the main ingredient. - Portobello mushrooms for a meaty texture. - Cauliflower steaks for a unique twist. - Use tofu for a protein-packed choice. Exploring marinara sauce can change your dish's taste. Here are some ideas: - Add red pepper flakes for a spicy kick. - Mix in fresh herbs like basil or parsley. - Try roasted garlic for rich flavor. - Use a store-bought pesto for a fresh twist. For cheese, think beyond mozzarella: - Try gouda for a smoky taste. - Use ricotta mixed with herbs for creaminess. - Swap in feta for a tangy zing. Serving Chicken Parmesan with pasta enhances the meal: - Pair it with spaghetti for a classic touch. - Use penne for easy forkfuls. - Try zoodles for a low-carb option. To turn Chicken Parmesan into a pasta bake: - Cook your favorite pasta and mix with marinara. - Layer it with the chicken and cheese. - Bake until bubbly and golden for a comforting dish. For the full recipe, check out the detailed instructions above! To keep your Chicken Parmesan tasty, store leftovers properly. Let the dish cool down first. Then, place it in an airtight container. This helps keep moisture in and air out. You can also use a glass or plastic container with a tight lid. For longer storage, freeze the chicken. Just make sure to wrap it tightly in plastic wrap or foil before placing it in a freezer bag. It will stay fresh for about three months. When it’s time to enjoy your leftovers, you have two good options: the oven or the microwave. For the oven, preheat it to 375°F (190°C). Place the chicken on a baking sheet and cover it with foil. This keeps the heat in and helps the cheese melt smoothly. Bake for about 15-20 minutes until hot. If you choose the microwave, place the chicken on a microwave-safe plate. Heat it for one minute, then check. If it’s not hot enough, heat it in 30-second bursts. To keep the crispy texture, avoid the microwave if you can. The oven is best for keeping that delicious crunch. For a great Chicken Parmesan experience, follow these storage and reheating tips. Enjoy your meal! What sides pair well with Chicken Parmesan? Chicken Parmesan tastes great with many sides. I love serving it with spaghetti or a fresh salad. Garlic bread is also a hit! You can try roasted veggies for a healthy touch. Can Chicken Parmesan be made gluten-free? Yes! For gluten-free Chicken Parmesan, use gluten-free breadcrumbs. You can also use almond flour as a great option. Just ensure your marinara sauce is gluten-free too. How can I tell when the chicken is fully cooked? The best way to check is by using a meat thermometer. Chicken should reach 165°F (75°C). If you cut the chicken, the juices should run clear, not pink. How can I achieve a crispy coating every time? To get that perfect crispy coating, make sure to dry the chicken first. Dredge it in flour, then egg, and finally breadcrumbs. Press the breadcrumbs on firmly. Fry in hot oil for the best crunch. Can I prepare Chicken Parmesan ahead of time? Yes, you can prep it the day before! Coat the chicken and store it in the fridge. Just bake it when you are ready to eat. This saves time on busy nights. What is the best way to make homemade marinara sauce? For homemade marinara, sauté garlic in olive oil. Then add crushed tomatoes, salt, and herbs. Simmer for about 20 minutes. This will give you a rich and tasty sauce for your Chicken Parmesan. What is the prep and cook time for this recipe? Prep time for this easy Chicken Parmesan is about 15 minutes. The total cook time is around 30 minutes. So, you can have dinner ready in about 45 minutes. How many servings does this Chicken Parmesan recipe provide? This recipe serves four people. It's perfect for a family meal or a small gathering. Enjoy the cheesy goodness with everyone around the table. You can find the Full Recipe here. This Chicken Parmesan recipe offers a simple way to make a tasty meal. We covered all the essential ingredients and steps, from prepping the chicken to baking it. With tips and variations, you can customize it to your taste. Remember to store leftovers properly to keep them fresh. Whether served with pasta or alone, Chicken Parmesan is always a hit. Enjoy experimenting with flavors and techniques to make this dish your own!

Easy Chicken Parmesan Simple and Tasty Dinner Recipe

Craving a delicious, simple dinner? You’re in the right place! My Easy Chicken Parmesan recipe brings together tender chicken, rich

To make this tasty dish, gather these simple ingredients: - 2 cups cooked brown rice - 2 cups fresh broccoli florets - 1 cup shredded sharp cheddar cheese - 1 cup cottage cheese - 1 cup milk - 1/2 cup grated Parmesan cheese - 1/2 teaspoon garlic powder - 1/2 teaspoon onion powder - Salt and pepper to taste - 1/4 cup bread crumbs (optional) - 2 tablespoons olive oil Using fresh and high-quality ingredients will make your casserole shine. Fresh broccoli adds crunch and flavor. Sharp cheddar gives a bold taste. Choose whole milk for creaminess. If you like a deeper flavor, go for aged Parmesan. Each ingredient plays a role in the dish's overall taste. You can swap some items if needed. For a lighter option, use brown rice instead of white. You can also use frozen broccoli if fresh is not available. If you want a vegan dish, try dairy-free cheese and plant-based milk. Some people like to add extra veggies, like bell peppers or carrots, for more color and nutrition. To start, gather your ingredients. You will need cooked brown rice, fresh broccoli, and various cheeses. Preheat your oven to 350°F (175°C). Grease a medium baking dish with olive oil. In a large bowl, mix the cooked rice and broccoli florets. Stir them together well. In a separate bowl, blend the cheddar cheese, cottage cheese, milk, garlic powder, onion powder, salt, and pepper. Mix until smooth. Pour this cheese mixture over the rice and broccoli. Gently fold everything together, making sure the broccoli is spread out evenly. Transfer this mixture to your prepared baking dish. If you want a crunchy top, sprinkle bread crumbs on top. Baking is key to making this casserole shine. Bake it in the preheated oven for 25-30 minutes. Watch for bubbling and a golden brown top. If you want a deeper flavor, let it rest for a few minutes after baking. This helps all the flavors settle. You can also cover the dish with foil for the first half of baking. This keeps moisture in and helps the rice cook fully. After baking, take the casserole out of the oven. Let it cool for about 5-10 minutes. This helps prevent burns and makes serving easier. You can garnish with extra cheese or fresh herbs if you wish. For the full recipe, check out the detailed instructions. Enjoy your cheesy broccoli rice casserole! To make your casserole creamy, use both cheddar and cottage cheese. The cheddar gives flavor, while the cottage cheese adds moisture. Mixing them well with milk creates a rich base. Don't skip the garlic and onion powders; they enhance the taste. For extra creaminess, add more milk if needed. This will help bind the rice and broccoli together. Baking at 350°F (175°C) is key. It allows the ingredients to heat evenly and meld together. Lightly grease your baking dish with olive oil to prevent sticking. Cover the dish with foil for the first half of baking. This keeps moisture in and helps cook the broccoli fully. Remove the foil for the last few minutes to get that golden top. Herbs and spices can elevate your casserole. Try adding a teaspoon of dried thyme or basil. These herbs pair well with broccoli and cheese. A pinch of red pepper flakes can add a nice kick. For a fresh touch, sprinkle chopped parsley on top before serving. This not only boosts flavor but also adds color. {{image_2}} You can make this casserole vegetarian by keeping the cheese and rice. Use gluten-free rice, like brown or jasmine rice, to keep it gluten-free. This dish is yummy without meat. You can also add more veggies, like bell peppers or carrots, to boost flavor and nutrition. Want to switch things up? Try using gouda or mozzarella instead of cheddar. Each cheese gives a unique taste. For a sharp flavor, choose aged cheese. You can also mix cheeses for a richer experience. Just remember to keep your cheese choices in line with the flavor you like best. If you want more protein, add some cooked chicken or turkey. Diced ham is also a great choice. For a vegetarian option, consider adding chickpeas or lentils. These options make the dish heartier and help keep you full longer. Experiment with different proteins to find your favorite mix. For the full recipe, be sure to check out the complete guide! To keep your cheesy broccoli rice casserole fresh, first let it cool. Once it cools, place it in an airtight container. You can also cover it tightly with plastic wrap. Store it in the fridge for up to three days. Make sure to label your container with the date. This way, you won’t forget when you made it. When you're ready to enjoy leftovers, preheat your oven to 350°F (175°C). Place the casserole in a baking dish. Add a splash of milk to help keep it moist. Cover the dish with aluminum foil to prevent it from drying out. Heat for about 20 minutes, or until it's warm throughout. If you want a crispy top, remove the foil for the last five minutes. You can also freeze this dish for later! After it cools, portion it into freezer-safe containers. Leave some space at the top, as the casserole may expand when frozen. Seal the containers tightly and label them with the date. It can last in the freezer for up to three months. When you're ready to eat, thaw it in the fridge overnight before reheating. This will keep the flavors intact. You can easily prepare Cheesy Broccoli Rice Casserole ahead. Cook the rice and broccoli first. Mix them with the cheese and other ingredients. Pour the mixture into your baking dish. Cover it and store it in the fridge. When you're ready to bake, just pop it in the oven. You may need to add a few extra minutes to the cooking time. Yes, you can use frozen broccoli. It saves time and is often just as tasty. Just thaw and drain the broccoli before mixing it in. This helps prevent extra water in your casserole. Frozen broccoli cooks faster, so keep an eye on your bake time. Many sides go well with this casserole. Here are a few ideas: - Simple green salad - Roasted carrots - Garlic bread - Grilled chicken - Steamed asparagus These sides add variety and balance to your meal. Enjoy exploring new pairings! For the full recipe, check out the Cheesy Broccoli Rice Casserole section. In this blog post, we covered how to make a delicious Cheesy Broccoli Rice Casserole. You learned about the key ingredients and tips for the best results. We explored variations, cooking methods, and how to store leftovers. This dish is simple and fun to prepare. You can customize it to fit your taste. Whether you choose fresh or frozen broccoli, this recipe is easy to love. Enjoy your cooking adventure and share this comfort food with others!

Cheesy Broccoli Rice Casserole Simple Comfort Food

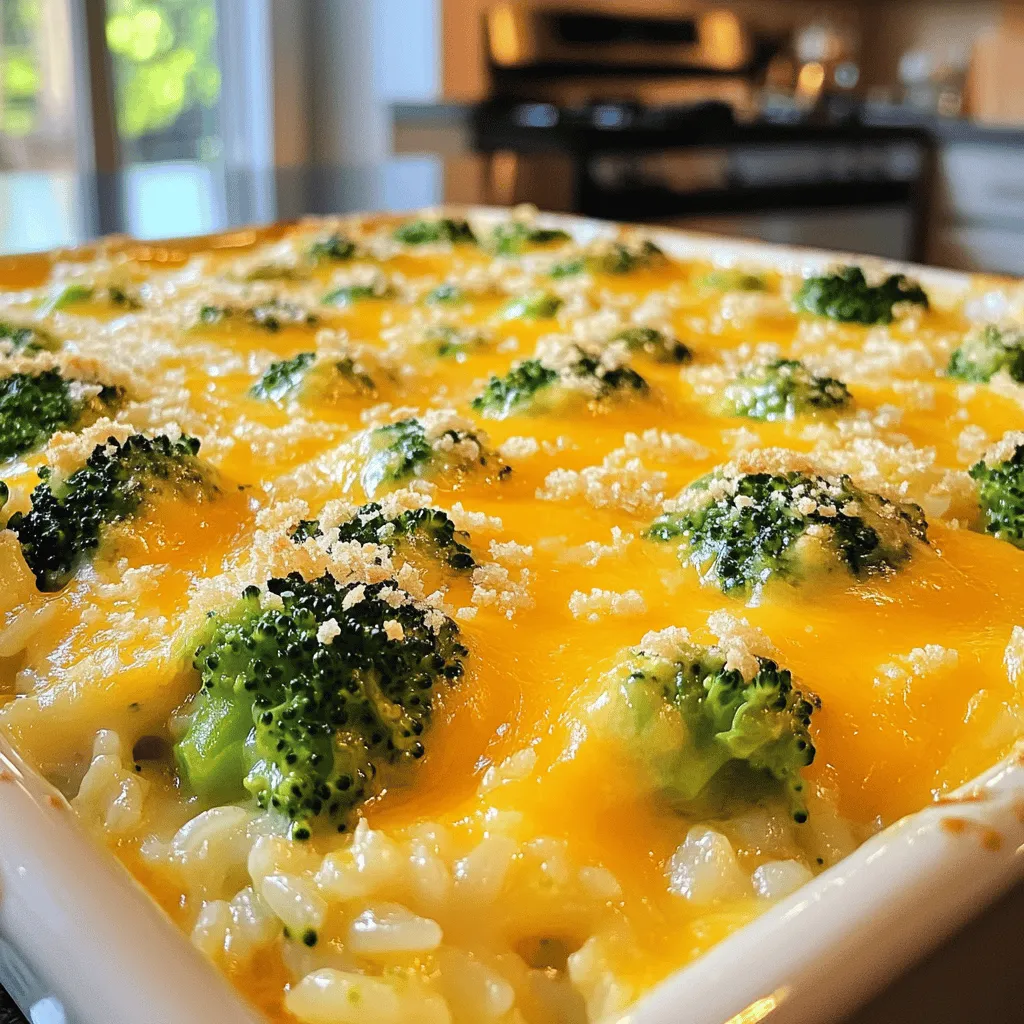
Welcome to your new favorite comfort dish: Cheesy Broccoli Rice Casserole! This simple recipe combines creamy, cheesy goodness with healthy

- 1 ½ cups all-purpose flour - 1 cup granulated sugar - 1 cup fresh blueberries The main ingredients are key to making this cake tasty. All-purpose flour gives the cake its structure. Granulated sugar adds sweetness, making every bite delightful. Fresh blueberries bring a burst of flavor and color to the cake. You can also use frozen blueberries if fresh ones are not available. - ½ cup unsalted butter - 2 large eggs - Zest of 1 lemon - 1 tablespoon lemon juice Next, we have the ingredients that boost flavor. Unsalted butter makes the cake rich and moist. The eggs help bind everything together, giving it a fluffy texture. Lemon zest and lemon juice are essential for that bright, zesty taste. They add a refreshing note that pairs perfectly with the blueberries. - ½ cup buttermilk (or milk with 1 teaspoon vinegar) - Powdered sugar for dusting For serving, you can use buttermilk or a mix of milk and vinegar. This adds moisture and tenderness to the cake. A light dusting of powdered sugar on top makes it look pretty and adds a touch of sweetness. These optional ingredients enhance the overall experience of enjoying your lemon blueberry pound cake. For the complete recipe, check out the [Full Recipe]. 1. First, preheat your oven to 350°F (175°C). This step is key for even baking. 2. Grease a 9x5 inch loaf pan. I like to line it with parchment paper too. This helps with easy removal later. 3. In a medium bowl, whisk together the dry ingredients. You will need: - 1 ½ cups all-purpose flour - 1 teaspoon baking powder - ½ teaspoon baking soda - ¼ teaspoon salt 4. In a large bowl, cream the softened butter and sugar together. Use an electric mixer for about 3-4 minutes. This makes the mixture light and fluffy. 5. Add the eggs one at a time. Mix well after each addition. Then, add in the lemon zest and juice. Keep mixing until everything is combined. 6. Gradually add the flour mixture to the wet ingredients. Alternate with the buttermilk. Start and end with the flour. Mix until just combined. Be careful not to overmix. 7. Now, gently fold in the blueberries using a spatula. Make sure they spread evenly throughout the batter. 8. Pour the batter into the prepared loaf pan and smooth the top. Bake in the preheated oven for 50-60 minutes. A toothpick should come out clean when inserted into the center. These steps will guide you to a delicious Lemon Blueberry Pound Cake. For the full recipe, check the previous section. To bake the best lemon blueberry pound cake, avoid overmixing the batter. Mix until just combined. This keeps your cake light and fluffy. If you overmix, the cake can become tough. Check for doneness using a toothpick. Insert it into the center of the cake. If it comes out clean, your cake is ready. If it has wet batter, bake for a few more minutes and check again. Serving your cake with a dusting of powdered sugar adds a nice touch. It looks pretty and gives a slight sweetness. Just sprinkle a little on top before serving. Pairing your cake with tea or coffee works well. The bright flavors of lemon and blueberry match nicely with a warm drink. Enjoy a slice with your favorite brew for a perfect treat. One common mistake is not using room temperature ingredients. Cold butter or eggs can make mixing harder. It can also affect how well the cake rises. Always bring these to room temp before you start. Another mistake is overbaking the cake. Every oven is different, so keep an eye on it. If you bake too long, the cake can dry out. Aim for that perfect golden color and a clean toothpick! {{image_2}} You can add fun flavors to your Lemon Blueberry Pound Cake. Try using different citrus fruits like oranges or limes. Just swap in their zest and juice. This change gives the cake a fresh twist. You can also mix in nuts or coconut for texture. Chopped walnuts or shredded coconut can add great crunch and taste. If you need a gluten-free cake, you can use a gluten-free flour blend. This swap works well without changing the taste. For a vegan version, replace the eggs with flax eggs. Mix 1 tablespoon of flaxseed meal with 2.5 tablespoons of water for each egg. Use a plant-based butter instead of regular butter for the best results. A glaze can make your cake shine. You can mix powdered sugar with lemon juice for a simple glaze. Drizzle it over the cooled cake for a beautiful finish. For a decorative touch, serve slices on a colorful plate. Add fresh blueberries and lemon slices around the cake. This adds color and makes it look special. You can even use edible flowers for more flair. To keep your lemon blueberry pound cake fresh, store it in the fridge. Wrap it tightly in plastic wrap. You can also use an airtight container. This prevents drying and keeps the flavor intact. If you want to freeze it, slice the cake first. Wrap each slice in plastic wrap and then place them in a zip-top bag. This way, you can enjoy a slice whenever you want! In the fridge, your cake will last about 5 days. If you freeze it, the cake can stay good for up to 3 months. Make sure to label your bag with the date. This helps you keep track of how long it’s been stored. If your cake feels a bit dry after storage, don’t worry! You can refresh it easily. Try warming it in the microwave for about 10 seconds. This helps bring back its soft texture. If you want to heat it in the oven, set it to 300°F (150°C) and warm for about 10 minutes. Enjoy your cake with a dusting of powdered sugar for extra sweetness. Yes, you can use frozen blueberries. Just add them directly to the batter without thawing. This keeps them from breaking apart and turning the batter blue. Adjust baking time if needed. Check your cake a few minutes early to ensure it bakes perfectly. If you don’t have buttermilk, mix regular milk with vinegar. Use 1 cup of milk and add 1 teaspoon of vinegar. Let it sit for 5 minutes before using. This gives you the right tangy flavor and helps the cake rise. To keep your cake moist, use room temperature ingredients. This helps them mix better. Don’t overmix the batter when combining wet and dry ingredients. Overmixing can make the cake dense. Make sure to check for doneness with a toothpick. If it comes out clean, your cake is ready! This blog post covered all you need for a delicious lemon blueberry pound cake. You learned about key ingredients like flour and blueberries, plus tips for mixing and baking. Remember to avoid common mistakes like overmixing. Experiment with variations to keep things fresh. Store leftovers correctly to enjoy later. You can make this cake yours with simple changes. Now, roll up your sleeves and bake a treat your friends and family will love.

Lemon Blueberry Pound Cake Delightful and Easy Recipe

Are you ready to create a delightful Lemon Blueberry Pound Cake that’s simple and delicious? This easy recipe brings together

- 2 cups shredded cooked chicken - 1 (8 oz) package cream cheese, softened - 1/2 cup Greek yogurt - 1/2 cup buffalo sauce - 1/2 cup shredded cheddar cheese - 1/2 cup shredded mozzarella cheese - 1/4 cup green onions, chopped - Salt and pepper to taste When making Buffalo Chicken Dip, you want to use good chicken. Cook it well, then shred it. I prefer using rotisserie chicken for ease. The cream cheese adds a rich and creamy texture. Softened cream cheese mixes better, so take it out early. Greek yogurt gives a nice tang and makes it creamy. For the heat, choose your favorite buffalo sauce. Adjust it based on your spice level. The cheeses blend perfectly. Cheddar brings sharpness, while mozzarella adds stretchiness. Don’t forget the green onions for a fresh bite. Season with salt and pepper to make all the flavors pop. - Alternate cheeses or dairy-free options - Different types of hot sauce or seasoning blends - Additional toppings like bacon bits or ranch dressing Feel free to get creative! You can swap cheeses based on what you have. Try using gouda for a smoky flavor or a dairy-free cream cheese for a lighter dip. Changing the hot sauce can also change the dip’s taste. Want more crunch? Add bacon bits or a drizzle of ranch dressing on top. - Mixing bowls - Baking dish - Oven Gather your tools first. You’ll need a mixing bowl to combine all the ingredients. A baking dish is essential for cooking the dip. Make sure your oven is ready to go at 350°F (175°C). This dip cooks quickly, so you want everything in place. For the full recipe, check out Buffalo Chicken Bliss Dip. - Preheat the Oven: Set your oven to 350°F (175°C). - Mix Ingredients: In a large bowl, combine cream cheese, Greek yogurt, and buffalo sauce. Stir until the mix is smooth. - Fold in Ingredients: Gently add shredded chicken, cheddar cheese, mozzarella cheese, and half of the green onions. - Season: Add salt and pepper to taste. This step brings out the flavors. - Transfer Mixture: Pour the dip into an oven-safe baking dish. Spread it evenly. - Bake: Place the dish in the oven. Bake for 20-25 minutes until it bubbles and turns golden. You can find the full recipe above if you want to explore more! Enjoy your cooking! To make the best buffalo chicken dip, you can adjust the spice levels. If you like it mild, use less buffalo sauce. For a kick, add more sauce. Room temperature cream cheese works best. It mixes easier and gives a smooth texture. Tortilla chips, celery sticks, and veggie platters are perfect sides. They add crunch and freshness. For a fun touch, drizzle more buffalo sauce on top. This makes the dish look great and adds extra flavor. If you want more help, check out YouTube for video tutorials. Many cooking blogs also share tips and tricks for buffalo chicken dip. You can find lots of helpful content to guide you. {{image_2}} You can easily lighten up your dip. Use Greek yogurt instead of sour cream. This swap adds protein and creaminess. You can also choose low-fat or fat-free cheese. These options keep the flavor while cutting calories. Want a meat-free version? Try plant-based chicken substitutes. They work well in this dip. You can also try buffalo cauliflower for a tasty twist. It adds great flavor and a fun texture. To boost the taste, add garlic powder or onion powder. These spices add depth to the dip. You can also experiment with different hot sauce brands. Each brand brings its own heat and flavor profile. After enjoying your Buffalo Chicken Dip, store any leftovers properly. - Refrigeration: Keep in an airtight container for up to 3 days. - Freezing: Can be frozen for up to 2 months. When it's time to enjoy your dip again, you can reheat it easily. - Microwave: Heat in 30-second increments until warm. - Oven: Reheat at 350°F (175°C) until heated through. The dip tastes best when served warm. This ensures the flavors pop! - Best served warm for optimal flavor and texture. - Add fresh toppings after reheating if necessary. This method helps keep your dip tasty and ready for your next gathering. If you want the full recipe, check out the Full Recipe section above. Buffalo Chicken Dip has a few key ingredients that make it special. It starts with shredded cooked chicken, which gives it protein and heartiness. Cream cheese adds a rich, creamy texture, while Greek yogurt brings a tangy flavor. Buffalo sauce gives it that spicy kick. The shredded cheddar and mozzarella cheeses add a savory taste and a gooey consistency. Finally, chopped green onions add freshness and a pop of color. Each ingredient plays a role in making this dip creamy, spicy, and delicious. Yes, you can prepare Buffalo Chicken Dip in advance. Mix all the ingredients together, then store the dip in an airtight container in the fridge. It stays fresh for up to three days. When you're ready to serve, just bake it in the oven at 350°F until it’s bubbly. This makes party planning easy! If you want more heat, you can adjust the buffalo sauce. Use a hotter sauce, or add more than the recipe suggests. For extra spice, mix in some cayenne pepper or chili powder. You can also add diced jalapeños for a fresh, spicy kick. Tailor the heat to fit your taste. Buffalo Chicken Dip can be gluten-free, depending on the ingredients you choose. Most of the core ingredients are naturally gluten-free. However, always check the label on your buffalo sauce. Some brands may contain gluten. If you're unsure, look for a gluten-free hot sauce to be safe. Buffalo Chicken Dip pairs well with many dippers. Tortilla chips are a classic choice. Fresh celery sticks also work well to balance the heat. You can serve it with carrot sticks, pita chips, or even crackers. Get creative and see what you like best! Yes, you can use canned chicken for Buffalo Chicken Dip. It’s a quick and easy option. Just drain the chicken and shred it before mixing. This saves time and still gives you a tasty dip. You won’t lose flavor, and it makes meal prep super simple. For the full recipe, you can check the Buffalo Chicken Bliss Dip. In this post, we discussed how to make delicious Buffalo Chicken Dip. You learned about the main and optional ingredients, and the tools you need. I provided a step-by-step guide for mixing, baking, and serving. Plus, I shared tips for storage and variations to keep it fun. Try this recipe for game days or gatherings. Enjoy the blend of flavors and customize it to your taste. You’ll impress friends and family with this tasty dip!

Buffalo Chicken Dip Irresistible Party Favorite Recipe

Are you ready to impress your guests with a dish everyone loves? Buffalo Chicken Dip is the ultimate party favorite

- 2 cups cooked chicken, shredded - 1 can (15 oz) white beans, drained and rinsed - 1 can (4 oz) diced green chilies - 1 medium onion, diced - 3 cloves garlic, minced - 1 cup corn (fresh or frozen) - 4 cups chicken broth - 1 cup heavy cream - 1 teaspoon cumin - 1 teaspoon chili powder - 1 teaspoon dried oregano - Salt and pepper to taste - 2 tablespoons olive oil - Fresh cilantro, for garnish - Lime wedges, for serving The main ingredients form the base of the creamy white chicken chili. Cooked chicken brings protein and flavor. White beans add creaminess and fiber. Diced green chilies give it a mild kick, while the onion and garlic provide depth. For additional flavor, corn adds sweetness and texture. Chicken broth keeps it moist and rich. Heavy cream transforms the chili into a comfort dish that feels indulgent. Spices are the heart of this recipe. Cumin adds warmth, while chili powder brings a hint of spice. Dried oregano rounds out the flavors. Season with salt and pepper to taste. Using fresh cilantro as a garnish brightens the dish. Lime wedges enhance the flavors when squeezed on top. This combination makes every bite a delight. You can find the Full Recipe in the detailed instructions above. - Heat olive oil in a large pot over medium heat. - Sauté diced onion until translucent. - Add minced garlic and cook until fragrant. Start by heating the olive oil. This helps to bring out the flavors. Onion adds a nice sweetness to the chili. Cook it for about five minutes. Once it turns translucent, add the minced garlic. Garlic brings a rich aroma and taste. Cook it just until you smell it, which should take about one minute. - Stir in the shredded chicken, green chilies, corn, and white beans. - Pour in chicken broth and bring to a gentle simmer. Next, add the shredded chicken. This is where the chili gets its heartiness. Mix in the green chilies, corn, and white beans. Each ingredient adds its own unique flavor. Once everything is well combined, pour in the chicken broth. This will create a lovely base for your chili. Bring the mixture to a gentle simmer. This allows the flavors to blend beautifully. - Add cumin, chili powder, and oregano. - Let simmer for 15 minutes to meld flavors. - Reduce heat and stir in heavy cream, cooking for an additional 5 minutes. Now it's time to add spices. Sprinkle in the cumin, chili powder, and oregano. These spices give the chili its warm and comforting taste. Let the chili simmer for 15 minutes. This is when the magic happens, and the flavors meld together. After that, reduce the heat and stir in the heavy cream. This will make your chili creamy and rich. Cook it for another five minutes to heat through. Enjoy every spoonful of your creamy white chicken chili! You can find the Full Recipe if you want precise instructions or to share with friends. - Use leftover roast chicken for convenience. This saves time and adds flavor. - Adjust spice levels by varying chili powder amount. Start with less if unsure. - Serve in deep bowls garnished with cilantro. This adds a fresh touch. - Pair with warm crusty bread or tortilla chips. They make great dippers. - Ensure chicken is thoroughly cooked to avoid foodborne illness. Use a meat thermometer. - Keep leftovers refrigerated within 2 hours of cooking. This helps prevent spoilage. {{image_2}} You can change up the protein in this dish. Substitute shredded turkey or tofu for the chicken. This keeps the meal tasty while adding variety. Use a low-fat cream or coconut milk for lighter options. These swaps help you enjoy a creamy dish without too many calories. To kick up the heat, add diced jalapeños. This gives your chili a nice spicy kick. You can also incorporate smoked paprika for a smoky flavor. This adds depth and warmth to your dish, making it even more appealing. You can make this chili gluten-free by checking your broth label. Many brands offer gluten-free options. For a vegan version, use beans and vegetables only. Replace the cream with coconut milk for a rich taste without dairy. These modifications let everyone enjoy this comforting dish. Store your creamy white chicken chili in an airtight container. It stays fresh for up to 3 days. Make sure it cools down before you seal it up. This helps keep the flavors intact. You can freeze the chili in a suitable container for up to 3 months. To thaw, place it in the refrigerator overnight. This method keeps the texture and flavor from changing too much. When ready to enjoy, reheat on the stove over low heat. Add a splash of broth if it seems too thick. You can also microwave it in short intervals. Just remember to stir frequently to heat it evenly. You can use half-and-half, sour cream, or coconut milk as alternatives. Half-and-half gives a nice creaminess. Sour cream adds a tangy touch. Coconut milk is great for a dairy-free option. It has a mild spice level; adjust chili powder to increase heat. If you like it hot, add more chili powder. You can also add jalapeños or hot sauce to spice it up. Yes, you can combine ingredients in a slow cooker and cook on low for 6-8 hours. This method makes it easy and lets the flavors blend well. Just add the heavy cream in the last hour. You can thicken it by adding more beans or using a cornstarch slurry. A slurry is made by mixing cornstarch with water, then stirring it into the chili. This method works fast and keeps it creamy. It pairs well with tortilla chips, cornbread, or a fresh salad. Tortilla chips add crunch, while cornbread is a nice side. A salad brings a refreshing balance to the dish. You can find the Full Recipe for Creamy White Chicken Chili in the provided instructions. You now have a complete guide to making Creamy White Chicken Chili. We covered the key ingredients, easy steps, and useful tips. If you follow these instructions, your chili will be tasty and satisfying. Remember, you can adjust the flavors to fit your taste. Try out different ingredients or serving options. Feel free to store leftovers for later enjoyment. Enjoy your cooking journey, and stay safe in the kitchen!

Creamy White Chicken Chili Easy Comfort Food Recipe

If you’re craving a warm bowl of comfort, look no further than this Creamy White Chicken Chili. Packed with tender

- 4 cups all-purpose flour - 1/4 cup honey - 1 cup warm milk (about 110°F) - 1/4 cup unsalted butter, melted - 2 1/4 teaspoons active dry yeast (1 packet) - 1/2 teaspoon salt - 2 large eggs - 1 tablespoon ground cinnamon - 1/2 cup brown sugar - 1/2 cup chopped walnuts (optional) - 1/4 cup powdered sugar (for icing) - 1 tablespoon milk (for icing) When you make cinnamon rolls, choose fresh ingredients for the best taste. Look for flour that is finely milled. Use honey that is pure and raw if possible. Warm milk should feel cozy, about the same as bath water. The yeast needs warmth to grow, so check the milk temperature. For a richer flavor, use high-quality unsalted butter. If you have allergies, substitute eggs with applesauce or flaxseed meal. Use almond milk instead of regular milk for a dairy-free option. Each roll has about 250 calories. They contain 35 grams of carbs, 10 grams of fat, and 5 grams of protein. If you add walnuts, the protein and healthy fats increase. This treat is a wonderful balance of sweetness and richness. Enjoy them fresh for the best taste! Activating the yeast is the first step. Mix warm milk and active dry yeast in a small bowl. Let it sit for about five minutes. You will see bubbles forming. This means the yeast is alive and ready. Next, gather a large mixing bowl. Add flour, honey, melted butter, salt, and eggs. Once the yeast mixture is foamy, pour it into the bowl. Stir everything together until it forms a sticky dough. Now, it’s time to knead the dough. Sprinkle some flour on a clean surface. Place the dough on it and push it with your palms. Fold it over and push again. Do this for about five to seven minutes. The dough should feel smooth and elastic when ready. Place the kneaded dough in a greased bowl. Cover it with a kitchen towel. Set it in a warm spot. Let it rise for about one hour. Look for the dough to double in size. A good sign is that it will feel puffy. After the dough rises, punch it down gently. This helps release air bubbles. Roll it out on a floured surface. Aim for a rectangle about 16 by 12 inches. Spread melted butter on the rolled-out dough. Then, sprinkle brown sugar and ground cinnamon evenly over the top. For a crunchy touch, add chopped walnuts if you like. Start from one long side and carefully roll the dough into a tight log. Pinch the seam to seal it. Cut the log into twelve equal rolls. Place them in a greased baking dish. Cover and let them rise for another thirty minutes. This will help them become fluffy. To get the right dough consistency, focus on moisture. Your dough should be soft but not sticky. If it sticks to your fingers, add a bit more flour. Knead it well until it feels smooth and elastic. This helps develop gluten, which gives the rolls their lovely chew. Rising times are key. After mixing, let the dough rise until it doubles in size. This usually takes about an hour. A warm, draft-free spot works best. You can check if it’s ready by gently pressing a finger into the dough. If it bounces back slowly, it’s perfect! Be careful not to under-knead or over-knead your dough. Under-kneading can lead to dense rolls. You may end up with something closer to bread than fluffy rolls. On the other hand, over-kneading can make them tough. Aim for about 5-7 minutes of kneading for the best texture. Not letting the dough rise enough is another common pitfall. If you rush this step, your rolls won’t be light and airy. Always give the dough the full rising time. You want those beautiful air pockets for the perfect bite! To boost flavor, consider adding spices or extras. Chopped nuts, like walnuts or pecans, add a nice crunch. You might also sprinkle in some nutmeg or cardamom for a unique twist. For icing, you can mix it up! Instead of just powdered sugar and milk, try adding cream cheese for a richer topping. A splash of vanilla or maple syrup can elevate the taste, too. Experiment with what you like best to complement your warm rolls! {{image_2}} To make vegan cinnamon rolls, you can swap out eggs and milk easily. Use unsweetened almond milk or oat milk instead of regular milk. For eggs, try using ground flaxseed mixed with water. This mix works well as a binder. You can also use applesauce; it adds moisture and sweetness. For sweeteners, maple syrup or agave nectar are great options. They blend well and keep the rolls moist. If you need gluten-free cinnamon rolls, use a good gluten-free flour blend. Look for blends that include xanthan gum to help with texture. Almond flour or coconut flour can also work, but you may need to adjust the liquid. Adapt the recipe by adding more moisture if using these flours. Keep an eye on baking time, too, as gluten-free rolls can bake faster. You can also get creative with flavors! Try adding chocolate chips to the cinnamon filling for a sweet twist. They melt and mix well with the cinnamon and sugar. Another fun idea is to make apple pie-inspired cinnamon rolls. Just add diced apples and cinnamon to the filling. This gives you a mix of sweet and fruity flavors. Enjoy the endless possibilities! To keep your cinnamon rolls fresh, let them cool completely. Then, wrap each roll in plastic wrap. This keeps the moisture in. Place the wrapped rolls in an airtight container. Store them at room temperature for up to three days. If your kitchen is warm, refrigerate them to prevent spoilage. You can freeze cinnamon rolls unbaked or baked. For unbaked rolls, place them in a greased baking dish. Cover the dish tightly with plastic wrap and foil. Freeze for up to three months. When you want to bake, thaw them overnight in the fridge. Let them rise for 30 minutes before baking. For baked rolls, allow them to cool completely. Wrap each roll in plastic wrap and place in a freezer bag. To reheat, thaw in the fridge overnight. Then, warm them in the oven at 350°F for 10 minutes. Homemade cinnamon rolls last about three days at room temperature. In the fridge, they can last for up to a week. Look for signs of spoilage, like mold or an off smell. If the rolls feel dry or hard, it’s time to toss them. Proper storage keeps them fresh and tasty for longer. For the full recipe, check out Heavenly Honey Cinnamon Rolls. Yes, you can make the dough ahead. Here’s how: - Prepare the dough as usual. - After kneading, place it in a greased bowl. - Cover it tightly with plastic wrap. - Refrigerate the dough overnight. - When ready, let it sit at room temperature for about 30 minutes before rolling. To get fluffy cinnamon rolls, follow these tips: - Use warm milk when mixing the dough. - Ensure your yeast is fresh and active. - Knead the dough well for about 5-7 minutes. - Let the dough rise in a warm place until it doubles in size. - Avoid adding too much flour while kneading. If your dough doesn’t rise, check these common issues: - Make sure your yeast is fresh. - Ensure the milk isn’t too hot or cold. - Let it rise in a warm, draft-free place. - If it still fails, try adding a bit more yeast. For detailed steps, check out the Heavenly Honey Cinnamon Rolls [Full Recipe]. Making delicious cinnamon rolls starts with fresh ingredients and simple steps. You learned how to prepare the dough, knead it right, and shape perfect rolls. Remember to watch your rising times and avoid common mistakes. Variations like vegan or gluten-free options let everyone enjoy these treats. Store your rolls well to keep them fresh. When cravings hit, you now have the tools to create tasty cinnamon rolls at home. Happy baking!

Homemade Cinnamon Rolls Irresistible Warm Delight

There’s nothing like the smell of homemade cinnamon rolls baking in your kitchen. This easy recipe will guide you to

- 1 pound boneless, skinless chicken breasts - 2 bell peppers (one red, one green) - 1 medium onion - 2 tablespoons olive oil - 2 teaspoons chili powder - 1 teaspoon cumin - 1 teaspoon garlic powder - 1 teaspoon paprika - Salt and pepper to taste - Fresh cilantro and lime wedges - 8 small flour tortillas - Optional toppings (sour cream, guacamole, etc.) The main ingredients create a colorful and flavorful base for your fajitas. The chicken keeps it hearty, while the bell peppers and onion add crunch and sweetness. The seasoning brings a wonderful warmth and depth to every bite. For the best flavor, use fresh spices. They make a big difference in taste. You can also adjust the spice level to fit your family's taste. When it comes to serving, warm tortillas are a must. They hold all the goodness inside. Add your favorite toppings like sour cream or guacamole. This meal is not just easy, it is also fun to eat. Enjoy every bite of these easy sheet pan fajitas. For the full recipe, see my detailed instructions. - Preheat oven to 400°F (200°C). - Prepare baking sheet with parchment paper. Start by getting your oven ready. Preheating it helps cook the fajitas evenly. Line your baking sheet with parchment paper. This makes cleanup a breeze! - Combine chicken, bell peppers, and onion. - Season with olive oil and spices. In a large bowl, mix the sliced chicken, bell peppers, and onion. Pour in the olive oil, then add chili powder, cumin, garlic powder, paprika, salt, and pepper. Toss everything well so the chicken and veggies are coated with the spices. - Spread mixture on sheet pan. - Bake for 20-25 minutes, stirring halfway. Now, spread the mixture evenly on the prepared baking sheet. Place it in the oven and bake for 20 to 25 minutes. Be sure to stir the mix halfway through. This ensures all the ingredients roast evenly and become tender. - Warm tortillas in a skillet. - Garnish and serve with lime wedges. While the fajitas bake, warm your tortillas in a skillet. Heat them for about 30 seconds on each side. Once the fajitas are ready, serve them warm. Fill each tortilla with the tasty chicken and veggies. Garnish with fresh cilantro and lime wedges for that zesty kick. For the full recipe, check out the earlier section. Enjoy your meal! To make your fajitas shine, always choose fresh ingredients. Fresh chicken, vibrant peppers, and crisp onions create a tasty meal. Adjust seasoning based on your taste. If you like it spicy, add more chili powder. For a milder taste, cut back on the spices. How can you tell when chicken is fully cooked? The chicken should be white throughout, not pink. You can also cut a piece in half to check. Using a meat thermometer gives the best results. The chicken needs to reach 165°F (74°C) for safety. Garnishing your fajitas can make them pop. Try adding fresh cilantro on top for color and flavor. Lime wedges are great for squeezing over the fajitas. For plating, serve the fajitas on a big platter. This makes it fun for everyone to dig in. {{image_2}} You can easily change the protein in your fajitas. If you prefer shrimp, use it instead of chicken. Shrimp cooks fast and adds a nice flavor. For a heartier meal, try beef strips. Both options will taste great with the same spices. If you want plant-based options, consider tofu or tempeh. Tofu absorbs flavors well, while tempeh has a nutty taste. Simply cube them and season as you would chicken. Adding more veggies to your fajitas brings extra flavor and color. Zucchini, corn, or mushrooms work well. Slice them thinly and mix them into your dish. You can even make it a veggie-only fajita. Just skip the meat and load up on vegetables. This option is perfect for a lighter meal or for vegetarians. Adjusting the spice level makes your fajitas fit any taste. Want more heat? Add sliced jalapeños to the mix. They give a nice kick. If you have kids or prefer milder food, reduce the chili powder. You can also serve the spices on the side. This way, everyone can adjust their own fajitas. For the full recipe, check out the detailed guide. To keep your fajitas fresh, store them in airtight containers. This helps keep the flavors locked in. You can place the chicken and veggies together or separately. Keep them in the fridge for up to three days. Mark the date on your container to track freshness. When it's time to eat, you can reheat fajitas easily. The best method is using a skillet over medium heat. This keeps the chicken and veggies from becoming soggy. Stir them often to warm them evenly. If you use a microwave, heat in short bursts. Check every 30 seconds to prevent overheating. If you want to save some fajitas for later, freezing is a great option. First, let them cool completely. Then, place them in freezer bags. Remove as much air as possible before sealing. For thawing, place them in the fridge overnight. Reheat in a skillet or microwave when ready to enjoy. Yes, you can prep the fajitas ahead of time. Start by slicing the chicken and vegetables. Then, mix them with the olive oil and spices. Place them in a container, and store in the fridge for up to 24 hours. This way, you save time when you’re ready to cook. Just spread the mixture on the sheet pan and bake as directed. Fajitas taste great with many sides and drinks. Here are some ideas: - Mexican rice or cilantro lime rice - Refried beans or black beans - Fresh salsa or pico de gallo - Guacamole or sour cream - Cold drinks like lemonade or a light beer No sheet pan? No problem! You can grill or sauté your fajitas. For grilling, place the chicken and veggies on skewers. Cook them on a grill until done. If you prefer to sauté, heat a skillet over medium heat. Add the seasoned chicken and veggies, stirring often until cooked through. You can swap out spices easily! Here are some substitutes: - Chili powder: Use paprika or cayenne for heat. - Cumin: Try coriander or a dash of curry powder. - Garlic powder: Fresh minced garlic works well. - Paprika: Use cayenne for heat or leave it out. For the full recipe, check out the earlier section! To wrap up, making fajitas is straightforward and fun. You need simple ingredients like chicken and bell peppers. After mixing and baking, you can add your favorite toppings. Remember to taste and adjust seasonings for the best flavor. Explore variations with different proteins or veggies to keep things exciting. Finally, be sure to store leftovers properly for later. Enjoying this dish can bring flavor to any meal!

Easy Sheet Pan Fajitas Simple and Delicious Meal

Looking for a quick and tasty dinner? You’re in the right place! My Easy Sheet Pan Fajitas are simple to

For the best Southern fried chicken, choose legs and thighs. These cuts stay juicy. They also have more flavor than breasts. Look for fresh chicken with no discoloration. Organic or free-range options can enhance taste. Always buy chicken that feels firm to the touch. To make your chicken tender and flavorful, you need buttermilk. Use 1 cup for this recipe. It adds a rich taste and helps the meat stay juicy. The main marinade is simple: - 1 cup buttermilk Marinate the chicken pieces for at least 2 hours or overnight. This step is key to great flavor. The dredging mixture gives your chicken that crispy coating. You will need: - 1 cup all-purpose flour - 1 tablespoon paprika - 1 teaspoon garlic powder - 1 teaspoon onion powder - 1 teaspoon cayenne pepper (adjust for heat) - 1 teaspoon salt - ½ teaspoon black pepper Mix all these dry ingredients in a shallow dish. This mixture adds layers of flavor to your fried chicken. Make sure to coat each piece well before frying. This helps get that perfect crunch. Now you have everything you need. Check out the Full Recipe for detailed steps! Start by placing your chicken pieces in a large bowl. Pour in one cup of buttermilk. This will make the chicken tender and juicy. Cover the bowl with plastic wrap. Let it sit in the fridge for at least two hours. If you have time, marinate it overnight. This step is key for flavor! Next, take a shallow dish and add one cup of all-purpose flour. Then, mix in the spices: one tablespoon of paprika, one teaspoon of garlic powder, one teaspoon of onion powder, and one teaspoon of cayenne pepper. Add one teaspoon of salt and half a teaspoon of black pepper. Stir well until all the ingredients blend perfectly. Now, it’s time to fry! Heat about one inch of vegetable oil in a large skillet or Dutch oven over medium-high heat. Aim for around 350°F. You can check the oil by dropping a bit of flour in it. If it sizzles, it’s ready. Take the marinated chicken out of the fridge. Let the extra buttermilk drip off. Dredge each piece in the flour mixture, ensuring it's nicely coated. Shake off any extra flour and place the chicken on a wire rack. Carefully place the chicken in the hot oil. Don’t overcrowd the pan; this helps it cook evenly. Cook for about 15-18 minutes on one side. Flip the chicken and cook for another 10-12 minutes. The chicken should be golden brown and reach an internal temperature of 165°F. Once done, put the chicken on a paper towel-lined plate to drain excess oil. Allow it to rest for a few minutes before serving. Enjoy your crispy Southern fried chicken! For the full recipe, check the earlier section. To get that crunchy bite, follow these steps. First, make sure your chicken is dry before dredging. Pat it with paper towels. Next, your oil needs to be hot enough. Aim for 350°F. If it’s too cold, the chicken will soak up oil and become greasy. Fry in small batches. This prevents the oil from cooling down too much. Lastly, let the chicken rest on a wire rack after frying. This keeps it crisp and avoids sogginess. For extra taste, think about your spices. The classic blend includes garlic and onion powder. But you can tweak it! Try adding herbs like thyme or rosemary for depth. A splash of hot sauce in the buttermilk marinade adds a nice kick. You can also mix in some lemon zest for brightness. Experiment and find what flavors you love most! Using the right tools makes a big difference. A heavy skillet or Dutch oven is best for frying. These hold heat well and cook evenly. A thermometer is key to check oil temperature. It helps you avoid burnt chicken. Don't forget a wire rack for cooling. This allows air to circulate and keeps your chicken crispy. For serving, a rustic platter adds charm to your dish. For the full recipe, check out the detailed instructions. {{image_2}} To make spicy Southern fried chicken, add more heat. Increase the cayenne pepper to two teaspoons. You can also add hot sauce to the buttermilk. This gives the chicken a nice kick. Serve it with a cooling dip, like ranch dressing or yogurt. For herb-infused fried chicken, use fresh herbs. Add chopped rosemary or thyme to your dredging mixture. You can also mix in garlic and onion powder for extra flavor. This version brings a fresh taste to your meal. It pairs well with lemon wedges for a bright touch. You can try different cooking methods for Southern fried chicken. Baking is a great option for a healthier twist. Coat the chicken and place it on a greased baking sheet. Bake at 400°F for 30-35 minutes or until golden brown. Another option is using an air fryer. This method uses hot air to cook the chicken. It gives you crispiness with less oil. Preheat the air fryer to 375°F and cook for about 25 minutes. Check for an internal temperature of 165°F to ensure it’s done. For the full recipe, refer to the earlier section. Enjoy experimenting with these variations! After you enjoy your delicious Southern fried chicken, store any leftovers. Place the chicken in an airtight container. This keeps it fresh and tasty. You can also wrap it tightly in foil or plastic wrap. Store it in the fridge for up to four days. If you want to keep it longer, consider freezing it. When it's time to enjoy your leftovers, reheating is key. The oven is the best choice to keep the skin crispy. Preheat your oven to 375°F (190°C). Place the chicken on a baking sheet. Heat for about 20 minutes, turning halfway. Use a meat thermometer to check that it reaches 165°F (74°C). If you're in a hurry, you can use the microwave, but the skin won't be as crispy. Freezing is a great option if you have extra chicken. First, let the chicken cool completely. Wrap each piece in plastic wrap or foil. Then, place them in a freezer-safe bag. Label the bag with the date. Your chicken can last up to three months in the freezer. When you’re ready to eat it, thaw it in the fridge overnight before reheating. This helps maintain its flavor and texture. For the full recipe, check the section above. Marinating chicken is key for flavor. I recommend at least 2 hours. For the best taste, try marinating overnight. The buttermilk makes the chicken juicy and tender. Yes, you can! An air fryer makes it healthier and still crispy. To do this, follow the same steps for marinating and coating. Preheat the air fryer to 375°F. Cook for about 25-30 minutes, turning halfway. Check that the chicken reaches 165°F inside. Southern fried chicken pairs well with many sides. Some great options include: - Coleslaw - Cornbread - Mashed potatoes - Green beans - Macaroni and cheese These sides bring out the chicken's rich flavors. Enjoy your meal! For the complete dish, check the Full Recipe. In this blog post, we explored how to make delicious Southern fried chicken. We began with the right chicken selection and marinade ingredients, then covered step-by-step instructions for marinating, dredging, and frying. I shared tips for crispy chicken, flavor boosts, and recommended equipment. We also discussed fun variations and smart storage tips. Now you’re ready to impress with your fried chicken. Enjoy your cooking and share your tasty results!

Southern Fried Chicken Crispy and Flavorful Recipe

Get ready to elevate your cookout with my crispy and flavorful Southern Fried Chicken recipe! I’m excited to share my

To make Garlic Herb Roasted Potatoes, you need a few simple items. Here’s the full list: - 2 pounds baby potatoes, halved - 4 cloves garlic, minced - 3 tablespoons olive oil - 2 teaspoons dried rosemary - 2 teaspoons dried thyme - 1 teaspoon smoked paprika - Salt and pepper, to taste - Fresh parsley, chopped (for garnish) When choosing herbs, fresh and dried each have their perks. Fresh herbs bring bright flavors. They make your dish pop with color and smell. Dried herbs work well, too. They are more concentrated in flavor. If you use dried herbs, use less than fresh. For this dish, I like dried rosemary and thyme. They both pair perfectly with garlic. Want to take your Garlic Herb Roasted Potatoes to the next level? You can add some optional ingredients. Here are a few ideas: - Lemon zest for a citrusy kick - Crushed red pepper flakes for heat - Grated Parmesan cheese for a cheesy touch - Fresh lemon juice for brightness Feel free to mix and match these options. You can create a dish that fits your taste perfectly! For the full recipe, check out the details above. To start, wash the baby potatoes well. Scrub them gently to remove dirt. Cut each potato in half. This helps them cook evenly. Halving also allows the herbs to stick better. If you see any blemishes, cut those off. This way, you keep the potatoes looking nice. In a large bowl, add the halved potatoes. Next, toss in the minced garlic. Pour in the olive oil, and sprinkle the dried rosemary and thyme. Add smoked paprika, salt, and pepper. Use your hands to mix everything well. Ensure each piece of potato gets coated. This step is key for flavor. The oil helps the herbs stick and adds crispiness. Spread the coated potatoes on a baking sheet. Make sure they are in a single layer. If they are crowded, they won't crisp up well. Roast them in a preheated oven at 425°F (220°C). Flip the potatoes halfway through cooking. This helps them brown evenly. Roast for 25-30 minutes. They should be golden and crispy when done. For an extra touch, sprinkle fresh parsley on top before serving. This adds color and flavor. For the complete recipe, check the Full Recipe section. When you pick potatoes, choose firm ones. Look for smooth skin with no blemishes. Baby potatoes work best for this dish. They are small and cook quickly. If you want larger potatoes, cut them into smaller pieces. This helps them roast evenly. Cooking time matters a lot. Smaller potatoes roast faster, about 25 to 30 minutes. Larger pieces may need an extra 10 minutes. Always check for doneness by poking them with a fork. They should be soft inside and crispy outside. Adjust time as needed for size. Avoid overcrowding the pan. If potatoes are too close, they won’t crisp up. Spread them in a single layer on the baking sheet. Another mistake is not flipping them. Turn the potatoes halfway through cooking for even browning. Lastly, don’t skip the seasoning. The herbs add fantastic flavor. For the full recipe, check the section above. {{image_2}} You can change the herbs for new flavors. Try basil or oregano instead of rosemary. You can add some chili flakes for heat. A little cumin gives a nice earthy taste too. Mix and match until you find your favorite combo. You can make this dish a full meal. Toss in some bell peppers, zucchini, or carrots with the potatoes. For protein, add diced chicken or sausage. This adds color and nutrition. You’ll have a tasty, one-pan meal that is easy to serve. Both the air fryer and oven work well for this recipe. The air fryer cooks faster and gives a great crunch. Set it to 400°F (200°C) and cut the cooking time by 10 minutes. The oven will give you a more even roast. It’s perfect for larger batches. Check out the Full Recipe for more tips on cooking methods. To keep your leftover Garlic Herb Roasted Potatoes fresh, place them in an airtight container. Make sure they cool down before sealing. You can store them in the fridge for up to three days. If you want to enjoy them later, freezing is a good option too. When you reheat these potatoes, aim for the oven if possible. Preheat the oven to 375°F (190°C). Spread the potatoes on a baking sheet and heat for about 10-15 minutes. This helps to keep them crispy. You can also use a skillet on medium heat. Just add a little olive oil to enhance the flavor. To freeze Garlic Herb Roasted Potatoes, first cool them completely. Then, spread them out on a baking sheet in a single layer. Freeze for about an hour. Once frozen, transfer them to a freezer-safe bag. Label the bag with the date. They can last up to three months in the freezer. When ready to eat, thaw in the fridge overnight before reheating. For the full recipe, refer back to the beginning of this article. You can keep Garlic Herb Roasted Potatoes in the fridge for about four days. Store them in an airtight container to keep them fresh. Make sure they cool down before sealing them up. This way, they won’t get soggy or lose their crunch. Yes, you can prepare these potatoes ahead of time. Cut the baby potatoes and mix them with the herbs and oil. Store this mixture in the fridge for up to 24 hours before cooking. When you're ready, just spread them on a baking sheet and roast. This saves time on busy days! Garlic Herb Roasted Potatoes go well with many dishes. They are great with grilled meats like chicken or steak. You can also serve them with baked fish or roasted veggies. A fresh salad on the side makes a nice balance. For a cozy meal, enjoy them with a warm soup. These potatoes fit into many meals, making them a favorite! Garlic Herb Roasted Potatoes are easy to make and tasty. We covered the key ingredients, from fresh herbs to optional flavors. I shared step-by-step instructions for crispiness and tips to avoid common mistakes. You can try different herbs, add veggies, or cook in an air fryer. Store leftovers properly for later use, and I answered many FAQs. In summary, this dish is versatile and delicious. Enjoy experimenting with flavors and cooking methods. Happy cooking!

Garlic Herb Roasted Potatoes Crunchy and Flavorful Dish

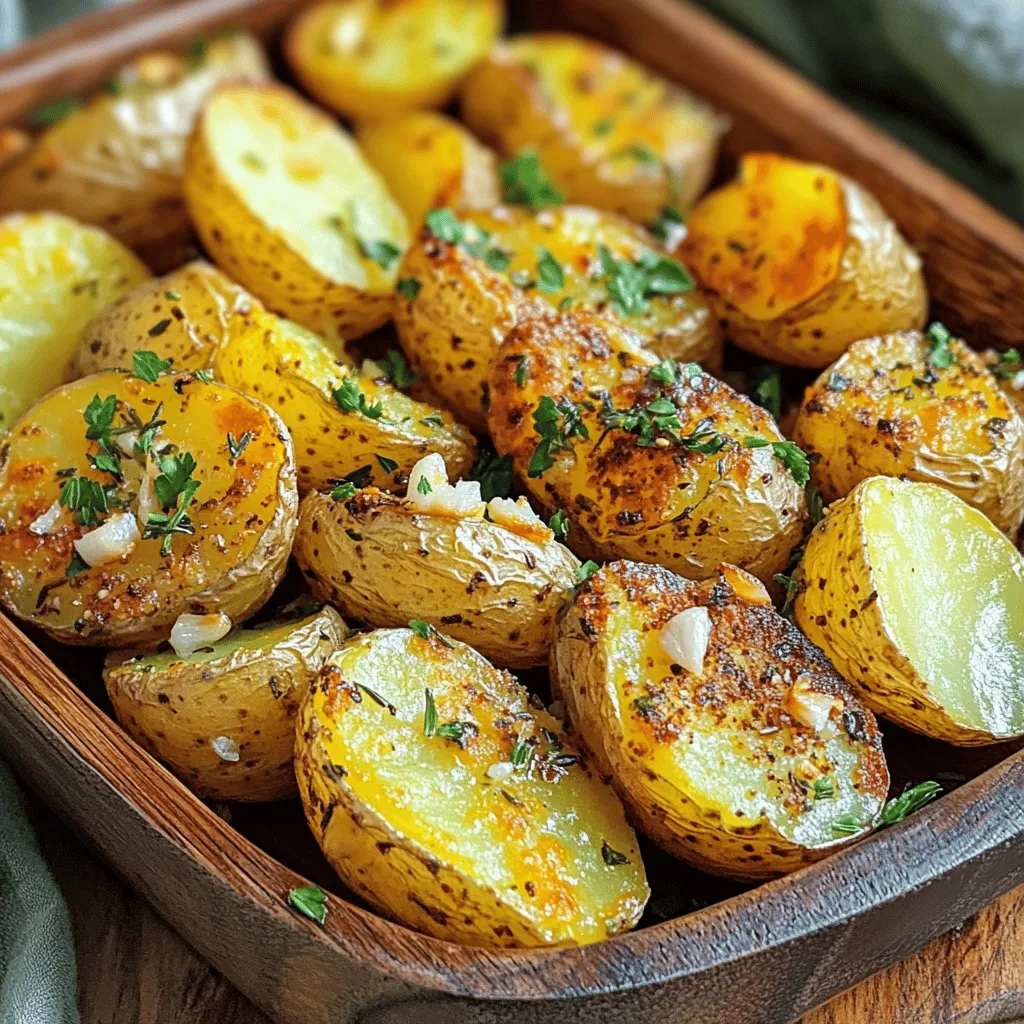
Looking for a side dish that’s both crunchy and bursting with flavor? Look no further! My Garlic Herb Roasted Potatoes

Older posts
Newer posts
← Previous Page1 … Page79 Page80 Page81 … Page84 Next →

dsad

© 2026 Foodish Talk • Built with GeneratePress

Our Policies

  • Copyright Policy
  • Cookie Policy
  • GDPR Policy
  • Privacy Policy
  • Disclaimer
  • Terms Of Use

More Information

  • Home
  • About
  • Contact
  • Appetizers
  • Dessert
  • Dinner
  • Drinks
©2026, Foodish Talk About Back To Top