Skip to content
DisclaimerTerms Of UseGDPR PolicyCookie Policy

Foodish Talk

  • Home
  • Drinks
  • Appetizers
  • Dinner
  • Dessert
  • About
  • Contact
  • Privacy Policy
DisclaimerTerms Of UseGDPR PolicyCookie Policy

NO-ING-IMG

To make triple cheese stuffed pretzel bites, gather these key ingredients: - 1 ½ cups warm water (110°F - 115°F) - 2 tablespoons granulated sugar - 1 packet (2 ¼ teaspoons) active dry yeast - 4 cups all-purpose flour - 1 teaspoon salt - ½ teaspoon baking soda - ½ cup shredded mozzarella cheese - ½ cup shredded cheddar cheese - ½ cup cream cheese, softened - 1 egg, beaten (for egg wash) - Coarse sea salt (for topping) These ingredients come together to create soft and cheesy bites that are hard to resist. You can spice up your pretzel bites with these optional add-ins: - ½ teaspoon garlic powder - ½ teaspoon dried herbs Adding these will give your pretzel bites extra flavor. Feel free to mix and match based on your taste. Here are some tools you will need to make your pretzel bites: - Large mixing bowl - Parchment paper - Slotted spoon - Rolling pin - Baking sheet Having these tools ready will make the process smooth and fun. Enjoy the journey as you create these tasty snacks! For the full recipe, check the link above. To start, I mix warm water, granulated sugar, and yeast in a bowl. This mixture should sit for about 5 minutes. You want it to become frothy. This froth shows the yeast is alive and ready to help the dough rise. It is a crucial step for good pretzel bites. After activating the yeast, I add all-purpose flour and salt. I mix until a dough forms, and then I knead it on a floured surface for 5 to 7 minutes. The dough should feel smooth and elastic. This kneading helps develop gluten, making the bites chewy. I then place the dough in a greased bowl, cover it, and let it rise for about 1 hour in a warm spot. It should double in size during this time. Once the dough has risen, I punch it down and divide it into 16 pieces. I flatten each piece into a small disk. Then, I put about 1 tablespoon of the cheese filling in the center of each disk. This filling is made with mozzarella, cheddar, and cream cheese. After that, I fold the dough around the filling, sealing it tightly, and roll it into a ball. This step is key to keeping the cheese inside while baking. Next, I prepare a baking soda bath. I bring 10 cups of water to a gentle boil and add baking soda. I carefully drop in 4 or 5 pretzel bites at a time and boil them for 30 seconds. This step gives the bites their classic pretzel flavor and chewy texture. After boiling, I remove them with a slotted spoon and place them on a parchment-lined baking sheet. Then, I brush each pretzel bite with a beaten egg and sprinkle coarse sea salt on top. This makes them shiny and adds a nice flavor. I bake them at 425°F (220°C) for about 12 to 15 minutes. They should turn golden brown and smell amazing. Once they cool for a few minutes, I enjoy them warm. For the full recipe, check out the details above! To get the best rise for your pretzel bites, warm is key. Use water that's 110°F to 115°F. This temperature helps the yeast activate well. After mixing, let the dough sit in a warm spot. A draft-free area works best. Cover it with a damp cloth to keep moisture in. This makes the dough double in size, which is what you want. For a creamy filling, mix the mozzarella, cheddar, and cream cheese until smooth. These cheeses blend well together. You can add garlic powder or dried herbs for extra taste. This is optional but makes the filling more flavorful. Make sure to seal the dough tightly around the filling. This keeps the cheese inside as it cooks. An egg wash gives your pretzel bites a shiny, golden finish. Use a beaten egg before baking. Brush it on top of each bite for that perfect look. Don't skip this step! The egg wash also helps the coarse sea salt stick. If you want, you can sprinkle on some extra herbs after applying the egg wash. This adds a nice touch to the final look. For the full recipe, check out the details above. Enjoy making these tasty treats! {{image_2}} You can change the cheese in these bites for fun. For a sharper taste, try gouda or pepper jack. For a creamier mix, use ricotta or goat cheese. Mixing different cheeses gives you new flavors. Just remember to keep the amounts the same. You can still use the full recipe for guidance. Spice things up by adding herbs or spices to the cheese mix. Dried oregano or basil works nicely. You can also add a pinch of crushed red pepper for heat. For a smoky flavor, try using smoked cheese. These little changes can take your pretzel bites to a new level. If you need a gluten-free snack, you can switch the flour. Use a gluten-free flour blend. Make sure it has a binding agent like xanthan gum. This will help the dough hold together. You can follow the same steps in the full recipe, but keep an eye on the texture. Enjoying this snack is possible for everyone! After enjoying your triple cheese stuffed pretzel bites, store any leftovers in an airtight container. Keep them at room temperature for up to two days. If you want to keep them longer, place them in the fridge. They will stay fresh for about a week this way. To prevent sogginess, do not wrap them tightly in plastic. When you’re ready to eat the leftovers, you can easily reheat them. Preheat your oven to 350°F (175°C). Place the pretzel bites on a baking sheet and warm them for about 5 to 7 minutes. This method keeps them soft and tasty. You can also microwave them for 20-30 seconds, but they may lose some crunch. If you want to save some pretzel bites for a later date, freezing is a great option. First, let them cool completely. Then, place the bites on a baking sheet and freeze them until firm. Once frozen, transfer them to a freezer bag or container. They can last for up to three months in the freezer. To reheat, just bake them from frozen at 350°F (175°C) for about 10-12 minutes. You can enjoy your homemade snacks anytime! For the full recipe, check out the section above. To make the pretzel dough rise faster, find a warm spot in your kitchen. You can turn on your oven for a few minutes, then turn it off. Place the dough in the oven with the door closed. The warm air will help the dough rise. You can also cover the bowl with a damp cloth. This keeps the dough moist and helps it rise quicker. Yes, you can use different types of cheese! Feel free to get creative. Try using pepper jack for a spicy kick. Gouda or fontina can add a rich flavor. Just remember to keep the total amount of cheese the same. This way, the filling remains the right texture. You can find prepared triple cheese stuffed pretzel bites at many grocery stores. Look in the frozen food aisle or the snack section. Some local bakeries may also sell them fresh. If you prefer, you can order them online from food delivery services. For the best taste, I recommend making them at home using the full recipe. You learned about making tasty stuffed pretzel bites. We explored key ingredients, tools, and steps. I shared tips to perfect the rise and filling. Plus, I provided fun variations and storage ideas. Try different cheese mixes and flavors to find your favorite. These bites bring joy and flavor. Follow my steps and you’ll create a treat loved by all. Enjoy your cooking!

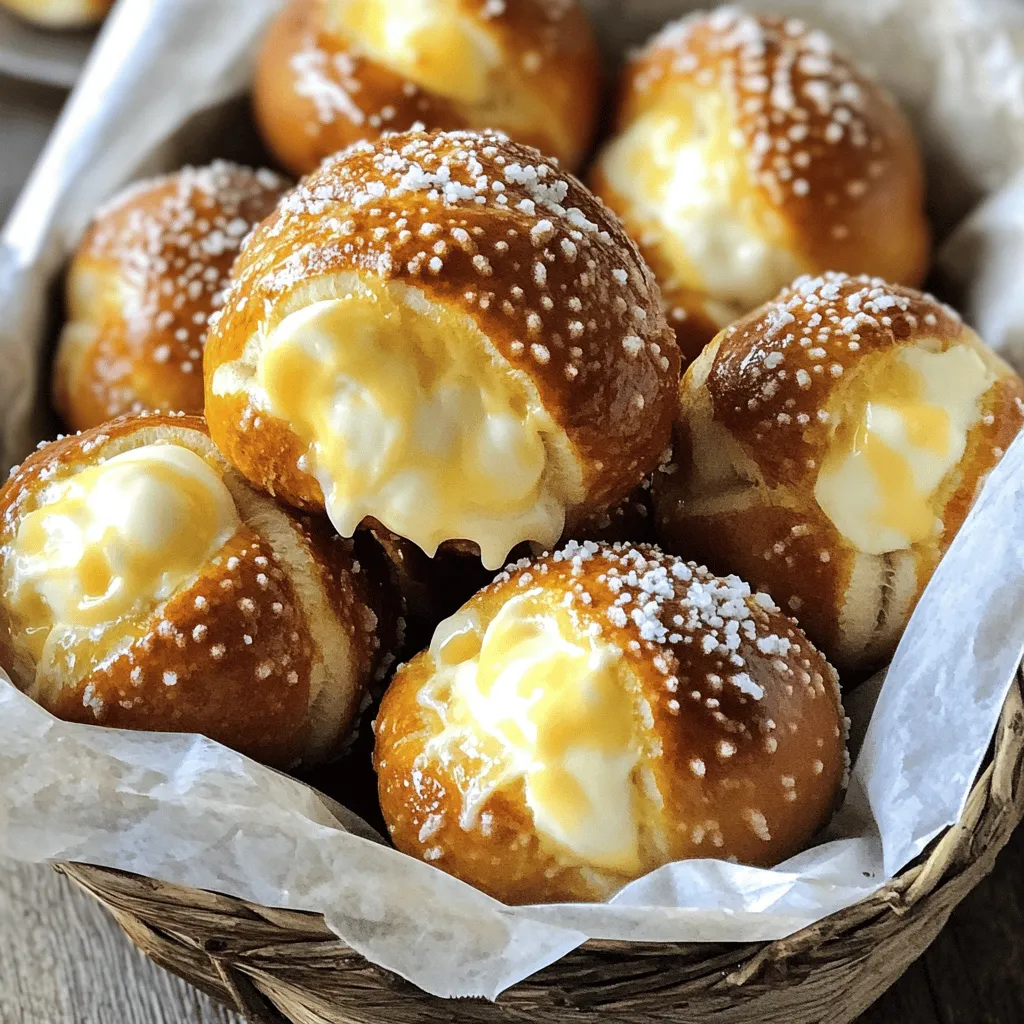
Triple Cheese Stuffed Pretzel Bites Tasty Snack Idea

If you’re craving a snack that packs a cheesy punch, you’ve come to the right place! I’m excited to share

- 1 medium head of cauliflower, cut into florets - 1/2 cup all-purpose flour - 1/2 cup almond milk (or any non-dairy milk) - 1 teaspoon garlic powder - 1 teaspoon onion powder - 1 teaspoon smoked paprika - 1/2 teaspoon salt - 1/4 teaspoon black pepper - 1/4 cup honey - 2 tablespoons chipotle sauce - 4 large whole wheat tortillas - 1 cup shredded lettuce - 1 avocado, sliced - 1/2 cup crumbled feta cheese (optional) - Fresh cilantro, for garnish The main ingredients create a great mix of flavors and textures. The cauliflower brings a nice crunch, while the honey and chipotle sauce give a sweet and spicy kick. You can choose to add feta cheese for a creamy finish. For the best results, measure each ingredient carefully. Here is a guide: - Cauliflower: 1 medium head, about 4 cups of florets - Flour: 1/2 cup - Almond milk: 1/2 cup - Breadcrumbs: 1/2 cup (Panko is great for extra crunch) - Honey: 1/4 cup - Chipotle sauce: 2 tablespoons For the flour, I recommend using a brand like King Arthur for consistency. If you're using almond milk, unsweetened varieties work best to keep the flavors balanced. Each serving has approximately: - Calories: 300 - Protein: 10g - Fats: 12g - Carbohydrates: 40g These wraps can be a healthy option. They are gluten-free if you use gluten-free flour and tortillas. To make it vegan, just ensure the feta cheese is omitted or replaced with a plant-based option. Enjoy this delightful meal knowing it fits many dietary needs! First, let's prep the cauliflower and ingredients. Start by cutting a medium head of cauliflower into small florets. This helps the cauliflower cook evenly and get crispy. Next, gather your other ingredients. You will need flour, almond milk, garlic powder, onion powder, smoked paprika, salt, and black pepper. Now, whisk together the batter. In a mixing bowl, combine 1/2 cup of flour and 1/2 cup of almond milk. Add 1 teaspoon each of garlic powder, onion powder, and smoked paprika. Then, mix in 1/2 teaspoon of salt and 1/4 teaspoon of black pepper. Make sure the batter is smooth. Now, it's time to coat the florets. Dip each cauliflower piece into the batter, letting any extra drip off. Then, roll the florets in 1/2 cup of breadcrumbs. Panko gives a nice crunch. Set the coated florets aside as you heat the oven. Preheat your oven to 425°F (220°C). Line a baking sheet with parchment paper. Place the coated cauliflower wings on the prepared sheet. Bake for 25-30 minutes. Flip them halfway through for even browning. They should be golden brown and crispy when done. While the wings bake, prepare the honey chipotle sauce. In a small saucepan, mix 1/4 cup of honey with 2 tablespoons of chipotle sauce. Heat over low heat until warm. Stir until the two blend well. Adjust the chipotle sauce based on your spice preference. Once the cauliflower wings are ready, it's time to assemble. Take a large whole wheat tortilla and layer it with shredded lettuce, the baked cauliflower, and sliced avocado. If you like, add crumbled feta cheese for extra flavor. Now, roll the tortilla tightly. To do this, fold in the sides and then roll from the bottom up. This technique helps keep everything inside and makes for a neat presentation. Cut the wrap in half if you want to share. Finish by garnishing with fresh cilantro. It adds a nice touch and brightens the dish. For the full recipe, check out the detailed instructions to ensure your wraps are perfect! To get that perfect crunch on cauliflower, follow these steps: - Cut the florets evenly. This helps them cook at the same rate. - Use Panko breadcrumbs. They create a crispier texture than regular ones. - Don’t crowd the baking sheet. Spread the florets out to allow hot air to circulate. For even cooking in the oven: - Preheat your oven fully. A hot oven helps the cauliflower roast rather than steam. - Flip the florets halfway through. This ensures both sides cook evenly and get crispy. You can enhance these wraps with dips or sides. Here are some ideas: - Serve with ranch or blue cheese dip. These pair well with the spicy flavor. - Toss in a fresh side salad. A light salad complements the wraps nicely. - Try sweet potato fries. They add a sweet crunch that balances the spice. Ideal occasions for serving the wraps include: - Game day. They make a great snack for watching sports. - Casual gatherings. Friends will love them at parties. - Quick weeknight meals. They are easy to prepare and fun to eat. Be careful not to over or undercook the cauliflower: - Check for doneness at 25 minutes. It should be golden brown and crispy. - Use a fork to test. If it goes in easily, the cauliflower is ready. Another mistake is making the wraps too filled or improperly rolled: - Don't overload your wraps. A few pieces of cauliflower and toppings work best. - Roll tightly but gently. This keeps all the good stuff inside. If you roll too loosely, the filling will spill out. Try these tips to make your Honey Chipotle Cauliflower Wing Wraps even better. For the full recipe, check out the section above. Enjoy cooking! {{image_2}} You can change the sauce to fit your taste. For a smoky twist, try barbecue sauce. If you want heat, add more chipotle sauce. You can also swap spices. Try cayenne for extra spice or cumin for earthiness. Feel free to change the veggies too. Instead of cauliflower, use broccoli or Brussels sprouts. You can even use chickpeas for a protein boost. If you want a meaty wrap, shredded chicken or jackfruit works well. These wraps can fit many diets. To keep it vegan, use a plant-based milk and skip the feta cheese. For gluten-free wraps, use gluten-free flour and tortillas. If you're watching carbs, try large lettuce leaves instead of tortillas. You can use collard greens or cabbage for a fresh crunch. These options keep the meal light and tasty. Want to spice it up? Add chili powder or smoked paprika to your batter. You can sprinkle crushed red pepper on top for more heat. Incorporating seasonal ingredients can also make a big difference. In summer, use fresh corn or zucchini for added flavor. In fall, add roasted sweet potatoes or carrots. This keeps your wraps fun and exciting! For the full recipe, check out the details above. To keep your Honey Chipotle Cauliflower Wing Wraps fresh, store them in airtight containers. This helps lock in moisture and flavor. You can keep them in the fridge for up to three days. If you want them to last longer, consider freezing them. When reheating, the best method is to use an oven. Set it to 350°F (175°C) and bake the wraps for about 10-15 minutes. This keeps the wraps crispy. If you prefer, you can reheat the cauliflower wings separately in a pan. This way, they stay crunchy and taste fresh. To freeze your wraps, wrap each one tightly in plastic wrap. Place the wrapped wraps in a freezer-safe bag. They can last up to two months in the freezer. When ready to eat, let them thaw in the fridge overnight. For best results, reheat them in the oven to restore their crispiness. Honey chipotle cauliflower wing wraps are a fun twist on traditional wings. They feature crispy cauliflower florets tossed in a sweet and spicy honey chipotle sauce. The wraps use whole wheat tortillas, which hold all the flavors together. You get a great mix of crunch, sweetness, and heat. Each bite bursts with a unique taste that will have you coming back for more. Yes, you can prep some parts ahead. You can cut the cauliflower and store it in the fridge. Make the batter a day before and keep it in a sealed container. You can also mix the honey chipotle sauce ahead of time. Just reheat it when you're ready to cook. This way, you save time and can enjoy your meal faster. If you want to replace honey, there are some great options. Maple syrup is a popular choice. Agave nectar can work too, as it is similar in sweetness. For a low-carb option, try using erythritol or monk fruit sweetener. Each of these will give your wraps a nice touch of sweetness without using honey. To add more heat, consider using extra chipotle sauce. You can also mix in cayenne pepper or crushed red pepper flakes. Another option is to add some sliced jalapeños for a fresh kick. Just taste as you go, so you get the level of spice you want. You can use frozen cauliflower, but there are some things to keep in mind. Frozen cauliflower may not get as crispy as fresh. If you choose frozen, thaw it and drain excess water first. Pat it dry to help it crisp up in the oven. Fresh cauliflower is ideal for the best texture and flavor. These wraps pair well with a side salad or some crunchy veggies. You can also serve them with a cool dip like ranch or guacamole. For drinks, iced tea or a light beer complements the flavors nicely. You can even enjoy them with a refreshing fruit smoothie. They make a perfect meal for a casual gathering or a fun night in. For the full recipe, check out the details above to create this delightful dish! This blog post covered delicious honey chipotle cauliflower wing wraps. We discussed the main ingredients, precise measurements, and key nutritional information. I provided step-by-step instructions for preparation, cooking, and assembly. You also learned essential tips, variations, and proper storage methods. In closing, these wraps are not only tasty but very flexible. Feel free to customize them to suit your needs. Enjoy making and sharing this delightful recipe!

Honey Chipotle Cauliflower Wing Wraps Delightful Meal

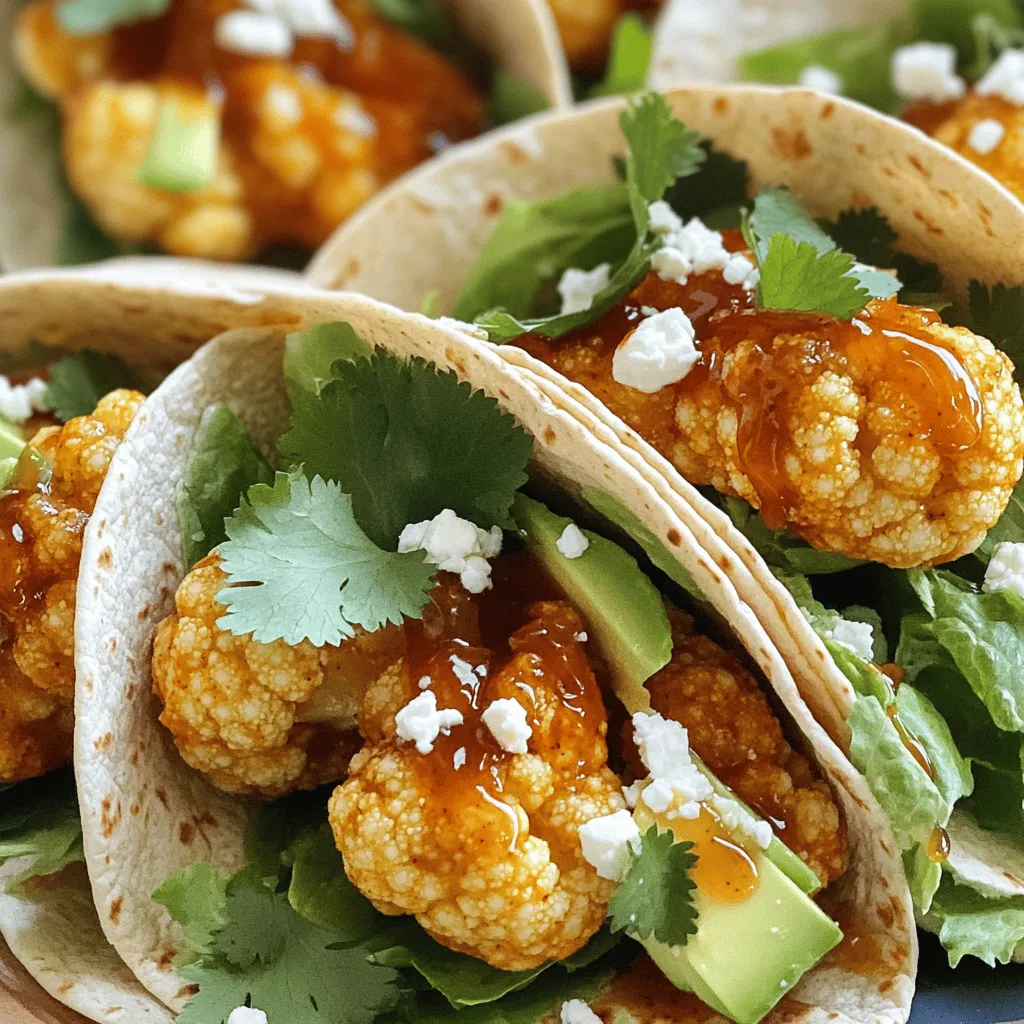
If you’re craving a fun and tasty meal, Honey Chipotle Cauliflower Wing Wraps are a must-try! Packed with spicy, sweet

- 1 cup cream cheese, softened - 1/2 cup sour cream - 1/2 cup dill pickles, finely chopped - 1/4 cup pickled jalapeños, finely chopped The main ingredients bring creaminess and tang to the dip. Cream cheese is the base, giving a rich texture. Sour cream adds a slight tang that brightens the flavor. Dill pickles give crunch and a vinegar kick. Jalapeños offer heat, making the dip exciting. - 1 cup cherry tomatoes, halved - 1 cucumber, sliced - Assorted crackers and breadsticks for dipping Add-ons make your dip board fun and colorful. Cherry tomatoes add sweetness and vibrancy. Cucumber slices bring a fresh crunch that balances the dip's richness. Crackers and breadsticks provide various textures for dipping. Guests can mix and match to their heart's content. - 2 tablespoons honey - 1 tablespoon Dijon mustard - 1 teaspoon garlic powder - 1 teaspoon onion powder - Salt and pepper to taste Optional seasonings can elevate the dip. Honey adds sweetness, balancing the spice. Dijon mustard gives a unique tang that enhances flavor. Garlic and onion powders add depth and warmth. Salt and pepper help round out the taste. Adjust these to fit your palate and make the dip your own. For the full recipe, check out the Sweet and Spicy Pickle Dip Board. Enjoy crafting a delightful dip that will surely impress your guests! Mixing the Base Ingredients Start by gathering your ingredients. You will need softened cream cheese and sour cream. In a mixing bowl, combine 1 cup of cream cheese with 1/2 cup of sour cream. Mix them well using a hand mixer or spatula until the texture is smooth. This creamy base is the heart of your dip. Incorporating Pickles and Jalapeños Next, you’ll add the flavor! Chop up 1/2 cup of dill pickles and 1/4 cup of pickled jalapeños. Stir these into the cream cheese mixture. The pickles add crunch, while the jalapeños bring the heat. You can adjust the spice by adding more jalapeños if you like it hot. Seasoning the Dip Now it’s time to season. Add 2 tablespoons of honey, 1 tablespoon of Dijon mustard, 1 teaspoon of garlic powder, and 1 teaspoon of onion powder. Mix everything together until it’s well blended. Taste and add salt and pepper as needed. If you want it sweeter, add more honey. Transferring the Dip to the Serving Bowl Once your dip is ready, transfer it to a nice serving bowl. Place the bowl in the center of a large serving board or platter. This will be the star of your board. Arranging Fresh Vegetables Now, let’s add some fresh veggies. Halve some cherry tomatoes and slice a cucumber. Arrange the cherry tomatoes and cucumber around the bowl. This adds color and freshness. Plus, they are great for dipping! Placing Crackers and Breadsticks Finally, add an assortment of crackers and breadsticks around the dip. Make sure to use different shapes and sizes. This gives your board variety and makes it fun for guests to grab something to dip. Garnishing the Dip For a finishing touch, sprinkle some chopped pickles and jalapeños on top of the dip. This makes it look inviting and adds extra flavor. Choosing Colorful Crackers Use colorful crackers to contrast the green and yellow hues of the veggies. This pop of color makes your dip board visually appealing. Creating Visual Depth on the Board To create depth, stack some crackers and breadsticks in different places. This adds dimension and makes your board look full and festive. Follow these steps, and you will have a delicious Sweet and Spicy Pickle Dip Board that impresses your guests! For the complete recipe, refer to the [Full Recipe]. Adjusting Sweetness and Spiciness To get the right blend, taste as you go. Add more honey for sweetness or more jalapeños for spice. You can always add more, but it’s hard to take it out! Achieving the Right Consistency For a creamy dip, mix the cream cheese and sour cream well. If it's too thick, add a splash of pickle juice. This will keep it smooth and spreadable. Flavor Enhancements to Consider Want to kick it up a notch? Try adding a squeeze of fresh lemon juice. It brightens the dip and adds a nice zing. Fresh herbs like dill or chives can also bring more flavor. Pairing with Drinks This dip goes well with cold drinks. Try it with a light beer or a refreshing lemonade. Wine lovers can enjoy it with a crisp white wine. Ideal Serving Temperature Serve the dip cold or at room temp. It should be easy to scoop and creamy. Take it out of the fridge about 15 minutes before serving. Making it a Meal: Pair with Proteins You can turn this dip into a meal. Pair it with grilled chicken or shrimp. It also works well with sliced deli meats or a veggie platter. Themed Serving Boards Make your board fun! Use bright colors and different textures. Add some cheese or nuts to give it variety. Using Seasonal Elements Incorporate seasonal fruits or vegetables. In summer, add fresh berries. In fall, try some roasted squash for warmth. Creative Plating Techniques Use different bowls for the dip and veggies. Arrange them in a circle or a fun shape. This draws the eye and makes the board inviting. For the full recipe, check out the Sweet and Spicy Pickle Dip Board! {{image_2}} You can change the taste of your Sweet and Spicy Pickle Dip by adding different spices. Consider mixing in smoked paprika for warmth or a pinch of cayenne for more heat. These spices can lift the flavor and surprise your guests. Substituting ingredients can also create new flavors. For instance, swap out dill pickles for bread and butter pickles. This change adds a sweet touch. You can use Greek yogurt instead of sour cream for a tangy twist and extra protein. If you want vegan-friendly options, use vegan cream cheese and yogurt. The taste remains rich, while keeping it plant-based. You can also add avocado for creaminess. It will keep the dip creamy and delicious. For gluten-free pairings, choose gluten-free crackers or fresh veggies. Carrot sticks and bell pepper slices work well. They add crunch and color to your board. If you're looking for dairy-free alternatives, use cashew cream instead of cream cheese. This swap gives you the creamy texture without dairy. A splash of lemon juice can help brighten the flavor. Low-carb options are also easy to include. Use cucumber slices or radishes instead of breadsticks. These keep the dip light and fresh while staying low in carbs. Individual dipping cups are a fun way to serve the dip. Fill small cups with the dip and place them on a platter. This style allows guests to grab their own, making it easy and neat. For large party platters, make a big batch of dip. Set it in the center of a large board. Surround it with a variety of dippers: colorful crackers, fresh veggies, and fruits. This setup invites everyone to dig in. Themed event boards can add flair to your gathering. Create a picnic or barbecue theme by using checkered cloths and rustic bowls. You can even label each dip and its dippers for a fun touch. For the full recipe, check out the Sweet and Spicy Pickle Dip Board 🥒. Store any leftover dip in the fridge. Use a clean, airtight container to keep it fresh. It stays good for about three to five days. Always check for signs of spoilage before using. You can freeze the dip for longer storage. First, place it in a freezer-safe container. Leave some space at the top, as the dip will expand. Use it within three months for best taste. To thaw, move it to the fridge overnight. Stir well before serving, as freezing can change the texture. To keep your crackers fresh, store them in a cool, dry place. Use a sealed bag or container. For best taste, eat them within a week. Avoid leaving crackers out in the air, as they can get stale quickly. If you notice staleness, try toasting them lightly in the oven for a quick refresh. You can serve many tasty items with this dip. Recommended accompaniments include: - Fresh veggies like carrots, bell peppers, and celery. - Crunchy crackers, such as wheat or rice crackers. - Slices of baguette or breadsticks. - Tortilla chips for a fun twist. These pairings add texture and flavor. They also make your board look colorful and inviting. Yes, you can make this dip ahead of time. Making it in advance helps the flavors blend well. You can prepare it up to two days before your event. For storage, place the dip in an airtight container. Keep it in the fridge until you are ready to serve. This keeps it fresh and tasty. The heat level can vary based on how many jalapeños you use. If you want it milder, use fewer jalapeños. You can also remove the seeds for less heat. Understanding jalapeño varieties is key. Some are hotter than others. If you enjoy spice, opt for spicier varieties. If you prefer mild, choose milder options. Absolutely! You can explore different types of pickles for this recipe. Sweet pickles add a different flavor profile. Bread and butter pickles give a nice sweetness. Using various pickles impacts the overall taste. Experiment with dill pickles for a tangy kick. Feel free to mix and match to find your favorite blend. For the full recipe, check the detailed instructions above. This article covered how to make a tasty Sweet and Spicy Pickle Dip. We explored the main ingredients like cream cheese, dill pickles, and jalapeños. I shared step-by-step instructions for mixing, seasoning, and presenting the dip. You learned tips for perfecting the flavor and serving ideas. We also discussed variations and storage options to keep your dip fresh. Now, you have everything you need to enjoy this dip at your next gathering. Have fun mixing, sharing, and savoring this delicious treat!

Sweet and Spicy Pickle Dip Board for Hosting Success

If you’re looking to wow your guests at your next gathering, the Sweet and Spicy Pickle Dip Board is your

To make this tasty dish, gather the following ingredients: - 1 lb potato gnocchi (you can use store-bought or homemade) - 1 cup pumpkin puree (canned or fresh) - 1/2 cup grated Parmesan cheese - 4 tablespoons unsalted butter - 4 cloves garlic, minced - 1 teaspoon dried thyme - 1 teaspoon dried rosemary - Salt and pepper (to taste) - 1/2 cup heavy cream - 1/2 cup shredded mozzarella cheese - Fresh parsley (for garnish) Feel free to customize your bake! You can add extra spices or use different cheeses. If you want a bit of heat, sprinkle in some red pepper flakes. For a healthier twist, you can even swap in whole wheat gnocchi. This recipe is all about making it your own! 1. Preheat the oven. Set it to 375°F (190°C). This helps cook the dish evenly. 2. Cook the gnocchi. Bring a large pot of salted water to a boil. Add the gnocchi and cook until they float. This usually takes about 2-3 minutes. 3. Drain the gnocchi. Once they float, drain them in a colander and set them aside. This step is key to prevent mushiness. 4. Melt the butter. In a saucepan over medium heat, add the butter. Wait until it melts, but don't let it brown. 5. Sauté the garlic. Add minced garlic to the melted butter. Cook for 1-2 minutes until it smells good. Watch closely so it doesn’t burn. 6. Prepare the sauce. Stir in the pumpkin puree and heavy cream. Add dried thyme, dried rosemary, salt, and pepper. Mix well and heat until smooth. 7. Combine the gnocchi. Gently fold the cooked gnocchi into the sauce. This coats them nicely. 1. Transfer the mixture. Pour the gnocchi and sauce into a greased 9x13 inch baking dish. Spread it evenly. 2. Layer the cheese. Sprinkle grated Parmesan cheese over the top. Then add shredded mozzarella for that gooey texture. 3. Bake it. Place the dish in the preheated oven. Bake for 25-30 minutes, until the cheese is golden and bubbly. 4. Cool before serving. Take it out of the oven and let it sit for a few minutes. This makes serving easier. Tips for Texture: To get that perfect cheesy layer, make sure to use fresh cheese. Avoid pre-shredded cheese, as it can contain anti-caking agents that prevent melting. Time Management: You can cook the gnocchi and prepare the sauce at the same time. This saves you about 10 minutes. For the full recipe, refer to the Buttery Garlic Parm Pumpkin Gnocchi Bake instructions above. - Choosing gnocchi: Look for fresh potato gnocchi. Brands like Giovanni Rana or Whole Foods' store brand are great options. They have a good texture and cook well. - Enhancing flavors: Use fresh herbs when possible. Basil, oregano, or even sage can add depth. You can also add a pinch of red pepper flakes for a mild kick. - Cooking tools: A large pot for boiling, a good colander for draining, and a sturdy baking dish are key. A silicone spatula helps mix without breaking the gnocchi. - Handling gooey cheeses: Avoid stirring too hard after adding mozzarella. This can cause the cheese to clump and become tough. Just sprinkle it on and let it melt beautifully. - Preventing mushy gnocchi: Do not overcook the gnocchi in boiling water. They should cook only until they float. If they sit too long, they can absorb too much water. - Baking times and temperatures: Stick to 25-30 minutes at 375°F (190°C). Watch for a golden top. If it browns too fast, cover it loosely with foil. This keeps it from burning while the inside cooks. {{image_2}} You can easily switch out a few ingredients to suit your needs. - Gluten-free options for gnocchi: Look for gluten-free gnocchi made from rice or corn. These work well and keep the dish tasty. - Dairy-free alternatives for cream and cheeses: Use coconut cream for a rich base. Nutritional yeast gives a cheesy flavor without dairy. - Seasonal veggie additions to enhance the dish: Add spinach or kale for greens. Roasted mushrooms or squash can add depth to the flavor. Pairing your Buttery Garlic Parm Pumpkin Gnocchi Bake with the right sides can elevate the meal. - Ideas on what to serve alongside: A simple green salad with a lemon vinaigrette complements the richness. Garlic bread is also a great side. - Recommended wine pairings: Try a crisp white wine like Pinot Grigio. A light red like Pinot Noir works too. - Portioning the dish for family-style serving: Serve it straight from the baking dish. Use a large spoon to scoop out portions for everyone. This style feels warm and inviting. To keep your buttery garlic parm pumpkin gnocchi bake fresh, follow these steps: - Refrigeration: Store leftovers in an airtight container. It will last up to 3 days. - Freezing: If you want to save it longer, freeze it in a freezer-safe container. It lasts up to 3 months. For best shelf-life, use glass or plastic containers with tight lids. When you're ready to enjoy your leftovers, reheat them gently. Preheat your oven to 350°F (175°C). Place the gnocchi bake in an oven-safe dish. Cover it with foil to keep it moist. Bake for about 15-20 minutes until heated through. This method helps keep the cheese and gnocchi's texture intact. If you're busy during the week, make this dish ahead of time. - Making in Advance: You can prepare the entire dish and store it before baking. Just follow the recipe up to the baking step. - Assembling Ahead: Layer the gnocchi and sauce in the baking dish. Cover it tightly with plastic wrap or foil. You can also freeze it before or after baking. If freezing before, let it cool completely first. When you're ready to bake it, remove it from the freezer and let it thaw in the fridge overnight. Then, bake as directed. These tips make it easy to enjoy a delicious meal without the rush! Check out the Full Recipe for more details. What can I use instead of pumpkin puree? You can use butternut squash puree or sweet potato puree. Both options give a sweet taste. You can also blend cooked carrots for a different flavor. How long can I store the Buttery Garlic Parm Pumpkin Gnocchi Bake? You can store it in the fridge for about three days. Just keep it in an airtight container. If you want to keep it longer, freeze it for up to two months. Can I use frozen gnocchi in this recipe? Yes, you can use frozen gnocchi. Just cook them straight from the freezer. Follow the package directions for timing. Is it possible to make this dish ahead of time? Absolutely! You can prepare it the day before and bake it just before serving. This saves you time and helps the flavors blend well. What to do if my gnocchi is mushy? If your gnocchi turns mushy, it may have cooked too long. Next time, cook them until they float. Drain them immediately and mix them gently with sauce. How to salvage burnt cheese on top? If the cheese is burnt, you can scrape off the top layer. Then, add fresh cheese and return the dish to the oven for a few minutes. This helps improve the look and taste. How to adjust for high altitude or different ovens? At high altitude, you may need to bake longer. Keep an eye on the cheese. If your oven runs hot, lower the temperature a bit. Always check for golden cheese as a sign of doneness. This Buttery Garlic Parm Pumpkin Gnocchi Bake is easy to make and delicious. You learned about the ingredients, cooking steps, and tips to avoid mistakes. I also shared variations and storage ideas that suit your needs. When you follow these steps, you’ll love your tasty meal. Enjoy sharing this dish with friends and family. Cooking can be fun and rewarding, so don't hesitate to try new things! Keep experimenting, and you’ll impress everyone with your skills.

Buttery Garlic Parm Pumpkin Gnocchi Bake Recipe

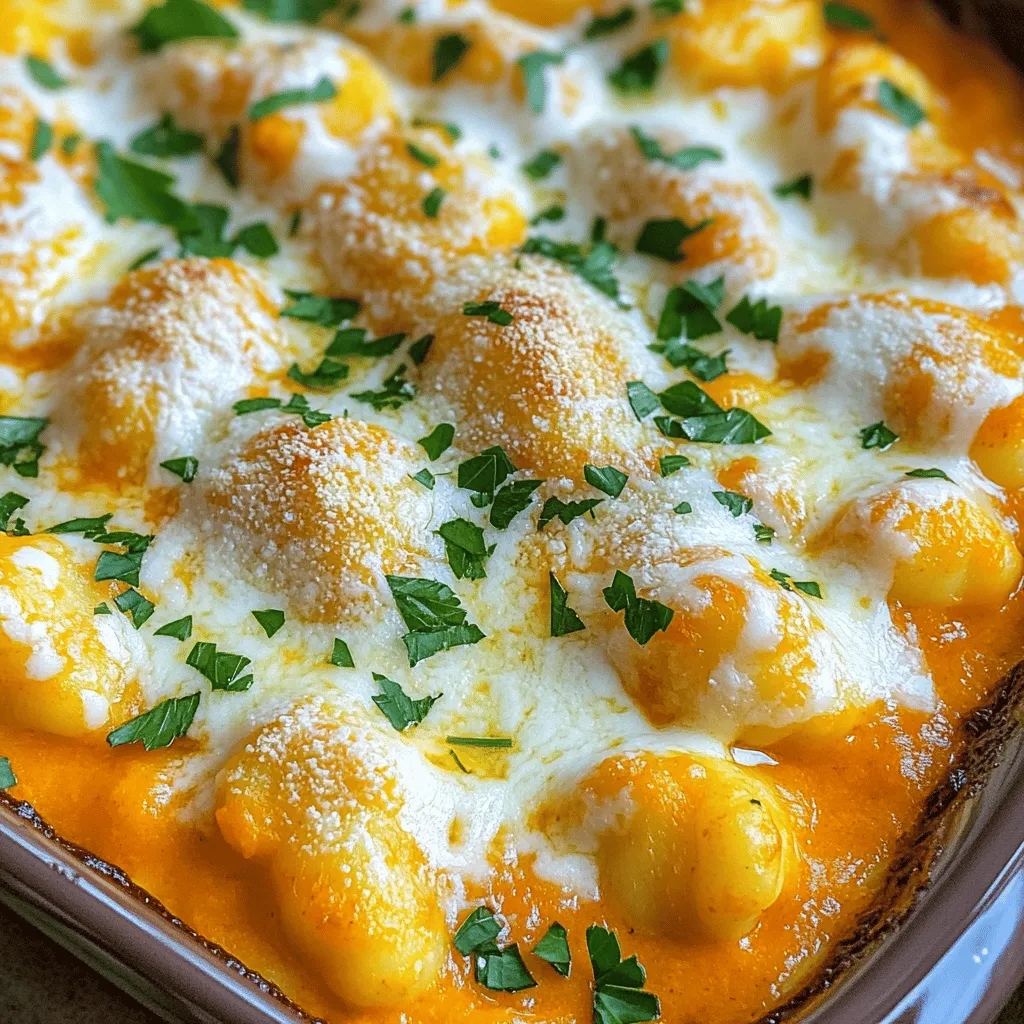
Looking for a cozy dish that packs a flavor punch? Try my Buttery Garlic Parm Pumpkin Gnocchi Bake! Perfect for

- 1 cup sushi rice - 2 cups water - 1 tablespoon rice vinegar - 1 teaspoon sugar - 1/2 teaspoon salt - 1 pound salmon fillet - 2 tablespoons olive oil - 1 teaspoon lemon zest - 1 tablespoon lemon juice - 1 cup mixed salad greens (arugula, spinach, and kale) - 1 small cucumber, diced - 1/2 bell pepper, diced - 1/2 avocado, sliced - 1/4 cup cherry tomatoes, halved - 2 tablespoons sesame seeds - Salt and black pepper to taste For the sushi rice, using 1 cup gives perfect texture. You should use 2 cups of water for cooking. This ratio ensures the rice cooks well. You need 1 tablespoon of rice vinegar to add flavor. The 1 teaspoon of sugar balances the vinegar's acidity. Use 1/2 teaspoon of salt to enhance the rice's taste. For salmon, 1 pound is ideal. Cooking it with 2 tablespoons of olive oil adds richness. The zest of 1 teaspoon lemon brightens the dish. Use 1 tablespoon of lemon juice for a fresh finish. The salad greens should total 1 cup for a nice base. Diced 1 small cucumber adds crispness. A 1/2 bell pepper gives color and crunch. Use 1/2 avocado sliced for creaminess. The 1/4 cup of halved cherry tomatoes adds sweetness. Lastly, sprinkle 2 tablespoons of sesame seeds for texture. Season with salt and black pepper to your taste. Feel free to add more veggies, like shredded carrots or radishes. You can switch the salmon for grilled chicken or tofu if you prefer. Add fresh herbs like cilantro or basil for extra flavor. Consider drizzling a spicy sauce for a kick. Start by rinsing the sushi rice. Place it in a bowl and run cold water over it. Swirl the rice gently until the water turns clear. This step removes excess starch. After that, drain the rice well. In a medium saucepan, combine the rinsed rice and two cups of water. Bring it to a boil, then lower the heat. Cover the pot and let it simmer for about 15 minutes. The rice should be tender when done. After cooking, let it sit for 10 minutes while covered. This helps the rice finish cooking. Transfer the rice to a bowl. In a small bowl, mix rice vinegar, sugar, and salt until dissolved. Pour this over the warm rice and fold gently. Let it cool to room temperature. This is your flavorful sushi rice. For the salmon, start by heating olive oil in a non-stick skillet over medium-high heat. Season the salmon fillet with salt, black pepper, and lemon zest. Once the oil is hot, place the salmon skin-side down. Cook it for about 4 to 5 minutes. Flip the salmon and cook for another 3 to 4 minutes. The salmon should be cooked through and crispy on the outside. Remove it from the skillet and let it rest for a few minutes. This resting time is important for keeping the fish moist. While the salmon rests, prepare the salad. In a large bowl, combine mixed greens, diced cucumber, bell pepper, avocado, and cherry tomatoes. This mix adds color and nutrition. Next, flake the cooled salmon into large chunks. Gently fold this salmon into the salad. Add the crispy sushi rice for texture. Drizzle lemon juice over the top and sprinkle sesame seeds for extra crunch. Toss everything gently to combine. This salad is fresh and full of flavor. Serve it immediately, and feel free to add extra avocado slices for a creamy touch. For the full recipe, refer to the earlier section with all the ingredients. To cook salmon well, choose fresh fillets. Look for bright color and no fishy smell. Use a non-stick pan for easy cooking. Heat the pan first before adding oil. This step helps create a nice crust. Season the salmon with salt and pepper for flavor. Cook skin-side down first. This keeps the fish moist. Aim for a cook time of about 4-5 minutes on one side. Flip it gently and cook for another 3-4 minutes. It should be crispy outside and tender inside. For crispy rice, start with sushi rice. Rinse the rice well until the water runs clear. This removes excess starch. Cook the rice with the right water ratio. Use 1 cup of rice to 2 cups of water. After cooking, let it sit covered for 10 minutes. Mix rice vinegar, sugar, and salt for added flavor. Fold this mixture into the warm rice gently. Once the rice cools, heat a pan with oil. Press the rice into the pan to make a thin layer. Cook until golden and crispy, about 4-5 minutes per side. Serve the salad fresh for the best taste. You can add extra toppings like nuts or seeds for crunch. Consider a light dressing, like a lemon vinaigrette, for added zing. Garnish with avocado slices for a creamy touch. This salad pairs well with a chilled white wine. Enjoy it as a light lunch or dinner. For the complete recipe, check the section above. {{image_2}} You can easily change some ingredients in this salad. For the sushi rice, use brown rice for more fiber. If you want a different taste, quinoa works great too. Instead of salmon, you can try grilled chicken or tofu. This adds variety and makes it suitable for different diets. Swap out the vegetables, too. Try adding radishes for crunch, or shredded carrots for sweetness. You can mix in your favorite greens, like romaine or butter lettuce. Adding more protein can make this salad heartier. Shrimp, scallops, or even chickpeas add great texture and flavor. If you prefer plant-based options, consider edamame or lentils. For extra veggies, include roasted sweet potatoes or beets. These ingredients not only boost nutrition but also add color to your plate. To enhance flavors, consider different dressings. A sesame ginger dressing pairs wonderfully with this salad. You can mix soy sauce, ginger, and garlic for a quick option. If you like spice, add a dash of sriracha or chili flakes. Fresh herbs like cilantro or basil can brighten each bite. A squeeze of lime juice can also add a zesty kick. You can find the full recipe and try these variations. To store leftovers, first let the salad cool down. Place it in an airtight container. Keep it in the fridge for up to two days. Make sure to store the crispy rice separately to keep it crunchy. This way, you can enjoy your salad later without losing texture. When ready to eat leftovers, avoid microwaving the salad directly. Instead, reheat the salmon in a skillet over low heat. Add a splash of water to keep it moist. If you need to warm up the rice, use the same skillet. Just add a bit of olive oil and heat until crispy again. Freezing this salad isn’t the best choice. The fresh ingredients do not freeze well. However, you can freeze the cooked salmon. Wrap it tightly in plastic wrap, then place it in a freezer bag. It will keep for up to a month. Thaw it in the fridge before using it again. For the best taste, make the salad fresh each time. For the full recipe, refer to the earlier section. Crispy rice is made from sushi rice that gets cooked and seasoned. After cooking, I cool it and pan-fry it until it is crunchy. This gives a fun texture to the salad. The rice adds a delightful crunch that contrasts with the tender salmon and fresh veggies. Yes, you can prepare parts of the salad ahead. You can cook the sushi rice and salmon in advance. Store them separately in the fridge. Mix the salad greens and veggies just before serving. This keeps everything fresh and crisp. Yes, this recipe is gluten-free. It uses sushi rice, fresh veggies, and salmon. Just make sure to use gluten-free rice vinegar. Always check labels if you have allergies. Enjoy this salad worry-free! This post covered how to create a delicious sushi salad. We explored the ingredients and their measurements. You learned how to prepare the sushi rice and cook the salmon. I shared tips for making crispy rice and different serving ideas. We also discussed ingredient swaps for variations and storage tips for leftovers. Remember, cooking is all about creativity. Enjoy the process and make it your own!

Crispy Rice Salmon Harvest Salad Fresh and Flavorful

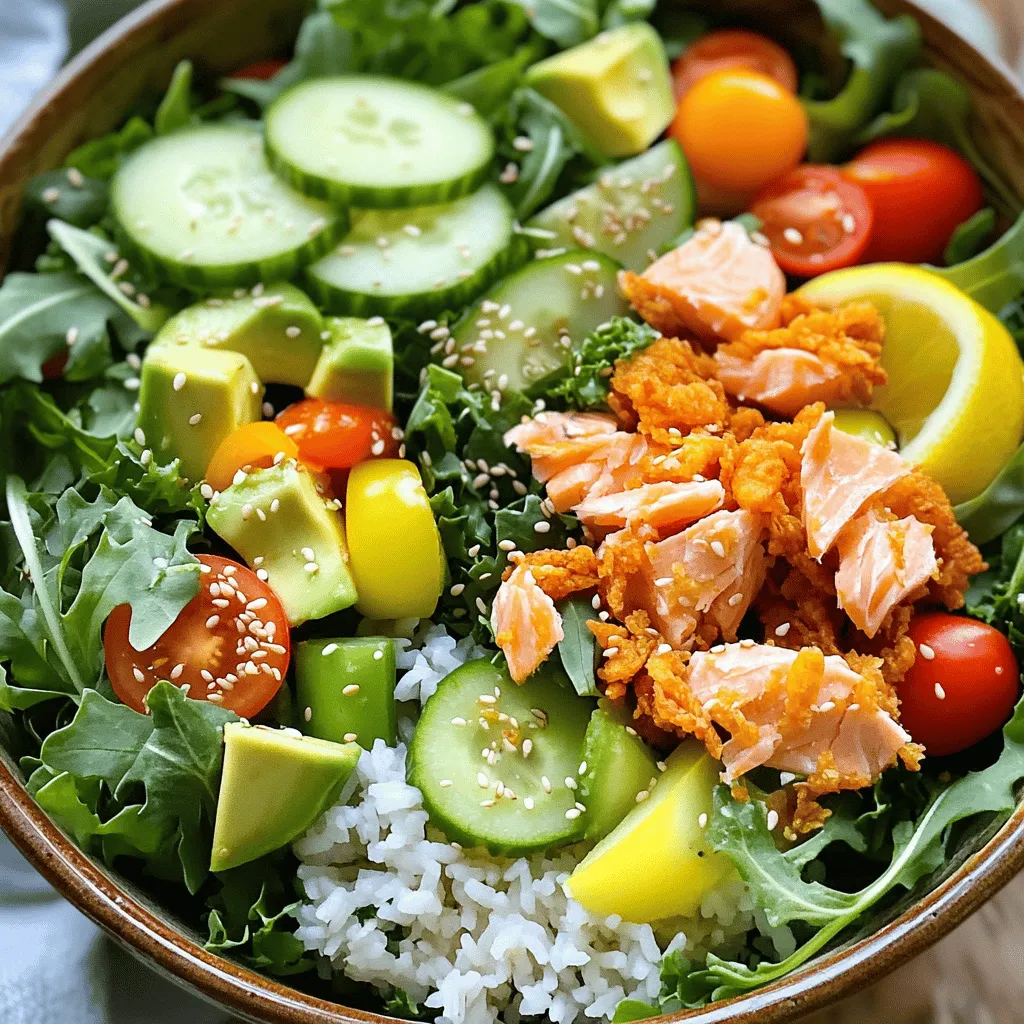
Are you ready to taste a dish that bursts with flavor and crunch? In my recipe for Crispy Rice Salmon

- 3 medium apples (preferably Granny Smith), peeled and diced - 1 tablespoon lemon juice - 1/4 cup brown sugar - 1 teaspoon ground cinnamon - 1 tablespoon all-purpose flour The apple filling brings a sweet and tangy flavor. Granny Smith apples work best. Their tartness cuts through the sweetness of the caramel. The lemon juice adds brightness and helps keep the apples fresh. Brown sugar gives a deep, rich sweetness. Cinnamon adds warmth and spice. The flour helps thicken the filling as it cooks. - 1/2 cup granulated sugar - 2 tablespoons unsalted butter - 1/4 cup heavy cream - 1 tablespoon white miso paste - A pinch of salt Miso caramel combines sweet and savory. The granulated sugar caramelizes to create a rich flavor. Butter adds creaminess. Heavy cream gives a smooth texture. Miso paste introduces umami, making the caramel unique. Just a pinch of salt enhances all the flavors. - 1 cup all-purpose flour - 1/2 cup rolled oats - 1/3 cup brown sugar - 1/2 teaspoon baking powder - 1/4 teaspoon salt - 1/2 cup cold unsalted butter, cubed The crumble base is a mix of flour and oats. Oats add texture and heartiness. Brown sugar sweetens the crumble. Baking powder helps it rise a bit in the oven. Cold butter is key. It creates a flaky, crumbly texture. When you mix it in, you want to see small lumps. These ingredients work together to create layers of flavor and texture. You can find the full recipe [here](Full Recipe). - Toss diced apples with lemon juice, brown sugar, cinnamon, and flour. - Set aside to allow flavors to meld. Start by dicing three medium Granny Smith apples. Their tartness shines when mixed with sweet and spicy flavors. Add one tablespoon of lemon juice to keep the apples bright and fresh. Next, sprinkle in a quarter cup of brown sugar for sweetness, one teaspoon of ground cinnamon for warmth, and one tablespoon of all-purpose flour to thicken. Mix well and let it sit. The apples will soak up the flavors, making each bite delicious. - Melt granulated sugar in a saucepan until deep amber. - Whisk in butter, then heavy cream, miso paste, and salt until smooth. For the miso caramel, heat half a cup of granulated sugar in a saucepan over medium heat. Stir it often. Watch it carefully as it melts and turns a deep amber color. Once it reaches that perfect hue, remove it from heat. Quickly whisk in two tablespoons of unsalted butter until it melts. Slowly add a quarter cup of heavy cream while stirring. Then, mix in one tablespoon of white miso paste and a pinch of salt for depth. This caramel is rich and savory, perfect for our bars. - Preheat oven to 350°F (175°C) and grease a 9x9-inch baking dish. - Combine dry ingredients and mix with cold cubed butter until crumbly. Now, let’s make the crumble. Preheat your oven to 350°F (175°C) and grease a 9x9-inch baking dish. In a bowl, mix together one cup of all-purpose flour, half a cup of rolled oats, one-third cup of brown sugar, half a teaspoon of baking powder, and a quarter teaspoon of salt. Cut in half a cup of cold unsalted butter, using your fingers or a pastry cutter. Your mixture should feel crumbly and look like coarse sand. - Press half of the crumble mixture into the baking dish to form the crust. - Layer with apple filling, pour miso caramel, and sprinkle remaining crumble on top. To assemble, press half of the crumble mixture into the bottom of the greased baking dish. This will be your crust. Next, evenly layer the apple filling over the crust. Pour the warm miso caramel on top, spreading it out gently. Finally, sprinkle the rest of the crumble mixture on top. This will create a nice, crunchy layer. - Bake for 25-30 minutes until golden brown and bubbly. - Cool in the baking dish for at least 15 minutes before slicing. Place the dish in your preheated oven and bake for 25 to 30 minutes. The top should turn golden brown and bubble up. Once done, take it out and let it cool in the dish for at least 15 minutes. This cooling time helps it set, making it easier to slice into perfect squares. It’s time to enjoy your miso caramel apple crumble bars! For the full recipe, check the previous section. I recommend using tart apples, like Granny Smith. They bring a nice balance to the sweet caramel. Tart apples add a fresh flavor and make the bars taste bright. You want apples that will hold their shape while baking, too. To avoid graininess, watch your heat. Melt the sugar slowly until it turns a deep amber. Stir it often to keep it smooth. When you add butter and cream, do it slowly. This helps keep the mixture silky. Whisk in the miso paste until it blends well. The final caramel should be thick but pourable. For a perfect crumble texture, use cold butter. This makes the mixture flaky and light. Cut the butter into the dry ingredients until it looks like coarse crumbs. You don't want to overmix, as this can make it dense. The result should be crumbly and crunchy when baked. For the full recipe, make sure to check out the complete list of ingredients and steps! {{image_2}} Adding nuts can make your Miso Caramel Apple Crumble Bars even better. Nuts give a nice crunch and a rich flavor. You can use walnuts, pecans, or almonds. Just chop them up and mix them into the crumble. About 1/2 cup of nuts works great. This little change adds texture and makes every bite exciting. If you want to change the sweet taste, try using honey or maple syrup instead of sugar. These natural sweeteners bring their unique flavors. Using honey adds a floral note. Maple syrup gives a warm, earthy taste. If you decide to switch, use about 1/3 cup of either sweetener to balance the flavors. Just remember, this can change the texture a bit, so adjust your other ingredients if needed. Want to make your bars even tastier? Adding a splash of vanilla extract or a sprinkle of nutmeg can take the flavor up a notch. Vanilla adds warmth and sweetness, while nutmeg gives a cozy, spicy touch. Just 1 teaspoon of vanilla or 1/4 teaspoon of nutmeg can make a big difference. These small tweaks help create a more complex flavor that you and your guests will love. For the complete recipe, check out the [Full Recipe]. To keep your bars fresh, place them in an airtight container. Store them in the fridge. This will help maintain their taste and texture. Make sure they cool completely before sealing. You can layer parchment paper between the bars to prevent sticking. If you want to freeze the bars, wrap them well in plastic wrap. Then, place them in a freezer-safe bag. This will stop freezer burn. When you want to eat them, take them out and let them thaw in the fridge. This keeps the texture nice and soft. Miso caramel apple crumble bars last about three days in the fridge. At room temperature, they stay good for about two days. For the best taste, eat them within these time frames. After that, the flavors may fade. Enjoy your delicious treat from the [Full Recipe]! Yes, you can make these bars gluten-free. Use gluten-free flour blends. Look for blends that contain rice flour, almond flour, or potato starch. These options work well in the crumble and crust. If you can’t find miso paste, you have a few options. You can use tahini for a similar creaminess. Another choice is a mix of peanut butter and soy sauce. These will give you a unique flavor twist and still add richness. You can tell the bars are done when the top is golden brown. The apples will bubble up, and you can smell a sweet aroma. If you poke a toothpick into the center, it should come out clean. Yes, you can make these bars ahead of time. Bake them a day or two before your event. Store them in an airtight container in the fridge. This helps the flavors meld and makes serving easy. Serve these bars warm or at room temperature. Add a scoop of vanilla ice cream on top for a tasty treat. You can also drizzle extra miso caramel or sprinkle some sea salt for added flavor. Check the Full Recipe for additional ideas! This article covered how to make Miso Caramel Apple Crumble Bars, focusing on ingredients, steps, and tips. You learned to blend tart apples with miso caramel for a unique dessert. Remember, using cold butter ensures a crunchy crumble, and variations like nuts add extra flavor. These bars are perfect for gatherings or a sweet treat at home. Enjoy making these delicious bars and sharing them with others. Happy baking!

Miso Caramel Apple Crumble Bars Easy and Delicious Treat

If you’re looking for a treat that combines sweet apples, rich miso caramel, and a crunchy crumble, you’ve found it!

The Tailgate Chili Mac Bread Bowl is a fun dish perfect for game day. It combines creamy chili mac with warm, crusty bread. You will love how easy it is to make and serve. This dish feeds four to six people, making it great for sharing. You will need the following ingredients for the Tailgate Chili Mac Bread Bowl: - 1 large round sourdough bread loaf - 2 cups elbow macaroni - 1 lb ground beef or turkey - 1 can (15 oz) chili beans, drained and rinsed - 1 can (14 oz) diced tomatoes with green chilies - 1 cup shredded cheddar cheese - 1 small onion, chopped - 2 cloves garlic, minced - 1 tablespoon chili powder - 1 teaspoon cumin - 1 teaspoon paprika - Salt and pepper to taste - Chopped green onions and cilantro for garnish You can make this dish your own with some fun add-ins! Try these options: - Swap the ground beef for chicken or plant-based protein. - Use gluten-free elbow macaroni for a gluten-free version. - Add bell peppers or corn for extra flavor and color. - For a spicy kick, add jalapeños or hot sauce. Feel free to mix and match ingredients to suit your taste. The Full Recipe has all the steps to guide you through. 1. Preheat your oven to 350°F (175°C). This step warms the oven for the bread bowl. 2. Cut the top off the sourdough bread loaf. Hollow out the inside, leaving a thick wall. Keep the bread pieces for later. 3. Cook the elbow macaroni in a large pot. Follow the package instructions until it is al dente. Drain and set it aside. 1. Heat a skillet over medium heat. Add ground beef or turkey. Cook until it is browned, which takes about 5-7 minutes. 2. Drain any excess fat. This step keeps the dish from being greasy. 3. Add chopped onion and minced garlic to the skillet. Sauté until the onion turns translucent, which should take around 3-4 minutes. 4. Stir in chili beans, diced tomatoes, cooked macaroni, chili powder, cumin, paprika, salt, and pepper. Mix it all well and let it simmer for 5 minutes. 5. Remove from heat. Stir in half of the shredded cheese until it melts and combines with the mixture. 1. Spoon the chili mac mixture into the hollowed-out bread bowl. Fill it until it overflows slightly. 2. Top with the remaining cheese. This will create a nice cheesy crust. 3. Place the bread bowl on a baking sheet. Bake it in the oven for 20-25 minutes. Look for melted, bubbly cheese and slightly toasted bread. 4. Carefully remove it from the oven. Let it cool for a few minutes before slicing to serve. For the full recipe, check the above section. This meal is perfect for game day! To make the best chili mac, focus on quality meat. Choose fresh ground beef or turkey. You can even mix both for a rich taste. Use a sturdy pot for cooking. This will help blend flavors well. For extra flavor, let the mix simmer longer. This step makes a big difference. Taste as you go to adjust spices. The right balance of chili powder and cumin is key. A great presentation makes your dish pop. Serve your bread bowl on a large wooden board. Place the reserved bread pieces around it. This gives a rustic feel. For a colorful touch, add chopped green onions and cilantro on top. You can even sprinkle some extra cheese for a nice finish. Using bright plates or bowls can also enhance the look. You can prep this dish in advance. Cook the chili mac mixture and cool it. Store it in an airtight container in the fridge. When game day comes, just fill the bread bowl and bake. This saves time and stress. You can also hollow out the bread a day before. Just wrap it in plastic to keep it fresh. {{image_2}} You can make a tasty vegetarian chili mac. Swap the meat for your favorite veggies. Try mushrooms, zucchini, or bell peppers. Use canned black beans or lentils for protein. They add great texture. You can also use plant-based cheese for a dairy-free option. This keeps the dish creamy and delicious. If you want to change the protein, many options exist. Ground turkey works well, just like beef. You could also use chicken or pork. For a lighter dish, shredded rotisserie chicken is easy and fast. If you like seafood, shrimp adds a fun twist. Make sure to adjust cooking times for each protein type. To change the spice level, you have many choices. If you like it mild, skip the chili powder. You can add sweet bell peppers instead. For more heat, add jalapeños or cayenne pepper. Start with small amounts and taste as you go. This way, you can find the perfect heat for your crowd. To store leftovers, let the chili mac cool first. Place it in an airtight container. You can keep it in the fridge for up to three days. Make sure to wrap the bread bowl separately to keep it fresh. This way, your game day feast stays tasty for another meal. Reheating is simple. Preheat your oven to 350°F (175°C). Place the bread bowl on a baking sheet. Heat for about 15-20 minutes. This warms the chili mac and keeps the bread crisp. You can also use a microwave for quick reheating, but the bread may get a bit soft. To freeze, scoop out the chili mac from the bread bowl. Place the mac in a freezer-safe container. It can last up to three months. When ready to eat, thaw it overnight in the fridge. Reheat as mentioned above. The bread bowl can be frozen too, but it may lose some texture. Enjoy your Tailgate Chili Mac Bread Bowl later with ease! Yes, you can use other bread types. A round Italian or a soft baguette works well. Just ensure the bread can hold the filling. If you choose a softer bread, consider baking it a bit longer. This helps it stay firm. You want it to be sturdy enough to hold the chili mac. Toppings add flavor and fun. Here are some great options: - Chopped green onions - Fresh cilantro - Sour cream - Jalapeños for heat - Extra shredded cheese - Avocado slices for creaminess Feel free to mix and match these toppings. They can make your dish more colorful and tasty. To make this recipe gluten-free, swap the pasta and bread. Use gluten-free elbow macaroni and a gluten-free bread loaf. Many stores have these options. Also, double-check the chili beans and diced tomatoes for gluten ingredients. This way, everyone can enjoy this tasty dish! For the full recipe, check back to see how to create this delicious meal. In this post, we explored how to create Tailgate Chili Mac Bread Bowls. We covered the full recipe, key ingredients, and helpful tips. You learned about cooking and baking steps and ways to make variations. I shared storage tips and answered common questions. Remember, you can mix and match ingredients to suit your taste. Enjoy making this fun meal for parties or family nights. With a little practice, you will impress everyone.

Tailgate Chili Mac Bread Bowl for Game Day Feast

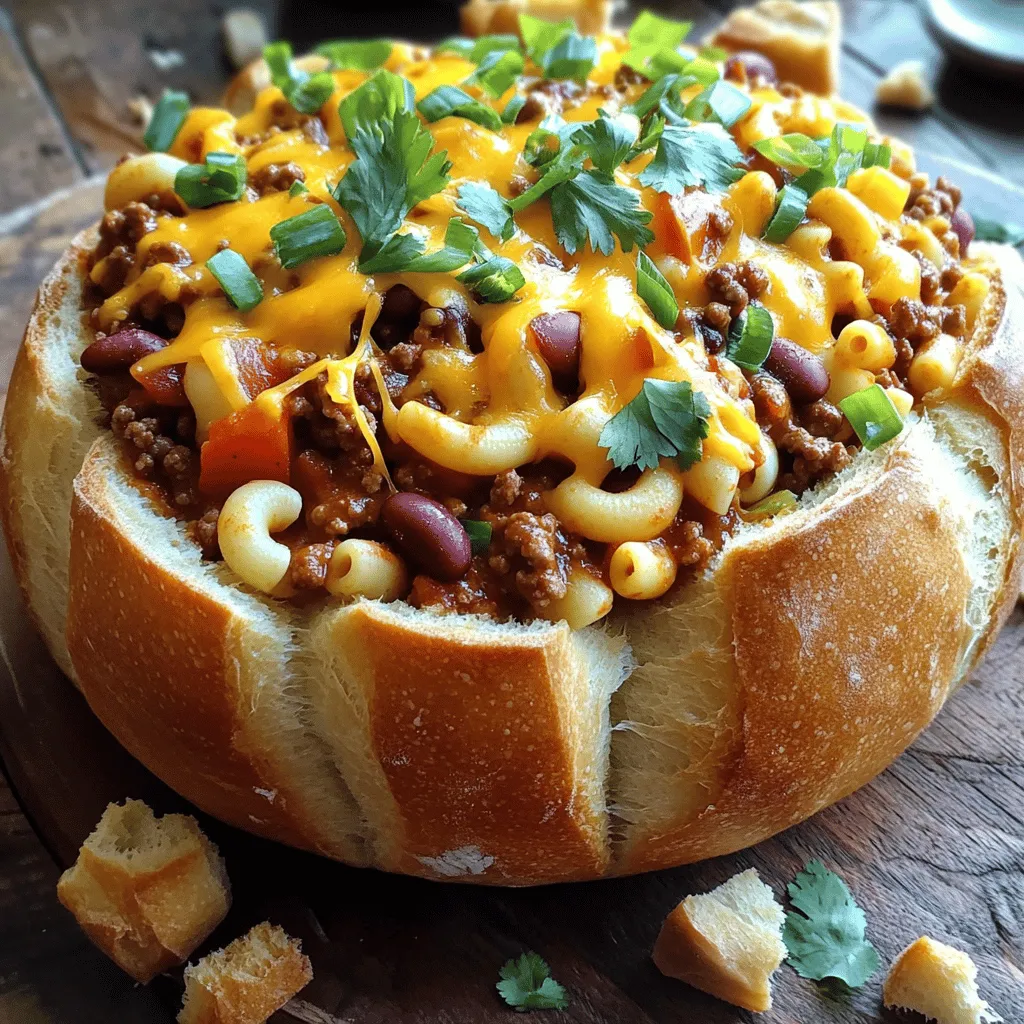
Game day is about great food and fun with friends. That’s why I’m excited to share my Tailgate Chili Mac

To make these tasty brownies, you will need: - 1 cup unsalted butter (melted) - 2 cups granulated sugar - 1 teaspoon vanilla extract - 4 large eggs - 1 cup all-purpose flour - 2/3 cup unsweetened cocoa powder - 1/4 teaspoon baking powder - 1/4 teaspoon salt - 1 teaspoon espresso powder (optional) - 1 cup pumpkin puree - 8 oz cream cheese (softened) - 1/2 cup powdered sugar - 1 teaspoon pumpkin pie spice - 1 tablespoon lemon juice If you need to swap some items, here are some ideas: - Use coconut oil instead of butter for a dairy-free option. - Substitute brown sugar for granulated sugar to add a rich flavor. - If you don’t have pumpkin puree, use mashed bananas for a different taste. - For a lighter option, consider using Greek yogurt in place of cream cheese. Using good ingredients makes a big difference. Fresh eggs and high-quality cocoa powder can enhance flavor. Organic pumpkin puree offers better taste and nutrition. Always choose full-fat cream cheese for a creamy texture. This ensures your brownies come out rich and delicious. Don't rush this step; it pays off in the end. For the full recipe, check out the complete guide. Start by preheating your oven to 350°F (175°C). Greasing the baking dish is key. Use a 9x13 inch dish for the best results. Line it with parchment paper, letting it hang over the edges. This helps with easy removal later. In a large bowl, mix the melted butter and granulated sugar together until smooth. You want this blend to feel creamy. Next, add in the vanilla extract, then the eggs one by one. Make sure to mix each egg well before adding the next one. In another bowl, whisk together the flour, cocoa powder, baking powder, salt, and espresso powder. Gradually mix this dry blend into your wet mixture until combined. Avoid overmixing to keep the brownies soft. In a separate bowl, beat the cream cheese until it is smooth. Add the pumpkin puree, powdered sugar, pumpkin pie spice, and lemon juice. Mix until it is creamy and well-blended. This will create a rich, flavorful swirl for your brownies. Pour half of your brownie batter into the prepared baking dish. Spread it out evenly. Next, drop spoonfuls of the pumpkin cheesecake mixture over the brownie batter. Then, add the rest of the brownie batter on top. Use a knife or skewer to swirl the pumpkin mixture gently into the brownie batter. Be careful not to overmix; you want to see that marbled effect. Bake the brownies in the preheated oven for 30-35 minutes. Insert a toothpick into the center; it should come out mostly clean. A few crumbs are fine. Allow the brownies to cool completely in the pan on a wire rack. Once cool, lift them out using the parchment paper overhang. Cut into squares and enjoy! For the full recipe, check the detailed instructions above. To create the perfect swirl in your brownies, you need a gentle touch. After layering your pumpkin cheesecake mix on the brownie batter, use a knife or skewer. Start from one edge and move towards the other. Make gentle figure-eight motions to blend the mixes. Keep the movements light to avoid overmixing. You want a nice marbled effect, not a solid color. Practice makes perfect, so don’t worry if it takes a few tries! There are a few common mistakes to watch out for. First, don’t overmix your brownie batter. Overmixing can lead to tough brownies. Second, make sure your cream cheese is very soft. If it’s too cold, it won’t blend well. Also, don’t skip the lemon juice; it brightens the flavor. Lastly, allow the brownies to cool completely before cutting. Cutting too soon can cause them to fall apart. You can easily enhance the flavor of your pumpkin cheesecake swirl brownies. Try adding a pinch of salt to the pumpkin mixture for balance. Espresso powder deepens the chocolate flavor, so don’t skip that if you like strong flavors. You can also mix in chocolate chips for extra chocolatey goodness. Lastly, top your brownies with a sprinkle of cinnamon or nutmeg for a warm, cozy touch. For the full recipe, don't forget to check the details! {{image_2}} You can make these brownies gluten-free with simple swaps. Use 1 cup of almond flour or a gluten-free all-purpose flour mix instead of regular flour. This keeps the texture nice and chewy. Check the labels to make sure your cocoa powder is also gluten-free. You can enjoy all the flavors without missing out! To make these brownies vegan, replace the eggs with flax eggs. Mix 1 tablespoon of ground flaxseed with 2.5 tablespoons of water for each egg. Let it sit for a few minutes until it thickens. Use plant-based butter instead of regular butter. Replace cream cheese with a vegan cream cheese brand. These swaps keep the taste rich and creamy. Want to change up the flavor? You can add spices like cinnamon, nutmeg, or ginger. Each spice adds a unique twist. For a warm kick, add 1/2 teaspoon of cayenne pepper to the brownie batter. If you want a more traditional taste, stick with pumpkin pie spice. These variations help you customize your brownies based on your mood. For the full recipe, check out the details above to create your perfect treat! To keep your pumpkin cheesecake swirl brownies fresh, store them in an airtight container. This method helps retain moisture and flavor. If you stack them, add parchment paper between layers. This prevents sticking and keeps the swirls intact. You can freeze these brownies for later enjoyment. First, let them cool completely. Then, wrap them tightly in plastic wrap and place them in a freezer-safe bag. Make sure to remove as much air as possible to avoid freezer burn. They freeze well for up to three months. Stored properly, brownies will last for about a week at room temperature. You can keep them in the fridge for up to two weeks. However, they taste best when fresh. For maximum flavor, enjoy them within the first few days after baking. For the complete recipe, refer to the Full Recipe section. Yes, you can make these brownies ahead of time. Bake them, then cool completely. Store in an airtight container at room temperature for up to three days. For longer storage, wrap brownies tightly and freeze. You can enjoy them later by thawing at room temperature. These brownies pair well with many treats. Try serving them with: - Whipped cream - Vanilla ice cream - A drizzle of caramel sauce - Chopped nuts for crunch Each option adds a different flavor and texture. You could also serve them with a warm drink like spiced cider or coffee. To check if your brownies are done, use a toothpick. Insert it into the center of the brownies. If it comes out with a few moist crumbs, they are ready. If the toothpick comes out clean, they may be overbaked. Keep an eye on the baking time to achieve the perfect texture. Enjoy the full recipe for more details! In this post, I shared how to make delicious Pumpkin Cheesecake Swirl Brownies. We covered the best ingredients, the right steps for mixing, and some useful tips. Quality ingredients matter for great taste. I also shared variations for gluten-free and vegan options. Try these brownies to impress friends and family. With practice, you will master this tasty treat. Enjoy the sweet rewards of your hard work!

Pumpkin Cheesecake Swirl Brownies Irresistible Delight

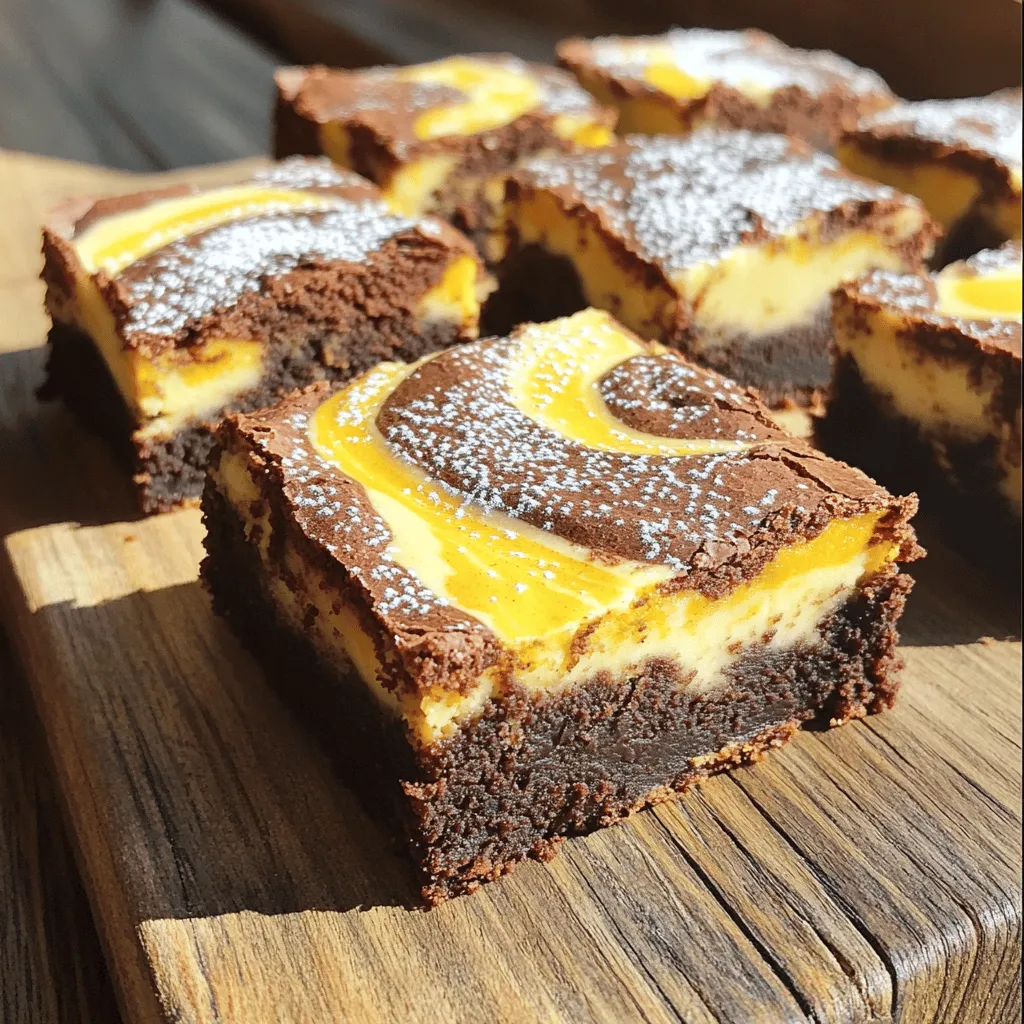
Get ready to savor the magic of fall with my Pumpkin Cheesecake Swirl Brownies! These decadent treats combine rich brownie

- 1 pre-made flatbread (store-bought or homemade) - 2 cups Brussels sprouts, trimmed and thinly sliced - 1 tablespoon olive oil - 1 tablespoon pure maple syrup - 1/2 teaspoon garlic powder - 1/2 teaspoon salt - 1/4 teaspoon black pepper - 1 cup ricotta cheese - 1/3 cup walnuts, chopped - 1/4 cup crumbled feta cheese - Fresh thyme leaves, for garnish When making Maple Brussels Sprout Flatbread, you need fresh, simple ingredients. The flatbread serves as a tasty base. You can use store-bought flatbread to save time. If you enjoy baking, make your own for extra flavor. Brussels sprouts are the star of this dish. Their nutty taste pairs well with the sweetness of maple syrup. Trim and slice them thinly for even cooking. Olive oil adds richness, while garlic powder gives depth. Salt and black pepper enhance all the flavors. Ricotta cheese provides a creamy layer. It adds a nice contrast to the crispy sprouts. Walnuts bring a crunchy texture. They also add healthy fats and protein. Feta cheese gives a salty kick that brightens the dish. Don't forget fresh thyme leaves for a pop of color and freshness. - Additional herbs (e.g., rosemary, oregano) - Balsamic glaze for drizzling - Different types of cheese (e.g., goat cheese, mozzarella) You can personalize your flatbread with optional toppings. Fresh herbs like rosemary or oregano can add more flavor. A drizzle of balsamic glaze can bring a sweet tang to the dish. Feel free to swap cheeses for more variety. Goat cheese or mozzarella can be delicious alternatives. - Caloric content per serving - Breakdown of macronutrients - Any notable vitamins or minerals Each serving of this flatbread is not only tasty but also nutritious. It offers a good balance of protein, healthy fats, and fiber. Brussels sprouts are high in vitamins C and K. They also contain antioxidants, which are great for your health. Ricotta cheese adds calcium, while walnuts provide omega-3 fatty acids. This flatbread is a smart choice for a meal that satisfies both the taste buds and the body. For the complete list of ingredients and detailed instructions, check out the Full Recipe. How to properly slice Brussels sprouts Start by trimming the ends of the Brussels sprouts. This removes any tough parts. Then, cut them in half from top to bottom. For a finer texture, slice each half into thin pieces. Aim for slices about 1/4 inch thick. This helps them cook evenly and get crispy. Making your own flatbread vs. buying store-bought You can choose to make your own flatbread, which is fun and simple. Just mix flour, water, and a pinch of salt to form dough. Roll it out and cook it on a hot pan. If you’re short on time, store-bought flatbread works great too. Both options taste delicious with the toppings. Preheating the oven Before you start cooking, preheat your oven to 425°F (220°C). This high heat helps the Brussels sprouts roast well. A hot oven creates crispy edges and brings out their sweet flavor. Cooking time for roasted Brussels sprouts Roast the Brussels sprouts for about 12-15 minutes. Keep an eye on them as they cook. They should become tender and have a nice golden color. If they look a bit charred, that adds extra flavor! How to layer the ingredients on the flatbread After roasting, spread the Brussels sprouts mixture evenly on your flatbread. Make sure to cover the surface well. Next, mix ricotta cheese with a pinch of salt and pepper. Spread this creamy layer over the sprouts. Top with walnuts and feta for a nice crunch and flavor. Importance of baking times for cheese melting Once you add the cheese, return the flatbread to the oven for about 5 minutes. This short bake allows the cheese to warm up and melt slightly. Watch closely to avoid overcooking. You want that creamy texture without drying out the cheese. For the complete details, check the Full Recipe. To boost the taste of your Maple Brussels Sprout Flatbread, consider adding spices. A dash of red pepper flakes brings heat. Dried thyme or oregano can add earthiness. Fresh herbs like basil enhance the dish with bright notes. The grade of maple syrup also impacts flavor. Grade A syrup is lighter and sweeter. Grade B syrup has a stronger, richer taste. Using grade B syrup can add depth to your dish. Crispy Brussels sprouts make a big difference. To get them crispy, slice them thinly. Toss them well with olive oil and seasonings. Spread them out on the flatbread without crowding. This helps them roast evenly. For a golden-brown flatbread, preheat your oven. Bake the flatbread at 425°F (220°C) for the right time. Keep an eye on the color as it cooks. Pair your flatbread with light side dishes. A fresh salad with lemon vinaigrette works well. Roasted vegetables can add a nice touch, too. You can serve this flatbread in many ways. Cut it into small pieces for appetizers. It also makes a great main dish when served whole. Enjoy it for lunch or dinner! For the full recipe, check out the Maple Brussels Sprout Flatbread recipe above. {{image_2}} You can switch up the veggies based on what's in season. For spring, try artichokes or asparagus. In summer, use cherry tomatoes or zucchini. For fall, add roasted sweet potatoes or squash. In winter, kale or root vegetables are great choices. You can also change the flatbread type. Use whole wheat or gluten-free flatbreads. You can even try pita bread or naan for a fun twist. Each option gives a new taste and texture to your meal. If you need a vegan option, swap the ricotta cheese for a nut-based cheese or tofu. You can blend soaked cashews with lemon juice and nutritional yeast for a creamy topping. It’s a great way to keep the flavors rich. For gluten-free needs, you can make your own flatbread with gluten-free flour. There are many recipes online. Look for options that use almond or coconut flour. This way, everyone can enjoy the flatbread. Want more protein? Add cooked chicken or crispy bacon to the flatbread. These toppings give a hearty feel. You can cook the chicken with herbs for extra taste. Bacon adds a nice crunch and saltiness. If you like heat, try adding red pepper flakes or a spicy sauce. Sriracha or hot honey works well. A touch of spice can balance the sweet maple flavor. It creates a great contrast that excites the palate. For the full recipe, check out the Maple Brussels Sprout Flatbread recipe. To store leftovers, let the flatbread cool down. Place it in an airtight container. This keeps it fresh and tasty. The flatbread lasts about 3-4 days in the fridge. Check for any signs of spoilage before eating. For freezing, wrap the flatbread tightly in plastic wrap. Then, put it in a freezer bag. This helps prevent freezer burn. The flatbread can stay frozen for up to 2 months. When you want to eat it, take it out and thaw it in the fridge overnight. To reheat, place it back in a preheated oven at 350°F (175°C) for about 10-15 minutes. To reheat for quality, use the oven. This brings back the crispiness. You can also sprinkle a little olive oil before reheating for added moisture. If you want to add freshness, top it with fresh herbs or a drizzle of maple syrup before serving. This will make the flatbread taste like it was just made. Enjoy your Maple Brussels Sprout Flatbread even after storage! You can find the Full Recipe for more details. Yes, you can use frozen Brussels sprouts. However, they may not taste as fresh. Frozen sprouts often have extra water. This can make your flatbread soggy. If you use frozen sprouts, thaw them first. Pat them dry with a towel. This helps keep the flatbread crispy. Fresh Brussels sprouts are best for flavor and texture. To make your flatbread more filling, try adding proteins. Grilled chicken or turkey would work well. You can also add beans for a plant-based option. Quinoa or brown rice can give it a hearty touch. These extra ingredients will keep you satisfied longer. If you need a ricotta substitute, try cottage cheese. It has a similar texture and taste. For a non-dairy option, use cashew cheese. You can also blend silken tofu with a bit of lemon juice. This will mimic ricotta's taste well. The flatbread can last up to three days in the fridge. Make sure to cover it tightly. This keeps it fresh and safe to eat. If you see any signs of spoilage, toss it out. Reheat it in the oven for the best texture. Enjoy your flatbread warm! This blog post covered a delicious flatbread topped with Brussels sprouts, ricotta, and walnuts. We explored the essential ingredients and their nutritional benefits, discussed a step-by-step cooking process, and shared helpful tips for flavor and texture. You can adapt this recipe for seasonal veggies and dietary needs, making it versatile. Enjoying leftovers is easy with proper storage and reheating tips. This flatbread makes a perfect dish for any occasion, and I hope you create a tasty version that you love.

Maple Brussels Sprout Flatbread Flavorful and Easy Meal

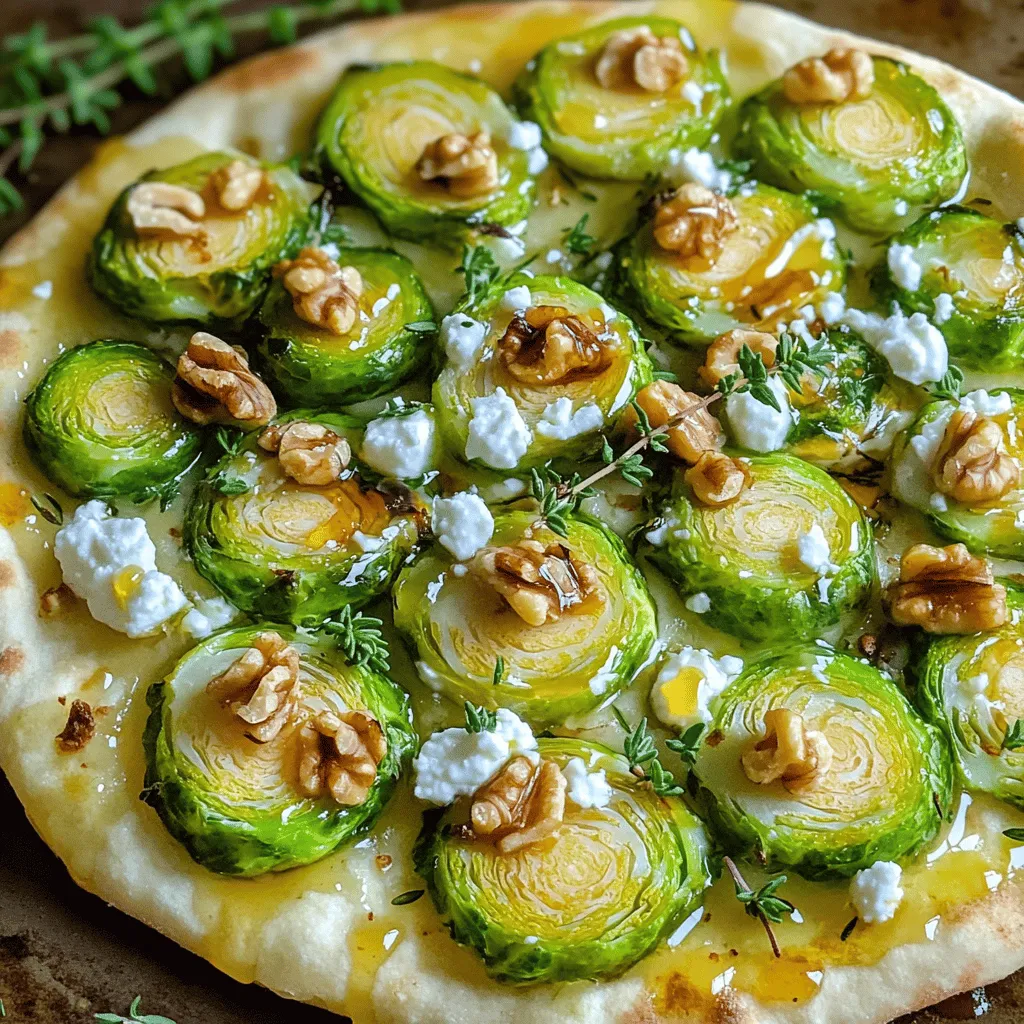
Looking for a quick and tasty meal? Try my Maple Brussels Sprout Flatbread! This dish combines the nutty flavor of

- Medium head of cauliflower - Olive oil - Spices (smoked paprika, garlic powder, salt, black pepper) - Honey and chipotle sauce - Whole wheat tortillas - Fresh toppings (shredded lettuce, diced tomatoes, cilantro, avocado) The key to great flavor lies in the right mix of ingredients. For these Honey Chipotle Cauliflower Wing Wraps, the medium head of cauliflower acts as the star. It soaks up all the good flavors and gives each bite a hearty base. Olive oil helps the spices stick. It also adds a nice richness. The spices—smoked paprika, garlic powder, salt, and black pepper—bring warmth and depth. Smoked paprika adds a subtle smokiness that pairs perfectly with the heat from the chipotle sauce. Honey brings sweetness to balance the spice. Chipotle sauce adds a kick that makes your taste buds dance. Together, they create a glaze that coats the roasted cauliflower in a sticky, tasty layer. Whole wheat tortillas serve as the wrap. They are healthy and filling. You can load them with fresh toppings like shredded lettuce, diced tomatoes, cilantro, and creamy avocado. Each of these toppings adds a fresh crunch and a burst of flavor. For the full recipe, check out the details above. 1. Preheating the oven and preparing the baking sheet Start by preheating your oven to 425°F (220°C). This step is key to getting your cauliflower crispy. Line a baking sheet with parchment paper. This helps with easy cleanup and prevents sticking. 2. Tossing the cauliflower with seasonings In a large bowl, take your cauliflower florets. Add 1 tablespoon of olive oil, 1 teaspoon of smoked paprika, ½ teaspoon of garlic powder, ½ teaspoon of salt, and ½ teaspoon of black pepper. Toss everything well until all the florets are coated. This mix gives a great flavor to the wings. 3. Roasting the cauliflower until crispy Spread the seasoned cauliflower florets on the lined baking sheet in a single layer. Bake them for about 25 minutes. Halfway through, turn them over to ensure even roasting. The goal is for them to turn golden brown and crispy. 1. Mixing honey and chipotle sauce While your cauliflower roasts, grab a small bowl. Mix together 1 tablespoon of honey and 1 tablespoon of chipotle sauce. Adjust the amount of chipotle to your taste for spiciness. 2. Drizzling over cauliflower and returning to the oven Once the cauliflower is done, drizzle the honey-chipotle mix over the florets. Toss gently to coat them evenly. Place them back in the oven for 5 more minutes. This step helps the glaze set and enhances the flavor. 3. Warming tortillas and assembling wraps To warm the tortillas, use a dry skillet or the microwave for a few seconds. This makes them easier to fold. Now, lay a handful of shredded lettuce in the center of each tortilla. Top with the roasted cauliflower, diced tomatoes, fresh cilantro, and avocado slices. 4. Folding and serving Fold in the sides of the tortilla and roll it up tightly from the bottom. Slice the wraps in half, and serve them with lime wedges for an extra zing. Enjoy this tasty meal with friends or family! For more details, check the Full Recipe! - Ensuring even roasting and crispiness: Start by cutting the cauliflower into similar-sized florets. This helps them cook evenly. Toss them well with olive oil and spices. Spread them out on the baking sheet. Give them space so they roast, not steam. Flip them halfway to get nice color and crispness. - Adjusting honey and chipotle sauce to taste: Start with equal parts honey and chipotle sauce. Taste the mixture and adjust as needed. Want more sweetness? Add more honey. Need more heat? Add more chipotle sauce. This balance gives the wings a great flavor. - Pairing with side dishes or dips: These wraps go well with crunchy side dishes like carrot sticks or cucumber slices. You can also serve them with creamy dips like ranch or guacamole. They add great contrast to the spicy wings. - Best practices for wrapping and serving: Warm the tortillas for easy wrapping. Place the filling in the center. Fold the sides in first, then roll from the bottom up. This keeps the filling snug. Serve with lime wedges for a zesty kick. For the full recipe, check out the main article. {{image_2}} You can change up the main flavors in your Honey Chipotle Cauliflower Wing Wraps. Adding other veggies boosts both taste and nutrition. Try bell peppers for sweetness or carrots for crunch. They add texture and color, making the wraps even more appealing. If you want to switch sauces, consider a tangy barbecue sauce. This pairs well with the roasted cauliflower. You might also try a creamy ranch or a zesty cilantro lime dressing. Each sauce brings a different vibe to your wraps. Experimenting with flavors keeps your meals fresh and exciting. For those who follow a vegan diet, making these wraps is easy. Just replace honey with agave syrup or maple syrup. Both provide that sweet touch without any animal products. If you need gluten-free options, choose gluten-free tortillas. Many stores offer great choices made from rice or corn. These wraps still taste great and keep the meal enjoyable for everyone. You can easily adapt the recipe to fit various dietary needs while keeping it delicious. To keep your Honey Chipotle Cauliflower Wing Wraps fresh, wrap them tightly in foil or plastic. Place them in an airtight container. Store in the fridge for up to three days. The wraps stay tasty this way. When it comes to reheating, the oven is your best friend. Preheat it to 350°F (175°C). Place your wraps on a baking sheet and heat for about 10-15 minutes. This keeps the tortilla crispy and the filling warm. You can also use a skillet over medium heat. This method adds a nice crunch to the wrap. You can freeze these wraps, but it's best to freeze the components separately. Wrap the cauliflower wings in plastic wrap, then place them in a freezer bag. Store tortillas and fresh toppings separately. This helps keep everything fresh. For thawing, move the frozen wings to the fridge overnight. When ready, reheat in the oven or skillet. For the tortillas, warm them in a pan or microwave just before serving. This way, you enjoy the best texture and taste from your wraps. For full details, check the Full Recipe. How spicy are Honey Chipotle Cauliflower Wing Wraps? These wraps have a mild to medium spice level. The chipotle sauce adds heat, but honey balances it. You can adjust the spice by adding more or less chipotle sauce. If you prefer a milder taste, use less sauce. Can I make these wraps ahead of time? Yes, you can prep the cauliflower and sauce in advance. Store them in the fridge in separate containers. When ready, warm the cauliflower and assemble the wraps. This way, you save time and enjoy fresh, tasty wraps. What are the best sides to serve with the wraps? Some great sides include fresh salad, roasted veggies, or chips and salsa. These sides complement the flavors well. You can also add a zesty dip, like guacamole or yogurt sauce, for extra flavor. Overview of calories, protein, and nutrients per serving Each serving of Honey Chipotle Cauliflower Wing Wraps has about 300 calories. You get around 10 grams of protein and plenty of vitamins. The whole wheat tortillas add fiber, making the meal more filling. Health benefits of cauliflower and fresh toppings Cauliflower is low in calories and high in nutrients. It provides vitamin C, K, and folate. The fresh toppings enhance the wraps with vitamins and minerals. Ingredients like avocado add healthy fats, making these wraps a nutritious choice. In this post, we explored how to make tasty Honey Chipotle Cauliflower Wing Wraps. You learned about the key ingredients, oven-roasting steps, and tips for a perfect wrap. I shared storage tips and some quick FAQs. These wraps are a fun, tasty way to enjoy healthy food. Experiment with different vegetables and sauces to make them your own. Enjoy your cooking and happy eating!

Honey Chipotle Cauliflower Wing Wraps Flavor Boost

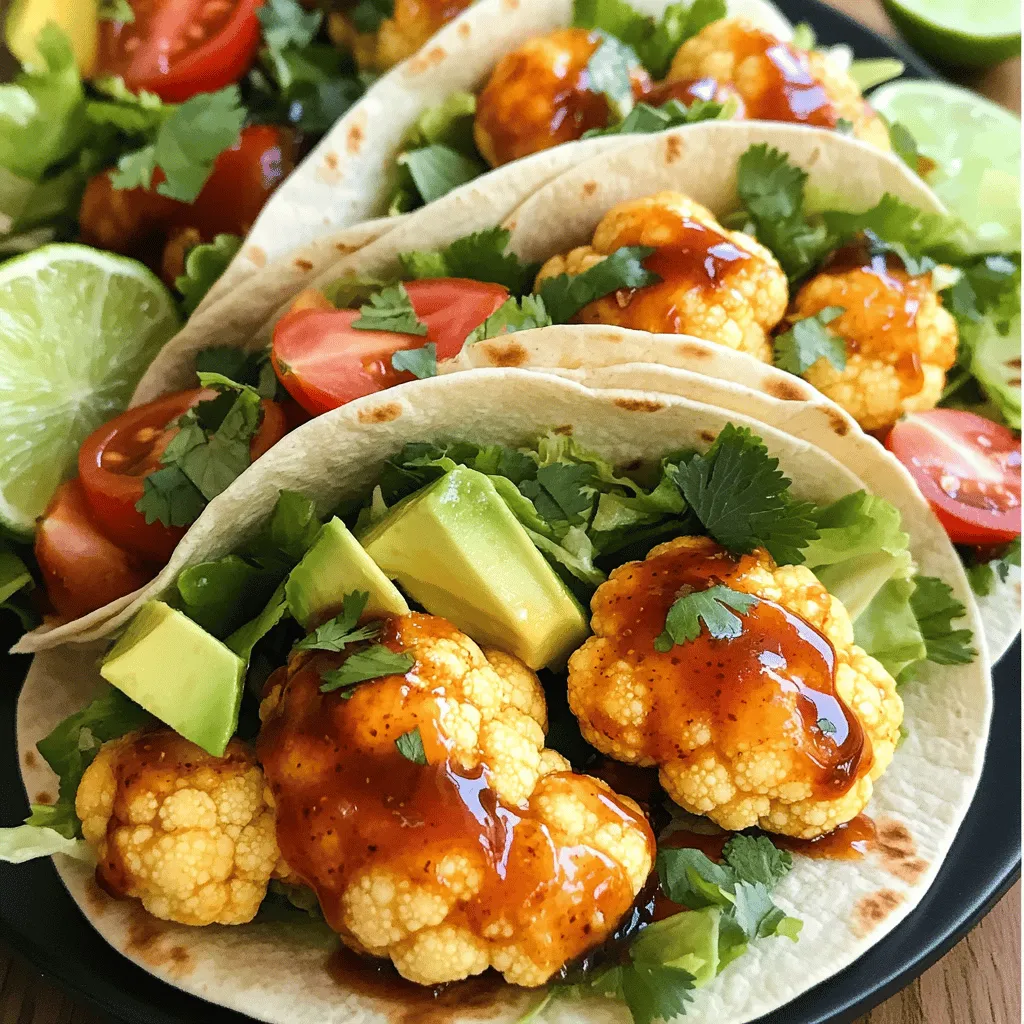
Are you ready to spice up your meal? Honey Chipotle Cauliflower Wing Wraps offer a tasty twist that’s perfect for

Older posts
Newer posts
← Previous Page1 … Page52 Page53 Page54 … Page84 Next →

dsad

© 2026 Foodish Talk • Built with GeneratePress

Our Policies

  • Copyright Policy
  • Cookie Policy
  • GDPR Policy
  • Privacy Policy
  • Disclaimer
  • Terms Of Use

More Information

  • Home
  • About
  • Contact
  • Appetizers
  • Dessert
  • Dinner
  • Drinks
©2026, Foodish Talk About Back To Top