Skip to content
DisclaimerTerms Of UseGDPR PolicyCookie Policy

Foodish Talk

  • Home
  • Drinks
  • Appetizers
  • Dinner
  • Dessert
  • About
  • Contact
  • Privacy Policy
DisclaimerTerms Of UseGDPR PolicyCookie Policy

NO-ING-IMG

- Heavy cream - Whole milk - Pumpkin puree - Maple syrup - Vanilla extract - Ground spices: cinnamon, nutmeg, ginger, allspice - Salt To create the perfect Pumpkin Pie Spice Coffee Creamer, we need quality ingredients. The heavy cream and whole milk add a rich base. The pumpkin puree gives it that warm, cozy flavor. Maple syrup sweetens it just right. Vanilla extract adds depth. The ground spices are the stars here. Cinnamon brings warmth. Nutmeg adds a hint of sweetness. Ginger gives a slight kick. Allspice rounds it out with a complex flavor. Finally, a pinch of salt enhances all these tastes. - Calories per serving: About 100 calories - Breakdown: 8g fat, 6g sugar, 2g protein This creamer packs a flavorful punch. Each serving has around 100 calories. You'll get 8 grams of fat, which adds to the creaminess. The 6 grams of sugar come from maple syrup. With 2 grams of protein, it makes your coffee feel more like a treat. This creamer tastes like a warm hug in a cup. The rich creaminess fills your mouth. The pumpkin puree adds a smooth texture. Each sip bursts with spice. Cinnamon warms you up. Nutmeg and ginger add depth and balance. Allspice rounds out the flavor, giving it a fall twist. Together, these spices bring out the best in your coffee. They also enhance the natural sweetness of the maple syrup. This blend creates a cozy drink perfect for chilly mornings or any time you need a pick-me-up. For the full recipe, check out the details above. Enjoy your delicious homemade Pumpkin Pie Spice Coffee Creamer! To make your Pumpkin Pie Spice Coffee Creamer, start by gathering your ingredients. In a medium saucepan, combine: - 1 cup heavy cream - 1 cup whole milk - 1/2 cup pumpkin puree Whisk these together continuously over medium heat. This helps blend the cream, milk, and pumpkin smoothly. Keep an eye on the mixture; you want it warm, not boiling. If it boils, it can change the texture. Once your mixture is warm, reduce the heat to low. Stir in: - 1/4 cup maple syrup - 1 teaspoon vanilla extract Mix until both are fully combined. Next, add your spices: - 1 teaspoon ground cinnamon - 1/2 teaspoon ground nutmeg - 1/2 teaspoon ground ginger - 1/4 teaspoon ground allspice - A pinch of salt Continue whisking until the spices mix well with the cream. Look for a rich, warm color. When you smell the spices, it's a good sign to remove the pot from heat. Let the mixture cool briefly in the pot. This helps to set the flavors. After cooling, pour it into a glass jar or an airtight container. Store it in the fridge for up to one week. Before each use, shake the jar well. This ensures all the flavors mix back together. For the full recipe, refer to the detailed instructions provided earlier. To make your Pumpkin Pie Spice Coffee Creamer even creamier, try these suggestions: - Use half-and-half instead of whole milk for a richer taste. - Replace heavy cream with coconut cream for a vegan option. - Add a splash of flavored syrup, like vanilla or caramel, to enhance the flavor. Enjoy your creamer in fun ways! Here are some ideas: - Pour it into your morning coffee for a cozy treat. - Use it in a chai latte for a festive twist. - Pair it with desserts like cookies and cakes. A slice of pumpkin pie or a chocolate chip cookie works wonderfully! Here are a few common pitfalls when making your creamer: - Avoid overheating the ingredients. This can change the texture and flavor. - Don’t skip the whisking process. Whisking ensures all flavors blend well. It creates that smooth texture you want! For the full recipe, check out the details I shared earlier! {{image_2}} You can easily make Pumpkin Pie Spice Coffee Creamer dairy-free. Using coconut or almond milk works well. These milks add a nice flavor without dairy. If you need a substitute for heavy cream, try full-fat coconut milk. It gives a rich texture similar to cream. Get creative with flavor mix-ins! You can try adding different spices like cardamom or cloves. For a seasonal twist, add peppermint in winter. This change can keep your coffee exciting year-round. There are many sweetener options for your creamer. You can use honey or agave syrup. Both are natural and bring a unique taste. Adjust the sweetness to your liking, adding more or less to suit your taste buds. Feel free to explore these variations to make your Pumpkin Pie Spice Coffee Creamer truly your own! For the original recipe, check out the Full Recipe. Pumpkin Pie Spice Coffee Creamer stays fresh in the fridge for up to one week. To check for spoilage, look for changes in smell or texture. If the creamer smells sour or looks lumpy, it's time to toss it. Always trust your senses! You can freeze the creamer, but it may change texture. To freeze, pour it into ice cube trays or a sealable container. When you're ready to use it, thaw in the fridge overnight. Avoid using the microwave, as it can separate the ingredients. Incorporate this creamer into your daily coffee by adding 2-4 tablespoons to your cup. Shake the jar well before use to mix the spices evenly. This ensures each sip is filled with the rich pumpkin flavor you love. Enjoy your coffee with a hint of fall magic! Yes, you can use non-dairy milk. The best substitutes are almond milk, coconut milk, or oat milk. Each option brings a unique flavor and texture. Almond milk is light, coconut milk is creamy, and oat milk has a rich taste. Choose what you love most! The creamer stays fresh in the fridge for up to one week. Store it in an airtight container. Always check for any strange smells or changes in texture. If it smells off, it’s best to toss it. Freshness matters for the best taste! Absolutely! You can make it sweeter or less sweet. Start with less maple syrup. Taste as you go. If you want more sweetness, add more syrup a little at a time. This way, you find the perfect level for your taste buds. This creamer is not just for coffee! You can add it to pancakes, waffles, or oatmeal. It also works great in smoothies or milkshakes. Use it in baked goods like muffins or cakes for extra flavor. Get creative with it! You can find premade versions in many grocery stores. Look in the dairy or coffee aisle. Brands like CoffeeMate and International Delight often carry it. Check your local store or find it online for easy shopping. Yes, you can make a vegan version! Use coconut cream instead of heavy cream. Swap whole milk with almond or oat milk. Replace maple syrup with agave nectar for a plant-based sweetener. This way, everyone can enjoy this yummy treat! You now have a complete guide to making Pumpkin Pie Spice Coffee Creamer. We covered essential ingredients like heavy cream and spices that boost flavor. You learned how to prepare and store your creamer, along with tips to avoid common mistakes. Experiment with variations and enjoy your creamer in different ways. Remember to adjust sweetness to your liking. You can easily make this right at home. Enjoy your delicious coffee experience!

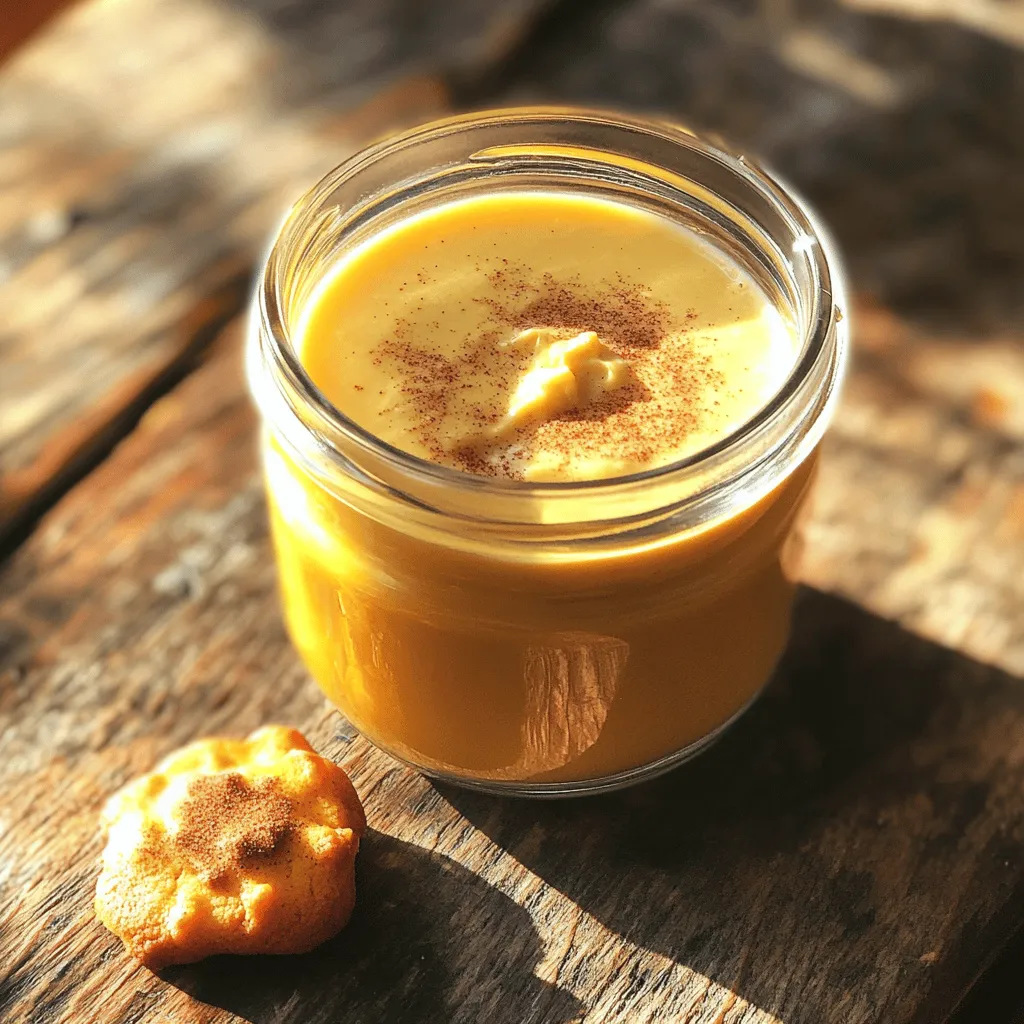
Pumpkin Pie Spice Coffee Creamer Bold Flavor Boost

Pumpkin Pie Spice Coffee Creamer is a game-changer for your morning cup. This rich, creamy blend combines pumpkin puree and

For the perfect batch of Frosted Christmas Brownies, gather these essentials: - 1 cup unsalted butter, melted - 2 cups granulated sugar - 4 large eggs - 1 teaspoon vanilla extract - 1 cup all-purpose flour - 1 cup cocoa powder - ½ teaspoon baking powder - ½ teaspoon salt - 1 cup semi-sweet chocolate chips These ingredients work together to create rich and fudgy brownies. The melted butter and sugar form a sweet base. Eggs add moisture and help bind everything. Vanilla extract gives a lovely aroma. Flour and cocoa provide the brownie structure, while baking powder gives a slight lift. Finally, chocolate chips add gooey bursts of chocolate throughout. You will also need a few simple items for the frosting: - 1 cup powdered sugar - 2 tablespoons unsweetened cocoa powder - 2 tablespoons milk - ½ teaspoon peppermint extract This frosting is creamy and smooth, with a hint of peppermint to spark the holiday spirit. The powdered sugar adds sweetness, while cocoa powder gives a rich chocolate flavor. Milk helps blend everything together, making it easy to spread on the brownies. To make your brownies festive, consider these toppings: - Sprinkles or crushed candy canes - Optional: Holiday-themed decorations Adding sprinkles or crushed candy canes gives a pop of color. It also adds a nice crunch. You can even use holiday-themed decorations for an extra festive touch. Just let your creativity shine! For the full recipe, check out the recipe section. 1. Preheat your oven to 350°F (175°C). Grease a 9x13 inch baking pan with butter or line it with parchment paper. This will help the brownies come out easily. 2. In a large bowl, combine 1 cup of melted butter and 2 cups of granulated sugar. Whisk them together until they blend well. 3. Add 4 large eggs to the mixture one at a time. Whisk after each egg until it is fully mixed. Stir in 1 teaspoon of vanilla extract for extra flavor. 1. In a separate bowl, blend together 1 cup of all-purpose flour, 1 cup of cocoa powder, ½ teaspoon of baking powder, and ½ teaspoon of salt. This mix adds structure and flavor. 2. Gradually mix the dry ingredients into the wet mixture. Stir gently until everything is combined. Do not overmix; it can make the brownies tough. 1. Fold in 1 cup of semi-sweet chocolate chips. This will add extra chocolatey goodness to your brownies. 2. Pour the brownie batter into the prepared pan. Use a spatula to spread it evenly. Bake for 25-30 minutes. Check with a toothpick; it should come out with a few moist crumbs. 3. Once baked, let the brownies cool completely in the pan on a wire rack. This step is key for nice, clean cuts later. 1. While the brownies cool, make your frosting. In a medium bowl, combine 1 cup of powdered sugar, 2 tablespoons of unsweetened cocoa powder, 2 tablespoons of milk, and ½ teaspoon of peppermint extract. 2. Mix everything together until smooth and creamy. This frosting adds a sweet and festive touch. 1. Make sure the brownies are completely cool before you frost them. This prevents the frosting from melting. 2. Spread the frosting evenly over the cooled brownies. Use a spatula for a smooth finish. 3. Top with festive sprinkles or crushed candy canes. This adds a fun holiday look to your treats. For the full recipe, check out the details provided above! Enjoy making these festive treats. To make moist brownies, focus on a few key steps. First, use fresh ingredients, especially eggs and butter. They help create a rich flavor and soft texture. Second, do not overmix your batter. Mix just until combined to keep the brownies tender. Overmixing can lead to tough brownies. Keep an eye on your bake time. Check your brownies a few minutes early. If a toothpick comes out with a few moist crumbs, they are ready. Overbaking dries them out, so trust your instincts! For a festive touch, get creative with your decorations. Use sprinkles or crushed candy canes for a pop of color. You can even mix them into the frosting for extra fun. If you want a twist, try using white chocolate frosting or a cream cheese frosting instead. Both pair well with the rich chocolate flavor. You can also use holiday-themed stencils to dust powdered sugar on top. This adds a nice touch without much work. Let your imagination run wild with toppings! When serving your frosted Christmas brownies, pair them with a scoop of vanilla ice cream. The cold ice cream contrasts nicely with the warm brownies. You may also serve them with a drizzle of chocolate sauce for added sweetness. For a pretty presentation, use a decorative platter. Add a few sprigs of mint or seasonal decorations. This simple touch makes your dessert look more festive and inviting. Enjoy your delicious creations with family and friends! For the full recipe, check the earlier section. {{image_2}} You can add nuts or different types of chocolate to your brownies. Walnuts or pecans give a nice crunch. Try using white chocolate chips for a fun twist. You can also mix in dark chocolate for a richer taste. For a festive touch, add spices like cinnamon or nutmeg. These warm flavors make your brownies taste like the holidays. Just a pinch can change everything. They add depth and warmth that everyone will love. If you need gluten-free options, substitute the all-purpose flour with almond flour or a gluten-free blend. This keeps the brownies soft and delicious. Just be sure to check that your chocolate chips are also gluten-free. For vegan brownies, replace the butter with coconut oil. You can use flax eggs instead of regular eggs. Mix one tablespoon of ground flaxseed with three tablespoons of water. Let it sit for five minutes until it thickens. This works great in baked goods and keeps them moist. Using seasonal cookie cutters makes fun shapes from your brownies. You can cut them into stars or trees for a festive look. Decorate with frosting and sprinkles for added color. For various holidays, customize your decorations. Use colored frosting for different themes. For Halloween, try orange and black sprinkles. For Easter, use pastel colors. This makes your brownies a festive treat for any occasion! For the full recipe, see the section above. To keep your frosted brownies fresh, store them properly. Wrap the brownies in plastic wrap or aluminum foil. This keeps the moisture in and the air out. Place them in an airtight container for added protection. If you want to enjoy them later, the fridge is a great choice. They can stay fresh for up to a week in the refrigerator. Want to save some for later? Freezing is a smart option. Cut the brownies into squares before freezing. Wrap each piece in plastic wrap tightly. Then, place them in a freezer bag. This way, they won’t stick together. Your frosted brownies can last up to three months in the freezer. When you're ready to enjoy them, take out the desired amount. Let them thaw in the fridge for a few hours or overnight. For a quicker thaw, leave them on the counter for about 30 minutes. Enjoy your tasty treat without losing any of that festive flavor. For more delicious details, check out the Full Recipe. Frosted brownies can last about 3 days at room temperature. Keep them in an airtight container. If you store them in the fridge, they can last up to a week. The cold helps keep them fresh and moist. Yes! You can have fun with many frosting types. Cream cheese frosting adds a tangy twist. A simple chocolate ganache is rich and smooth. You can also try a vanilla buttercream or a nutty frosting for a unique flavor. Brownies pair well with ice cream or whipped cream. Serve them warm with a scoop of vanilla ice cream. You can also add fresh berries for a fruity touch. For drinks, hot cocoa or coffee complements brownies perfectly. You can make these brownies a day or two ahead of time. Just bake them, cool, and frost. Store them in the fridge until you are ready to serve. This way, they stay fresh for your holiday gatherings. To cut brownies neatly, use a sharp knife. Dip the knife in hot water, wipe it off, and then cut. This method prevents messy edges. For even squares, mark where you will cut before slicing. Frosted Christmas brownies are a delicious holiday treat. This blog post covered essential ingredients, step-by-step instructions, and fun variations. Remember to adjust for dietary needs or get creative with decorations. Proper storage keeps them fresh longer. These tips will help you create perfect brownies for any occasion. Enjoy baking and share these treats with friends and family! You'll make sweet memories this holiday season.

Frosted Christmas Brownies Simple and Festive Treat

Get ready to delight your taste buds with festive cheer! My Frosted Christmas Brownies are simple to make and full

To make your own Starbucks-style pumpkin syrup, gather these simple items: - 1 cup pumpkin puree (canned or homemade) - 1 cup granulated sugar - 1 cup water - 1 teaspoon vanilla extract - 1 teaspoon pumpkin pie spice (or a mix of cinnamon, ginger, and nutmeg) - 1/2 teaspoon salt These ingredients are easy to find. You might already have some in your kitchen. I love using pumpkin puree that you make at home. It gives a fresh taste. If you use canned, pick a brand that has no added sugar. For pumpkin pie spice, you can make your own. Mix equal parts of cinnamon, ginger, and nutmeg. This mix brings warmth to the syrup. If you want a sugar-free version, try a sugar substitute. Use a sweetener that measures like sugar. For a vegan syrup, all your ingredients are vegan-friendly. Just ensure your pumpkin puree is pure and without dairy. This recipe is adaptable and can fit many diets. Making your own pumpkin syrup is simple and fun. You need just a few ingredients. This guide will help you create a rich and flavorful syrup. It takes about 20 minutes from start to finish. Let’s jump right into the steps! 1. Start with Sugar and Water: In a medium saucepan, add 1 cup of water and 1 cup of granulated sugar. Set the heat to medium. Stir the mix until the sugar dissolves fully. This takes only a few minutes. 2. Add Pumpkin and Spices: Next, add 1 cup of pumpkin puree, 1 teaspoon of pumpkin pie spice, and 1/2 teaspoon of salt. Use a whisk to mix everything well. You want it to be smooth, with no lumps. 3. Bring to a Boil: Turn up the heat a bit to bring the mix to a gentle boil. Once it starts bubbling, lower the heat. Let it simmer for about 10 minutes. Stir now and then to keep it from sticking. 4. Finish with Vanilla: After 10 minutes, take the saucepan off the heat. Stir in 1 teaspoon of vanilla extract for that sweet flavor. 1. Let it Cool: Allow the syrup to cool down to room temperature. This helps it to thicken a bit. 2. Strain the Syrup: Once cooled, you need to strain it. Use a fine-mesh sieve or cheesecloth. This step removes any solids, leaving you with smooth syrup. 3. Store the Syrup: Pour the strained syrup into a clean jar or bottle. Seal it up and refrigerate. You can enjoy this syrup for up to two weeks. Now you're ready to use your homemade syrup in lattes, pancakes, or any dish that needs a pumpkin kick! For the full recipe, check the earlier section. To boost the flavor of your pumpkin syrup, try adding a pinch of nutmeg. It gives a warm taste that pairs well with pumpkin. Fresh spices are best. Grind them yourself for more aroma. You can also mix in a splash of maple syrup for depth. The sweet notes blend well with pumpkin and spice. Experiment with different types of sugar, too. Brown sugar adds a rich, caramel flavor. One mistake is not measuring your ingredients. Accurate amounts make a big difference. Too much sugar can make the syrup overly sweet. Another pitfall is not simmering long enough. This step helps the flavors meld. Stir often to prevent burning. Lastly, don’t skip the straining step. It removes lumps and gives a smooth texture. You can use the pumpkin syrup in many ways. Drizzle it over pancakes or waffles for a sweet treat. Add it to your morning coffee for that cozy vibe. It also works well in smoothies or oatmeal. For a fun twist, mix it in cocktails. Try it in a fall-inspired martini. The options are endless! {{image_2}} You can change the flavor of your pumpkin syrup by adding different spices. For a warm touch, try adding cardamom or allspice. If you love chocolate, a bit of cocoa powder can give a rich taste. Vanilla bean can add a nice depth too. Just add these extras in small amounts and taste as you go. This way, you can make a syrup that fits your mood. If you want a healthier option, you can swap out the sugar. Use maple syrup or honey for natural sweetness. You can also try coconut sugar. It has a light caramel flavor that fits well with pumpkin. If you need a zero-calorie option, look for stevia or monk fruit sweetener. Just remember, these sweeteners may change the syrup's taste, so adjust them slowly. The recipe can change with the seasons. In fall, fresh pumpkin is great, but in winter, try butternut squash. In spring, you could use sweet potato for a twist. For summer, consider adding fresh herbs like mint or basil for a unique flavor. These swaps can bring new life to your pumpkin syrup, making it exciting year-round. For the full recipe, check the beginning of this article. To keep your pumpkin syrup fresh, store it in a clean jar or bottle. Make sure the container is airtight. This helps to keep out air and bacteria. Place it in the fridge right after it cools. Always use a clean spoon to scoop the syrup. This prevents germs from getting in. Your pumpkin syrup can last up to two weeks in the fridge. Check for any signs of spoilage. If you see mold or notice an off smell, it's time to toss it. If the syrup is sticky or clumpy, that’s another sign it has gone bad. Always trust your senses when checking food. You can freeze pumpkin syrup if you need to store it longer. Pour the syrup into ice cube trays. Once frozen, pop the cubes into a freezer-safe bag. This way, you can take out just what you need later. It can last up to six months in the freezer. Just thaw the amount you want in the fridge before using. Now you're ready to enjoy your Starbucks-style pumpkin syrup in a variety of drinks and treats! Homemade pumpkin syrup lasts about two weeks in the fridge. Store it in a clean jar. Always check for any signs of spoilage before using. If it smells off or looks strange, toss it out. Yes, you can use sugar substitutes. Options like stevia or monk fruit work well. Keep in mind that these may change the taste and texture. Experiment to find what you like best. You can use pumpkin syrup in many drinks! It’s great in lattes, coffee, or tea. Drizzle it over milkshakes or hot chocolate for a fall twist. You can even use it in smoothies for added flavor. For the full recipe, check out the details above. You now have all the key details for making pumpkin syrup. We covered the ingredients, steps, and tips. You learned about variations, storage, and common questions. It's simple to make delicious pumpkin syrup at home. Enjoy it in your favorite drinks. Use the tips to avoid mistakes and enhance flavor. Remember to store it right to keep it fresh. Happy cooking!

Starbucks Style Pumpkin Syrup Rich and Flavorful Recipe

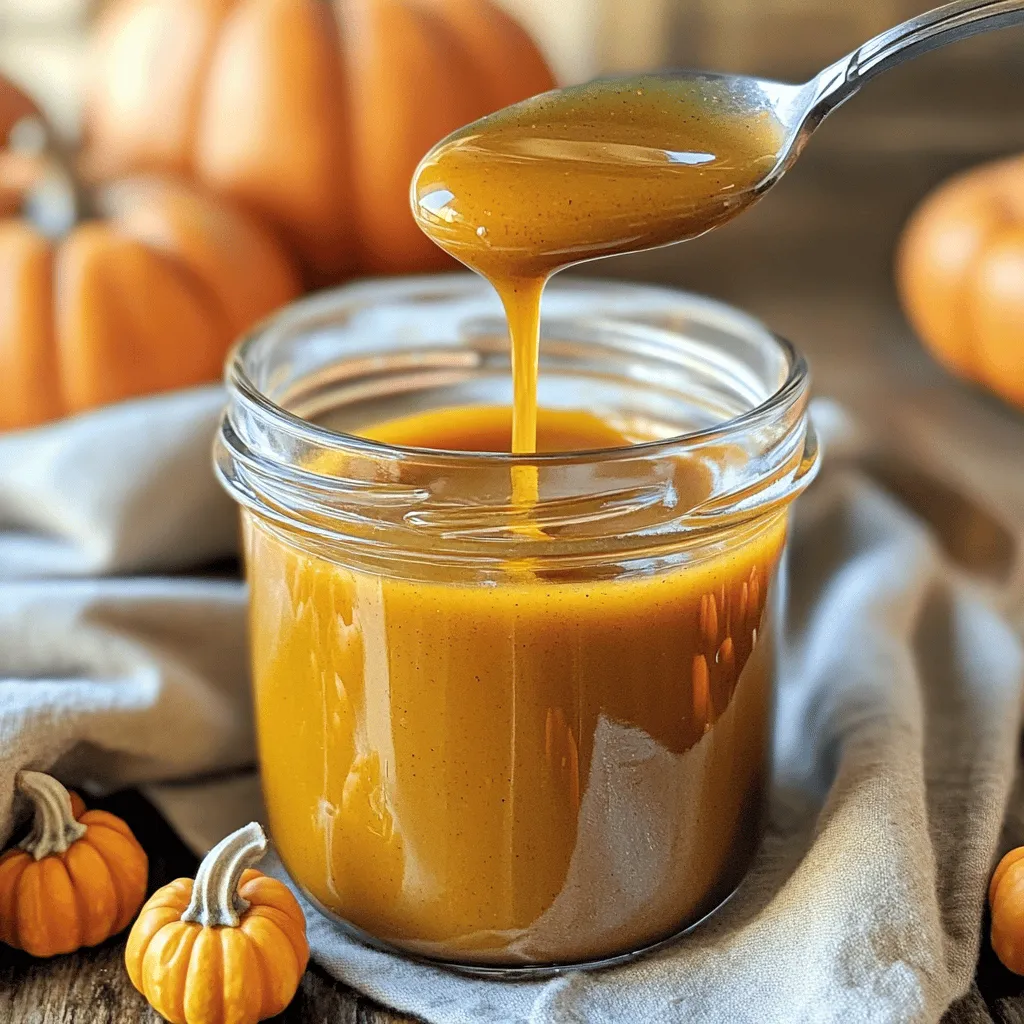
Fall is here, and there’s nothing like the taste of pumpkin syrup to warm your spirit! This Starbucks-style pumpkin syrup

To make the Sweet and Spicy Pickle Dip, you need just a few key ingredients. Here's what you'll need: - 1 cup cream cheese, softened - 1/2 cup mayonnaise - 1 cup dill pickles, finely chopped - 1/4 cup pickled jalapeños, finely chopped - 2 tablespoons honey - 1 teaspoon garlic powder - 1 teaspoon onion powder - 1 tablespoon Dijon mustard - 1/4 teaspoon smoked paprika - Salt and pepper to taste These ingredients create a rich, creamy dip with a sweet and spicy kick. The dip shines with a variety of dippers. You want to balance flavors and textures. Here are some great choices: - Tortilla chips - Pita bread - Sliced veggies like carrots, cucumbers, and bell peppers - Crackers Mix and match these dippers for your board. Each one brings a unique taste and crunch. To make your dip board look even more inviting, consider adding some garnishes. They add color and flair. Here are some fun options: - Chopped pickles - Finely diced jalapeños - A sprinkle of smoked paprika These little touches make your Sweet and Spicy Pickle Dip Board not just tasty, but also beautiful. For the complete recipe, check the [Full Recipe]. To start, gather your ingredients. You need cream cheese, mayonnaise, dill pickles, jalapeños, honey, garlic powder, onion powder, Dijon mustard, smoked paprika, salt, and pepper. First, mix the softened cream cheese and mayonnaise until smooth. You can use an electric mixer or a spatula for this. Next, add the finely chopped dill pickles and jalapeños. Stir until they are well blended. Now, drizzle in the honey and add the garlic powder, onion powder, Dijon mustard, and smoked paprika. Mix until everything is combined. Season with salt and pepper to your liking. When done, transfer the dip to a serving dish and smooth the top with a spatula. For the dip board, choose a large platter or cutting board. Place the dip in the center. Arrange your dippers around the dip. You can use tortilla chips, pita bread, sliced veggies like carrots, cucumbers, and bell peppers, and crackers. Make it fun! Balance colors and shapes for a great look. I love to add a touch of flair to my dip board. You can garnish the top of the dip with extra chopped pickles or jalapeños. A sprinkle of smoked paprika adds a nice pop of color too. Serve the board with small spoons or toothpicks for easy sharing. This Sweet and Spicy Pickle Dip Board is perfect for parties or game days. Enjoy every bite! Don’t forget to check the Full Recipe for more details. Mixing the dip well is key. Start by blending cream cheese and mayonnaise. This smooth base helps your flavors blend nicely. Add the chopped pickles and jalapeños next. Stir until you see a nice mix. Taste it! If it feels off, adjust with more honey or mustard. Remember, balance is crucial. Sweet, spicy, and tangy should all shine through. You can prep this dip a day ahead. Just keep it in the fridge. When you’re ready, take it out and let it warm a bit. This helps flavors pop. Arrange your dippers right before serving for a fresh look. If you want to save time, chop your veggies a day early too. It makes party prep easy. To add texture, consider mixing in some crispy elements. Chopped nuts or crispy onions can work wonders. They add crunch that contrasts nicely with the creamy dip. You can also play with herbs, like fresh dill or cilantro, for a fresh twist. Try adding a squeeze of lemon juice for an extra zing. Little details can turn a good dip into a great one. For the full recipe, check out [Full Recipe]. {{image_2}} You can change the heat in the Sweet and Spicy Pickle Dip by swapping ingredients. If you want more heat, add more jalapeños or use a hotter pepper. You might try adding diced serrano peppers for a kick. For less heat, skip the jalapeños. Instead, use sweet pickle relish. This keeps the flavor but reduces the spice. To make this dip vegetarian, simply keep all the original ingredients. For a vegan version, swap the cream cheese and mayonnaise with plant-based options. Look for vegan cream cheese and mayo made from nuts or soy. These alternatives keep the dip creamy and flavorful without using animal products. You can enhance the dip by adding seasonal ingredients. In summer, use fresh herbs like dill or basil. In fall, consider adding roasted pumpkin or butternut squash. These ingredients add fun flavors and colors to the dip board. They also bring a fresh twist to the classic recipe. Feel free to explore and create your own versions. You can find the Full Recipe for more ideas. To keep your Sweet and Spicy Pickle Dip fresh, store it in an airtight container. This helps to lock in flavors and prevent the dip from drying out. Make sure to refrigerate it right after your event. If you leave it out, bacteria can grow, making it unsafe to eat. You can freeze the dip if you have extra. Use a freezer-safe container and leave some space at the top. This allows for expansion. When you are ready to eat it, thaw the dip in the fridge overnight. Stir well before serving to bring back its creamy texture. The dip stays fresh in the fridge for about 3 to 5 days. Always check for signs of spoilage, like changes in smell or color. For the best taste, eat it within this time. Enjoy your dip while it's at its best! For the full recipe, check out the Sweet and Spicy Pickle Dip Board. The best dippers are fun and crunchy. I love using tortilla chips and pita bread. Sliced veggies like carrots, cucumbers, and bell peppers add fresh flavor. Crackers are also a great choice. They give a nice crunch and hold the dip well. Mix and match your dippers for a colorful spread. Yes, you can! Different pickles add unique flavors. Try bread-and-butter pickles for sweetness. You can also use spicy pickles for extra heat. Just make sure to chop them finely. This way, they mix well into the dip. Experiment with your favorites to find the best taste! Yes, this dip is gluten-free! The main ingredients, like cream cheese and mayonnaise, contain no gluten. Just be careful with your dippers. Choose gluten-free tortilla chips or veggie sticks. Always check labels to ensure your dippers are safe to enjoy. To boost the heat, add more pickled jalapeños. You can also mix in hot sauce or chili flakes. Start small, then taste and adjust. This way, you find the right spice level for you. Enjoy the kick it adds to the Sweet and Spicy Pickle Dip! In this blog post, we explored how to make a fun Sweet and Spicy Pickle Dip. You learned about the key ingredients and how to present it. I shared tips for mixing, flavor balancing, and storing leftovers. We also discussed variations to suit your taste, like spice levels and dietary needs. Remember, this dip brings joy to any gathering. Experiment with your ideas to make it even better. Now, go impress your friends with this tasty treat!

Sweet and Spicy Pickle Dip Board Flavorful Delight

Do you love bold flavors? Welcome to the world of Sweet and Spicy Pickle Dip! This dip board combines tangy

- 1 pound store-bought gnocchi - 2 cups pumpkin puree (canned or fresh) - 1 cup heavy cream - 3 tablespoons unsalted butter - 4 cloves garlic, minced - 1 cup grated Parmesan cheese, plus extra for topping - 1 teaspoon dried sage (or 1 tablespoon fresh sage, chopped) - 1/2 teaspoon ground nutmeg - Salt and pepper to taste - Fresh parsley, chopped for garnish Gathering these simple ingredients is the first step to making your buttery garlic parm pumpkin gnocchi bake. You can find gnocchi at most grocery stores, and it cooks quickly, making it perfect for busy nights. Pumpkin puree adds a creamy texture and a slight sweetness that pairs well with garlic and cheese. Heavy cream gives the dish that rich and smooth feel, while butter helps create a lovely sauce. Garlic adds a punch of flavor, and Parmesan cheese brings that salty, nutty taste we all love. Dried sage adds warmth, while nutmeg adds a hint of spice. Do not forget to grab salt and pepper to season your dish just right. Fresh parsley not only brightens the flavors but also makes for a lovely garnish. For the full recipe, check out the details above. Enjoy the process of cooking, and let your kitchen be filled with delightful aromas! - Bring salted water to a boil. - Cook gnocchi until they float and drain. Cooking gnocchi is quick and easy. First, fill a large pot with water and add salt. The salt helps flavor the gnocchi. Once the water boils, add the gnocchi. They will sink at first but watch closely. When they float, they are done. This usually takes only a few minutes. Drain them well and set them aside. - Melt butter in a skillet. - Sauté minced garlic until fragrant. Next, grab a large skillet. Heat it over medium heat and add butter. Let it melt slowly. Once it’s melted, add the minced garlic. Stir it for about a minute. You want the garlic to smell great, but don’t let it burn. If it burns, it will taste bitter. - Add pumpkin puree, heavy cream, and seasonings. - Simmer to meld flavors. Now it’s time to make the sauce creamy and rich. Add pumpkin puree and heavy cream to the skillet. Stir the mixture well. Then, add in the grated Parmesan cheese, sage, nutmeg, salt, and pepper. Mix everything together and let it simmer for a few minutes. This allows the flavors to blend nicely. - Transfer gnocchi mixture to a baking dish. - Bake at 375°F for 20–25 minutes. Preheat your oven to 375°F. Take a greased baking dish and add the gnocchi mixture. Spread it out evenly. Top with more Parmesan cheese for that extra flavor. Place the dish in the oven and bake for 20 to 25 minutes. You want it to bubble and turn golden on top. For the complete recipe, check out the [Full Recipe]. To make the best buttery garlic parm pumpkin gnocchi bake, first, cook the gnocchi properly. This means boiling them until they float. Floating gnocchi is a sign they are ready. If you mix undercooked gnocchi with the sauce, they will be tough. Next, be careful with the garlic. Cook it just until it smells great. If you let it cook too long, it can turn bitter. You want sweet, fragrant garlic to blend with the creamy sauce. If you want to swap out heavy cream, try using coconut milk. It adds a nice flavor and keeps it creamy. You can also use almond milk or cashew cream for a lighter option. For cheese, if you need a dairy-free choice, try nutritional yeast. It gives a cheesy flavor without the dairy. For a fun presentation, serve the bake straight from the dish. Spoon it into bowls for a cozy feel. You can drizzle a bit of extra sauce on top too. Pair it with a simple salad or some warm bread. A crusty baguette goes well with the creamy dish. Enjoy each bite! For more ideas, check out the full recipe to explore additional pairings and tips. {{image_2}} You can make this dish even better by adding spinach or kale. Both greens boost the nutrition. They also add a nice color and texture to the bake. Different cheese options can bring new flavors. Try mozzarella for a gooey melt or feta for a salty kick. Want to spice things up? Experiment with cayenne or paprika for a kick. A little heat can wake up the pumpkin flavor. You can also use fresh herbs like thyme or rosemary. They add a lovely aroma and depth to the dish. If you need gluten-free options, look for gluten-free gnocchi. Many brands offer tasty alternatives. For a vegan twist, swap heavy cream with coconut milk or cashew cream. Both will keep the dish creamy and rich without dairy. Try these variations to make the buttery garlic parm pumpkin gnocchi bake your own. The full recipe is just a starting point, and your creativity can shine. After enjoying your buttery garlic parm pumpkin gnocchi bake, store any leftovers in airtight containers. This keeps the dish fresh and tasty. Be sure to refrigerate it within two hours of cooking. Cream-based dishes, like this one, can spoil quickly. So, always follow food safety guidelines to avoid waste. When it’s time to enjoy your leftovers, you have two main options: the oven or the microwave. I prefer the oven. It warms the dish evenly, making it taste fresh again. Set your oven to 350°F (175°C) and bake for about 15-20 minutes. If you use the microwave, heat it in short bursts. Stir it often to avoid hot spots. If the gnocchi seems dry, add a splash of cream or broth. This helps maintain its rich, creamy texture. Yes, you can freeze this dish, but it’s best if you do it before baking. Transfer the uncooked gnocchi mixture to a freezer-safe container. When you’re ready to eat, thaw it in the fridge overnight. For reheating, bake it straight from the fridge. Adjust the cooking time as needed. This keeps each bite as delicious as the first. Yes, you can use homemade gnocchi! Homemade gnocchi often has a lighter texture. Just be sure to cook it until it floats in boiling water. The cooking time may vary, so check for doneness. If you make your own, use a simple mix of potatoes and flour. This will give your dish a unique touch. If you cannot find pumpkin puree, try butternut squash puree. It has a similar taste and texture. You can also use sweet potato puree for a sweeter flavor. Both options work well in this dish and offer a tasty alternative. This recipe is mostly vegetarian, but check your Parmesan cheese. Some brands use animal rennet. Opt for a vegetarian cheese to ensure it meets dietary needs. You can also add more veggies like spinach or mushrooms for extra flavor and nutrition. Yes, this dish is great for meal prep! To store, place it in airtight containers. Refrigerate leftovers for up to three days. For best results, reheat in the oven to keep it creamy. You can also freeze it for later. Just make sure to thaw it in the fridge overnight before reheating. For the full recipe, check the earlier sections. This creamy pumpkin gnocchi bake combines simple ingredients for delicious flavor. We covered how to prepare the gnocchi and create a rich pumpkin sauce. With helpful tips on ingredient swaps and serving ideas, you can customize your dish to your liking. Remember, you can make this meal vegetarian or adjust it for dietary needs. Enjoy this warm, comforting dish that’s perfect for any meal or occasion. Now, go ahead and whip up this recipe to delight your taste buds.

Buttery Garlic Parm Pumpkin Gnocchi Bake Delight

If you love cozy, comforting meals, then this Buttery Garlic Parm Pumpkin Gnocchi Bake is for you! With a creamy

- 1 cup sushi rice - 1 pound salmon fillet - 4 cups mixed salad greens (e.g., arugula, spinach, and kale) - 2 tablespoons soy sauce - 1 tablespoon rice vinegar - 2 tablespoons sesame oil - Fresh herbs (e.g., cilantro or parsley) - 1/4 cup sesame seeds - 1 avocado, sliced The main ingredients in this recipe will give you a fresh and hearty meal. Sushi rice is the star. It gives the salad a nice texture. The salmon adds protein and a rich flavor. The mixed salad greens bring a crispness that balances everything well. For seasonings, soy sauce adds a salty touch. Rice vinegar gives a slight tang. Sesame oil adds a nutty aroma that ties it all together. You can make it even better. Fresh herbs add color and zest. Sesame seeds bring a nice crunch. Sliced avocado adds creaminess that you will love. Once you gather these ingredients, you can follow the [Full Recipe] to create your delicious Crispy Rice Salmon Harvest Salad! - First, rinse the sushi rice under cold water until the water runs clear. This step removes excess starch, which helps the rice cook evenly. - Next, combine the rinsed rice and 2 cups of water in a saucepan. Heat it over medium heat until it boils. Once boiling, lower the heat. Cover and cook for 15-20 minutes until tender. After cooking, let the rice sit for 10 minutes off the heat. - Now, mix 1 tablespoon of rice vinegar, 1 teaspoon of sugar, and 1/2 teaspoon of salt in a small bowl until dissolved. Stir this mixture into the warm rice, fluff it with a fork, and let it cool. - Heat 2 tablespoons of sesame oil in a nonstick skillet over medium-low heat. Spread the cooled rice in an even layer. Cook for about 5 minutes until the bottom turns golden and crispy. Carefully flip the rice and cook the other side for another 5 minutes. Once done, remove from heat and let it cool slightly. Break it into pieces. - While the rice crisps, season the salmon fillet with salt and pepper. Heat a drizzle of sesame oil in another skillet over medium heat. - Cook the salmon skin-side down for 4-5 minutes, then flip it over. Cook for another 3-4 minutes until fully cooked. Remove it from the heat and let it cool slightly. Flake the salmon into bite-sized pieces. - In a large bowl, add the mixed salad greens. Then, include 1 cup of halved cherry tomatoes, 1/2 thinly sliced cucumber, 1/4 cup of thinly sliced radishes, and sliced avocado. - Gently toss the salad with the flaked salmon. - In a small bowl, whisk together 2 tablespoons of soy sauce and 1 tablespoon of fresh lemon juice. Drizzle this dressing over the salad and toss lightly to combine. - Finally, top the salad with the crispy rice pieces and sprinkle sesame seeds over everything. You can find the Full Recipe in the main article. Enjoy your meal! To make crispy rice, start with sushi rice. Rinse it well until the water runs clear. This removes extra starch. Use a saucepan to cook the rice with water. Bring it to a boil, then lower the heat. Cover and cook for about 15-20 minutes. Let it sit for 10 minutes after cooking. To avoid soggy rice, make sure it cools before you crisp it. Spread the rice evenly in a nonstick skillet with sesame oil. Cook over medium-low heat. This will help it become golden and crunchy. You can cook the salmon in two ways: grilling or pan-searing. Each method gives a different flavor and texture. For grilling, preheat your grill. Cook the salmon skin-side down for about 4-5 minutes. Flip it and cook for another 3-4 minutes. If you choose pan-searing, heat a splash of sesame oil in a skillet. Season the salmon with salt and pepper. Cook it skin-side down first. This method is quick and gives a nice crust. When serving, use large bowls or individual plates. This lets the colors pop. Arrange the salmon, rice, and veggies neatly. Garnish with fresh herbs for brightness. It makes the dish look more inviting. Using a deep bowl can help keep the salad components together. A shallow dish works well for a more casual look. {{image_2}} You can swap the salmon for chicken or tofu. Chicken adds a mild taste and works well with the salad. Simply grill or pan-sear it. For tofu lovers, use firm tofu. Press it to remove water, then cube and pan-fry until golden. This keeps the texture nice and adds protein. You can also try other fish. Mahi-mahi or trout can add different flavors. Each fish cooks a bit differently, so keep an eye on the cook time. Using seasonal vegetables makes this dish fresh and exciting. In spring, add peas or asparagus. In summer, grill zucchini or bell peppers. Fall is great for roasted squash or beets. These swaps keep your salad vibrant and tasty. For dressings, try different flavors. A creamy avocado dressing can add richness. A zesty citrus vinaigrette brightens up the dish. Experiment to find your favorite combo! To make this salad gluten-free, use tamari instead of soy sauce. Tamari has a similar taste and works well. Always check ingredient labels to ensure other items are gluten-free too. Some dressings or seasonings might contain gluten. Being careful helps keep your meal safe and enjoyable! For the full recipe, visit the section above and try making your own Crispy Rice Salmon Harvest Salad. To keep your Crispy Rice Salmon Harvest Salad fresh, store it in an airtight container. Make sure to separate the crispy rice from the salad. This keeps the rice crunchy. The salad should stay good in the fridge for about three days. After that, the greens may wilt, and the flavors can fade. You can freeze parts of this salad but not the whole thing. The crispy rice will lose its crunch when thawed. For freezing, keep the salmon and salad mix in separate containers. The salmon can last up to two months in the freezer. The salad mix should be used within one month for the best taste. If you need to reheat the salmon, do it gently. Use a skillet on low heat. This way, you avoid overcooking it. To keep the crispy rice crunchy, reheat it in a dry skillet. Heat it on medium-low for a few minutes. This method helps maintain that perfect texture. Sushi rice is the best choice for this salad. It is sticky and holds together well. This gives the salad a nice texture. Sushi rice also has a subtle, sweet flavor. It absorbs the dressing well, enhancing the taste. Using sushi rice makes each bite delightful. Yes, you can prepare this salad ahead of time. For best results, store the components separately. Keep the salad greens and vegetables in one container. Place the salmon in another container. This helps keep everything fresh. You can add the dressing just before serving. This prevents the greens from wilting. To keep the crispy rice crunchy, store it in an airtight container. Avoid adding it to the salad until you are ready to serve. If you have leftovers, you can re-crisp the rice. Just heat it in a skillet on low heat for a few minutes. This will help restore its crunchiness. This blog post detailed a fresh sushi salad recipe with key ingredients like sushi rice, salmon, and greens. I shared step-by-step instructions for preparing rice, cooking salmon, and assembling the salad. You learned helpful tips for perfecting crispy rice and variations for protein swaps and seasonal ingredients. Remember, this meal is not only tasty but also flexible to suit your needs. Enjoy creating your own sushi salad masterpiece, and don't be afraid to experiment!

Crispy Rice Salmon Harvest Salad Fresh and Flavorful

Looking for a fresh and flavorful dish that’s easy to make? You’ve found it! My Crispy Rice Salmon Harvest Salad

To make these delicious bars, you need simple ingredients that pack a punch. Here’s what you’ll need: - 2 cups rolled oats - 1 cup all-purpose flour - 1/2 cup brown sugar - 1/2 cup unsalted butter, melted - 1 teaspoon cinnamon - 1/4 teaspoon salt - 3 medium apples, peeled, cored, and chopped - 1/2 cup granulated sugar - 1/4 cup miso paste (white or yellow) - 1/3 cup heavy cream - 1/4 teaspoon nutmeg - 1 teaspoon vanilla extract These ingredients come together to create a sweet and salty treat. The miso paste gives an umami flavor that surprises and delights. If you need to swap out some ingredients, don’t worry! Here are a few easy changes: - Use coconut oil instead of butter for a dairy-free option. - Swap gluten-free flour for all-purpose flour to make it gluten-free. - Try honey or maple syrup instead of brown sugar for a different sweetness. - Use any tart apples, like Granny Smith, for a nice bite. These substitutions keep the essence of the bars while fitting your needs. Understanding the nutrition in your treats is important. Here’s a rough breakdown per bar, based on 16 servings: - Calories: 200 - Total Fat: 9g - Saturated Fat: 5g - Carbohydrates: 30g - Fiber: 2g - Sugars: 10g - Protein: 2g These bars are a tasty snack but enjoy them in moderation. For a more balanced treat, consider pairing them with some Greek yogurt or fresh fruit. For the complete recipe, check out the [Full Recipe]. To make Miso Caramel Apple Crumble Bars, follow these simple steps: 1. Preheat your oven to 350°F (175°C). 2. Line an 8x8 inch baking dish with parchment paper. 3. Mix the crust ingredients in a large bowl. 4. Chop the apples and mix them with sugar and spices. 5. Make the miso caramel in a small pan. 1. Preheat the Oven: Start by preheating the oven. This helps the bars bake evenly. 2. Prepare the Crust: In a bowl, mix together: - 2 cups rolled oats - 1 cup all-purpose flour - 1/2 cup brown sugar - 1/2 cup melted unsalted butter - 1 teaspoon cinnamon - 1/4 teaspoon salt Stir the mix until it looks like coarse crumbs. Keep 1 cup of this mix for later. Press the rest into the bottom of your lined baking dish. 3. Prepare the Apples: Take 3 medium apples and chop them up. In a separate bowl, mix: - Chopped apples - 1/2 cup granulated sugar - 1/4 teaspoon nutmeg - 1 teaspoon vanilla extract Spread this apple mix evenly over the crust. 4. Make the Miso Caramel: In a small saucepan, combine: - 1/4 cup miso paste - 1/3 cup heavy cream - 1/2 cup brown sugar Heat this on medium. Stir until it becomes smooth and thick. 5. Assemble the Bars: Drizzle the miso caramel over the apple layer. Sprinkle the reserved oat mix on top. 6. Bake: Place the dish in the oven. Bake for 30-35 minutes. Look for a golden brown topping and bubbly apples. 1. Cool the Bars: Let the bars cool in the dish for at least 15 minutes. This helps them set. 2. Slice and Serve: Use the parchment paper to lift the bars out. Place them on a board and cut into squares. 3. Enjoy: Serve warm or at room temperature. For a treat, add a scoop of vanilla ice cream or whipped cream. Follow these steps from the Full Recipe, and you'll create a delicious dessert that everyone will love! When mixing your ingredients, focus on even blending. Start by mixing dry items first. This includes oats, flour, brown sugar, cinnamon, and salt. Use a whisk to break up clumps. Then, add the melted butter. Mix until you see coarse crumbs. This texture helps form a great crust. For a perfect crust, press the mixture firmly into the baking dish. Use your fingers or the back of a measuring cup. Make sure it is even all around. This helps the crust bake evenly. Bake the crust for 10 minutes before adding the apples. This step gives it a nice firm base. One common mistake is over-mixing the batter. This can make the crust tough. Another mistake is not measuring ingredients correctly. Use dry measuring cups for dry items and liquid cups for wet items. Lastly, do not skip the cooling step. Let the bars cool for at least 15 minutes. This helps them set and makes slicing easier. Explore the recipe further in the [Full Recipe] for more details. {{image_2}} You can bring fun twists to your Miso Caramel Apple Crumble Bars. For example, try using different types of miso. Red miso adds a deeper flavor. You could also swap apples for pears or peaches. These fruits add sweetness and a new taste. Another cool idea is to mix in nuts. Chopped walnuts or pecans give a nice crunch. You could even add chocolate chips for a sweet surprise. These small changes can make your bars unique and exciting. The crust is a key part of these bars. If you want something different, you can use graham cracker crumbs. They add a nice flavor and crunch. You can also try almond flour for a gluten-free option. Just mix it with butter and a little sugar. Another option is to use coconut flour. It gives a tropical twist to your bars. You can add shredded coconut to the crust too. This will enhance the flavor and texture. Seasonal fruits can add freshness to your bars. In fall, try using cranberries for a tart kick. They pair well with apples and the sweet miso caramel. In summer, you can use ripe berries. Strawberries, blueberries, or raspberries bring a burst of color and taste. In winter, consider using citrus fruits. Oranges or blood oranges can brighten up your dessert. You can mix these fruits with apples for a fun flavor blend. These seasonal changes keep your bars exciting and delicious. For the full recipe, check out the instructions above! To keep your miso caramel apple crumble bars fresh, store them in an airtight container. Place a layer of parchment paper between the bars to prevent sticking. If you have leftovers, they can last up to five days in the fridge. Just be sure to let them cool completely before storing. If you want to save some bars for later, freezing is a great option. Wrap each bar tightly in plastic wrap. Then, place them in a freezer-safe bag or container. They can last up to three months in the freezer. When you're ready to enjoy them, just thaw overnight in the fridge. To bring back that warm, gooey goodness, reheat your bars in the oven. Preheat the oven to 350°F (175°C). Place the bars on a baking sheet and heat for about 10-15 minutes, or until warm. You can also use the microwave for a quick fix. Heat each bar for about 15-20 seconds. Enjoy them warm, just like when they were fresh from the oven! I love serving these bars warm. They taste great on their own, but a scoop of vanilla ice cream makes them even better. You can also add a drizzle of extra miso caramel on top. For a fun twist, try adding chopped nuts or a sprinkle of sea salt. These toppings create a nice balance with the sweet apples. Yes! You can easily make these bars gluten-free. Just swap the all-purpose flour with gluten-free flour. Make sure to check the oats too. Some oats are not gluten-free due to cross-contamination. Look for certified gluten-free oats for the best results. The bars will still taste amazing! You’ll know the bars are done when the top is golden brown and the apples bubble slightly. This usually takes about 30 to 35 minutes in the oven. To be sure, insert a toothpick into the center. If it comes out clean or with just a few crumbs, they are ready! Let them cool in the pan before slicing. Miso caramel apple crumble bars blend rich flavors with fun textures. We explored the key ingredients and shared easy steps to create your own. I outlined tips for perfecting your crust and avoiding common mistakes. You can experiment with unique ingredients and seasonal fruits to make it your own. Finally, knowing how to store and reheat these treats keeps them fresh longer. Enjoy these tasty bars at any time, knowing you made them yourself!

Miso Caramel Apple Crumble Bars Irresistible Treat

Are you ready to discover a dessert that combines sweet and savory in the best way? Miso Caramel Apple Crumble

- 1 large sourdough bread loaf - 1 cup elbow macaroni - 1 can (15 oz) chili (vegetarian or meat-based) - 1 cup shredded cheddar cheese - 1/2 cup diced bell peppers (any color) - 1/4 cup chopped green onions - 1 tablespoon olive oil - 1 teaspoon garlic powder - 1 teaspoon cumin - Salt and pepper to taste To make this Tailgate Chili Mac Bread Bowl, start with key items. The sourdough bread loaf forms a sturdy bowl. I love the taste of sourdough; it adds a great depth of flavor. Next, elbow macaroni creates a fun texture and heartiness. For the chili, you can use either vegetarian or meat-based options. Both taste amazing. Now, let's add some extra touch with shredded cheddar cheese. It melts beautifully and makes every bite rich. Diced bell peppers add sweetness and color, making the dish more vibrant. Green onions lend a fresh crunch that brightens up the mix. Don't forget the spices! Olive oil helps sauté the peppers, making them soft and sweet. Garlic powder gives a nice kick, while cumin adds warmth. Salt and pepper enhance all the flavors, making them pop. For the full recipe, remember to check the steps and enjoy the process! 1. Preheat your oven to 375°F (190°C). This helps the bread bowl get nice and warm. 2. Take your large sourdough bread loaf and carefully slice off the top. Hollow out the inside. You want to make a bowl. Save the bread you removed for later. It’s great for crumbs or croutons. 3. Cook 1 cup of elbow macaroni. Follow the package instructions. You want it al dente. Drain it and set it aside. 1. In a large skillet, heat 1 tablespoon of olive oil over medium heat. 2. Add 1/2 cup of diced bell peppers. Sauté for about 3-4 minutes. You want them soft and tasty. 3. Stir in 1 can of chili, 1 teaspoon of garlic powder, 1 teaspoon of cumin, and salt and pepper to taste. Mix it well. Let it simmer for 5-7 minutes to heat through. 4. Combine the cooked macaroni with the chili mix. Fold in 1 cup of shredded cheddar cheese. Mix until everything is well combined. 1. Spoon the chili mac mixture into the hollowed-out bread bowl. Pack it in slightly so it holds well. 2. Top the filled bread bowl with the remaining cheddar cheese. 3. Place the bread bowl on a baking sheet. Bake in the preheated oven for 15-20 minutes. You want the cheese to melt and bubble. 4. Once done, take it out and let it cool for a couple of minutes. Garnish with 1/4 cup of chopped green onions and optional jalapeño slices. Enjoy this tasty Tailgate Chili Mac Bread Bowl! For the full recipe, refer to the complete instructions above. To make the bread bowl hold its shape, choose a sturdy sourdough loaf. Look for one that is thick and fresh. After cutting the top off, hollow it out gently. Leave a good amount of bread on the sides. This helps keep the chili mac inside. For cheesy goodness, use high-quality shredded cheddar cheese. Grate it fresh for the best melt. Mixing in half the cheese with the chili mac adds rich flavor. Top it with more cheese before baking for a golden crust. When serving at a tailgate, presentation matters. Place the bread bowl on a large platter. Offer small bowls for guests to scoop out the chili mac. This way, everyone can enjoy it with pieces of the bread. Pair the chili mac with cold beverages. A light lager or a fruity soda complements the flavors well. You can also serve it with chips for added crunch. You can make some parts of this recipe ahead of time. Cook the macaroni and prepare the chili mix a day before. Store them in the fridge until you are ready to assemble. This saves time on game day. For quick alternatives, use pre-made chili from a can. If you need a gluten-free option, try corn pasta instead of elbow macaroni. These tips help you enjoy the dish without stress. {{image_2}} You can choose between vegetarian and meat-based chili for your Tailgate Chili Mac Bread Bowl. Vegetarian chili brings a hearty feel without meat. It usually features beans, tomatoes, and spices. Meat-based chili often includes ground beef or turkey, giving it a robust flavor. You can also mix beans to your taste. Try black beans, kidney beans, or pinto beans for extra texture and taste. Cheese plays a big role in this recipe. While I love cheddar cheese, you can switch it up. Try Monterey Jack or pepper jack for a spicy kick. If you want to avoid dairy, use dairy-free cheese options. There are many great brands that melt well. Look for vegan cheese made from nuts or soy. These options still give you a creamy finish. Sourdough bread is classic for this dish, but you can explore other options. Try round ciabatta or a crusty baguette for a twist. If you need gluten-free bread, look for gluten-free artisan loaves. They work well for bowls too. Just make sure they are sturdy enough to hold the chili mac without getting soggy. To store chili mac, let it cool first. Place it in airtight containers. You can use glass or plastic containers. These keep the chili mac fresh and tasty. If you have bread leftover, store it separately. It helps prevent the bread from getting soggy. You can reheat chili mac in the microwave or oven. For the microwave, place a serving in a bowl. Heat for 1-2 minutes, stirring halfway. For the oven, set it to 350°F (175°C). Put the chili mac in a baking dish. Cover it with foil to keep it moist. Bake for about 15 minutes until hot. To keep the bread fresh, heat it separately. You can wrap it in foil and warm it in the oven. Yes, you can freeze the chili mac! Just make sure it cools fully. Place it in freezer-safe containers. Leave some space at the top for expansion. To thaw, move it to the fridge overnight. For reheating, you can use the microwave or oven. If using the oven, bake it at 350°F (175°C) until hot. This keeps the taste and texture nice. Enjoy your Tailgate Chili Mac Bread Bowl later with the Full Recipe! For the perfect bread bowl, choose a large sourdough loaf. Aim for a loaf that is about 10 to 12 inches in length and 5 to 6 inches in diameter. This size gives you enough room for the chili mac filling and keeps the bread sturdy. A smaller loaf may collapse under the weight, while a larger one may not fit well on your table. Yes, you can prepare some parts ahead of time. Cook the macaroni and store it in the fridge. You can also sauté the bell peppers and mix the chili, then refrigerate. Just assemble and bake the bread bowl when you’re ready to serve. This makes your tailgate prep easy and fun! To change the spice level, start with your chili choice. If you prefer mild, select a low-spice chili. For more heat, add jalapeño slices or chili powder. Taste as you cook, and adjust seasoning to fit your flavor preference. This way, you make it just right for your crowd. Pair your chili mac bread bowl with simple side dishes. A fresh salad adds a nice crunch. Cornbread or garlic bread also pairs well. For drinks, serve iced tea or lemonade to balance the richness. These choices create a complete tailgate meal everyone will love. This blog post covers the key steps to create a delicious chili mac bread bowl. We explored main ingredients like sourdough bread, elbow macaroni, and chili. I shared tips for baking, serving, and storing your dish. You can easily adjust flavors and ingredients to fit your taste. With these ideas, you can impress guests and enjoy tasty meals. Keep experimenting with variations and find your favorite way to make this dish. Enjoy creating your next delicious meal!

Tailgate Chili Mac Bread Bowl Delightful Recipe

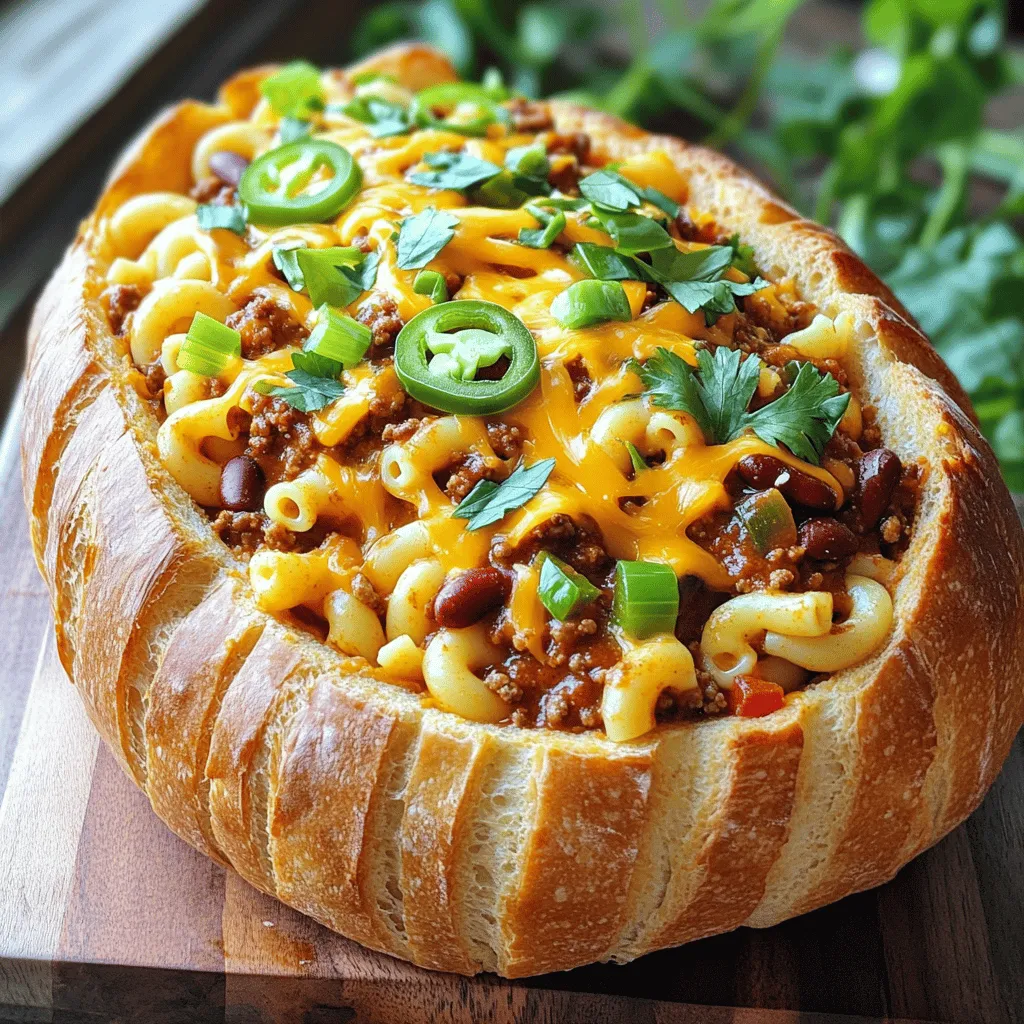
Are you ready to wow your friends at the next tailgate? This Tailgate Chili Mac Bread Bowl recipe brings comfort

To make pumpkin cheesecake swirl brownies, you need these ingredients: - 1 cup unsweetened cocoa powder - 1 cup all-purpose flour - 1/2 teaspoon baking powder - 1/2 teaspoon salt - 1 cup granulated sugar - 1/2 cup unsalted butter, melted - 3 large eggs - 1 teaspoon pure vanilla extract - 1 cup pumpkin purée - 1 teaspoon pumpkin pie spice - 8 ounces cream cheese, softened - 1/2 cup powdered sugar These ingredients blend together to create rich, creamy brownies. The cocoa gives the brownies a deep flavor. The pumpkin adds moisture and a nice fall taste. The cream cheese swirl makes each bite feel special. You can make swaps if you need to. Here are some ideas: - Cocoa Powder: Use Dutch-processed cocoa for a smoother taste. - All-Purpose Flour: Swap with gluten-free flour if you're avoiding gluten. - Granulated Sugar: Coconut sugar can work if you want a healthier option. - Unsalted Butter: You can replace it with coconut oil or vegetable oil. - Cream Cheese: A dairy-free cream cheese works great for a vegan option. These swaps help you customize your brownies without losing flavor. For gluten-free brownies, use a gluten-free flour blend. This keeps the texture while removing gluten. If you're vegan, use flax eggs instead of eggs. Mix 1 tablespoon ground flaxseed with 2.5 tablespoons water per egg, then let it sit. For the cream cheese, use a dairy-free alternative. These changes let everyone enjoy the brownies. Creating this treat offers something for everyone, whether they follow a specific diet or just want a delicious dessert. For the full recipe, check out the instructions above to create your own delightful pumpkin cheesecake swirl brownies. Start by preheating your oven to 350°F (175°C). Grease a 9x13-inch baking pan with butter. You can also line it with parchment paper. This helps in easy removal later. In a medium bowl, whisk together the dry ingredients. Combine 1 cup of cocoa powder, 1 cup of flour, 1/2 teaspoon of baking powder, and 1/2 teaspoon of salt. Set this mixture aside. In a large bowl, mix 1 cup of granulated sugar with 1/2 cup of melted butter. Whisk until smooth. Add 3 large eggs, one at a time. Mix well after each egg. Finally, stir in 1 teaspoon of vanilla extract. Slowly add the dry mix to the wet mix. Fold gently until just combined. In another bowl, beat 8 ounces of softened cream cheese with 1/2 cup of powdered sugar. Mix until smooth. Then, add 1 cup of pumpkin purée and 1 teaspoon of pumpkin pie spice. Mix until fully blended and creamy. Pour about two-thirds of the brownie batter into your baking pan. Spread it evenly. Next, spoon the pumpkin cheesecake mixture over the top. Finish by dolloping the remaining brownie batter on top. To create the swirl, use a knife or skewer. Gently drag it through the batter. This creates a lovely marbled look. Place the pan in your preheated oven. Bake for 25-30 minutes. Check for doneness by inserting a toothpick into the center. It should come out with a few moist crumbs, not wet batter. Once baked, let the brownies cool completely in the pan on a wire rack. This helps them set nicely before you cut them into squares. For the full recipe, refer to the earlier section. To get that stunning swirl, dollop the pumpkin cheesecake mixture onto the brownie batter. Use a knife or skewer to swirl gently. Don’t mix too much! You want to see both layers. A little twist creates that marbled look we all love. For fudgy brownies, do not overmix the batter. This keeps them dense and rich. Bake just until a toothpick shows a few moist crumbs. Overbaking can make them dry. Let them cool completely to set the perfect texture. Use a 9x13-inch baking pan for even cooking. A whisk helps blend the ingredients smoothly. A rubber spatula works well for folding the batter. I also recommend a sharp knife for swirling. These tools make the process easier and more fun. For detailed steps, check out the Full Recipe. {{image_2}} You can easily take your pumpkin cheesecake swirl brownies to the next level. Just add nuts or chocolate chips. Walnuts or pecans give a nice crunch. They also add flavor that contrasts with the creamy cheesecake. If you love chocolate, try adding chocolate chips. They melt and create pockets of gooey goodness. Mix in about half a cup before you swirl in the cheesecake layer. Sometimes, it’s fun to switch things up. You can replace pumpkin with other flavors in the cheesecake swirl. Try using sweet potato for a twist. Cream cheese mixed with maple syrup can also work well. For a fruity option, mix in mashed bananas or pureed strawberries. Just make sure to adjust the sweetness. This keeps the balance right and makes each bite exciting. Seasonal flavors make these brownies even more special. For fall or winter, add gingerbread spice to the cheesecake mix. This brings warmth and a cozy feel to every bite. In December, you might like to add peppermint extract. This gives a fresh kick and pairs well with chocolate. Just a few drops will do. Adjust the amount to your taste. These twists let you enjoy a new treat each season! For full details, check the Full Recipe. To keep your pumpkin cheesecake swirl brownies fresh, store them in an airtight container. This prevents them from drying out. Place a piece of parchment paper between layers to avoid sticking. If you plan to eat them within a few days, keep them at room temperature. For longer storage, the fridge works well too. When you're ready to enjoy your brownies, reheating can bring back their warmth. Preheat your oven to 350°F (175°C). Place the brownies on a baking sheet. Heat for about 10 minutes or until warm. You can also microwave them for 15-20 seconds. Just be careful not to overheat, as that can make them tough. If you want to save some brownies for later, freezing works great. Cut them into squares and wrap each piece in plastic wrap. Then, place all the wrapped brownies in a freezer bag. They can last up to three months in the freezer. When you're ready to eat, let them thaw in the fridge overnight or at room temperature for a few hours. Enjoy your tasty treat fresh from the freezer! For the full recipe, see the section above. Yes, you can make these brownies ahead of time. They store well for a few days. Just let them cool completely before wrapping them. Use plastic wrap or an airtight container to keep them fresh. Brownies taste even better after a day, as their flavors meld. If you need to replace cream cheese, try using mascarpone cheese. It has a similar texture and taste. You can also use Greek yogurt for a lighter option. For a vegan choice, cashew cream works well. Blend soaked cashews with a bit of lemon juice for a creamy texture. Check your brownies around 25 minutes of baking time. Insert a toothpick in the center. If it comes out with a few moist crumbs, they are done. If wet batter sticks to the toothpick, bake for a few more minutes. Remember, they will continue to cook slightly as they cool. Serve these brownies warm with a scoop of vanilla ice cream. They pair well with whipped cream, too. You can also dust them with powdered sugar for a pretty touch. For a fun twist, drizzle caramel or chocolate sauce on top. Yes, fresh pumpkin works great in this recipe! Roast a small pumpkin until tender, then scoop out the flesh. Blend it until smooth to match the consistency of canned pumpkin. This adds a fresh flavor to your brownies. Just ensure you measure the same amount as the canned version. For the full recipe, check out the details above. You learned how to make delicious pumpkin cheesecake swirl brownies. We covered key ingredients, easy steps, and helpful tips. You can get creative with flavors or dietary swaps. Store your brownies the right way to keep them fresh. Remember, the best brownies come from your kitchen. Enjoy baking, experimenting, and sharing this tasty treat with others!

Pumpkin Cheesecake Swirl Brownies Rich and Creamy Treat

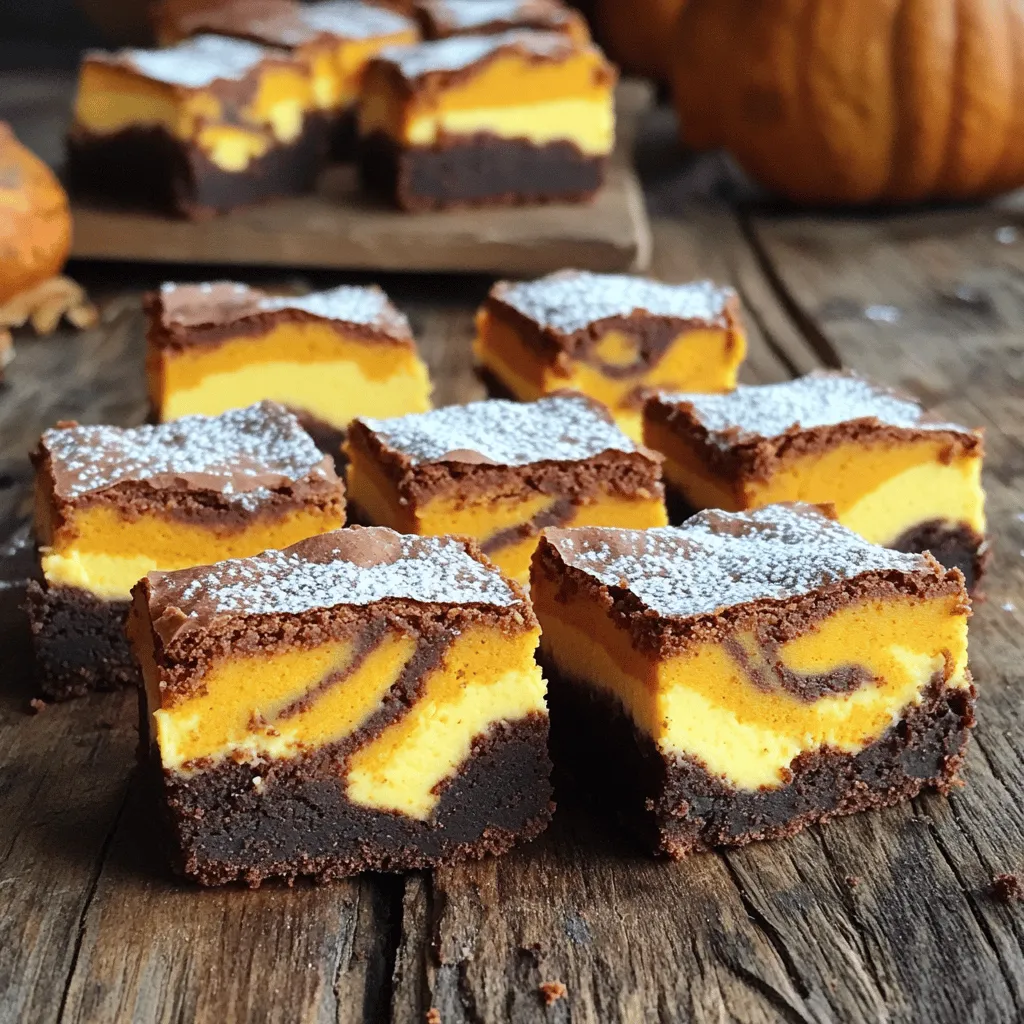
If you love rich and creamy desserts, you’re in for a treat! Pumpkin Cheesecake Swirl Brownies combine fudgy brownies with

- Pre-made flatbread or homemade flatbread - Brussels sprouts - Olive oil - Maple syrup - Garlic - Goat cheese - Pecans - Salt and pepper - Fresh thyme Using fresh, high-quality ingredients makes a big difference. For this Maple Brussels Sprout Flatbread, I recommend using Brussels sprouts that are firm and vibrant green. They add a lovely crunch and flavor. You can use store-bought flatbread to save time, but making your own is simple and fun. You can find many easy recipes online. Olive oil is essential for roasting the sprouts. It helps them crisp up nicely. Maple syrup brings a sweet touch that balances the sprouts' earthiness. Don't skip the garlic! It adds depth and warmth to the dish. Goat cheese melts beautifully and provides a tangy contrast to the sweet and savory notes. Pecans add a nice crunch and nutty flavor. Fresh thyme gives a pop of color and a fragrant finish. Salt and pepper enhance all the flavors. For the full recipe, check out the detailed instructions. This flatbread is a tasty way to enjoy Brussels sprouts! 1. Preheat your oven to 400°F (200°C). This helps the flatbread bake evenly. 2. Prepare the Brussels sprouts by thinly slicing them. Thin slices cook faster and taste better. 3. Place your flatbread on a baking sheet. This is where you will build your creation. 1. In a large bowl, toss the sliced Brussels sprouts with olive oil, maple syrup, minced garlic, salt, and pepper. Make sure they are well coated. 2. Spread this mixture evenly on a baking sheet lined with parchment paper. This keeps them from sticking. 3. Roast the Brussels sprouts in the preheated oven for 15-20 minutes. Stir halfway through to ensure even cooking. They should be golden brown and tender when done. 1. While your Brussels sprouts roast, layer crumbled goat cheese over the flatbread. This adds rich flavor and creaminess. 2. Once the Brussels sprouts are ready, take them out of the oven. Layer them on top of the goat cheese. 3. For a delightful crunch, sprinkle chopped pecans over the roasted Brussels sprouts. 1. Return the flatbread to the oven and bake for an additional 5-7 minutes. This step makes the flatbread crisp. 2. To check for doneness, look for slightly melted goat cheese and a crisp flatbread. You want it golden and warm. Dive into the full recipe to explore the rich flavors of this dish! To boost the taste of your Maple Brussels Sprout Flatbread, consider these spices: - Cinnamon: A pinch adds warmth. - Nutmeg: Just a dash can bring depth. - Red pepper flakes: For a kick, sprinkle some on top. For toppings, try adding: - Sliced apples: Their sweetness pairs well. - Balsamic glaze: Drizzle it on for tangy flavor. - Crushed red pepper: For those who enjoy heat. Roasting Brussels sprouts gives them a crispy texture. Here’s why you might choose this method: - Roasting enhances their natural sweetness. - It creates a delightful crunch. If you sauté instead, you get softer sprouts. This method works if you’re short on time. For baking, keep these temperatures in mind: - 400°F (200°C): This is perfect for roasting and baking. - 350°F (175°C): Use this for more gentle cooking. Make your flatbread look amazing with these garnishes: - Fresh thyme leaves: They add color and flavor. - Extra pecans: Scatter them on top for crunch. When serving, pair the flatbread with: - A light salad: It balances the richness. - A glass of white wine: A crisp wine complements the dish well. These tips will help you create a beautiful and tasty Maple Brussels Sprout Flatbread. For a full recipe, check out the instructions above! {{image_2}} You can swap out goat cheese for other tasty options. Feta cheese adds a salty kick. Mozzarella gives a milder, creamy taste. For a sharp flavor, try blue cheese. Each cheese changes the flatbread's feel and taste. Play with these options to find your favorite mix! To make this flatbread vegan, skip the cheese. You can use cashew cheese or almond cream instead. These alternatives add a creamy touch without dairy. Top with roasted veggies like bell peppers or mushrooms for more flavor. You can still enjoy the maple and Brussels sprouts in a plant-based way. Seasonal veggies can spice up your flatbread. In the fall, add butternut squash for sweetness. In spring, use asparagus for a fresh crunch. Change the herbs based on seasons, too. Fresh basil in summer or sage in winter will enhance your dish. Embrace the flavors of each season to keep this meal exciting! To keep your Maple Brussels Sprout Flatbread fresh, use an airtight container. Glass or plastic containers work well. Store it in the fridge for up to three days. The sooner you eat it, the better the taste. To reheat, use an oven or toaster oven. Preheat to 350°F (175°C) and bake for about 10 minutes. This method keeps the flatbread crisp. If it seems dry, drizzle a little olive oil on top. This helps refresh the flavor and keeps it tasty. Yes, you can freeze this flatbread. Wrap it tightly in plastic wrap and then in foil. It will last for up to two months in the freezer. To use, thaw it in the fridge overnight. Reheat in the oven to restore its crispness. This way, you can enjoy a quick meal anytime! Yes, you can make flatbread from scratch. To do this, mix flour, water, salt, and a bit of oil. Knead the dough until smooth. Let it rest for about 30 minutes. Roll it out thin and cook it in a hot skillet for about 2-3 minutes on each side. Tips for quick flatbread preparation: - Use a food processor for faster mixing. - Roll the dough thin for quicker cooking. - Preheat your skillet or oven to speed up the process. If you need a substitute for goat cheese, here are some options: - Feta cheese offers a similar tangy flavor. - Ricotta cheese has a creamy texture, but it's milder. - Blue cheese adds a strong flavor, great for bold taste lovers. Dairy-free cheese substitutes: - Cashew cheese provides a creamy base. - Almond cheese is a nutty alternative. - Store-bought vegan cream cheese is also a good choice. To avoid bitterness, select fresh Brussels sprouts. Look for bright green, tight, and firm sprouts. Trim the ends and remove any yellow leaves. Flavor-enhancing techniques: - Roast them for a sweeter taste. - Toss with olive oil and maple syrup to balance bitterness. - Add garlic or onions for extra flavor. This blog post showed how to make a tasty flatbread with Brussels sprouts. You learned about the key ingredients, step-by-step instructions, and cooking tips. There are also fun ideas for variations and storage information. I hope you feel inspired to create this dish. With simple changes, you can make it your own. Enjoy cooking and sharing this flatbread with family and friends!

Maple Brussels Sprout Flatbread Flavorful and Easy Meal

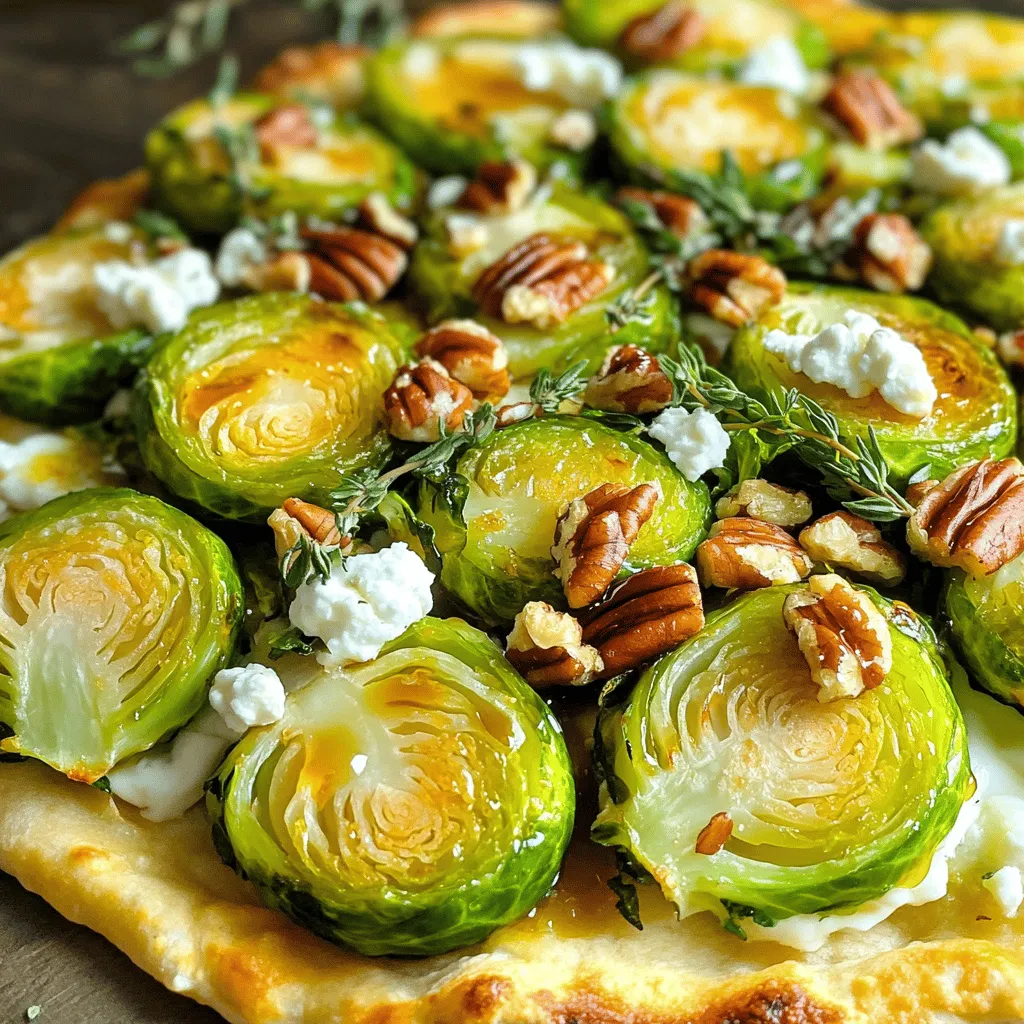
Looking for a tasty and easy meal? Try my Maple Brussels Sprout Flatbread! This dish marries sweet maple and hearty

Older posts
Newer posts
← Previous Page1 … Page51 Page52 Page53 … Page84 Next →

dsad

© 2026 Foodish Talk • Built with GeneratePress

Our Policies

  • Copyright Policy
  • Cookie Policy
  • GDPR Policy
  • Privacy Policy
  • Disclaimer
  • Terms Of Use

More Information

  • Home
  • About
  • Contact
  • Appetizers
  • Dessert
  • Dinner
  • Drinks
©2026, Foodish Talk About Back To Top