![- All-purpose flour and baking essentials: - 1 ½ cups all-purpose flour - 1 teaspoon baking soda - 1 teaspoon baking powder - 1 teaspoon ground cinnamon - ½ teaspoon ground nutmeg - ½ teaspoon salt - Sugars and flavor enhancers: - ½ cup unsalted butter, softened - 1 cup granulated sugar - 1 teaspoon vanilla extract - ¼ cup powdered sugar - 1 teaspoon lemon juice - Wet ingredients: pumpkin, eggs, and cream cheese: - 2 large eggs - 1 cup canned pumpkin puree - 4 ounces cream cheese, softened - Optional toppings and garnishes: - Chopped walnuts for topping These ingredients come together to create a moist and flavorful bread. The blend of spices adds warmth, while the cream cheese swirl brings a rich texture. You can customize this recipe with your favorite nuts or fruits. The Full Recipe gives you step-by-step guidance to bake this delightful treat. 1. Preheat your oven and grease the loaf pan. Start by setting your oven to 350°F (175°C). While it heats, take a 9x5-inch loaf pan and grease it well. This step is key to ensuring that your bread comes out easily after baking. 2. Mixing dry ingredients. In a medium bowl, whisk together these dry ingredients: - 1 ½ cups all-purpose flour - 1 teaspoon baking soda - 1 teaspoon baking powder - 1 teaspoon ground cinnamon - ½ teaspoon ground nutmeg - ½ teaspoon salt Set this bowl aside for later. 3. Preparing the pumpkin mix. In a large bowl, cream ½ cup softened unsalted butter with 1 cup granulated sugar. Mix until light and fluffy. This should take about 3-4 minutes. Then, add 2 large eggs, one at a time. Mix well after each egg. Next, stir in 1 cup canned pumpkin puree and 1 teaspoon vanilla extract. Blend until everything is combined. 1. Creaming butter and sugar. If you followed the previous step, you now have a nice creamy mixture. This is important for the texture of your bread. 2. Adding eggs and pumpkin puree. Make sure to add the eggs slowly. This helps the batter become smooth. The pumpkin puree adds moisture and flavor. 3. Integrating dry ingredients. Gradually add the dry mix from the first step into your pumpkin mixture. Stir gently until just combined. You don’t want to overmix, as this can make your bread tough. 1. Mixing cream cheese filling. In a small bowl, blend 4 ounces softened cream cheese with ¼ cup powdered sugar and 1 teaspoon lemon juice. Whip it until smooth. This filling will add a creamy twist to your bread. 2. Layering the mixture in the loaf pan. Pour half of the pumpkin batter into the prepared loaf pan. Then, spoon dollops of the cream cheese mixture over this batter. Pour the rest of the pumpkin batter on top. Take a knife and gently swirl the cream cheese mixture into the pumpkin batter for a marbled look. 1. Baking time and temperature details. Place your loaf pan in the oven and bake for 60-70 minutes. The bread should rise and turn golden brown. 2. Checking for doneness. To see if your bread is ready, insert a toothpick into the center. If it comes out clean, your bread is done. If it has batter on it, give it a few more minutes. Follow these steps closely for a delightful Pumpkin Cream Cheese Bread, just like the Full Recipe suggests! To avoid undercooked or overcooked bread, always check the oven temperature. An oven that is too hot can burn the outside before the inside cooks. Use an oven thermometer to be sure. When baking, place your loaf pan in the center of the oven. This helps ensure even heat around the bread. Always use a toothpick to check for doneness. Insert it into the center; if it comes out clean, your bread is ready. If you need gluten-free options, use a blend of gluten-free flour. Brands like Bob's Red Mill or King Arthur Flour work well. Just remember to add a bit of xanthan gum to help with texture. For vegan options, swap the eggs for flaxseed meal. Mix one tablespoon of flaxseed with three tablespoons of water and let it sit until it thickens. Instead of butter, use coconut oil or a vegan butter substitute. To spice up your bread, try adding a pinch of ginger or cloves. You can also mix in some orange zest for a citrusy twist. For texture, think about what you like. If you want moist bread, use more pumpkin puree. If you prefer a denser bread, reduce the pumpkin a bit. You can also add chopped nuts or cranberries for extra crunch and flavor. For the complete recipe, check out the [Full Recipe]. {{image_2}} You can make this pumpkin cream cheese bread even better with fun mix-ins. Chopped nuts, like walnuts or pecans, add a nice crunch. You can also stir in fruits like raisins for a sweet surprise. For a seasonal twist, try adding cranberries. Their tartness balances the sweet pumpkin flavors. Chocolate chips are another great choice. This adds a rich, gooey texture that kids and adults love. You can change the spices to suit your taste. Try adding ginger or allspice for a warm flavor. If you want a hint of orange, mix in some orange zest. You can also explore extracts, like almond or maple. They give your bread a unique taste. To adjust the sweetness, consider using honey or maple syrup. They add a different note to the bread while keeping it moist. For the best results, check the [Full Recipe]. To keep your Pumpkin Cream Cheese Bread fresh, store it in an airtight container. This helps prevent it from drying out. You can also wrap it in plastic wrap or foil. Keep it in a cool, dry place away from heat. This way, you can enjoy your bread for days. If you want to freeze the bread, slice it first. Wrap each slice in plastic wrap, then place them in a freezer bag. This makes it easy to take out just what you need. When you're ready to eat, thaw the slices at room temperature. You can also heat them in the microwave for a few seconds. At room temperature, Pumpkin Cream Cheese Bread lasts about 3 to 4 days. If you store it in the fridge, it can last about a week. However, you may notice it drying out faster in the fridge. To know if the bread is no longer good, look for a few signs. Check for mold, which can appear as green or white spots. If the bread smells sour or off, it’s best to throw it away. Lastly, if it feels very dry or hard, it may not taste good anymore. Always trust your senses! Can I make this recipe ahead of time? Yes, you can prepare this bread a day or two in advance. Just store it in an airtight container. The flavors will grow stronger, making it even tastier. How can I make this recipe healthier? To make this recipe healthier, you can use whole wheat flour instead of all-purpose flour. You might also reduce the sugar by half. Adding applesauce can replace some butter for moisture. What is the best way to serve Pumpkin Cream Cheese Bread? Serve this bread warm for the best taste. You can slice it and spread a little butter on top. It also pairs well with hot coffee or tea. Where to find canned pumpkin puree? You can find canned pumpkin puree in most grocery stores. Look in the baking aisle or near the canned vegetables. If fresh pumpkins are in season, you can also make your own puree. Recommendations for cream cheese brands I recommend brands like Philadelphia or Kraft for cream cheese. They have a smooth texture and great flavor. You can also try organic options for a cleaner taste. Is this recipe suitable for beginners? Absolutely! This recipe is great for beginners. The steps are simple, and you can learn as you bake. Just follow the instructions closely, and you will succeed. What tools do I need to successfully bake this bread? You need a few basic tools: - 9x5-inch loaf pan - Mixing bowls - Whisk - Measuring cups and spoons - A spatula for mixing These tools will help you create this delicious bread with ease. This blog post covered everything you need to make delicious pumpkin cream cheese bread. I shared essential ingredients, step-by-step instructions, and helpful baking tips. You can also explore variations and learn about storage best practices. In your kitchen, this recipe can be a great way to enjoy fall flavors. Feel free to try new mix-ins and make it your own. Happy baking!](https://foodishtalk.com/wp-content/uploads/2025/07/6612da57-6f46-4af5-95dc-3fbf94194a81.webp)
Pumpkin Cream Cheese Bread Delightful and Easy Recipe
Looking for a delicious fall treat? You’ll love this Pumpkin Cream Cheese Bread recipe! It’s simple, tasty, and perfect for
Looking for a delicious fall treat? You’ll love this Pumpkin Cream Cheese Bread recipe! It’s simple, tasty, and perfect for
![To make the Pumpkin Streusel Coffee Cake Muffins, you will need a mix of wet and dry ingredients. Each part brings unique flavors and texture. Here’s the complete list: - 1 cup canned pumpkin puree - 1/2 cup granulated sugar - 1/2 cup brown sugar, packed - 1/3 cup vegetable oil - 2 large eggs - 1 teaspoon vanilla extract - 1 1/2 cups all-purpose flour - 1 teaspoon baking powder - 1 teaspoon baking soda - 1 teaspoon ground cinnamon - 1/2 teaspoon ground nutmeg - 1/4 teaspoon ground ginger - 1/4 teaspoon salt For the Streusel Topping: - 1/2 cup all-purpose flour - 1/4 cup brown sugar, packed - 1/4 cup rolled oats - 1 teaspoon ground cinnamon - 1/4 cup cold butter, cubed Using the right ingredients is key. The pumpkin puree keeps the muffins moist, while the sugars add sweetness. The spices bring warmth, perfect for fall. The streusel topping adds a crunchy layer that contrasts with the soft muffins. Check the [Full Recipe] to see how everything comes together. 1. Preheat the oven and prepare muffin tin: First, preheat your oven to 350°F (175°C). Next, line a muffin tin with paper liners or grease it lightly with oil. This step helps the muffins bake evenly and prevents sticking. 2. Mix wet ingredients until smooth: In a large bowl, add 1 cup of canned pumpkin puree, 1/2 cup of granulated sugar, 1/2 cup of packed brown sugar, 1/3 cup of vegetable oil, 2 large eggs, and 1 teaspoon of vanilla extract. Whisk these ingredients together until the mixture is smooth and well combined. 3. Combine and mix dry ingredients: In another bowl, mix 1 1/2 cups of all-purpose flour, 1 teaspoon of baking powder, 1 teaspoon of baking soda, 1 teaspoon of ground cinnamon, 1/2 teaspoon of ground nutmeg, 1/4 teaspoon of ground ginger, and 1/4 teaspoon of salt. Whisk these dry ingredients thoroughly to ensure an even blend. - Gradually incorporate dry ingredients into wet mixture: Slowly add the dry mixture to the wet ingredients. Stir gently until just combined. Be careful not to overmix, as this can lead to dense muffins. - Combine streusel ingredients and mix until crumbly: In a separate bowl, mix 1/2 cup of all-purpose flour, 1/4 cup of packed brown sugar, 1/4 cup of rolled oats, and 1 teaspoon of ground cinnamon. Add 1/4 cup of cold, cubed butter. Use your fingers or a pastry cutter to mix until the mixture looks like coarse crumbs. - Fill muffin cups with batter and add streusel topping: Scoop the pumpkin batter into each muffin cup, filling them about 2/3 full. Then, sprinkle a generous tablespoon of streusel topping over each filled cup. - Bake muffins and perform the toothpick test for doneness: Place the muffin tin in the oven and bake for 20-25 minutes. To check if they're done, insert a toothpick into the center of a muffin. If it comes out clean, the muffins are ready! - Cool muffins before serving; presentation tips for display: Allow the muffins to cool in the pan for about 5 minutes. Then, transfer them to a wire rack to cool completely. For a lovely display, serve the muffins warm, maybe topped with a sprinkle of additional cinnamon. Arrange them on a cake stand or platter for an inviting look. You can find the full recipe for these delightful Pumpkin Streusel Coffee Cake Muffins to try them out at home! To get the best texture and flavor in your muffins, follow these steps: - Use fresh ingredients: Fresh baking powder and spices make a big difference. - Don’t overmix: Mix until just combined. This keeps the muffins light and fluffy. - Check your oven: Use an oven thermometer to ensure it’s at the right temperature. - Cool the batter: Let your batter sit for about 10 minutes before baking. This helps the muffins rise better. Storing your muffins correctly keeps them fresh longer: - Room temperature: Place muffins in an airtight container at room temperature for up to 3 days. - Refrigeration: If you need to store them longer, keep them in the fridge for about a week. - Freezing: For longer storage, freeze muffins in a freezer-safe bag for up to 3 months. Thaw in the fridge or at room temperature. Pair these muffins for a delightful experience: - Coffee: A rich cup of coffee complements the pumpkin flavor well. - Tea: Try them with spiced chai tea for a cozy treat. - Toppings: Serve with a dollop of cream cheese frosting or a sprinkle of powdered sugar for extra sweetness. For the full recipe, visit the link provided. Enjoy your baking adventure! {{image_2}} You can change some ingredients for special diets. For a gluten-free version, use gluten-free flour. Almond or coconut flour works well. If you want vegan muffins, swap eggs with flax eggs (1 tablespoon of flaxseed meal mixed with 2.5 tablespoons of water). This makes a great binder. Also, use coconut oil instead of vegetable oil for a rich taste. Try adding chocolate chips to the batter for a sweet touch. Mix in 1/2 cup of dark or milk chocolate chips right before you fill the muffin tins. You can also add nuts for crunch. Chopped walnuts or pecans blend well with the pumpkin flavor. If you prefer fruit, diced apples or dried cranberries bring a nice burst of sweetness. Seasonal ingredients can add fun to your muffins. In fall, add chopped apples for a spiced apple twist. In winter, mix in some fresh cranberries for a tart flavor. In spring, consider using lemon zest for a bright taste. And during summer, fresh blueberries can create a tasty, juicy muffin. Each change can make your muffins unique and exciting. For the full recipe, check out the details above! Store your Pumpkin Streusel Coffee Cake Muffins at room temperature. Place them in an airtight container to keep them fresh. They will stay good for about three days. You can also use a cake dome for an easy display. This keeps them soft and moist. For longer storage, freezing is a great option. Wrap each muffin in plastic wrap. Then place them in a freezer bag. Make sure to remove as much air as possible. You can freeze them for up to three months. When you're ready to eat, just thaw them at room temperature. To reheat your muffins, preheat your oven to 350°F (175°C). Place the muffins on a baking sheet. Heat them for about 10 minutes. This restores their soft texture. You can also use a microwave for quick reheating. Heat for about 15-20 seconds, but be careful not to make them dry. Enjoy your warm muffins! For the full recipe, click [here](#). To stop muffins from sticking, always grease the pan well. Use butter or non-stick spray. You can also line the muffin tin with paper liners. This way, the muffins come out clean and easy. Yes, you can use fresh pumpkin! Bake a small pumpkin until soft, then scoop out the flesh. Blend it until smooth. Use the same amount as the canned pumpkin. Fresh pumpkin may add a little more moisture, so check the texture. If you lack all-purpose flour, try using whole wheat flour or oat flour. You can also use gluten-free flour blends. Just make sure to check the ratios since some flours absorb more liquid than others. To check if muffins are done, insert a toothpick into the center. If it comes out clean or with a few crumbs, they are ready. If the toothpick has wet batter, bake for a few more minutes. You can easily double the recipe! Just multiply each ingredient by two. Use a larger mixing bowl to combine everything. Keep an eye on baking time; larger batches may need extra time in the oven. Each muffin has around 180 calories. They provide some fiber and vitamins from the pumpkin. The sugars and fats add flavor but also increase calories. Enjoy them as a treat, but watch your portion size. For the full recipe, check out the details above! In this post, I covered how to make Pumpkin Streusel Coffee Cake Muffins. We explored the key ingredients, step-by-step instructions, and helpful tips for perfect muffins. I also shared variations, storage info, and answered common questions. Baking can be fun and rewarding. Don't hesitate to try these muffins for your next gathering. Enjoy the process and the delicious results!](https://foodishtalk.com/wp-content/uploads/2025/07/f78ef244-195c-4d8e-a77f-e8ecb2cc9c55.webp)
Craving a cozy treat that makes your mornings brighter? Look no further than Pumpkin Streusel Coffee Cake Muffins! Bursting with
![For these Pumpkin Spice Doughnut Muffins, you need a mix of simple and fresh ingredients. Here’s what you’ll need: - 1 cup all-purpose flour - 1/2 cup whole wheat flour - 1 teaspoon baking powder - 1/2 teaspoon baking soda - 1 teaspoon ground cinnamon - 1 teaspoon ground nutmeg - 1/2 teaspoon ground ginger - 1/4 teaspoon ground cloves - 1/2 teaspoon salt - 1 cup canned pumpkin puree - 3/4 cup brown sugar, packed - 1/4 cup granulated sugar - 1/3 cup vegetable oil - 2 large eggs - 1 teaspoon vanilla extract - 1/3 cup milk - 1/4 cup granulated sugar (for rolling) - 1/2 teaspoon ground cinnamon (for rolling) Using fresh ingredients is key. Fresh flour makes a big difference in texture. The spices should be fresh for the best flavor. Canned pumpkin puree works well, but you can use fresh pumpkin if you prefer. It may take more time to prepare, but the taste is worth it. If you have food allergies, there are easy swaps you can try. For gluten-free muffins, use a gluten-free flour blend. Instead of eggs, you can use flax eggs or applesauce. Almond milk can replace regular milk for a dairy-free option. These substitutions help everyone enjoy these tasty muffins. For the full recipe, check the details above. Enjoy your baking! To make your pumpkin spice doughnut muffins, start by mixing the dry and wet ingredients. In a medium bowl, whisk together: - 1 cup all-purpose flour - 1/2 cup whole wheat flour - 1 teaspoon baking powder - 1/2 teaspoon baking soda - 1 teaspoon ground cinnamon - 1 teaspoon ground nutmeg - 1/2 teaspoon ground ginger - 1/4 teaspoon ground cloves - 1/2 teaspoon salt Set this aside once mixed. Next, in a large bowl, combine the wet ingredients: - 1 cup canned pumpkin puree - 3/4 cup brown sugar, packed - 1/4 cup granulated sugar - 1/3 cup vegetable oil - 2 large eggs - 1 teaspoon vanilla extract - 1/3 cup milk Mix these until smooth. Now, take the dry mix and add it to the wet mix. Stir gently until just combined. Avoid overmixing; this keeps your muffins light and fluffy. Next, preheat your oven to 350°F (175°C). Grease a muffin tin or line it with paper liners to prevent sticking. Spoon the batter into each muffin cup, filling them about 3/4 full. Bake your muffins for 18 to 20 minutes. To check doneness, insert a toothpick into the center of a muffin. If it comes out clean, your muffins are ready. While the muffins bake, prepare the cinnamon-sugar topping. In a small bowl, mix: - 1/4 cup granulated sugar - 1/2 teaspoon ground cinnamon Once your muffins are baked, let them cool in the tin for about 5 minutes. After that, transfer them to a wire rack. While they are still warm, roll the tops in the cinnamon-sugar mixture. This adds a sweet, crunchy finish to your delicious treats. Enjoy the smell and taste of these pumpkin spice doughnut muffins! For a full recipe, check out the [Full Recipe]. Ensuring a Moist Texture To keep your muffins moist, use canned pumpkin puree. It adds richness and flavor. Do not overmix the batter; mix until just combined. This helps avoid dense muffins. Another key is to measure your flour correctly. Too much flour can dry out your muffins. Spoon flour into a measuring cup and level it off. Using the Right Muffin Tin Select a sturdy muffin tin for the best results. A non-stick or silicone muffin tin works well. These help muffins cook evenly and release easily. If using a metal tin, grease it well or use paper liners. This prevents sticking and makes cleanup easy. Adding Nuts or Chocolate Chips For extra crunch, mix in chopped nuts. Walnuts or pecans add a nice touch. You can also add chocolate chips for a sweet twist. About half a cup is a good amount. Stir them in gently before pouring the batter into the muffin tin. Experimenting with Spices Feel free to play with spices! Add a pinch of allspice or cardamom for depth. You can also increase the cinnamon if you love a strong flavor. This is your chance to customize your muffins to your taste. Just remember to start small and adjust as you go. For the complete recipe, check out the Full Recipe. {{image_2}} Gluten-Free Adaptation You can make these pumpkin spice doughnut muffins gluten-free. Use a gluten-free flour blend instead of all-purpose and whole wheat flour. Look for blends that include xanthan gum for better texture. This change keeps the muffins soft and moist, just like the original recipe. Vegan Substitutes To make these muffins vegan, swap eggs with flaxseed meal or applesauce. Use non-dairy milk instead of regular milk. Replace vegetable oil with melted coconut oil or applesauce. These simple swaps will keep the muffins tasty and rich without any animal products. Maple Glaze Option For a sweet twist, try a maple glaze. Mix powdered sugar with maple syrup and a splash of milk. Drizzle this glaze over the muffins once they cool. It adds a rich, sweet layer that pairs well with pumpkin spice. Chocolate Swirl Idea Want a chocolatey surprise? Add chocolate chips to the batter or swirl in melted chocolate before baking. This chocolate variation brings a delightful contrast to the pumpkin spice flavor. It’s a fun way to enjoy these muffins in a new light. You can find the Full Recipe of these muffins above. Storing at Room Temperature You can keep your pumpkin spice doughnut muffins fresh at room temperature. Use an airtight container to store them. This will help maintain moisture and flavor. They stay good for about three days. If you see any signs of mold, toss them out. Freezing for Longer Shelf Life For longer storage, freeze your muffins. Wrap each muffin in plastic wrap, then place them in a freezer bag. This method keeps them fresh for up to three months. When you want to enjoy one, just take it out and let it thaw at room temperature. Microwave Method To reheat your muffin quickly, use the microwave. Place one muffin on a microwave-safe plate. Heat it for about 10 to 15 seconds. Check if it’s warm enough; if not, heat it in 5-second bursts. Oven Method For a crispier texture, use the oven. Preheat your oven to 350°F (175°C). Wrap the muffins in aluminum foil to keep them moist. Heat for about 10 to 15 minutes. This method makes them taste freshly baked again. For the full recipe, check the section above! Can I use fresh pumpkin instead of canned? Yes, you can use fresh pumpkin. To do this, cook the pumpkin until it's soft. Then, mash it until smooth. This gives a great flavor, but make sure to remove excess water. How can I make these muffins less sweet? To cut down on sweetness, reduce the brown sugar by a quarter cup. You can also leave out the granulated sugar for rolling. Consider adding unsweetened applesauce for moisture without extra sugar. What to do if my muffins are too dense? If your muffins are dense, check your measurements. Too much flour can make them heavy. Make sure to spoon the flour into the measuring cup, not pack it. Also, ensure you’re not overmixing the batter. Stir until just combined. How do I know when my muffins are done baking? To check if your muffins are done, insert a toothpick into the center. If it comes out clean, they’re ready. If there’s batter on the toothpick, bake for a few more minutes. Keep an eye on them to avoid overbaking. In this blog post, we explored how to create delicious pumpkin spice doughnut muffins. We highlighted the importance of fresh ingredients and offered allergen substitutions. You learned step-by-step instructions, from mixing the batter to cooling the muffins. We provided tips for perfect texture and ideas for flavor enhancements. Don't forget about variations like gluten-free or vegan options, and proper storage methods for freshness. With these insights, you can bake muffins that impress. Enjoy the process and share your tasty results!](https://foodishtalk.com/wp-content/uploads/2025/07/f4d7a2d8-e1c8-48b8-abb9-05ef66d41cbf.webp)
Are you ready for the ultimate fall treat? Pumpkin Spice Doughnut Muffins are a delicious blend of soft muffins and
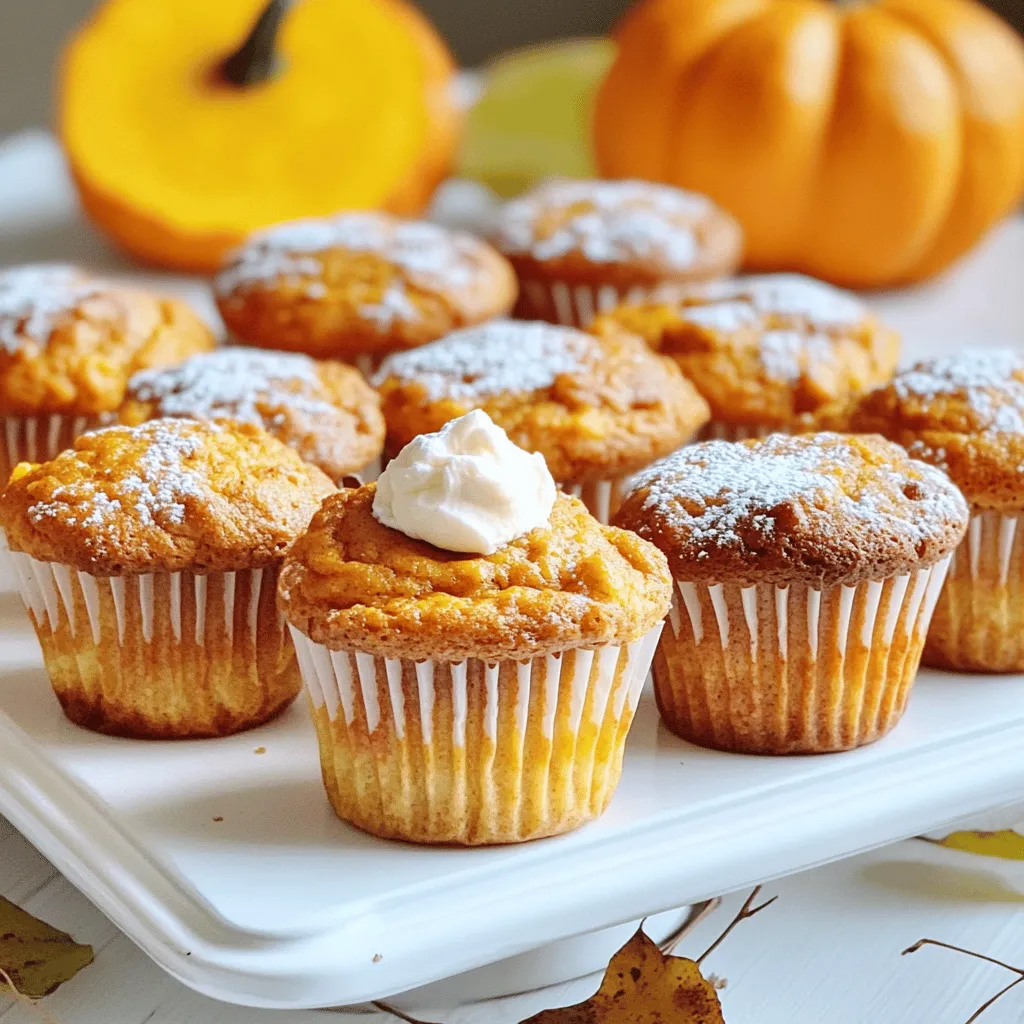
Fall is here, and that means it’s time to enjoy warm, tasty treats! I’m excited to share my Pumpkin Cheesecake
![- 1 cup canned pumpkin puree - 1/2 cup vegetable oil - 1/2 cup brown sugar - 1/2 cup granulated sugar - 2 large eggs - 1 teaspoon vanilla extract - 1 1/2 cups all-purpose flour The base of these muffins starts with canned pumpkin puree. It gives the muffins their rich flavor and moist texture. The vegetable oil adds softness and helps the muffins rise. Brown sugar and granulated sugar bring sweetness to the mix. Eggs bind everything together, while vanilla extract adds a warm, inviting aroma. All-purpose flour is the main structure. - 1 teaspoon baking powder - 1 teaspoon baking soda - 1 teaspoon ground cinnamon - 1/2 teaspoon ground nutmeg - 1/4 teaspoon ground ginger - 1/4 teaspoon salt Next, we need some baking essentials. Baking powder and baking soda create the perfect lift. Cinnamon, nutmeg, and ginger add a cozy spice flavor. Salt balances all the sweet notes, enhancing the overall taste. - 1/2 cup chopped walnuts or pecans - 1/4 cup chocolate chips For a twist, consider optional add-ins. Chopped walnuts or pecans provide a crunch. Chocolate chips add a sweet surprise in every bite. Feel free to mix and match these add-ins based on your tastes. You can find the complete list and instructions in the [Full Recipe]. - Preheat oven to 350°F (175°C). - Line muffin tin with paper liners or grease. - In a big bowl, combine pumpkin puree, vegetable oil, brown sugar, and granulated sugar. - Whisk until smooth and creamy. - Add in the eggs one at a time, mixing well. Then add vanilla extract. - In a different bowl, whisk together flour, baking powder, baking soda, and spices. - Gradually mix into the pumpkin mixture. Stir gently to avoid overmixing. - If you want, fold in chopped walnuts or chocolate chips. - Scoop batter into muffin tin, filling each cup about 3/4 full. - Bake for 18-20 minutes. A toothpick should come out clean from the center. You can find the full recipe with detailed steps and additional tips for these tasty muffins. To make your muffins light and fluffy, avoid overmixing the batter. Mix just until you see no dry flour. This keeps the muffins tender. Use room temperature ingredients for better mixing. Cold eggs or oil can slow down the process. You can boost the flavor by adding spices like allspice or clove. A pinch adds warmth. For a bright twist, add zest from an orange or lemon. This gives a fresh taste and lifts the pumpkin flavor. Serve your muffins warm. A light dusting of powdered sugar makes them look special. You can also top them with cream cheese frosting for richness. Garnish with extra cinnamon or chopped nuts for a nice touch. These simple steps make a big difference in how your muffins look and taste. {{image_2}} To make these muffins gluten-free, simply replace all-purpose flour with a gluten-free flour blend. Most blends work well and give a nice texture. Look for one that contains xanthan gum, as it helps with structure. For a vegan option, swap the eggs for flaxseed meal or applesauce. Mix 1 tablespoon of flaxseed meal with 2.5 tablespoons of water to replace one egg. Use plant-based oils like coconut oil or vegetable oil. For sweeteners, choose sugars that are vegan-friendly, like brown sugar or maple syrup. You can add a teaspoon of vanilla extract for extra depth. Maple syrup also adds a sweet twist. If you want to mix things up, try incorporating dried fruits like cranberries or raisins. These fruits bring natural sweetness and a chewy texture to your muffins. Feel free to explore these variations to make the pumpkin muffins truly yours! For the full recipe, check out the main article. To keep your pumpkin muffins fresh, place them in an airtight container. Store them at room temperature for a few days. If you want them to last longer, put them in the fridge. This will help keep them moist and tasty. If you have extra muffins, freezing is a great option. Wrap each muffin tightly in plastic wrap. Then, wrap them again in foil. Finally, store them in freezer-safe bags. They can last for up to 3 months this way. Just label the bags so you remember when you made them! When you’re ready to enjoy a muffin, you can warm it up. Use the microwave for a quick heat. If you prefer the oven, preheat it to 350°F (175°C) and warm the muffin for 5-10 minutes. For an extra kick of flavor, sprinkle some cinnamon sugar on top before serving. You can use fresh pumpkin puree instead of canned. Here’s how: - Start with a small pumpkin. Cut it in half and remove the seeds. - Roast the pumpkin halves in the oven at 350°F (175°C) for about 45 minutes. - Scoop out the soft flesh and blend it until smooth. - Use this fresh puree in your recipe, just like you would use canned pumpkin. This fresh puree adds a nice flavor and is fun to make. Yes, you can use different types of sugar! Here are some options: - Coconut sugar gives a unique taste and is less processed. - Maple syrup adds a lovely sweetness and natural flavor. - Honey can work too, but use less since it is sweeter. Just adjust the amount to keep your muffins sweet but not too wet. Dense muffins can happen for a few reasons: - Overmixing the batter is a common cause. Mix until just combined. - Using too much flour can also make them heavy. Measure carefully. - Not enough leavening agents like baking powder can lead to density. To avoid this, follow the recipe closely and mix gently. You can check if your muffins are done with these tips: - Insert a toothpick into the center of a muffin. If it comes out clean, they are ready. - Look for a nice golden-brown color on top. - The muffins should spring back when lightly pressed. These simple checks help ensure perfect muffins every time. You can easily make mini pumpkin muffins! Just follow these steps: - Use a mini muffin tin instead of a regular one. - Fill each cup about halfway with batter. - Bake for about 10-12 minutes, checking for doneness with a toothpick. Mini muffins are great for snacks or parties, and they bake faster! For more detailed instructions and a full recipe, check the Full Recipe. In this blog post, we explored how to make delicious pumpkin muffins. We covered main ingredients, baking essentials, and optional add-ins. I shared step-by-step instructions to guide you through baking. You learned tips for the perfect texture and flavor variants. Don't forget to try out storage options for freshness! Now, you can enjoy these tasty muffins any time. Happy baking!](https://foodishtalk.com/wp-content/uploads/2025/07/91423a12-68cd-4cac-8d7c-8e7d0d0a4da2.webp)
Pumpkin muffins are a delightful fall treat, and I’m here to share my top recipe with you! Packed with warm
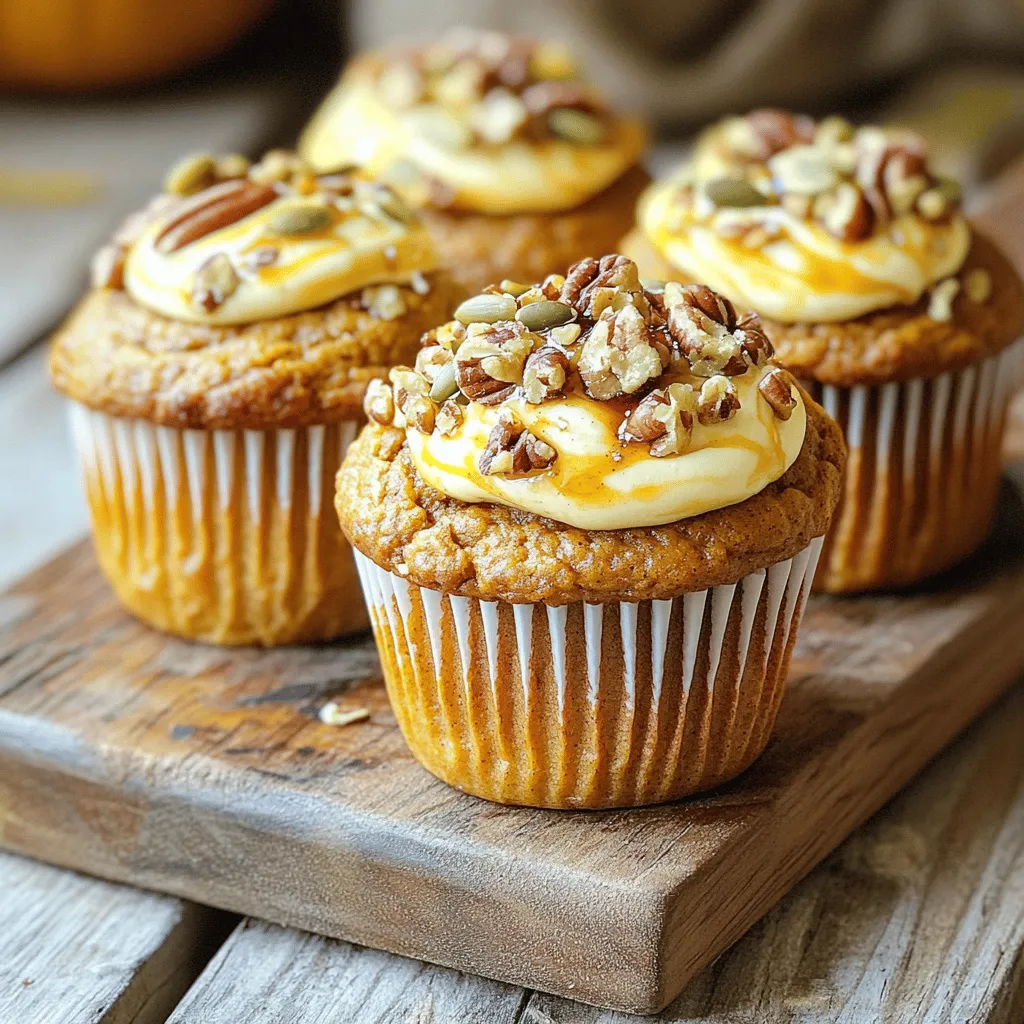
Fall is here, and what better way to celebrate than with a cozy treat? These Gluten-Free Pumpkin Cream Cheese Muffins
![- 1 pound pizza dough (store-bought or homemade) - 4 tablespoons unsalted butter, melted - 4 cloves garlic, minced - 1/2 cup grated Parmesan cheese - 1 teaspoon dried Italian herbs (oregano, basil, thyme) - 1/4 teaspoon red pepper flakes (optional) - Salt, to taste - Fresh parsley, chopped (for garnish) Gathering the right ingredients makes cooking fun and easy. For the main part, you need pizza dough. You can buy this at the store or make your own if you prefer. Next, grab some unsalted butter. We will melt it to add a rich flavor. Garlic is key for this dish, so use four cloves, minced. And don’t forget the Parmesan cheese! You need half a cup to give those knots their cheesy goodness. Now, let’s add some additional flavorings. Dried Italian herbs will bring a nice touch. A teaspoon of herbs like oregano, basil, and thyme works well. If you like a kick, add a bit of red pepper flakes, about a quarter teaspoon. Don’t forget to season with salt to taste. Finally, chop up some fresh parsley for a lovely garnish. This combination of ingredients creates the perfect balance for Garlic Parmesan Knots. You can find the full recipe at the end of this section. - Preheat your oven to 425°F (220°C) and line a baking sheet with parchment paper. - On a floured surface, roll out the pizza dough into a rectangle, about 1/4 inch thick. - Cut the dough into strips, about 1 inch wide and 6 inches long. - Take each strip and tie it into a knot, tucking the ends underneath. Place each knot onto the prepared baking sheet. - In a small bowl, mix the melted butter, minced garlic, Italian herbs, red pepper flakes, and a pinch of salt. - Brush the garlic butter mixture generously over each knot until well coated. - Sprinkle the grated Parmesan cheese evenly over the knots. - Bake in the preheated oven for 12-15 minutes. Look for golden brown knots that have risen slightly. - Once done, remove them from the oven and let them cool for a few minutes. For a full recipe, check the Garlic Parmesan Knots section above. To make sure your knots are fluffy, use fresh pizza dough. If you're using store-bought dough, check the expiration date. A good rise depends on proper baking. Keep the oven at 425°F (220°C) for the best results. Avoid overbaking by keeping an eye on the knots. They should turn golden brown and puff slightly. If you leave them in too long, they can dry out. You can swap the Parmesan cheese for other cheeses, like mozzarella or provolone. This gives a new twist to the flavor. For a spicier kick, add more red pepper flakes than the recipe calls for. Try adding toppings like fresh basil or even sun-dried tomatoes. These can give each knot a unique taste. Garlic Parmesan knots go well with marinara sauce or ranch dressing. You can also serve them as a side with pasta dishes. To present them nicely, place the knots in a basket lined with a cloth. This keeps them warm and adds a nice touch. You can sprinkle some extra parsley on top for color. For the full recipe, check out the [Full Recipe]. {{image_2}} You can change the dough for Garlic Parmesan Knots. Use whole wheat pizza dough for a healthier twist. It adds a nutty flavor and a bit more fiber. Gluten-free pizza dough is another great choice. It makes this recipe friendly for those with gluten allergies. You can also try different bread bases. Use soft bread or even dough from your favorite rolls. Each option brings a unique taste and texture. Feel free to customize the flavor of your knots. You can add fresh herbs like rosemary or thyme. Mix in different cheeses like mozzarella or cheddar for a fun twist. If you love heat, try making spicy garlic parmesan knots. Just add more red pepper flakes to the garlic butter mix. This will give your knots a nice kick that pairs well with the garlic. Dipping sauces can elevate your Garlic Parmesan Knots. Marinara sauce is a classic choice. It offers a nice balance to the rich flavors of the knots. You can also serve them with garlic aioli for a creamy option. If you want to make your own sauce, try mixing mayonnaise, garlic, and lemon juice. This will add a bright and tangy flavor. Don't be afraid to get creative with your dips! To store Garlic Parmesan Knots, let them cool first. Place them in an airtight container. You can also wrap them in plastic wrap. Keep them in the fridge for up to three days. For longer storage, try freezing them. Wrap each knot in foil or freezer-safe bags. They can last for up to three months in the freezer. Best practices include avoiding moisture. Moisture can make them soggy. Always ensure the knots are cool before sealing. This method keeps them fresh and tasty. When you want to eat your leftovers, reheating is key. The best method is to use the oven. Preheat your oven to 350°F (175°C). Place the knots on a baking sheet. Bake them for about 10 minutes. This method helps restore their crispness. You can also use a microwave for quick heating. Place a damp paper towel over the knots. Heat them for about 20-30 seconds. This keeps them soft but may not crisp the outside. Always check to avoid overheating. Enjoy your Garlic Parmesan Knots just like new! Garlic Parmesan knots stay fresh for about 2 to 3 days. Store them in an airtight container. They may lose some crispness but will still taste great. You can also reheat them to bring back some texture. Yes, you can freeze Garlic Parmesan knots. Place them in a freezer-safe bag or container. They stay good for up to 3 months. To use them, thaw in the fridge overnight and reheat in the oven. These knots pair well with many dishes. You can serve them with marinara sauce for dipping. They also go great with pasta, salads, or soups. Their flavor complements Italian meals perfectly. To prepare Garlic Parmesan knots ahead, follow the steps up to baking. Place the knots on the baking sheet and cover them. You can keep them in the fridge for up to 24 hours. Bake them when ready to serve for fresh, warm knots. Absolutely! You can mix in other cheeses. Mozzarella, cheddar, or even feta can work well. Each cheese adds its own unique flavor. Feel free to experiment and find your favorite combination. For the full recipe, check out the Garlic Parmesan Knots section. In this post, we explored how to make Garlic Parmesan Knots. You learned about key ingredients like pizza dough, butter, and garlic. The step-by-step guide helped you shape and bake the knots to perfection. I shared tips for great texture and delicious flavors. You also discovered how to store leftovers and consider variations. Take a moment to try these knots at home. They make a great snack or side dish. Enjoy the process and make it your own!](https://foodishtalk.com/wp-content/uploads/2025/07/5a2b17ae-3375-4436-8aab-ed4e7a776979.webp)
Are you ready to impress with a simple yet mouthwatering treat? Garlic Parmesan Knots are the perfect snack or side
![To make Honey Garlic Chicken Bites, you need simple and fresh items. Here are the must-have ingredients: - 1 pound boneless, skinless chicken breasts, cut into bite-sized pieces - 1/2 cup honey - 1/4 cup soy sauce (low sodium) - 3 cloves garlic, minced - 1 tablespoon fresh ginger, grated - 1 tablespoon sesame oil - 1 tablespoon rice vinegar - 1 teaspoon cornstarch mixed with 1 tablespoon water (for thickening) - Salt and pepper to taste - Sesame seeds (for garnish) - Chopped green onions (for garnish) Each ingredient plays a role. The chicken gives protein, while honey adds sweetness. Soy sauce adds saltiness and umami. Garlic and ginger boost flavor, while sesame oil gives a nutty taste. You can make the sauce stand out with a few tweaks. Try these ideas: - Add chili flakes for heat. - Use maple syrup instead of honey for a different sweetness. - Mix in orange juice for a citrus twist. - Try balsamic vinegar for a richer flavor. These changes can make the dish your own. Adjust based on your taste. Garnishes add color and texture to your dish. Here are my favorites: - Sesame seeds: They add crunch and look great. - Chopped green onions: They bring freshness and a mild onion flavor. - Fresh cilantro: It gives a bright touch to the dish. These garnishes enhance the look and taste of your Honey Garlic Chicken Bites. Enjoy adding them! For the complete recipe, check out the Full Recipe section. Start by making the marinade. In a medium bowl, mix the honey, soy sauce, minced garlic, grated ginger, sesame oil, and rice vinegar. Whisk them well until they blend into a smooth sauce. This step builds the flavor base for your chicken. Next, season the chicken pieces lightly with salt and pepper. Then, add the chicken to the bowl with the marinade. Toss to coat every piece well. Cover the bowl and let it sit in the fridge. Marinate for at least 30 minutes, or up to 2 hours for more flavor. The longer it sits, the better it tastes. When you are ready, heat a large skillet over medium-high. Once hot, add the marinated chicken pieces. Cook them for about 5 to 7 minutes. You want them golden brown and cooked through. Stir occasionally to ensure even cooking. After cooking, reduce the heat to low. Pour any leftover marinade from the bowl into the skillet. This will add more flavor to the chicken as it simmers. To thicken the sauce, stir in the cornstarch mixture. This is made by mixing 1 teaspoon of cornstarch with 1 tablespoon of water. Add it to the skillet and stir well. Cook for another 2 to 3 minutes until the sauce thickens. Keep stirring to avoid lumps. Once thickened, turn off the heat. Transfer the chicken bites to a serving dish. Drizzle the thickened sauce over the top for extra flavor. Don’t forget to garnish with sesame seeds and chopped green onions. This adds a nice touch and makes your dish more appealing. For the complete recipe, refer to the [Full Recipe]. Marinating your chicken is key for great taste. I suggest letting it soak for at least 30 minutes. If you have time, aim for two hours. This helps the flavors soak in deeply. Try to keep the marinade cold while the chicken rests. For extra flavor, you can add a splash of citrus juice. Both skillet and oven methods work well for this dish. The skillet gives you a nice sear and quick cooking time. It takes about 5-7 minutes on medium-high heat. If you choose the oven, preheat it to 400°F. Bake the chicken for about 20-25 minutes until cooked through. Either way, you will enjoy tasty bites. Avoid skipping the marinating step. This can make your chicken bland. Also, don’t overcrowd the skillet. This can lead to steaming instead of browning. If you use the oven, check the chicken a few minutes early. Overcooked chicken can be dry. Lastly, remember to thicken the sauce. Use the cornstarch mixture to get that perfect glaze. For more details on making this dish, check the Full Recipe. {{image_2}} You can switch chicken for other proteins to mix things up. Tofu is a great option for a vegetarian twist. Use firm tofu, cut it into bite-sized cubes, and follow the same steps. Shrimp also works well. You can cook shrimp in just a few minutes. They soak up the honey garlic sauce nicely, giving you a new flavor. While honey garlic sauce is a star, other sauces can shine too. Try a teriyaki sauce for a sweet, soy-rich flavor. A spicy Szechuan sauce will add a nice kick if you enjoy heat. You can also use a sweet chili sauce for a different sweet-spicy balance. Mixing sauces can create unique tastes for your chicken bites. These bites pair well with several sides. Serve them over rice to soak up the tasty sauce. Steamed veggies like broccoli or snap peas add color and crunch. You could also try a fresh salad for a light meal. For a fun twist, serve them in lettuce wraps for a crunchy bite. Each of these side options enhances the meal and makes it even more enjoyable. Check the [Full Recipe] for more tips and details! To keep your honey garlic chicken bites fresh, store them in an airtight container. Make sure the chicken cools down first. Place it in the fridge if you plan to eat it within three days. For longer storage, consider freezing. When you are ready to enjoy your leftovers, reheat them gently. Use a skillet over medium heat for the best results. Add a splash of water or broth to keep the chicken moist. Stir it often until warmed through. You can also use a microwave. Heat in short bursts to avoid overcooking. You can freeze honey garlic chicken bites for up to three months. Place them in a freezer-safe bag, removing as much air as possible. When you're ready to eat, thaw in the fridge overnight. Reheat thoroughly before serving. The honey garlic flavor will still shine! For the full recipe, refer back to the earlier section. You should marinate the chicken for at least 30 minutes. This lets the flavors soak in well. If you have more time, marinating for up to 2 hours deepens the taste even more. I find that this time really makes a difference in flavor. Yes, you can use other meats! Chicken thighs work great for a juicier bite. You can also try pork or shrimp. Just adjust the cooking time to ensure they are cooked through. I recommend cutting the meat into similar sizes for even cooking. Absolutely! Look for gluten-free soy sauce, often labeled as tamari. It has a similar taste and works just as well. This way, you can enjoy the same great flavor without the gluten. Yes, you can prep the chicken and marinade ahead of time. Just keep the marinated chicken in the fridge until you're ready to cook. This makes it a great weeknight meal option. I love pairing these bites with steamed rice or quinoa. You can also serve them with stir-fried veggies for a balanced meal. It’s all about what you enjoy! If you like some heat, add red pepper flakes to the marinade. You can also use sriracha for a spicy kick. Just start with a little and taste as you go. Store any leftovers in an airtight container in the fridge. They will stay fresh for about 3 to 4 days. Reheat them in the microwave or on the stove for a quick meal. Yes, you can freeze them! Place them in a freezer-safe container. They can last up to 3 months. Just thaw in the fridge before reheating. This gives you a quick meal option for busy nights. Yes! Kids often enjoy the sweet and savory flavors. The chicken bites are easy to eat and fun to dip in extra sauce. You can get creative with sides to make it more appealing for kids. To make Honey Garlic Chicken Bites, start with the right ingredients and flavors. Use a tasty marinade to boost your chicken's taste. Follow the steps carefully for cooking and thickening the sauce. Try different proteins and sauces for fun new twists. Store leftovers well, and reheat them for another meal. These bites are easy to make and very tasty. Enjoy experimenting and creating your own version!](https://foodishtalk.com/wp-content/uploads/2025/07/ac40e309-7e4e-4638-ac08-e76996855c13.webp)
Looking for a quick and tasty meal? Honey Garlic Chicken Bites are perfect for busy weeknights! This dish is simple
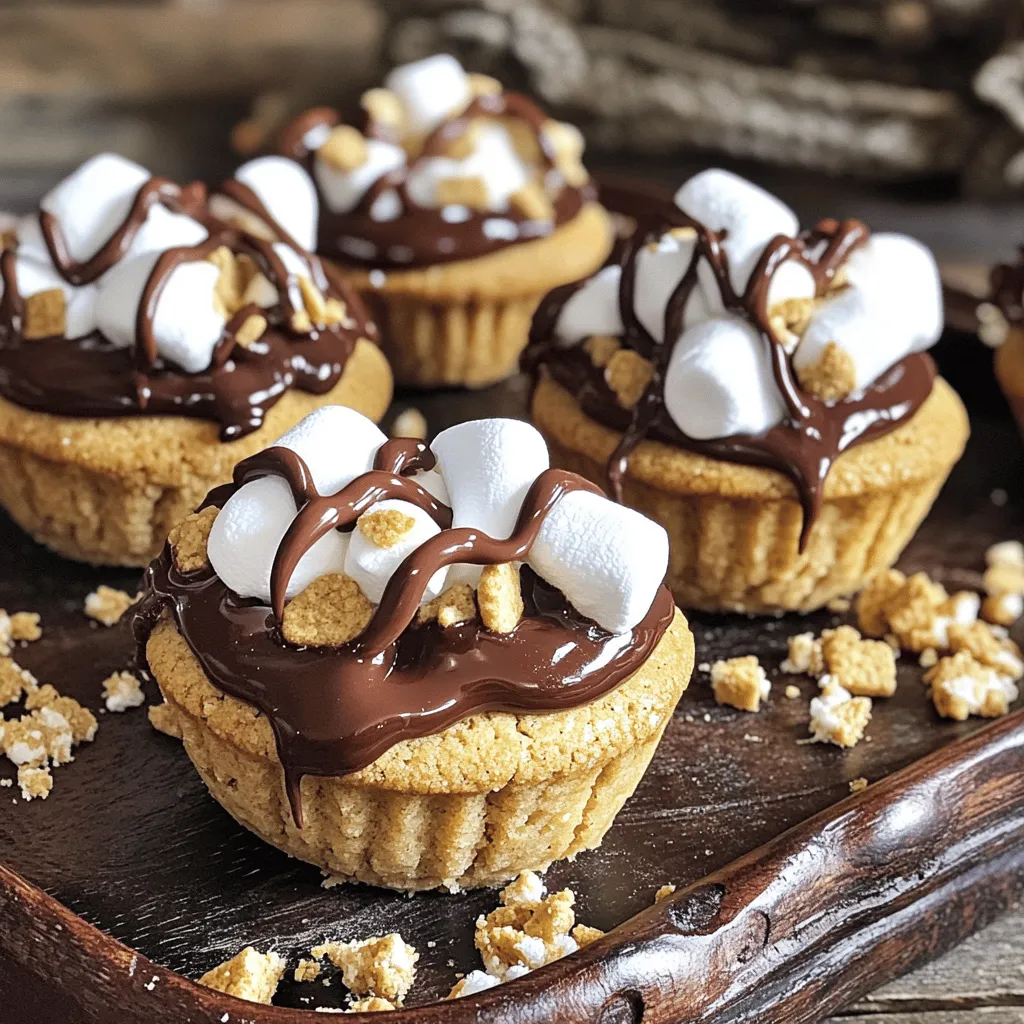
Are you craving a sweet treat that combines the classic flavors of s’mores with the fun of cookie cups? Look
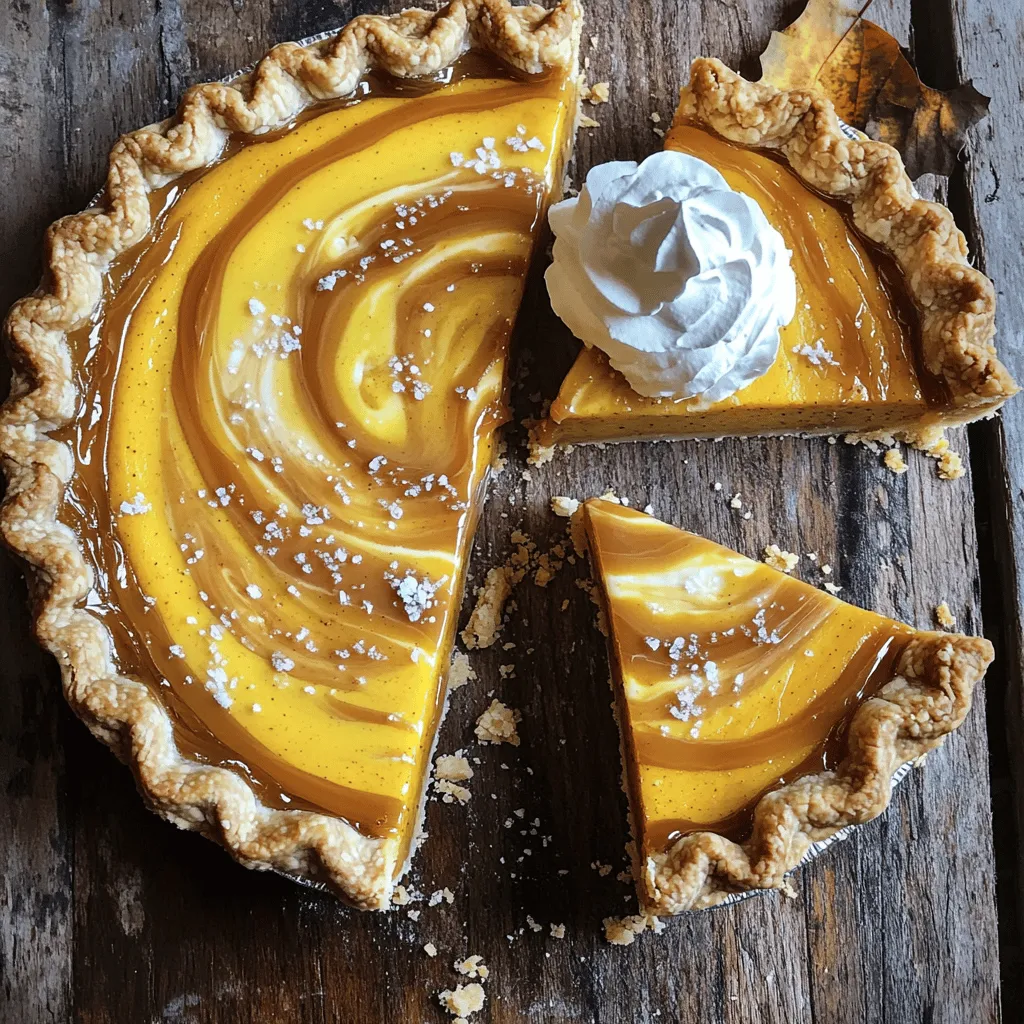
Looking for the perfect holiday dessert? Let me introduce you to my Salted Caramel Pumpkin Pie. Imagine creamy pumpkin filling,
