Skip to content
DisclaimerTerms Of UseGDPR PolicyCookie Policy

Foodish Talk

  • Home
  • Drinks
  • Appetizers
  • Dinner
  • Dessert
  • About
  • Contact
  • Privacy Policy
DisclaimerTerms Of UseGDPR PolicyCookie Policy

NO-ING-IMG

- 1 pound large shrimp, peeled and deveined - 2 tablespoons honey - 4 cloves garlic, minced - 1 tablespoon fresh ginger, minced - 2 tablespoons soy sauce (low sodium) - 1 tablespoon sesame oil - 1 red bell pepper, sliced - 1 cup snap peas - 1 carrot, julienned - 2 green onions, chopped - Sesame seeds for garnish - Cooked jasmine rice or quinoa for serving - Each serving has about 250 calories - Protein content is around 20 grams - Contains 30 grams of carbohydrates and 10 grams of fat Using these ingredients, you can create a vibrant and tasty dish that is quick to make. The shrimp provide protein, while the vegetables add crunch and color. The honey and garlic create a rich sauce that coats everything perfectly. If you want the full recipe, check it out [Full Recipe]. - Whisk together honey, garlic, ginger, and soy sauce in a bowl. - Heat sesame oil in a large skillet or wok over medium-high heat. - Sauté shrimp in the hot skillet for 2-3 minutes. Cook until they turn pink and opaque. - Remove shrimp from the skillet and set aside on a plate. - Add sliced bell pepper, snap peas, and julienned carrot to the skillet. - Stir-fry the vegetables for about 3-4 minutes. Cook until they are tender yet still crisp. - Return the shrimp to the skillet. Pour the honey garlic mixture over the shrimp and vegetables. - Stir everything together and cook for an additional 2 minutes. This allows the sauce to thicken slightly. - Remove from heat and stir in chopped green onions. Enjoy this delicious dish over cooked jasmine rice or quinoa. For the full recipe, check out the detailed instructions above. - To keep shrimp tender, cook them for just 2-3 minutes. - Avoid overcooking. They turn rubbery if cooked too long. - Pair shrimp with crunchy veggies like bell peppers and snap peas. - Carrots add a nice sweetness and color to your dish. - Want some heat? Add red pepper flakes or a dash of sriracha. - Balance sweetness with soy sauce. This brings out deep flavors. - Taste as you cook. Adjust honey or soy sauce to suit your taste. - Serve the stir fry over fluffy jasmine rice or quinoa. - Use a shallow bowl for a nice presentation. - Top with sesame seeds for a pop of crunch. - Add chopped green onions for color and freshness. For the complete recipe, check the Full Recipe section. {{image_2}} If you want to switch things up, you can use chicken instead of shrimp. Just cut the chicken into bite-sized pieces. Cook it the same way as the shrimp. Tofu is another great option. Use firm tofu, and cut it into cubes. Sauté it until golden brown. Both options add unique flavors and textures. Seasonal vegetables work great in this dish. Try adding bell peppers, zucchini, or asparagus. All these add color and crunch. If you're watching carbs, use cauliflower rice instead of jasmine rice. It’s a healthy swap that still fills you up. You can also throw in broccoli or bok choy for a nice twist. You can give the sauce a new taste by adding different herbs or spices. Fresh basil or cilantro adds brightness. A pinch of red pepper flakes gives it heat. For a healthier option, use low-sodium soy sauce or coconut aminos. They cut down on salt without losing flavor. For a sweet twist, add a splash of orange juice to the sauce. This adds a fresh, fruity note. Check out the Full Recipe for more details on making this dish your own! To store leftovers, let the honey garlic shrimp stir fry cool first. Place it in an airtight container. This will keep it fresh for later meals. I recommend using glass containers for better heat retention. They also help reduce odors in your fridge. If you want to freeze your shrimp stir fry, use a freezer-safe bag. Press out as much air as possible before sealing. This helps prevent freezer burn. To reheat frozen shrimp stir fry, thaw it in the fridge overnight. Then, heat it in a skillet over medium heat until hot, stirring often. In the fridge, this dish lasts about three days. Look for signs of spoilage, like a sour smell or off-color shrimp. If you see any of these signs, it's best to throw it away. Always trust your senses when checking food freshness. You can serve this dish with several sides. Here are some great options: - Steamed jasmine rice - Quinoa for a healthy twist - Fried rice for extra flavor - A simple green salad - Crunchy spring rolls These sides balance the sweet and savory flavors of the shrimp stir fry. Yes, you can use frozen shrimp. Just follow these steps: 1. Thaw the shrimp overnight in the fridge. 2. Alternatively, place them in cold water for about 30 minutes. 3. Pat them dry before cooking. Using frozen shrimp saves time and is often just as good as fresh. You can easily adjust the sauce for more flavor. Here are some ideas: - Add red pepper flakes for heat. - Try lime juice for tanginess. - Mix in fresh herbs like cilantro or basil. - Use less honey for a less sweet flavor. These tweaks let you create a sauce that fits your taste perfectly. For the full recipe, check out the section above. This blog post covered a simple and tasty Honey Garlic Shrimp Stir Fry. We explored key ingredients like shrimp, honey, and fresh veggies. Step-by-step instructions guide you through cooking shrimp and stir-frying vegetables. I shared tips for tender shrimp and flavor hints for your dish's unique touch. With these ideas, you can enjoy this meal any time. Feel free to customize or store leftovers to enjoy later. Cooking can be fun, and this dish shows how easy it can be to create something special. Enjoy your cooking journey!

Honey Garlic Shrimp Stir Fry Quick and Easy Recipe

Are you ready to whip up a delightful dish in no time? This Honey Garlic Shrimp Stir Fry recipe is

- 2 lbs beef chuck, cut into 1-inch cubes - 4 medium carrots, sliced - 3 medium potatoes, diced - 1 large onion, chopped - 3 cloves garlic, minced - 4 cups beef broth - 2 tablespoons tomato paste - 1 teaspoon dried thyme - 1 teaspoon dried rosemary - Salt and pepper to taste - 2 tablespoons olive oil - 2 tablespoons Worcestershire sauce - 2 tablespoons cornstarch (for thickening) - 2 tablespoons water (for thickening) To make this beef stew, you need: - Instant Pot - Cutting board - Knife - Measuring cups and spoons - Mixing bowl (for thickening) Gather these ingredients and tools before you start cooking. The key to a great stew is in the prep work. You want to have everything ready to go. This recipe allows for some fun twists. You can swap in your favorite veggies or spices. The Full Recipe gives you a step-by-step guide to make this hearty dish. To start, turn on your Instant Pot and select the sauté function. Once the pot is hot, add two tablespoons of olive oil. Season two pounds of beef chuck, cut into one-inch cubes, with salt and pepper. Sear the beef in batches until brown on all sides. This step adds flavor. Remove the beef and set it aside on a plate. Now, in the same pot, add one large chopped onion and three minced garlic cloves. Cook these for about three to four minutes. Stir until they soften and smell great. This step builds the base flavor for your stew. Next, add four sliced medium carrots and three diced medium potatoes to the pot. Mix them well with the onions and garlic. Then, add two tablespoons of tomato paste and two tablespoons of Worcestershire sauce, if you like. Pour in four cups of beef broth. Scrape the bottom of the pot to lift any tasty bits. Finally, return the seared beef to the pot and add one teaspoon each of dried thyme and dried rosemary. Close the lid of the Instant Pot and set the valve to sealing. Select the manual or pressure cook setting and cook on high pressure for 35 minutes. This time allows the flavors to blend and the beef to become very tender. When the cooking time is up, let the pot release pressure naturally for ten minutes. Then, switch the valve to venting to release any leftover steam. If you want a thicker stew, mix two tablespoons of cornstarch with two tablespoons of water to make a slurry. Select the sauté function again and stir in the slurry. Cook for about three to five minutes until the stew thickens to your liking. Taste your stew and add more salt or pepper if needed. Serve it warm in hearty bowls, and garnish with fresh chopped parsley. Pair it with crusty bread for a cozy meal. For the full recipe, check out the earlier section. Enjoy your delicious Instant Pot beef stew! To make your beef stew burst with flavor, start with good meat. Use beef chuck for tenderness. Sear the beef until it has a nice brown crust. This step adds a deep flavor to the stew. Don't skip the garlic and onion; they add great taste. Use fresh herbs like thyme and rosemary for a rich aroma. If you want a softer stew, cook it longer. For more bite, stick to the 35 minutes. Remember, different cuts of beef may need different times. If you use a lean cut, reduce the pressure cooking time. Always check to see if the beef is fork-tender before serving. One common mistake is overcooking the beef. This can make it tough and dry. Also, don’t rush the sauté step. Proper browning is key. Avoid adding too much liquid at once; it can dilute the flavor. Finally, remember to release the pressure naturally for better texture. {{image_2}} You can swap beef for other meats. Chicken thighs work well in this stew. Pork shoulder adds a nice twist. Lamb brings a rich flavor. Always adjust cook time based on the protein you choose. For chicken, cook for 25 minutes. For pork, keep it at 35 minutes. To make this stew vegetarian, replace beef with mushrooms. Use vegetable broth instead of beef broth. Add lentils for protein and texture. You can also toss in chickpeas for extra heartiness. Season with soy sauce for depth. This keeps the dish tasty and filling. Feel free to change up the veggies. Sweet potatoes add a sweet touch. Green beans or peas bring color and freshness. Turnips or parsnips can give the stew a unique flavor. Just keep your favorite veggies in mind when cooking. You can mix and match to create your perfect stew. After enjoying your beef stew, let it cool down. Use a clean, airtight container for storage. It can stay in the fridge for up to three days. Make sure to label the container with the date. This helps you keep track of freshness. If you want to keep it longer, beef stew freezes well. Pour it into freezer-safe bags or containers. Leave some space at the top, as it will expand when frozen. It can last for about three months in the freezer. When you're ready to eat it, thaw it in the fridge overnight. To reheat, you can use a saucepan or the microwave. For the stove, pour the stew into a pot. Heat over medium until it bubbles. Stir it often to heat evenly. If using a microwave, place it in a bowl and cover it. Heat for two minutes, then stir. Check that it’s hot throughout before serving. You can keep beef stew in the fridge for about 3 to 4 days. Store it in an airtight container. Make sure it cools down before sealing. This way, it stays fresh and safe to eat. Yes, you can make beef stew ahead of time. It tastes even better after sitting. The flavors blend nicely when it rests. Just store it in the fridge and reheat when ready to serve. Beef stew pairs well with several sides. Here are some great options: - Crusty bread - Mashed potatoes - Rice - Green salad - Steamed vegetables These sides add texture and flavor to your meal. To thicken your beef stew, use cornstarch. Mix 2 tablespoons of cornstarch with 2 tablespoons of water. Stir this mixture into the stew while it's cooking. Let it simmer for a few minutes. This will give you a nice, thick stew. If you want a richer texture, use this method after cooking. You can find the full recipe with detailed steps for thickening in the previous sections. You now have a solid guide for making instant pot beef stew. We covered the key ingredients, cooking steps, and essential tips. I also shared fun variations and storage methods. Remember, practice makes perfect. Don’t fear small mistakes; they lead to great learning. Enjoy creating your stew and sharing it with friends or family. Cooking is more than just a meal; it's a way to connect. Happy cooking!

Instant Pot Beef Stew Savory and Quick Recipe

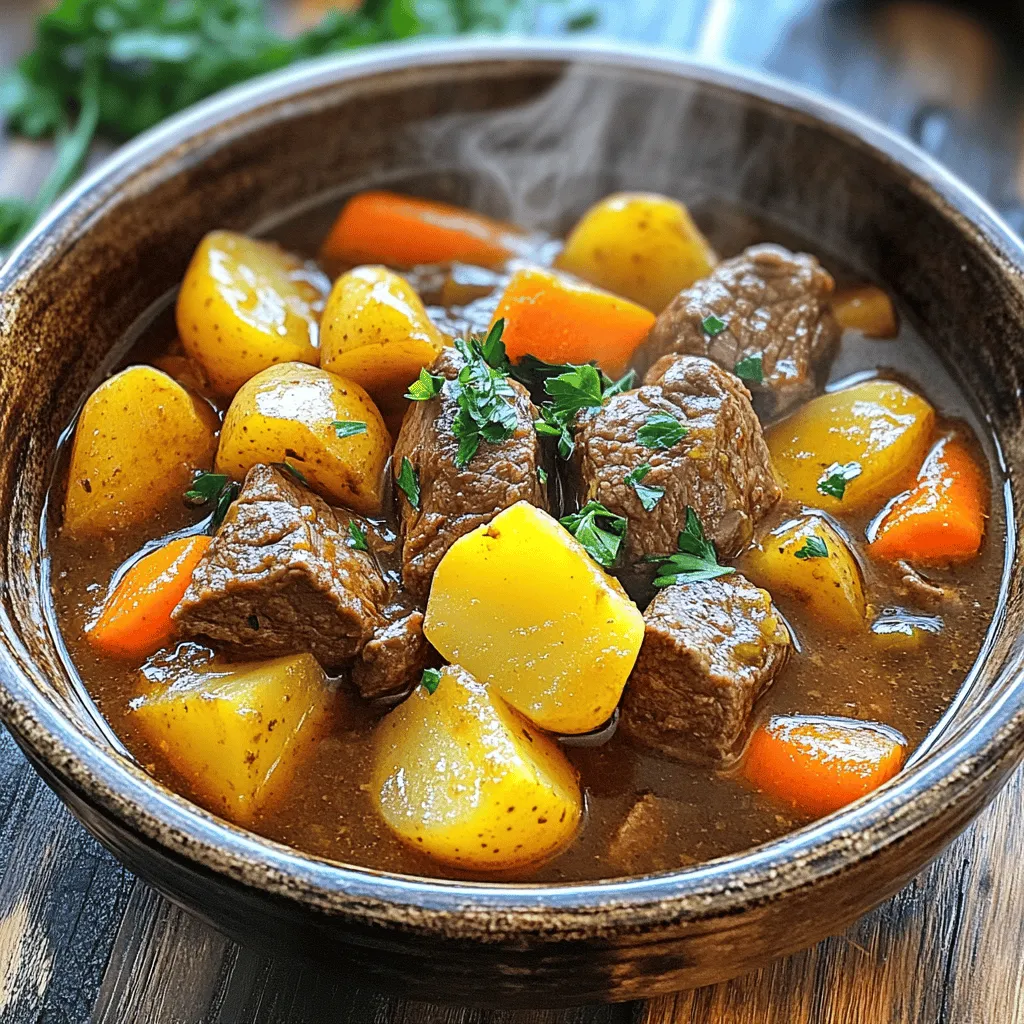
Looking for a hearty meal that cooks fast? This Instant Pot Beef Stew recipe is your answer. In just one

- 4 boneless, skinless chicken breasts - 4 cloves garlic, minced - 1 cup cherry tomatoes, halved - 1 cup spinach, fresh - 1 cup heavy cream - 1 cup chicken broth First, you need the chicken. The boneless, skinless chicken breasts cook evenly and stay juicy. Fresh garlic adds a strong flavor that makes the dish shine. The cherry tomatoes give a burst of sweetness when cooked. Spinach adds a nice color and nutrition to the meal. Heavy cream makes everything rich and smooth, while chicken broth adds depth. - 1 teaspoon Italian seasoning - ½ teaspoon red pepper flakes (optional) - Salt and pepper to taste - ¼ cup grated Parmesan cheese - Fresh basil for garnish Seasoning is key to great taste. Italian seasoning gives a warm, herbal flavor that pairs well with chicken. Red pepper flakes add a hint of heat, but you can skip them if you prefer mild. Salt and pepper enhance all the flavors. Grated Parmesan cheese brings a salty richness. Finally, fresh basil adds a pop of color and freshness to the dish. For the full recipe, check out the detailed steps. This will help you create a meal that's not just tasty but also visually stunning. To start, season your chicken breasts well. Use salt, pepper, and Italian seasoning. This mix makes the chicken flavorful. Make sure you cover both sides. This step is key for tasty chicken. Next, get your skillet ready. Heat the olive oil over medium-high heat. You want it hot but not smoking. Cook the chicken for about 6-7 minutes on each side. Look for a nice golden brown color. This means it’s cooked through. Once done, remove the chicken and set it aside. Now, it’s time to build flavor. In the same skillet, lower the heat to medium. Add the minced garlic and cherry tomatoes. Sauté them for 2-3 minutes. You want the tomatoes to soften but not fall apart. The garlic should smell great too. After that, return to your chicken. This step adds all the great flavors back into the dish. Now let's make that creamy sauce. Slowly pour in the chicken broth while stirring. This helps to mix it well. Then, add the heavy cream. Keep stirring until it simmers. To thicken the sauce, let it cook for a few minutes. You’ll notice it becoming creamier. If you want it thicker, cook it longer. This makes your sauce rich and delicious. For the full recipe, check out the details above. Enjoy making this creamy garlic Tuscan chicken! To ensure juicy and tender chicken, start with good seasoning. I like to use salt, pepper, and Italian seasoning. This enhances the chicken's natural flavors. Cook over medium-high heat for about 6-7 minutes on each side. This browning creates a nice crust. After cooking, let the chicken rest. Resting helps keep the juices inside, making it more tender. Want a creamier sauce? Just add more heavy cream. If you like some heat, mix in extra red pepper flakes. You can also experiment with the sauce. Try adding sun-dried tomatoes for a twist. For a different flavor, consider using coconut milk instead of heavy cream. This change gives a unique taste while keeping it creamy. Plating can make your dish more appealing. Use a large plate and place the chicken in the center. Spoon the creamy sauce around the chicken. Scatter the cherry tomatoes and spinach on top for a pop of color. For garnishing, sprinkle fresh basil over the dish. This not only adds flavor but also makes your meal look great. For the full recipe, check out the detailed instructions to make this delicious meal. {{image_2}} You can easily switch up the protein in this dish. Instead of chicken, try shrimp or tofu. Both options give a new twist. Shrimp cooks fast and adds a delightful taste. Tofu brings a great texture for a vegetarian option. When it comes to veggies, look at what’s in season. Fresh asparagus, zucchini, or bell peppers work well. These swaps keep your dish fresh and exciting. Changing up the herbs can make this dish your own. Basil, oregano, or thyme add unique flavors. If you like it spicy, throw in some smoked paprika or chili powder. You can also try using different cheeses. Feta or goat cheese brings a tangy flavor. Mozzarella melts beautifully and gives a creamy finish. For a gluten-free version, use gluten-free chicken broth. This keeps the dish safe for those with gluten issues. If you're looking for a dairy-free option, coconut cream works well. It gives a rich texture without dairy. Low-carb lovers can skip the heavy cream. Use cauliflower cream or almond milk instead. This keeps the dish light yet tasty. These variations allow you to enjoy Creamy Garlic Tuscan Chicken in new ways. For the full recipe, check the earlier section. To keep leftovers fresh, place them in an airtight container. This helps prevent moisture loss and keeps the flavors intact. Let the dish cool to room temperature before sealing it. Store Creamy Garlic Tuscan Chicken in the fridge for up to three days. If you plan to eat it later, check for any signs of spoilage. Yes, you can freeze Creamy Garlic Tuscan Chicken! First, let it cool completely. Then, transfer it to a freezer-safe container. Use heavy-duty plastic wrap or foil for extra protection. It stays fresh for up to three months in the freezer. When reheating, let it thaw overnight in the fridge. For best results, warm it on low heat in a skillet. Stir frequently to prevent sticking. You can also add a splash of chicken broth to keep it creamy. Enjoy your flavorful meal even after freezing! Cooking Creamy Garlic Tuscan Chicken takes about 30 minutes in total. - Preparation time: 10 minutes - Cooking time: 20 minutes You will spend time prepping the chicken and chopping garlic and tomatoes. Cooking the chicken takes about 14 minutes. You then make the sauce and finish cooking everything together. Yes, you can make this dish ahead of time. To meal prep, cook the chicken and sauce fully. Store them in a sealed container in the fridge for up to three days. When you reheat, do it slowly on low heat. Add a splash of cream for extra flavor. I love serving this dish with a few tasty sides. Here are some suggestions: - Steamed broccoli - Garlic bread - Pasta - Rice - A fresh green salad These sides balance the creamy sauce and add freshness to your meal. You can use frozen chicken breasts for this recipe, but be careful. Thaw them before cooking. It ensures even cooking and better texture. If you cook them from frozen, it will take longer, and the chicken may not brown well. Always check the internal temperature. It should reach 165°F to be safe. In this blog post, we explored how to make Creamy Garlic Tuscan Chicken. We covered essential ingredients, cooking steps, and tips for perfect chicken. You learned how to create a rich sauce and adjust flavors to your liking. Remember, proper seasoning keeps your chicken juicy. Feel free to experiment with ingredients and presentation. This dish is not only delicious but also easy to adapt. I hope you enjoy making it and impressing your family or friends!

Creamy Garlic Tuscan Chicken Flavorful Dinner Delight

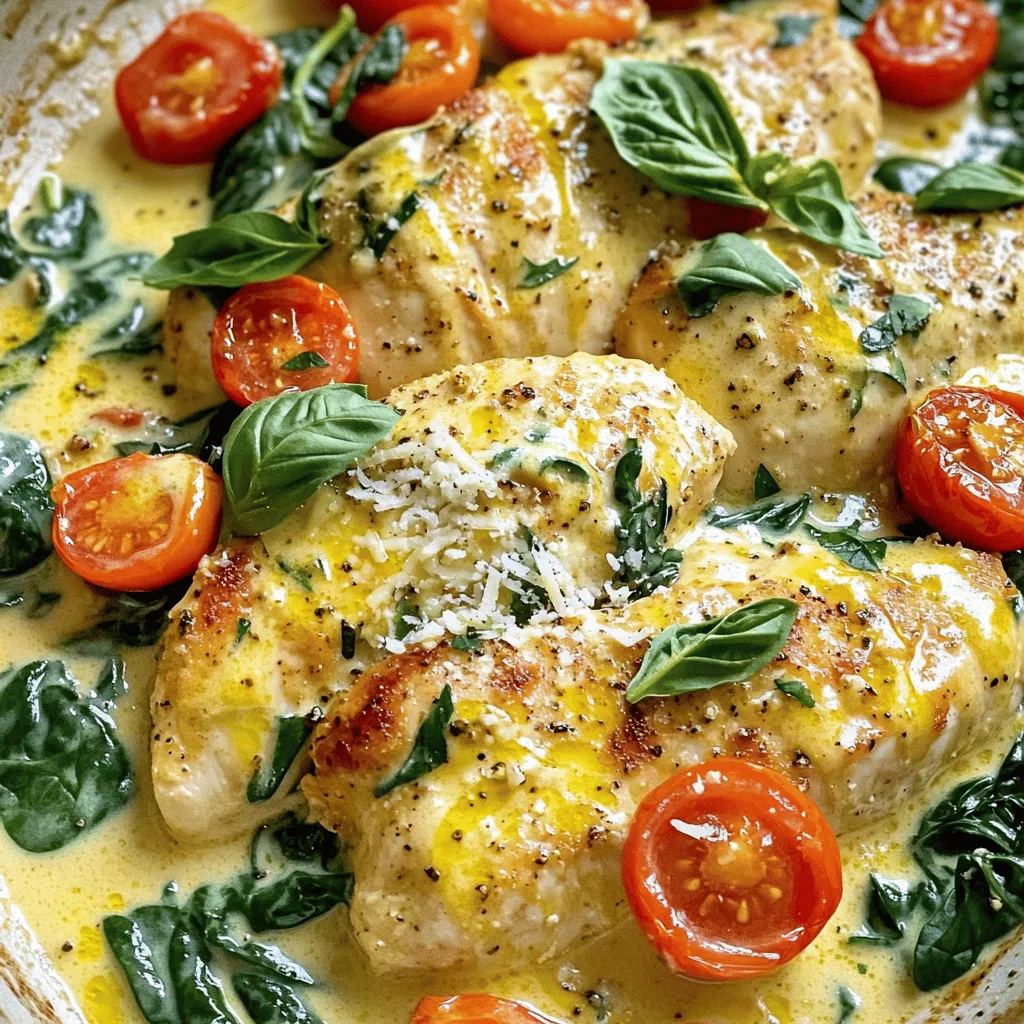
Are you ready to impress at dinner with a dish that’s both rich and flavorful? Creamy Garlic Tuscan Chicken is

- 4 medium cucumbers, thinly sliced - 1 small red onion, thinly sliced - 1 cup sour cream - 2 tablespoons apple cider vinegar The main ingredients bring a fresh taste to the salad. Choosing the right cucumbers is key. I love using thin-skinned varieties like English cucumbers. They are crisp and juicy. The red onion adds a nice color and a mild bite. Sour cream gives the salad its rich, creamy texture. Apple cider vinegar adds a tangy kick. This balance of flavors makes every bite enjoyable. - 2 tablespoons fresh dill, chopped - 1 tablespoon olive oil - 1 tablespoon sugar - Salt and pepper to taste You can customize your Polish cucumber salad with these extras. Fresh dill adds a fragrant note that works well. Olive oil gives it a richer taste. A little sugar can balance the vinegar’s tanginess. Salt and pepper enhance all the flavors. These optional garnishes help create a salad that suits your taste. You can find the full recipe above to help guide you through. Start by washing the cucumbers well. This removes any dirt or pesticides. Cut off both ends of each cucumber. Use a sharp knife or a mandolin to slice them thinly. Thin slices help the salad absorb the dressing better. For this task, a mandolin is great for even slices, but a knife works fine too. In a large bowl, combine the sliced cucumbers and thinly sliced red onions. Mix them gently to spread out the onions. In another bowl, whisk together the sour cream, apple cider vinegar, sugar, olive oil, salt, and pepper. Make sure everything is well blended. This dressing adds a creamy and tangy flavor to the salad. Now, pour the dressing over the cucumbers and onions. Toss everything together gently. You want to coat all the veggies with the dressing. Add the chopped fresh dill and mix again to combine the herbs. Taste the salad and adjust the seasoning if needed. Cover the bowl with plastic wrap and refrigerate it for at least 30 minutes. This resting time helps the flavors meld beautifully. Before serving, stir the salad again for an even mix. Enjoy your Polish cucumber salad! For the full recipe, check the earlier section. For a crunchy salad, pick the right cucumbers. I recommend using English cucumbers. They have fewer seeds and a thinner skin. Persian cucumbers are also great. They stay crisp and have a nice flavor. Look for firm cucumbers without soft spots. Freshness is key to a tasty salad. Balancing the sour cream and vinegar is important. I like to start with equal parts. You can add more vinegar for a tangy kick. If you prefer it creamier, add extra sour cream. Sweetness is also a matter of taste. Start with one tablespoon of sugar. You can add more if you like it sweeter. A pinch of salt and pepper will enhance all the flavors. Serve your Polish cucumber salad in a clear bowl. This lets the bright colors shine. A sprinkle of fresh dill on top adds a nice touch. You can also use cherry tomatoes for a pop of color. If you want, serve it with crusty bread. This makes for a great side dish at any meal. Enjoy your delicious creation! {{image_2}} Polish cucumber salad is fun to change. You can add different herbs to make it special. Try using parsley or chives for a fresh taste. Each herb gives a unique flavor. Including additional vegetables can also enhance your salad. You might add radishes or bell peppers. These colors and textures make the dish more exciting. You can even mix in tomatoes for a juicy bite. Making this salad vegan-friendly is easy. Swap sour cream with a plant-based option. You can use soy yogurt or cashew cream. Both give a creamy texture without dairy. If you want low-calorie options, cut the sour cream in half. Use Greek yogurt instead. This keeps the taste while making it lighter. You can also skip the sugar or use a sugar substitute. This keeps your salad fresh and flavorful without extra calories. For the full recipe, check out the Polish Cucumber Salad Delight 🥒. To keep your Polish cucumber salad fresh, use airtight containers. This keeps air out and helps prevent spoilage. Store the salad in the fridge right after making it. The cool temperature keeps the flavors bright and the cucumbers crisp. Polish cucumber salad stays fresh for about three days in the fridge. After that, the cucumbers may get soggy and lose their crunch. Check for any off smells or changes in color before eating. If it looks or smells bad, it’s best to toss it. I do not recommend freezing Polish cucumber salad. Freezing changes the texture of the cucumbers. They become mushy once thawed, and the salad will not taste as good. Enjoy it fresh for the best flavor experience. For the full recipe, check out the complete guide. Polish cucumber salad has deep roots in Polish culture. It is a staple dish that many families enjoy. This salad is often served at gatherings and holiday meals. It reflects the importance of fresh, local ingredients. Cucumber salad pairs well with many traditional Polish dishes. It showcases how simple ingredients can create a great flavor. The dish is a great way to celebrate the season's fresh produce. Yes, you can prepare Polish cucumber salad in advance. I recommend making it at least 30 minutes before serving. This allows the flavors to mix well. If you want to prepare it earlier, refrigerate it for a few hours. Just remember to stir it before serving. This salad is best enjoyed chilled. It can stay fresh for up to two days in the fridge. To make your salad creamier, you can adjust the dressing. Adding more sour cream will give it a thicker texture. You can also use Greek yogurt as a tasty alternative. Mixing in a bit of mayonnaise can create a rich flavor. For a lighter version, try using low-fat sour cream. Experiment with these options to find your perfect creaminess level. Enjoy the journey of creating your ideal Polish cucumber salad! You now know how to make a delicious Polish cucumber salad. We covered key ingredients, from crunchy cucumbers and tangy sour cream to optional herbs and seasonings. I shared tips for prepping and mixing the salad, ensuring great flavor. You can even make variations to suit your taste and dietary needs. Remember to store it properly to keep it fresh. Enjoy making this tasty dish that brings a bit of Polish culture to your table.

Polish Cucumber Salad Fresh and Flavorful Delight

Are you ready to dive into a delightful taste of Poland? In this article, I’ll guide you through making a

To make the ultimate sweet potato casserole, gather these ingredients: - 4 large sweet potatoes, peeled and cubed - 1/2 cup brown sugar - 1/4 cup maple syrup - 1/2 cup milk (or almond milk for a dairy-free option) - 1/3 cup unsalted butter, melted - 2 large eggs - 1 teaspoon vanilla extract - 1 teaspoon cinnamon - 1/2 teaspoon nutmeg - 1/4 teaspoon salt - 1 cup mini marshmallows - 1 cup pecans, chopped - 1/2 cup crushed graham crackers These ingredients create a blend of sweet and savory flavors. Sweet potatoes serve as the base, offering a rich, creamy texture. Brown sugar and maple syrup add warmth and sweetness. Milk helps blend everything smoothly. The eggs hold the mixture together, while vanilla, cinnamon, and nutmeg enhance the taste. For the topping, mini marshmallows provide a sweet crunch. Pecans add a nutty flavor, and crushed graham crackers give a delightful crunch. Together, these ingredients make a delicious side dish for your holiday feast. Want to see how to use them? Check out the Full Recipe for more details! - Preheat your oven to 350°F (175°C). Grease a 9x13 inch baking dish with butter. - In a large pot, bring water to a boil. Add the cubed sweet potatoes. Cook them for about 15-20 minutes. They should be tender when you pierce them with a fork. Drain and let them cool for a bit. - Once cool, place the sweet potatoes in a large mixing bowl. Mash them until they are smooth and creamy. - Now, add brown sugar, maple syrup, milk, melted butter, eggs, vanilla extract, cinnamon, nutmeg, and salt to the mashed sweet potatoes. - Mix everything until it is creamy and well blended. You want a nice, even texture. - Pour the sweet potato mixture into your prepared baking dish. Spread it evenly across the bottom. - In a separate bowl, mix the mini marshmallows, chopped pecans, and crushed graham crackers together. - Sprinkle this topping evenly over the sweet potato layer. - Bake in the preheated oven for 30-35 minutes. You want the topping to be golden brown and the casserole heated through. Follow the [Full Recipe] for all the details you need! - Tips for mashing sweet potatoes: Cook the sweet potatoes until they're very soft. This makes mashing easy. I like to use a potato masher for a smooth texture. If you want it extra creamy, try a hand mixer. - Recommended baking dish for even cooking: I always use a 9x13 inch dish for this casserole. It helps the sweet potatoes bake evenly and keeps the topping crisp. Make sure to grease it well so nothing sticks. - Ensuring the right topping texture: For a perfect topping, mix mini marshmallows, chopped pecans, and crushed graham crackers. This blend gives a nice crunch. Spread it evenly over the sweet potato mix before baking. - Best ways to present the casserole: Serve warm right from the baking dish for a cozy feel. A sprinkle of cinnamon or a drizzle of maple syrup adds a lovely touch. Place a few pecans on top for extra flair. - Pairing options for a complete meal: This casserole pairs well with savory dishes like roasted turkey or glazed ham. You can also serve it with green beans or a fresh salad for balance. - How to reduce sugar without sacrificing taste: Swap some of the brown sugar with mashed bananas or unsweetened applesauce. This adds natural sweetness and moisture without extra sugar. - Dairy-free modifications and alternatives: Use almond milk instead of regular milk. Coconut cream is a great substitute for butter. These changes make it dairy-free while keeping the taste rich and creamy. You can find the full recipe for the Ultimate Sweet Potato Casserole to try these tips at home! {{image_2}} You can easily elevate your sweet potato casserole with extra spices. Adding nutmeg or ginger gives warmth and depth. You can also consider mixing in fresh herbs like rosemary for a surprising twist. Another fun way to enhance the flavor is by incorporating fruits. Diced cranberries add a tart burst, while chopped apples bring sweetness and crunch. Both options can brighten up the dish and provide new textures. For a unique topping, try using walnuts or pecans instead of marshmallows. Chopped walnuts offer a nice crunch and a rich taste. You can even sprinkle chocolate chips for a sweet surprise. If you want a healthier option, consider using oatmeal or crushed nuts. These toppings can add fiber and keep the dish wholesome while still being delicious. Seasonal changes can inspire great variations. For fall, you can add pumpkin puree or roasted squash to your casserole. This gives a lovely color and taste that fits the season perfectly. For a tropical twist, mix in some shredded coconut or crushed pineapple. This fruity addition can make your casserole a fun, sunny treat, even in colder months. Feel free to explore these variations to make the Ultimate Sweet Potato Casserole your own. Check out the Full Recipe to get started! To store leftovers, let the casserole cool down first. Use an airtight container to keep it fresh. Glass or plastic containers work well. Make sure to cover it tightly. This method helps keep the flavors intact. You can store it in the fridge for up to three days. If you want to freeze the casserole, first cool it completely. Cut it into portions for easy thawing. Wrap each portion tightly in plastic wrap, then place them in a freezer bag. Remove as much air as possible. This will help prevent freezer burn. To thaw, move a portion to the fridge overnight. Reheat it in the oven at 350°F until warm. You can also use the microwave for quick reheating. In the refrigerator, the sweet potato casserole lasts about three days. If frozen, it stays good for up to three months. Always check for signs of spoilage. Look for an off smell, discoloration, or mold. If you see these signs, it's best to discard it. Enjoy the Ultimate Sweet Potato Casserole knowing it can last for your future meals! For the full recipe, check out the detailed instructions above. To make your sweet potato casserole creamy, mash the sweet potatoes well. Use a potato masher or a mixer for smoothness. Adding milk and melted butter helps too. Mix until the ingredients blend completely. You want a velvety texture, so take your time. If it feels too thick, stir in a bit more milk. Yes, you can prepare the casserole ahead of time. Make it the day before and store it in the fridge. Just cover it tightly with plastic wrap or foil. When you are ready to bake, remove it from the fridge and let it sit at room temp for 30 minutes. Then, bake as directed. This saves time on busy holidays. You can swap some ingredients for others. Use coconut milk instead of regular milk for a dairy-free option. Maple syrup can be replaced with honey or agave syrup. If you don’t have brown sugar, white sugar works too, but add a bit of molasses for flavor. You can also use other nuts if you don’t have pecans. Yes, this casserole is gluten-free. The main ingredients, like sweet potatoes and eggs, do not contain gluten. Just make sure to use gluten-free graham crackers for the topping. Always check labels to be sure, especially if you have allergies. You can use other types of potatoes, but sweet potatoes give the best flavor. If you want to try, use Yukon gold or red potatoes. They will change the taste and texture slightly. Remember to adjust the cooking time, as these potatoes may cook differently than sweet potatoes. This blog post detailed how to create a delicious sweet potato casserole. We covered the key ingredients, step-by-step preparation, and baking tips. You learned about flavor variations and clever storage methods. Remember, it’s all about finding your perfect balance of sweetness and flavor. Feel free to experiment with toppings and ingredients to match your taste. Enjoy making your casserole, and share it with family and friends!

Sweet Potato Casserole Delightful Holiday Side Dish

Looking for a perfect holiday side dish? Sweet potato casserole is not just a favorite—it’s a classic! With creamy sweet

To make Slow Cooker Garlic Butter Beef Bites, you need the right ingredients. Here’s what you will need: - 1 lb beef sirloin, cut into bite-sized pieces - 1/4 cup unsalted butter - 6 cloves garlic, minced - 1 teaspoon onion powder - 1 teaspoon smoked paprika - 1 teaspoon dried thyme - 1/2 teaspoon black pepper - 2 tablespoons soy sauce (low sodium) - Salt to taste - Fresh parsley for garnish These ingredients create a rich and savory flavor. The beef sirloin is perfect for tenderness. You can use unsalted butter for better control of salt. Garlic adds a wonderful aroma and taste. The spices like smoked paprika and thyme boost the flavor profile. Using low-sodium soy sauce helps keep the dish balanced. Fresh parsley is great for a final touch. For the full recipe, you can check the details above. Enjoy cooking and savor each bite! Start by prepping the beef sirloin. Cut it into bite-sized pieces, about one inch each. This will help them cook evenly. Next, mince the garlic. You will need six cloves for a rich flavor. Now, let’s melt the butter. Pour a quarter cup of unsalted butter into a large skillet over medium heat. Once it melts, add the minced garlic. Sauté the garlic for one to two minutes. It should smell great, but keep an eye on it. You don’t want it to burn. Next, sear the beef in the skillet. Add the beef pieces and cook for about three to four minutes. Make sure to brown them on all sides. This step adds a lot of flavor to the beef. After searing, combine the beef and seasonings in the slow cooker. Add onion powder, smoked paprika, dried thyme, black pepper, and soy sauce. Stir well to coat the beef evenly with the spices. Pour the melted garlic butter mixture over the beef in the slow cooker. This adds moisture and flavor. Cover the slow cooker and set it to cook. You can choose to cook on low for six hours or on high for three hours. The beef will be tender and full of flavor when done. Once the cooking time is up, taste the beef bites. Adjust seasoning if needed. You can add a bit of salt or more spices to fit your taste. For serving, dish out the beef bites in a rustic wooden bowl. Drizzle some cooking juices over them for extra flavor. Garnish with fresh parsley for a touch of color. Pair these bites with crusty bread or creamy mashed potatoes. Enjoy your delicious Slow Cooker Garlic Butter Beef Bites! You can find the Full Recipe for even more details. Searing beef is key for flavor. It adds a rich, brown crust. This crust holds juices and boosts taste. For the best cuts, look for sirloin, ribeye, or tenderloin. These cuts are juicy and tender when cooked right. You can add herbs and spices for extra flavor. Try rosemary or oregano to mix things up. You can also use different types of garlic. Roasted garlic gives a sweet, rich taste. Fresh garlic has a sharp, vibrant kick. Slow cooking and pressure cooking are great options. Slow cooking brings out deep flavors and makes beef tender. Pressure cooking saves time but can change the texture a bit. If you cook on the stovetop, keep an eye on the heat. Cook it low and slow, stirring often. For the full recipe, check the earlier sections. Enjoy your cooking! {{image_2}} You can easily swap some ingredients in this recipe. If you want a lower sodium option, use coconut aminos instead of low-sodium soy sauce. This swap keeps the dish flavorful and is perfect for those watching their salt intake. For butter, you can use ghee or olive oil. Ghee gives a rich taste, while olive oil adds a lighter flavor. For a gluten-free version, choose gluten-free soy sauce. Many brands offer this option. This change ensures everyone can enjoy the dish without worry. If you follow a keto diet, you can skip the soy sauce entirely. Replace it with more spices or a low-carb sauce to keep it tasty and friendly for your diet. When it comes to serving, think beyond the plate. You can serve these beef bites in tacos or bowls. Add toppings like avocado, sour cream, or salsa for extra flavor. For sides, crusty bread or creamy mashed potatoes work wonderfully. Both options soak up all the tasty juices from the beef. Don't forget to check out the Full Recipe for more ideas! To keep your Slow Cooker Garlic Butter Beef Bites fresh, store them in a sealed container. Refrigerate them within two hours of cooking. Use glass or plastic containers with tight lids. These will help keep the beef juicy and flavorful. The beef bites can last in the fridge for up to three days. Just remember to cool them before sealing to avoid steam buildup. When you're ready to enjoy leftovers, the best way to reheat is gently. You can use a microwave or a skillet. If using a microwave, heat on medium power for 1-2 minutes. Stir halfway to ensure even heating. For the skillet, add a splash of water or broth to keep them moist. Heat on low, stirring often, until warm. This method keeps the flavors strong and the beef tender. If you want to save some for later, freezing is a great option. Allow the beef bites to cool completely. Place them in a freezer-safe bag or container. Remove as much air as possible to avoid freezer burn. They can stay fresh for up to three months in the freezer. To eat, thaw in the fridge overnight and reheat as mentioned above. This way, you can enjoy your tasty beef bites anytime! For the full recipe, check out the details above. How long does it take to cook Slow Cooker Garlic Butter Beef Bites? It takes about 6 hours on low or 3 hours on high. This slow cook gives the beef time to soak up all the flavors. Can I use a different cut of beef for this recipe? Yes, you can use cuts like chuck or brisket. These cuts also become tender and flavorful when slow-cooked. What can I serve with garlic butter beef bites? These beef bites pair well with mashed potatoes, rice, or crusty bread. You can also add a side salad for freshness. Can I prep this recipe ahead of time? Yes, you can prepare the beef and sauce a day before. Just store them in the fridge until you’re ready to cook. How do I know when the beef is tender? Check the beef after the cooking time. It should break apart easily with a fork if it's tender. What can I use instead of garlic? If you're not a fan of garlic, try using shallots. They add a mild, sweet flavor to the dish. Can I add vegetables to this slow cooker recipe? Absolutely! Carrots, potatoes, or bell peppers work well. Just chop them into bite-sized pieces and add them with the beef. For the full recipe, check out the Slow Cooker Garlic Butter Beef Bites section above! This post covered all the steps to make savory garlic butter beef bites. We discussed ingredients, cooking methods, and tips for perfect flavor. Remember to sear the beef for extra taste and explore variations for dietary needs. Store leftovers properly to enjoy later. With these tips, you can make this dish your own. Happy cooking!

Slow Cooker Garlic Butter Beef Bites Flavorful Delight

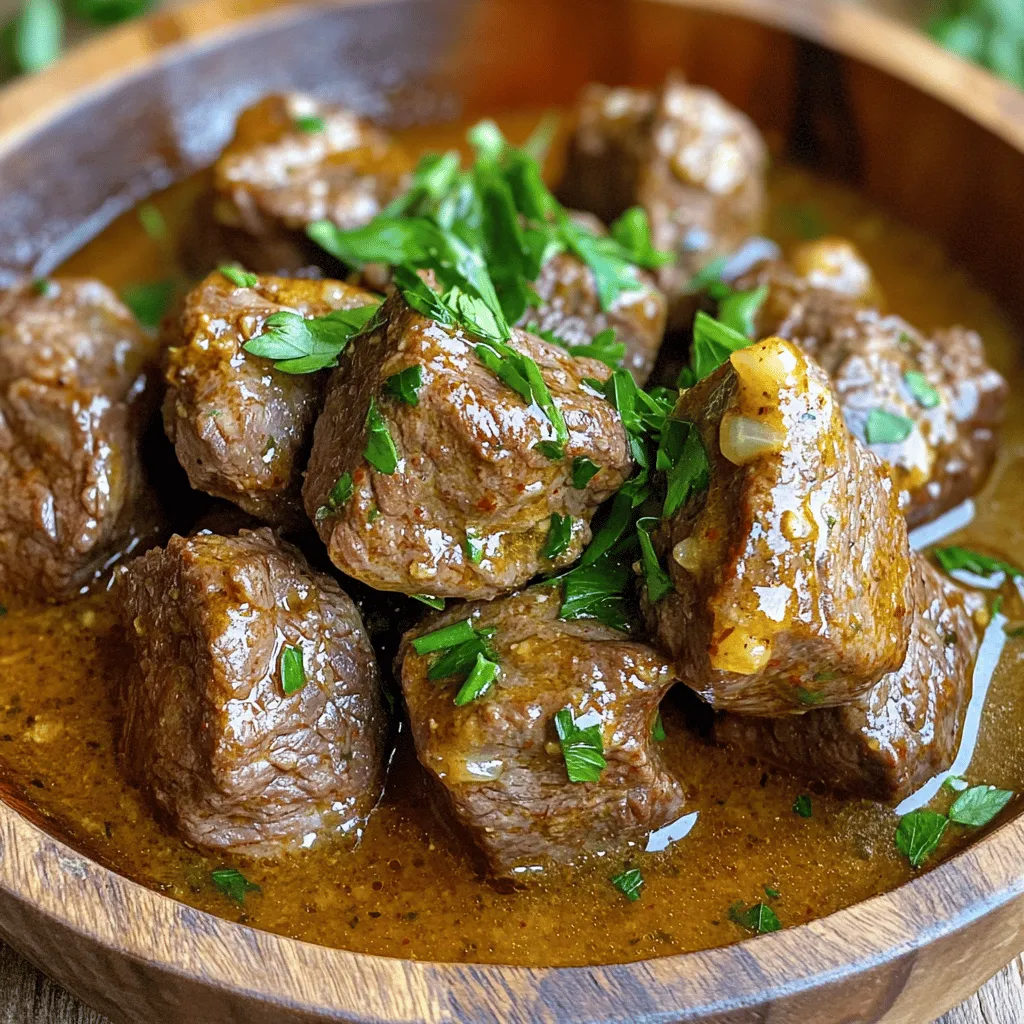
If you’re searching for a mouthwatering recipe that’ll wow your taste buds, you’re in the right place! Slow Cooker Garlic

- 2 pounds flank steak, sliced against the grain - 1 cup soy sauce (low sodium recommended) - 1 cup brown sugar - ½ cup vegetable oil - 1 tablespoon minced garlic - 1 tablespoon minced ginger - 1 teaspoon red pepper flakes (adjust for spice preference) - 4 green onions, chopped (reserve some for garnish) - 1 cup beef broth - 2 tablespoons cornstarch - Cooked rice for serving Gathering the right ingredients is key for making this dish shine. Flank steak is the star here. It is flavorful and tender when cooked low and slow. Soy sauce adds a rich, salty taste. Brown sugar brings a touch of sweetness that balances the salt. Vegetable oil gives a nice base for the marinade. I add garlic and ginger for warmth and depth. They also help make the dish smell amazing while it cooks. Red pepper flakes let you control the heat level. You can add more or less based on your taste. Green onions add freshness and a pop of color. Save some for the top when serving. You can enhance your dish with optional items. Beef broth adds a deeper flavor, making the sauce richer. Cornstarch helps thicken it up later. Serve it over cooked rice for a complete meal. {{ingredient_image_1}} To start, you need to make the marinade. In a large bowl, combine: - 1 cup soy sauce - 1 cup brown sugar - ½ cup vegetable oil - 1 tablespoon minced garlic - 1 tablespoon minced ginger - 1 teaspoon red pepper flakes Whisk all these ingredients together until the sugar dissolves. This mix brings a sweet and savory flavor to the beef. The red pepper flakes add a nice kick. If you want less heat, use fewer flakes. Next, take 2 pounds of flank steak, sliced against the grain. Toss the beef in the marinade. Make sure each piece is well coated. This step helps the beef soak up all those great flavors. Once mixed, transfer everything into the slow cooker. It should look delicious already! Now it’s time to cook. Set your slow cooker to low for 6-8 hours or high for 3-4 hours. Before closing the lid, add 1 cup of beef broth. This adds moisture and richness. The longer you cook, the more tender the beef gets. About 30 minutes before you plan to eat, mix 2 tablespoons of cornstarch with 3 tablespoons of water to form a slurry. Stir this into the slow cooker. This will thicken the sauce and make it glossy. Once everything looks good, stir in the chopped green onions. Reserve some for garnish. Serve the Mongolian beef over warm cooked rice. Enjoy your flavorful meal! For slow cooking, flank steak is the best choice. It is tender and flavorful. Always slice against the grain. This makes the meat softer and easier to chew. If you use a different cut, like chuck roast, it will also work. Just be sure to adjust the cooking time since it is thicker. If you want more heat, add more red pepper flakes. Start with a little, then taste. You can also use fresh chili peppers or sriracha sauce for heat. If you prefer milder flavors, reduce the red pepper flakes. You can also skip them entirely if you like it sweet. To boost the flavor, add herbs or spices. Consider adding crushed black pepper or sesame seeds. Fresh ingredients are always best for taste. Use fresh ginger and garlic for more punch. Dried herbs can work too but may lack some freshness. Feel free to experiment and find your favorite mix! Pro Tips Choose the Right Cut: Flank steak is ideal for this recipe due to its tenderness when cooked low and slow. Make sure to slice it against the grain for maximum tenderness. Marinate for Flavor: If time allows, marinating the beef for a few hours or overnight can enhance the flavor significantly. Just ensure to keep it refrigerated. Adjust the Spice Level: The red pepper flakes can be adjusted based on your heat preference. Start with less if you're unsure and add more later. Leftovers Storage: Store leftovers in an airtight container in the refrigerator for up to 3 days. Reheat gently to preserve the beef's tenderness. {{image_2}} You can swap flank steak for chicken. Use boneless, skinless thighs or breasts. The cooking time stays the same. This gives a lighter taste, but still keeps the dish flavorful. For a vegetarian version, try using tofu. You can use firm or extra-firm tofu for best results. Press the tofu to remove excess water, then cut it into cubes. You can marinate it just like the beef. This will soak up all the yummy flavors. To add more depth, consider using sesame oil. This oil gives a warm, nutty taste that pairs well with the sweet sauce. A tablespoon or two will elevate your dish. You can also add hoisin sauce for a hint of sweetness and tang. Just mix it in with the soy sauce before marinating. Adding vegetables can also enhance your meal. Try bell peppers or broccoli. These veggies cook well and add color. Toss them into the slow cooker about an hour before serving. Serve your Mongolian beef over different types of rice. Jasmine rice is fragrant and pairs nicely. Brown rice offers a nutty flavor and more fiber. For a fun twist, try serving it with fried rice. You can also add a side of steamed vegetables. This balances the meal and adds nutrients. Consider a simple salad with a light dressing for freshness. To store your Slow Cooker Mongolian Beef, let it cool first. Place it in an airtight container. This keeps the beef fresh and safe. The cooked Mongolian beef lasts about 3 to 4 days in the fridge. You can freeze the Mongolian beef for later use. First, let it cool completely. Then, transfer it to a freezer-safe container or bag. Make sure to squeeze out any extra air. It can stay frozen for about 2 to 3 months. To thaw, place it in the fridge overnight. For reheating, warm it in a pot over low heat, stirring often. You can also microwave it in short bursts until hot. Leftover beef can be a great base for other meals. Try making beef tacos or stir-fries! You can also add it to salads for a quick lunch. To keep the sauce fresh, store it separately. This will prevent the beef from getting soggy. Enjoy your tasty leftovers in new and exciting ways! Cooking this dish is simple. On low, it takes about 6-8 hours. If you are short on time, the high setting cooks it in 3-4 hours. The low setting lets the meat get super tender. It also allows the flavors to blend well. The high setting is quicker but may not give as rich a taste. Choose based on your schedule! Yes, you can try other cuts. Flank steak is best for its tenderness. However, you can use chuck roast or sirloin too. Chuck is more affordable but may need longer to cook. Sirloin is also good and tender. Keep in mind, the cut you choose affects the taste and texture. This recipe is not gluten-free due to soy sauce. But you can easily make it gluten-free. Use tamari instead of soy sauce. Tamari is a gluten-free soy sauce that tastes great. Also, check your beef broth for gluten-free options. This way, you can enjoy the same great flavor without gluten! This article covered the key ingredients and steps for making Slow Cooker Mongolian Beef. You learned how to prepare the marinade, marinate the beef, and the cooking process. Tips on spice levels and variations expanded your options. Finally, remember that you can customize this dish to fit your taste. Experiment with flavors and enjoy the ease of slow cooking. Whether you serve it with rice or veggies, your meal will be delicious and comforting. Happy cooking!

Slow Cooker Mongolian Beef Flavorful and Easy Recipe

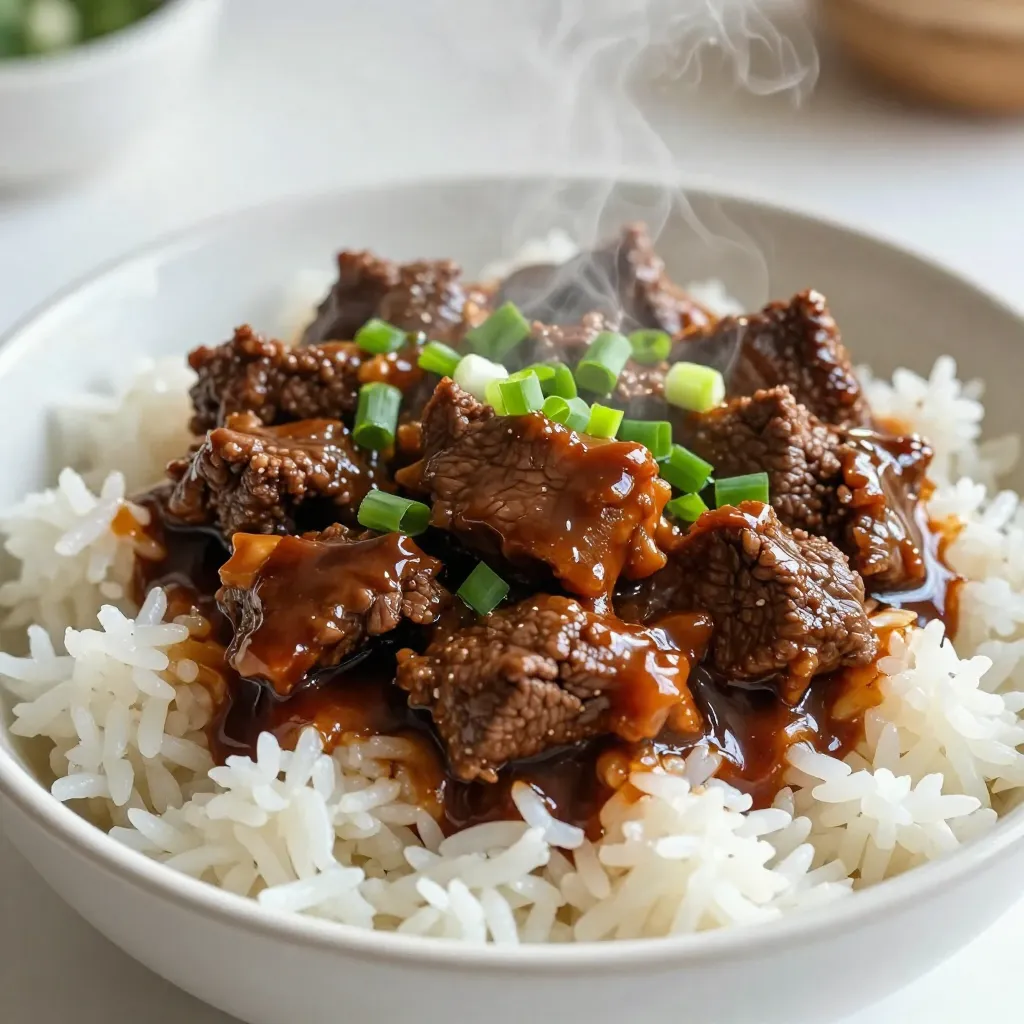
Are you craving a delicious, easy meal that practically cooks itself? Look no further! This Slow Cooker Mongolian Beef recipe

- 1 cup strawberries, diced - 1 cup kiwi, diced - 1 cup mango, diced - 1/2 cup pineapple, diced - 1/4 cup red onion, finely chopped - 2 tablespoons fresh cilantro, chopped - 2 tablespoons lime juice - 1 tablespoon honey or agave syrup - 4 flour tortillas - 1/4 cup sugar - 1 teaspoon ground cinnamon - 2 tablespoons melted butter The fruit salsa is a bright mix of flavors. I love using fresh, ripe fruits. Strawberries, kiwi, mango, and pineapple add sweetness and a hint of tartness. Dicing them into small pieces helps blend the flavors well. You can also add red onion for a slight crunch and cilantro for a fresh taste. Lime juice adds zing, balancing the sweetness. Honey or agave syrup gives it a lovely shine. For the cinnamon sugar chips, I prefer flour tortillas. They get crisp and golden, perfect for dipping. Mixing sugar with cinnamon creates a sweet topping that pairs well with the salsa. Brushing melted butter on the tortillas helps the sugar mix stick. This delightful dish brings joy to any table. You can find the complete directions in the Full Recipe section. First, grab a large mixing bowl. Combine all your diced fruits: strawberries, kiwi, mango, and pineapple. The mix of colors makes it lively and fun! Next, add the finely chopped red onion and fresh cilantro. These ingredients bring great taste and texture to the salsa. Now, it’s time to dress the salsa. Drizzle the mixture with lime juice and honey. This adds a sweet and tangy flavor. If you want a little heat, add chili powder to the mix. It gives the salsa a nice kick. Gently toss everything together until it’s well blended. Preheat your oven to 350°F (175°C). While it warms up, cut each flour tortilla into triangles. This will be your crunchy chips! Brush melted butter lightly over each triangle. Next, mix sugar and ground cinnamon in a small bowl. Sprinkle this mix generously over the buttered tortillas. Now, place the tortilla triangles on a baking sheet in a single layer. Bake them for about 10-12 minutes, or until they are crisp and golden brown. Keep a close eye on them because they can burn quickly! Once ready, let them cool for a few minutes before serving. This delightful mix of fruit salsa and cinnamon sugar chips will surely impress your friends and family. For the full recipe, check out the details above! - Use ripe and fresh fruits for the best flavor. Fresh fruits burst with juice and sweetness. - Adjust sweetness with more or less honey. Start with one tablespoon and taste as you go. - Monitor closely to prevent burning. Chips can go from golden to charred fast, so watch them. - Experiment with different types of tortillas. Try corn or whole wheat for unique flavors. - Pair with yogurt for added creaminess. The smooth texture complements the fruit salsa well. - Use as a topping for ice cream or desserts. This adds a fruity twist to your favorite treats. {{image_2}} You can change the fruits in your salsa. Swap in seasonal fruits like peaches or berries for a fresh twist. These fruits add sweetness and a lovely texture. You can also incorporate tropical fruits like papaya or guava. These fruits will bring a fun taste and unique flair. Feel free to mix and match your favorites! If you want to change the sweetness, try using maple syrup or stevia instead of honey. This change can lower the calorie count. If you prefer a sugar-free option, use fruit puree. It will add natural sweetness while keeping it healthy. This way, you can enjoy the salsa without added sugars. Do you like a little heat? Add jalapeño for a spicy kick in your fruit salsa. This will balance the sweetness with a nice zing. You can also experiment with different spices in the cinnamon mix. Try adding nutmeg or allspice for a new flavor profile. These small changes can make your fruit salsa exciting! If you have extra salsa, store it in an airtight container in the fridge. This helps keep the flavors fresh. It’s best consumed within 2 days for the best taste. After that, the fruits may lose their crunch and flavor. To keep your cinnamon sugar chips crispy, place them in a sealed bag. They can stay at room temperature for up to a week. This method keeps them nice and crunchy, perfect for snacking. If your chips lose their crunch, you can warm them in the oven briefly. Just a few minutes will help regain their crisp texture. Avoid microwaving them, as this can make them chewy and less enjoyable. For the full recipe of this delightful mix, please check the Full Recipe. Yes, but it's best to add lime juice right before serving. This keeps the salsa fresh. If you mix it all together too soon, the fruits can get mushy. Just prepare the fruits and store them in the fridge. Add the lime juice at the last moment, and you’ll have a zesty, bright salsa. Any fresh, juicy fruits work well; try to mix textures and flavors. I love using strawberries, kiwi, and mango together. Pineapple adds a nice sweetness too. You can also play around with berries or peaches. The key is to use fruits that are ripe and in season for the best taste. Use agave syrup instead of honey for a vegan-friendly option. This swap keeps the sweetness while making it suitable for a vegan diet. You won’t lose any flavor, and the salsa will still taste amazing. Just remember to check that your tortillas are vegan too! Yes, corn tortillas can be used to create a gluten-free option. They add a different flavor and texture. Just cut them into triangles as you would with flour tortillas. Bake them the same way, and you’ll have delicious, crispy chips to enjoy with your fruit salsa. This blog post shared the fun of making a tasty fruit salsa with crispy cinnamon sugar chips. You learned how to mix fresh fruits, add spices, and get creative with variations. Remember to use ripe fruit for great flavor and store leftovers wisely. Whether you're enjoying it as a snack or a dessert topping, this recipe is simple and satisfying. Get cooking and let your flavors shine!

Fruit Salsa with Cinnamon Sugar Chips Delightful Mix

Are you ready to elevate your summer snacks? This Fruit Salsa with Cinnamon Sugar Chips is the perfect blend of

- 1 lb (450g) baby potatoes, halved - 1 lb (450g) smoked sausage, sliced - 1 cup shredded sharp cheddar cheese The main stars of this recipe are baby potatoes and smoked sausage. Baby potatoes are small and tender. They roast nicely and soak up all the flavors. Smoked sausage adds a rich taste. It brings a nice kick, making each bite satisfying. I love using sharp cheddar cheese for its bold flavor. It melts perfectly and creates a gooey layer on top. - 1 packet ranch dressing mix (approx. 1 oz or 28g) - 2 tablespoons olive oil - 1 teaspoon garlic powder - 1 teaspoon paprika The seasoning is key to making this dish shine. The ranch dressing mix adds a tangy taste that pairs well with the potatoes and sausage. Olive oil helps everything get crispy and golden. Garlic powder gives a warm, savory touch, while paprika adds a hint of smokiness and color. These flavors make each bite a delight. - 1 cup sour cream - Fresh chives, chopped (for garnish) When serving, I like to drizzle sour cream on top. It adds a cool and creamy contrast. Chopped fresh chives not only look great but also add a mild onion flavor. Together, they elevate the dish and make it even more enjoyable. For the full recipe, check out the earlier section. 1. First, preheat your oven to 425°F (220°C). This helps cook the potatoes evenly. 2. In a large bowl, mix the halved baby potatoes with olive oil. 3. Add garlic powder, paprika, salt, and pepper. Toss to coat the potatoes well. 1. Spread the seasoned potatoes on a baking sheet. Make sure they are in a single layer. 2. Roast the potatoes for 20 minutes. They should start becoming tender. 3. While the potatoes roast, mix the sliced smoked sausage with the ranch dressing mix. Make sure the sausage is well coated. 4. After 20 minutes, take out the baking sheet. Toss in the smoked sausage with the potatoes. 5. Return the pan to the oven and roast for another 15-20 minutes. The potatoes should be golden brown and cooked through. 1. In the last 5 minutes of baking, sprinkle the shredded cheddar cheese over the mixture. 2. Wait until the cheese melts and bubbles. 3. Once baked, take it out and let it cool for a few minutes. 4. Drizzle sour cream on top and add chopped chives for a colorful look. For the full recipe, check back on the main article. Enjoy your delicious Cheesy Ranch Potatoes with Smoked Sausage! For this dish, I recommend using baby potatoes. They roast well and stay tender. Yukon Gold or red potatoes are great choices too. When picking potatoes, aim for even sizes. This way, they cook evenly and become perfectly tender. You can boost the flavor of your Cheesy Ranch Potatoes by adding extra seasonings. Try some onion powder or black pepper for a kick. If you want to switch up the meat, turkey sausage or chicken sausage works well. For a vegetarian option, use mushrooms or chickpeas instead. Always preheat your oven to 425°F (220°C). This high heat helps the potatoes get crispy. If your oven runs hot or cool, adjust the cooking time. Check the potatoes after 20 minutes and then again after 15 minutes with the sausage. This way, you’ll get a perfect golden brown finish. {{image_2}} You can switch out the smoked sausage for chicken or turkey sausage. These meats are lighter but still add good flavor. If you want a veggie option, try using mushrooms or tempeh. Both give a nice texture and soak up the ranch flavor. While sharp cheddar cheese is tasty, you can use other types too. Monterey Jack or pepper jack can add a fun twist. If you need a dairy-free choice, try vegan cheese or nutritional yeast. These options melt well and keep the dish creamy. To make this dish even better, add some veggies. Bell peppers, onions, or even zucchini work great. They add color and crunch. You can also spice things up with cayenne pepper or Italian herbs. These spices will give your dish more depth and excitement. To keep your Cheesy Ranch Potatoes tasty, store leftovers in the fridge. Use airtight containers to prevent drying out. This will keep them fresh for up to three days. Before sealing, let the dish cool to room temperature. This helps avoid condensation that can make the potatoes mushy. When it's time to enjoy your leftovers, you can reheat them in several ways. The oven is best for keeping the crispy texture. Preheat the oven to 350°F (175°C) and bake for about 15 minutes. You can also use a microwave, but this may make the potatoes softer. If microwaving, heat in short bursts and stir as needed. Yes, you can freeze Cheesy Ranch Potatoes! To freeze, place cooled portions in freezer-safe bags or containers. Remove as much air as possible to prevent freezer burn. When ready to eat, thaw them in the fridge overnight. Reheat in the oven for the best results. This way, your meal still tastes great. For the full recipe, check the earlier section. The best way to reheat this dish is in the oven. Preheat your oven to 350°F (175°C). Place the potatoes and sausage in a baking dish. Cover it with foil to keep moisture in and heat for about 15-20 minutes. This helps keep the potatoes crispy and the cheese gooey. Yes, you can prepare Cheesy Ranch Potatoes ahead of time. Cook the potatoes and sausage as directed. Let them cool, then store them in the fridge for up to two days. When ready to eat, just reheat them in the oven. You can also mix everything but the cheese in advance. Add the cheese just before baking for the best flavor. To make this dish healthier, consider these tips: - Use less cheese or switch to a lower-fat cheese. - Substitute turkey sausage for smoked sausage. - Add more vegetables like broccoli or bell peppers. - Use Greek yogurt instead of sour cream for a lighter option. These changes can help reduce calories and fat while keeping the dish tasty. For the full recipe, check the recipe section. We've covered how to make Cheesy Ranch Potatoes with Smoked Sausage simply and tasty. With baby potatoes, smoked sausage, and sharp cheddar, you create a hearty dish. Season it well with ranch dressing mix, garlic powder, and paprika for flavor. Don't forget the toppings like sour cream and fresh chives. Remember, you can mix and match ingredients for variety. Store leftovers correctly and reheat for the best taste. Enjoy this dish that’s perfect for meals or gatherings!

Cheesy Ranch Potatoes with Smoked Sausage Delight

Get ready for a flavor-packed experience with Cheesy Ranch Potatoes with Smoked Sausage Delight! This dish combines crispy baby potatoes,

- 2 lbs boneless, skinless chicken thighs - 1 can (14 oz) coconut milk - 1/2 cup plain yogurt - Ginger, minced - Garlic, minced - Onion, finely chopped - Tomato paste - Curry powder - Garam masala - Turmeric - Cumin - Cayenne pepper To craft the best slow cooker butter chicken, you need key ingredients that create rich flavors. First, the chicken thighs are the star of the dish. They stay juicy and tender during cooking. Coconut milk adds a creamy texture. It also balances the spices well. The yogurt adds extra creaminess and tang. Next, we have aromatics. Minced ginger and garlic create a fresh, zesty base. Chopping the onion finely helps it blend into the sauce. This mix builds depth in flavor. We then add seasonings to bring the dish to life. Tomato paste gives you a nice richness. Curry powder and garam masala offer warmth and complex flavor. Turmeric adds a bright color and earthiness. Cumin brings a nutty touch, while cayenne pepper adds heat. Adjust these to your taste for the perfect balance. For a full guide on making this dish, refer to the Full Recipe. Each ingredient plays a role, making this meal flavorful and easy to prepare. You will love how these simple ingredients combine to create a delicious meal. Seasoning the Chicken Pieces Start with 2 lbs of boneless, skinless chicken thighs. Cut them into bite-sized pieces. In a large bowl, add salt, pepper, cumin, turmeric, and cayenne pepper. Toss the chicken well to coat it evenly. This step adds great flavor to each piece. Tips for Even Coating To ensure even coating, mix the spices first before adding them to the chicken. Use your hands or a spoon to rub the spices all over the chicken. Let it sit for a few minutes. This way, the flavors will soak in better. Best Practices for Onions, Garlic, and Ginger Next, focus on the aromatics. Chop one large onion finely. In a pan, add a tablespoon of oil over medium heat. Sauté the onion for about 5 minutes until it turns translucent. Then, add one tablespoon each of minced garlic and ginger. Cook for one more minute. This step builds a strong flavor base for the dish. Importance of Sautéing for Flavor Sautéing helps to release the natural oils and flavors in the onions, garlic, and ginger. This makes your butter chicken taste richer and more complex. Don’t rush this step; it’s key for a tasty dish. Transferring Ingredients to the Slow Cooker Now, transfer the sautéed onion mix to your slow cooker. Add the seasoned chicken, 2 tablespoons of tomato paste, 2 tablespoons of curry powder, 1 teaspoon of garam masala, and 1 can of coconut milk. Stir everything well to combine. Cooking Times: Low vs High Cover the slow cooker. Cook on low for 6-7 hours or on high for 3-4 hours. Choose low for a more tender chicken. Both methods will yield a mouthwatering dish. How to Adjust Spice Levels To control the spice, start with less cayenne pepper. You can always add more later. Taste as you go. If it’s too hot, add a bit of sugar or more coconut milk. This balances the heat well. Recommended Cooking Techniques for Better Texture Searing the chicken before adding it to the slow cooker is key. It gives a nice crust and deep flavor. If you skip this, the chicken may turn out soft and bland. Always sauté the onions, garlic, and ginger until fragrant. This step adds a rich base for your sauce. Adding Yogurt at the Right Time Add yogurt about 30 minutes before serving. This keeps the yogurt creamy and prevents curdling. Stir it gently into the sauce. Let it heat through but don’t let it boil. Alternatives to Yogurt for a Dairy-Free Version If you want a dairy-free option, try using coconut cream instead of yogurt. It gives a similar creaminess and flavor. You can also use cashew cream for a nutty twist. Best Accompaniments: Rice and Garnishes Serve this butter chicken over steamed basmati rice. The rice soaks up the sauce well. You can also add naan bread for dipping. Top with fresh cilantro for color and flavor. Presentation Tips for an Appealing Dish For a pretty presentation, use a shallow bowl. Add the rice first, then spoon the butter chicken over it. Sprinkle cilantro on top. This makes the dish pop and looks great for guests. For the full recipe, check [Full Recipe]. {{image_2}} You can switch up the protein in this butter chicken. Chicken thighs are juicy and tender. Chicken breasts are leaner but drier. If you want a lighter dish, breasts work well. Just remember to not overcook them. For a tasty vegetarian option, try tofu or cauliflower. Tofu absorbs flavors well, making it a great choice. Use firm tofu and cut it into cubes. Cauliflower gives a nice texture and taste too. Just roast it before adding to the slow cooker. The type of curry powder you use changes the flavor. Each brand has a unique taste. Try different blends to see what you like best. You can also mix your own for fun! Add vegetables like peas, spinach, or bell peppers for more nutrition. These veggies add color and taste to the dish. They make it heartier and more filling. Just toss them in during the last hour of cooking. While cilantro is classic, try other fresh herbs. Mint and parsley add a different taste. Chopped green onions give a nice crunch too. For extra texture, sprinkle nuts or seeds on top. Cashews or pumpkin seeds provide great crunch. These toppings make your meal look fancy and delicious. You can find the full recipe for creamy coconut butter chicken above! - How Long Will It Last in the Fridge? Your butter chicken will stay fresh in the fridge for about 3 to 4 days. Make sure it cools completely before you store it. This helps keep the flavors intact. - Best Storage Practices for Leftovers Use an airtight container to store your butter chicken. This prevents it from drying out. If you have a lot of leftovers, divide them into smaller portions. This makes reheating easier. - Can You Freeze Butter Chicken? Yes, you can freeze butter chicken. It freezes well and can last for up to 3 months. Just make sure to store it in a freezer-safe container. - Thawing and Reheating Tips To thaw, place it in the fridge overnight. This keeps it safe and tasty. When ready to eat, reheat it on the stove over low heat. Stir often to avoid burning. You can also use the microwave for quick reheating. Just cover it to keep moisture in. Enjoy your meal! For the full recipe, check out the [Full Recipe]. Serve butter chicken hot over steamed basmati rice. The rice soaks up the sauce well. I like to garnish it with fresh cilantro for color and taste. You can also add naan bread on the side. This helps scoop up the creamy sauce. Serve with a side of cooling cucumber salad. It balances the spices nicely. Yes, you can use a regular pot for this recipe. Start by sautéing the onions, garlic, and ginger in the pot. Then add the seasoned chicken and all the other ingredients. Cover and cook on low heat. It will take about 30-40 minutes until the chicken is tender. Stir occasionally to prevent sticking. To make butter chicken extra creamy, add more coconut milk. You can also use heavy cream instead of yogurt. Start by adding a little, then taste and add more if needed. Another tip is to blend the sauce before serving. This creates a smooth texture that feels luxurious. Butter chicken pairs well with several side dishes. Here are some of my favorites: - Steamed basmati rice - Warm naan bread - Cucumber raita or salad - Roasted vegetables - Mango lassi to drink These sides bring out the rich flavors in the dish. Enjoy experimenting with your meals! In this blog post, we explored how to make a delicious butter chicken. We covered key ingredients like chicken, coconut milk, and yogurt, plus spices that bring bold flavors. I shared step-by-step instructions to guide you through cooking. You learned tips for enhancing flavors, variations to try, and how to store leftovers. Now, you have everything you need to create this meal. Enjoy experimenting with flavors and make it your own!

Best Slow Cooker Butter Chicken Flavorful and Easy Meal

If you’re craving a warm, rich dish that’s easy to make, you’ve come to the right place. My Best Slow

Older posts
Newer posts
← Previous Page1 … Page46 Page47 Page48 … Page84 Next →

dsad

© 2026 Foodish Talk • Built with GeneratePress

Our Policies

  • Copyright Policy
  • Cookie Policy
  • GDPR Policy
  • Privacy Policy
  • Disclaimer
  • Terms Of Use

More Information

  • Home
  • About
  • Contact
  • Appetizers
  • Dessert
  • Dinner
  • Drinks
©2026, Foodish Talk About Back To Top