Strawberry Lemonade Layer Cake Delicious Summer Treat

Looking for the perfect summer treat? Look no further! My Strawberry Lemonade Layer Cake combines sweet strawberries and zesty lemon for a refreshing flavor you’ll love. With simple ingredients and easy steps, you can create a delicious cake that impresses at any gathering. Get ready to indulge in a slice of summer sunshine! Let’s dive into the ingredients and get baking!

Ingredients

Complete Ingredients List

– 2 cups all-purpose flour

– 1 ½ cups granulated sugar

– ½ cup unsalted butter

– 1 cup buttermilk

– 3 large eggs

– 2 tablespoons fresh lemon juice

– Zest of 1 lemon

– 1 teaspoon vanilla extract

– 2 teaspoons baking powder

– ½ teaspoon baking soda

– ¼ teaspoon salt

– 1 cup fresh strawberries, pureed

– 1 cup heavy cream

– 2 tablespoons powdered sugar

– Extra strawberries and lemon slices for garnish

When I make my Strawberry Lemonade Layer Cake, I always start with the best ingredients. Each one plays a key role in the cake’s flavor and texture.

Flour gives structure to the cake. I use all-purpose flour because it combines well with other ingredients. Granulated sugar adds sweetness and helps the cake rise. Butter makes it rich and moist. Buttermilk makes the cake tender and adds a slight tang.

Eggs help bind the cake. They also provide moisture. Fresh lemon juice and lemon zest bring out the bright flavors of summer. Vanilla extract adds warmth to the cake’s taste.

Baking powder and baking soda are my leavening agents. They help the cake rise and become fluffy. Salt enhances all the flavors, making them pop.

Fresh strawberries, pureed, give the cake its lovely color and fruity taste. Heavy cream and powdered sugar are for the whipped topping. They create a light and creamy finish on each slice.

Finally, I like to garnish with extra strawberries and lemon slices. This adds a beautiful touch and makes the cake even more inviting.

You can find the full recipe for this delicious cake with all these ingredients and steps.

Step-by-Step Instructions

Preparing the Cake Batter

Preheat the oven and prepare cake pans: Start by setting your oven to 350°F (175°C). Grease and flour three 8-inch round cake pans to prevent sticking.

Cream the butter and sugar: In a large bowl, use a mixer to beat ½ cup of softened butter and 1 ½ cups of granulated sugar. Mix until it is light and fluffy, which takes about 3-4 minutes.

Add eggs, buttermilk, lemon juice, lemon zest, and vanilla extract: Add 3 large eggs one at a time, then mix in 1 cup of buttermilk, 2 tablespoons of fresh lemon juice, the zest of 1 lemon, and 1 teaspoon of vanilla extract. Make sure everything is combined well.

Baking the Cake

Mix dry ingredients and combine mixtures: In another bowl, whisk together 2 cups of all-purpose flour, 2 teaspoons of baking powder, ½ teaspoon of baking soda, and ¼ teaspoon of salt. Gradually add this mix to the wet ingredients. Stir until just combined; be careful not to overmix.

Fold in strawberry puree: Gently fold in 1 cup of fresh strawberry puree. This adds a lovely flavor and color to your batter.

Pour batter, bake, and cool the cakes: Divide the batter evenly among the prepared pans. Smooth the tops and bake for 25-30 minutes. Check for doneness with a toothpick. If it comes out clean, the cakes are done. Let them cool in the pans for 10 minutes, then transfer to wire racks to cool completely.

Assembling the Cake

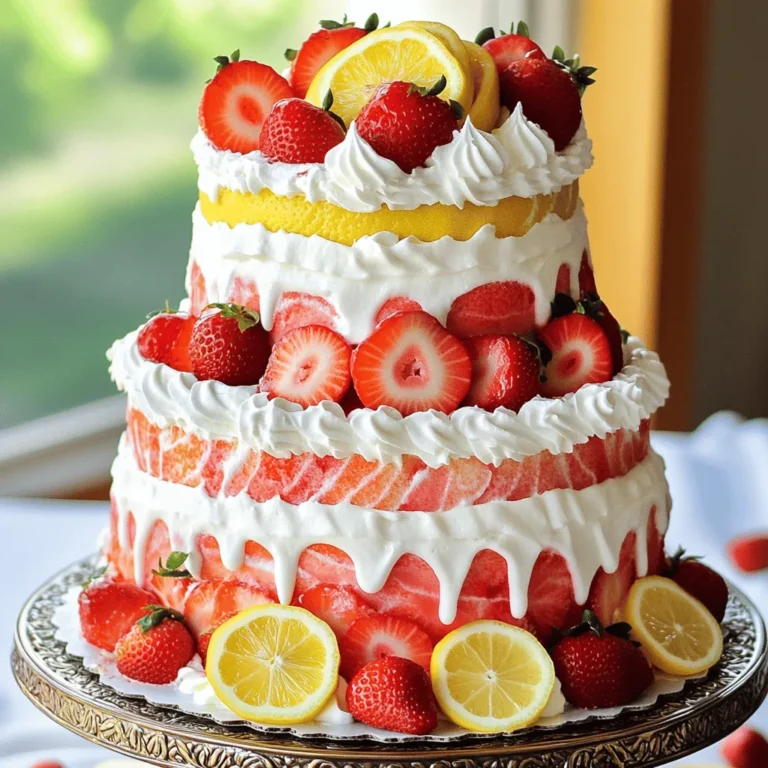
Whip cream and layer the cake: In a new bowl, whip 1 cup of heavy cream with 2 tablespoons of powdered sugar until you reach stiff peaks. Place one cake layer on a serving plate and spread a generous layer of whipped cream on top. Add fresh strawberries on top of the cream.

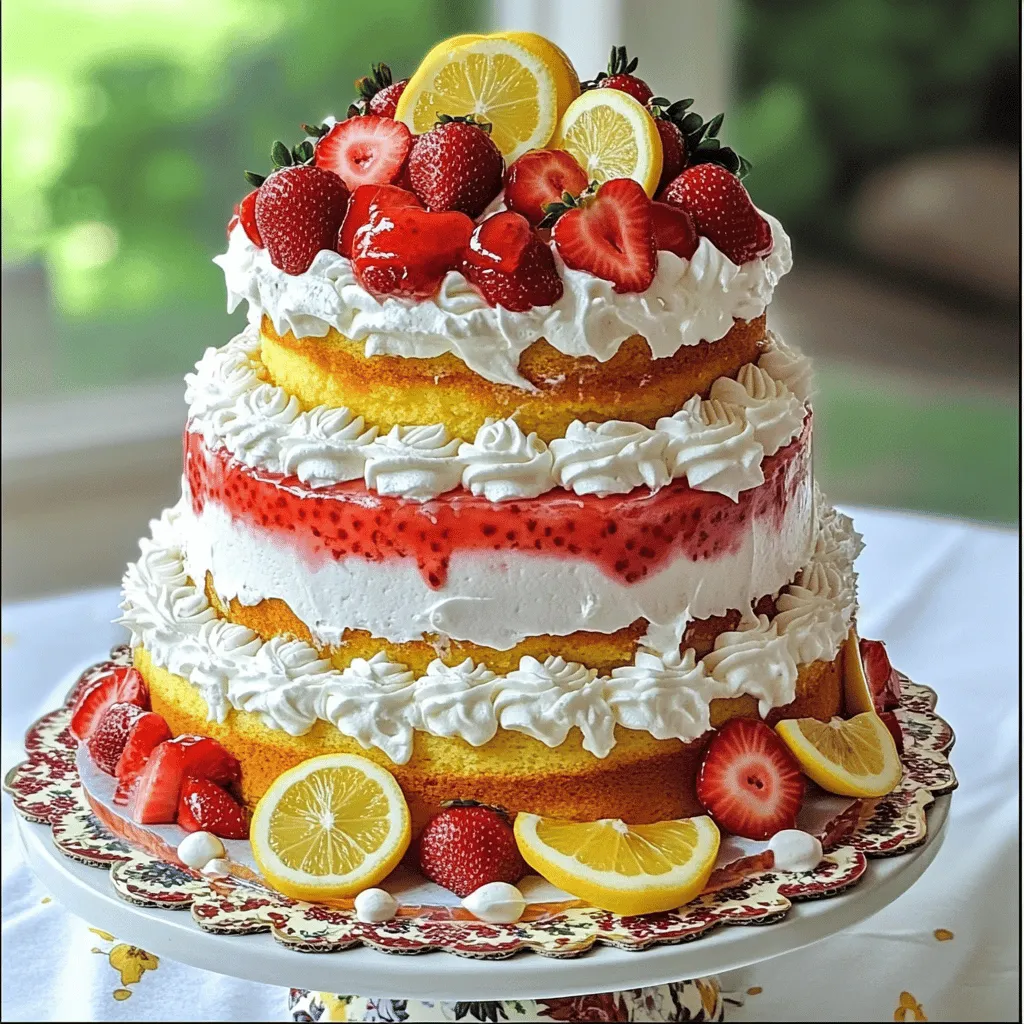
Garnish with strawberries and lemon slices: Repeat this with the second layer. Place the third layer on top and cover the whole cake with the remaining whipped cream. Decorate with extra strawberries and lemon slices for a fresh look.

Chill before serving: Place the cake in the fridge for at least 30 minutes to set before slicing. This helps the layers stay together, making it easier to serve.

For the complete guide, check the Full Recipe.

Tips & Tricks

Perfecting the Cake Texture

Using room temperature ingredients is key. When eggs and butter are warm, they blend better. This helps the cake rise and stay soft. Make sure to take them out ahead of time.

Avoid overmixing the batter. Mix just until the dry and wet ingredients come together. Overmixing can make the cake tough. You want a light and fluffy texture, so mix gently.

Decorating Ideas

Get creative with your strawberries! You can slice them and layer them between the cake layers. You can also arrange whole strawberries on top for a fresh look. Using lemon slices adds a nice pop of color.

For presentation, serve on a pretty platter. Drizzle extra strawberry puree around the base. This gives it a fun and colorful touch. You can also sprinkle some lemon zest on top for added flavor.

Troubleshooting Common Issues

If your cake sinks, it may be from underbaking or too much batter. Always check with a toothpick. If it comes out clean, the cake is done. If it’s too wet, bake a bit longer.

For dry layers, make sure to measure your flour correctly. Too much flour can dry out the cake. If you find the layers dry, consider adding a simple syrup to moisten them before frosting.
Variations

Alternative Flavors

You can change up the flavor of this cake easily. Swap strawberries for other berries like raspberries or blueberries. You can also use fruit purees from peaches or mangoes for a twist. For a citrus kick, try adding lime or orange juice instead of lemon. These changes can create a fun and refreshing cake for summer.

Gluten-Free Version

If you need a gluten-free cake, use a gluten-free flour blend. Make sure it has xanthan gum to help with texture. Gluten-free cakes often bake faster, so check them a few minutes early. This way, you won’t risk drying them out.

Vegan Adaptation

To make this cake vegan, replace eggs with flaxseed meal or unsweetened applesauce. Use 1 tablespoon of flaxseed mixed with 3 tablespoons of water for each egg. For cream, try coconut cream or almond milk whipped cream. These swaps keep the cake rich and creamy without any animal products.

Storage Info

Best Practices for Storing

To keep your Strawberry Lemonade Layer Cake fresh, store it in the fridge. Use an airtight container to avoid drying out. If you have leftover cake, make sure to wrap it well in plastic wrap first. This helps it stay moist and tasty. Avoid placing it near strong-smelling foods. The cake can absorb those odors.

Freezing Instructions

If you want to save some cake for later, freezing is a great option! Start by slicing the cake into pieces. Wrap each piece in plastic wrap. After that, place them in a freezer-safe bag. Be sure to remove as much air as possible. To thaw, take out a slice and leave it at room temperature for about 30 minutes. This keeps the flavor and texture just right. You can enjoy your cake even after freezing! For the full recipe, check out the Strawberry Lemonade Layer Cake recipe.

FAQs

What is the best way to slice a layered cake?

To slice a layered cake, use a sharp, long knife. Start from the center and cut straight down. Wipe the knife with a damp cloth between slices. This keeps each piece clean. For even slices, mark the top with light lines before cutting. This way, you can see where to slice.

How long can I store the Strawberry Lemonade Layer Cake?

You can store this cake for up to five days in the fridge. Keep it covered with plastic wrap or in an airtight container. This helps keep the cake fresh. If you want to store it longer, freeze it. Just wrap it well in plastic wrap and foil. It can last up to three months in the freezer.

Can I make this cake a day in advance?

Yes, you can make this cake a day ahead. Bake and cool it completely. Then, store it in the fridge, covered. This helps the flavors blend well. Just add the whipped cream and garnish before serving.

What can I serve with Strawberry Lemonade Layer Cake?

This cake pairs well with light drinks. Try iced tea or lemonade. You can also serve it with fresh fruit, like berries or citrus slices. A scoop of vanilla ice cream works great too. It adds a creamy touch to the cake. For a fun twist, serve it with a fruity yogurt. Each of these options makes the cake shine. For the full recipe, check out the details above.

You now know how to make a delicious Strawberry Lemonade Layer Cake. We covered the ingredients, step-by-step instructions, and handy tips to ensure success. Remember, the cake’s texture relies on room temperature ingredients and careful mixing. You can adapt the recipe for different diets too, making it versatile. With storage tips, you can enjoy this cake longer than a few days. Now, gather your ingredients and start baking. This cake is sure to impress everyone who tries it! Your kitchen will become a happy place filled with sweet scents.

- 2 cups all-purpose flour - 1 ½ cups granulated sugar - ½ cup unsalted butter - 1 cup buttermilk - 3 large eggs - 2 tablespoons fresh lemon juice - Zest of 1 lemon - 1 teaspoon vanilla extract - 2 teaspoons baking powder - ½ teaspoon baking soda - ¼ teaspoon salt - 1 cup fresh strawberries, pureed - 1 cup heavy cream - 2 tablespoons powdered sugar - Extra strawberries and lemon slices for garnish When I make my Strawberry Lemonade Layer Cake, I always start with the best ingredients. Each one plays a key role in the cake's flavor and texture. Flour gives structure to the cake. I use all-purpose flour because it combines well with other ingredients. Granulated sugar adds sweetness and helps the cake rise. Butter makes it rich and moist. Buttermilk makes the cake tender and adds a slight tang. Eggs help bind the cake. They also provide moisture. Fresh lemon juice and lemon zest bring out the bright flavors of summer. Vanilla extract adds warmth to the cake's taste. Baking powder and baking soda are my leavening agents. They help the cake rise and become fluffy. Salt enhances all the flavors, making them pop. Fresh strawberries, pureed, give the cake its lovely color and fruity taste. Heavy cream and powdered sugar are for the whipped topping. They create a light and creamy finish on each slice. Finally, I like to garnish with extra strawberries and lemon slices. This adds a beautiful touch and makes the cake even more inviting. You can find the full recipe for this delicious cake with all these ingredients and steps. - Preheat the oven and prepare cake pans: Start by setting your oven to 350°F (175°C). Grease and flour three 8-inch round cake pans to prevent sticking. - Cream the butter and sugar: In a large bowl, use a mixer to beat ½ cup of softened butter and 1 ½ cups of granulated sugar. Mix until it is light and fluffy, which takes about 3-4 minutes. - Add eggs, buttermilk, lemon juice, lemon zest, and vanilla extract: Add 3 large eggs one at a time, then mix in 1 cup of buttermilk, 2 tablespoons of fresh lemon juice, the zest of 1 lemon, and 1 teaspoon of vanilla extract. Make sure everything is combined well. - Mix dry ingredients and combine mixtures: In another bowl, whisk together 2 cups of all-purpose flour, 2 teaspoons of baking powder, ½ teaspoon of baking soda, and ¼ teaspoon of salt. Gradually add this mix to the wet ingredients. Stir until just combined; be careful not to overmix. - Fold in strawberry puree: Gently fold in 1 cup of fresh strawberry puree. This adds a lovely flavor and color to your batter. - Pour batter, bake, and cool the cakes: Divide the batter evenly among the prepared pans. Smooth the tops and bake for 25-30 minutes. Check for doneness with a toothpick. If it comes out clean, the cakes are done. Let them cool in the pans for 10 minutes, then transfer to wire racks to cool completely. - Whip cream and layer the cake: In a new bowl, whip 1 cup of heavy cream with 2 tablespoons of powdered sugar until you reach stiff peaks. Place one cake layer on a serving plate and spread a generous layer of whipped cream on top. Add fresh strawberries on top of the cream. - Garnish with strawberries and lemon slices: Repeat this with the second layer. Place the third layer on top and cover the whole cake with the remaining whipped cream. Decorate with extra strawberries and lemon slices for a fresh look. - Chill before serving: Place the cake in the fridge for at least 30 minutes to set before slicing. This helps the layers stay together, making it easier to serve. For the complete guide, check the Full Recipe. Using room temperature ingredients is key. When eggs and butter are warm, they blend better. This helps the cake rise and stay soft. Make sure to take them out ahead of time. Avoid overmixing the batter. Mix just until the dry and wet ingredients come together. Overmixing can make the cake tough. You want a light and fluffy texture, so mix gently. Get creative with your strawberries! You can slice them and layer them between the cake layers. You can also arrange whole strawberries on top for a fresh look. Using lemon slices adds a nice pop of color. For presentation, serve on a pretty platter. Drizzle extra strawberry puree around the base. This gives it a fun and colorful touch. You can also sprinkle some lemon zest on top for added flavor. If your cake sinks, it may be from underbaking or too much batter. Always check with a toothpick. If it comes out clean, the cake is done. If it’s too wet, bake a bit longer. For dry layers, make sure to measure your flour correctly. Too much flour can dry out the cake. If you find the layers dry, consider adding a simple syrup to moisten them before frosting. {{image_2}} You can change up the flavor of this cake easily. Swap strawberries for other berries like raspberries or blueberries. You can also use fruit purees from peaches or mangoes for a twist. For a citrus kick, try adding lime or orange juice instead of lemon. These changes can create a fun and refreshing cake for summer. If you need a gluten-free cake, use a gluten-free flour blend. Make sure it has xanthan gum to help with texture. Gluten-free cakes often bake faster, so check them a few minutes early. This way, you won’t risk drying them out. To make this cake vegan, replace eggs with flaxseed meal or unsweetened applesauce. Use 1 tablespoon of flaxseed mixed with 3 tablespoons of water for each egg. For cream, try coconut cream or almond milk whipped cream. These swaps keep the cake rich and creamy without any animal products. To keep your Strawberry Lemonade Layer Cake fresh, store it in the fridge. Use an airtight container to avoid drying out. If you have leftover cake, make sure to wrap it well in plastic wrap first. This helps it stay moist and tasty. Avoid placing it near strong-smelling foods. The cake can absorb those odors. If you want to save some cake for later, freezing is a great option! Start by slicing the cake into pieces. Wrap each piece in plastic wrap. After that, place them in a freezer-safe bag. Be sure to remove as much air as possible. To thaw, take out a slice and leave it at room temperature for about 30 minutes. This keeps the flavor and texture just right. You can enjoy your cake even after freezing! For the full recipe, check out the Strawberry Lemonade Layer Cake recipe. To slice a layered cake, use a sharp, long knife. Start from the center and cut straight down. Wipe the knife with a damp cloth between slices. This keeps each piece clean. For even slices, mark the top with light lines before cutting. This way, you can see where to slice. You can store this cake for up to five days in the fridge. Keep it covered with plastic wrap or in an airtight container. This helps keep the cake fresh. If you want to store it longer, freeze it. Just wrap it well in plastic wrap and foil. It can last up to three months in the freezer. Yes, you can make this cake a day ahead. Bake and cool it completely. Then, store it in the fridge, covered. This helps the flavors blend well. Just add the whipped cream and garnish before serving. This cake pairs well with light drinks. Try iced tea or lemonade. You can also serve it with fresh fruit, like berries or citrus slices. A scoop of vanilla ice cream works great too. It adds a creamy touch to the cake. For a fun twist, serve it with a fruity yogurt. Each of these options makes the cake shine. For the full recipe, check out the details above. You now know how to make a delicious Strawberry Lemonade Layer Cake. We covered the ingredients, step-by-step instructions, and handy tips to ensure success. Remember, the cake's texture relies on room temperature ingredients and careful mixing. You can adapt the recipe for different diets too, making it versatile. With storage tips, you can enjoy this cake longer than a few days. Now, gather your ingredients and start baking. This cake is sure to impress everyone who tries it! Your kitchen will become a happy place filled with sweet scents.

Strawberry Lemonade Layer Cake

Indulge in the delightful flavors of summer with this Strawberry Lemonade Layer Cake! This delicious cake features fluffy layers infused with fresh strawberries and zesty lemon, combined with a light whipped cream frosting. Perfect for any celebration, it's sure to impress your guests. Ready to bake a masterpiece? Click through for the full recipe, tips, and tricks to create this stunning dessert that everyone will love!

Ingredients
  

2 cups all-purpose flour
1 ½ cups granulated sugar
½ cup unsalted butter, softened
1 cup buttermilk
3 large eggs
2 tablespoons fresh lemon juice
Zest of 1 lemon
1 teaspoon vanilla extract
2 teaspoons baking powder
½ teaspoon baking soda
¼ teaspoon salt
1 cup fresh strawberries, pureed
1 cup heavy cream
2 tablespoons powdered sugar
Extra strawberries and lemon slices for garnish

Method
 

Preheat the Oven: Preheat your oven to 350°F (175°C). Grease and flour three 8-inch round cake pans.
    Cream the Butter and Sugar: In a large mixing bowl, cream together the softened butter and granulated sugar until light and fluffy (about 3-4 minutes).
      Add Eggs and Flavorings: Beat in the eggs one at a time, then mix in the buttermilk, lemon juice, lemon zest, and vanilla extract until combined.
        Mix Dry Ingredients: In another bowl, whisk together the flour, baking powder, baking soda, and salt.
          Combine Mixtures: Gradually add the dry ingredients to the wet mixture, mixing just until combined. Be careful not to overmix.
            Add Strawberry Puree: Gently fold in the strawberry puree until evenly distributed throughout the batter.
              Bake: Divide the batter evenly among the prepared pans, smoothing the tops. Bake for 25-30 minutes, or until a toothpick inserted into the center comes out clean.
                Cool: Allow the cakes to cool in the pans for 10 minutes, then transfer to wire racks to cool completely.
                  Prepare Whipped Cream: In a separate bowl, whip the heavy cream and powdered sugar until stiff peaks form.
                    Assemble the Cake: Once the cakes are completely cooled, place one layer on a serving plate. Spread a generous layer of whipped cream on top, followed by a layer of fresh strawberries. Repeat the process with the second layer. Top with the third layer and cover the entire cake with the remaining whipped cream.
                      Garnish: Decorate with extra strawberries and lemon slices on top for a beautiful finish.
                        Chill: Place the cake in the refrigerator for at least 30 minutes to set before slicing.
                          Prep Time: 30 minutes | Total Time: 1 hour 30 minutes | Servings: 10
                            - Presentation Tips: Serve the cake on a decorative platter and drizzle some extra strawberry puree around the base for an attractive touch. Display with a few whole strawberries and lemon slices for a fresh look.

                              Leave a Comment

                              Recipe Rating