


Latest & Greatest

Raspberry Peach Lemonade Refreshing Summer Drink
Summer is here, and there’s nothing better than a refreshing Raspberry Peach Lemonade to cool you down! This drink combines
Read more…
Cheesecake Crescent Rolls Casserole Delightful Treat
If you love dessert, you’re in for a treat! This Cheesecake Crescent Rolls Casserole is creamy, delightful, and super easy
Read more…
Grilled Shrimp Bowl with Avocado and Corn Salsa Delight
Dive into the vibrant world of flavors with my Grilled Shrimp Bowl topped with creamy avocado and fresh corn salsa!
Read more…
Creamy Garlic Butter Lobster Tails Flavorful Recipe
If you crave a seafood dish that feels fancy yet easy to make, you need to try Creamy Garlic Butter
Read more…
Garlic Parmesan Chicken Meatloaves Simple and Tasty
Welcome to my kitchen, where simple meets tasty! Today, I’m sharing a delicious recipe for Garlic Parmesan Chicken Meatloaves. These
Read more…
Spicy Pork Wontons Flavorful and Easy to Make
Are you ready to spice up your cooking routine? These Spicy Pork Wontons are packed with flavor and a breeze
Read more…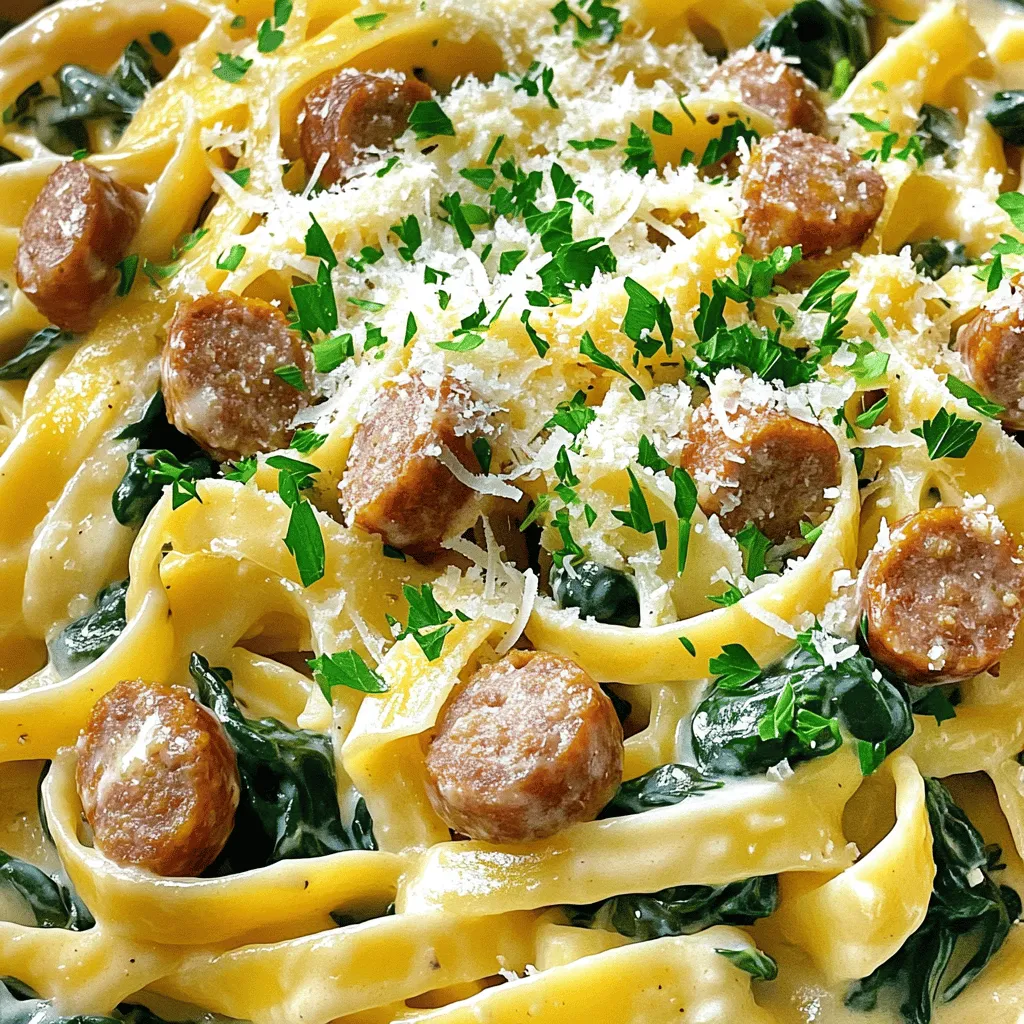
Sausage Alfredo Pasta Creamy and Flavorful Delight
Are you ready to savor a dish that bursts with creamy goodness? My Sausage Alfredo Pasta recipe combines tender fettuccine,
Read more…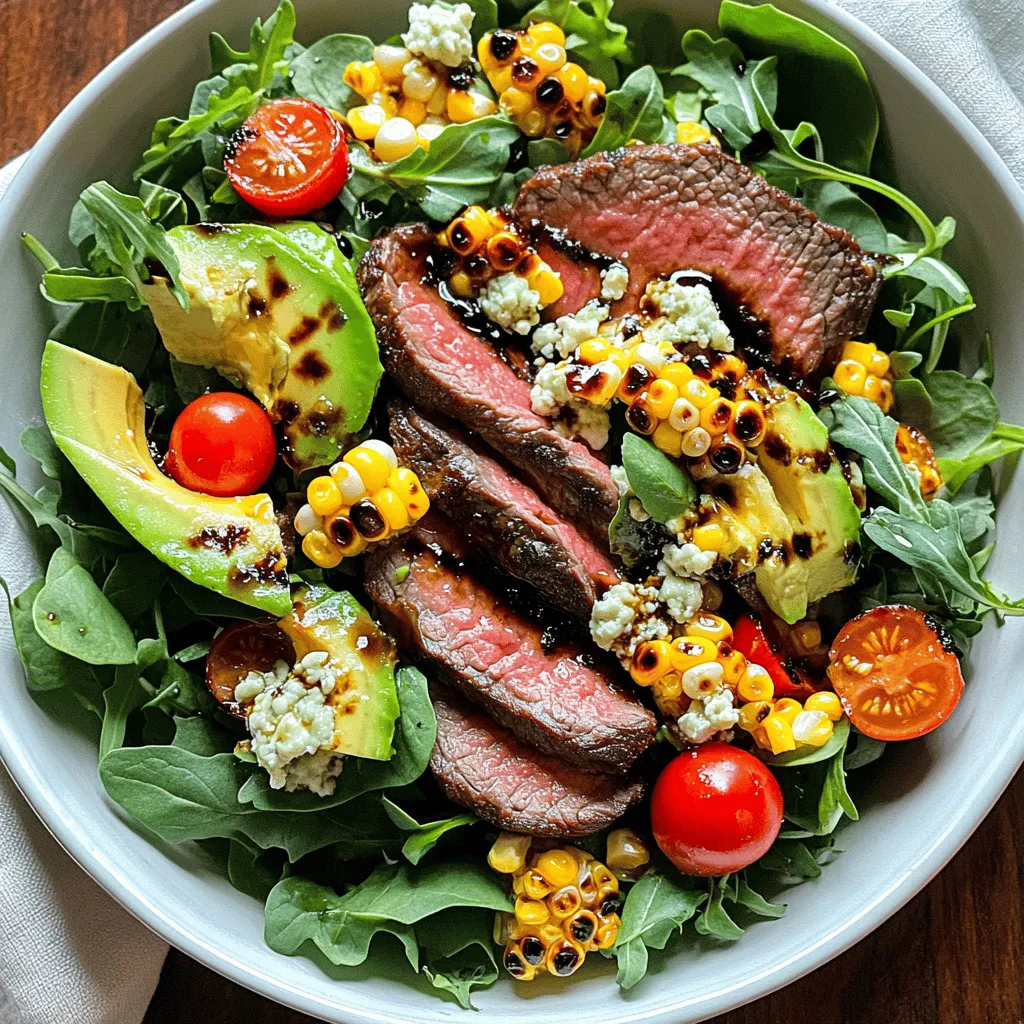
Balsamic Steak Gorgonzola Salad with Grilled Corn Bliss
Are you ready to elevate your salad game? The Balsamic Steak Gorgonzola Salad with Grilled Corn brings together juicy flank
Read more…browse recipes


Savory Sweet Potato Hash with Eggs for Breakfast Delight
Start your day right with my Savory Sweet Potato Hash with Eggs! This dish is packed with flavor and nutrients, making it the perfect…
My Latest Desserts

Mini Vanilla Cream Tarts with Raspberries Delight
Welcome to the sweet world of Mini Vanilla Cream Tarts with Raspberries! Today, I’ll show you how to make these Read Full Recipe-
Frozen Yogurt Bark Delightful and Simple Treat
If you’re looking for a quick, tasty treat, frozen yogurt bark is a winner. It’s easy to make and fun Read Full Recipe -
Fruit Salad with Honey Lime Dressing Easy Recipe
Looking for a fresh and easy treat? This Fruit Salad with Honey Lime Dressing is the perfect choice. Bursting with Read Full Recipe -
Blueberry Cheesecake Bars Simple and Delicious Treat
Looking for a dessert that’s easy to make and bursting with flavor? You’ve found it! These Blueberry Cheesecake Bars are Read Full Recipe -
Lemon Cheesecake Crumb Bars Delightful and Fresh Treat
Are you ready to brighten your day with a sweet treat? These Lemon Cheesecake Crumb Bars combine creamy cheesecake with Read Full Recipe -
Blueberry Heaven Cookies Irresistible Sweet Treat
Welcome to your new favorite cookie recipe! Blueberry Heaven Cookies are the perfect blend of sweet and tart, making them Read Full Recipe -
Lemon Blueberry Sorbet Fresh and Refreshing Delight
Cool off with a bowl of Lemon Blueberry Sorbet! This sweet, tangy treat is perfect for hot days. You only Read Full Recipe -
Lemon Blueberry Cupcakes Delightful and Light Treat
Are you ready to indulge in a sweet treat that brightens your day? These Lemon Blueberry Cupcakes are just what Read Full Recipe -
Blueberry Cheesecake Cookies Delightful and Easy Recipe
If you love the sweet and tangy combo of blueberry cheesecake, you’re in for a treat! I’ll show you how Read Full Recipe -
Greek Yogurt Ice Cream Creamy and Simple Delight
Looking for a cool treat that’s both delicious and easy to make? Greek yogurt ice cream is your answer! This Read Full Recipe


hey,
i’m !
I’m so happy you’re here!
I pour heart and skill into every recipe I create. I know you’ll taste the difference now let’s enjoy this flavorful adventure together.


![Lasagna soup has a rich and tasty mix of ingredients. Here are the key items you will need: - 1 lb ground beef or Italian sausage - 1 medium onion, diced - 3 cloves garlic, minced - 1 bell pepper, diced (any color) - 1 can (28 oz) crushed tomatoes - 4 cups beef broth - 2 teaspoons Italian seasoning - 1 teaspoon dried basil - 1 teaspoon sugar - Salt and pepper to taste - 8 oz lasagna noodles, broken into smaller pieces Each ingredient adds depth and flavor. The meat gives it heartiness, while the veggies add freshness. The broth brings all the flavors together, and the tomatoes provide sweetness and acidity. Cheese is a big part of lasagna soup. Here are the cheeses you should use: - 1 cup ricotta cheese - 1 cup shredded mozzarella cheese - 1/2 cup grated Parmesan cheese These cheeses create a creamy, cheesy topping that melts beautifully. Ricotta adds richness, mozzarella offers a stretchy texture, and Parmesan gives a sharp bite. For a pop of color and flavor, you can add garnishes. Here are some great options: - Fresh basil - Parsley Garnishes not only make your soup look nice but also add fresh flavor. Sprinkle them on right before serving for the best taste. You can find the Full Recipe above to guide you in preparing this delightful dish. To start, you need to brown the meat. In a large pot over medium heat, add 1 pound of ground beef or Italian sausage. Cook it until it turns brown, breaking it apart with a spoon. Drain any extra fat if necessary. Next, sauté the vegetables. Add 1 diced medium onion, 3 minced garlic cloves, and 1 diced bell pepper to the pot. Sauté for about 5 minutes. This step softens the veggies and brings out their flavors. Now, it’s time to build the soup. Stir in 1 can of crushed tomatoes and 4 cups of beef broth. Then, add 2 teaspoons of Italian seasoning, 1 teaspoon of dried basil, 1 teaspoon of sugar, and salt and pepper to taste. Bring this mixture to a boil. Once it boils, lower the heat. Let it simmer for about 10 minutes. This helps all the flavors blend together nicely. Next, add the noodles. Toss in 8 ounces of broken lasagna noodles. Cook them for about 10 to 12 minutes until they are tender. While the noodles cook, prepare the cheese mixture. In a separate bowl, mix together 1 cup of ricotta cheese, half of the shredded mozzarella cheese, and 1/2 cup of grated Parmesan cheese. Once the noodles are done, take the pot off the heat. Serve the soup in bowls, adding a dollop of the cheese mixture on top. Sprinkle the remaining mozzarella cheese over each bowl. You can garnish with fresh basil or parsley. This adds a nice touch of color and flavor. For the full recipe, check out the instructions provided earlier. To get your noodles just right, cook them at the end. This keeps them from getting mushy. Add them to the pot just before serving. They will soak up the broth but stay firm. Boosting flavors in your soup is easy. Use fresh herbs like basil and parsley. They add a bright taste. A splash of red wine can enhance the depth too. Don't skip the seasoning; salt and pepper are key. Lasagna soup pairs well with crusty bread. A side salad can add fresh crunch. You can also serve it with garlic bread for a tasty twist. For garnish, sprinkle extra cheese on top. Fresh basil leaves make it look pretty. A drizzle of olive oil adds a nice touch too. Using the wrong pasta can ruin your soup. Lasagna noodles work best. Avoid small pasta shapes, as they cook too quickly. Never skip the simmering step. This is when all the flavors blend. Letting it simmer for a bit makes a big difference. {{image_2}} You can make a tasty vegetarian version of lasagna soup. Start by swapping the meat for plant-based proteins. Options like lentils, mushrooms, or tempeh work well. They add heartiness and flavor. Next, boost the veggie count! Toss in spinach, zucchini, or carrots for a colorful mix. This not only enhances nutrition but also makes your soup more vibrant and appealing. For gluten-free eaters, use gluten-free noodles. There are many brands available that mimic regular pasta well. They hold up nicely in soup. You can also choose an alternative broth. Vegetable broth is a great option here, giving a light and fresh taste. Just check the label to ensure it is gluten-free. If you like a kick, try adding red pepper flakes. Just a pinch can turn up the heat. You can also incorporate spicy sausage instead of the regular meat. This adds rich flavors and a delightful bite. Adjust the spice level to your taste. Remember, you want a cozy feel, not overwhelming heat! For all these variations, keep in mind the [Full Recipe] to guide you through the base. Enjoy experimenting with flavors! To keep your lasagna soup fresh, store it in an airtight container. Place it in the fridge. It’s best to let the soup cool before sealing it. Avoid adding the cheese mixture until you’re ready to eat. This helps keep flavors fresh. For freezing, use a freezer-safe container. Leave some space at the top for expansion. You can freeze it for up to three months. Just remember to label the container with the date. When reheating, the best method is using the stove. Pour the soup into a pot and heat it over medium heat. Stir often to avoid sticking. You can also use the microwave. Just place it in a microwave-safe bowl and cover it. Heat in short bursts, stirring in between. To keep the flavor and texture, add a splash of broth or water. This helps to avoid dryness. If you added the cheese mixture before freezing, stir it in after reheating. Lasagna soup lasts in the fridge for about three to four days. If you see any mold or off smells, it's time to toss it. When in doubt, trust your senses. It's better to be safe than sorry. Lasagna soup is a warm and cozy dish. It mixes the flavors of classic lasagna in a broth. You get layers of taste in every spoonful. The main components include ground beef or sausage, tomatoes, and broth. You also have noodles that soak up the rich flavors. The cheese adds creaminess and balance. It’s like having lasagna but in a comforting bowl of soup. Yes, you can make lasagna soup in advance. To prepare, cook the soup as directed. Let it cool, then store it in the fridge. It will keep well for three to four days. When ready to eat, reheat the soup on the stove. Add a splash of broth if it’s too thick. This makes it quick and easy for busy weeknights. Lasagna soup can be a healthy meal choice. It offers protein from the meat and cheese. You also get vitamins from the vegetables. The amount of cheese can be adjusted to lower fat. You can even swap in whole-grain noodles for added fiber. Just keep an eye on portion sizes for a balanced meal. To boost the flavor, use fresh herbs like basil or parsley. You can also add a splash of balsamic vinegar. This gives a nice tang to the soup. Try using homemade broth for richer taste. Adding spicy sausage instead of regular meat can also enhance flavor. For an extra kick, sprinkle in some red pepper flakes. These tips will make your soup even better. For the full recipe, check out the Lasagna Soup Delight. Lasagna soup combines hearty flavors and comfort in one bowl. We explored the essential ingredients, from ground meat to rich cheeses. Preparing it step by step ensures a delicious result. Always remember to avoid common mistakes to perfect your soup. Whether you want a vegetarian or spicy version, options abound. Store leftovers properly to enjoy later. Overall, lasagna soup is flexible, satisfying, and worth a try. Enjoy your cooking journey and savor each delicious bite!](https://foodishtalk.com/wp-content/uploads/2025/04/67db01e5-42d0-4d9e-809f-cd7f6944f89d-300x300.webp)

Creamy Spinach Artichoke Dip Tasty and Easy Recipe
Are you ready to whip up a delicious appetizer everyone will love? This Creamy Spinach Artichoke Dip is both tasty and easy to make.…

