


Latest & Greatest

Thai Cashew Chicken Stir Fry Simple and Flavorful Meal
Looking for a quick, tasty meal? Thai Cashew Chicken Stir Fry is your answer! This dish combines tender chicken, crunchy
Read more…
Swirled Strawberry Matcha Cookies Irresistible Delight
Ready to bake a treat that’s as beautiful as it is delicious? These Swirled Strawberry Matcha Cookies are a fun
Read more…
Pineapple Cucumber Salad Refreshing and Healthy Recipe
If you’re looking for a bright, tasty dish that boosts your health, try my Pineapple Cucumber Salad. This simple recipe
Read more…
Bow Tie Pasta Salad Fresh and Flavorful Recipe
Looking to spice up your meal routine? This Bow Tie Pasta Salad is fresh, vibrant, and bursting with flavor! Packed
Read more…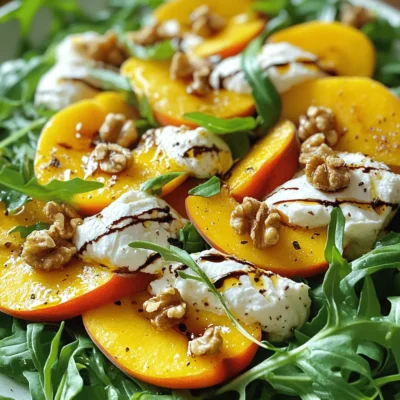
Peach Burrata Salad with Balsamic Drizzle Delight
Are you ready to savor a refreshing summer dish? My Peach Burrata Salad with Balsamic Drizzle brings together ripe peaches,
Read more…
Lemon Impossible Pies Delightful Dessert Recipe
If you love lemon desserts, you’re in for a treat! This Lemon Impossible Pie is the perfect mix of sweet,
Read more…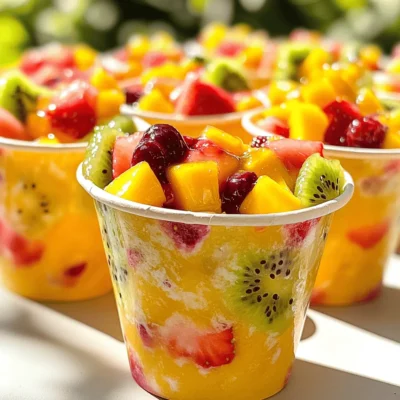
Homemade Otter Pops Fun and Refreshing Summer Treat
Summer is the perfect time for Otter Pops! These frozen treats are easy to make and super fun. In this
Read more…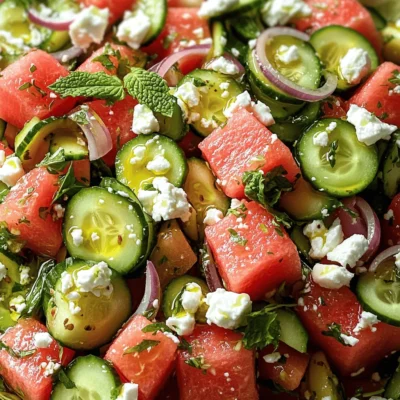
Refreshing Watermelon Cucumber Feta Salad Recipe
Are you ready to beat the heat with a burst of flavor? This Refreshing Watermelon Cucumber Feta Salad is the
Read more…browse recipes


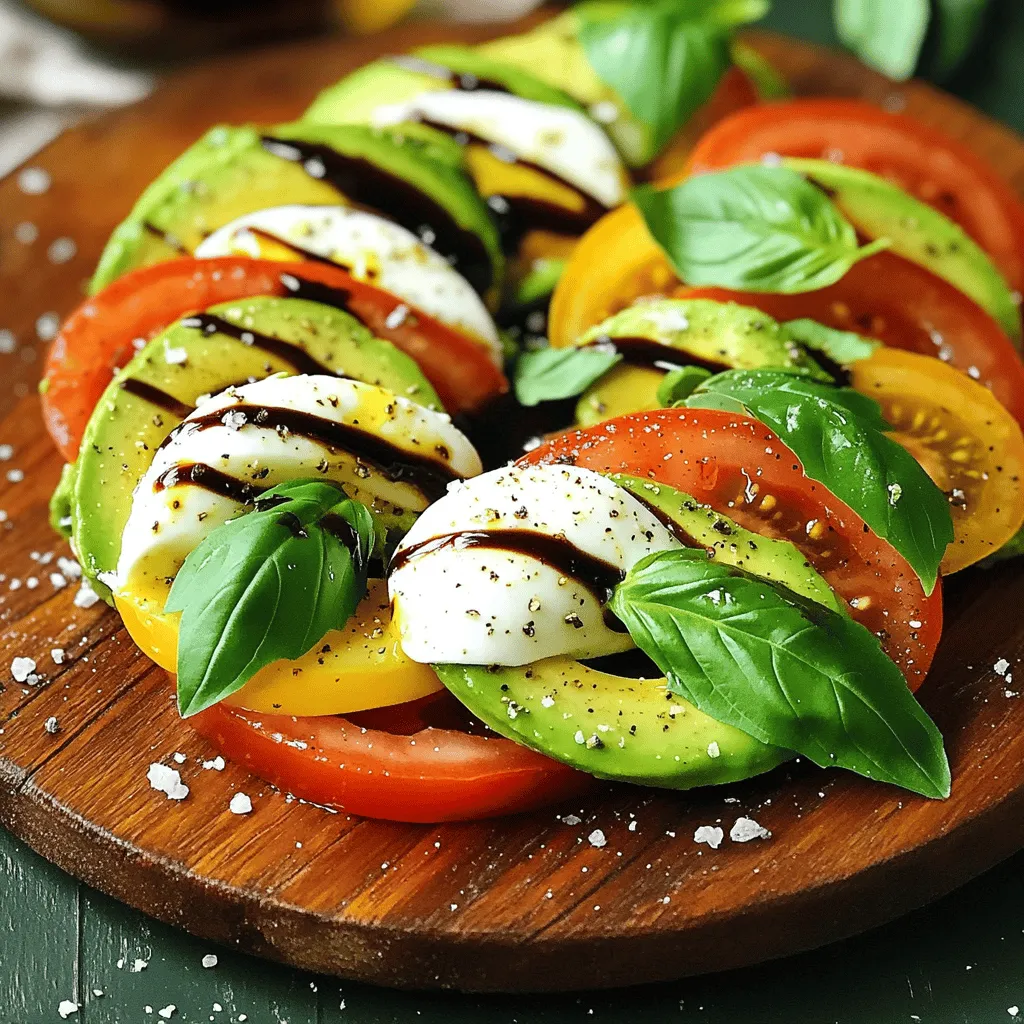
Avocado Caprese Salad Fresh and Flavorful Dish
Looking for a fresh and flavorful dish? The Avocado Caprese Salad is the perfect choice! This simple salad features creamy avocados, ripe tomatoes, and…
My Latest Desserts

Mini Vanilla Cream Tarts with Raspberries Delight
Welcome to the sweet world of Mini Vanilla Cream Tarts with Raspberries! Today, I’ll show you how to make these Read Full Recipe-
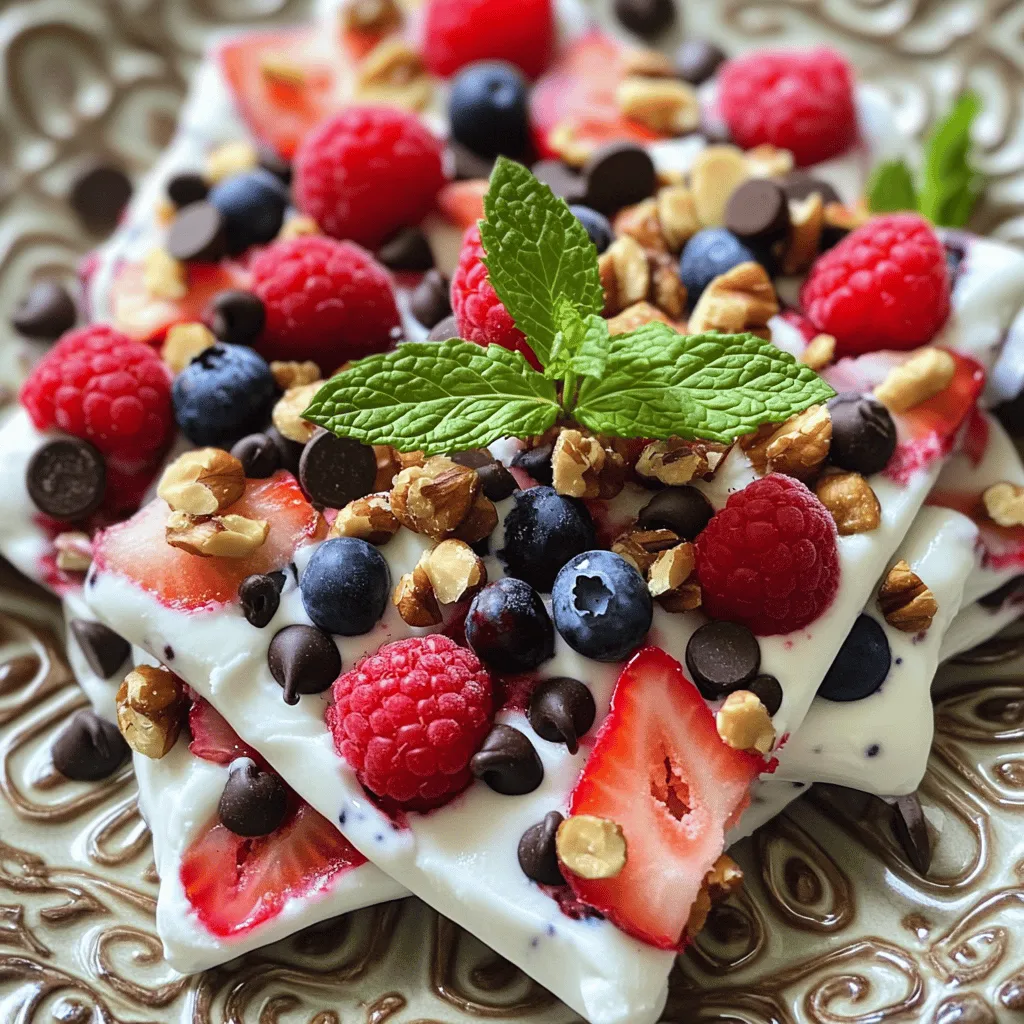
Frozen Yogurt Bark Delightful and Simple Treat
If you’re looking for a quick, tasty treat, frozen yogurt bark is a winner. It’s easy to make and fun Read Full Recipe -
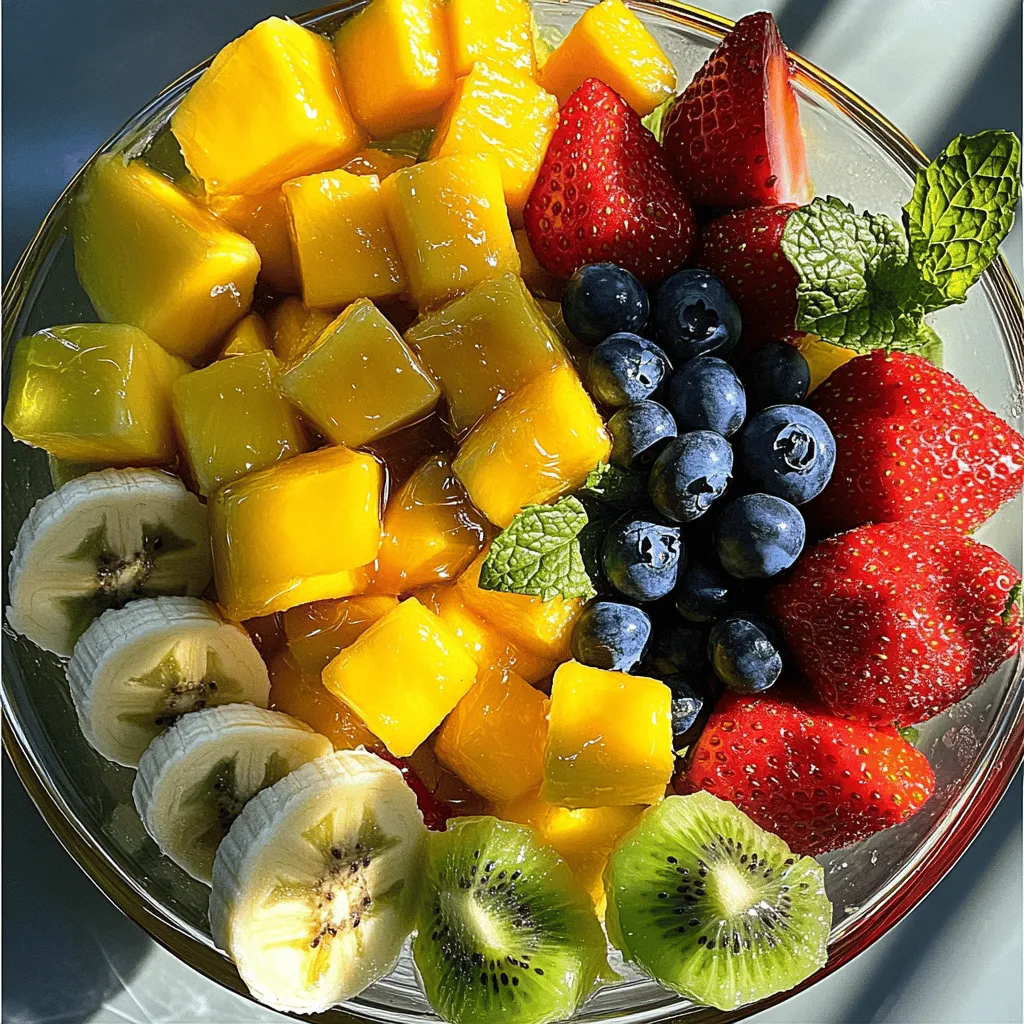
Fruit Salad with Honey Lime Dressing Easy Recipe
Looking for a fresh and easy treat? This Fruit Salad with Honey Lime Dressing is the perfect choice. Bursting with Read Full Recipe -
Blueberry Cheesecake Bars Simple and Delicious Treat
Looking for a dessert that’s easy to make and bursting with flavor? You’ve found it! These Blueberry Cheesecake Bars are Read Full Recipe -
Lemon Cheesecake Crumb Bars Delightful and Fresh Treat
Are you ready to brighten your day with a sweet treat? These Lemon Cheesecake Crumb Bars combine creamy cheesecake with Read Full Recipe -
Blueberry Heaven Cookies Irresistible Sweet Treat
Welcome to your new favorite cookie recipe! Blueberry Heaven Cookies are the perfect blend of sweet and tart, making them Read Full Recipe -
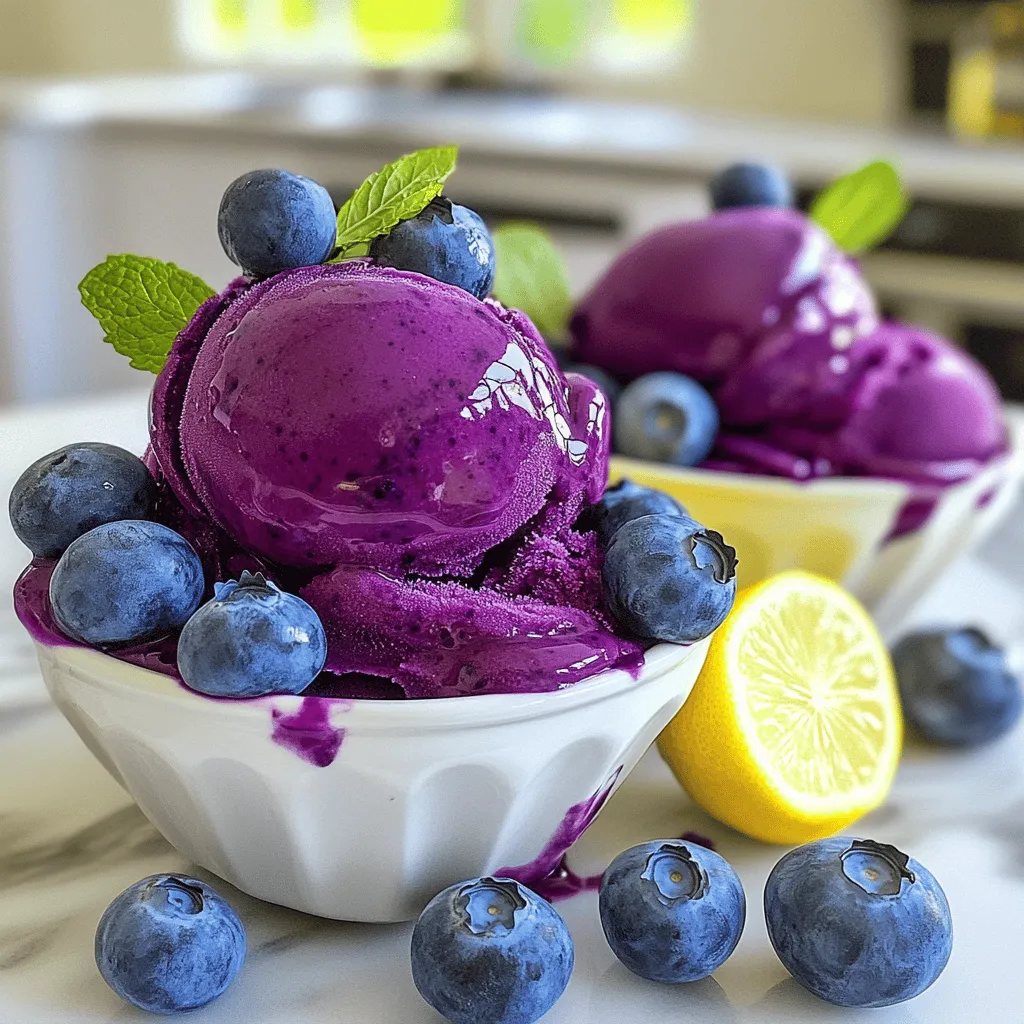
Lemon Blueberry Sorbet Fresh and Refreshing Delight
Cool off with a bowl of Lemon Blueberry Sorbet! This sweet, tangy treat is perfect for hot days. You only Read Full Recipe -
Lemon Blueberry Cupcakes Delightful and Light Treat
Are you ready to indulge in a sweet treat that brightens your day? These Lemon Blueberry Cupcakes are just what Read Full Recipe -
Blueberry Cheesecake Cookies Delightful and Easy Recipe
If you love the sweet and tangy combo of blueberry cheesecake, you’re in for a treat! I’ll show you how Read Full Recipe -
Greek Yogurt Ice Cream Creamy and Simple Delight
Looking for a cool treat that’s both delicious and easy to make? Greek yogurt ice cream is your answer! This Read Full Recipe


hey,
i’m !
I’m so happy you’re here!
I pour heart and skill into every recipe I create. I know you’ll taste the difference now let’s enjoy this flavorful adventure together.


![- 1 cup rolled oats - 1 cup almond milk (or any milk of choice) - 1/2 cup Greek yogurt (or plant-based yogurt) These key ingredients form the base of your lemon blueberry overnight oats. Rolled oats give a chewy texture and are filling. Almond milk adds creaminess without extra calories. Greek yogurt brings protein and tang, making your breakfast satisfying. - 1 tablespoon honey or maple syrup (adjust to taste) - Zest of 1 lemon - Juice of 1 lemon - 1/2 teaspoon vanilla extract - 1/2 teaspoon cinnamon Flavor enhancers make your oats pop. Honey or maple syrup adds sweetness. Lemon zest and juice provide a bright zing. Vanilla extract brings warmth, while cinnamon adds depth. Each ingredient works together to create a delightful taste. - 1/2 cup fresh blueberries (plus extra for topping) - Additional sweeteners - Other fruit options Toppings are where you can get creative. Fresh blueberries add color and flavor. You can also add more sweeteners if you like it sweeter. Feel free to mix in other fruits like bananas or strawberries. Each variation adds a unique twist to your breakfast. For the full recipe, check out the Lemon Blueberry Delight Overnight Oats section. To start, mix your rolled oats and almond milk in a medium bowl. Stir well until they blend smoothly. Next, add Greek yogurt, honey or maple syrup, lemon zest, lemon juice, vanilla extract, cinnamon, and a pinch of salt. Mix all these ingredients until they are well combined. This base creates a creamy, tangy mixture that will make your oats taste great. Now, it’s time to add the fresh blueberries. Use a gentle folding technique to mix them into the oat mixture. This helps to keep the blueberries intact and evenly spread. Make sure each spoonful has some blueberries for the best flavor. This step is key to enjoying bursts of sweetness in every bite. After mixing, transfer the oat mixture into a jar or an airtight container. Seal it tightly and refrigerate overnight or for at least 4-6 hours. This chilling time allows the oats to soak up the milk and flavors. When you wake up, the mixture will be thick and ready to eat. Before serving, stir the oats. If they seem too thick, add a splash of milk. Enjoy them topped with extra blueberries and a drizzle of honey or syrup. You will love how easy this breakfast is! For the full recipe, check out the section above. To get the right texture, adjust the milk. Start with one cup of almond milk. If you want creamier oats, add more milk. On the other hand, if you like thicker oats, use less milk. The flavors will improve overnight. They mix together as they sit. The lemon zest and juice wake up the taste. Choose jars or airtight containers for serving. They look nice and keep the oats fresh. For a complete breakfast, serve with nuts or seeds. You can also add a side of fruit or yogurt. This makes it filling and fun. Avoid over-soaking the oats. If they sit too long, they can become mushy. Aim for soaking them overnight or for about six hours. Don’t skip on the lemon zest and juice. They add bright flavor and make the dish special. {{image_2}} You can easily change the taste of your lemon blueberry overnight oats. Try adding nuts or seeds for a nice crunch. Chopped almonds or walnuts work great. You can also add chia seeds for extra fiber. If you want to switch up the fruit, use strawberries or peaches instead of blueberries. Each fruit gives a unique flavor and keeps breakfast fun. If you need gluten-free options, use gluten-free oats. They will taste just as good. For a vegan twist, swap Greek yogurt for a plant-based yogurt. Almond or coconut yogurt are great choices. Make sure to check the labels to ensure they are dairy-free. Citrus fruits can change with the seasons. In winter, try adding a bit of orange zest for a bright touch. In summer, go wild with fresh berries like raspberries or blackberries. You can even mix different berries for a fun flavor explosion. Seasonal fruit makes your breakfast fresh and exciting. For the complete recipe, check out the [Full Recipe]. To keep your lemon blueberry overnight oats fresh, use an airtight container. Glass jars work well. They keep the taste and texture just right. Stored this way, the oats last about 3 to 5 days in the fridge. Check for any signs of spoilage before eating. Making a big batch saves time. You can prepare several jars at once. Just double or triple the recipe. If you want to freeze some, divide them into single servings. They freeze well for up to 3 months. Thaw overnight in the fridge for a quick breakfast. To ensure your oats are safe, check for spoilage. If they smell sour or off, it's best to toss them. Also, look for changes in texture. If they feel slimy or mushy, don’t eat them. Remember, freshness is key to enjoying your lemon blueberry overnight oats. For the full recipe, check out the details above. Yes, you can use quick oats. However, they absorb liquid faster. This may change the texture. Rolled oats give a chewier bite. Quick oats make the mix softer. If you prefer softer oats, go for quick oats. If you want a heartier meal, stick with rolled oats. You can store overnight oats in the fridge for up to five days. They stay fresh and tasty. Just make sure to use an airtight container. The flavors blend nicely over time. If you see any signs of spoilage, it’s best to toss them. Absolutely! You can choose any milk you like. Almond, soy, or oat milk all work well. For yogurt, use Greek or plant-based options. This flexibility allows you to meet your taste and dietary needs. Be sure to adjust sweetness if you switch to flavored yogurt. Add more yogurt or a splash of milk. Blending in a banana or avocado can also help. These ingredients add creaminess without changing the taste much. Experiment with different amounts to find your perfect texture. Yes, feel free to add any fruit you enjoy! Sliced bananas, strawberries, or peaches all make great choices. Just remember that some fruits might change the flavor. Add them right before serving for the best texture. Honey and maple syrup are popular choices. You could also use agave nectar or stevia. Adjust the amount based on your taste. Just remember, less is more if you want to let the lemon shine. Definitely! Make a big batch at once. Use separate containers to store them for the week. This way, you have ready meals for busy mornings. Just grab and go! Yes, you can freeze them! Use freezer-safe containers. Just leave some space for expansion. When you’re ready to eat, thaw them in the fridge overnight. Stir well before serving. No problem! You can swap them for any other fruit. Try raspberries, blackberries, or even chopped apples. The lemon flavor pairs well with many fruits, so feel free to get creative! Serve them cold or warm them up in the microwave. Top with extra fruit, nuts, or seeds. This adds texture and flavor. For a fancy touch, drizzle honey on top before serving. For a complete guide, check out the Full Recipe! Lemon blueberry overnight oats are simple and fun to make. You blend rolled oats, milk, and yogurt for a tasty base. Add fresh blueberries, lemon zest, and your favorite sweeteners for flavor. Always remember to adjust the milk for the right texture and avoid over-soaking. Try different fruits or toppings for variety. Store leftovers in airtight containers, and check for spoilage to stay safe. Enjoy this healthy breakfast that satisfies all tastes and preferences!](https://foodishtalk.com/wp-content/uploads/2025/05/1237c475-1128-4ce0-af13-5dc2ee8edfa8-300x300.webp)

Sausage Breakfast Casserole Simple and Tasty Recipe
Start your day off right with my simple and tasty sausage breakfast casserole! You can whip this dish up with just a few ingredients…