

Latest & Greatest
Avocado Caprese Salad Fresh and Flavorful Dish
Looking for a fresh and flavorful dish? The Avocado Caprese Salad is the perfect choice! This simple salad features creamy
Read more…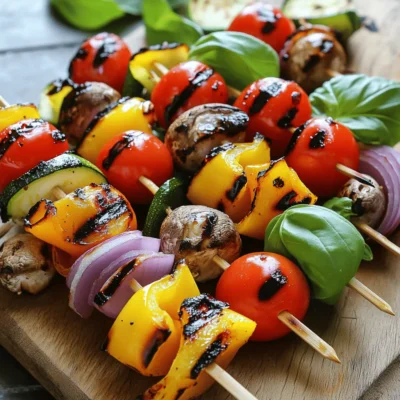
Grilled Vegetable Skewers Vibrant and Flavorful Dish
Grilled vegetable skewers are a colorful and tasty dish that anyone can enjoy. I love how easy they are to
Read more…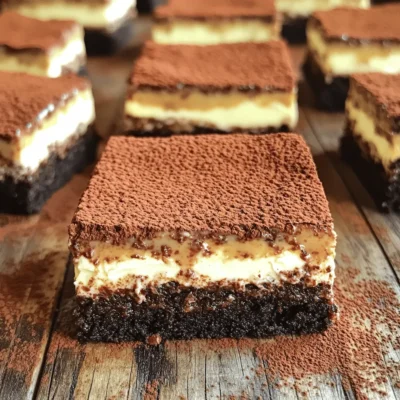
Tiramisu Brownies Irresistible Coffee Dessert Delight
If you love coffee and dessert, you’re in for a treat! Tiramisu Brownies combine rich chocolate with creamy mascarpone and
Read more…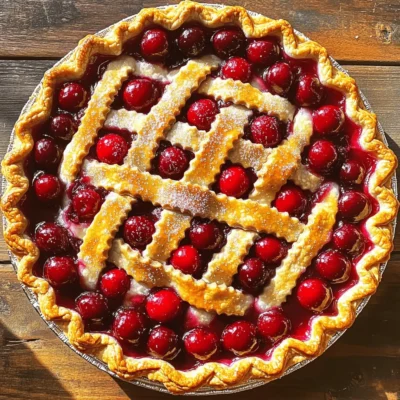
Easy Cherry Pie Delightful and Simple Recipe Guide
Looking for a quick and tasty dessert? This Easy Cherry Pie will make your taste buds sing! With just a
Read more…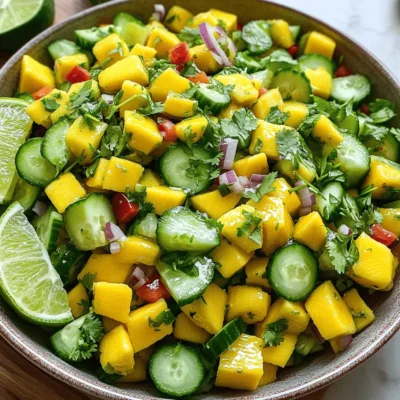
Refreshing Mango Salad with Lime Dressing Delight
Are you ready to beat the heat with a delicious and easy dish? This Refreshing Mango Salad with Lime Dressing
Read more…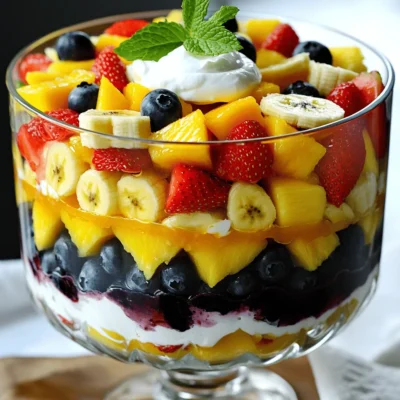
Layered Fruit Salad with Citrus Dressing Delight
Are you ready to impress your taste buds? My Layered Fruit Salad with Citrus Dressing combines fresh, vibrant fruits to
Read more…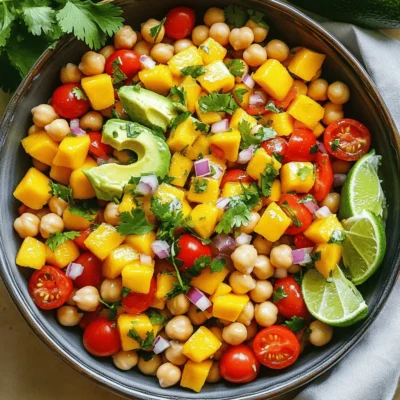
Mango Chickpea Salad Fresh and Flavorful Dish
Are you ready to brighten your meal with a Mango Chickpea Salad? This fresh and colorful dish is packed with
Read more…
Lemon Iced Tea Refreshing and Easy Recipe Guide
Looking for a refreshing drink that’s easy to make? Lemon Iced Tea is the perfect choice! In this guide, I’ll
Read more…browse recipes


![To make chewy chocolate chip cookies, you will need: - 1 cup (226g) unsalted butter, softened - 3/4 cup (150g) brown sugar, packed - 1/2 cup (100g) granulated sugar - 2 large eggs - 1 teaspoon vanilla extract - 2 1/4 cups (285g) all-purpose flour - 1/2 teaspoon baking soda - 1/2 teaspoon salt - 1 1/2 cups (270g) semi-sweet chocolate chips - 1/2 cup (90g) chopped nuts (optional - walnuts or pecans recommended) You can add different flavors or textures to your cookies. Some options include: - Milk chocolate chips for a sweeter taste - Dark chocolate chips for a richer flavor - Chopped nuts like walnuts or pecans for crunch - Sea salt on top for a flavor boost Using high-quality ingredients matters. Fresh butter gives a rich taste. Good chocolate enhances the cookie's flavor. Fresh eggs create a better texture. Quality flour helps the cookies rise properly. Avoid old or stale ingredients to ensure your cookies turn out delicious. For the full method to create these tasty treats, check the full recipe. To make the dough, start by preheating your oven to 350°F (175°C). Line two baking sheets with parchment paper. In a large bowl, cream together the softened butter, brown sugar, and granulated sugar. Mix until it's smooth and fluffy, which takes about 3 to 5 minutes. Next, add the eggs one at a time. Make sure to mix well after each egg. Then, stir in the vanilla extract. In another bowl, whisk together the all-purpose flour, baking soda, and salt. Slowly add this dry mix to your wet ingredients. Mix until just combined; avoid overmixing. Finally, gently fold in the chocolate chips and nuts, if you choose to add them. Now it's time to bake! Use a cookie scoop or a tablespoon to drop rounded balls of dough onto your prepared baking sheets. Leave some space between each cookie. Bake in the preheated oven for 10 to 12 minutes. The edges should be golden brown, while the centers remain soft. This is key to getting that chewy texture. After baking, take out the cookies and let them cool on the baking sheets for about 5 minutes. This helps them set. Then, transfer the cookies to wire racks to cool completely. For storage, keep the cookies in an airtight container. This keeps them fresh and chewy. If you want to save cookie dough for later, you can freeze it. Just scoop the dough onto a baking sheet and freeze until solid. Then, store the dough balls in a freezer bag. To get chewy chocolate chip cookies, focus on the butter. Use softened unsalted butter. Cream it with sugars for 3-5 minutes. This adds air, making your cookies light. Next, use brown sugar as it holds moisture. A mix of white and brown sugar works too. Also, don't overmix when adding flour. It makes the cookies tough. Lastly, remove them from the oven when they are still soft in the middle. They will continue to cook on the baking sheet. Common mistakes can ruin your cookies. First, don’t skip the chilling step. Chilling the dough for at least 30 minutes helps the flavors blend and prevents spreading. Another mistake is measuring flour poorly. Use the scoop and level method, not packing it down. Also, avoid opening the oven door too often. Each time you do, heat escapes, affecting baking time. Finally, resist the urge to bake on a hot baking sheet. It can cause uneven baking. Good equipment makes a big difference. Use a heavy baking sheet for even heat. Parchment paper helps prevent sticking and makes cleanup easy. A cookie scoop ensures uniform size for even baking. A stand mixer or hand mixer saves time and effort for creaming butter. Lastly, invest in an oven thermometer. It helps you know if your oven runs hot or cold, leading to perfect cookies every time. For the full recipe, check out the details above. {{image_2}} You can change up your chewy chocolate chip cookies easily. Try adding white chocolate chips for a sweet twist. You might even like to mix in some peanut butter chips for a rich flavor. Matcha powder brings a unique green hue and earthy taste. Dried fruit, like cranberries or cherries, adds a nice chew and tartness. You can also use a mix of semisweet and dark chocolate chips for depth. The options are endless, so feel free to get creative! If you need a gluten-free option, swap all-purpose flour for a gluten-free blend. Ensure the blend contains xanthan gum for the right texture. For a vegan version, use coconut oil instead of butter and flax eggs as a binder. To make a flax egg, mix one tablespoon of ground flaxseed with three tablespoons of water. Let it sit for five minutes until it thickens. Use dairy-free chocolate chips to keep it vegan-friendly. These swaps let everyone enjoy these cookies! Seasonal flavors can make your cookies even more fun. For fall, add pumpkin spice to the dough. You can also mix in chopped nuts for a crunchy texture. During the holidays, sprinkle festive colored sugar on top before baking. For Valentine's Day, use heart-shaped cookie cutters and add pink or red sprinkles. Themed designs can really make your cookies stand out at parties. These variations keep your chewy chocolate chip cookies exciting and fresh! To keep your chewy chocolate chip cookies fresh, store them in an airtight container. This will help keep moisture inside and prevent them from drying out. You can place a piece of bread in the container. The bread will absorb excess moisture and keep the cookies soft. Avoid stacking cookies on top of each other. This can cause them to stick together or lose their shape. You can freeze both cookie dough and baked cookies. For dough, scoop rounded balls and place them on a baking sheet. Freeze them for about 1 hour, then transfer them to a freezer bag. This way, you can bake fresh cookies anytime! For baked cookies, let them cool completely. Place them in an airtight container or a freezer bag. They will last up to 3 months in the freezer. In an airtight container at room temperature, your cookies will stay fresh for about 1 week. If you keep them in the fridge, they can last about 2 weeks. However, refrigeration may change the texture, making them less chewy. Frozen cookies can last up to 3 months, keeping their taste and texture intact. Enjoy your cookies at their best by following these storage tips! For the full recipe of these delicious cookies, check out [Full Recipe]. Chewy cookies have a soft, warm texture. This happens when you use more brown sugar than white sugar. Brown sugar holds moisture well. Also, adding an extra egg yolk helps keep the cookie soft. Another key point is not to overbake. Bake just until the edges turn golden. The centers should look soft. This method creates that perfect chewy bite. Yes, you can use different flours! All-purpose flour works great, but you can try others. For a nuttier taste, use whole wheat flour. Almond flour adds a gluten-free option. If you experiment, adjust the amount of flour. Too much flour may lead to dryness. Always remember to keep the right balance for the best results. If your cookies spread too much, try chilling the dough first. Place it in the fridge for 30 minutes before baking. Another fix is to add a bit more flour to the dough. This helps it hold its shape better. Also, check your oven temperature. An oven that’s too hot can cause spreading. Make sure to follow the Full Recipe for best results. This blog post covered everything you need for chewy chocolate chip cookies. We reviewed key ingredients and why they matter. I shared easy steps to make cookie dough, bake, and store your cookies. You learned tips for that perfect chewy texture and how to avoid common mistakes. Plus, I included fun variations for all diets. Keep these tips in mind to create delicious cookies each time. With quality ingredients and careful steps, you can impress anyone with your baking skills. Enjoy making and sharing your cookies!](https://foodishtalk.com/wp-content/uploads/2025/06/543f97ba-3f81-4cbe-a36c-4733960876f3.webp)
Chewy Chocolate Chip Cookies Simple and Irresistible
Are you ready to bake the best cookies of your life? In this post, I’ll share my simple and irresistible recipe for chewy chocolate…
My Latest Desserts

Fig Cake with Almond and Honey Delight Recipe
Are you ready to indulge in a delightful treat? My Fig Cake with Almond and Honey recipe combines rich flavors Read Full Recipe-
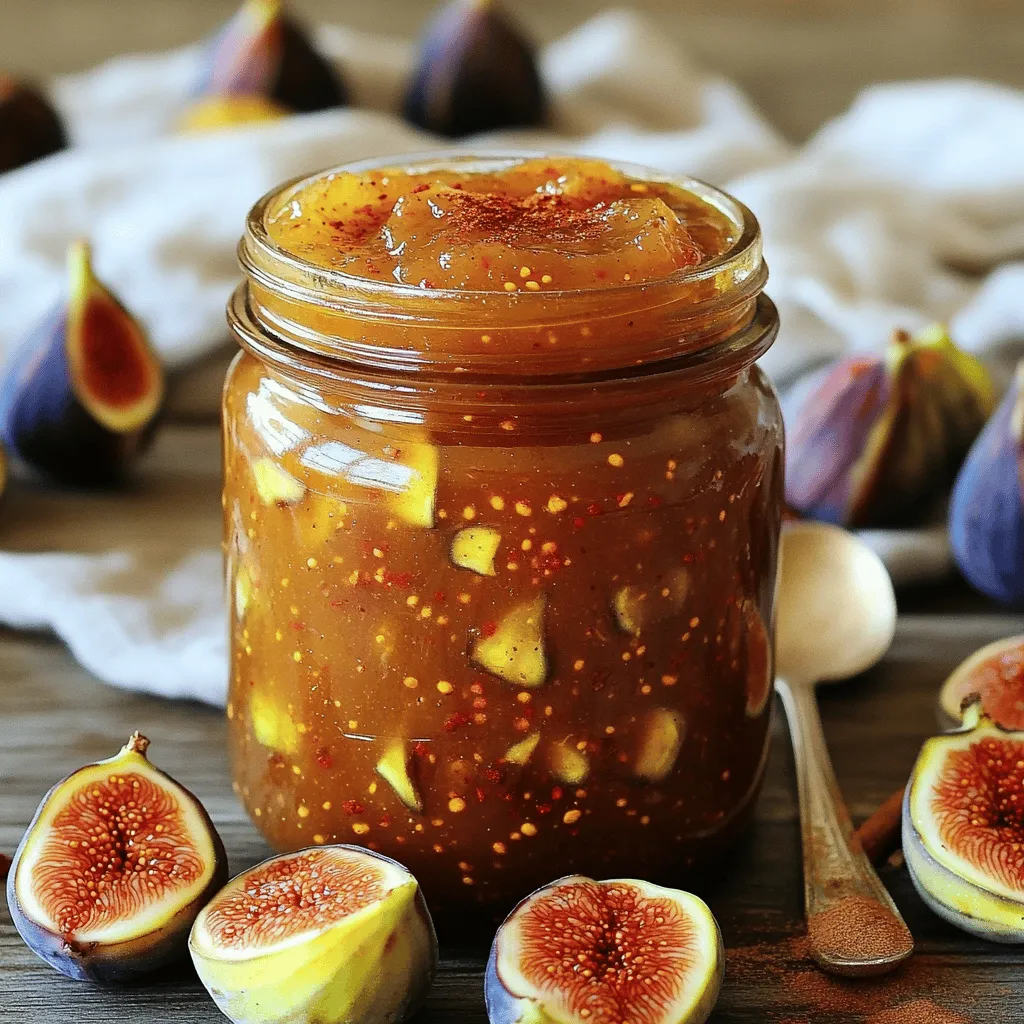
Simple Fig Jam Easy Recipe to Savor and Enjoy
Are you ready to make a burst of flavor with your next kitchen project? This Simple Fig Jam recipe is Read Full Recipe -
Mini Vanilla Cream Tarts with Raspberries Delight
Welcome to the sweet world of Mini Vanilla Cream Tarts with Raspberries! Today, I’ll show you how to make these Read Full Recipe -
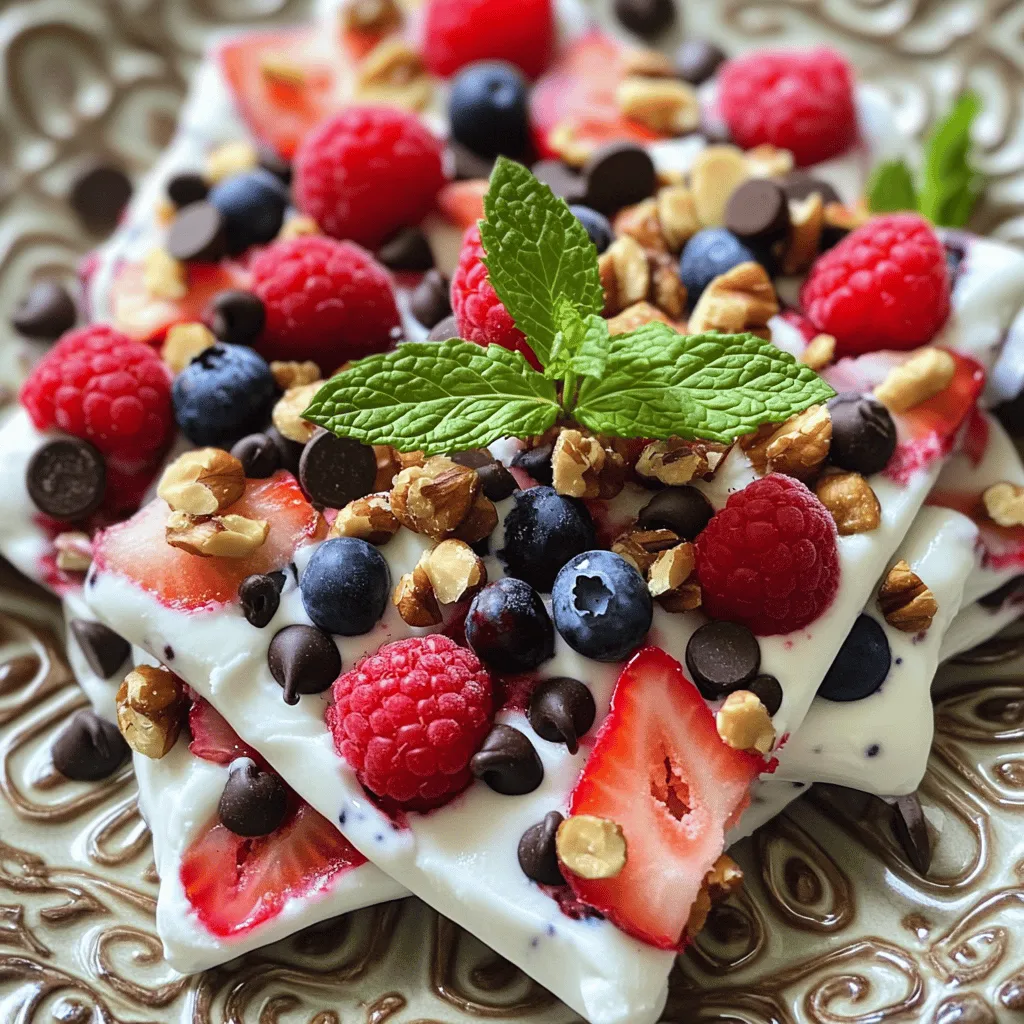
Frozen Yogurt Bark Delightful and Simple Treat
If you’re looking for a quick, tasty treat, frozen yogurt bark is a winner. It’s easy to make and fun Read Full Recipe -
Fruit Salad with Honey Lime Dressing Easy Recipe
Looking for a fresh and easy treat? This Fruit Salad with Honey Lime Dressing is the perfect choice. Bursting with Read Full Recipe -
Blueberry Cheesecake Bars Simple and Delicious Treat
Looking for a dessert that’s easy to make and bursting with flavor? You’ve found it! These Blueberry Cheesecake Bars are Read Full Recipe -
Lemon Cheesecake Crumb Bars Delightful and Fresh Treat
Are you ready to brighten your day with a sweet treat? These Lemon Cheesecake Crumb Bars combine creamy cheesecake with Read Full Recipe -
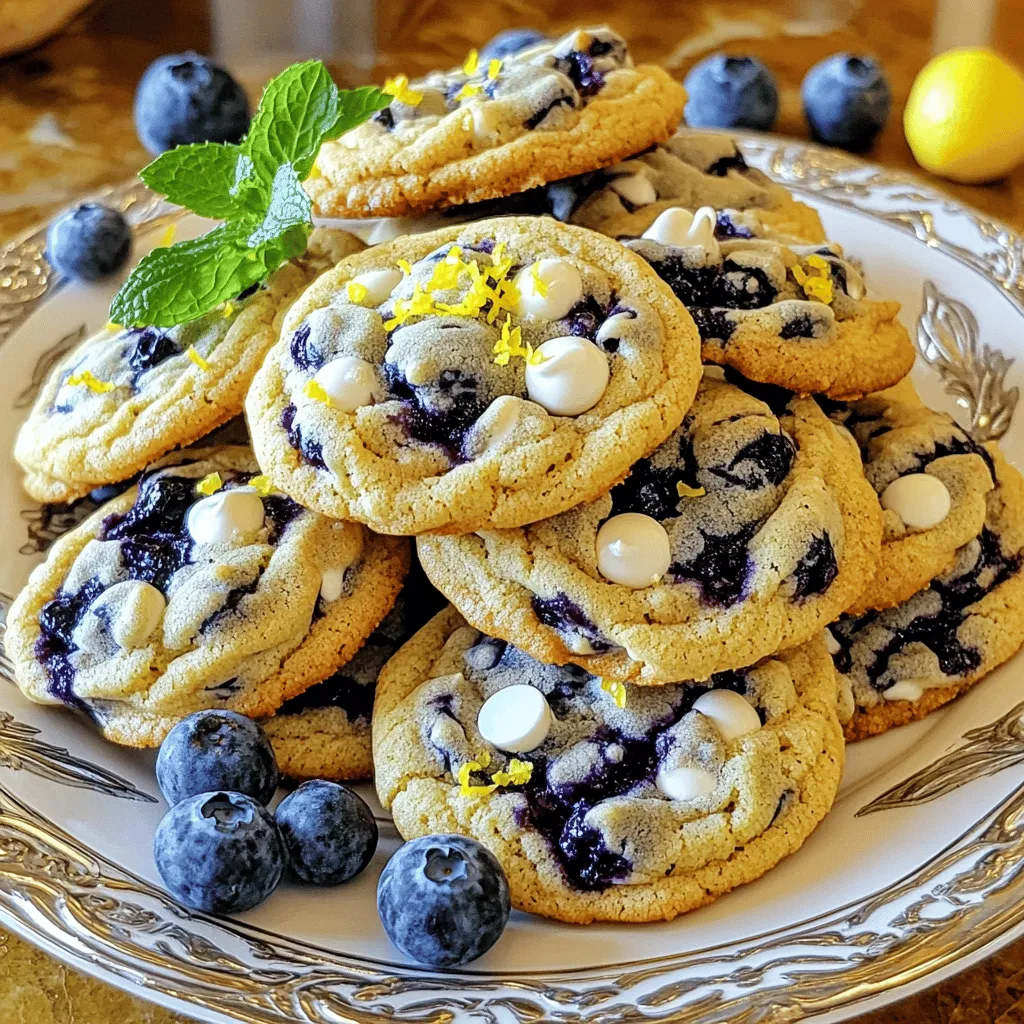
Blueberry Heaven Cookies Irresistible Sweet Treat
Welcome to your new favorite cookie recipe! Blueberry Heaven Cookies are the perfect blend of sweet and tart, making them Read Full Recipe -
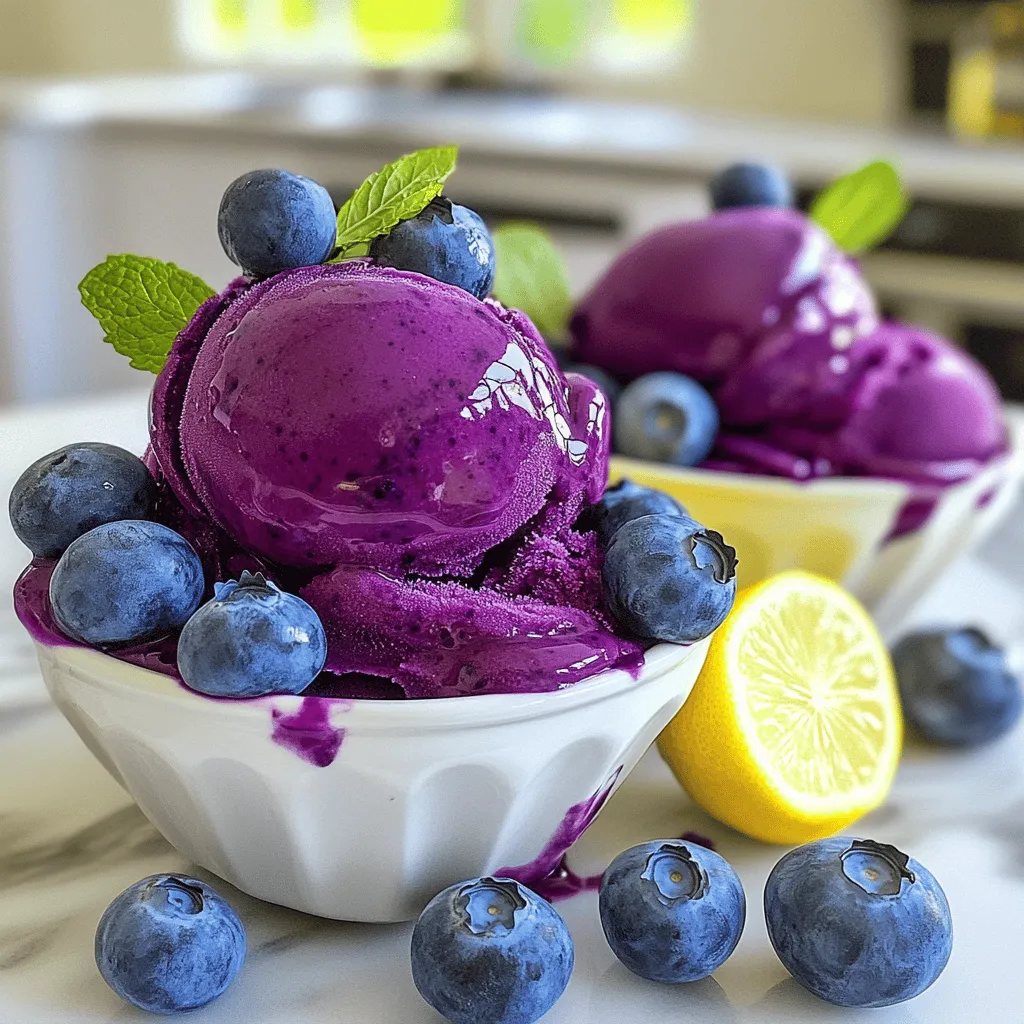
Lemon Blueberry Sorbet Fresh and Refreshing Delight
Cool off with a bowl of Lemon Blueberry Sorbet! This sweet, tangy treat is perfect for hot days. You only Read Full Recipe -
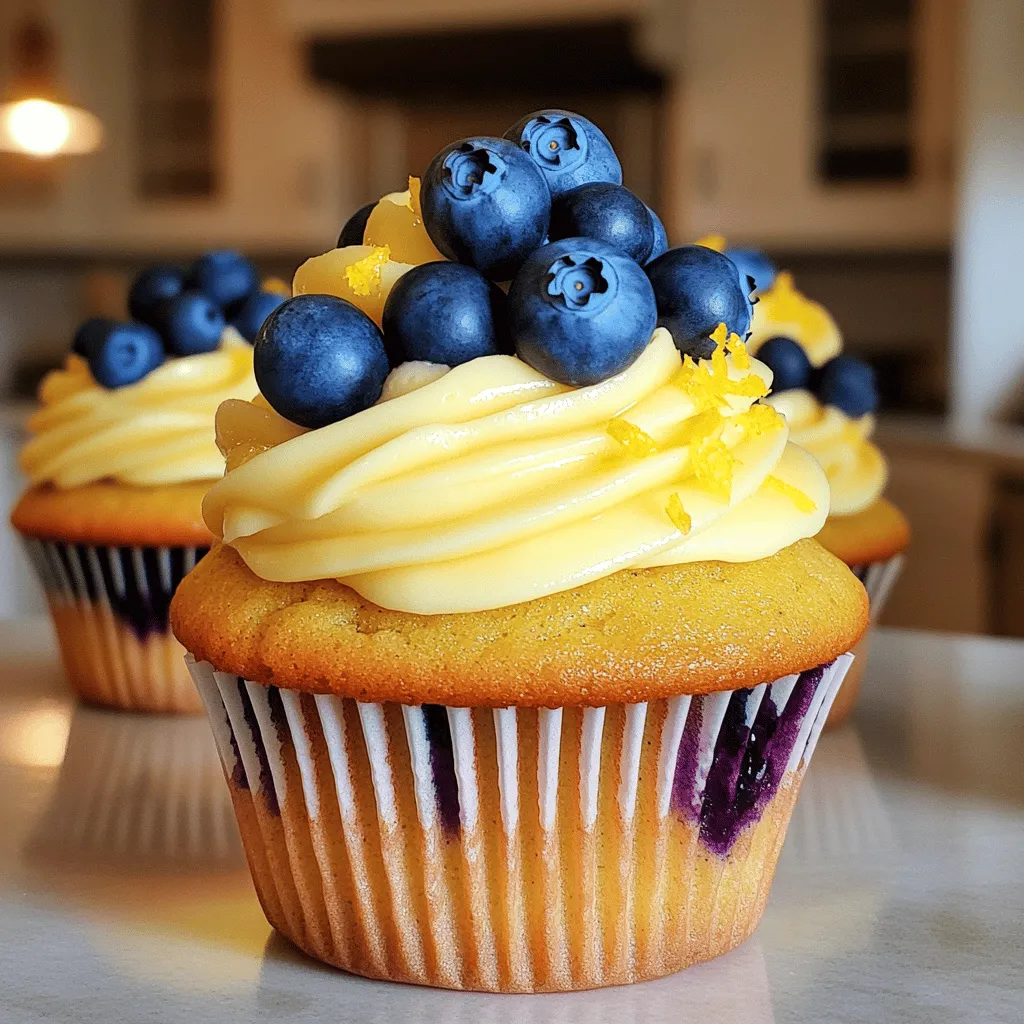
Lemon Blueberry Cupcakes Delightful and Light Treat
Are you ready to indulge in a sweet treat that brightens your day? These Lemon Blueberry Cupcakes are just what Read Full Recipe


hey,
i’m !
I’m so happy you’re here!
I pour heart and skill into every recipe I create. I know you’ll taste the difference now let’s enjoy this flavorful adventure together.

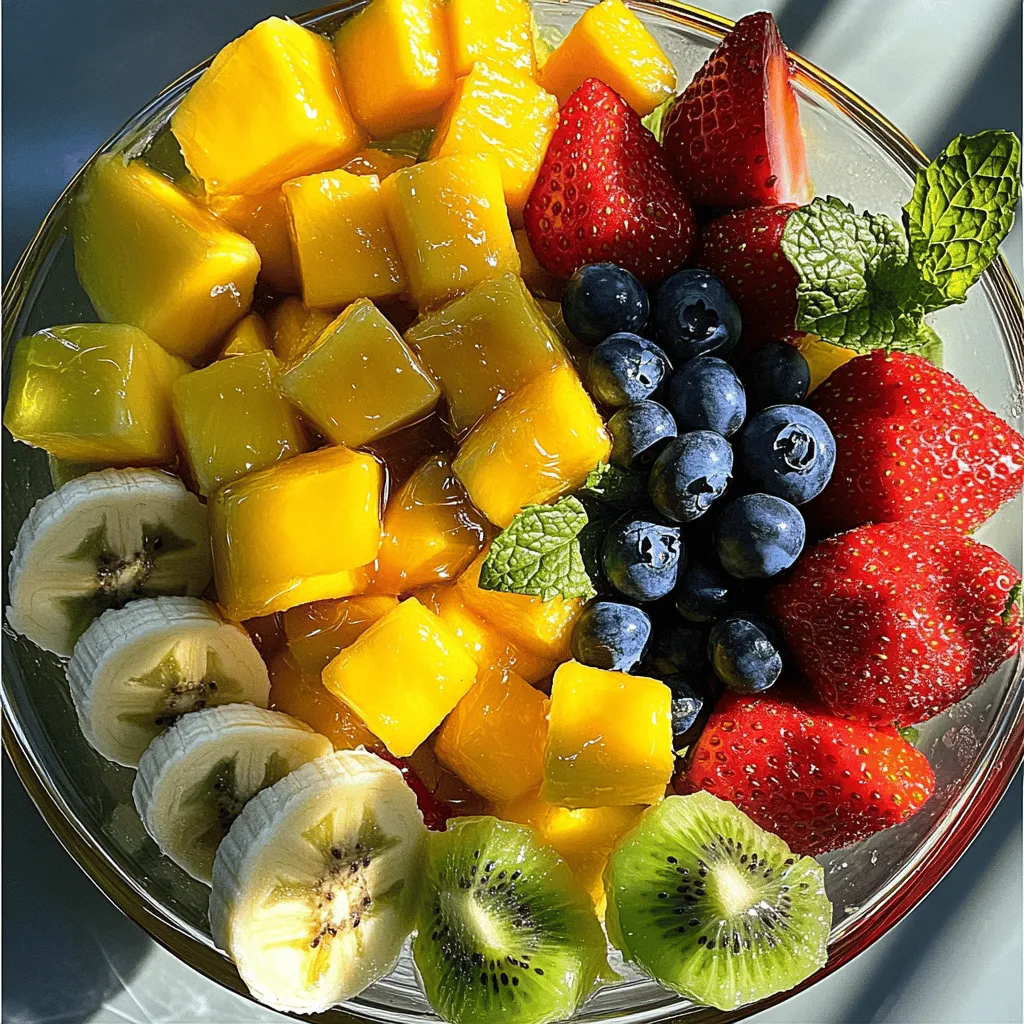
![- 2 packets frozen acai puree - 1 ripe banana - 1 cup unsweetened almond milk - 1 tablespoon almond butter - Sweetener (honey or agave syrup) To make the acai smoothie bowl, start with quality ingredients. Frozen acai puree gives a rich taste and vibrant color. A ripe banana adds natural sweetness and creaminess. Almond milk serves as a smooth base, but you can use any milk you like. Almond butter adds a nice nutty flavor. You can choose your sweetener based on your taste. - 1/2 cup granola - 1/4 cup shredded coconut - Fresh fruits (strawberries, blueberries, kiwi, mango) - Chia seeds and mint leaves For the toppings, granola provides a crunchy texture. Shredded coconut adds a tropical twist. Fresh fruits not only look great but also boost flavor and nutrients. You can mix and match fruits based on what you love. Chia seeds give a nice crunch and healthy benefits. Mint leaves add freshness and a pop of color. This recipe is flexible. You can use the [Full Recipe] to explore all the delicious options for your acai smoothie bowl. Enjoy creating your energizing and healthy delight! 1. First, gather your ingredients. You need frozen acai, a ripe banana, almond milk, almond butter, and a sweetener. 2. Next, place the frozen acai, sliced banana, almond milk, almond butter, and your choice of sweetener into a blender. 3. Blend these ingredients until smooth and creamy. If it's too thick, add more almond milk. 4. Taste the mixture and adjust the sweetness if needed. Add more honey or agave syrup for a sweeter flavor. 1. Pour the blended acai mixture into a bowl. 2. Now, it's time to add your toppings. Arrange granola, fresh fruits, and shredded coconut on top. 3. For a finishing touch, sprinkle chia seeds over the bowl. 4. Finally, garnish with fresh mint leaves to add a pop of color and freshness. You can find the full recipe for the Acai Bliss Smoothie Bowl at the end of the article. Enjoy your vibrant and energizing delight! To make your acai smoothie bowl smooth, start with the right amount of almond milk. Use one cup, but you can add more if it is too thick. This helps blend the frozen acai and banana well. When you use frozen ingredients, blend in small bursts. This prevents the blender from getting stuck. If you notice lumps, stop and stir the mixture. Keep blending until it’s creamy and smooth. You can boost the flavor and health benefits of your smoothie bowl easily. Try adding a scoop of protein powder or a handful of fresh spinach. Both options mix well and add extra nutrients. For sweeteners, consider using maple syrup or coconut sugar instead of honey. This gives you a chance to switch up the taste. Each choice brings a unique flavor to your acai bowl. {{image_2}} You can switch up the fruits in your acai smoothie bowl. A tropical version adds fun and flavor. Use mango, pineapple, and banana. This mix creates a sweet and refreshing taste. Another option is the berry medley. Combine strawberries, blueberries, and raspberries. These berries pack a punch of color and vitamins. Each bite bursts with juicy goodness. Feel free to mix and match your favorites! Change your toppings for new textures and flavors. Nut butter is a great choice. Almond, peanut, or cashew butter all work well. They add richness and creaminess to your bowl. Seeds and nuts offer a nice crunch. Try chia seeds, pumpkin seeds, or walnuts. These add healthy fats and protein. Plus, they make your bowl more filling. Adding different toppings keeps things interesting and fun! For the full recipe, check out the Acai Bliss Smoothie Bowl. Enjoy the journey of creating your perfect bowl! To keep your acai smoothie bowl fresh, refrigerate any leftovers right away. Place the bowl in an airtight container. This helps to keep the air out and maintain the taste. Use a glass or plastic container that seals tightly. If you store it properly, your smoothie bowl can last up to two days in the fridge. You can freeze the smoothie base for later use. Pour the leftover smoothie into ice cube trays or freezer-safe bags. This way, you can enjoy it later. To thaw, simply remove the cubes or bags and let them sit at room temperature for about 30 minutes. You can also microwave them for a quick thaw. Just make sure to stir well before serving. An acai smoothie bowl is a thick blend of acai berries, bananas, and milk. It often features toppings like fruits, granola, and seeds. This dish is popular for breakfast or as a snack. The vibrant color and fresh taste make it appealing. It’s healthy, refreshing, and full of nutrients. Many people love it because it looks great and tastes even better. Yes, you can make acai bowls without frozen acai. You can use acai powder instead. Mix the powder with yogurt or milk for a creamy base. Some people use other berries like blueberries or strawberries. This way, you can still enjoy a tasty bowl without acai. Just blend your chosen fruit with milk and add your favorite toppings. Acai berries are rich in antioxidants, vitamins, and minerals. They help fight inflammation and boost heart health. Acai also contains healthy fats that support brain function. One serving has fiber that aids digestion and keeps you full. Eating acai can improve your skin and give you energy. It’s a smart choice for a healthy diet. You can find acai products at most grocery stores. Look in the frozen foods section for acai puree. Health food stores often carry acai powder. Many online shops offer these products as well. Brands like Sambazon and Açaí Roots are popular and trusted. Always check for organic options for better quality. You can easily adjust the acai bowl recipe for dietary needs. To make it vegan, just use plant-based milk and skip honey. For gluten-free, ensure your granola is labeled gluten-free. If you need nut-free, swap almond butter for sunflower seed butter. You can still enjoy a delicious acai bowl while meeting your dietary requirements. Acai Bliss Smoothie Bowl 🥥 Recipe Details You learned how to make a tasty acai smoothie bowl. We covered the main ingredients, like frozen acai puree and banana, and showed you the best toppings. I provided step-by-step instructions for blending and serving. We talked about tips for the perfect consistency and added nutrition. If you want to get creative, try different fruits or toppings. Store any leftovers properly or even freeze them for later. Enjoy the health benefits of acai while making it your own. Dive into this delicious treat today!](https://foodishtalk.com/wp-content/uploads/2025/07/6cd7a2a6-9807-4356-bfa8-b2532ad9426f-300x300.webp)


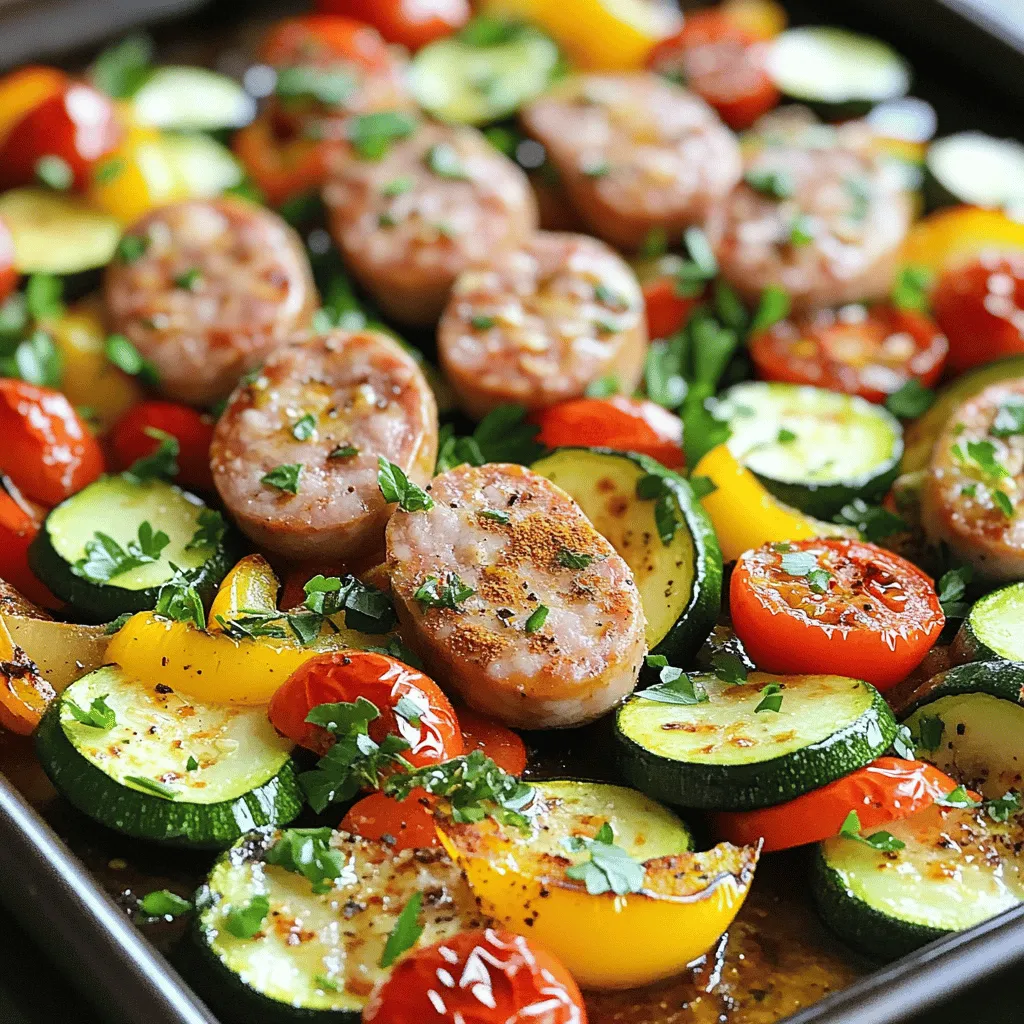
Satisfying Sheet Pan Sausage and Veggies Recipe
Are you looking for a quick and tasty dinner idea? Try my Satisfying Sheet Pan Sausage and Veggies recipe! This meal is easy to…