Looking for a dessert that’s easy to make and oh-so-delicious? You’re in the right place! This No-Bake Oreo Cheesecake is simple enough for anyone, even if you’re new to baking. With just a few key ingredients and a little bit of time, you’ll create a creamy, dreamy treat your friends and family will rave about. Let’s dive into how you can whip this up effortlessly!
Ingredients
Main Ingredients for No-Bake Oreo Cheesecake
To make this tasty No-Bake Oreo Cheesecake, you need a few key items:
– 24 Oreo cookies, crushed
– 1/4 cup unsalted butter, melted
– 16 oz cream cheese, softened
– 1 cup powdered sugar
– 1 teaspoon vanilla extract
– 1 cup heavy whipping cream
– 8 Oreo cookies, chopped (for filling)
– Additional crushed Oreos for topping
These ingredients work together to create a rich and creamy treat. The crushed Oreos form the crust, while the cream cheese adds the smooth texture.
Optional Ingredients and Variations
You can change this recipe to suit your taste. Here are some ideas:
– Use different types of cookies for the crust, such as chocolate wafers.
– Add a swirl of peanut butter or chocolate sauce to the filling for extra flavor.
– Top with fresh berries for a fruity twist.
These options keep the dessert fresh and exciting. Feel free to mix and match based on your favorites!
Equipment Needed
To prepare this cheesecake, you will need some simple tools:
– 9-inch springform pan
– Medium bowl
– Large mixing bowl
– Electric mixer
– Spatula
– Plastic wrap
Having these items ready makes the process smooth. You can focus more on creating your delicious cheesecake without any stress. Enjoy the fun of cooking!
Step-by-Step Instructions
Preparing the Oreo Crust
To start, gather your ingredients. You need 24 crushed Oreo cookies and 1/4 cup melted butter. Mix the crushed cookies and melted butter in a medium bowl. The mixture should feel like wet sand. Next, take a 9-inch springform pan. Press the cookie mixture evenly into the bottom of the pan. Use a measuring cup to pack it tightly. Set the crust aside while you prepare the filling.
Making the Cream Cheese Filling
Now, let’s make the filling. In a large bowl, add 16 ounces of softened cream cheese. Beat it with an electric mixer until it’s smooth. Gradually add in 1 cup of powdered sugar and 1 teaspoon of vanilla extract. Mix until everything is smooth and well combined. In another bowl, whip 1 cup of heavy cream until stiff peaks form. Gently fold the whipped cream into the cream cheese mixture. Be careful to keep the air in the whipped cream. Finally, fold in 8 chopped Oreo cookies. This adds nice bits of cookie to your cheesecake.
Assembling and Refrigerating the Cheesecake
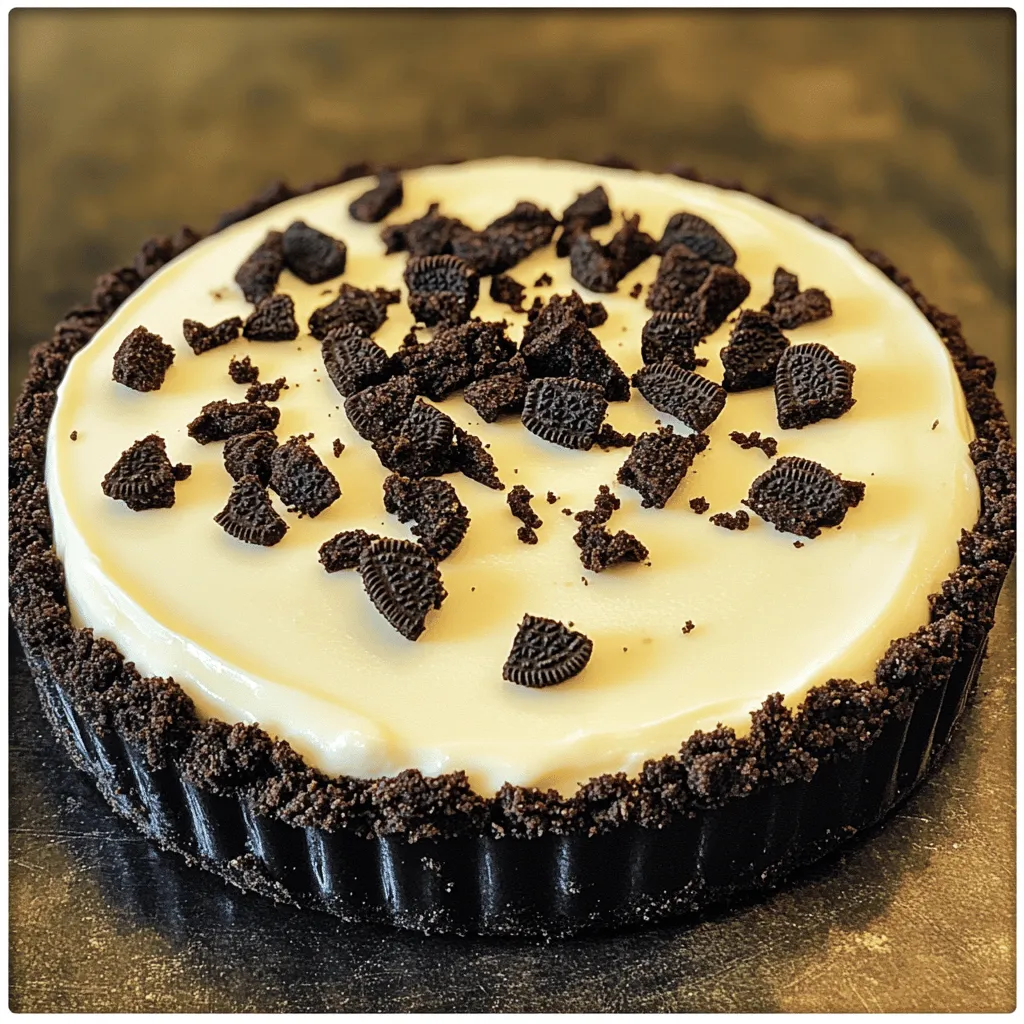
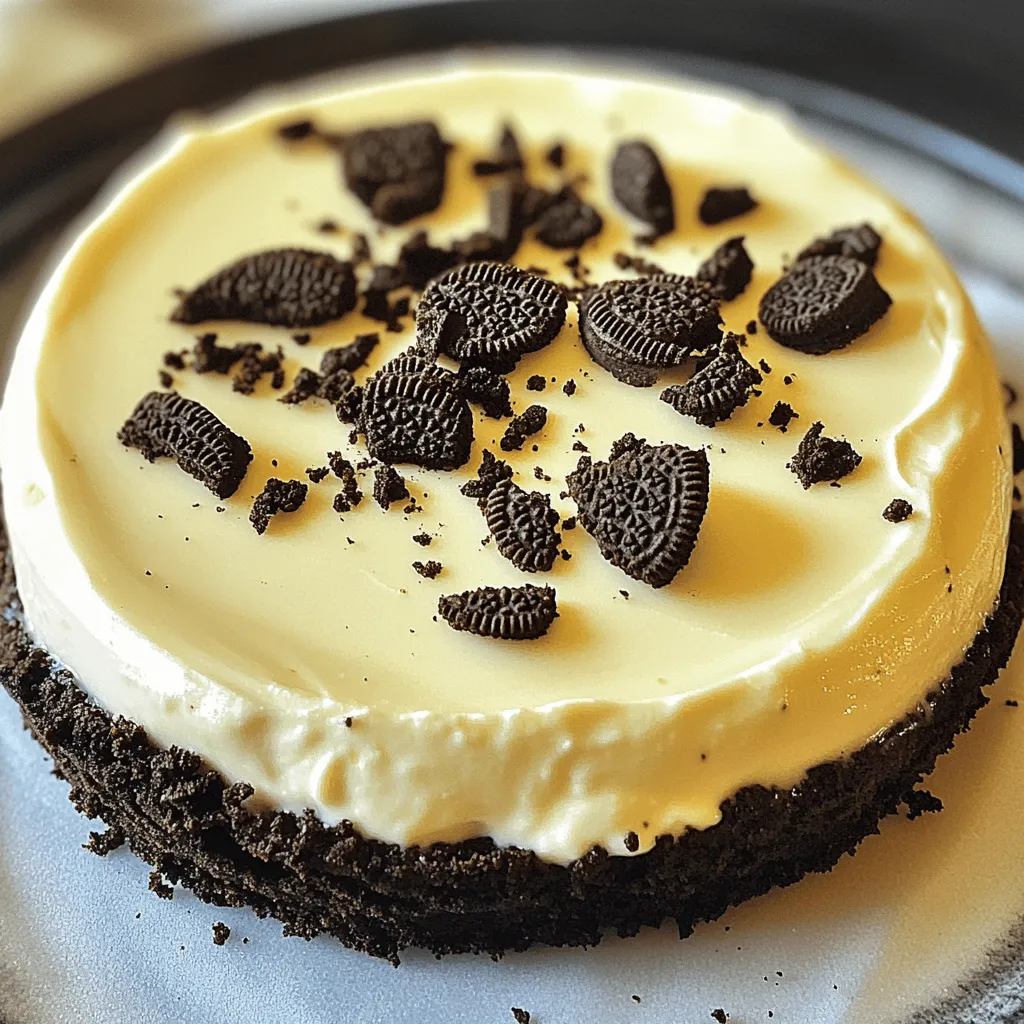
Pour the cream cheese filling over your prepared crust in the springform pan. Use a spatula to spread it out evenly. Cover the pan with plastic wrap. Place it in the fridge for at least 4 hours, or overnight if you can wait. Once it’s set, carefully remove the sides of the springform pan. For a tasty finish, top the cheesecake with extra crushed Oreos. Enjoy your delicious no-bake Oreo cheesecake!
Tips & Tricks
Tips for Perfecting the Cheesecake Texture
For the best texture, follow these simple tips:
– Use room temperature cream cheese. Cold cream cheese will not blend well.
– Whip the heavy cream until it forms stiff peaks. This gives the cheesecake a light feel.
– Fold the whipped cream in gently. This keeps the mixture airy and fluffy.
Common Mistakes to Avoid
Many errors can spoil your cheesecake. Here are some to watch out for:
– Don’t skip the chilling time. Letting it set is key for the right firmness.
– Avoid overmixing the cream cheese. This can add air and cause cracks.
– Make sure your crust is tightly packed. A loose crust can crumble when sliced.
Serving Suggestions for No-Bake Oreo Cheesecake
Serving your cheesecake right can make it even better:
– Chill the cake well before serving. Cold cheesecake tastes great.
– Top with whipped cream for a creamy finish. Add extra crushed Oreos for crunch.
– Serve with a drizzle of chocolate sauce. It adds a rich flavor that pairs well.Enjoy creating your dessert masterpiece!
Variations
Flavors and Add-ins
You can change this Oreo cheesecake to fit your taste. Try adding mint extract for a fresh twist. You can mix in peanut butter for a nutty flavor. Crushed chocolate cookies make a fun addition too. If you love fruit, add berries or even banana slices. Each add-in gives the cheesecake a new vibe. Don’t forget to adjust sugar to match your add-ins!
Gluten-Free Oreo Cheesecake Options
If you need a gluten-free version, use gluten-free Oreo cookies. They taste just as good! The rest of the recipe stays the same. Use the same amount of melted butter for the crust. You still get that creamy filling and crunchy base everyone loves. This way, you can enjoy cheesecake without worry.
Vegan No-Bake Oreo Cheesecake Recipe
To make a vegan version, swap cream cheese for a dairy-free alternative. Use coconut cream or cashew cream instead. For the crust, use vegan butter and gluten-free Oreos. Replace heavy cream with coconut milk whipped until fluffy. This recipe still offers all the rich flavors of the classic. You can serve it just like the original and impress your friends!
Storage Info
How to Store Leftover Cheesecake
To store leftover cheesecake, cover it tightly with plastic wrap. You can also use an airtight container. This keeps it fresh and prevents it from absorbing other flavors. Store it in the fridge for up to five days. Make sure to keep it chilled until you are ready to enjoy a slice.
Freezing Instructions
You can freeze this cheesecake for longer storage. First, let it chill in the fridge for at least four hours. Then, wrap it in plastic wrap and foil to prevent freezer burn. Place it in the freezer for up to three months. This way, you can enjoy a sweet treat anytime!
Best Practices for Thawing
When you’re ready to eat your frozen cheesecake, transfer it to the fridge. Let it thaw overnight for the best texture. Avoid thawing at room temperature, as this can make it too soft. Once thawed, enjoy your cheesecake within two days for the best taste.
FAQs
Can I use different cookies for this recipe?
Yes, you can try different cookies! Chocolate sandwich cookies work well. You might also like using cookies like graham crackers for a different taste. Just remember that the flavor will change. Experimenting can lead to fun and tasty results.
How long does No-Bake Oreo Cheesecake last in the fridge?
This cheesecake lasts about 5 days in the fridge. Make sure to keep it covered. Use plastic wrap or a lid to keep it fresh. After a few days, the flavors blend, making it even more delicious!
Can I make this cheesecake ahead of time?
Absolutely! You can make it a day or two before you need it. This cheesecake tastes best when it chills overnight. Making it ahead gives the flavors time to mix. Plus, you’ll save time on the day of your event.
What is the best way to cut a no-bake cheesecake?
To cut your cheesecake, use a warm knife. Dip it in hot water, then dry it off. This helps make clean slices. Start from the center and cut outwards. If it’s sticky, rinse and warm the knife again for smooth cuts.
You’ve learned how to make a delightful No-Bake Oreo Cheesecake. We covered the easy ingredients, step-by-step instructions, and helpful tips. Remember, you can customize this treat with flavors and variations. Always store it properly to keep it fresh. With these insights, you can make this cheesecake like a pro. Enjoy sharing this sweet dessert with friends and family!


