Are you craving a sweet, zesty treat that’s super easy to make? These No-Bake Mini Key Lime Pies are your answer! With a smooth and tart filling, they are perfect for warm days or special occasions. I’ll guide you through simple steps and tips to make this refreshing dessert a hit. Let’s dive in and whip up these delightful mini pies that everyone will love!
Ingredients
Main Ingredients for No-Bake Mini Key Lime Pies
To make these mini key lime pies, gather these key ingredients:
– 1 cup graham cracker crumbs
– 1/4 cup granulated sugar
– 1/2 teaspoon ground cinnamon
– 1/4 cup unsalted butter, melted
– 1 (8 oz) package cream cheese, softened
– 1 can (14 oz) sweetened condensed milk
– 1/2 cup fresh key lime juice
– Zest of 2 key limes
These ingredients create a creamy, tangy filling with a crunchy crust. The graham cracker crumbs add texture and sweetness. The key lime juice gives that perfect tart flavor that makes these pies special.
Optional Garnishes and Decorations
You can enhance your mini pies with a few fun garnishes:
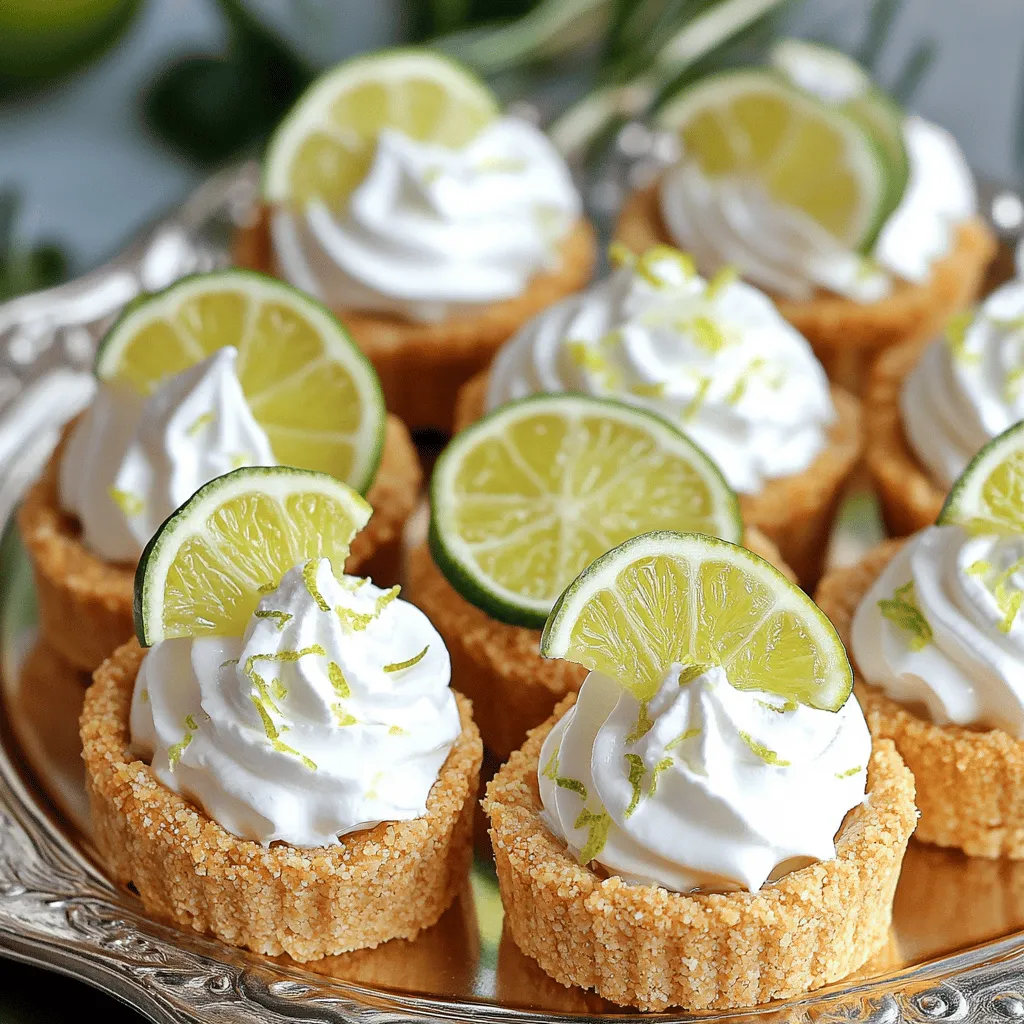
– Whipped cream, for topping
– Key lime slices, for garnish
– Additional lime zest, for extra flair
These garnishes not only make the pies look pretty but also add more flavor. A dollop of whipped cream on top makes each bite creamy and dreamy.
Ingredient Substitutions
If you need to change up the ingredients, here are some easy swaps:
– Use crushed digestive biscuits instead of graham crackers for the crust.
– Swap sweetened condensed milk with coconut cream for a dairy-free option.
– Regular limes can replace key limes if you can’t find them.
These substitutions help you customize the recipe to fit your needs. Remember, the goal is to enjoy making and eating these mini key lime pies.
Step-by-Step Instructions
Preparing the Crust
To start, gather your ingredients for the crust. You need graham cracker crumbs, sugar, cinnamon, and melted butter. In a mixing bowl, combine 1 cup of graham cracker crumbs, 1/4 cup of granulated sugar, and 1/2 teaspoon of ground cinnamon. This mix gives your crust a nice flavor. Next, pour in 1/4 cup of melted butter. Stir until it looks like wet sand. This means it’s ready to press. Use a muffin tin, preferably silicone, so you can remove the pies easily. Press the crumb mixture into the bottom of each muffin cup. Make sure it’s even. Now, you have a tasty crust ready for the filling.
Making the Key Lime Filling
Now, let’s make the key lime filling. You’ll need cream cheese, sweetened condensed milk, fresh key lime juice, and lime zest. In a large bowl, beat 1 (8 oz) package of softened cream cheese until it’s smooth. This step is important for a creamy texture. Gradually add 1 can of sweetened condensed milk while you keep beating. This should make the mix creamy and thick. Next, mix in 1/2 cup of fresh key lime juice and the zest of 2 key limes. Stir until everything is smooth and well combined. This filling is bright and tart, perfect for your mini pies.
Assembling and Setting the Mini Pies
Time to assemble! Spoon or pipe the key lime filling into each crust. Fill them to the top for a nice presentation. After you fill the crusts, refrigerate the mini pies. Let them chill for at least 4 hours, or until they are set. Once they are firm, carefully remove them from the muffin tin. Place them on a serving platter. For that extra touch, top each mini pie with whipped cream. You can also add a slice of key lime and some lime zest for garnish. These mini pies are now ready to impress!
Tips & Tricks
Common Mistakes to Avoid
Making no-bake mini key lime pies is simple, but mistakes can happen. One common mistake is overmixing the cream cheese. This can make the filling too airy and less smooth. Another issue is not pressing the crust firmly enough. You want a solid base to hold your filling. Also, using bottled lime juice instead of fresh juice can change the taste. Fresh key limes give the best flavor.
How to Achieve the Perfect Texture
To get the perfect texture, follow these steps. First, make sure your cream cheese is at room temperature. This helps it blend smoothly with the condensed milk. Mix until creamy before adding lime juice. If you want a creamier filling, use a food processor for mixing. Chill the pies long enough. Four hours is ideal, but overnight makes them even better.
Making Ahead of Time
You can easily make these mini pies ahead of time. They keep well in the fridge for up to three days. Just cover them tightly with plastic wrap. If you want to freeze them, make sure to leave off the whipped cream. You can add it just before serving. This way, your pies stay fresh and tasty.

Variations
Flavor Variations (such as Coconut Key Lime Pies)
You can switch up the flavor of your mini key lime pies. A fun twist is to add coconut. To make coconut key lime pies, mix in shredded coconut into the filling. You can use about 1/2 cup of unsweetened shredded coconut. This adds a nice chew and tropical taste. You can also top the pies with toasted coconut for extra crunch.
Dietary Alternatives (Gluten-Free, Vegan)
If you need gluten-free options, use gluten-free graham crackers. They work well and taste great. For a vegan version, swap out the cream cheese with a vegan cream cheese. Use a plant-based condensed milk in place of the sweetened condensed milk. This makes it easy for everyone to enjoy a tasty treat.
Creative Serving Suggestions
Serving these mini pies can be fun! Try placing them in decorative cupcake liners for a pop of color. You can also add fresh berries on top for a burst of flavor. Another idea is to serve them on a fun platter with extra lime slices. This makes your dessert look fancy and inviting.
Storage Info
Best Storage Practices
To keep your no-bake mini key lime pies fresh, store them in the fridge. Use an airtight container to protect them from other odors. Arrange the pies in a single layer. If you stack them, place parchment paper between layers.
How Long Do They Last?
These mini pies last about five days in the fridge. After that, they may lose their texture. Keep an eye on them for any signs of spoilage, like off smells or changes in color.
Tips for Freezing Mini Key Lime Pies
You can freeze these pies for longer storage. First, let them set in the fridge for at least 4 hours. Then, wrap each pie tightly in plastic wrap. After that, place them in a freezer-safe bag. They can last up to three months in the freezer. When ready to eat, thaw them overnight in the fridge. Enjoy a quick treat anytime with this easy method!
FAQs
Can I use regular limes instead of key limes?
Yes, you can use regular limes. Key limes have a sweeter taste. They are smaller and more aromatic. If you choose regular limes, expect a slightly different flavor. Use the same amount of juice in your recipe.
How do I know when my mini pies are set?
Your mini pies are set when the filling is firm. They should hold their shape when removed from the muffin tin. Refrigerate them for at least 4 hours. If you press the top lightly, it should feel solid.
What can I serve with no-bake mini key lime pies?
You can serve mini key lime pies with whipped cream. Fresh berries add color and flavor. Mint leaves provide a nice touch, too. For a fun twist, try serving them with coconut flakes. Add a slice of key lime for garnish.
No-bake mini key lime pies are simple and fun to make. We covered the main ingredients, optional garnishes, and even substitutions you can try. I shared step-by-step instructions for making the crust and filling, plus tips on how to avoid mistakes. Remember, you can also explore flavor variations and storage tips to keep your treats fresh. Enjoy your mini pies, and feel free to experiment. There’s plenty of room for your own creativity in this tasty dessert!


