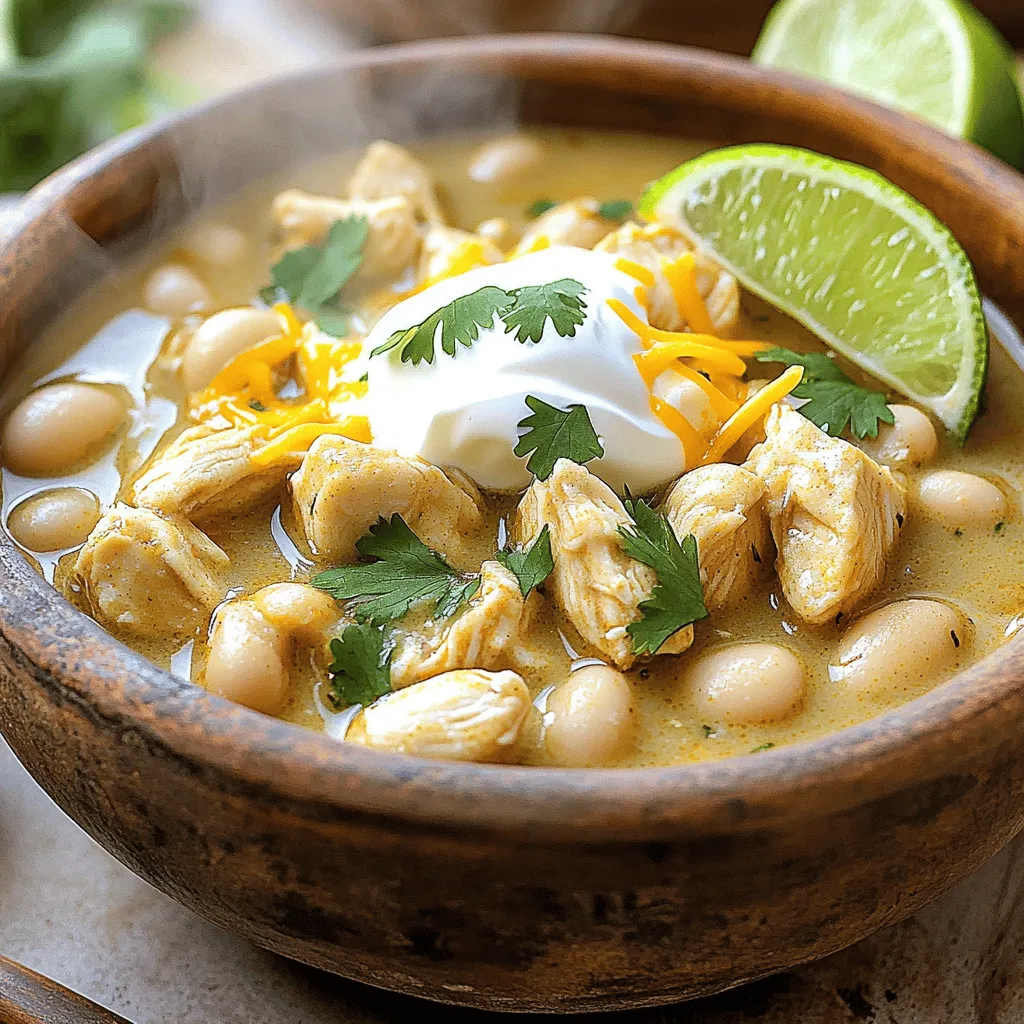
Craving something warm, hearty, and easy to make? Look no further than creamy white chicken chili! This dish combines tender chicken with creamy beans and fresh herbs for a meal that feels like a hug. I’ll walk you through the steps and tips to make this comforting recipe your new favorite. Grab your pot and let’s turn simple ingredients into a delightful bowl of goodness!
Ingredients
Main Ingredients
– 1 lb boneless, skinless chicken breasts, cubed
– 2 cans (15 oz each) white beans, drained and rinsed
– 2 cups chicken broth
– 1 cup sour cream
– 1 cup Monterey Jack cheese, shredded
– 1 tablespoon olive oil
– 1 medium onion, chopped
– 3 cloves garlic, minced
– 1 can (4 oz) diced green chilies, drained
– 1 teaspoon ground cumin
– 1 teaspoon paprika
– 1 teaspoon chili powder
– Salt and pepper, to taste
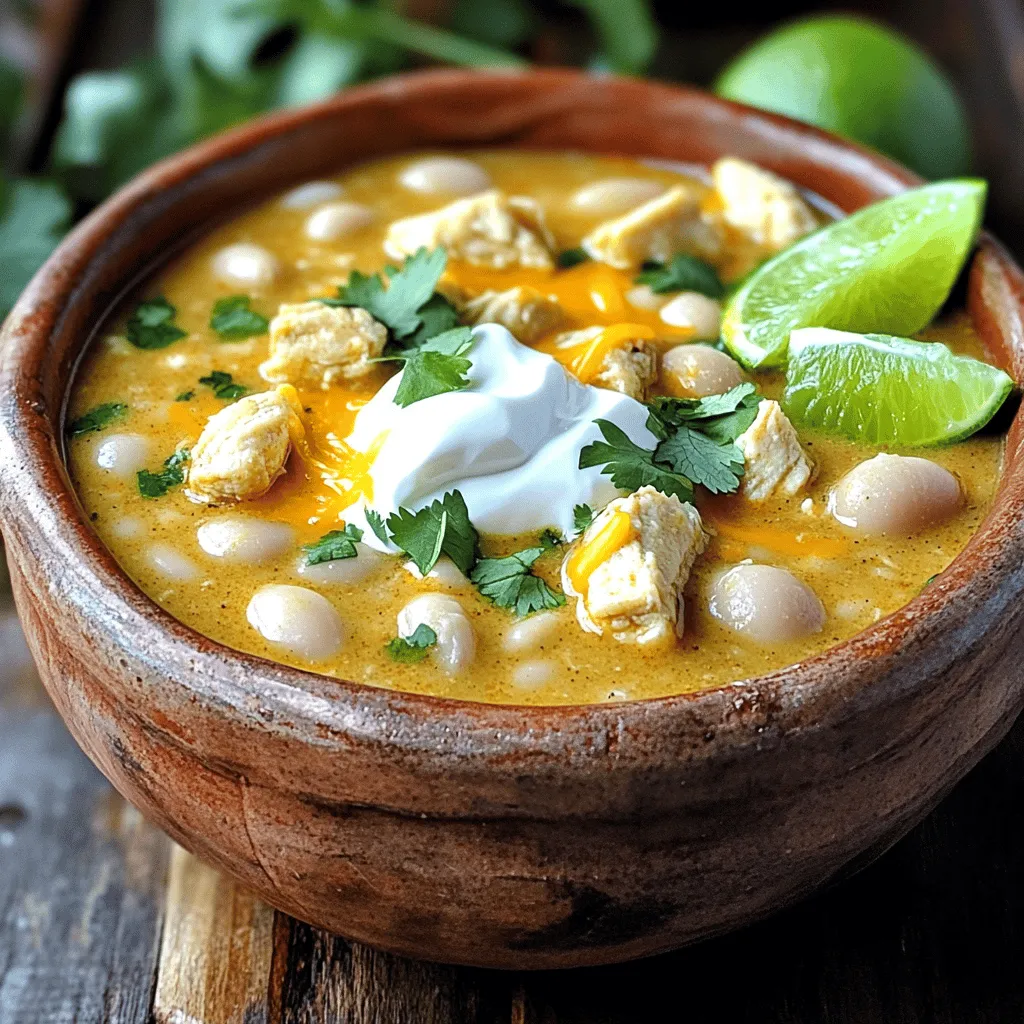
In this creamy white chicken chili, the main ingredients shine. The chicken breasts provide lean protein. The white beans add creaminess and fiber. Chicken broth gives it a solid base of flavor. Sour cream and cheese create a rich texture. Each spice adds warmth and depth to the dish.
Optional Garnishes
– Fresh cilantro
– Lime wedges
Garnishing with fresh cilantro adds brightness. Lime wedges give a nice zing. Both enhance the chili’s flavor and make it pop.
Key Kitchen Tools
– Large pot or Dutch oven
– Cutting board and knife
– Measuring cups and spoons
For this recipe, you need a large pot or Dutch oven. It helps cook everything evenly. A cutting board and knife make prep easy. Measuring cups and spoons ensure you get the right amounts.
Step-by-Step Instructions
Preparation Steps
1. Sautéing onions and garlic:
First, take a large pot or Dutch oven. Pour in one tablespoon of olive oil and heat it over medium heat. Next, add one medium onion, chopped. Cook it for about 5 minutes. You want the onion to be soft and clear. Then, add three cloves of minced garlic. Stir it around for one minute. This will bring out the lovely garlic flavor.
2. Browning chicken:
Now, add one pound of cubed, boneless, skinless chicken breasts to the pot. Cook the chicken for about 5 to 7 minutes. Make sure to stir often, so all sides get brown. This step adds a nice depth of flavor to your chili.
Cooking the Chili
3. Adding the main ingredients:
Once the chicken is browned, it’s time to add the fun stuff! Stir in two cans of drained and rinsed white beans. Then, pour in two cups of chicken broth and one can of diced green chilies. Add one teaspoon each of ground cumin, paprika, and chili powder. Don’t forget to season with salt and pepper!
4. Simmering process:
Bring the pot to a boil. Once it bubbles, turn down the heat to low. Cover the pot and let it simmer for about 20 minutes. This helps all the flavors meld together and cook the chicken fully.
Final Touches
5. Stirring in sour cream and cheese:
After simmering, take the pot off the heat. Let it cool for a couple of minutes. Now, stir in one cup of sour cream and one cup of shredded Monterey Jack cheese. Mix it well until the chili is creamy and dreamy.
6. Adjusting seasonings:
Taste your chili. This is the time to tweak the flavors. Add more salt, pepper, or spices if needed. If it needs a bit more creaminess, feel free to add extra sour cream or cheese.
This creamy white chicken chili is rich, hearty, and perfect for a cozy day at home.Enjoy!
Tips & Tricks
Enhancing Flavor
To make your creamy white chicken chili pop, focus on the spices. I recommend using:
– 1 teaspoon ground cumin
– 1 teaspoon paprika
– 1 teaspoon chili powder
These spices add depth and warmth. They create a cozy taste that makes each bite special. For extra creaminess, mix in sour cream and Monterey Jack cheese at the end. This step makes the chili rich and smooth. The cheese melts into the pot, giving a comforting texture.
Cooking Techniques
The right cooking methods help you achieve tender chicken. Start by browning the chicken in olive oil. This step locks in the juices and gives flavor. Make sure to cook it until it turns golden brown. After that, simmer the pot on low heat. This slow cooking allows flavors to blend and the chicken to soften. Let it simmer for about 20 minutes for the best results.
Serving Suggestions
When it comes to serving, pair your chili with fun sides. You can offer tortilla chips or cornbread for a nice crunch. Add toppings like fresh cilantro or lime wedges for extra zing. Presentation matters too! Serve the chili in bright bowls and sprinkle with herbs. This makes it look as good as it tastes.
Variations
Ingredient Swaps
You can change a few ingredients to create new flavors. For beans, try black beans or pinto beans instead of white beans. Each type offers a unique taste and texture. If you like heat, swap the diced green chilies for jalapeños or even chipotle peppers. These spicy options will give your chili a kick.
Dietary Adjustments
If you need gluten-free options, just check your broth and spices. Most are gluten-free, but always read the labels. For a vegetarian version, skip the chicken and use vegetable broth. Add more beans or some corn for heartiness. You can also include tofu for protein.
Flavor Profiles
You can enhance the flavor by adding fruits or vegetables. Try corn, bell peppers, or even zucchini to your chili. These add color and nutrition. If you want a smoky version, add smoked paprika or some bacon. This gives a rich, deep flavor that pairs well with the creaminess of the chili.
Storage Info
Refrigerating
To keep your creamy white chicken chili fresh, store it in an airtight container. Let it cool completely before sealing it up. This helps avoid moisture build-up. In the fridge, it lasts about 3 to 4 days. If you want it to stay fresh longer, consider freezing it.
Freezing
Freezing is a great option for leftovers. First, let the chili cool completely. Then, pour it into a freezer-safe container, leaving space for expansion. You can also use freezer bags for easy storage. Label the bags with the date. It stays good for up to 3 months. To thaw, move it to the fridge overnight. When ready to reheat, warm it on low heat on the stove until hot. Stir often to keep it creamy.
Reusing Leftovers
You can repurpose leftover chili in many fun ways. Consider using it as a filling for burritos or quesadillas. You can also serve it over rice or pasta for a quick meal. Another idea is to add it to a baked potato for a hearty twist. If you want a new recipe, try making a creamy chili dip. Just mix it with some cream cheese and bake until bubbly. Enjoy your chili in different meals!
FAQs
How do I make Creamy White Chicken Chili spicier?
You can add more heat in a few ways:
– Mix in diced jalapeños.
– Use spicy green chilies instead.
– Add a pinch of cayenne pepper or red pepper flakes.
– Stir in hot sauce to taste.
These options let you control the heat level. Start with a small amount and taste as you go. This way, you won’t overpower the lovely flavors of the chili.
Can I make this recipe in a slow cooker?
Yes, you can use a slow cooker for this chili. Here’s how:
– Sauté the onion and garlic first, then add to the slow cooker.
– Add all remaining ingredients to the pot, except for the sour cream and cheese.
– Cook on low for 6-8 hours or on high for 3-4 hours.
– Stir in the sour cream and cheese about 30 minutes before serving.
Using a slow cooker gives the flavors time to blend. It also makes cooking easy and hands-free.
What can I serve with Creamy White Chicken Chili?
This chili pairs well with several tasty sides:
– Warm cornbread or crusty bread.
– A fresh green salad with a light dressing.
– Tortilla chips for crunch.
– Sliced avocado for creaminess.
These sides add variety and balance to your meal. Enjoy experimenting with different combinations!
This blog post shared a simple recipe for Creamy White Chicken Chili. We covered key ingredients and highlighted kitchen tools to make cooking easy. I explained each preparation step and how to create a rich flavor. You learned tips for customizing the dish and storing leftovers.
In closing, this chili is versatile and tasty. With the right ingredients, you can make it your own. Enjoy trying out these ideas and making this dish your favorite!