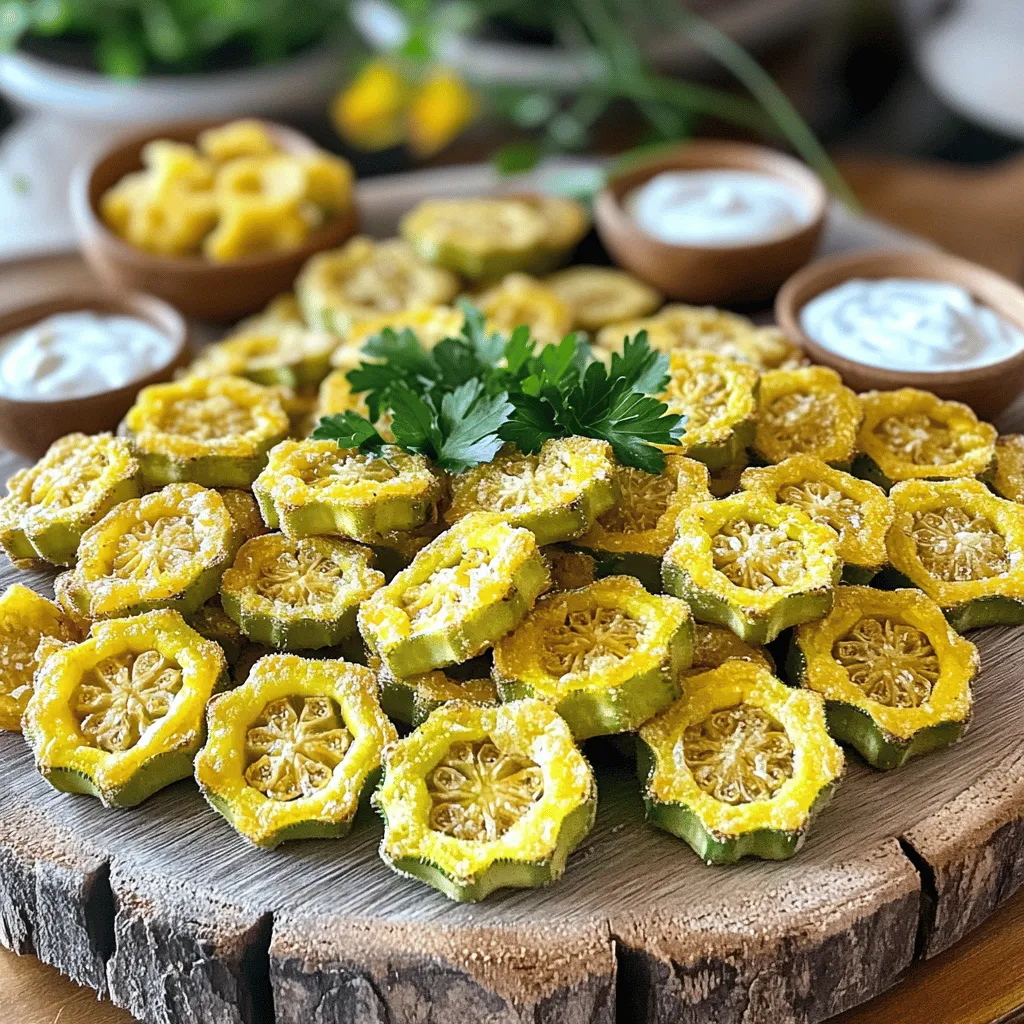
If you crave a crispy Southern dish, Buttermilk Fried Okra is a must-try. This recipe gives you tender okra coated in a crunchy blend of spices and cornmeal. Whether you’re a newbie or a seasoned cook, you’ll love how easy it is to make this tasty delight. Get ready to impress your family and friends with a dish that’s sure to be a hit at your table!
Ingredients
To make buttermilk fried okra, gather these simple ingredients:
– Fresh okra
– Buttermilk
– Cornmeal
– All-purpose flour
– Spices: garlic powder, onion powder, cayenne pepper, salt, black pepper
– Vegetable oil for frying
Using fresh okra is key for the best flavor and texture. Look for firm, green pods. The buttermilk helps the coating stick well and adds a nice tang. Cornmeal gives the okra a crunchy bite, while the flour adds a lightness to the coating.
For spices, garlic and onion powder enhance the flavor. Cayenne pepper adds heat, so adjust it to your liking. Salt and black pepper round out the taste. Finally, vegetable oil is essential for frying. It needs to be hot for that perfect crunch.
Step-by-Step Instructions
Preparation of Okra
First, you need to soak the sliced okra in buttermilk. Use about 1 cup of buttermilk for 2 cups of sliced okra. Let it soak for at least 30 minutes. This step helps the cornmeal coating stick better.
After soaking, drain the excess liquid from the okra. You want to remove the extra buttermilk, but don’t rinse the okra. Just let it drip for a minute.
Coating Process
Now, it’s time to prepare the coating. In a shallow dish, mix together the dry ingredients. Combine 1 cup of cornmeal, ½ cup of all-purpose flour, 1 teaspoon of garlic powder, 1 teaspoon of onion powder, ½ teaspoon of cayenne pepper, 1 teaspoon of salt, and 1 teaspoon of black pepper.
Next, use a dredging technique. Take each piece of okra and coat it evenly with the dry mixture. Make sure each piece is well-covered. Shake off any extra flour to avoid clumps.
Frying the Okra
Heat about 1 inch of vegetable oil in a deep skillet over medium-high heat. You want the oil to reach around 350°F (175°C). Use a thermometer for accuracy.
Once the oil is ready, carefully add the coated okra in batches. Fry for about 3-4 minutes. Keep an eye on them. You want them to turn golden brown and crispy.
After frying, use a slotted spoon to transfer the okra to a paper towel-lined plate. This helps drain any extra oil. Enjoy your crispy buttermilk fried okra with your favorite dipping sauce!
Tips & Tricks
Perfecting the Coating
To make your buttermilk fried okra crispy, focus on the coating. The key lies in using both cornmeal and flour. This mix creates a crunchy shell. I like to soak the okra in buttermilk for at least 30 minutes. This helps the coating stick better.
You can adjust the spice level to fit your taste. If you want more heat, add more cayenne pepper. Start with half a teaspoon and taste. You can always add more later!
Best Dipping Sauces
Pair your fried okra with the right dipping sauce to enhance the flavors. Ranch dressing is a classic choice. It brings a cool creaminess that contrasts well with the heat. Aioli is another great option. Its garlic flavor complements the okra beautifully.
You can make sauces at home or buy them. Homemade sauces allow you to control the flavors and ingredients. Store-bought options are quick and easy, perfect for busy cooks.
For a fun twist, try mixing sauces. Blend ranch with a bit of hot sauce for a zesty kick. Explore different flavors to keep things exciting!
Variations
Adding Flavors
You can change up the flavor of buttermilk fried okra easily. Start by experimenting with different spices. Try adding smoked paprika for a rich, smoky taste. A dash of cumin can give a warm, earthy vibe. Want a kick? Use more cayenne pepper or even add chili powder.
You can also include cheese or herbs. Grated Parmesan or cheddar can make the okra extra tasty. Fresh herbs like parsley or thyme can brighten the dish. Mix in dried herbs like oregano or basil for a flavor boost.
Oven-Baked Alternative
If you want a health-conscious option, try the oven-baked method. This way, you use less oil and still get a crispy bite. Preheat your oven to 425°F (220°C). Spread the coated okra on a baking sheet in a single layer. Bake for about 20-25 minutes. Flip them halfway for even cooking.
This method keeps the taste and crunch of fried okra while cutting down on fat. It’s a win-win for your plate!
Storage Info
Storing Leftovers
To keep your buttermilk fried okra fresh, store it in an airtight container. Place it in the fridge within two hours of cooking. This way, it stays crispier. The okra will last about 3 to 4 days. When you want to enjoy it again, reheat it in an oven or air fryer. This helps keep the coating crunchy. Avoid microwaving, as it can turn the okra soggy. Heat it at 350°F (175°C) for about 10 minutes.
Freezing Options
You can freeze cooked okra to enjoy later. Let the fried okra cool completely. Then, place it in a single layer on a baking sheet. Freeze for about an hour until firm. Once frozen, transfer the okra to a freezer bag. Remove as much air as you can. This helps prevent freezer burn. It can stay good for up to 3 months. When ready to eat, thaw it in the fridge overnight. Reheat as mentioned above for the best texture.
FAQs
How to make buttermilk fried okra gluten-free?
To make buttermilk fried okra gluten-free, swap the all-purpose flour. You can use gluten-free flour blends. Almond flour or chickpea flour also works great. For the coating, cornmeal is your best friend. You can use just cornmeal or mix it with the gluten-free flour for a nice crunch.
Can I use frozen okra?
Yes, you can use frozen okra. However, frozen okra tends to be softer. When you cook it, it may not have the same crunch as fresh okra. If you use frozen, thaw it first. Pat it dry to remove excess moisture. This way, the coating sticks better.
What goes well with buttermilk fried okra?
Buttermilk fried okra pairs well with many dishes. Try serving it alongside fried chicken or barbecue. It also goes nicely with a fresh salad or coleslaw. For a snack, dip it in ranch or aioli. You can even serve it as a side with cornbread. Enjoying it with a glass of sweet tea adds a true Southern touch.
Buttermilk fried okra is easy and fun to make. With the right ingredients and steps, you can create a tasty dish. Remember to soak the okra in buttermilk for the best flavor. Use the right spices to match your taste. Don’t forget about storage tips for leftovers or freezing cooked okra. You can even try new flavors or health-friendly ways to cook it. Enjoy your fresh take on this classic dish!