Skip to content
DisclaimerTerms Of UseGDPR PolicyCookie Policy

Foodish Talk

  • Home
  • Drinks
  • Appetizers
  • Dinner
  • Dessert
  • About
  • Contact
  • Privacy Policy
DisclaimerTerms Of UseGDPR PolicyCookie Policy

Ava

- 2 cups cooked chicken breast, shredded - 4 large whole wheat tortillas - 1 cup romaine lettuce, chopped - ½ cup cherry tomatoes, halved - ½ cup grated Parmesan cheese - ¼ cup Caesar dressing (homemade or store-bought) - ½ teaspoon garlic powder - ½ teaspoon black pepper - 1 tablespoon olive oil - Fresh parsley, chopped for garnish These ingredients create a tasty Chicken Caesar Wrap. Each one plays a key role. The cooked chicken gives protein. The tortillas wrap everything up nicely. The romaine lettuce adds crunch. Cherry tomatoes bring a fresh burst. Parmesan cheese adds saltiness and creaminess. The Caesar dressing ties it all together with flavor. Garlic powder and black pepper spice things up. Olive oil helps warm the tortillas. Finally, parsley makes it pretty. - Calories per serving: About 350 calories - Macronutrient breakdown: - Protein: 28g - Carbohydrates: 32g - Fats: 12g Understanding the nutritional information helps you make good choices. This wrap is balanced with protein, carbs, and healthy fats. It fits well in a meal plan. You can enjoy it for lunch or dinner. Using the Full Recipe, you can easily prepare a meal that satisfies. 1. Combining the chicken and dressing Start by taking a mixing bowl. Add 2 cups of shredded chicken breast. Then, sprinkle in ½ teaspoon of garlic powder and ½ teaspoon of black pepper. Pour in ¼ cup of Caesar dressing. Toss everything well until the chicken is fully coated. This step makes your chicken flavorful and tasty. 2. Preparing the salad filling In a separate bowl, mix 1 cup of chopped romaine lettuce, ½ cup of halved cherry tomatoes, and ½ cup of grated Parmesan cheese. This fresh mix adds crunch and color to your wrap. Set this mixture aside while you warm the tortillas. 1. Warming the tortillas Heat a non-stick skillet over medium heat. Drizzle 1 tablespoon of olive oil in the pan. Take one large whole wheat tortilla and place it in the skillet. Warm it for about 30 seconds on each side or until it feels soft. Remove it from the skillet and repeat with the rest of the tortillas. 2. Assembling the wrap Now, take a warmed tortilla. Lay a generous portion of the chicken mixture on it. Next, add the salad filling you prepared earlier. Roll the tortilla tightly. Be sure to fold in the sides as you go to keep the filling secure. 1. Cutting and garnishing the wraps After you assemble each wrap, cut them in half diagonally. This makes them easier to eat. Arrange the wraps on a plate. To finish, sprinkle freshly chopped parsley on top for a pop of color and flavor. 2. Serving suggestions Serve your wraps with extra Caesar dressing on the side for dipping. You can pair them with a light salad or some crunchy veggies for a complete meal. Enjoy the savory flavors and simple steps of this Chicken Caesar Wrap! For the full recipe, visit our recipe section. Choosing the right chicken is key to a tasty Chicken Caesar Wrap. I recommend using cooked chicken breast. It is lean and juicy, perfect for wraps. You can grill, bake, or even use rotisserie chicken. If you want bold flavor, season the chicken with garlic powder and black pepper. This enhances the taste without extra effort. Now, let’s talk about how to wrap it up securely. First, warm your tortillas. This makes them soft and easy to fold. Place the filling in the center, leaving space on the sides. When you roll, start from the bottom and tuck the sides in. This technique helps keep the filling inside. A tight roll ensures every bite is full of flavor. To keep your wraps fresh, wrap them in plastic wrap. This prevents them from drying out. Store them in the fridge for up to three days. When you’re ready to eat, you can reheat them in a skillet. Just warm each side for two to three minutes. You’ll enjoy a warm, delicious meal again! {{image_2}} You can easily switch up the protein in your Chicken Caesar Wrap. Here are some ideas: - Turkey: Use shredded turkey for a leaner option. - Tuna: Canned tuna works well, just mix it with the dressing. - Tofu: Firm tofu can be grilled or sautéed for a tasty twist. For dressings or toppings, you can try: - Ranch dressing: A creamy alternative for a different flavor. - Greek yogurt: Use instead of Caesar dressing for a healthy swap. - Bacon bits: Add crispy bacon for extra crunch and flavor. If you're looking for gluten-free options, simply use gluten-free tortillas. Many brands offer these, and they taste great. For a vegetarian or vegan option, follow these tips: - Swap chicken for chickpeas: Use canned chickpeas for protein. - Vegan dressing: Look for plant-based Caesar dressings. - Nutritional yeast: Use this instead of Parmesan for a cheesy flavor. Pair your Chicken Caesar Wrap with these tasty sides for a complete meal: - Sweet potato fries: Baked or fried, these are a fun addition. - Vegetable sticks: Carrots and celery with hummus make a crunchy side. - Fruit salad: A fresh mix of fruits balances the savory wrap. These variations and side dishes can make your Chicken Caesar Wrap even more enjoyable! Don't forget to check out the Full Recipe for all the steps to create this delicious meal. You can find tasty Chicken Caesar Wraps at many local restaurants. Look for cafes or diners known for fresh wraps. Many places use high-quality chicken and fresh veggies. Some spots even make their Caesar dressing from scratch. This makes their wraps stand out. Ask locals for their favorite places. You might discover hidden gems in your area! If you prefer to make it at home, grocery stores offer pre-made options. Many stores stock ready-to-eat Chicken Caesar Wraps in their deli section. You can also find meal kits that include all the ingredients. These kits often come with easy instructions. This makes cooking fun and simple. Check the freezer aisle too, as some brands offer frozen wraps. You can enjoy Chicken Caesar Wraps from the comfort of your home. Numerous food delivery apps feature local restaurants that sell them. Services like Uber Eats and DoorDash allow you to browse menus easily. You can order your wrap and have it delivered to your door. This is perfect for busy days or lazy weekends. Enjoy your meal without leaving your couch! To make a Chicken Caesar Wrap, follow these steps: 1. Mix the Chicken: In a bowl, combine 2 cups of shredded chicken, ½ teaspoon of garlic powder, ½ teaspoon of black pepper, and ¼ cup of Caesar dressing. Stir well to coat the chicken. 2. Prepare the Filling: In another bowl, mix 1 cup of chopped romaine lettuce, ½ cup of halved cherry tomatoes, and ½ cup of grated Parmesan cheese. 3. Warm the Tortillas: Heat a non-stick skillet over medium heat. Add 1 tablespoon of olive oil. Warm one large whole wheat tortilla for about 30 seconds on each side. You want it soft but not crispy. Repeat with the other tortillas. 4. Assemble the Wrap: Take a warmed tortilla. Place a generous amount of the chicken mix in the center. Add some of the salad mixture on top. 5. Roll It Up: Roll the tortilla tightly. Fold in the sides as you go to keep everything inside. 6. Cut and Serve: Cut each wrap in half diagonally. Place them on a plate and garnish with fresh parsley. Yes, you can prepare the Chicken Caesar Wrap ahead of time. Here are some tips: - Prep Ingredients: You can mix the chicken and dressing a day before. Store in the fridge in an airtight container. - Assemble Later: Keep the salad filling separate until you're ready to eat. This keeps the lettuce crisp. Assemble the wraps just before serving for the best taste. A Chicken Caesar Wrap has about 350 calories per serving. Here’s a simple breakdown: - Chicken: 150 calories - Tortilla: 120 calories - Parmesan Cheese: 50 calories - Dressing: 30 calories These numbers can vary based on the specific ingredients you use. Most traditional wraps contain gluten. However, you can easily make a gluten-free Chicken Caesar Wrap. Here are your options: - Use Gluten-Free Tortillas: Many stores sell gluten-free tortillas made from rice or corn. - Check the Dressing: Make sure your Caesar dressing is gluten-free. Some brands offer gluten-free options. By choosing these alternatives, you can enjoy a delicious wrap that fits your dietary needs! For the full recipe, check out the Zesty Chicken Caesar Wrap. In this article, we covered how to make a Chicken Caesar Wrap. We explored ingredients, cooking steps, and tips for better flavor. I shared ideas for variations and where to buy wraps. These wraps are simple, tasty, and healthy. You can customize them to fit your tastes. Whether you're making them at home or ordering out, enjoy your Chicken Caesar Wraps!

Savory Chicken Caesar Wrap Easy and Delicious Meal

Are you hungry for a quick, tasty meal? Let me introduce you to the Savory Chicken Caesar Wrap! This easy

To make the Creamy Parmesan Sausage Ditalini Soup, gather these simple ingredients: - 1 pound Italian sausage (mild or spicy) - 1 medium onion, diced - 2 cloves garlic, minced - 3 medium carrots, diced - 2 celery stalks, diced - 6 cups chicken broth - 1 can (14 oz) diced tomatoes, undrained - 1 cup Ditalini pasta - 1 cup heavy cream - 1 cup grated Parmesan cheese - 1 teaspoon dried oregano - 1 teaspoon dried basil - Salt and pepper to taste - Fresh parsley, chopped (for garnish) Each ingredient plays a key role in this soup. The Italian sausage gives a hearty flavor. The veggies add crunch and sweetness. Ditalini pasta brings comfort and fullness. Heavy cream and Parmesan cheese create a rich, creamy texture. Herbs like oregano and basil enhance the taste. For the best results, use fresh ingredients. This ensures your soup is vibrant and full of flavor. If you want to explore more, check the Full Recipe for detailed steps! First, we need to brown the Italian sausage. In a large pot, heat it over medium heat. Use a spoon to break it up while cooking. This takes about 5 to 7 minutes. Cook until the sausage is brown and no longer pink. Be sure to remove any excess grease. Next, let's sauté the vegetables for flavor. Add the diced onion, carrots, and celery to the pot. Sauté these for about 5 minutes. You want them softened and fragrant. Then, stir in the minced garlic and cook for one more minute. This brings out the garlic's delicious aroma. Now, it's time to add the broth and tomatoes. Pour in the chicken broth and the can of diced tomatoes. Make sure to include all the juice from the can. Bring this mixture to a gentle boil. Then, incorporate the Ditalini pasta and herbs. Add the Ditalini pasta, dried oregano, and dried basil. Reduce the heat and let it simmer for 10 to 12 minutes. You want the pasta to be al dente, not mushy. For the final touches, mix in cream and cheese. Stir in the heavy cream and grated Parmesan cheese. Mix well until the cheese melts and the soup is creamy. Then, taste and adjust seasoning with salt and pepper. Cook for another 2 to 3 minutes. This lets all the flavors blend together. Now, ladle the soup into bowls. Garnish with fresh chopped parsley for a pop of color. Enjoy your creamy Parmesan sausage Ditalini soup! For the full recipe, check out the [Full Recipe]. - Tips for selecting quality sausage: Look for fresh Italian sausage from a trusted butcher. Check the label for high meat content and avoid fillers. Fresh sausage has a great flavor. You can choose mild or spicy based on your taste. - Maximizing vegetable freshness: Use fresh, colorful veggies. Crisp carrots and vibrant celery add great taste. Always wash them well. Cut them just before cooking for the best flavor and texture. - Preventing overcooking the pasta: Cook the Ditalini pasta al dente. This means it should still have a bit of bite. Add it to the soup last, so it cooks just right. Keep an eye on the timer! - Achieving the perfect creamy consistency: Stir in the heavy cream slowly. This helps it mix well with the broth and cheese. Make sure the heat is low when you add it. This keeps the cream from curdling. - Pairing with bread or salads: Serve the soup with crusty bread or a fresh salad. This makes a balanced meal. The bread is great for dipping, and the salad adds crunch. - Best time to serve the soup: This soup is perfect for chilly nights. Serve it warm to bring comfort. It also works well for family gatherings or casual dinners with friends. {{image_2}} You can easily swap out the Italian sausage. Turkey sausage works great if you want a leaner option. For a vegetarian dish, use plant-based sausage or mushrooms. They add a nice texture and flavor. If you're looking for dairy-free options, try coconut cream instead of heavy cream. Nutritional yeast can replace Parmesan cheese. It gives a cheesy flavor without dairy. Spice up your soup with red pepper flakes or smoked paprika. Both add warmth and depth. You can also add more veggies like spinach or zucchini for extra nutrients. For garnishing, try croutons for crunch or a sprinkle of chili flakes for heat. Fresh herbs like chives or basil can brighten up the dish. This soup can take on flavors from different cuisines. For a Mexican twist, add corn and lime juice. You could also mix in some black beans for protein. Using seasonal produce makes your soup fresh. In the fall, add pumpkin or squash. In summer, use fresh tomatoes or bell peppers. These simple changes keep your soup exciting and delicious. To keep your Creamy Parmesan Sausage Ditalini Soup fresh, follow these tips: - Refrigeration: Place leftovers in an airtight container. Store in the fridge for up to 3 days. Make sure to cool the soup to room temperature before sealing it. This helps prevent condensation, which can make the soup watery. - Freezing Tips: For longer storage, freeze the soup in portions. Use freezer-safe bags or containers. Remove as much air as possible to avoid freezer burn. This soup can last for up to 3 months in the freezer. When you're ready to enjoy it, thaw in the fridge overnight. Reheating is simple and keeps the soup tasty: - Methods: You can reheat the soup on the stove over low heat. Stir often to prevent sticking. If you prefer, you can use the microwave. Heat in short bursts, stirring in between. - Adjusting Seasoning: Sometimes, flavors fade during storage. Taste the soup before serving. If needed, add a pinch of salt, pepper, or even a sprinkle of cheese. This brings back its rich taste. Here’s what to expect for freshness: - Fridge: The soup stays fresh for about 3 days in the fridge. Ensure it’s in a sealed container to maintain quality. - Freezer: In the freezer, the soup will be good for 3 months. After that, it may lose its best flavor and texture. Always label your containers with the date to keep track. You can use small pasta shapes like macaroni or orzo. Both work well in soup. If you want a low-carb option, try zucchini noodles or cauliflower rice. Each choice gives a different texture but still tastes great. Yes, you can! This soup tastes even better the next day. Just store it in the fridge after it cools. When you're ready to eat, heat it up on the stove. You might need to add a little water or broth to keep it creamy. Absolutely! This soup freezes well. Let it cool completely, then put it in an airtight container. It can stay in the freezer for up to three months. Thaw it in the fridge overnight before reheating. To spice it up, add red pepper flakes or a splash of hot sauce. You can also use spicy Italian sausage instead of mild. If you like fresh heat, toss in some chopped jalapeños or a dash of cayenne pepper. For one serving, you can expect about: - Calories: 350 - Protein: 22g - Carbs: 30g - Fat: 18g - Fiber: 3g These values can vary based on the exact ingredients you use. For the full recipe, check the details provided. In this post, we covered how to make a delicious Italian sausage soup. We explored the key ingredients, preparation steps, and tips to enhance flavor. You learned about ingredient swaps and regional twists to customize your soup. Storing and reheating tips ensure you enjoy every last bite. This soup is not just tasty; it’s adaptable. Whether you stick to the classic or experiment with your own twists, this recipe brings warmth to any meal. Enjoy creating your own version!

Creamy Parmesan Sausage Ditalini Soup Delightful Recipe

Looking for a warm, comforting dish that’s packed with flavor? This Creamy Parmesan Sausage Ditalini Soup is a delightful option

To make Meaty Texas Trash Dip, you need: - 1 pound ground beef - 1 can (15 oz) black beans, rinsed and drained - 1 can (11 oz) corn, drained - 1 can (10 oz) diced tomatoes with green chilies - 1 cup cream cheese, softened - 1 cup sour cream - 1 cup shredded cheddar cheese, plus extra for topping - 1 tablespoon taco seasoning - 1 tablespoon olive oil - ½ cup green onions, chopped - Tortilla chips for serving You can add your twist to this dip. Here are some ideas: - Jalapeños for heat - Bell peppers for crunch - Black olives for a salty touch - Additional spices like cumin or paprika - Fresh cilantro for a bright flavor You don’t have to stick to these ingredients if you want to swap them out. Here are some easy swaps: - Use turkey or chicken instead of beef for a leaner option. - Cream cheese can be replaced with Greek yogurt for a lighter dip. - Swap sour cream with a dairy-free alternative if you prefer it. - Use low-fat cheese to cut calories while still enjoying the flavor. These substitutions keep the dip tasty while fitting your needs. Enjoy creating your own version of this dip! For the full recipe, check out the complete instructions. To start, gather your ingredients. You will need ground beef, black beans, corn, diced tomatoes, cream cheese, sour cream, cheddar cheese, taco seasoning, olive oil, green onions, and tortilla chips. 1. First, heat the olive oil in a large skillet over medium heat. 2. Next, add the ground beef and cook until browned, about 5-7 minutes. Break it apart with a spatula as it cooks. 3. After browning, drain any excess fat from the skillet. 4. Now, stir in the taco seasoning to coat the beef evenly. 5. Add in the black beans, corn, and diced tomatoes, and mix well. Heat this mixture for about 3-4 minutes. 6. Lower the heat and add the softened cream cheese and sour cream. Stir until smooth. 7. Mix in the shredded cheddar cheese. Keep stirring until it melts and blends into the dip. 8. Remove from heat and sprinkle chopped green onions on top. You can add extra cheddar cheese for a nice touch. 9. Serve warm with tortilla chips for dipping, either in a serving dish or in the skillet. To get the best texture, use fresh cream cheese. Make sure it is softened to mix easily. Stir the beef mixture thoroughly to avoid lumps. When adding cheese, mix until it melts evenly. This will give your dip a smooth, creamy texture. Keep the heat low when combining the cream cheese and sour cream for a better blend. For a visual guide, check out cooking channels on platforms like YouTube. Look for videos on "Texas Trash Dip" for step-by-step visuals. You can also find helpful tips and tricks in these videos to enhance your cooking experience. If you want to follow along with the full recipe, refer to the recipe section above. To get the best flavor from your Meaty Texas Trash Dip, start with fresh ingredients. Use a good quality ground beef for a rich taste. Sauté the beef until it is nicely browned. This adds depth to the flavor. Don’t rush when mixing in the cream cheese and sour cream. Let them melt evenly for a smooth dip. Always taste your dip before serving. You can adjust the seasoning to suit your taste. One big mistake is not draining the canned ingredients well. Excess liquid can make your dip too runny. Another error is not cooking the meat fully. Undercooked meat can ruin the flavor and texture. Avoid overcooking the cheese. If you cook it too long, it can become rubbery. Lastly, don’t forget to garnish your dip. A sprinkle of green onions or extra cheese makes a big difference. Using a heavy skillet is key for even heating. A spatula helps break up the meat while cooking. A measuring cup ensures you add the right amounts of cream cheese and sour cream. If you have a slow cooker, it can keep your dip warm while serving. A good knife and cutting board make chopping green onions easy. For serving, a large bowl or a warm skillet adds a cozy touch. For the complete recipe, refer to the section above on Meaty Texas Trash Dip. {{image_2}} You can add heat to your Meaty Texas Trash Dip easily. Start by mixing in sliced jalapeños or diced serrano peppers. These add fresh spice. You can also use spicy taco seasoning instead of the regular kind. If you love heat, add a few dashes of hot sauce before serving. This gives the dip a nice kick that many will enjoy. If you want a meatless version, replace the ground beef with lentils or black soybeans. These options keep the dip hearty. You can also use vegan cream cheese and sour cream for a plant-based twist. This way, everyone can enjoy the dip, even those on a vegan diet. This dip goes well with various sides. The classic choice is tortilla chips, of course. You can also serve it with fresh veggies, like carrot sticks or bell pepper strips. For a fun twist, use soft taco shells for dipping. You can even turn this dip into a topping for baked potatoes or nachos. Each option offers a new way to enjoy this flavor-packed dish. For the full recipe, check out the details above. To keep your Meaty Texas Trash Dip fresh, store it in an airtight container. Let the dip cool to room temperature first. This helps prevent moisture buildup, which can make the dip soggy. Make sure to seal the container tightly. This keeps out air and bad smells from your fridge. When you want to enjoy the dip again, reheating is key. You can use a microwave or stovetop. If using a microwave, heat on medium power for 1-2 minutes. Stir halfway through to heat evenly. If using the stovetop, warm it in a skillet over low heat. Stir often to avoid burning. This keeps the dip creamy and tasty. In the fridge, your dip lasts about 3-5 days. If you want to keep it longer, you can freeze it. The dip can stay in the freezer for up to 3 months. When ready to eat, thaw it overnight in the fridge. Reheat as mentioned above to enjoy that rich taste again. For the full recipe, check out the Meaty Texas Trash Dip section. You can serve Meaty Texas Trash Dip with various items. Tortilla chips make a great choice. You can also use veggies like carrots or celery. Pretzels are fun too. If you want variety, try pita chips or crackers. For a hearty option, consider soft bread or mini tacos. Each choice adds a new twist. Yes, you can make this dip ahead of time. Prepare it and store it in the fridge. Just cover it well to keep it fresh. When ready to serve, heat it gently on the stove or in the microwave. Stir it well to mix the heat evenly. This dip tastes great even after a day or two. Just remember to reheat it until it's nice and warm. You can make Meaty Texas Trash Dip healthier with a few easy swaps. Use lean ground turkey or chicken instead of beef. Opt for low-fat cream cheese and sour cream. Add more beans or veggies for extra fiber and nutrients. You can even use Greek yogurt instead of sour cream for a protein boost. These changes will keep the flavor while making it a bit lighter. Meaty Texas Trash Dip is a fun and tasty dish. We covered its key ingredients, how to prepare it, and helpful tips to boost flavor. I shared variations for different tastes and simple storage tips to keep leftovers fresh. Remember, with a few swaps, you can make this dip suit your needs. Enjoy making your own version and impressing your guests! Happy dipping!

Meaty Texas Trash Dip Irresistible Flavor Experience

Get ready for a flavor blast with Meaty Texas Trash Dip! This creamy, hearty dip is a game-changer for your

For a delicious bowl of Easy Thai Noodle Soup, gather these key ingredients: - 200g rice noodles - 4 cups vegetable broth - 1 can (400ml) coconut milk - 1 tablespoon red curry paste - 1 tablespoon soy sauce - 1 tablespoon lime juice - 1 cup carrots, julienned - 1 cup bell peppers, sliced (red and yellow for color) - 1 cup snap peas - 4 green onions, chopped - Fresh cilantro for garnish - Salt and pepper to taste These ingredients create a rich and creamy soup with a burst of flavor. You might have some of these items at home. Look for: - Soy sauce - Lime juice - Salt and pepper These staples add depth to your soup. They work well with many dishes, so they are great to keep on hand. When picking fresh ingredients, focus on quality. Here are some tips: - Carrots: Choose firm, smooth ones. Avoid soft or wrinkled carrots. - Bell Peppers: Look for bright colors and a shiny skin. They should feel heavy for their size. - Snap Peas: Pick pods that are crisp and bright green. Avoid any that look dull or have brown spots. - Green Onions: Select ones with firm white bases and fresh green tops. They should not be wilted. Using fresh ingredients makes your soup taste better. Always choose what looks best, and you’ll enhance your meal. For the full recipe, check out the cooking instructions mentioned earlier. Start by soaking the rice noodles in hot water. Follow the package instructions for the best results. I usually let them sit for about 10 minutes. Once soft, drain the noodles and set them aside. This gives them the perfect texture for the soup. Next, grab a large pot. Pour in the vegetable broth and heat it on medium heat. Add the coconut milk and stir until smooth. The rich coconut flavor adds depth to the soup. Then, mix in the red curry paste and soy sauce. These ingredients will give your broth a nice, bold taste. Now, it’s time for the veggies! Add the julienned carrots, sliced bell peppers, and snap peas to the pot. Let everything simmer for 5-7 minutes. You want the veggies to be tender but still crisp. This keeps the soup fresh and colorful. After that, squeeze in the lime juice. This adds a nice zing! Season with salt and pepper to taste. Finally, fold in the soaked noodles and heat everything for 2-3 minutes. This step combines all the flavors beautifully. Serve hot, garnished with chopped green onions and fresh cilantro. For the full recipe, check out the details above. Enjoy your Easy Thai Noodle Soup! To get the best noodles, soak them well. Use hot water to soften rice noodles. Follow the package instructions for timing. Undercooked noodles will be chewy. Overcooked noodles will turn mushy. Aim for the perfect bite. After soaking, drain them and set aside until you add them to the soup. Garnishes add freshness and zest to your soup. Use chopped green onions and cilantro for a bright touch. A squeeze of lime juice brings acidity, which balances the richness of coconut milk. If you like heat, add sliced chili peppers. These small additions boost flavor and make your bowl look beautiful. One common mistake is adding noodles too soon. This can lead to mushy noodles and a heavy soup. Always add them right before serving. Another mistake is skipping the lime juice. This ingredient brightens the overall flavor. Lastly, don’t skip the salt and pepper. They enhance all the other flavors in the dish. {{image_2}} You can add protein to your Easy Thai Noodle Soup for more flavor. Chicken, tofu, and shrimp are great options. If you choose chicken, use cooked, shredded meat. Just add it in during the last few minutes of cooking. For tofu, use firm tofu. Cut it into cubes and sauté it before adding it to the soup. Shrimp cooks quickly, so add it in the last 3-4 minutes. Each protein gives a different taste and texture. If you want a vegetarian or vegan soup, skip the meat. You can add more veggies instead. Some great options are mushrooms, zucchini, or bok choy. They will give your soup extra depth. You can also use vegetable broth and coconut milk, just like the recipe suggests. For protein, add more tofu or try chickpeas. Both will make your soup filling and tasty. Do you like spicy food? You can make your Easy Thai Noodle Soup hotter! Start with a small amount of red curry paste. Taste it before adding more. You can also mix in fresh chili peppers or chili flakes. If you want less heat, add more coconut milk to balance the spice. This way, you control how spicy your soup is, making it just right for you. Storing your leftover soup is easy. First, let the soup cool to room temperature. Then, pour it into an airtight container. Make sure to leave some space at the top. This space allows for expansion when freezing. Seal the container tightly and label it with the date. You can keep the soup in the fridge for up to three days. Reheating the soup right can keep it tasty. Pour the soup into a pot. Heat it over medium heat. Stir often to avoid burning. If it seems too thick, add a little water or broth. You can also use a microwave. Place the soup in a microwave-safe bowl. Heat it for 1-2 minutes, stirring halfway through. Always check the temperature before serving. Freezing is a great way to save soup for later. Use a freezer-safe container or freezer bags. If using bags, lay them flat in the freezer. This makes stacking easy and saves space. The soup can last up to three months in the freezer. When you're ready to eat, thaw it in the fridge overnight. Follow the reheating tips to enjoy your Easy Thai Noodle Soup again! For a complete guide, check the Full Recipe. To make this soup gluten-free, use gluten-free soy sauce. You can find it in stores. Also, ensure the rice noodles you choose are gluten-free. Most rice noodles are naturally gluten-free, but always check the label. This way, you can enjoy the same great flavor without gluten. Yes, you can switch out the vegetables! Feel free to add broccoli, zucchini, or baby corn. You can even use frozen mixed vegetables if you're short on time. Just remember to cook them until they're tender but still crisp. This flexibility makes the soup fun and unique every time. The soup stays fresh in the fridge for about 3 days. Store it in an airtight container to keep it tasty. When you reheat it, add a splash of broth or water. This keeps the soup from becoming too thick. Enjoy it again with all the original flavors! This blog post covered key ingredients, simple steps, and smart tips for Easy Thai Noodle Soup. You learned how to choose fresh ingredients and avoid common mistakes. We also explored fun variations and storage options for leftovers. Creating this dish can be fun and rewarding. With practice, this soup can become a family favorite. Enjoy making and sharing your version of this tasty meal!

Easy Thai Noodle Soup Quick and Flavorful Recipe

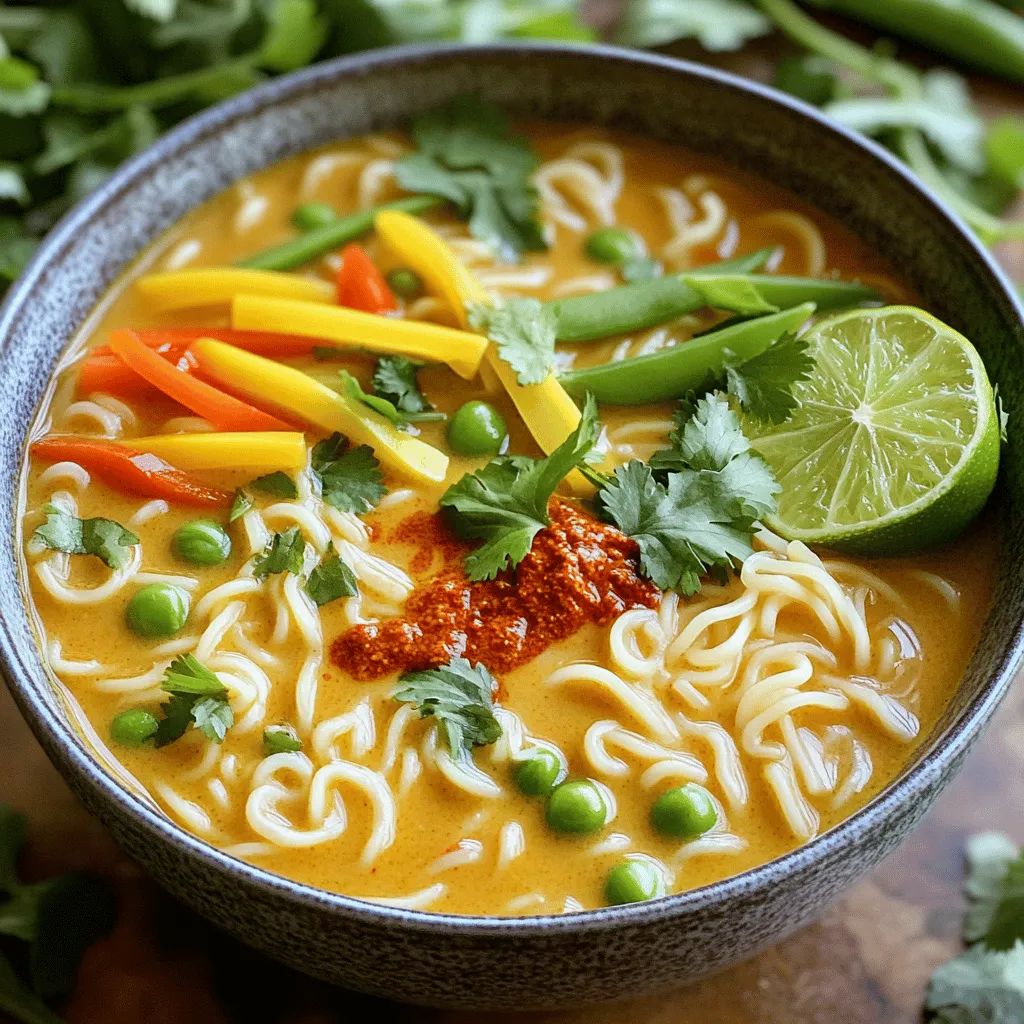
Looking for a quick, delicious meal? You’ll love my Easy Thai Noodle Soup! This recipe features simple steps and common

- 1.5 lbs chicken thigh fillets, diced - 1 cup long-grain rice - 1 medium onion, finely chopped - 2 cloves garlic, minced - 1 bell pepper (any color), diced - 1 cup chicken broth - 1 can (14 oz) diced tomatoes with green chilies - 1 teaspoon smoked paprika - 1 teaspoon Cajun seasoning - 1/2 teaspoon dried thyme - 1/2 teaspoon black pepper - 1 tablespoon olive oil - Salt to taste - 2 green onions, chopped (for garnish) - Fresh parsley, chopped (for garnish) Using the right amounts makes a big difference. For the chicken, use 1.5 lbs. This gives you nice, juicy pieces. The rice is 1 cup, which helps soak up all the flavors. The onion should be one medium-sized, and it adds a great base flavor. Use two cloves of garlic for a nice kick. For the bell pepper, any color works! The chicken broth should be one cup to keep things moist. The diced tomatoes bring both texture and zest. The spices, like smoked paprika and Cajun seasoning, are key for flavor. You can swap chicken thighs for chicken breasts if you like. Breasts are leaner but can dry out. For the rice, brown rice is a good choice, but it needs a longer cooking time. If you don’t have chicken broth, vegetable broth works well too. You can skip the bell pepper or use zucchini instead. For spices, if you don’t have smoked paprika, regular paprika will do. You can always adjust the heat by adding more or less Cajun seasoning. Check out the Full Recipe for more details. First, you need to prepare the chicken. I like using chicken thigh fillets for this dish. They stay juicy and tender. Dice 1.5 pounds of chicken thighs into bite-sized pieces. Season them with salt and black pepper. Heat 1 tablespoon of olive oil in a large pot over medium heat. When the oil is hot, add the chicken. Cook it for about 5 to 7 minutes. You want the chicken to brown nicely. Once it's done, remove the chicken from the pot and set it aside. This step adds great flavor to your dish. Now, let’s sauté the vegetables. In the same pot, add the chopped onion, bell pepper, and minced garlic. Use one medium onion, one bell pepper, and two cloves of garlic. Sauté these for about 3 to 4 minutes. You want the veggies to soften and release their flavors. This step is key for depth in your dish. Next, stir in the rice. Use 1 cup of long-grain rice. Add in 1 teaspoon of smoked paprika, 1 teaspoon of Cajun seasoning, and 1/2 teaspoon of dried thyme. Cook this mixture for one more minute. This helps the rice soak up all the spices. After the rice is mixed with the spices, it’s time to add the liquids. Pour in 1 can of diced tomatoes with green chilies and 1 cup of chicken broth. Then, return the browned chicken to the pot. Mix everything well. Bring it to a gentle boil. Once it’s boiling, reduce the heat to low. Cover the pot and let it simmer for 25 to 30 minutes. The rice should become tender and absorb most of the liquid. After cooking, let it sit for another 5 minutes. Fluff the rice with a fork and taste for seasoning. Adjust if needed. Serve hot and garnish with chopped green onions and fresh parsley for a pop of color. Enjoy this delightful one pot chicken and dirty rice dish! For the complete recipe, check out the Full Recipe. To make your dish full of flavor, use high heat for browning the chicken. This locks in juices and creates a nice crust. When you sauté the veggies, stir them well. This helps release their natural sweetness. Adding spices like smoked paprika early also boosts the taste. The heat wakes up the spices, making them pop in your dish. For perfectly cooked rice, rinse it first. This removes excess starch and keeps it fluffy. Use the right ratio of liquid to rice. I suggest 1 cup of rice to 1.5 cups of liquid. This ensures the rice cooks well and absorbs all the flavors. Once you add the rice to the pot, don’t stir too much. Stirring can break the grains and make your rice gummy. When meal prepping, chop all your ingredients in advance. Store them in airtight containers in the fridge. This saves time on busy days. You can also cook a double batch of this dish. It keeps well and tastes even better the next day. Just reheat it gently on the stove. For a quick meal, consider preparing the rice in a rice cooker while you cook the chicken. This way, everything is ready at the same time. For the full recipe, check the details above. {{image_2}} You can boost the nutrition and flavor by adding more vegetables. Consider adding carrots, peas, or corn. These veggies add sweetness and color to your dish. You can also use spinach or kale for some leafy greens. Just chop them up and stir them in during the last few minutes of cooking. This way, they stay bright and fresh. If you want to change the protein, you have options! Try using diced turkey, sausage, or even shrimp. Each choice brings its own taste and texture. For a vegetarian option, replace the chicken with chickpeas or lentils. Both will soak up the flavors nicely. Just adjust the cooking time as needed. Do you prefer heat or a milder taste? To add spice, mix in some cayenne pepper or hot sauce. You can also use spicy sausage for a kick. If you want it mild, stick with the original recipe. You can even leave out the Cajun seasoning. This dish is flexible enough to satisfy everyone at your table. After cooking, let your One Pot Chicken and Dirty Rice cool down. Once it cools, place it in an airtight container. Store it in the fridge for up to four days. This keeps the dish fresh and tasty. Make sure to label the container with the date. That way, you know when to eat it! If you want to save it for later, you can freeze it. First, let it cool completely. Then, portion it into freezer-safe bags or containers. Remove as much air as possible to prevent freezer burn. It can last up to three months in the freezer. Just remember to label it too! When you're ready to eat, take it out of the fridge or freezer. If frozen, let it thaw overnight in the fridge. You can reheat it on the stove over low heat. Add a splash of chicken broth to keep it moist. Stir often until it's heated through. You can also use the microwave. Heat it in short bursts, stirring in between. Enjoy your flavorful dish! For the full recipe, check out the details above. Yes, you can use brown rice. Brown rice adds a nutty taste and more fiber. However, brown rice takes longer to cook. You will need to adjust the liquid and cooking time. Use about 1.5 cups of broth and simmer for 40-45 minutes. This way, it cooks well with the chicken. One Pot Chicken and Dirty Rice is a full meal by itself. Still, you can pair it with sides. Consider serving a fresh salad for crunch. A simple coleslaw adds a nice contrast. You might also enjoy cornbread on the side. It soaks up the flavors well and adds warmth. To add heat, you can include chopped jalapeños or a dash of hot sauce. Adding extra Cajun seasoning boosts flavor and spice. You can also use spicy sausage along with the chicken. This will mix well and give a great kick. Adjust the spice to suit your taste. Feel free to experiment! For the full recipe, check out the [Full Recipe]. This blog post covered key ingredients, cooking steps, and useful tips for one-pot chicken and dirty rice. You learned how to prepare chicken, sauté veggies, and cook rice perfectly. I shared ways to add flavors and variations for everyone to enjoy. In cooking, small choices create big flavors. Remember, practice makes you better. Enjoy your cooking journey! You can make a dish everyone loves.

One Pot Chicken and Dirty Rice Flavorful Dish

Are you ready to spice up dinner with a one-pot wonder? My One Pot Chicken and Dirty Rice is not

- 2 cups pumpkin, peeled and cubed - 1 cup canned coconut milk - 1 medium onion, finely chopped - 2 cloves garlic, minced - 1 tablespoon ginger, grated - 1 tomato, chopped - 1 teaspoon mustard seeds - 1 teaspoon cumin seeds - 1 teaspoon turmeric powder - 1 teaspoon garam masala - 1 teaspoon red chili powder - 1 cup spinach - Salt to taste - Fresh cilantro for garnish - 1 cup vegetable broth or water - 2 tablespoons vegetable oil Gather all your ingredients before you start cooking. This one pot recipe makes it easy to create a warm, hearty dish. You can use fresh or canned pumpkin, but canned saves time. Coconut milk adds a creamy touch and balances the spices. The mustard and cumin seeds give a nice crunch. Don't skip the ginger and garlic; they bring great flavor. If you want to add more greens, spinach works well. For a touch of color, fresh cilantro makes a lovely garnish. Adjust the salt to your taste. Remember to have your vegetable broth or water ready to add to the pot. For the full recipe, check the link provided. Now that you have your ingredients, let’s get cooking! - Heat 2 tablespoons of vegetable oil in a large pot over medium heat. - Add 1 teaspoon of mustard seeds and 1 teaspoon of cumin seeds. Let them crackle for about 30 seconds. - Sauté 1 medium onion, chopped, along with 2 cloves of minced garlic and 1 tablespoon of grated ginger. Cook until the onion is soft and translucent, which takes about 5 minutes. - Stir in 1 chopped tomato and cook for about 3-4 minutes until it becomes soft. - Add 1 teaspoon of turmeric powder, 1 teaspoon of garam masala, 1 teaspoon of red chili powder, and salt to taste. Mix well and cook for an additional minute to release the spices' aroma. - Add 2 cups of cubed pumpkin into the pot, mixing it well with the spices. - Pour in 1 cup of canned coconut milk and 1 cup of vegetable broth. Stir and bring the mixture to a gentle boil. - Reduce the heat to low. Cover the pot and let it simmer for 20-25 minutes until the pumpkin is tender. If you want, add 1 cup of spinach in the last 5 minutes of cooking. - Taste the curry and adjust the seasoning as needed. If you prefer a creamier texture, use a potato masher to mash some of the pumpkin. - Garnish with fresh cilantro before serving. This Indian Pumpkin Curry is a simple, wholesome meal that you can easily make in one pot. For a complete guide, check out the Full Recipe. - Experiment with adding lime juice for brightness. This small touch can lift the dish. - Consider adding a dash of sugar for balance. It helps to round out the flavors. - Adjust liquid quantities for desired thickness. More broth makes it soupier. - Use a potato masher for a creamier texture. This creates a lovely mouthfeel. - Pair with steamed basmati rice or naan. Both options soak up the curry well. - Garnish with additional cilantro or red chili flakes for visual appeal. This adds color and freshness. For the full recipe, check out Spiced Pumpkin Delight Curry. {{image_2}} You can make this curry even better by adding different veggies. Sweet potatoes or carrots give the dish a nice sweetness. Both add a lovely color and flavor. For a healthy boost, throw in some spinach or kale. They blend well with the pumpkin and add nutrients. Want to make your curry heartier? Add chickpeas or lentils. They give you protein and a nice texture. If you prefer meat, grilled chicken works great. It adds flavor and makes it more filling. Do you like it spicy? Adjust the red chili powder to your taste. You can add more if you want a kick. For a richer flavor, sprinkle in some extra garam masala. It enhances the aroma and taste of the curry. Store any leftover Indian Pumpkin Curry in airtight containers. It stays fresh in the refrigerator for up to 4 days. This helps keep the flavors intact and makes for a quick meal option later. If you want to save some curry for later, freeze it in portions. This method makes reheating easy. The curry lasts up to 2 months in the freezer. Just make sure to label the containers with the date. To enjoy your curry again, reheat it on the stovetop or in the microwave. If using the stovetop, warm it on low heat, stirring often. For the microwave, heat until it’s piping hot. Always check that it’s heated through before serving. Feel free to explore [Full Recipe] for more details about the dish! Yes, fresh pumpkin can be used; just ensure it's diced evenly. Fresh pumpkin gives a nice texture and flavor. I like to peel and cube it before cooking. This way, it cooks evenly and blends well with spices. Yes, the Indian Pumpkin Curry is both vegetarian and vegan-friendly. It uses coconut milk and veggies. You can enjoy this dish without any animal products. It’s a great meal option for everyone. Absolutely! Increase the amount of red chili powder or add fresh chilies. If you love spicy food, go for it! Start with a little and taste as you go. You can always add more heat. Use a potato masher to mash some pumpkin or add more coconut milk. Mashing some pumpkin gives it a creamy texture. You can also let it simmer longer to reduce the liquid. This dish pairs well with rice, naan, or flatbreads. I love serving it with fluffy basmati rice. You can also try it with warm naan for a perfect bite. Enjoy your meal! This Indian Pumpkin Curry blends rich flavors and simple steps. You learned how to create a tasty dish with various spices, plus options for protein or veggies. Remember, you can adjust spice levels to suit your taste. Storing leftovers is easy too, so enjoy this meal multiple times. Don't hesitate to experiment and make it your own. Cooking should be fun, and this recipe makes that happen.

Indian Pumpkin Curry Easy One Pot Recipe Delight

Are you ready to spice up your dinner routine? This Indian Pumpkin Curry offers a burst of flavor while being

To make a tasty Cowboy Pasta Salad, you need fresh and simple ingredients. Here’s what to gather: - 8 oz (about 2 cups) rotini pasta - 1 cup cherry tomatoes, halved - 1 cup sweet corn, cooked (fresh or frozen) - 1 red bell pepper, diced - 1 cup black beans, rinsed and drained - 1/2 cup red onion, finely chopped - 1 cup shredded cheddar cheese - 1/2 cup cooked bacon, crumbled (optional) - 1/4 cup fresh cilantro, chopped - 1/4 cup ranch dressing - 2 tablespoons lime juice - Salt and pepper to taste Gathering these ingredients makes the salad colorful and fun. The rotini pasta serves as a great base. It holds the dressing well and adds a nice chew. Cherry tomatoes bring sweetness, while sweet corn adds crunch. The red bell pepper adds a nice pop of color and flavor. Black beans are not just tasty; they add protein too. Red onion gives a sharp bite that balances the flavors. Cheddar cheese adds creaminess, and bacon gives a smoky twist if you choose to use it. Fresh cilantro brightens the dish and adds a fresh herbal note. The ranch dressing and lime juice tie everything together. They add creaminess and a zesty kick. You can find the full recipe in the article, which guides you through the easy steps. This salad is perfect for summer gatherings. You’ll love how easy it is to make! To boil rotini pasta perfectly, fill a large pot with water. Add a pinch of salt and bring it to a boil. Once boiling, add the pasta. Stir it gently to prevent sticking. Cook according to the package instructions until it is al dente, about 8-10 minutes. I like to taste a piece to check if it’s just right. After cooking, drain the pasta in a colander. This will remove the hot water. Rinsing the pasta is key! Rinse it under cold water for about a minute. This stops the cooking process and cools it down quickly. It also helps the pasta not stick together later. In a large mixing bowl, combine the cooled rotini with the vegetables. This includes 1 cup of halved cherry tomatoes, 1 cup of sweet corn, 1 diced red bell pepper, 1 cup of rinsed black beans, and 1/2 cup of finely chopped red onion. If you like bacon, add 1/2 cup of crumbled cooked bacon too. Mix everything well. Next, let’s make the dressing. In a smaller bowl, whisk together 1/4 cup of ranch dressing and 2 tablespoons of lime juice. Add salt and pepper to taste. Pour this dressing over the pasta and vegetable mix. Toss it gently until everything is coated in that creamy goodness. Now, let’s bring it all together! Add 1 cup of shredded cheddar cheese and 1/4 cup of chopped fresh cilantro into the bowl. Toss all the ingredients again to mix well. Before serving, taste the salad. Adjust the seasoning. You can add more salt or pepper if needed. Cover the bowl and refrigerate for at least 30 minutes. This lets the flavors meld, making the salad even better. Enjoy this Cowboy Pasta Salad! It’s a fun and tasty summer dish. For detailed measurements and steps, check the Full Recipe. To make the perfect Cowboy Pasta Salad, cook your rotini pasta until it is al dente. Al dente means the pasta is firm yet tender. This texture holds up well in salads. Follow the package instructions for the best results. Once cooked, drain the pasta and rinse it with cold water. This stops the cooking process and cools the pasta down quickly. To prevent your pasta from sticking, add a splash of olive oil after rinsing. Toss it gently to coat each piece. This small step keeps the pasta from clumping together. Garnishing can elevate your Cowboy Pasta Salad. Try adding fresh cilantro on top for a burst of color. A sprinkle of shredded cheese adds texture and flavor. You can also serve lime wedges on the side. This adds a zesty touch that brightens the dish. For creative serving, use small mason jars or clear cups. Layer the ingredients for a fun, rustic look. This works well for picnics or potlucks. Cowboy Pasta Salad is great on warm days. It pairs well with grilled meats like chicken or steak. The flavors complement each other nicely. It also works as a side dish for barbecues or gatherings. This salad is perfect for summer parties, picnics, or family meals. The bright colors and fresh flavors make it a crowd-pleaser. Serve it chilled to keep it refreshing. You can make it ahead, and the flavors will blend beautifully. For the full recipe, make sure to check out the complete instructions! {{image_2}} You can swap out black beans for other beans. Chickpeas or kidney beans work well too. If you want a different flavor, try using cooked lentils. You can also change the veggies. If you don't like red bell pepper, use yellow or green. You can add cucumbers or avocado for extra crunch. If you want to keep it simple, skip the red onion. To add some heat, try jalapeños or red pepper flakes. You can also mix in hot sauce for a spicy kick. If you love bold flavors, add some smoked paprika or chipotle powder. Experiment with different dressings. While ranch is great, try Italian or chipotle dressing for a twist. You can even make your own dressing using olive oil and vinegar. If you want to make it vegetarian, leave out the bacon. You can add more veggies or nuts for protein. To make it vegan, swap ranch dressing for a vegan option. For gluten-free options, use gluten-free pasta made from rice or quinoa. There are many great choices that taste just as good. Enjoy your Cowboy Pasta Salad with these fun twists! To keep your Cowboy Pasta Salad fresh, store it in an airtight container. This method prevents air from making it soggy. You can keep it in the fridge for up to three days. After that, the flavors may fade. Yes, you can freeze Cowboy Pasta Salad! However, some ingredients like tomatoes and cheese may change in texture. To freeze, first, cool the salad completely. Then place it in a freezer-safe bag or container. Make sure to remove as much air as possible. It can last in the freezer for about three months. To enjoy your leftovers, thaw the salad in the fridge overnight. Once thawed, add a splash of ranch dressing and lime juice to freshen it up. This small adjustment revives the flavors nicely. Taste and add salt and pepper if needed. Enjoy your revitalized Cowboy Pasta Salad! For the full recipe, check out the complete details above. Cowboy Pasta Salad is a colorful and hearty dish. It blends pasta, beans, and fresh veggies. This dish has roots in Southwestern cuisine, reflecting bold flavors. It often features ranch dressing, which adds a creamy touch. The combination of textures and tastes makes it fun to eat. You can enjoy it as a side or a main dish. This salad is quick to make. It takes about 15 minutes to prep the ingredients. Cooking the pasta adds another 10 minutes. After mixing everything, let it chill for 30 minutes. In total, you need about 45 minutes from start to finish. This makes it great for a summer meal or potluck. Yes, you can make Cowboy Pasta Salad ahead of time. It actually tastes better after chilling. For meal prep, make it a day in advance. Just store it in an airtight container in the fridge. This allows the flavors to blend well. When you’re ready to serve, give it a quick toss. If needed, add a splash of lime juice or extra dressing to liven it up. For the full recipe, check out the details above. Cowboy Pasta Salad is a fun, colorful dish. We covered all the key steps. You learned about the ingredients, cooking tips, and serving ideas. I shared variations and storage tips to keep it fresh. Remember, you can make this salad your own with easy swaps. Enjoy it at picnics, barbecues, or as a quick meal. I hope you feel ready to make this tasty dish. Happy cooking!

Cowboy Pasta Salad Flavorful and Easy Summer Dish

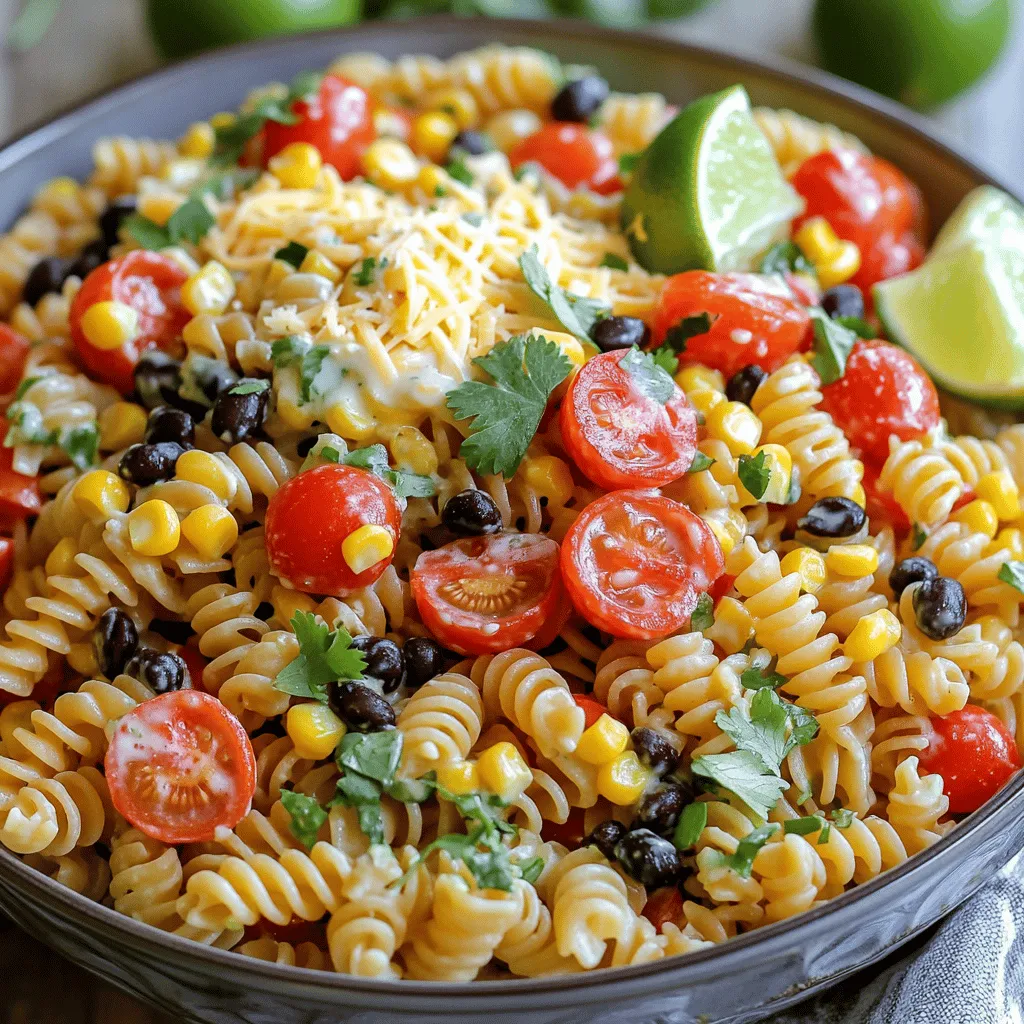
Looking for a fun and tasty dish to spice up your summer? Cowboy Pasta Salad checks all the boxes! This

- 1 box yellow cake mix - 3 large eggs - 1/2 cup unsalted butter, melted - 1 cup coconut milk - 1 cup crushed pineapple, drained - 1 container (8 oz) whipped topping - 1/2 cup sweetened shredded coconut - 1/2 cup maraschino cherries, drained - 1/4 cup chopped macadamia nuts (optional) - 1 pack (3 oz) instant coconut cream pudding mix - 1/4 cup milk (for the jello) Gather these ingredients for a fun and tasty dessert. The yellow cake mix is the base. Eggs and melted butter add richness. Coconut milk gives the cake a tropical twist. Crushed pineapple adds sweetness and moisture. The whipped topping makes it creamy and light. Shredded coconut gives texture and a burst of flavor. Maraschino cherries add a pop of color and taste. Chopped macadamia nuts can add crunch if you like. Instant coconut cream pudding mix creates a smooth filling. Finally, milk helps the pudding mix come together. Check the Full Recipe for detailed steps to make this dessert. Enjoy your cooking! 1. Prep the oven and baking pan: Set your oven to 350°F (175°C). Grease and flour a 9x13-inch baking pan. This step helps prevent sticking. 2. Mixing the cake batter: In a large bowl, combine the yellow cake mix, eggs, melted butter, and coconut milk. Beat on medium speed for 2 minutes. This helps create a smooth batter. 3. Baking time and checking for doneness: Pour the batter into your prepared pan. Smooth it out with a spatula. Bake for 25 to 30 minutes. Check for doneness by inserting a toothpick. If it comes out clean, your cake is ready! 1. Cooling and poking the cake: After baking, remove the cake from the oven. Let it cool in the pan for 10 minutes. Use a wooden spoon handle to poke holes all over the cake, spaced about 2 inches apart. This allows the filling to soak in. 2. Preparing the pudding filling: In another bowl, mix the coconut cream pudding with 1/4 cup of milk. Whisk until it thickens. Stir in the crushed pineapple until well combined. 1. Filling the holes and chilling: Pour the pudding mixture over the cake, filling the holes. Use a spatula to spread it evenly. Cover the cake and place it in the fridge for at least 2 hours. This helps the flavors meld and the cake to set. 2. Topping with whipped cream and garnishes: After chilling, spread the whipped topping over the cake. Sprinkle shredded coconut on top. Add maraschino cherries and chopped macadamia nuts if you like. Now you have a stunning Tropical Paradise Poke Cake to enjoy! For the full recipe, check the section above. To make your poke cake moist and flavorful, always use the right ingredients. Choose a quality cake mix for the best taste. I like to add a little more liquid, like coconut milk, for extra moisture. This keeps your cake from being dry. For a fluffier texture, mix the cake batter well but do not overdo it. Beat it for about two minutes. This helps to incorporate air and gives your cake that lightness. Let the batter rest for a few minutes before baking. This helps the bubbles settle and makes the cake rise better. There are many fun ways to serve poke cake. Cut it into squares and place each piece on a colorful plate. You can add a slice of fresh pineapple or a cherry on top for flair. This makes it look more inviting and tasty. For presentation, consider adding a drizzle of chocolate or caramel sauce. This adds flavor and makes the dish pop! You can also sprinkle some extra shredded coconut on top for a tropical touch. With these tips, you'll create a poke cake that looks and tastes amazing. For the complete recipe, check out the Full Recipe section. {{image_2}} You can play with flavors in poke cakes. Here are some fun options: - Chocolate Poke Cake: Use chocolate cake mix instead. After baking, poke holes and fill with chocolate pudding. Top with whipped cream and chocolate shavings for a treat. - Strawberry Poke Cake: Swap yellow cake mix for strawberry. Fill the holes with strawberry jello and fresh strawberries. Top with whipped cream for a fruity delight. - Lemon Poke Cake: Choose lemon cake mix for a zesty twist. Fill with lemon pudding and a splash of lemon juice. Garnish with lemon zest for a bright finish. You can make poke cakes fit special diets too. - Gluten-free adaptations: Use gluten-free cake mix. Ensure all other ingredients are gluten-free. This way, everyone can enjoy a slice. - Vegan modifications: Replace eggs with flax eggs. Use almond milk instead of cow's milk. Choose a vegan whipped topping for a delicious vegan poke cake. These variations help you create flavors everyone will love. Check out the Full Recipe for more ideas! To keep your poke cake fresh, refrigeration works best. - Wrap it tightly: Use plastic wrap or aluminum foil to cover the cake. This keeps it moist and prevents odors. - Use an airtight container: If you have one, store the cake in a container. This can help keep it fresh longer. For freezing, follow these simple steps: - Cool the cake completely: Make sure it’s at room temperature. - Slice it: Cut it into squares for easy serving later. - Wrap each piece: Use plastic wrap, then place it in a freezer bag. Remove as much air as possible. How long does poke cake last? - In the fridge, it lasts about 3 to 5 days. - In the freezer, it can last up to 3 months. Signs of spoilage to watch for include: - Dry texture: If the cake feels dry, it may not taste good. - Off smell: If it smells strange, it’s best to throw it out. - Mold: Any sign of mold means it’s time to say goodbye. Following these tips will help you enjoy your tropical paradise poke cake longer! For the full recipe, check back to create this tasty treat. A poke cake is a dessert where you poke holes in a baked cake. Then, you soak it with a flavored liquid. This method makes the cake moist and full of flavor. It’s usually topped with whipped cream or frosting. Poke cakes are easy to make and fun to eat. Yes, you can use any flavor cake mix you like. Chocolate, vanilla, or even red velvet works well. Each flavor can change the taste of your poke cake. Feel free to mix and match flavors for fun combinations. I recommend chilling the poke cake for at least 2 hours. This allows the flavors to blend and the cake to set. The longer you chill it, the better it tastes. For best results, prepare it the day before. While whipped topping adds a creamy texture, it’s not a must. You can use whipped cream or even a frosting instead. If you prefer a healthier option, you can skip it altogether. The cake will still be tasty without it. Absolutely! Poke cakes are perfect for making ahead. You can bake it a day or two before your event. Just make sure to cover it well in the fridge. It will stay fresh and delicious for days. Check out the Full Recipe for a tasty option! This blog post covered everything you need for a Tropical Paradise Poke Cake. We looked at the key ingredients, step-by-step instructions, and tips for making it extra delicious. You learned various ways to serve and store your cake. In my view, this poke cake is a fun and tasty treat. Try it out with friends or at your next gathering. Enjoy every bite!

Easy Poke Cake Recipes for Delicious Desserts

Looking for an easy dessert that impresses? Look no further! I’m excited to share simple poke cake recipes that anyone

- 1 cup dried red kidney beans (or 2 cans, drained and rinsed) - 1 tablespoon olive oil - 1 medium onion, diced - 2 cloves garlic, minced - 1 green bell pepper, diced - 1 stalk celery, diced - 1 teaspoon smoked paprika - 1/2 teaspoon dried thyme - 1/2 teaspoon cayenne pepper (adjust to taste) - 1 bay leaf - 4 cups vegetable broth (or chicken broth) - 1 cup long-grain white rice - Salt and pepper to taste - Fresh parsley, chopped (for garnish) Gathering these ingredients is the first step to making red beans and rice. You have two choices for beans: dried or canned. If you pick dried beans, you must soak them overnight. This helps them cook better. Canned beans save time and work just as well. You will also need some fresh veggies. The onion, garlic, bell pepper, and celery add great flavor. The spices, such as smoked paprika and cayenne, give the dish its warmth. Adjust the cayenne to match your taste. The broth adds depth. You can use vegetable or chicken broth, depending on your preference. Finally, long-grain white rice ties everything together. This recipe makes four servings, so it’s perfect for a family meal. Don't forget the garnish! Chopped parsley adds a nice touch. For the complete recipe, check out the full recipe. - Calories per serving: Approximately 350 - Protein: 12g - Carbohydrates: 60g - Fat: 6g - Vitamins and minerals: Good source of fiber, iron, and vitamin C This dish is hearty and filling. It provides a great mix of protein, carbs, and healthy fats. Each serving has a good amount of fiber, which is great for digestion. You also get iron and vitamin C from the veggies. Enjoy this tasty and nutritious meal! To start, you must decide between using dried beans or canned beans. If you choose dried beans, rinse them well and soak them overnight. This step helps soften the beans and cuts down cooking time. If you use canned beans, you can skip soaking and move straight to cooking. Just remember to drain and rinse them before adding them to the pot. Next, it’s time to chop and prepare your vegetables. You will need one medium onion, two cloves of garlic, one green bell pepper, and one stalk of celery. Dice them into small pieces. This helps them cook evenly and blend well in the dish. Having everything prepped makes cooking smoother and more fun. Now, let’s get to the cooking! In a large pot or Dutch oven, heat one tablespoon of olive oil over medium heat. Once hot, add your diced onion, garlic, green bell pepper, and celery. Sauté these for about five to seven minutes, until they soften and smell great. After that, stir in one teaspoon of smoked paprika, half a teaspoon of dried thyme, half a teaspoon of cayenne pepper, and one bay leaf. Let these spices toast in the pot for a minute. This step adds depth to the flavor. Next, if you used dried beans, add them in now along with four cups of vegetable broth. If you’re using canned beans, wait until later to add them. Bring the mixture to a boil, then lower the heat. Let it simmer uncovered for about thirty minutes. This allows the beans to soften and the flavors to mix nicely. After thirty minutes, it’s time to stir in one cup of long-grain white rice. Cover the pot and let it simmer for another twenty to twenty-five minutes. The rice will cook and absorb all those lovely flavors. If you used canned beans, add them in the last five minutes to heat through. Finally, taste your dish and add salt and pepper as needed. Don’t forget to remove the bay leaf before serving. Enjoy your hearty red beans and rice! For the full recipe, check out the [Full Recipe]. To get the best texture in your beans, soak dried beans overnight. This helps them cook evenly. If you use canned beans, drain and rinse them well. This step removes excess sodium and helps with flavor. For perfect rice, use long-grain white rice. Rinse it under cold water before cooking. This removes extra starch and keeps the rice fluffy. When you add rice to your dish, make sure to cover it. This keeps steam inside and cooks the rice evenly. To give your dish a personal touch, consider adding spices like cumin or oregano. These spices add warmth and depth. You can also mix in a bit of lemon juice. This will brighten the flavors and balance the meal. Balancing flavors is key. Taste as you cook. If you find it too spicy, add a bit of sugar. It helps tone down heat without taking away flavor. This small trick can elevate your red beans and rice. Garnish your dish with fresh parsley. It adds color and a fresh taste. You can also sprinkle some green onions on top for a nice crunch. For side dishes, cornbread is a classic choice. Its sweetness pairs well with the savory beans. You can also serve a simple green salad. This adds freshness and makes the meal light. For the full recipe, check out my detailed guide. Enjoy your cooking! {{image_2}} You can easily make red beans and rice meat-free. Start by using vegetable broth instead of chicken broth. This change keeps the dish rich and full of flavor. For protein, consider adding tofu or tempeh. Both options soak up flavors well and give a nice texture. You can cube the tofu and sauté it with the veggies. If you choose tempeh, crumble it and cook it with the spices. This will let all the flavors blend nicely. Don't forget to adjust the spices to make sure everything tastes great! If you like heat, there are easy ways to spice things up. You can add more cayenne pepper when cooking. This will give your dish a nice kick. Another option is to mix in hot sauce or fresh jalapeños. Slice them and stir them in during cooking for a burst of flavor. You can also serve your dish with extra hot sauce on the side. This way, everyone can add as much heat as they like. Just remember, spice can be strong, so start small and taste as you go! Red beans and rice can change based on where you are. In Creole cooking, you might find tomatoes added. This gives a different flavor and color to the dish. Cajun recipes often skip tomatoes and focus on spices. They may include andouille sausage for a smoky taste. You can also explore local specialties. In some areas, folks add local beans or spices unique to their culture. This adds personal flair to the dish. Don't be afraid to mix things up! Your red beans and rice can reflect your own style and taste. For the full recipe, check out the Savory Red Beans and Rice Delight. To store your red beans and rice, let it cool first. Place leftovers in airtight containers. This keeps the flavors fresh. Use glass containers or sturdy plastic ones. They help keep moisture in. Label your containers with the date. This way, you know when to use them. Generally, the dish lasts about 4 to 5 days in the fridge. Freezing red beans and rice is easy. Let the meal cool completely before freezing. Transfer it to freezer-safe bags or containers. Squeeze out extra air to avoid freezer burn. Seal them tightly and label with the date. It stays good for about 2 to 3 months. When you are ready to eat, remove it from the freezer. Thaw it in the fridge overnight. You can also use the microwave for quick thawing. Reheat on the stove over low heat. Add a splash of broth or water to keep it moist. Enjoy your comforting meal even after a long time! To make red beans and rice from scratch, follow these steps: 1. Soak the Beans: If using dried kidney beans, rinse and soak them overnight. If using canned beans, skip this step. 2. Sauté Vegetables: Heat olive oil in a large pot. Add diced onion, minced garlic, diced green bell pepper, and diced celery. Cook for about 5-7 minutes until soft. 3. Add Spices: Stir in smoked paprika, dried thyme, cayenne pepper, and a bay leaf. Cook for one more minute. 4. Add Beans and Broth: If using soaked beans, add them now with vegetable broth. If using canned beans, add them later. 5. Simmer: Bring the pot to a boil, then reduce heat. Simmer uncovered for about 30 minutes. 6. Add Rice: Stir in the rice and cover the pot. Let it simmer for 20-25 minutes until the rice is cooked. 7. Season and Serve: Taste and add salt and pepper. Remove the bay leaf before serving. This method gives you a tasty and hearty dish. You can find the Full Recipe to get all the details. You can serve red beans and rice with many great sides. Here are some popular options: - Cornbread: The soft texture pairs well. - Coleslaw: A crunchy side adds freshness. - Fried Plantains: Sweet and savory flavors balance the dish. - Green Salad: A crisp salad can lighten the meal. - Hot Sauce: For those who like it spicy, a splash adds heat. These sides make the meal more filling and enjoyable. Cooking red beans and rice takes about one hour. Here’s the breakdown: - Prep Time: 15 minutes for chopping and soaking. - Cooking Time: 45 minutes total. - 30 minutes to simmer the beans. - 20-25 minutes to cook the rice. In total, you can have a hearty meal ready in an hour! Yes, you can adapt this recipe for a slow cooker. Here’s how: 1. Prepare Beans: Soak dried beans overnight or use canned beans. 2. Sauté First: You can sauté the veggies and spices in a pan. This adds flavor. 3. Combine Ingredients: Add sautéed veggies, beans, broth, and rice to the slow cooker. 4. Cook: Set to low for 6-8 hours or high for 3-4 hours. This method is great for busy days. You’ll come home to a warm and tasty meal! This article provided a complete guide on making red beans and rice. We covered the ingredients, cooking steps, and tips for the best flavor. I shared ways to customize your dish, from vegetarian options to spicy twists. Proper storage methods help keep leftovers fresh, too. Enjoy this dish as a comforting meal or a festive side. With the right steps, you can create a satisfying, flavorful meal that your family will love. Start cooking and make your kitchen full of delicious smells!

Red Beans and Rice Flavorful Comfort Food Recipe

Are you ready to indulge in a hearty bowl of red beans and rice? This classic dish offers warmth and

- 12 oz (340g) spaghetti or linguine - 3 large yellow onions, thinly sliced - 4 cloves garlic, minced - 4 cups vegetable broth - 1 teaspoon dried thyme - 2 tablespoons olive oil - 1 tablespoon balsamic vinegar - 1 cup grated Gruyère cheese - 1 cup grated Parmesan cheese - Salt and pepper to taste - 1 tablespoon fresh parsley, chopped (for garnish) For this One Pot French Onion Pasta, the ingredients come together to create a simple yet rich dish. The yellow onions provide a sweet base when they caramelize, while the garlic adds depth. The vegetable broth brings everything together in a hearty way. The cheeses, Gruyère and Parmesan, create a creamy texture that makes every bite feel special. You can also adjust the salt and pepper to match your taste. Fresh parsley adds a pop of color and a hint of taste on top. This list makes it easy to gather what you need for the recipe. If you want to explore more, check out the Full Recipe for specific measurements and steps. - Heat 2 tablespoons of olive oil in a large pot. - Add 3 large yellow onions that are thinly sliced and a pinch of salt. - Cook the onions for 20-25 minutes. Stir often until they turn soft and golden. - After the onions are caramelized, add 4 cloves of minced garlic. - Cook for 2 more minutes until you smell the garlic. - Pour in 1 tablespoon of balsamic vinegar. Scrape the pot to get all the tasty bits. - Now, pour in 4 cups of vegetable broth and 1 teaspoon of dried thyme. - Add 12 oz of spaghetti or linguine to the pot. Stir well to cover the pasta in broth. - Reduce heat and let it simmer. Cook according to package directions for 9-11 minutes. - Once the pasta is cooked, reduce the heat to low. - Stir in 1 cup of grated Gruyère cheese and 1 cup of grated Parmesan cheese. - Mix until the cheese melts and becomes creamy. Adjust with salt and pepper to taste. For a full recipe, check the details above. Caramelizing onions is key to this dish. Start with large yellow onions. Slice them thinly for even cooking. Heat olive oil in your pot over medium heat. Add the onions and a pinch of salt. Stir occasionally and be patient. Cook low and slow for about 20-25 minutes. This builds rich, sweet flavors. If you rush, the onions may burn, not caramelize. For a creamy texture, choose cheeses wisely. Gruyère and Parmesan work best together. They melt well and add depth. If you're out of Gruyère, try Fontina or Emmental. Both give a similar flavor. To avoid clumping, add cheese slowly. Stir it in off the heat to blend smoothly. You want a creamy sauce, not a lumpy mess. Timing is critical when cooking pasta. Add it after the broth starts to boil. Stir it often while it cooks. This helps prevent sticking. Follow the package directions for al dente pasta. Remember, it continues to cook off the heat. Stirring keeps it tender and helps mix in the flavors. If you overcook it, your dish will be mushy. Enjoy your perfectly cooked meal! {{image_2}} You can easily make this dish heartier by adding cooked beef or chicken. Simply shred cooked chicken or slice beef before adding it to the pot. Mix it in during the last few minutes of cooking. This adds protein and flavor. If you want a vegetarian twist, try adding cooked mushrooms or lentils instead. They bring a nice depth and texture. For those with gluten sensitivities, you can swap out the pasta. Look for gluten-free spaghetti or linguine made from rice or chickpeas. These options work well and keep the dish tasty. Make sure to check the cooking time on the package. Gluten-free pasta often cooks differently than regular pasta. You can make this dish even more nutritious by adding vegetables. Spinach, kale, or zucchini are great choices. Slice them thin and toss them into the pot with the pasta. They will cook quickly and blend nicely. Just remember to adjust the cooking time so they don't overcook. Enjoy the extra colors and flavors they bring to your meal! To store leftover One Pot French Onion Pasta, let it cool first. Place it in an airtight container. Use it within 3-4 days for the best taste. Keep it in the fridge to maintain its flavor. Always label the container with the date you stored it. You can reheat the pasta on the stove or in the microwave. For the stove, add a splash of broth to the pot. Heat it over low to medium heat, stirring gently. In the microwave, cover it with a damp paper towel. Heat in short intervals, stirring in between. This keeps it moist and creamy. To freeze portions, let the pasta cool completely. Scoop it into freezer-safe containers, leaving space at the top. Seal tightly and label with the date. It can last in the freezer for 2-3 months. To thaw, move it to the fridge overnight. Reheat it as described above. Enjoy your easy, hearty meal anytime! Yes, you can use other types of pasta. I often use penne or fusilli. Just make sure to adjust the cooking time based on the pasta you choose. Thin pasta cooks faster than thicker types. Always check the package directions for best results. To make this dish vegan, swap the cheese for vegan cheese. You can also use nutritional yeast for a cheesy flavor. Replace the vegetable broth with homemade or store-bought vegan broth. This keeps the dish rich and tasty without using animal products. Yes, you can prepare the dish ahead of time. Cook the pasta and sauce, then cool it down. Store it in the fridge for up to two days. When ready to serve, just reheat it in a pot over low heat. You may need to add a splash of broth to keep it creamy. I love serving this pasta with a simple green salad or garlic bread. You can also pair it with roasted vegetables for a heartier meal. A glass of white wine complements the flavors well and makes it feel special. To store leftovers, let the pasta cool completely. Place it in an airtight container. It keeps well in the fridge for about three days. If you want to keep it longer, you can freeze portions. Just ensure to thaw it overnight in the fridge before reheating. In this blog post, we explored how to make One Pot French Onion Pasta. We covered ingredients needed, step-by-step cooking instructions, and some helpful tips. Don't forget to try different cheeses and add your favorite veggies. Storing and reheating tips help you enjoy leftovers too. Overall, this dish is easy, tasty, and adaptable. You'll impress friends and family with this comforting meal. Enjoy making your tasty pasta with confidence!

One Pot French Onion Pasta Simple and Savory Dish

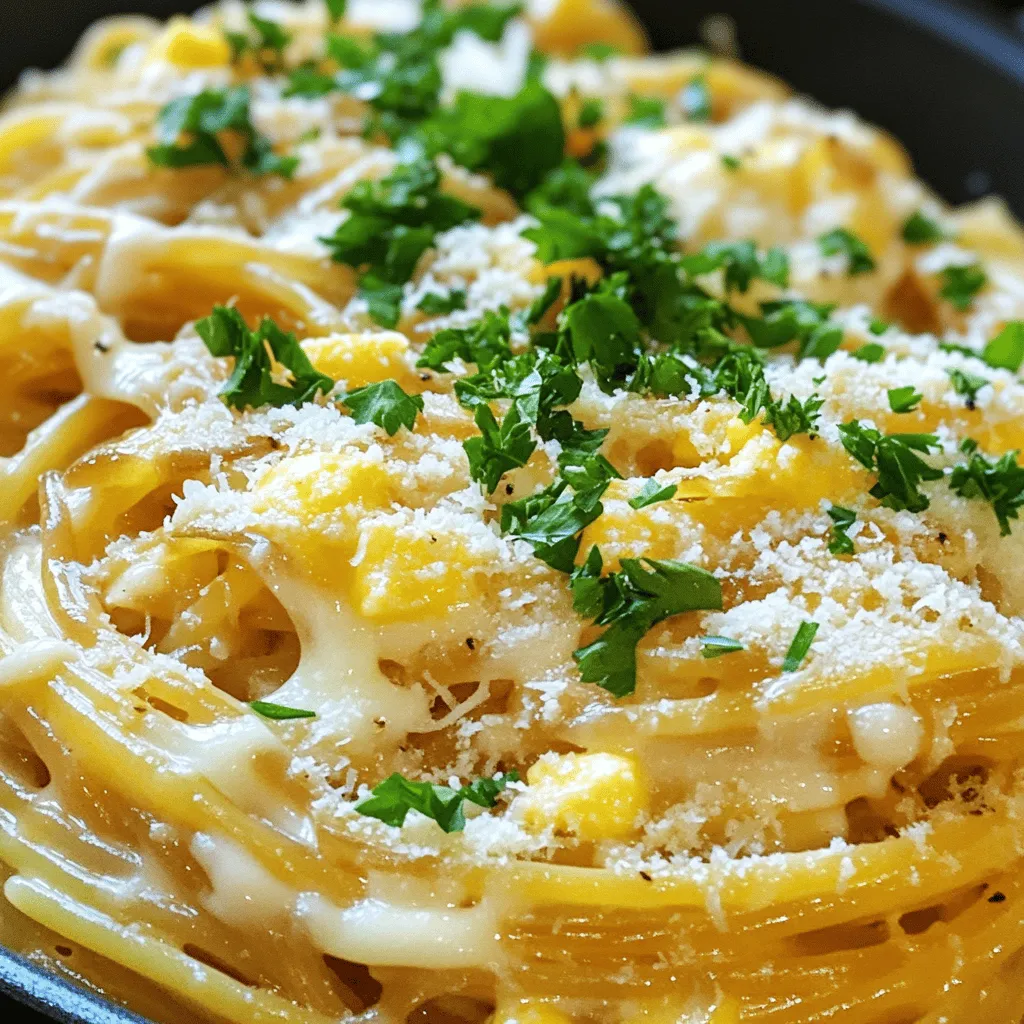
Looking for a dish that’s both simple and packed with flavor? One Pot French Onion Pasta is your answer! It

Older posts
Newer posts
← Previous Page1 … Page54 Page55 Page56 … Page62 Next →

dsad

© 2025 Foodish Talk • Built with GeneratePress

Our Policies

  • Copyright Policy
  • Cookie Policy
  • GDPR Policy
  • Privacy Policy
  • Disclaimer
  • Terms Of Use

More Information

  • Home
  • About
  • Contact
  • Appetizers
  • Dessert
  • Dinner
  • Drinks
©2025, Foodish Talk About Back To Top