Skip to content
DisclaimerTerms Of UseGDPR PolicyCookie Policy

Foodish Talk

  • Home
  • Drinks
  • Appetizers
  • Dinner
  • Dessert
  • About
  • Contact
  • Privacy Policy
DisclaimerTerms Of UseGDPR PolicyCookie Policy

Ava

- 12 jumbo pasta shells - 1 cup cooked chicken, shredded - 1/2 cup cream cheese, softened - 1/4 cup buffalo wing sauce - 1/2 cup shredded mozzarella cheese - 1/4 cup blue cheese crumbles (optional) To make Quick Buffalo Chicken Stuffed Shells, these main ingredients are key. The jumbo pasta shells hold the delicious filling. The cooked chicken adds protein and flavor. Cream cheese makes the filling creamy. Buffalo wing sauce gives it a spicy kick. Shredded mozzarella adds a melty texture. You can add blue cheese if you like its tangy taste. - 1/4 teaspoon garlic powder - 1/4 teaspoon onion powder - Salt and pepper to taste These spices and seasonings are important for flavor. Garlic powder adds depth, while onion powder enhances the taste. Salt and pepper balance all the flavors. Adjust them to fit your taste buds. - 1/4 cup chopped green onions for garnish - 1 cup marinara sauce Garnishes and sauces elevate the dish. Chopped green onions add a fresh crunch on top. Marinara sauce provides a rich base for the stuffed shells. Together, they create a beautiful and tasty presentation. For the full recipe, check the details above. - Preheat your oven to 375°F (190°C). - Cook the jumbo pasta shells according to package instructions until al dente. Start by heating your oven. This step is key to ensuring everything bakes evenly. While the oven warms, boil water for your pasta. You want those shells just right—not too soft. Al dente gives the best texture and helps hold the filling. - In a mixing bowl, combine shredded chicken, cream cheese, buffalo wing sauce, and seasonings. Next, grab a bowl. Here, mix shredded chicken with cream cheese. Add buffalo wing sauce for that spicy kick! I often adjust the sauce based on your heat preference. Toss in garlic powder, onion powder, salt, and pepper. Stir until everything blends well. This mix should have a creamy and zesty flavor. - Carefully stuff each shell with the mixture and arrange in a baking dish. - Spread marinara sauce and top with cheeses before baking. Now for the fun part! Take each shell and stuff it with your tasty filling. Place them seam side up in a baking dish. Once all shells are in, spread marinara sauce over them. Top with mozzarella cheese and blue cheese crumbles if desired. Cover the dish with foil to keep moisture in. Bake for 20 minutes, then remove the foil and bake for another 10 minutes. Wait for that cheese to bubble and turn golden. You can find the complete recipe [Full Recipe]. - Ensure shells are cooked al dente for better texture. This means they should be firm yet tender. - Mix filling ingredients thoroughly for even flavor distribution. This helps every bite taste great. - Cover with foil to retain moisture during the first bake. This keeps the dish juicy and delicious. - Remove foil for the last few minutes to achieve a golden cheese topping. This adds a nice crispness. - Serve with a side salad or garlic bread for a complete meal. This adds freshness and balance to your plate. - Drizzle with extra buffalo sauce for more heat. This gives it that extra kick everyone loves. {{image_2}} - Use cooked rotisserie chicken for faster prep. This saves time and adds flavor. - Swap buffalo sauce for barbecue sauce for a different flavor profile. This can make it sweeter and less spicy. - Make it gluten-free by using gluten-free pasta shells. This way, everyone can enjoy the dish. - Use dairy-free cream cheese and mozzarella for a dairy-free version. This caters to those with lactose intolerance. - Add diced celery or carrots to the filling for extra crunch. This gives the dish more texture. - Include spices like cayenne or paprika for an extra kick. This enhances the heat and depth of flavor. Try these variations to make your Quick Buffalo Chicken Stuffed Shells even more exciting. For the full recipe, check out the details above. You can store leftovers in an airtight container in the fridge for up to 3 days. This keeps the shells fresh and tasty. When you're ready to eat, reheat them in the oven or microwave. Using the oven gives the best results. You will enjoy the warm, cheesy goodness again. You can freeze baked stuffed shells in individual portions. This makes for easy meals later on. When you want to eat them, thaw overnight in the fridge. This way, they will heat evenly when you’re ready to enjoy. If you plan to freeze the stuffed shells, assemble them but do not bake. Baking them fresh gives the best taste and texture. The flavors will shine through, and you will enjoy them more. For the full recipe, check out the earlier section. Yes, you can prepare the shells a day in advance and refrigerate before baking. This makes meal prep easy. Just store them covered in the fridge. When you're ready, bake as directed. This saves time on busy nights. Pair with a fresh salad, garlic bread, or veggie sticks for a balanced meal. These sides add color and nutrition. A crisp salad cools the spicy flavors. Garlic bread offers a nice crunch. Veggie sticks provide a crunchy contrast. The cheese should be bubbly and golden brown, and the filling should be heated through. You can check by inserting a fork into the shells. If it feels hot, they are ready to enjoy. This ensures every bite is delicious. In this post, I shared how to make delicious Buffalo Chicken Stuffed Shells. We covered key ingredients, step-by-step instructions, and tips for perfecting your dish. Remember, the right cooking methods and ingredients can elevate your meal. Feel free to mix things up with variations or dietary swaps. Plus, you can store leftovers easily for later. Enjoy this tasty recipe as part of your family meals and impress your guests with the bold flavors.

Quick Buffalo Chicken Stuffed Shells Flavorful Delight

Are you ready to spice up dinner with a quick and tasty dish? Let’s dive into these Quick Buffalo Chicken

- 300g spaghetti - 200g shrimp, peeled and deveined - 200g scallops - 100g calamari, sliced - 2 tablespoons olive oil - 3 cloves garlic, minced - 1 cup heavy cream - 1 cup seafood broth - 1 tablespoon lemon juice - 1 teaspoon red chili flakes (optional) - Salt and pepper to taste - 2 tablespoons fresh parsley, chopped - Grated Parmesan cheese for serving - Vegetables to add for extra flavor (e.g., spinach, cherry tomatoes) - Alternative seafood options (e.g., crab, mussels) Gathering the right ingredients is key to making creamy seafood spaghetti. I like to start with fresh seafood. The shrimp, scallops, and calamari add great texture and taste. Use good quality spaghetti for the best bite. Don't skip the garlic; it brings out the flavor. Heavy cream makes the sauce rich and smooth. The seafood broth adds depth. You can adjust the spice with red chili flakes if you want some heat. Feel free to customize this dish. Adding vegetables like spinach or cherry tomatoes can brighten the dish. You can also swap in different seafood, like crab or mussels, for variety. For the full recipe, check out the detailed cooking steps and tips to make your meal a success! - Bring a large pot of salted water to a boil. - Cook the spaghetti until al dente, then drain. Cooking the spaghetti is simple. Start with a large pot, and fill it with water. Add salt for flavor. Once the water boils, add the spaghetti. Stir it well to keep it from sticking. Follow the package instructions for cooking time. You want it to be al dente, which means firm to the bite. After cooking, drain the spaghetti in a colander. Remember to save a bit of the pasta water for later. - Sauté garlic and optional chili flakes in olive oil. - Add and cook shrimp, scallops, and calamari. To prepare the seafood, take a large skillet and heat the olive oil over medium heat. Add minced garlic and red chili flakes if you like some heat. Stir it for about one to two minutes. The garlic should smell great but not burn. Next, add your shrimp, scallops, and calamari to the skillet. Cook them for about three to four minutes. The seafood should turn opaque and be fully cooked. Once done, remove it from the skillet and set it aside. - Combine seafood broth, heavy cream, and lemon juice in skillet. - Thicken the sauce and return seafood. In the same skillet, pour in the seafood broth. Bring it to a gentle simmer. Then, add the heavy cream and lemon juice. Stir well to mix everything. Let the sauce simmer for three to five minutes. It should thicken a bit. After it’s thickened, return the cooked seafood to the skillet. Season with salt and pepper to taste. If the sauce is too thick, add a little reserved pasta water until it reaches your desired consistency. - Toss spaghetti with the creamy seafood sauce. - Make adjustments using reserved pasta water if needed. Finally, it’s time to combine everything! Toss the drained spaghetti into the skillet with the creamy seafood sauce. Make sure every strand of pasta gets coated well. If the sauce seems too thick, don’t hesitate to add more reserved pasta water. This will help to keep the dish silky and rich. Now, your creamy seafood spaghetti is ready to serve! For the full recipe, check the earlier sections. - Choose high-quality spaghetti for the best texture. It holds sauce well and adds flavor. - Avoid overcooking the seafood for optimal tenderness. Cook just until it turns opaque. - Serve with a sprinkle of fresh parsley and grated Parmesan. This adds color and taste. - Enhance flavor with a drizzle of high-quality olive oil. It makes the dish richer. - Suggested side dishes include garlic bread and a fresh green salad. These complement the meal. - Ideal wine pairings are white wines like Chardonnay or Sauvignon Blanc. They balance the creaminess. For more details on creating this dish, check out the Full Recipe. {{image_2}} You can switch up the sauce to change the taste of your creamy seafood spaghetti. Try a tomato-based sauce for a rich and tangy flavor. This adds a nice twist and balances the sweetness of the seafood. If you want a lighter feel, use a pesto sauce. The fresh herbs in pesto will brighten the dish and give it a vibrant color. These simple swaps let you explore new flavors while keeping the dish enjoyable. You don’t have to stick with seafood. You can replace it with chicken or even go vegetarian. Chicken adds a hearty touch and cooks quickly. For a veggie option, use mushrooms or artichokes. Both give a nice texture. If you need a gluten-free option, swap regular spaghetti with gluten-free pasta. Many brands offer great alternatives that taste just as good. To make your dish more exciting, add some spices or herbs. Basil and oregano work well with seafood and cream. They give depth to the flavor. You can also add a touch of citrus zest. Lemon or lime zest brightens the dish and adds a fresh kick. These small changes can make your creamy seafood spaghetti feel special and unique. To keep creamy seafood spaghetti fresh, store it in an airtight container. Make sure it cools down first to avoid steam buildup. Place the container in the fridge. Your leftovers will last for up to three days. For longer storage, you can freeze the spaghetti. Use a freezer-safe bag or container. It’s best to freeze it without the seafood if possible. This way, the texture stays nice. When reheating creamy seafood spaghetti, use a stovetop. This keeps the sauce creamy and smooth. Heat it gently over low heat. Stir often to prevent sticking. If the sauce seems thick, add a splash of seafood broth or cream. This brings back its rich flavor. You can also use a microwave, but be careful. Heat in short bursts and stir in between. This helps it heat evenly. Creamy seafood spaghetti can last about three to four days in the fridge. Make sure to store it in an airtight container. Keep it cool and avoid leaving it out. If you notice any change in smell or color, it’s best to toss it. For the best taste, eat it within the first couple of days. Yes, you can use frozen seafood. Just thaw it in the fridge overnight before cooking. If you're in a hurry, you can run it under cold water for quick thawing. When using frozen seafood, make sure to drain any excess water before adding it to the skillet. This helps avoid a watery sauce. If you want a lower fat option, try using half-and-half or whole milk. You can also use a mix of Greek yogurt and milk for a creamy texture. Coconut milk is a good dairy-free option too. Just remember, these substitutes may change the flavor a bit, but they still work well in this dish. For the full recipe, check the earlier sections for a delicious way to make creamy seafood spaghetti. In this blog post, I covered a delicious creamy seafood spaghetti recipe. You learned about the key ingredients, from shrimp to scallops, and optional additions for flavor. The step-by-step instructions help you cook perfect pasta and create a rich sauce. I shared tips for serving and ways to customize your dish. Remember, you can make this meal your own by swapping ingredients or sauces. Enjoy cooking, and savor each bite of your creamy seafood spaghetti!

Creamy Seafood Spaghetti Rich and Flavorful Delight

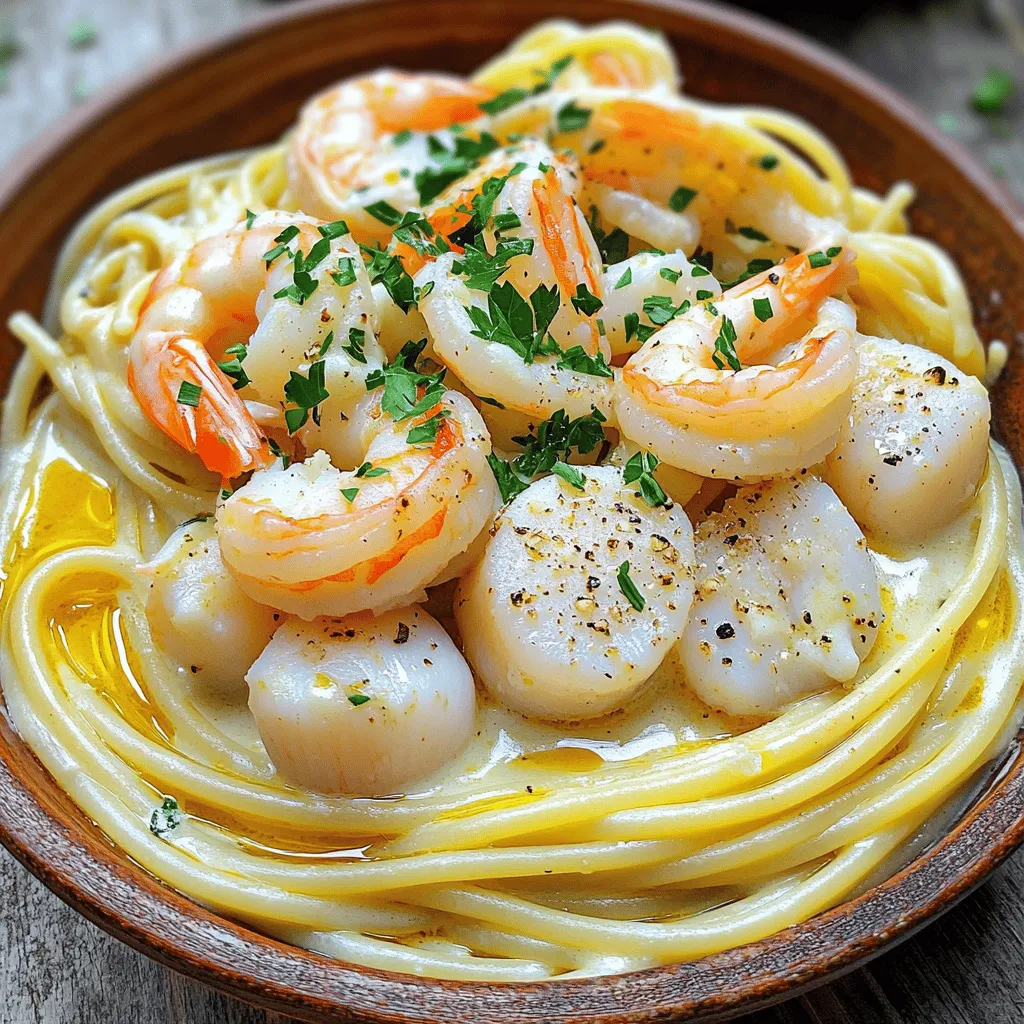
Dive into the rich and flavorful world of creamy seafood spaghetti! This dish combines shrimp, scallops, and calamari into a

The Chocolate Mousse Cake uses simple yet tasty ingredients. Here are the key components: - 1 1/2 cups all-purpose flour - 1 cup granulated sugar - 1/2 cup unsweetened cocoa powder - 1 teaspoon baking powder - 1/2 teaspoon baking soda - 1/2 teaspoon salt - 1/2 cup unsalted butter, softened - 2 large eggs - 1 teaspoon vanilla extract - 1 cup buttermilk - 1 cup semi-sweet chocolate chips - 2 cups heavy whipping cream - 1/4 cup powdered sugar - 1 teaspoon vanilla extract (for mousse) - Dark chocolate shavings for garnish The quality of chocolate and cream is key. Use high-quality chocolate for rich flavor. Fresh heavy cream adds a light and airy texture. If you need alternatives, here are some easy swaps: - For gluten-free, use a gluten-free flour blend. - For dairy-free, try coconut milk or almond milk. - For vegan, use flax eggs and dairy-free chocolate. Sourcing good ingredients is important. Check local markets for fresh options. Online stores may have the best specialty items. Always read labels to ensure quality. For the full recipe, you can refer to the detailed preparation steps. To start, preheat your oven to 350°F (175°C). Greasing and flouring two 9-inch round cake pans helps the cake come out easily. You can also line the pans with parchment paper for an extra layer of protection. Next, in a large bowl, whisk together the dry ingredients. Combine 1 1/2 cups of flour, 1 cup of sugar, 1/2 cup of cocoa powder, 1 teaspoon of baking powder, 1/2 teaspoon of baking soda, and 1/2 teaspoon of salt. Make sure everything is mixed well. In another bowl, mix the wet ingredients. Beat 1/2 cup of softened butter, 2 large eggs, and 1 teaspoon of vanilla extract. Once smooth, add 1 cup of buttermilk and mix until combined. Slowly add this wet mixture to the dry mixture. Stir until just combined, and then gently fold in 1 cup of chocolate chips. Pour the batter evenly into the prepared pans. Bake in the preheated oven for 25-30 minutes. Check doneness by inserting a toothpick into the center. If it comes out clean, your cakes are ready. Let them cool in the pans for 10 minutes before transferring to wire racks. For the mousse, start by heating 1 cup of heavy whipping cream in a medium saucepan. Keep it over medium heat until it just starts to simmer. Remove the saucepan from heat and add 1 cup of chocolate chips. Stir until melted and smooth. This step is key, so let the mixture cool slightly. In a separate bowl, whip the remaining 1 cup of heavy cream with 1/4 cup of powdered sugar and 1 teaspoon of vanilla extract. Continue whipping until stiff peaks form. Carefully fold this whipped cream into the cooled chocolate mixture. Make sure to combine gently until no streaks remain. This creates a light and airy mousse. Now it's time to put the cake together. Place one layer of cake on a serving platter. Spread half of the chocolate mousse on top. Then, add the second layer of cake. Cover the top with the rest of the mousse, smoothing it out for a nice finish. Chill the assembled cake in the refrigerator for at least 2 hours. This allows the mousse to set properly. For the best results, serve the cake cold. Garnish with dark chocolate shavings before serving. This adds a lovely touch to your delightful chocolate mousse cake. For the full recipe, check the main article. When making chocolate mousse cake, small errors can ruin your dessert. Here are some common mistakes to watch for: - Incorrect Measurements: Always measure your ingredients accurately. Too much flour can make the cake dry. - Overmixing Batter: Mix just until ingredients blend. Overmixing can lead to a dense cake. - Not Cooling Cakes: Allow the cake layers to cool completely. Warm layers can melt the mousse. Precision is key to success. Follow the recipe closely, and your cake will shine. Fluffy mousse is the star of this cake. Here’s how to make your mousse light and airy: - Whipping Cream: Use cold cream for the best results. Whip until stiff peaks form, but don’t overwhip. - Folding Technique: Gently fold the whipped cream into the chocolate. This keeps the mousse light and fluffy. - Temperature Matters: Ensure melted chocolate cools slightly before mixing. Hot chocolate can deflate whipped cream. Getting mousse right takes practice, but it's worth it for that perfect texture. Presenting your chocolate mousse cake well enhances the experience. Here are some fun ideas: - Beverage Pairings: Serve with coffee or dessert wine. These drinks complement the rich chocolate flavor. - Garnishments: Top with fresh berries or mint leaves for a pop of color. Dark chocolate shavings also add a touch of elegance. - Event Presentation: Use a cake stand for a beautiful display. Adding a dusting of cocoa powder on the plate can enhance the look. These tips will make your cake stand out at any gathering. Enjoy the delightful taste of your creation! {{image_2}} You can change the flavor of your chocolate mousse cake easily. Add extracts like orange or peppermint to the batter or mousse. These flavors add a fun twist. You can also mix in fruits like raspberries or strawberries. They add a fresh taste and nice texture. Nuts like almonds or hazelnuts also work well. They give a crunchy feel that contrasts with the smooth mousse. The type of chocolate you use can change the cake’s taste. You can choose milk, dark, or white chocolate. Each type has its own charm. Dark chocolate gives a rich flavor. Milk chocolate is sweet and creamy. White chocolate brings a light, sweet touch. Adjust the cocoa powder based on your chocolate choice. More cocoa can make the cake richer, while less can soften the taste. You can make individual servings of this cake too! Try baking the batter in cupcake liners. This way, you get cute chocolate mousse cupcakes. You can also use dessert jars for a fun presentation. Layer the cake and mousse in jars for a lovely treat. This makes it easy to serve at parties or gatherings. To keep your chocolate mousse cake fresh, follow these simple steps: - Wrap it well: Use plastic wrap to cover the cake tightly. This keeps moisture in and air out. - Use an airtight container: If you have a container large enough, place the wrapped cake inside. This adds extra protection. - Refrigerate: Store the cake in the fridge. This helps the mousse stay firm and tasty. - Avoid strong odors: Keep it away from strong-smelling foods. Mousse can absorb odors easily. If you want to freeze your chocolate mousse cake, here’s how: 1. Cool the cake: Make sure the cake is completely cool before freezing. 2. Slice it up: Cut the cake into individual slices. This makes it easy to thaw just what you need. 3. Wrap slices: Use plastic wrap to wrap each slice well. This prevents freezer burn. 4. Place in a container: Put the wrapped slices in a freezer-safe container. Label it with the date for reference. 5. Freeze: Store the cake in the freezer for up to three months. To thaw, move a slice to the fridge overnight. For a quick thaw, leave it out at room temperature for about 30 minutes. Enjoy your cake just like it's fresh from the oven! The mousse usually takes about 2 hours to set in the fridge. This time may change with the temperature of your ingredients. If you use warm chocolate, it may take longer. Always check if the mousse feels firm before serving. Yes, you can make this cake a day before you serve it. Just cover it well with plastic wrap. Keep it in the fridge to stay fresh. This also helps the flavors blend better. I recommend using high-quality semi-sweet chocolate. It has the right balance of sweetness and richness. Dark chocolate is also a great choice if you prefer a deeper flavor. Always choose chocolate with at least 60% cocoa for the best taste. Sure! You can use smaller or larger pans. Just remember, baking time may change. Check your cakes a few minutes early if you use smaller pans. For larger pans, you may need to bake a bit longer. Yes, chilling is key. It helps the mousse set properly, making it thick and creamy. Chilling also enhances the flavors, giving you a richer taste. So, don’t skip this step! A slice of this cake has about 350 calories. It also contains 25g of fat, 35g of carbs, and 5g of protein per serving. Always check specific brands for exact numbers. This cake is a treat, so enjoy it in moderation! You now have a complete guide to making a delicious chocolate mousse cake. Focus on using quality ingredients for the best taste. Follow the steps for layers, mousse, and chilling, and avoid common mistakes. Get creative with flavors and portion sizes. Remember, timing and temperature are key for perfect results. With these tips, you can impress anyone with your dessert skills. Enjoy baking and savor the joy of sharing your cake with others!

Chocolate Mousse Cake Delightful and Decadent Recipe

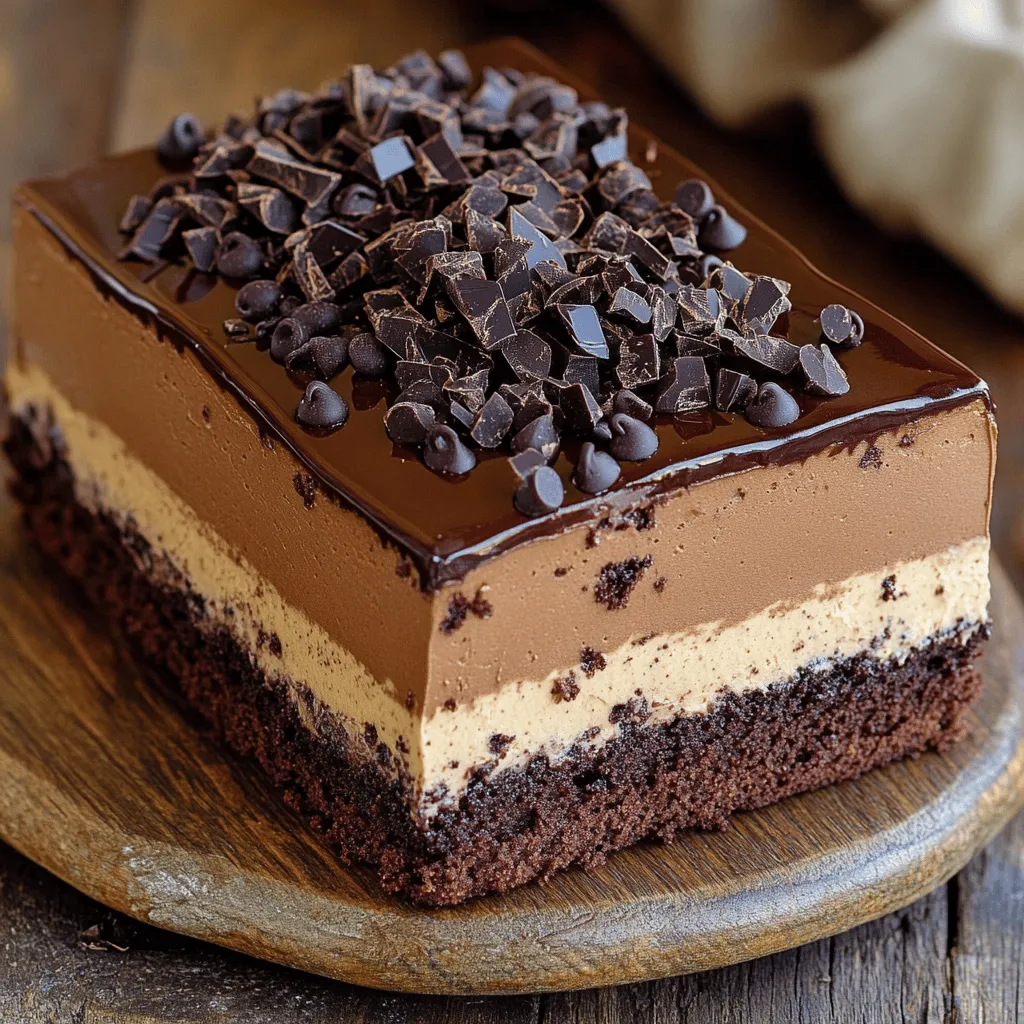
Are you ready to indulge in a rich, chocolatey delight? This Chocolate Mousse Cake is not just a dessert; it’s

To make Veg Hakka Noodles, you need a few simple ingredients. Here’s what you will need: - 200g eggless Hakka noodles - 1 tablespoon vegetable oil - 1 cup mixed bell peppers (red, green, yellow), sliced - 1 small carrot, julienned - 1 cup cabbage, shredded - 3 green onions, chopped (white and green parts separated) - 2 cloves garlic, minced - 1-inch piece ginger, grated - 2 tablespoons soy sauce - 1 tablespoon chili sauce (adjust to taste) - 1 teaspoon vinegar - Salt and pepper to taste - Sesame seeds for garnish These ingredients create a colorful and tasty dish that is sure to please. You don’t need fancy tools to cook Veg Hakka Noodles. Here’s a list of what you'll need: - Large pot for boiling noodles - Large skillet or wok for stir-frying - Colander for draining - Spatula or wooden spoon for mixing This equipment helps you cook the noodles and veggies evenly. Want to make your Veg Hakka Noodles even better? Here are some fun add-ins you can try: - Tofu for extra protein - Mushrooms for a rich flavor - Peas for a pop of sweetness - Cashews for crunch These add-ins can boost flavor and nutrition. Feel free to mix and match! Start by boiling a large pot of water. Add salt to the water for flavor. Once the water boils, add the eggless Hakka noodles. Cook them according to the package instructions until they are firm but tender. Drain the noodles in a colander and rinse them with cold water. This stops the cooking process. Drizzle some oil over the noodles and toss them gently. This keeps them from sticking together. In a large skillet or wok, pour in the vegetable oil. Heat it on medium-high. Add minced garlic and grated ginger to the hot oil. Stir them quickly to release their flavors. Be careful, as garlic can burn fast. You want a fragrant base for your noodles. Next, toss in the sliced bell peppers, julienned carrot, and shredded cabbage. Stir-fry these for about 3 to 4 minutes. You want them to be bright and still crisp. This step adds color and crunch to your dish. Now, add the cooked noodles to the skillet with the sautéed veggies. Pour in soy sauce, chili sauce, and vinegar. Toss everything together gently. Make sure the noodles are well-coated with the sauce. Cook for another 2 minutes to meld the flavors. Finally, stir in the chopped green onion (the white parts). Season with salt and pepper to taste. Mix everything well and remove it from the heat. Serve your Veg Hakka Noodles hot. Garnish with the green parts of the green onions and sprinkle sesame seeds on top. Enjoy this delightful dish that brings joy to any table! To get the best noodle texture, cook the noodles just right. Use a large pot and boil salted water. Follow the package instructions carefully. Aim for al dente, which means firm but not hard. Rinse the noodles with cold water when done. This stops cooking and keeps them from sticking. Toss them with a little oil to ensure they stay separate. The right sauces can make your Hakka noodles shine. Soy sauce is a must for that savory taste. Add chili sauce for some heat. If you want a tangy twist, a splash of vinegar works wonders. Mix the sauces well with the noodles and veggies. Taste as you go to find your perfect balance. You can also add more or less chili sauce based on your spice level. To keep your vegetables crisp, don’t overcook them. Stir-fry them quickly in hot oil. Start with garlic and ginger to build flavor. Then, add your veggies like bell peppers and cabbage. Cook them for just a few minutes until they are bright and crunchy. Remember to keep stirring to avoid burning. This method brings out their natural flavors and colors, making your dish look and taste amazing. {{image_2}} You can easily add tofu to your Veg Hakka Noodles. Tofu boosts protein and adds a nice texture. Use firm tofu for the best results. First, press the tofu to remove excess water. Cut it into cubes. Sauté the tofu in your skillet before the veggies. Cook it until golden brown on all sides. Then, continue with your recipe as normal. The tofu will soak up the flavors, making each bite delicious! For those who love heat, spicy Veg Hakka Noodles are a perfect choice. Increase the chili sauce to suit your taste. You can also add chopped fresh chili peppers for extra spice. Another great option is to include a dash of hot sauce. This kicks up the flavor and gives a nice zing. Serve with lime wedges for a refreshing contrast to the heat. If you need a gluten-free meal, you can still enjoy Veg Hakka Noodles. Use gluten-free Hakka noodles made from rice or other gluten-free ingredients. The cooking method remains the same. You can also check your soy sauce brand. Choose one labeled gluten-free. This way, you won’t miss out on taste while staying gluten-free. The dish will still be colorful and tasty! Explore the full recipe to make these yummy variations. To store leftover Veg Hakka Noodles, let them cool down first. Place them in an airtight container. Store them in the fridge for up to three days. If you want to keep them fresh, do not mix in the sauce until you are ready to eat. Reheat your Veg Hakka Noodles on the stove or in the microwave. For the stovetop, add a splash of water or oil to the pan. Heat over medium heat, stirring until warm. To use a microwave, place the noodles in a bowl. Cover with a damp paper towel and heat in 30-second bursts, stirring in between, until hot. You can freeze Veg Hakka Noodles for up to one month. Use a freezer-safe container or bag. Make sure to remove as much air as possible. When ready to eat, thaw them in the fridge overnight. Reheat them gently as mentioned above for the best texture. The best vegetables for Veg Hakka Noodles include: - Bell peppers (red, green, yellow) - Carrots - Cabbage - Green onions You can also add broccoli, snow peas, or mushrooms. Each adds color and crunch. Use fresh veggies for the best taste. Yes, you can make Veg Hakka Noodles without soy sauce. If you want a different flavor, use: - Coconut aminos - Tamari (for gluten-free) - A mix of vinegar and spices These options keep the dish tasty and vibrant. Veg Hakka Noodles can last in the fridge for about 3 to 4 days. Store them in an airtight container. To enjoy them later, make sure they are cool before sealing. This helps keep them fresh and tasty. Veg Hakka Noodles pair well with: - Spring rolls - Vegetable stir-fry - A light salad You can also serve dumplings or crispy tofu. These sides enhance the meal and add variety. For the full recipe, check out the earlier section. Veg Hakka Noodles are a fun and tasty dish to make at home. We discussed key ingredients, cooking steps, and helpful tips. I shared ways to customize your noodles with add-ins and variations. Proper storage and reheating keep them fresh and delicious. Now you're ready to make your own Veg Hakka Noodles. Enjoy experimenting in the kitchen and have fun with this dish!

Veg Hakka Noodles Tasty Dish for Instant Delight

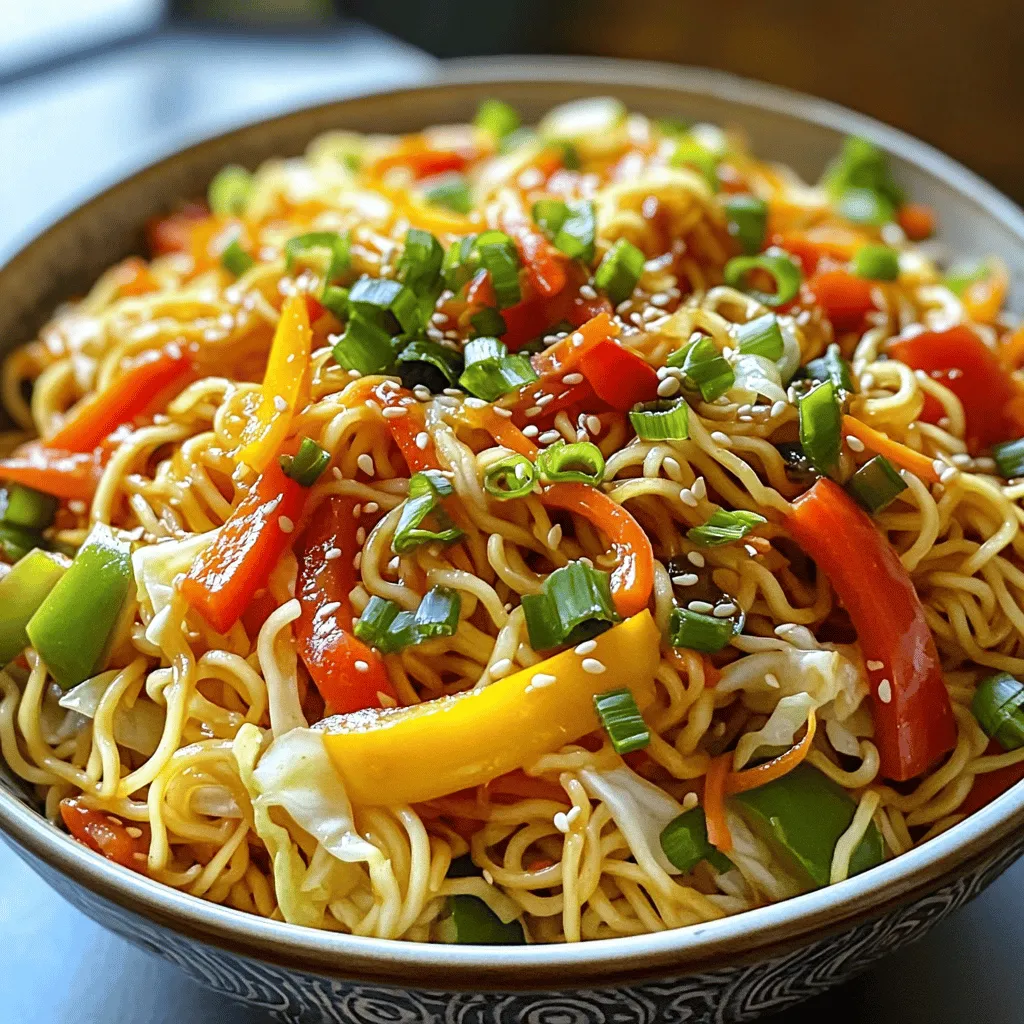
Ready to whip up a quick and tasty meal? Veg Hakka Noodles are your answer! This dish mixes fresh veggies

- 12 large sea scallops, cleaned and patted dry - Salt and freshly ground black pepper, to taste - 2 tablespoons olive oil - 1 tablespoon unsalted butter - 2 cloves garlic, minced - Zest of 1 lemon - 2 tablespoons fresh parsley, chopped - Lemon wedges, for serving To create perfect seared scallops, you need fresh, high-quality ingredients. Start with large sea scallops. They should be cleaned and dried well. This drying step is very important. If the scallops are wet, they won’t sear properly. Next, season the scallops with salt and pepper. This simple step adds great flavor. You can use freshly ground black pepper for a better taste. Now, let's talk about the cooking fat. Olive oil works well, but I like to add butter for richness. It gives a nice, nutty flavor to the dish. For flavor enhancers, garlic is a must. Minced garlic adds a punch of taste. Lemon zest brightens the dish and adds freshness. Finally, chopped parsley gives color and a mild herbal touch. Lemon wedges add a zesty finish when serving. Gather these ingredients and get ready for a delicious cooking experience. You’ll find the full recipe in the article. Enjoy your culinary adventure with these perfect seared scallops! First, you need to make sure the scallops are dry. Use a paper towel to pat them gently. This step is key for a nice sear. Next, season both sides with salt and pepper. A little goes a long way in bringing out their natural flavor. Now, let’s heat the pan. Pour 2 tablespoons of olive oil into a large skillet. Heat it over medium-high until it shimmers but does not smoke. Carefully place the scallops in the pan. Make sure they are not touching. Sear each scallop for about 2-3 minutes without moving them. You want a golden crust to form. Once the crust is ready, it’s time to flip the scallops. Use tongs to turn them gently. Now, add 1 tablespoon of unsalted butter and 2 cloves of minced garlic to the pan. Cook for another 2-3 minutes. As the butter melts, spoon it over the scallops for extra flavor. This step really makes the dish shine. For the full recipe, check the details provided earlier. Dry scallops are key. When they are wet, they won’t brown nicely. Pat them dry with a paper towel. This step is vital for that golden crust. Heat your pan until it is hot. The right temperature is around medium-high heat. If the oil shimmers, you’re ready. Cook the scallops for 2 to 3 minutes on one side. Don’t move them! This helps form a nice sear. Pair scallops with simple sides. Sautéed spinach or creamy risotto work well. You can also serve them with a fresh salad. For a pop of color, garnish with lemon wedges and chopped parsley. This adds bright flavors and makes the dish look great. If your scallops stick, they may not be ready to flip. Wait a bit longer before turning them. For thicker scallops, adjust your cooking time. Cook them for an extra minute on each side. Check for a golden crust and firmness to know they are done. Follow these tips for perfect results every time. For the full recipe, check out the details above. {{image_2}} For a twist, I love using herb-infused butter. You can mix in herbs like thyme, tarragon, or dill. These herbs add depth to the rich butter. Simply melt butter in the pan, then add your chosen herbs. It gives a fresh taste to your scallops. You can also experiment with seasonings. Try smoked paprika, cayenne, or even citrus zest. Each will change the flavor profile. A pinch of cayenne adds heat, while smoked paprika gives a nice, earthy touch. Explore different combos to find your favorite. Seared scallops shine when served with great sides. A creamy risotto pairs well. The creaminess complements the scallops' texture and keeps your meal rich. You can also add sautéed vegetables like asparagus or green beans for a light crunch. Wine can elevate your dish. A crisp white wine like Sauvignon Blanc works well. It cuts through the richness of the scallops. Another option is a light Pinot Grigio. Both wines enhance the meal without overpowering the flavors. Grab a glass to enjoy with your scallops. For the full recipe, check out Perfect Seared Scallops. Enjoy your cooking adventure! To store cooked scallops safely, first let them cool to room temperature. Place them in an airtight container. This keeps them fresh for up to two days. You can also wrap them tightly in plastic wrap, but the container works best. For reheating, use a gentle heat. You can warm them in a skillet over low heat. Add a splash of water or broth to keep them moist. Heat until they are just warm. Avoid overcooking, or they will turn tough. Yes, you can freeze cooked scallops. To do this, let them cool completely. Then, place them in a freezer-safe bag. Remove as much air as possible before sealing. They can stay in the freezer for about three months. When you are ready to use them, thaw scallops in the fridge overnight. This keeps their texture nice. For quick thawing, place them in a sealed bag under cold water. Avoid using a microwave, as it can change their texture. You can tell scallops are done when they turn opaque and firm. They should have a nice golden crust on the outside. If they are slightly springy to touch, they're ready. You want to avoid overcooking them. Overcooked scallops become tough and rubbery. A perfect scallop should melt in your mouth. Yes, you can use frozen scallops. Just make sure to thaw them properly first. Place them in the fridge overnight or run them under cold water. Frozen scallops may have extra moisture, so dry them well before cooking. This helps achieve that perfect sear. Fresh scallops often have a better taste and texture, but frozen can work in a pinch. To avoid overcooking scallops, pay close attention to the cooking time. Sear them for about 2-3 minutes on each side. Make sure your pan is hot enough before adding scallops. If you see them turning white all the way through, they're likely overcooked. Use a timer to help you track cooking time closely. You can find great scallops at local fish markets or seafood counters. Look for scallops that are firm and have a slight sheen. Fresh scallops should not have a strong fishy smell. Ask your fishmonger about the source. Wild-caught scallops often taste better than farmed ones. This post covered the key steps to cook perfect sea scallops. We explored essential ingredients, cooking tips, and even variations to keep it exciting. Remember, dry scallops and the right heat can make all the difference. Don't forget to pair these scallops with tasty sides and a nice wine. With practice, you'll impress friends and family with your skills. Enjoy your cooking journey and savor each delicious bite!

Perfect Seared Scallops Flavorful and Easy Recipe

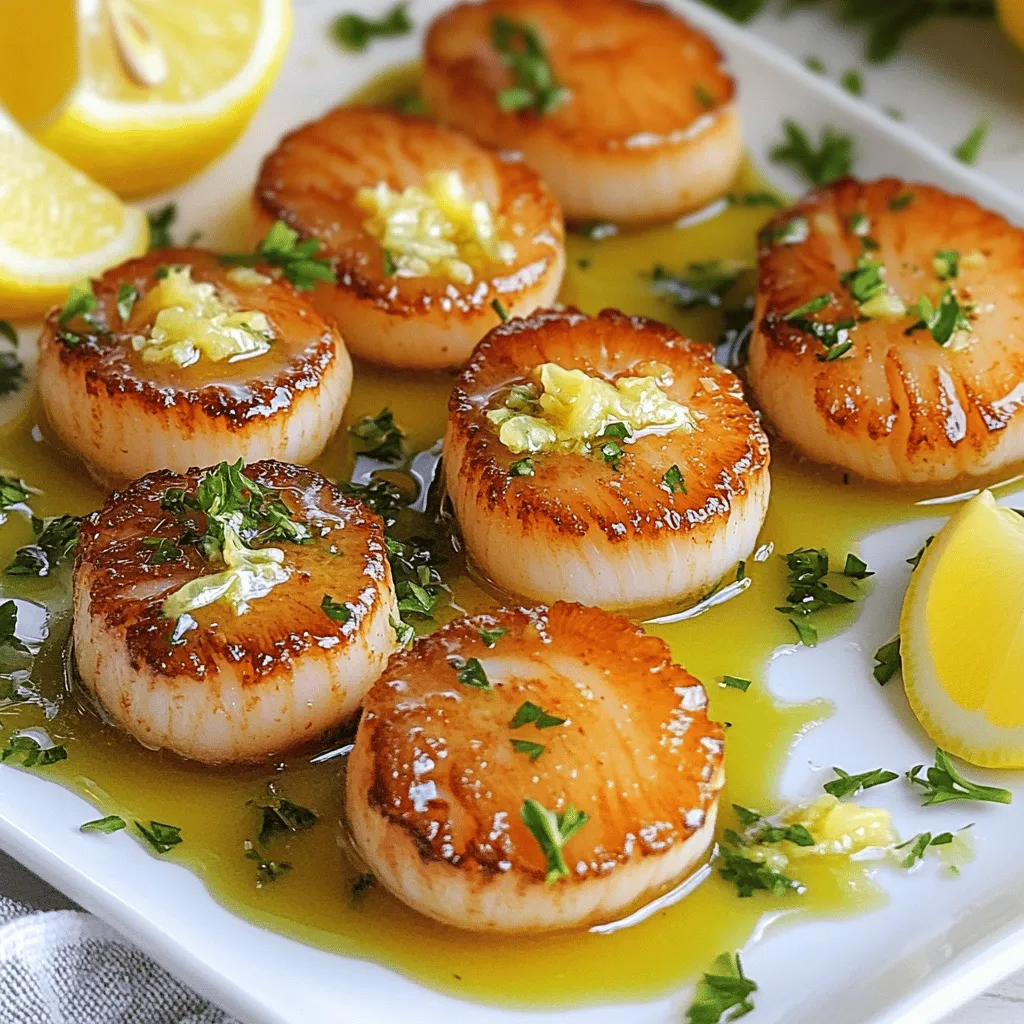
Are you ready to impress your guests with perfectly seared scallops? In this easy recipe, you’ll learn how to create

For this creamy garlic chicken penne, you will need: - 300g penne pasta - 2 boneless, skinless chicken breasts, diced - 4 cloves garlic, minced - 1 cup heavy cream - 1 cup chicken broth - 1 cup grated Parmesan cheese - 1 tablespoon olive oil - 1 teaspoon dried Italian herbs (oregano, basil, thyme) - Salt and pepper to taste - Fresh parsley, chopped (for garnish) Let's break down these ingredients further. Pasta measurements and types: I recommend using penne pasta for this dish. It holds the sauce well and offers a great bite. You can also try other pasta types, but penne is ideal. Chicken preparation details: Use boneless, skinless chicken breasts. Dice them into small pieces for quicker cooking. This way, they absorb more flavor from the garlic sauce. Broth and cream specifications: A cup of chicken broth adds depth. Heavy cream brings richness and creaminess. Together, they create a luxurious sauce that coats the pasta beautifully. Consider adding these to elevate your dish: - Cheese types for serving: Grated Parmesan cheese is a must. It adds a savory kick. You can also try Pecorino Romano for a sharper flavor. - Fresh herbs and their impact on flavor: Fresh parsley is perfect for garnish. It adds color and a fresh taste. You can also use basil or thyme for extra aroma and flavor. Start by boiling water in a large pot. Add salt to the water for flavor. Cook the penne pasta according to the package instructions, usually about 10-12 minutes. Look for that perfect al dente texture. It should be firm but not hard. When done, drain the pasta in a colander but keep some starch. This helps the sauce stick later. While the pasta cooks, season the chicken. Use salt, pepper, and dried Italian herbs for great flavor. Heat olive oil in a large skillet over medium heat. Add the chicken and cook until browned, about 5-7 minutes. Make sure it’s fully cooked. Use a meat thermometer if needed. The chicken should reach 165°F (75°C) for safety. Once cooked, take the chicken out and set it aside. In the same skillet, add the minced garlic. Sauté it for 1-2 minutes until it smells amazing. Watch it closely; burnt garlic tastes bitter. Next, pour in the chicken broth and let it simmer for a couple of minutes. Slowly add the heavy cream and stir. Let the sauce simmer on low heat for 3-4 minutes. This will help it thicken. If you want, you can use cornstarch or flour as a thickener. Now it's time to bring everything together. Add the chicken back to the skillet. Then, toss in the cooked penne pasta. Stir well to coat the pasta and chicken in the creamy garlic sauce. Make sure every bite has flavor. Finally, mix in the grated Parmesan cheese. This adds a rich taste and helps bind the dish together. Enjoy your delicious Creamy Garlic Chicken Penne! For the full recipe, check the section above. To achieve a creamy texture, you can use different types of cream. Heavy cream gives the best results. You can also try half-and-half for a lighter option. This will change the thickness and flavor. If you want a lighter dish, consider using Greek yogurt or sour cream. These will add creaminess but with a tangy taste. To adjust the thickness, keep an eye on your sauce. If it’s too thick, add a splash of chicken broth. This keeps the flavor strong while ensuring it doesn’t overcook. Stir often to prevent burning, and let it simmer low and slow. Spices and veggies can elevate your dish. Try adding a pinch of red pepper flakes for heat. You can also mix in fresh spinach or sun-dried tomatoes for color and nutrition. Both will add a nice twist to your creamy garlic chicken penne. Customizing proteins is easy too. Swap chicken for shrimp, beef, or even tofu for a veggie option. Each protein brings its own flavor. Fresh herbs like basil or thyme can add a burst of freshness. Feel free to get creative and make this dish your own! {{image_2}} If you need gluten-free options, use gluten-free penne. Many brands offer great taste and texture. Check labels to find one that suits you. For a dairy-free version, you can swap heavy cream with coconut milk or a plant-based cream. Nutritional yeast can stand in for Parmesan cheese for a cheesy flavor without dairy. To add more color and nutrition, toss in some spinach or mushrooms. Sauté them along with the garlic for a tasty boost. You can also mix in proteins like shrimp or tofu. Just cook them separately and then add them to the creamy sauce. Each option brings its own unique flavor and makes the dish more exciting. Explore these variations to make Creamy Garlic Chicken Penne your own. For the complete recipe, check out the Full Recipe. To keep your creamy garlic chicken penne fresh, follow these steps. First, let the dish cool down to room temperature. This helps reduce moisture that can lead to spoilage. Once cool, transfer it to an airtight container. You can store it in the fridge for up to three days. If you want to keep it longer, freeze it. It stays good in the freezer for about two months. Just make sure to label your container with the date. When it's time to enjoy your leftovers, reheating properly is key. The best method is to use a skillet over low heat. This helps keep the sauce creamy. Stir gently as you heat it to ensure even warmth. If you notice the sauce thickening too much, add a splash of chicken broth or cream. You can also reheat the sauce separately from the pasta. This way, you can control the texture better. Heat the sauce in a pan while cooking the pasta in another pot. Once both are warm, combine them just before serving. This method keeps the dish fresh and tasty. To reheat Creamy Garlic Chicken Penne, use a skillet or microwave. If using a skillet, add a splash of chicken broth or cream. This keeps the sauce creamy. Heat gently over low heat. Stir often to mix everything well. For the microwave, place the pasta in a bowl. Add a little broth or cream. Cover with a microwave-safe lid and heat in short bursts. Stir between heating sessions. Yes, you can make this dish ahead of time. Cook the pasta and chicken, then prepare the sauce. Combine everything but the cheese. Store it in the fridge for up to two days. Reheat gently before serving. Add the cheese just before eating to keep it fresh. This way, you save time on busy days. Creamy Garlic Chicken Penne pairs well with several sides. A light green salad adds freshness. Garlic bread is great for soaking up sauce. Roasted vegetables add a nice crunch. You can also serve it with steamed broccoli or asparagus for extra veggies. These sides complement the rich flavors of the pasta. To make Creamy Garlic Chicken Penne kid-friendly, reduce the garlic. Kids often prefer a milder taste. You can also substitute the chicken with diced, cooked ham or turkey. For a fun twist, add peas or corn. These ingredients add color and sweetness. Always check for allergies when making changes. Kids enjoy this dish when it looks bright and tasty! In this blog post, I covered a delicious recipe for Creamy Garlic Chicken Penne. I shared essential ingredients, step-by-step cooking tips, and ways to customize the dish. You learned about storage and reheating techniques to enjoy leftovers perfectly. Remember, cooking can be fun and creative. Don’t be afraid to make this dish your own. Enjoy experimenting with flavors, garnishes, and variations. Happy cooking!

Creamy Garlic Chicken Penne Hearty and Flavorful Meal

Are you ready to make a meal that’s both hearty and full of flavor? Creamy Garlic Chicken Penne brings comfort

To make honey garlic shrimp skewers, gather these key ingredients: - 1 pound large shrimp, peeled and deveined - 1/3 cup honey - 1/4 cup soy sauce (low sodium preferred) - 4 cloves garlic, minced - 1 tablespoon freshly grated ginger - 2 tablespoons olive oil - 1 tablespoon sesame seeds (optional) - 1 tablespoon chopped green onions, for garnish - Skewers (wooden or metal) These ingredients work together to create a sweet and savory flavor that makes the shrimp shine. The honey gives a nice glaze, while the garlic adds depth. Fresh ginger brings a warm kick that balances the sweetness. You will need a few tools to make this dish easy: - Mixing bowl for the marinade - Whisk for blending the marinade - Grill or grill pan for cooking - Skewers for threading the shrimp - Tongs for flipping the skewers Having the right tools makes your cooking smooth and fun. I recommend soaking wooden skewers in water for 30 minutes. This helps prevent them from burning on the grill. If you need to swap out ingredients, here are some options: - Use shrimp alternatives like chicken or tofu for a different protein. - Maple syrup can replace honey for a vegan option. - Coconut aminos can stand in for soy sauce if you want a soy-free dish. - You can skip the sesame seeds or use chopped nuts for a crunch. These substitutions allow you to customize the recipe to fit your taste and dietary needs. Feel free to get creative while keeping the core flavors intact. For the full recipe, click here: Full Recipe. Start by mixing the marinade. In a medium bowl, whisk together these ingredients: - 1/3 cup honey - 1/4 cup soy sauce - 4 cloves garlic, minced - 1 tablespoon freshly grated ginger - 2 tablespoons olive oil Whisk until the mix is smooth. The honey brings sweetness, while the soy sauce adds saltiness. Garlic and ginger give it a nice kick. This mix is key for great flavor. Now, it’s time to marinate the shrimp. Add 1 pound of large shrimp to the bowl with the marinade. Make sure each shrimp gets coated well. Let them sit for at least 20 minutes. If you want more flavor, let them marinate for up to 1 hour in the fridge. The longer they sit, the better they taste! Before grilling, soak wooden skewers in water for 30 minutes. This stops them from burning. Preheat your grill to medium-high heat. Thread the marinated shrimp onto the skewers. Leave a little space between each shrimp. This helps them cook evenly. Grill the skewers for 2-3 minutes on each side. Look for the shrimp to turn opaque and firm. Be careful not to overcook them! When they are done, take the skewers off the grill. You can sprinkle sesame seeds and chopped green onions for a nice touch. Enjoy your Honey Garlic Shrimp Skewers hot, and serve with extra honey sauce if you like. You can find the Full Recipe to guide you step by step. To grill shrimp well, start with dry shrimp. Pat them with a paper towel to remove extra moisture. Next, marinate your shrimp in the honey-soy mixture. This adds flavor and helps keep shrimp moist. When grilling, use medium-high heat. This cooks shrimp fast without burning them. Grill each side for only 2-3 minutes. Keep an eye on them. When they turn opaque, they are done! Overcooked shrimp can be tough and chewy. Skewering shrimp is easy but needs a few tricks. First, use skewers that are long enough to hold several shrimp. If you use wooden skewers, soak them for at least 30 minutes. This keeps them from burning on the grill. When threading shrimp, leave a little space between each one. This allows heat to circulate. For added flair, alternate shrimp with veggies like bell peppers or onions. This gives color and flavor to your skewers. Presentation makes a big difference when serving. Place the grilled skewers on a nice platter. Drizzle extra honey sauce over the shrimp for a glossy look. Sprinkle sesame seeds and chopped green onions for color and crunch. Serve with lemon wedges on the side. They add a zesty touch and brighten the dish. You can also pair the skewers with rice or a fresh salad. This balance makes your meal complete and satisfying. For the full recipe, check out the details above. {{image_2}} You can switch out shrimp for other proteins. Chicken is a great choice. Cut it into bite-sized pieces and marinate just like the shrimp. Beef also works well; use sirloin or tenderloin for the best taste. Tofu is perfect if you're looking for a plant-based option. Firm tofu holds up well on skewers. Just make sure to press it to remove excess water before marinating. Feel free to get creative with flavors. Try adding lime juice or sriracha for a tangy kick. You can mix in herbs like cilantro or basil for freshness. For a smoky flavor, use smoked paprika in your marinade. Adding crushed red pepper brings heat, which some people love. You can also experiment with other sweeteners like maple syrup or agave. Grilling gives the shrimp that lovely char. If you can't grill, use your oven. Preheat it to 400°F. Place the skewers on a baking sheet lined with foil. Cook for about 8-10 minutes, turning halfway. Keep an eye on them, so they don’t overcook. Both methods yield tasty results, but grilling adds that special touch. For the full recipe, check the earlier section. After enjoying your honey garlic shrimp skewers, you might have some leftovers. To store them, let the skewers cool down to room temperature. Then, wrap them tightly in plastic wrap or place them in an airtight container. Keep them in the fridge. They will stay fresh for up to three days. When you want to enjoy your leftovers, reheating is key. You can use a microwave, grill, or stovetop. If using a microwave, heat them on medium power for one to two minutes. If you prefer the grill, place the skewers on low heat for a few minutes. This helps keep the shrimp moist and tasty. Avoid high heat to prevent drying them out. You can freeze both raw and cooked shrimp skewers for future meals. For raw skewers, place them in a freezer-safe bag. Squeeze out as much air as possible before sealing. They can be frozen for up to three months. For cooked skewers, let them cool first. Then, follow the same steps to store them. They will stay fresh for about two months. When ready to eat, thaw them in the fridge overnight before reheating. For full details, check the Full Recipe. The best shrimp for skewers are large or extra-large shrimp. They hold up well on the grill and are easy to eat. Look for shrimp that are firm and fresh. I prefer wild-caught shrimp when possible. They often have better flavor and texture. Yes, you can use other sauces! Try teriyaki sauce or a spicy chili sauce if you like heat. A simple lemon and herb mix can also work well. Just remember, the key is to balance sweetness and saltiness for great flavor. You can marinate shrimp for 20 minutes to 1 hour. If you marinate them too long, they may become mushy. I recommend sticking to the shorter end for the best texture. Whenever I make these skewers, I find that 30 minutes is perfect. For a full experience, check out the Full Recipe for detailed instructions and tips! Honey garlic shrimp skewers are easy and fun to make. We covered all you need: ingredients, tools, and steps. I shared tips for grilling the perfect shrimp and ideas for serving them. You can explore variations with other proteins and flavors, plus how to store leftovers. Now, it’s time for you to try this recipe. Enjoy the tasty results and impress your friends!

Honey Garlic Shrimp Skewers Flavorful Grilled Delight

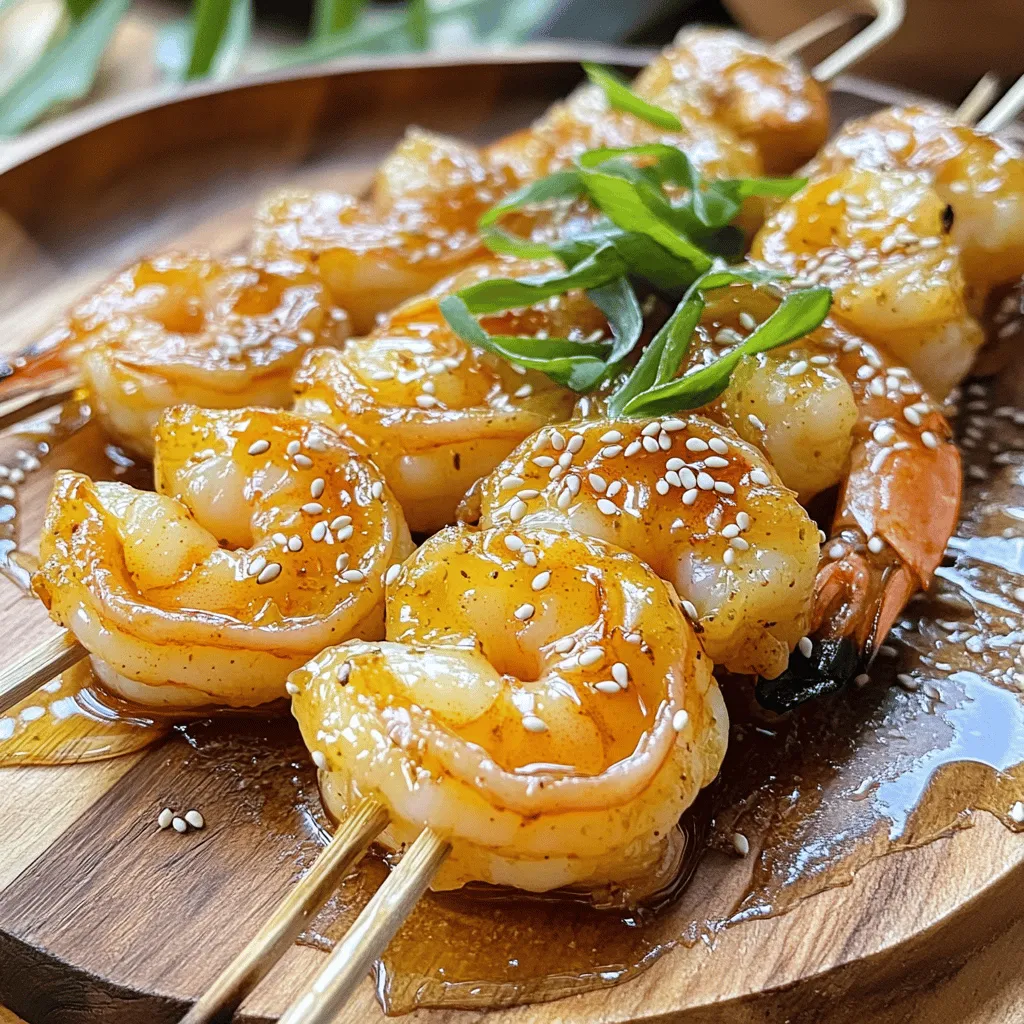
Ready to take your grilling game up a notch? Honey Garlic Shrimp Skewers are not just tasty; they’re easy to

- 1 cup quinoa, rinsed - 2 cups vegetable broth or water - 1 cup cherry tomatoes, halved - 1 cucumber, diced - 1 bell pepper (any color), diced - 1/2 red onion, finely chopped - 1/2 cup Kalamata olives, pitted and halved - 1/2 cup feta cheese, crumbled (optional for a dairy-free version) - 1/4 cup fresh parsley, chopped - 1/4 cup fresh mint, chopped The main ingredients bring life to the Mediterranean quinoa salad. Quinoa is the star here. It is a great source of protein and fiber. Rinsing the quinoa removes any bitterness. The fresh vegetables add color and crunch. Cherry tomatoes bring sweetness. Cucumbers and bell peppers give a nice crisp bite. Red onions add a mild sharpness. Kalamata olives introduce a briny flavor. Lastly, feta cheese is an optional touch that adds creaminess. - 3 tablespoons olive oil - 2 tablespoons lemon juice - 1 teaspoon dried oregano - Salt and pepper to taste The dressing ties everything together. Olive oil gives richness and a smooth texture. Lemon juice adds brightness and zing. Dried oregano enhances the Mediterranean flavor profile. Season with salt and pepper to your liking. - Approximately 200 calories per serving - Rich in protein, fiber, vitamins, and minerals This salad is not just tasty; it is also healthy. Each serving has around 200 calories. You will find protein and fiber from quinoa. Fresh vegetables provide vitamins. The olives and olive oil offer healthy fats. Enjoy this dish as a light meal or a side, and savor the goodness of every bite. For the complete recipe, check the Full Recipe section. 1. Rinse and Boil Start by rinsing 1 cup of quinoa under cold water. This removes any bitterness. In a medium saucepan, bring 2 cups of vegetable broth or water to a boil. Once boiling, add the rinsed quinoa. 2. Simmering and Fluffing Reduce the heat to a simmer. Cover the pot and cook for about 15 minutes. The quinoa will absorb all the liquid. After 15 minutes, remove the pot from heat. Let it sit, covered, for 5 more minutes. Then, fluff the quinoa with a fork and let it cool. 1. Chopping Vegetables While the quinoa cools, chop your fresh veggies. Dice 1 cucumber, 1 bell pepper, and finely chop 1/2 of a red onion. Cut 1 cup of cherry tomatoes in half. 2. Combining Ingredients In a large mixing bowl, add the chopped vegetables. Also, add 1/2 cup of Kalamata olives (pitted and halved), 1/2 cup of crumbled feta cheese (if using), 1/4 cup of fresh parsley, and 1/4 cup of fresh mint. 1. Whisking Together In a small bowl, whisk together 3 tablespoons of olive oil, 2 tablespoons of lemon juice, 1 teaspoon of dried oregano, and some salt and pepper. This dressing adds a bright flavor to the salad. 1. Mixing Salad and Dressing Once the quinoa is cool, add it to the large bowl of vegetables. Pour the dressing over the top. Gently toss everything together until well combined. 2. Adjusting Seasoning Taste your salad and adjust the seasoning with extra salt and pepper if needed. You can now serve your Mediterranean quinoa salad chilled or at room temperature. For the complete recipe, check out the [Full Recipe]. Quinoa comes in different types. The most common types are white, red, and black. White quinoa tastes milder and is light and fluffy. Red quinoa has a nutty flavor and stays firmer when cooked. Black quinoa adds a lovely color and a slightly sweet taste. To cook quinoa perfectly, rinse it well. Rinsing removes bitter saponins, giving a better taste. Use a ratio of two cups of liquid for every cup of quinoa. Bring the liquid to a boil, then add the rinsed quinoa. Turn the heat down and cover it. Let it simmer for about 15 minutes. Once the liquid is gone, let it sit for five minutes. Fluff it with a fork for a light texture. You can prepare Mediterranean quinoa salad in advance. Cook the quinoa and let it cool. Chop the veggies and store them in the fridge. Keep the dressing in a separate container. This way, the flavors stay fresh. To store your salad, use an airtight container. It stays fresh for up to three days in the fridge. If you want to enjoy it later, keep the dressing separate until serving to avoid sogginess. Serve your quinoa salad with grilled chicken or fish for a full meal. You can also pair it with pita bread or hummus for a tasty snack. For a beautiful presentation, use a large bowl or a platter. Arrange the salad in the center and sprinkle some fresh herbs on top. This adds color and makes it look appetizing. You can find the full recipe for this refreshing dish and more ideas in the Mediterranean Quinoa Salad section. {{image_2}} To make this salad vegan, you can swap out the feta cheese. Some great substitutes are: - Nutritional yeast: Adds a cheesy flavor without dairy. - Tofu feta: Crumbled tofu marinated in lemon juice, garlic, and herbs gives a nice texture. - Avocado: Creamy and rich, it adds healthy fats. These swaps keep the salad fresh and tasty. You can boost this salad's nutrition by adding more ingredients. Consider these options: - Chickpeas: They add protein and fiber. - Grilled chicken: This makes it heartier and adds flavor. - Seasonal vegetables: Try bell peppers in summer or roasted squash in fall. Adding these ingredients makes the salad filling and fun. Get creative with dressings and herbs to change the flavor. Here are some ideas: - Different dressings: Try a balsamic vinaigrette or tahini dressing for a new taste. - Herbs and spices: Experiment with basil, dill, or cumin to enhance flavor. These twists make each bite exciting and unique. For the full recipe, check out the Mediterranean Quinoa Salad section above. You can serve Mediterranean quinoa salad cold. It tastes great straight from the fridge. If you prefer it warm, heat it gently. Use a microwave for about 30 seconds. Stir it well to heat evenly. This salad lasts for about 3 to 5 days in the refrigerator. Keep it in an airtight container. This helps keep it fresh and tasty. The flavors may get better over time as they meld together. Yes, you can freeze Mediterranean quinoa salad, but with care. It does well without the dressing. Package the salad in a freezer-safe container. Leave some space at the top for expansion. When ready to eat, thaw overnight in the fridge. Add the dressing fresh once it is thawed. This keeps the salad crisp and delicious. To make Mediterranean Quinoa Salad, start by cooking the quinoa. Bring vegetable broth or water to a boil. Add rinsed quinoa, then lower the heat and simmer for about 15 minutes. After cooking, let it sit for 5 minutes. Fluff it with a fork and let it cool. Next, chop the fresh vegetables: cherry tomatoes, cucumber, bell pepper, and red onion. Combine these in a large bowl with olives, feta cheese, parsley, and mint. In a small bowl, whisk together olive oil, lemon juice, oregano, salt, and pepper. Pour this dressing over the salad and mix gently. This simple process results in a fresh, vibrant dish. You can find the full recipe in the article. Yes, you can use different grains if you prefer. Some good options are: - Brown rice: This grain adds a nutty flavor. - Farro: A chewy grain with a great texture. - Bulgur: It cooks quickly and has a mild taste. These grains can change the salad's texture and flavor. Just remember to adjust cooking times based on the grain you choose. Yes, Mediterranean Quinoa Salad is gluten-free. Quinoa is naturally gluten-free, making it perfect for those with gluten sensitivities. Just ensure that any other ingredients you use, like dressings or additional items, are also gluten-free. This salad is a great option for everyone! Mediterranean Quinoa Salad offers many health benefits. Here are some highlights: - High in protein: Quinoa is a complete protein, meaning it has all essential amino acids. - Rich in fiber: This salad helps with digestion and keeps you full. - Packed with vitamins: Fresh vegetables provide vitamins A and C. - Healthy fats: Olive oil and olives give good fats that support heart health. These benefits make this salad a nutritious choice for any meal. This Mediterranean Quinoa Salad combines tasty ingredients and simple steps. You learned how to cook quinoa, chop fresh veggies, and create a light dressing. I shared tips on choosing quinoa and preparing the salad ahead of time. You can even customize it with extra proteins or flavors. This salad is healthy, easy to make, and can fit your diet. Enjoy it now or store it for later. Dive in and make your own version today!

Mediterranean Quinoa Salad Refreshing and Healthy Dish

Looking for a dish that’s both refreshing and healthy? Look no further! This Mediterranean Quinoa Salad bursts with flavor and

For this dish, you need some key items: - 3 cups cooked rotini pasta - 2 cups cooked chicken breast, shredded - 2 cups Alfredo sauce (store-bought or homemade) - 1 cup broccoli florets, steamed - 1 cup mozzarella cheese, shredded - 1/2 cup Parmesan cheese, grated - 1/2 teaspoon garlic powder - 1/2 teaspoon Italian seasoning - Salt and pepper to taste - Fresh parsley, chopped (for garnish) These main ingredients come together to make a creamy, cheesy delight. The rotini holds the sauce well. The chicken adds protein, and the broccoli gives a nice crunch. You can add more fun to your bake with these options: - Cooked spinach for extra greens - Mushrooms for a savory touch - Bell peppers for a sweet crunch - Different cheeses like cheddar or gouda - Bacon bits for added flavor Feel free to mix and match these ingredients. They let you create the taste you love most. If you need to swap out ingredients, here are some ideas: - Use penne or fusilli pasta instead of rotini. - Swap chicken with turkey or rotisserie chicken. - Try a dairy-free Alfredo sauce for a lighter version. - Use frozen broccoli if fresh is not available. - Replace mozzarella with a low-fat cheese option. These substitutions maintain the dish's spirit while catering to your needs. You can still enjoy a great meal with different flavors! For the full recipe, check out the details above. Start by preheating your oven to 375°F (190°C). This step is key for cooking your dish evenly. While the oven heats, gather all your ingredients. You need cooked rotini pasta, cooked chicken breast, Alfredo sauce, broccoli florets, mozzarella cheese, Parmesan cheese, garlic powder, Italian seasoning, salt, and pepper. Having everything ready makes cooking fun and easy. In a large mixing bowl, combine the cooked rotini, shredded chicken, and Alfredo sauce. Add the steamed broccoli, garlic powder, Italian seasoning, salt, and pepper. Stir the mix until everything gets coated well. This helps all the flavors blend together. Once mixed, transfer it to a greased 9x13 inch baking dish. Now it's time to bake! Sprinkle the shredded mozzarella and grated Parmesan evenly over the pasta mix. Cover the dish with aluminum foil to keep it moist. Bake it for 20 minutes. After 20 minutes, take off the foil and bake for another 10 minutes. You want the cheese to bubble and turn golden brown. When done, let it cool for a few minutes. Garnish with chopped parsley before serving. Enjoy your Easy Chicken Alfredo Bake! For the full recipe, check the recipe section above. To make your Chicken Alfredo Bake shine, use fresh ingredients. Fresh chicken gives great flavor. Fresh broccoli adds color and crunch. Here are some tips: - Cook pasta al dente: This keeps it firm in the bake. - Mix well: Ensure each piece of pasta is coated. - Layer the cheese: Add half during mixing and half on top for a cheesy crust. - Let it rest: This helps flavors blend and makes serving easier. Many home cooks make simple mistakes. Here are some to watch for: - Overcooking pasta: This leads to mushy noodles in the bake. - Skipping seasoning: Salt and pepper boost flavor. Don't skip them! - Not covering while baking: Covering helps the dish cook evenly. - Rushing cooling time: Let it cool for a few minutes before serving to avoid burns. You can adjust the recipe for creaminess or health. To make it creamier: - Add more Alfredo sauce: A little extra sauce boosts richness. - Stir in cream cheese: This makes it extra smooth. For a healthier version: - Use whole wheat pasta: It adds fiber and nutrients. - Swap low-fat cheese: Use part-skim mozzarella or low-fat Alfredo sauce. - Add more veggies: Incorporate spinach or bell peppers for added nutrients. For the full recipe, check the section above. {{image_2}} You can easily swap chicken for veggies. Use cooked mushrooms, spinach, or zucchini. These add great flavor and texture. For a creamy base, stick with the Alfredo sauce. This version is still rich and delicious. You won’t miss the chicken! Feel free to add more veggies to the mix. Bell peppers, peas, or carrots work well. Just chop them up and toss them in. Make sure to steam or sauté them first. This keeps them tender and bright. More color on your plate makes it even more appealing! Cheese can change the whole dish. Try using gouda, cheddar, or feta. Each cheese gives a unique taste. Mix different cheeses for a more complex flavor. You could even add a sprinkle of blue cheese for a bold kick. It’s fun to experiment and find your favorite blend! For the full recipe, check out the details above! To keep your Easy Chicken Alfredo Bake fresh, let it cool first. Once cool, transfer it to an airtight container. You can store it in the fridge for up to three days. Make sure to cover it well to prevent drying out. When you're ready to eat leftovers, preheat your oven to 350°F (175°C). Place the chicken Alfredo bake in an oven-safe dish. Cover it with foil to keep it moist. Heat for about 20 minutes or until warm throughout. You can also use a microwave. Heat in short bursts, stirring in between, until hot. If you want to freeze the dish, do it right after baking. Let it cool completely. Then, wrap it tightly in plastic wrap and foil. You can freeze it for up to two months. When ready to eat, thaw it overnight in the fridge. Reheat it in the oven for the best texture. Enjoy your meal again with great taste! Yes, you can use other types of pasta. Any short pasta works well. Penne, fusilli, or shells all fit nicely. Just cook the pasta until it is al dente. This way, it won’t get mushy in the bake. Using a different shape can also add fun to your dish. To make this dish gluten-free, swap regular pasta for gluten-free pasta. Many brands offer great options now. You can also check the Alfredo sauce for gluten. Some sauces are gluten-free, while others are not. Always read the labels to be sure. This way, everyone can enjoy this tasty bake! This dish pairs well with simple sides. A fresh green salad adds a nice crunch. Garlic bread is another great choice for soaking up sauce. You might also enjoy steamed vegetables. They add color and nutrients to your meal. A light dessert, like fruit, makes a perfect finish! You can find more ideas in the Full Recipe. In this post, I covered the key parts of making an Easy Chicken Alfredo Bake. We explored the main ingredients, steps to bake it, and tips for perfect results. I shared ways to customize the dish with different flavors and veggie options. Storing leftovers is also easy, and reheating is straightforward. Remember, you can adjust ingredients to fit your taste. Keep experimenting with this fun recipe. With these insights, you’ll whip up a tasty dish that everyone will love. Enjoy your cooking!

Easy Chicken Alfredo Bake for a Quick Dinner Solution

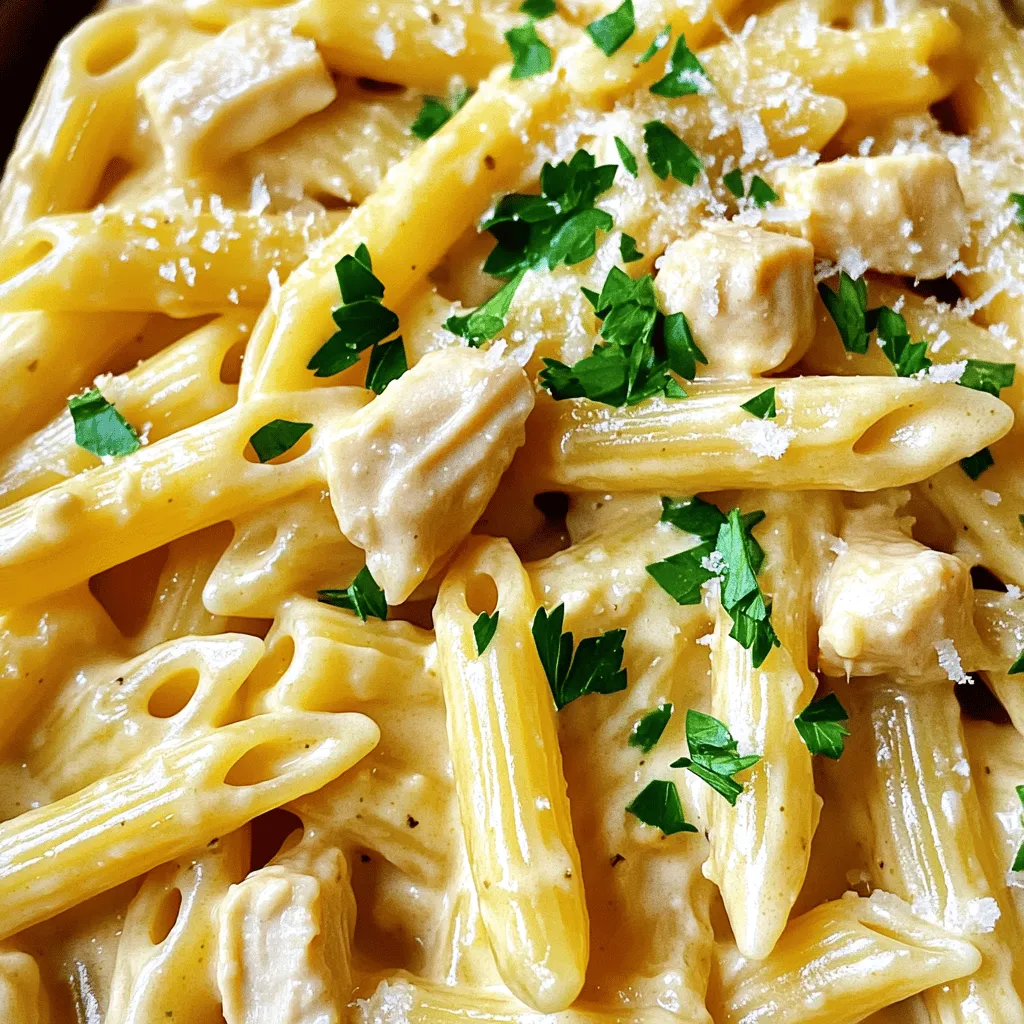
Are you looking for a quick dinner that’s tasty and easy to make? You’re in luck! This Easy Chicken Alfredo

- 1 cup rolled oats - 1 cup natural peanut butter - 1/2 cup honey or maple syrup - 1/2 cup unsweetened cocoa powder - 1/4 cup coconut oil, melted - 1/2 tsp vanilla extract - Pinch of salt - 1/2 cup dark chocolate chips (optional dairy-free) - 1/4 cup chopped nuts (optional, for topping) To make these no-bake chocolate peanut butter bars, you need simple and tasty ingredients. First, get rolled oats for a hearty base. Then, use natural peanut butter to add that creamy, nutty flavor. Honey or maple syrup will give the bars a sweet touch. Unsweetened cocoa powder adds rich chocolate taste without extra sugar. Coconut oil is key for binding. It also gives a nice texture. A splash of vanilla extract enhances the flavor. A pinch of salt balances the sweetness. If you love chocolate, add dark chocolate chips on top. They make the bars extra special. For some crunch, sprinkle chopped nuts over the chocolate layer. Every ingredient plays a role in flavor and texture. Each bite should be a mix of sweet, nutty, and chocolatey. This is why I love this recipe. It is easy, quick, and so satisfying. You can find the full recipe in the article to guide you step by step. - Combine all dry and wet ingredients in a mixing bowl. - Line the baking pan with parchment paper. - Press the mixture into the pan. To start, grab a large mixing bowl. Add rolled oats, peanut butter, honey or maple syrup, cocoa powder, melted coconut oil, vanilla extract, and a pinch of salt. You want to mix these until they blend well and form a thick dough. This dough should be sticky but not too wet. Next, take an 8x8 inch baking pan and line it with parchment paper. Make sure to leave some overhang on the sides. This will help you lift the bars out later. After that, transfer your mixture into the pan. Press it down firmly with a spatula or your hands. It should be packed tightly and evenly across the bottom. - Melt dark chocolate chips in the microwave. - Pour and spread melted chocolate over the bars. Now, it’s time for the chocolate! Use a microwave-safe bowl to melt the dark chocolate chips. Heat them in 30-second intervals, stirring after each time until smooth. Be careful not to burn the chocolate. Once melted, pour the chocolate over the pressed oat mixture. Use a spatula to spread the chocolate evenly across the top. - Refrigerate until firm. - Lift and cut into squares or bars. After spreading the chocolate, place the pan in the refrigerator. Let it chill for about 2 hours. This will help the bars set and become firm. When they are ready, lift the bars out using the parchment paper overhang. Cut them into squares or bars as you like. Enjoy your delicious no-bake chocolate peanut butter bars! For the full recipe, check out the recipe section. To keep your no-bake chocolate peanut butter bars fresh, store them in the fridge. I recommend using an airtight container. This method prevents them from drying out and keeps them tasty. They stay fresh for up to two weeks. If you freeze them, they can last up to three months. When serving these bars, presentation matters. Place them on a wooden board. A light dusting of cacao powder adds a nice touch. You can also drizzle extra melted chocolate on top for flair. For a delightful pairing, serve them with a glass of cold almond milk. This combo enhances the rich flavors and makes a perfect treat. Be careful not to overmix the ingredients. This can make your bars tough and chewy. Mix just until everything is combined. Another mistake is not pressing the mixture firmly enough into the pan. Make sure to pack it tightly to ensure the bars hold their shape when cut. Following these tips will help you make the best no-bake chocolate peanut butter bars! For the full recipe, refer back to the section above. {{image_2}} You can switch honey for agave syrup. This change keeps the bars sweet and smooth. For those who need sugar-free options, use a sugar substitute like stevia. These swaps make it easy to enjoy the bars without extra sugar. Want to spice things up? Try adding a pinch of cinnamon or nutmeg. These spices give the bars a warm taste that’s hard to resist. You can also mix in shredded coconut or dried fruits. These add texture and a hint of tropical flavor that will surprise your taste buds. If you want to make the recipe gluten-free, use gluten-free oats. They work just as well and keep the bars tasty. For a vegan option, choose dairy-free chocolate and a plant-based sweetener. This way, everyone can enjoy these treats. To keep your bars fresh, use an airtight container. Glass or plastic containers work well. Place parchment paper between layers to prevent sticking. If you want to store them longer, you can freeze them. Cut the bars into pieces and wrap each in plastic wrap. Then, place them in a freezer bag. They will stay fresh for about three months in the freezer. Look for changes in color or texture. If your bars become dry or crumbly, it’s time to toss them. Fresh bars last about one week in the fridge. If you see any mold, that’s a clear sign to discard them. Always check for an off smell, which can mean spoilage. Got leftover bars? Crumble them on top of yogurt for a tasty breakfast. You can also mix them into ice cream for a fun dessert. Another idea is to blend crumbled bars into smoothies for added flavor and energy. They can add a delicious twist to many recipes! Yes, you can use crunchy peanut butter. The bars will have a different texture. Some people love the extra crunch. If you enjoy a bit of texture, go for it! Just keep in mind that it may change the mouthfeel slightly. To make the bars vegan, replace honey with maple syrup. Use dairy-free chocolate chips. This keeps the bars creamy and sweet without animal products. You can also check for vegan-friendly coconut oil. Absolutely! You can try almond, cashew, or sunflower seed butter. Each nut butter brings a unique taste. Almond butter gives a nutty flavor, while sunflower seed butter is great for nut allergies. Just make sure the texture is similar. The bars should feel firm to the touch. You can also poke them gently with a finger. If they spring back, they are ready. Refrigerate them for about two hours for the best results. Enjoy your delicious creation! You now have a simple and tasty recipe for no-bake chocolate peanut butter bars. We covered all the key ingredients, preparation steps, and a few tips to make it perfect. Remember, feel free to adjust sweeteners or add flavors that you like. The bars are easy to store and can last long if kept right. Enjoy making them and sharing with friends or family. You’ll impress everyone with your no-bake treats!

No-Bake Chocolate Peanut Butter Bars Simple Treat

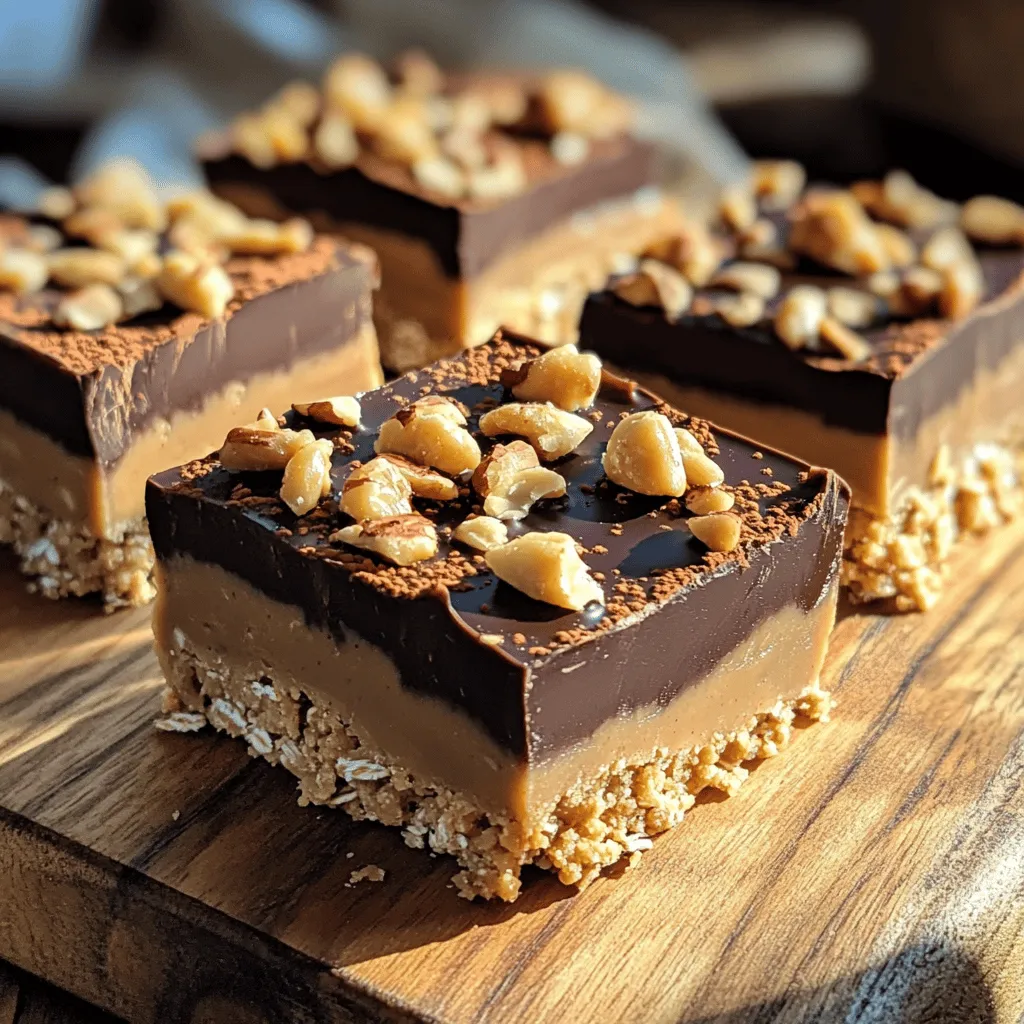
Looking for a sweet treat that’s quick and easy? These No-Bake Chocolate Peanut Butter Bars are the answer! With just

Older posts
Newer posts
← Previous Page1 … Page34 Page35 Page36 … Page67 Next →

dsad

© 2025 Foodish Talk • Built with GeneratePress

Our Policies

  • Copyright Policy
  • Cookie Policy
  • GDPR Policy
  • Privacy Policy
  • Disclaimer
  • Terms Of Use

More Information

  • Home
  • About
  • Contact
  • Appetizers
  • Dessert
  • Dinner
  • Drinks
©2025, Foodish Talk About Back To Top