![To make a tasty fruit salad, gather these fresh fruits: - 1 cup diced pineapple - 1 cup diced mango - 1 cup hulled and halved strawberries - 1 cup blueberries - 1 kiwifruit, peeled and diced - 1 banana, sliced These fruits add color and flavor. Pineapple brings a sweet and tangy taste. Mango adds a tropical twist. Strawberries are juicy and bright. Blueberries are small and packed with nutrients. Kiwifruit gives a lovely texture. Finally, banana adds creaminess. For a zesty and sweet dressing, use: - 2 tablespoons honey - 2 tablespoons lime juice - Zest of 1 lime - Fresh mint leaves for garnish The honey adds sweetness, while lime juice gives a refreshing kick. Lime zest enhances the flavor with its bright notes. Mint leaves add a lovely aroma and look great on top. This salad is not only tasty but healthy, too. - Calories per serving: about 120 - Macronutrient breakdown: - Carbohydrates: 30g - Protein: 1g - Fat: 0.5g The fruits are rich in vitamins, fiber, and antioxidants. Pineapple and mango boost your immune system. Strawberries help with heart health. Blueberries are good for your brain. Kiwifruit aids digestion, and bananas provide energy. Enjoy this salad for a healthy treat! Check out the Full Recipe for more details. To make the fruit salad, start by washing all the fruits. You want them clean and ready. Here’s how to dice and slice each fruit: - Pineapple: Cut off the top and bottom. Stand it up and slice off the skin. Cut the fruit into long strips, then dice into small pieces. - Mango: Stand the mango upright. Slice along the pit on both sides. Dice the flesh into cubes. - Strawberries: Remove the green tops. Slice the strawberries in half or quarters, depending on size. - Blueberries: These are easy! Just rinse and they’re ready to go. - Kiwifruit: Peel the kiwi with a knife. Cut it in half and then slice it into small pieces. - Banana: Simply peel and slice it into rounds. Make sure to keep each fruit in its own bowl until you mix them together. The dressing adds a nice zing! To make it, grab a small bowl. Here’s how to mix your honey lime dressing: 1. Add 2 tablespoons of honey to the bowl. 2. Squeeze in 2 tablespoons of lime juice. 3. Grate the zest of 1 lime and add it to the mix. Whisk everything together until it’s smooth and well combined. You can taste it to see if you need more honey or lime. Now, it’s time to bring everything together. Here are some tips on how to toss the fruit without mashing: - Gently add all the prepared fruits to a large mixing bowl. - Pour the honey lime dressing over the fruits. - Use a large spoon to carefully toss the fruit and dressing together. Start from the bottom, lifting the fruit up rather than stirring aggressively. Let the salad sit for about 10 minutes. This helps the flavors mix nicely. Transfer it to a serving bowl or cups for a pretty display. Don’t forget to add fresh mint leaves for garnish! For the full recipe, check out the details above. Enjoy your refreshing fruit salad! To make a great fruit salad, pick fresh, ripe fruits. I love using seasonal fruits because they taste the best. In summer, try peaches, berries, or watermelon. In fall, apples, pears, and grapes shine. Always wash your fruits well to remove dirt and pesticides. You can boost the taste of your fruit salad with spices or herbs. Try adding a pinch of cinnamon for warmth. A sprinkle of nutmeg can add depth. Fresh herbs, like basil or mint, can brighten the dish. Just a little can make a big difference. Make your fruit salad look stunning for gatherings. Use a clear bowl to show off the colors. You can also serve in individual cups for a nice touch. Garnish with mint leaves on top for a pop of green. This makes your salad not just tasty, but beautiful too. For more ideas, check out the Full Recipe! {{image_2}} You can make this fruit salad even more fun by adding tropical fruits. Consider using papaya, which adds a sweet touch. Coconut flakes also bring a nice crunch and flavor. Other great options include kiwi, passion fruit, or even dragon fruit. These fruits add vibrant colors and unique tastes to your salad. Mix and match your favorites for a delightful twist. If you want a vegan option, use agave syrup instead of honey. This keeps the sweetness without using any animal products. For a sugar-free dressing, try a sugar substitute like stevia. You can also skip the dressing altogether and use fresh lime juice alone. This makes it refreshing and light. To make your salad exciting, think about adding some crunch. Nuts like chopped almonds or walnuts work well. They add a nice texture and healthy fats. You can also sprinkle in some chia seeds or sunflower seeds. These are nutritious and give a satisfying crunch. Adding these elements can elevate your fruit salad. For the full recipe, see [Full Recipe]. To keep your fruit salad fresh longer, store it in an airtight container. This helps reduce air exposure, which can cause the fruit to brown. Place a piece of plastic wrap directly on the salad before sealing it. This creates another layer of protection. Always keep the salad in the fridge until you are ready to eat. Fresh fruit can last about three days in the fridge. Can you freeze fruit salad? Freezing fruit salad is not the best idea. Many fruits get mushy after thawing. If you want to freeze it, use fruits that hold up well, like pineapple or mango. However, you may lose some texture and flavor. It's best to enjoy your salad fresh! Can this salad be made ahead of time? Yes, you can make this salad a few hours in advance. Just remember to add the honey lime dressing right before serving. This keeps the fruit crisp and flavorful. If you prep it too early, the fruits may release juices and become soggy. Keeping the dressing separate helps maintain the salad's fresh taste. For the full recipe, check out the Tropical Bliss Fruit Salad! Fruit salad lasts about 2 to 3 days in the fridge. To keep it fresh, store it in an airtight container. This helps prevent browning, especially with bananas and apples. If you notice any fruit getting mushy, remove it right away. Yes, you can! Feel free to swap in your favorite fruits. Consider using apples, grapes, or peaches. Adjust the honey lime dressing to match the new fruits you choose. This makes your fruit salad unique and fun! You can serve this fruit salad with yogurt or granola for breakfast. It pairs well with grilled chicken or fish for lunch. For a snack, try it with whole-grain crackers. Enjoy it any time of day! This blog post covered how to create a fresh fruit salad with honey lime dressing. You learned which fruits to use and how to prepare them. I shared tips for enhancing flavor and serving beautifully. You also discovered variations and storage tips to keep your salad fresh. Remember, this salad is not only tasty but healthy. Enjoy making it at home and share it with others. The right mix of fruits can make all the difference. Happy preparing!](https://foodishtalk.com/wp-content/uploads/2025/07/d251ba2a-5a7d-4441-a69a-f952b8d64a7d.webp)
Fruit Salad with Honey Lime Dressing Easy Recipe
Looking for a fresh and easy treat? This Fruit Salad with Honey Lime Dressing is the perfect choice. Bursting with
Looking for a fresh and easy treat? This Fruit Salad with Honey Lime Dressing is the perfect choice. Bursting with

Looking for a dessert that’s easy to make and bursting with flavor? You’ve found it! These Blueberry Cheesecake Bars are
![- 2 packs of instant ramen noodles - 200g beef sirloin, thinly sliced - 2 tablespoons gochujang (Korean chili paste) - 4 cups beef broth - 1 tablespoon soy sauce - 1 teaspoon sesame oil - 2 garlic cloves, minced - 1 teaspoon fresh ginger, grated - 1 cup bok choy or spinach - 2 boiled eggs, halved - 2 green onions, chopped (white and green parts separated) - Sesame seeds for garnishing The main ingredients create the base of this dish. Instant ramen noodles cook quickly and absorb flavors well. Beef sirloin gives a rich taste and tender texture. Gochujang adds heat and depth. Beef broth brings everything together with a savory foundation. Additional ingredients enhance the dish. Soy sauce adds umami. Sesame oil deepens flavor. Garlic and ginger provide warmth and aroma. Bok choy or spinach adds freshness and color. Garnishes elevate the presentation. Boiled eggs add creaminess. Green onions give a pop of color. Sesame seeds add crunch. Each component plays a role in making this dish a savory delight. For the complete recipe, check out the [Full Recipe]. - Marinating the beef: Start by slicing the beef sirloin thinly. In a bowl, mix the sliced beef with gochujang, soy sauce, sesame oil, and minced garlic. This blend adds deep flavor. Let the beef marinate for at least 20 minutes. This step is key for tenderness and taste. - Cooking the beef: Heat vegetable oil in a skillet over medium-high heat. Once hot, add the marinated beef. Cook for about 3-4 minutes until the beef is browned. Make sure not to overcrowd the pan. This helps the beef sear well and keeps it juicy. Set the cooked beef aside. - Heating the broth: In a large pot, pour in the beef broth. Heat it over medium heat until it reaches a gentle boil. This forms the base of your ramen. - Adding spices and ingredients: Once boiling, add grated ginger, the white parts of the chopped green onions, rice vinegar, and sugar. Stir everything well to blend the flavors. Let it simmer for a few minutes. This creates a warm, flavorful broth that complements the beef. - Following package instructions: Add the instant ramen noodles directly into the boiling broth. Cook them according to the package instructions, usually around 3-4 minutes. Stir gently to prevent sticking. - Adding vegetables: When the noodles are almost done, toss in the bok choy or spinach. Cook for an additional minute until they wilt. This adds color and nutrients to your dish. For the full recipe, refer to the previous section. Now, you're ready to enjoy a delightful bowl of Spicy Korean Ramen with Grilled Beef! To make your ramen sing, balance the spice with gochujang. This chili paste gives a rich, deep heat. Use two tablespoons for a nice kick. Adjust to your taste. Marinating the beef is key. It helps the flavors soak in. I recommend at least 20 minutes. This makes the beef tender and flavorful. Grilling beef requires care. Use high heat for a nice sear. Cook it for just 3-4 minutes. This keeps it juicy. Use a skillet with a bit of oil to avoid sticking. Next, for the noodles, follow the package instructions. Usually, it takes about 3-4 minutes. Stir gently to avoid clumping. Under-cooked noodles can be chewy, so watch closely. First, serve the ramen in deep bowls. This keeps the broth warm. Top with grilled beef and halved boiled eggs. Add sesame seeds for crunch and color. Chop the green onions finely. Sprinkle the green parts on top for a pop of freshness. This makes your dish look vibrant and inviting. For more details, check the Full Recipe. {{image_2}} You can customize your ramen by changing the meat. Swap beef for pork or chicken. Both options work well in this dish. You’ll still enjoy great flavor and texture. If you want a meat-free meal, try using tofu. Tofu soaks up flavors well and adds protein. Cut the tofu into cubes and pan-fry it until golden. If you want to make this dish less spicy for kids, use less gochujang. Start with just a teaspoon and taste. You can always add more later. For heat seekers, add extra gochujang or even chili flakes. Mixing in some Sriracha can kick up the heat too. You can enhance your ramen with different sauces and toppings. Try adding a splash of sesame sauce or chili oil for extra depth. Consider toppings like nori (seaweed), kimchi, or pickled radish. Mixing in fresh vegetables can bring more color and taste. Spinach, carrots, and mushrooms all work great in this dish. For the full recipe, check the section above. To keep your spicy Korean ramen fresh, use airtight containers. Store the ramen and beef separately. This method helps keep the noodles from getting mushy. Place them in the fridge right after serving. Your leftovers will last for about three days. When you are ready to eat, reheat your ramen on the stove. Add a little broth or water to keep it moist. Heat it over low to medium heat, stirring often. Avoid using the microwave. Microwaving can make the noodles soggy. Yes, you can freeze cooked ramen, but it’s best to freeze the broth and beef separately. For the noodles, undercook them slightly before freezing. This helps them hold up better when you reheat. Store each item in individual containers. Label them with the date. Enjoy your ramen within three months for the best taste. You can make Spicy Korean Ramen from scratch by using fresh ingredients. Start with the ramen noodles, beef, and broth. You will need to marinate the beef in gochujang, soy sauce, sesame oil, and garlic. Grilling the beef gives it a smoky flavor. For the broth, heat beef broth and add ginger, green onions, vinegar, and sugar. Then, cook the ramen noodles in the broth. When ready, mix in bok choy or spinach. You can find the full recipe in the article. Pair your ramen with tasty side dishes. Here are some great options: - Korean kimchi - Pickled vegetables - Seaweed salad - Steamed dumplings - Crispy tempura These sides add flavor and texture. They enhance the meal and make it more filling. Spicy Korean Ramen is not gluten-free due to traditional ramen noodles. However, you can make it gluten-free. Substitute instant ramen with gluten-free noodles. Use tamari instead of soy sauce for a gluten-free option. Check your gochujang for gluten-free labels. Always read the ingredient lists for any packaged foods. In this blog post, we explored how to make Spicy Korean Ramen with grilled beef. We covered the key ingredients, including gochujang, garlic, and beef. I shared step-by-step instructions on beef preparation, broth making, and noodle cooking. We also discussed tips for flavor, cooking techniques, and garnishing your dish. Remember, you can adapt this recipe to fit your taste. Enjoy experimenting with different proteins or spice levels, and don't hesitate to save leftovers. With practice, you’ll master this dish and impress anyone who tries it.](https://foodishtalk.com/wp-content/uploads/2025/07/a01703fe-eecd-469a-849b-1167a492972b.webp)
If you’re craving a warm, spicy bowl of comfort, Spicy Korean Ramen with Grilled Beef is the dish you need.
![- 1 pound large shrimp, peeled and deveined - 1 cup fresh pineapple, cut into bite-sized chunks - 1 bell pepper (red or yellow), cut into chunks - 1 red onion, cut into chunks - 1 tablespoon olive oil - 2 tablespoons honey - 1 tablespoon soy sauce - 1 teaspoon sriracha (adjust to taste) - 1 teaspoon garlic powder - Salt and pepper to taste - Wooden skewers (soaked in water for 30 minutes) Gathering fresh ingredients is key. I highly recommend using large shrimp. They hold up well on the grill and soak up flavors nicely. Fresh pineapple makes a sweet contrast to the spice. Choose a ripe pineapple for the best taste. The bell pepper adds crunch and color. Red or yellow works great. The red onion gives a nice bite. Together, these ingredients create a balance of sweet and spicy. The marinade is simple but powerful. Olive oil helps keep the shrimp moist. Honey adds sweetness, while soy sauce brings depth. Sriracha adds a kick, so adjust it to your taste. Garlic powder gives a nice savory note. Make sure to soak the wooden skewers. This step prevents burning while grilling. Soaking for 30 minutes is ideal, so plan ahead. This recipe is not only tasty, but it is also healthy. You can enjoy these skewers as a meal or snack. For the full recipe, refer to the detailed instructions provided. To start, gather your ingredients for the marinade. You need olive oil, honey, soy sauce, sriracha, garlic powder, salt, and pepper. In a mixing bowl, whisk these ingredients together. Make sure they blend well. This mix adds flavor to the shrimp. You can adjust the sriracha to make it spicier or milder. Now, it's time to marinate the shrimp. Add the peeled and deveined shrimp to your marinade. Toss them gently to coat each shrimp well. Cover the bowl and place it in the fridge. Let the shrimp marinate for about 30 minutes. This step helps the shrimp absorb all the tasty flavors. While the shrimp marinates, prepare your skewers. If you use wooden skewers, soak them in water for 30 minutes. This will stop them from burning on the grill. Once the shrimp has marinated, take the skewers out. Start by placing a shrimp on the skewer, then add a chunk of pineapple. Follow it with a piece of bell pepper and a piece of red onion. Repeat this pattern until the skewer is full. Preheat your grill to medium-high heat. Once hot, place your skewers on the grill. Cook them for about 2 to 3 minutes on each side. The shrimp should turn pink and opaque. The vegetables become tender and slightly charred. After grilling, drizzle any leftover marinade over the skewers for extra flavor. Enjoy your sweet and spicy pineapple shrimp skewers fresh off the grill! For more details, check out the Full Recipe. Cook the shrimp until they turn pink and opaque. This usually takes about 2-3 minutes per side on the grill. Overcooked shrimp become tough and rubbery. To check doneness, look for a firm texture and a bright color. If you use a meat thermometer, the internal temperature should reach 120°F. When assembling your skewers, alternate shrimp and veggies for even cooking. Start with a piece of shrimp, then add a pineapple chunk, followed by a bell pepper or onion piece. This mix not only looks great but also enhances flavor. Make sure to leave a little space between each piece. This allows heat to circulate and cook everything evenly. For the best flavor, marinate the shrimp for at least 30 minutes. If you have time, marinating for up to 2 hours can deepen the taste. However, avoid marinating shrimp for longer than 2 hours, as the acid in the marinade can start to "cook" the shrimp. This can lead to a mushy texture. Enjoy your sweet and spicy pineapple shrimp skewers with this advice in mind! For the full recipe, check [Full Recipe]. {{image_2}} If you want a twist on the classic shrimp skewers, try using chicken or tofu. Chicken thighs work well; they stay juicy and tender. Cut the chicken into bite-sized pieces, just like the shrimp. Tofu is great for a meat-free option. Use firm or extra-firm tofu, and press it to remove excess water. Marinate it the same way as the shrimp. You can also try fish like salmon or swordfish. Just adjust the cooking time, as fish cooks faster than shrimp. Feel free to mix up the veggies on your skewers! Zucchini, mushrooms, or cherry tomatoes add great flavor and color. You could also use asparagus or even corn on the cob cut into smaller pieces. Just remember to cut all veggies into similar sizes. This ensures they cook evenly. Grilling different vegetables can bring new tastes to your skewers while keeping them colorful and fun. If you like things spicy, add more sriracha to the marinade. You can also use red pepper flakes for extra heat. If you prefer a milder flavor, reduce the sriracha or leave it out entirely. For a sweet touch, add more honey or brown sugar. You can balance the sweetness with lime juice for a zesty kick. Experiment with the spice levels to find your perfect balance. Remember, cooking should be fun and tailored to your taste! For the full recipe, check out Sweet and Spicy Pineapple Shrimp Skewers . To keep your sweet and spicy pineapple shrimp skewers fresh, place them in an airtight container. Make sure to cool them to room temperature first. Store them in the fridge for up to three days. Layer parchment paper between the skewers to avoid sticking. This helps keep the flavors intact. When it’s time to enjoy leftovers, heat them gently. You can use a microwave or a skillet. If using a microwave, cover the skewers loosely with a damp paper towel. Heat for about 1-2 minutes. If you prefer a skillet, warm them over low heat for about 5 minutes. This keeps the shrimp tender and juicy. You can freeze sweet and spicy pineapple shrimp skewers if you want to save them. Wrap them tightly in plastic wrap, then place them in a freezer bag. They can last for up to three months. When you’re ready to eat, thaw them in the fridge overnight. Reheat them as mentioned earlier for the best taste. For the full recipe, check the earlier section. You can tell shrimp is cooked when it turns pink and opaque. This usually takes about 2-3 minutes on each side when grilled. Use a fork to check. If the shrimp curls tightly, it is done. Overcooking makes shrimp tough, so watch closely. Yes, you can use frozen shrimp. Just make sure to thaw them first. Place them in the fridge overnight or run them under cold water for quicker thawing. Pat them dry before marinating to help the flavors stick better. These skewers pair well with many sides. Try serving them with rice or quinoa for a full meal. A fresh salad adds a nice crunch. You can also serve them with grilled veggies or a tangy dipping sauce for extra flavor. You can marinate shrimp for up to 30 minutes. This allows the flavors to soak in without making the shrimp mushy. Marinating for too long can break down the shrimp’s texture. For the best taste, stick to this time frame. For the full recipe, check out the Sweet and Spicy Pineapple Shrimp Skewers section above. This recipe shows you how to make delicious sweet and spicy pineapple shrimp skewers. You learned about the right ingredients, marinade, and cooking methods. I shared tips for the best flavor and texture. You can also explore variations based on your taste. Now, gather your ingredients and enjoy grilling these tasty skewers with family or friends. You’ll impress everyone with this easy, flavorful dish! Happy cooking!](https://foodishtalk.com/wp-content/uploads/2025/07/7e47b2b3-1ee5-46b8-84d8-0283e574575f.webp)
If you’re craving a burst of flavor, these Sweet and Spicy Pineapple Shrimp Skewers will hit the spot! Juicy shrimp
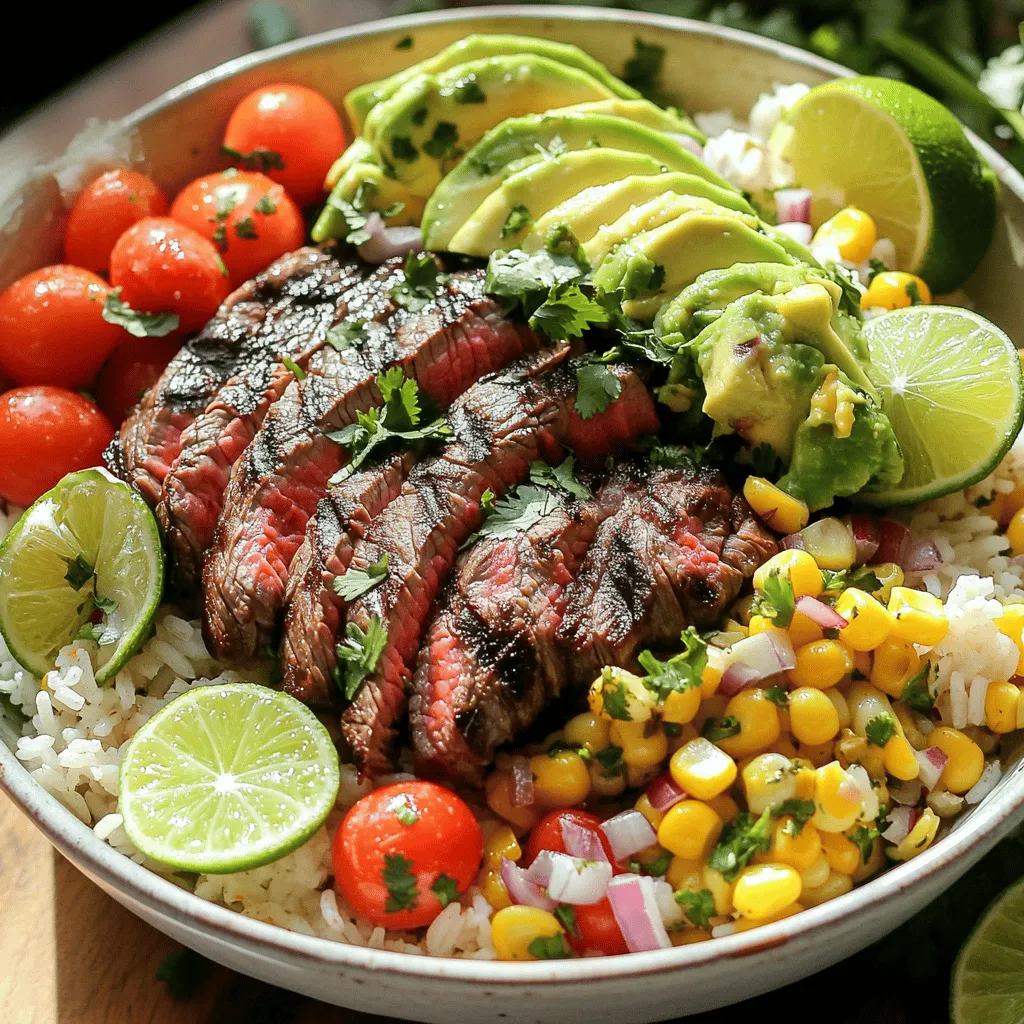
Looking for a tasty and easy meal prep idea? The Cilantro Lime Steak and Rice Bowl hits the spot! Packed
![To make a BBQ Chicken Power Bowl, gather these tasty ingredients: - 2 boneless, skinless chicken breasts - 1 cup BBQ sauce (homemade or store-bought) - 2 cups cooked quinoa - 1 cup black beans, drained and rinsed - 1 cup corn kernels (fresh, frozen, or canned) - 1 red bell pepper, diced - 1 avocado, sliced - 1 cup cherry tomatoes, halved - 1/4 cup fresh cilantro, chopped - 1 lime, cut into wedges - Salt and pepper to taste These ingredients blend well to create a colorful and flavorful meal. You can swap some ingredients based on your taste or what's in your kitchen. If you can't find quinoa, try brown rice or couscous. For the beans, chickpeas work well too. If you don't like black beans, kidney beans can work just fine. The red bell pepper can be replaced with yellow or green bell peppers for a different taste. If you want a dairy option, add some shredded cheese on top. You can also replace the avocado with a dollop of Greek yogurt for creaminess. Feel free to mix and match based on your preferences. Each serving of the BBQ Chicken Power Bowl packs a punch! Here’s a quick look at the nutrition: - Calories: Approximately 450 - Protein: About 30 grams - Carbohydrates: Around 50 grams - Fats: Roughly 15 grams This meal provides a great balance of carbs, protein, and healthy fats. It's perfect for lunch or dinner, boosting your energy while being satisfying. With the mix of beans and quinoa, you also get fiber, which is great for digestion. For the full breakdown, check out the [Full Recipe]. First, gather all your ingredients. This makes cooking easier and faster. You need: - 2 boneless, skinless chicken breasts - 1 cup BBQ sauce - 2 cups cooked quinoa - 1 cup black beans - 1 cup corn kernels - 1 red bell pepper - 1 avocado - 1 cup cherry tomatoes - 1/4 cup fresh cilantro - 1 lime - Salt and pepper Now, wash and cut the veggies. Dice the red bell pepper and slice the avocado. Halve the cherry tomatoes. Rinse the black beans and corn if needed. This prep helps the cooking flow. Next, heat your grill or grill pan over medium heat. Season the chicken breasts with salt and pepper. Then, brush a good amount of BBQ sauce on them. This adds great flavor. Place the chicken on the grill. Grill for about 6-7 minutes on each side. Keep brushing with more BBQ sauce if you want. Check that the chicken is cooked all the way through. The internal temperature should reach 165°F (75°C). Once done, remove the chicken and cover it with foil. Let it rest for 5 minutes. This keeps the chicken juicy. After resting, slice the chicken into strips. Now, it’s time to build your bowl. In a large bowl, mix the cooked quinoa, black beans, corn, diced red bell pepper, halved cherry tomatoes, and half of the chopped cilantro. Stir it well. Divide this mixture into serving bowls. Top each bowl with the sliced grilled chicken and avocado. If you like, drizzle more BBQ sauce over the top. Finish by garnishing with the remaining cilantro. Serve with lime wedges on the side. The lime adds a zesty punch to the meal. For the full recipe, check out the complete details. To get great grilled chicken, start with good meat. Use boneless, skinless chicken breasts for this dish. Make sure to season them well with salt and pepper. Brush on a thick layer of BBQ sauce. Grill over medium heat for about 6-7 minutes on each side. The chicken should reach an internal temperature of 165°F (75°C). Let the chicken rest for five minutes before slicing. This step keeps the chicken juicy and tasty. If you can’t grill, don't worry! You can cook the chicken in the oven. Preheat your oven to 400°F (200°C). Place the chicken in a baking dish and pour BBQ sauce over it. Bake for 20-25 minutes until cooked through. You can also use a stovetop pan. Heat a little oil in the pan, then add the chicken. Cook for 6-7 minutes per side until golden brown. A BBQ chicken power bowl is fun to create. You can mix in a variety of fresh veggies. Try adding sliced cucumbers or shredded carrots for crunch. Serve with avocado for creaminess and lime wedges for zest. If you want more protein, add chickpeas or extra beans. Enjoy it with a side of cornbread or a simple green salad. For the full recipe, check out the BBQ Chicken Power Bowl section. {{image_2}} You can easily make a vegetarian BBQ Chicken Power Bowl. Just swap chicken for tofu or tempeh. Tofu works well if you press it first. This helps remove excess moisture. Cut it into cubes and marinate in BBQ sauce. Grill or sauté until golden brown. Tempeh has a nutty taste and adds a nice bite. Slice tempeh and grill it too. Both options give you tasty, meat-free bowls. Don’t be afraid to mix things up! You can change the quinoa to brown rice or farro. Both options add a different texture. Instead of black beans, use chickpeas or pinto beans for a twist. You can also try different veggies like zucchini or spinach. Each swap creates a unique flavor and look. Feel free to use your favorite BBQ sauce too. Homemade or store-bought, it all works! Seasonal ingredients make your BBQ Chicken Power Bowl even better. In summer, add fresh corn and ripe tomatoes. These ingredients burst with flavor. In fall, swap in roasted butternut squash or sweet potatoes. They add warmth and sweetness. You can also switch the herbs based on the season. Use basil in summer or sage in fall. By changing ingredients, you keep your meals fresh and exciting. For the complete recipe, check out the [Full Recipe]. To keep your BBQ chicken power bowl fresh, store it in an airtight container. Place it in the fridge within two hours of cooking. The bowl will stay good for about three to four days. Make sure to separate the chicken from the quinoa mix for best results. This keeps the flavors fresh and prevents sogginess. You can freeze the BBQ chicken power bowl for meal prep. First, let the bowl cool completely. Then, use freezer-safe containers. Store the chicken, quinoa, beans, and veggies separately when possible. This way, you preserve the texture and taste. It can last up to three months in the freezer. When ready to eat, thaw it in the fridge overnight. To reheat, use the microwave or stovetop. If using a microwave, cover the bowl to keep moisture in. Heat in short bursts, stirring in between, until warm. If using the stovetop, add a splash of water to the pan. Heat gently over medium heat and stir. This helps the meal stay moist and tasty. Enjoy your delicious BBQ chicken power bowl! A BBQ Chicken Power Bowl is a tasty, healthy meal. It has grilled chicken, quinoa, and fresh veggies. You can mix flavors and textures in one bowl. This meal is colorful, full of nutrients, and filling. It’s great for lunch or dinner. You can enjoy it warm or cold. The best part? You can use your favorite BBQ sauce to give it your own twist. For the full recipe, check out the details above. Making BBQ sauce at home is simple. You need a few basic ingredients. Start with ketchup, vinegar, and brown sugar. Add some mustard for tang, and Worcestershire sauce for depth. Spice it up with garlic powder, onion powder, and a pinch of cayenne for heat. Mix all the ingredients in a pot. Heat it on low for about 15 minutes. Stir often until it thickens. Taste and adjust the flavors to your liking. Homemade BBQ sauce can be fun to make and tastes fresh. Yes, you can prepare a BBQ Chicken Power Bowl ahead of time. Cook the chicken and make the quinoa the day before. Store them in separate containers in the fridge. Chop the veggies and keep them fresh until you're ready to eat. When it's time to serve, just assemble the bowl. This way, you save time during busy days. You can enjoy a healthy meal quickly with all the flavors intact. This post covered all you need for a BBQ Chicken Power Bowl. We discussed ingredients, cooking steps, and tips for perfect grilling. You learned how to store leftovers and create variations for any season. Power bowls are easy to customize based on your taste. Whether you choose chicken or tofu, you can enjoy a healthy meal. Try making it ahead of time for busy days. Happy cooking!](https://foodishtalk.com/wp-content/uploads/2025/07/7764302d-9fc7-417c-a837-0233bd79cc5b.webp)
Looking for a healthy yet delicious meal idea? I’m excited to share my BBQ Chicken Power Bowl recipe that combines
![To make delicious lemon cheesecake crumb bars, gather these simple ingredients: - 1 ½ cups graham cracker crumbs - ½ cup unsalted butter, melted - 1/3 cup granulated sugar - 2 (8 oz) packages cream cheese, softened - 1 cup powdered sugar - 3 large eggs - 1/4 cup lemon juice (freshly squeezed) - Zest of 1 lemon - 1 teaspoon vanilla extract - Pinch of salt When choosing your ingredients, quality matters. Use fresh lemons for the best flavor. Look for cream cheese that is soft and smooth, as it mixes better. Choose unsalted butter for balance; this helps control the sweetness. If you're looking to switch things up, consider these substitutions: - Use digestive biscuits instead of graham crackers for a different flavor. - Coconut cream can replace cream cheese for a dairy-free option. - For a twist, try adding a bit of lime juice along with the lemon juice. These swaps can change your bars while keeping them tasty and fresh. Stick with the full recipe for best results, but feel free to get creative! To make the crust, start by mixing the graham cracker crumbs, melted butter, and granulated sugar in a bowl. You want the crumbs to feel moist. This mixture creates a base for your bars. Next, press the crumb mix into the bottom of your lined baking pan. Use your fingers or the back of a spoon to make it even. Bake this crust for about 10 minutes at 350°F until it is slightly golden. This step helps the crust hold its shape and adds flavor. For the cheesecake filling, take another large bowl. Beat the softened cream cheese until it is smooth. This is the key to a creamy texture. Slowly add in the powdered sugar, mixing well. Next, add your eggs one by one. Mix just until combined each time. Overmixing can ruin the creaminess. Now, stir in the lemon juice, lemon zest, vanilla extract, and a pinch of salt. Mix until everything is smooth and well blended. Now for the fun part—assembly! Pour the cheesecake filling over your cooled crust. Spread it out evenly with a spatula. Place the pan in the oven and bake for 30-35 minutes. You will know it’s done when the edges are set, and the center has a slight jiggle. Let it cool at room temperature for about an hour. Once cooled, refrigerate for at least 2 hours before slicing into bars. When ready, lift the bars out using the parchment paper and slice into squares. Baking time and temperature are very important for these bars. The oven should be at 350°F. This heat helps create a firm crust and a smooth filling. Watch for the edges—they should look set while the center is a bit wobbly. This slight jiggle means it will firm up as it cools. Once out of the oven, let the bars cool for one hour. Then, refrigerate them for at least two hours. This cooling time helps the flavors blend and makes the bars easier to cut. Remember, a well-timed bake makes for the best lemon cheesecake crumb bars! For the complete recipe, check the [Full Recipe]. To make your lemon cheesecake crumb bars creamy, use softened cream cheese. Cold cream cheese can lead to lumps. Always beat the cream cheese until smooth before adding other ingredients. Do not overmix the batter after adding the eggs. Mix just until combined to keep the texture light. Overmixing can cause the bars to be dense and less fluffy. For a lovely finish, serve the bars chilled. Dust them with powdered sugar before serving. You can also garnish with thin lemon slices or fresh mint leaves for color and freshness. Pair these bars with a cup of tea or coffee. They also go well with fresh berries on the side. For more details on making these delicious bars, check the Full Recipe. {{image_2}} You can switch up the flavors in your lemon cheesecake crumb bars. Try using other citrus fruits like lime, orange, or grapefruit. Each fruit brings its own twist. For a fun mix, add berries or chocolate. Blueberries, raspberries, or strawberries can add a burst of color and flavor. You might even layer in some melted chocolate for richness. If you need a gluten-free option, use gluten-free graham cracker crumbs. They work well and keep the great taste. For a vegan version, swap the cream cheese for a plant-based cream cheese. Use aquafaba, the liquid from canned chickpeas, instead of eggs. This way, you can still enjoy the creaminess without any dairy. These variations make the recipe fun and fit for everyone. You can explore many choices while keeping the essence of the lemon cheesecake bars. For more details, check the Full Recipe. To keep your lemon cheesecake crumb bars fresh, store them in an airtight container. Place a layer of parchment paper between the bars and the lid. This will help prevent sticking. You can keep them in the fridge for up to five days. If you want to store them longer, freeze the bars. Wrap each piece in plastic wrap, then put them in a freezer-safe bag. They can last for about three months in the freezer. When you want to enjoy your bars again, take them out of the fridge or freezer. If they are frozen, let them thaw in the fridge overnight. To refresh the flavors, you can chill them for a bit. Serve them cold for the best taste. You might add a dusting of powdered sugar on top to make them look great. Enjoy them with a slice of lemon or a sprig of mint for a fresh touch. How to tell when the bars are done baking? The bars are done when the edges look set. The center should have a slight jiggle. This means it will firm up as it cools. Can I use a different type of crust? Yes, you can! Use crushed cookies or even a nut crust. Just make sure to adjust the butter amount to match. What's the best way to cut the bars for neat slices? Use a sharp knife for clean cuts. Dip the knife in hot water, then wipe it dry before each cut. This helps keep the bars from sticking. How to make lemon cheesecake crumb bars from scratch? Start by making the crust from graham cracker crumbs, melted butter, and sugar. Then, whip up the filling with cream cheese, eggs, lemon juice, and zest. Finally, pour the filling over the crust and bake. For the full recipe, check the instructions above. Are there any alternative sweeteners for this recipe? You can use honey, maple syrup, or stevia. Just remember, this may change the taste and texture slightly. Adjust the amounts based on your choice. This article covered everything you need to make lemon cheesecake crumb bars. We discussed key ingredients, how to prepare the crust, and create a creamy filling. I shared useful baking tips and variations to cater to different tastes. Don’t forget proper storage to keep your bars fresh. Now, you can impress family and friends with this simple yet delicious treat. Happy baking!](https://foodishtalk.com/wp-content/uploads/2025/07/8342b03b-b2bd-4207-83df-6d9466928e59.webp)
Are you ready to brighten your day with a sweet treat? These Lemon Cheesecake Crumb Bars combine creamy cheesecake with
![To make Blueberry Heaven Cookies, you need the following ingredients: - 1 cup unsalted butter, softened - 1 cup brown sugar, packed - 1/2 cup granulated sugar - 2 large eggs - 1 teaspoon vanilla extract - 2 1/2 cups all-purpose flour - 1 teaspoon baking soda - 1/2 teaspoon salt - 1 cup fresh blueberries (or frozen, but thawed) - 1/2 cup white chocolate chips - Zest of 1 lemon These ingredients work in harmony to create a sweet, soft cookie. The butter gives it richness, while the sugars add sweetness. Eggs bind the dough and provide moisture. The flour and baking soda help the cookies rise and create a nice texture. You can customize your cookies by adding: - 1/2 cup chopped nuts (like walnuts or pecans) - 1/4 cup coconut flakes - 1 teaspoon cinnamon for warmth These extras can change the flavor and texture. Nuts add crunch, coconut brings a tropical twist, and cinnamon can enhance the sweetness. - Blueberries: Fresh blueberries burst with flavor and juice when baked. They provide vitamins and antioxidants. Frozen blueberries work too, but thaw them first. - White Chocolate Chips: They add creaminess and sweetness. You can swap them for dark chocolate chips for a richer taste. - Lemon Zest: This adds a bright, fresh flavor that balances the sweetness. It enhances the overall taste and aroma of the cookies. For the full recipe, refer to the [Full Recipe]. To start, gather your ingredients. You will need butter, sugars, eggs, vanilla, flour, baking soda, salt, blueberries, white chocolate chips, and lemon zest. First, preheat your oven to 350°F (175°C). Line two baking sheets with parchment paper. This step keeps the cookies from sticking. In a large bowl, cream the softened butter with brown and granulated sugar until fluffy. This takes about 2 minutes. Next, add the eggs one at a time. Mix well after each egg. Stir in the vanilla extract for great flavor. In another bowl, whisk together the flour, baking soda, and salt. Gradually add this dry mix to the creamed ingredients. Mix until just combined. Be careful not to overmix. Now, gently fold in the fresh blueberries and white chocolate chips. Use a spatula to avoid crushing the berries. Using a cookie scoop or tablespoon, drop the batter onto the baking sheets. Space them about 2 inches apart. This gives them room to spread. Sprinkle a little lemon zest on top of each cookie for a fresh twist. Bake the cookies for 12-15 minutes. Look for golden edges with soft centers. Remove them from the oven and let them cool on the baking sheet for 5 minutes. This helps them set before moving them. After 5 minutes, transfer the cookies to a wire rack. Let them cool completely. For a fun presentation, stack the cookies in a glass jar. You can also place them on a decorative plate. Garnish with extra blueberries and a mint sprig. This makes them look as good as they taste! Enjoy these Blueberry Heaven Cookies with friends or family. For the full recipe, refer to the recipe section. To make the best Blueberry Heaven Cookies, follow these tips: - Use Softened Butter: Start with butter at room temperature. This helps create a light texture. - Don’t Overmix: Mix until just combined to keep cookies tender. - Chill the Dough: If you have time, chill the dough for 30 minutes. It helps with shaping and keeps cookies from spreading too much. - Use a Cookie Scoop: This ensures even-sized cookies. They’ll bake uniformly and look great. Here are some common mistakes to watch out for: - Using Cold Butter: Cold butter can lead to hard cookies. Always soften it first. - Skipping the Baking Soda: Baking soda is key for a nice rise. Don’t forget it! - Overbaking: Check cookies 2 minutes before the timer goes off. They should be golden at the edges but soft in the center. - Crushing Blueberries: Gently fold in blueberries to keep them whole and juicy. Want to take your cookies to the next level? Try these ideas: - Citrus Zest: Add more lemon zest for a brighter flavor. Orange zest also works well. - Nuts: Chopped walnuts or pecans add a nice crunch. - Spices: A pinch of cinnamon can add warmth and depth. - Dried Fruit: Replace some blueberries with dried cranberries for a different twist. For a full recipe, check the [Full Recipe]. {{image_2}} If you don't have blueberries, you can swap them out. Raspberries and chopped strawberries work well. You can also use chopped apples for a different flavor. Each fruit will give a unique twist to your cookies. You can mix in fun ingredients to change the taste. Here are some ideas: - 1/2 cup chopped walnuts or pecans for crunch - 1/2 cup dried cranberries or cherries for sweetness - 1/2 cup shredded coconut for a tropical feel Try different combinations to discover your favorite mix! You can easily make these cookies gluten-free. Use a 1:1 gluten-free flour blend instead of all-purpose flour. For vegan cookies, replace the eggs with flaxseed meal or applesauce. Also, use vegan butter and dairy-free chocolate chips. These changes will keep the cookies delicious and safe for everyone. For the full recipe, check out the Blueberry Heaven Cookies section. To keep your Blueberry Heaven Cookies fresh, store them in an airtight container. Place parchment paper between layers of cookies to prevent sticking. Keep the container at room temperature for up to five days. For added softness, you can include a slice of bread in the container. The bread will help retain moisture. You can freeze Blueberry Heaven Cookies for later enjoyment. First, let the cookies cool completely. Then, place them in a single layer on a baking sheet. Freeze for about an hour. Once frozen, transfer them to a freezer-safe bag or container. Label the bag with the date. These cookies can last up to three months in the freezer. When ready to eat, just thaw at room temperature. Blueberry Heaven Cookies stay tasty for about five days at room temperature. If you want to enjoy them warm, you can reheat them. Place a cookie in the microwave for about 10-15 seconds. This will make it soft and warm again. You can also use an oven. Preheat it to 300°F and heat the cookies for about five minutes. Enjoy your warm treats! To keep your cookies fresh, store them in an airtight container. Place parchment paper between layers to avoid sticking. They stay good for about a week at room temperature. For longer storage, put them in the fridge to last up to two weeks. Yes, you can use frozen blueberries for Blueberry Heaven Cookies. Just make sure to thaw and drain them first. This helps keep the dough from getting too wet. Frozen blueberries may be softer, so handle them gently to avoid smashing them. You can make Blueberry Heaven Cookies healthier by swapping some ingredients. Use whole wheat flour for added fiber. Replace half the butter with applesauce to cut fat. You can also reduce sugar by a quarter and still enjoy sweet cookies. Adding nuts can boost protein too. Pre-made Blueberry Heaven Cookies are not common, but you may find similar ones in local bakeries. Large grocery stores sometimes carry gourmet cookies. You can also check online for bakeries that ship cookies. However, making them at home is a fun and tasty way to enjoy them! For the full recipe, check out the recipe section above. You now have all you need to make Blueberry Heaven Cookies. We covered the ingredients, step-by-step instructions, and baking tips. You can even try different variations to suit your taste. Remember, the key is to avoid common mistakes and enhance flavors. When stored properly, these cookies will stay fresh and tasty. They can also be frozen for later! Enjoy making and sharing these delicious treats. Happy baking!](https://foodishtalk.com/wp-content/uploads/2025/07/df761a7e-65c5-4d0f-a070-a35edd335824.webp)
Welcome to your new favorite cookie recipe! Blueberry Heaven Cookies are the perfect blend of sweet and tart, making them
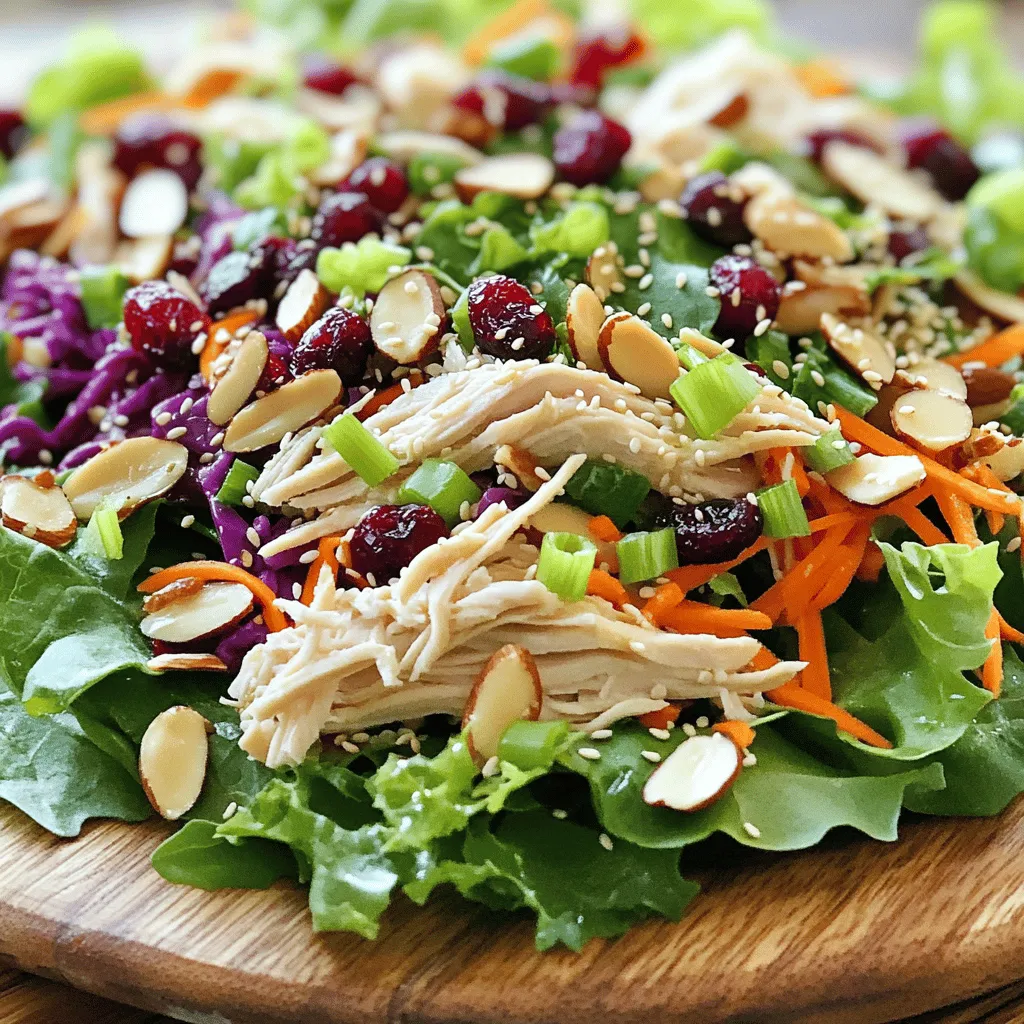
Are you ready to delight your taste buds with a fresh and colorful dish? This Asian Chicken Cranberry Salad bursts
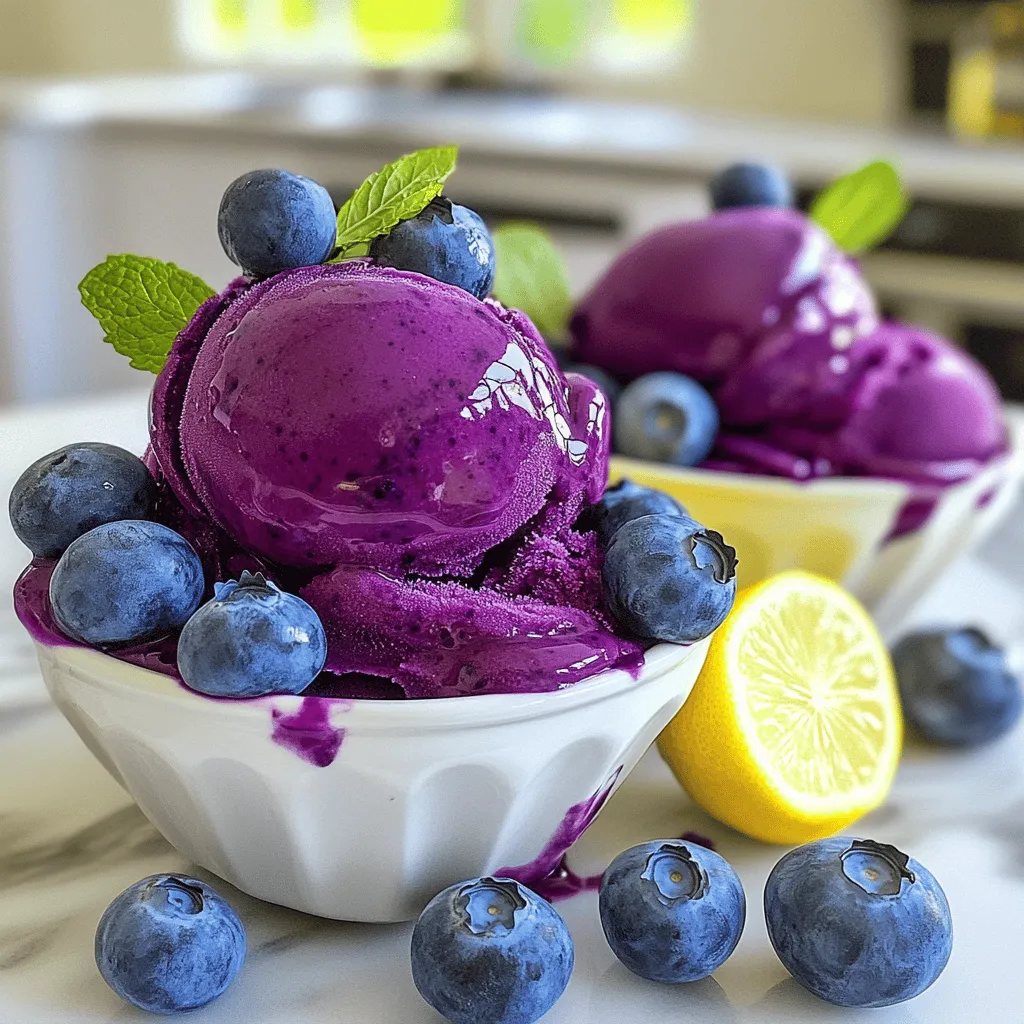
Cool off with a bowl of Lemon Blueberry Sorbet! This sweet, tangy treat is perfect for hot days. You only
