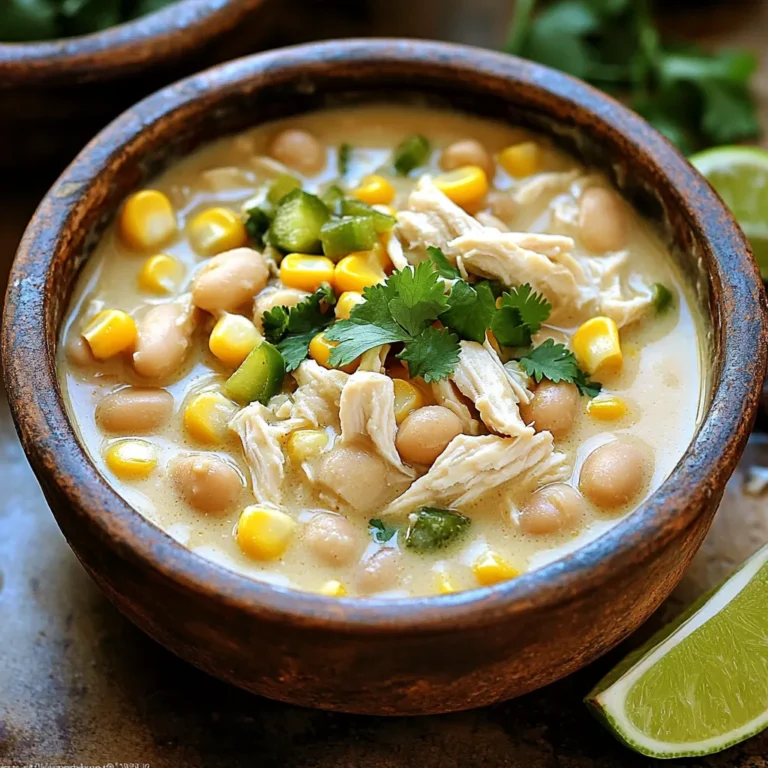
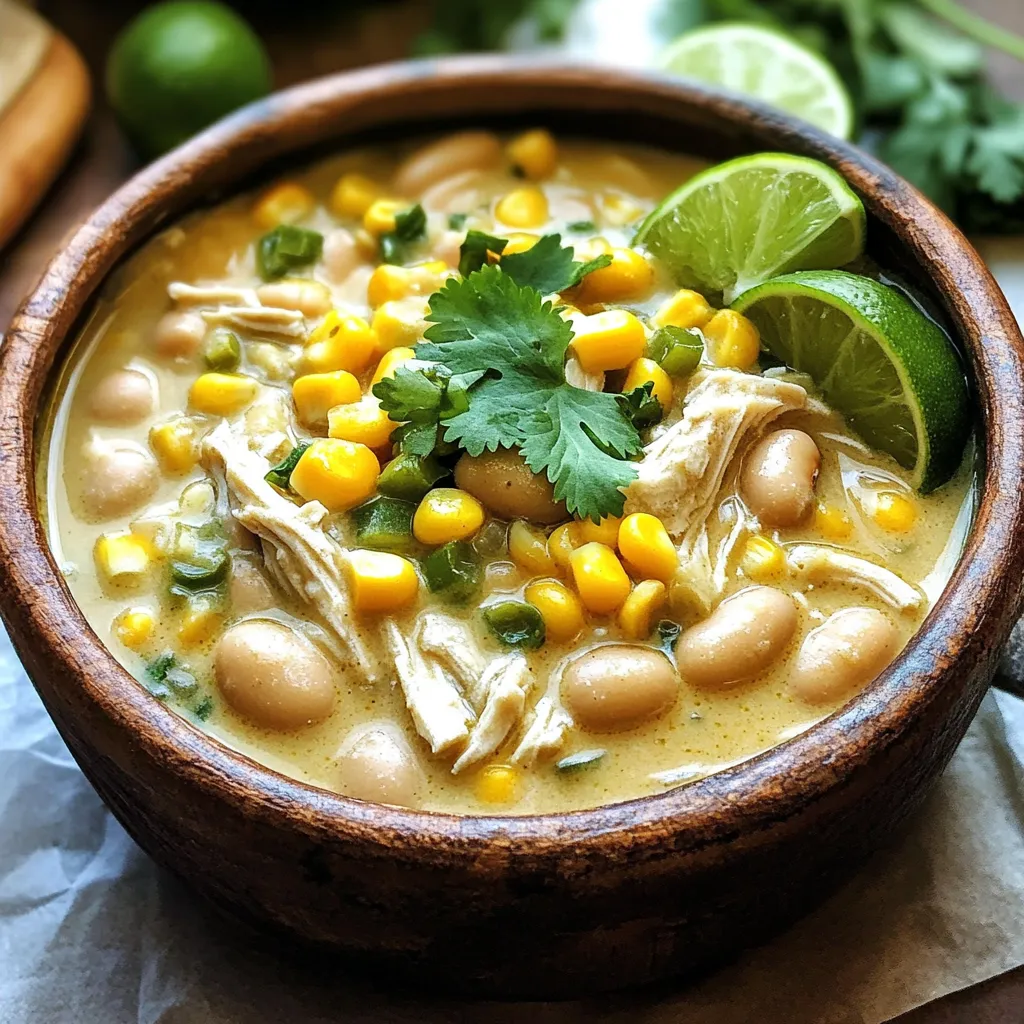
Are you ready to make a cozy meal that warms your heart? This Slow Cooker Creamy White Chicken Chili is rich, filling, and super easy! With tender chicken, creamy broth, and tasty spices, you will love every bite. Plus, it’s perfect for busy days. Grab your slow cooker and let’s dive into this delightful recipe that’s sure to become a family favorite. Your taste buds will thank you!
Ingredients
Main Ingredients
– 2 boneless, skinless chicken breasts
– 1 can (15 oz) white beans (cannellini or great northern)
– 1 can (4 oz) diced green chilies
Additional Ingredients
– 1 cup corn (frozen or canned)
– 1 medium onion, diced
– 3 cloves garlic, minced
– 2 cups chicken broth
– 1 cup heavy cream or coconut milk
– Ground spices and seasoning (cumin, chili powder, salt, pepper)
– Fresh toppings (cilantro, lime wedges)
The choice of your main ingredients is key to great chili. Chicken breasts give a nice, tender texture. White beans add creaminess and taste. Green chilies give a mild spice that lifts the flavor.
For the extra ingredients, corn adds sweetness. Diced onion and minced garlic give a strong base. The chicken broth ties it all together, adding depth. For creaminess, use heavy cream or coconut milk.
Don’t forget the spices! Cumin and chili powder enhance the dish. Salt and pepper can help balance flavors. Fresh cilantro and lime are perfect to top your chili. They add brightness and freshness to each bowl.
Gather these ingredients, and you are ready to create a bowl of comfort!
Step-by-Step Instructions
Preparation Steps
– Prep the Chicken and Seasoning: Start by placing the two chicken breasts at the bottom of your slow cooker. Sprinkle them with salt, pepper, ground cumin, and chili powder. This step adds great flavor right from the start.
– Add the Vegetables and Beans: Now, layer the diced onion, minced garlic, diced green chilies, corn, and white beans over the seasoned chicken. This mix of veggies gives the chili its heartiness and color.
Cooking Steps
– Pour in the Chicken Broth: Gently pour the chicken broth over the ingredients. Make sure everything is mostly submerged. This broth builds the base for a rich and creamy chili.
– Cooking Time Guidelines: Cover your slow cooker. Cook on low for about six hours or on high for three hours. The chicken should be very tender and easy to shred.
– Shred the Chicken Post-Cooking: Once cooked, take the chicken breasts out. Use two forks to shred the chicken into bite-sized pieces. Then, return the shredded chicken to the slow cooker. This step makes the chili easy to eat.
Finalizing Steps
– Incorporate the Creaminess: Now it’s time to stir in the heavy cream or coconut milk. Mix it well to make the chili creamy. Taste it and adjust with more salt or pepper if needed.
– Serve and Garnish: Ladle the chili into bowls. Garnish each bowl with fresh cilantro. Serve with lime wedges on the side. The lime adds a nice zesty kick!
Tips & Tricks
Perfecting the Flavor
Balancing Spices
To get the right taste, you need to balance the spices. I like to start with one teaspoon of cumin and chili powder. You can adjust to your taste as you cook. If you want more heat, add a pinch of cayenne pepper. Always taste before serving!
Achieving the Right Creaminess
For a creamy texture, heavy cream works well. If you prefer a lighter option, try coconut milk. Stir it in slowly after shredding the chicken. This helps the cream mix in evenly, giving you that rich, smooth feel.
Slow Cooker Advice
Choosing the Right Setting
Using a slow cooker is great for this chili. You can choose low or high heat. Cooking on low for six hours gives a deep flavor. If you’re short on time, high for three hours works, too. Just ensure the chicken is tender before shredding.
Cooking Time Variability
Cooking times can vary based on your slow cooker. Always check the chicken. It should shred easily with a fork. If it’s still tough, cook it longer. Adjust the time based on your model’s heat level.
Presentation Tips
Garnishing Ideas
Garnish makes a big difference! Fresh cilantro adds color and flavor. You can also add diced avocado or sour cream for a creamy touch. A sprinkle of cheese can add richness, too.
Serving Suggestions
Ladle the chili into bowls while hot. Serve with lime wedges on the side. Squeezing lime over the chili adds a fresh zing. You can pair it with tortilla chips for a fun crunch.
Variations
Ingredient Swaps
You can easily change the main protein in this dish. Instead of chicken, try turkey or beef. If you want a plant-based option, use tofu. Each choice adds its own taste. You can also switch the heavy cream. Use coconut milk for a dairy-free twist. This keeps the chili creamy without dairy.
Flavor Enhancements
Want to boost the flavor? Add more veggies! Bell peppers, zucchini, or carrots work well. They add color and nutrients. For a spicy kick, toss in jalapeños or a few drops of hot sauce. This will make the chili pop with heat and flavor.
Serving Variants
This chili is more than just a bowl meal. Use it as a taco filling. Just scoop some chili into a taco shell and add toppings. You can also serve it over rice for a burrito bowl. Top with cheese, sour cream, or salsa for extra taste. These ideas make the dish fun and versatile!
Storage Info
Refrigeration Guidelines
To store your leftover chili, let it cool first. Use an airtight container. This keeps it fresh and tasty. You can store it in the fridge for up to three days. When you want to reheat, scoop the chili into a pot. Heat it on low. Stir often to avoid burning. You can also use a microwave. Put it in a microwave-safe bowl. Heat in short bursts, stirring in between. This keeps the chili creamy.
Freezing Instructions
If you want to freeze the chili, let it cool down first. Use a freezer-safe container. Leave some space at the top. The chili will expand as it freezes. You can freeze it for up to three months. To thaw, move it to the fridge a day before. This gives it time to soften. You can also use cold water. Seal it in a bag and submerge it in water. This method is faster.
Shelf Life
How long does it last? In the fridge, it lasts for about three days. In the freezer, it can last for three months. For best taste, eat it within these time frames. If the chili looks or smells off, it’s best to toss it. Always trust your senses when it comes to food safety.
FAQs
How to make the chili spicier?
You can add heat to your chili in a few ways. Spices like cayenne pepper or crushed red pepper flakes work great. Adding fresh peppers can also give it more kick. Try jalapeños or serranos for a nice, spicy touch. Just be careful! Start with a little, then taste as you go. You can always add more spice, but it’s hard to take it out once it’s in.
Can I use frozen chicken?
Yes, you can use frozen chicken for this recipe. It will cook well in the slow cooker. Just make sure to add a bit of extra cooking time. If you use thawed chicken, the chili will cook faster. Both options will yield tender and juicy chicken. Just remember to check that the chicken reaches a safe temperature of 165°F when done.
Is it possible to make this chili in advance?
Absolutely! This chili is great for meal prep. You can make it a day or two ahead of time. Just store it in the fridge after it cools. When ready to eat, reheat it on the stove or in the microwave. You can also freeze it for later. Just make sure to cool it down first before freezing. This way, you have a tasty meal ready when you need it!
To wrap up, we explored a tasty chili using chicken, beans, and spices. You learned the best steps for prep and cooking. I shared tips for flavor and presentation. You can also swap ingredients for fun variations. Proper storage helps keep leftovers fresh. This recipe is easy and perfect for meal prep. Try it out, and enjoy a delicious dish any day.

