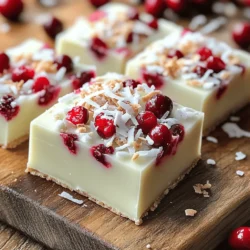
If you’re craving a sweet, simple treat, look no further. My White Chocolate Cranberry No Bake Bars are the perfect quick recipe for any occasion! With just a few ingredients and no baking required, you can whip up a delicious snack that delights your taste buds. Plus, you can customize it with your favorite toppings. Let’s dive into how to make this easy dessert and impress everyone around you!
Ingredients
Detailed Ingredient List
To make White Chocolate Cranberry No Bake Bars, gather these simple ingredients:
– 1 cup vanilla wafer crumbs
– 1/2 cup unsweetened shredded coconut
– 1 cup dried cranberries, chopped
– 1 cup white chocolate chips
– 1/2 cup sweetened condensed milk
– 1 tablespoon coconut oil
– 1 teaspoon vanilla extract
– A pinch of salt
These ingredients create a mix of sweet, creamy, and chewy. The vanilla wafer crumbs give a nice base. The coconut adds a tropical twist. The cranberries add a tart flavor that balances the sweetness.
Optional Toppings
You can add extra toppings for even more flavor and texture. Consider:
– Extra dried cranberries
– Shredded coconut
Sprinkling these on top makes the bars look pretty. It also gives a fun texture contrast.
Key Ingredient Substitutions
If you have allergies or want to switch things up, here are some ideas:
– For vanilla wafer crumbs, use graham cracker crumbs.
– Swap sweetened condensed milk with coconut milk for a dairy-free option.
– Use dark chocolate chips instead of white chocolate for a richer taste.
These swaps keep the bars tasty while catering to different diets.
Step-by-Step Instructions
Preparation of Baking Dish
Start by lining an 8×8 inch baking dish with parchment paper. Leave some paper hanging over the sides. This helps when you lift out the bars later.
Mixing Dry Ingredients
In a large bowl, add 1 cup of vanilla wafer crumbs. Next, mix in 1/2 cup of unsweetened shredded coconut. Stir these together until they are well combined.
Melting White Chocolate Mixture
Take a microwave-safe bowl and add 1 cup of white chocolate chips, 1 tablespoon of coconut oil, and a pinch of salt. Heat the bowl in the microwave for 30 seconds. Stir, then heat again for another 30 seconds. Keep stirring until the mixture is smooth and melted.
Combining All Ingredients
Pour the melted white chocolate mixture into the bowl with the crumb and coconut mix. Add in 1/2 cup of sweetened condensed milk and 1 teaspoon of vanilla extract. Mix everything together until well combined.
Pressing Mixture into Dish
Now, transfer the mixture into your lined baking dish. Use the back of a spatula or your hands to press it down evenly. Make sure it is compact to help the bars hold their shape.
Refrigeration Process
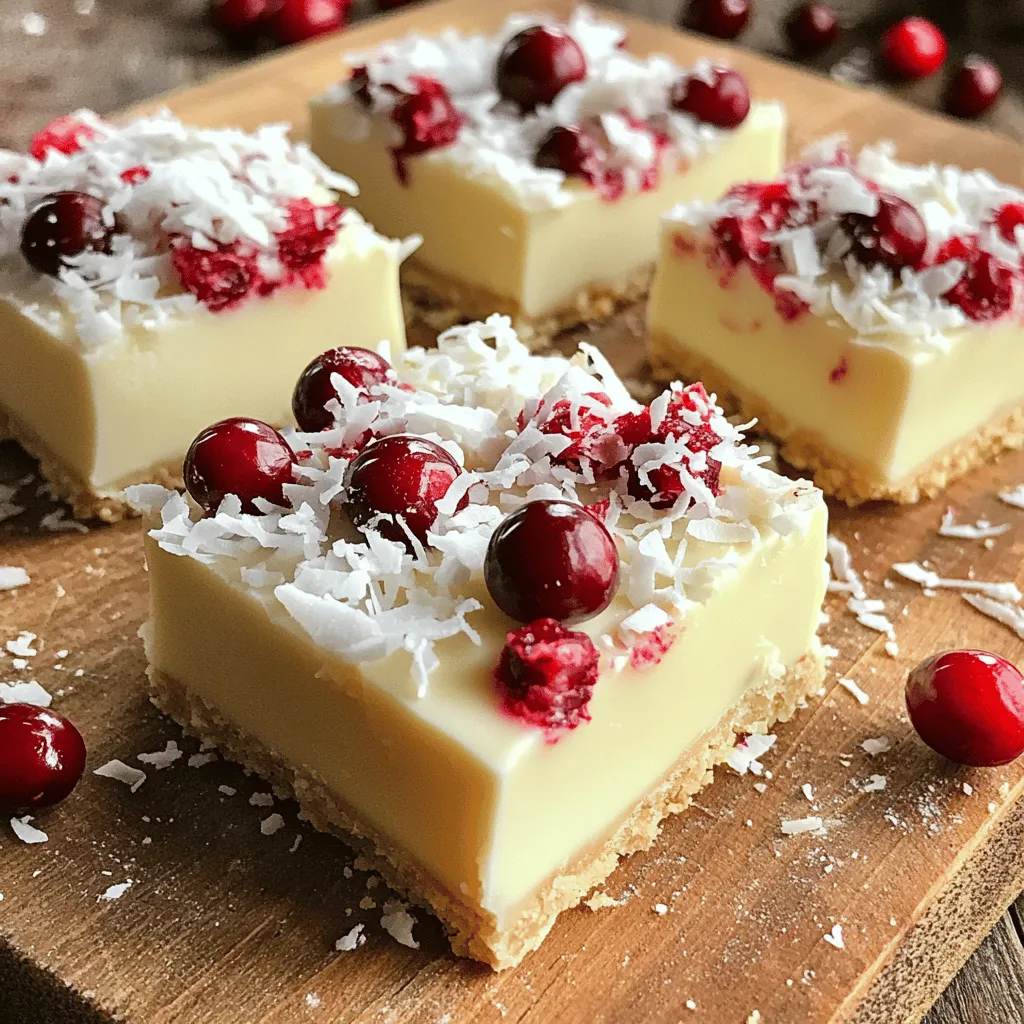
If you want extra texture and flavor, sprinkle some dried cranberries and coconut on top. Now, place the dish in the fridge. Let it chill for at least 3 hours or until fully set. After that, lift the bars out using the overhanging parchment paper and cut them into squares.
Tips & Tricks
How to Achieve the Best Texture
To get the best texture in your White Chocolate Cranberry No Bake Bars, use fresh ingredients. Make sure the coconut is unsweetened to keep the bars from being too sweet. The vanilla wafer crumbs should be fine to help the bars hold together. Press down firmly when you pack the mixture into the pan. This step is key! A compact mix prevents the bars from crumbling when you cut them.
Storing and Serving Suggestions
Store these bars in an airtight container in the fridge. They can last about a week, but they taste best in the first few days. For serving, cut them into small squares. You can add a few extra dried cranberries or coconut on top for a nice touch. Serve them chilled or at room temperature. They make a great snack or dessert!
Common Mistakes to Avoid
One common mistake is not letting the bars set long enough. They need at least three hours in the fridge. If you skip this step, they won’t hold their shape. Another mistake is not mixing the ingredients well. Stir until everything is fully combined. This ensures you get that sweet and tangy flavor in every bite. Finally, don’t skip the parchment paper. It helps remove the bars easily from the pan.
Variations
Flavor Additions
You can make these bars even more fun by adding flavors. Try mixing in chopped nuts like almonds or walnuts for a crunchy bite. You can also add spices like cinnamon or nutmeg for warmth. Just a pinch of either spice can change the whole taste. Experiment and find your favorite mix!
Using Different Chocolate Types
While white chocolate shines in these bars, you can switch it up. Use dark chocolate or semi-sweet chocolate for a rich twist. You can also blend these chocolates for a unique flavor. Each type of chocolate brings its own charm to the bars.
Healthier Alternatives
If you want a healthier snack, consider some swaps. You can use almond flour instead of vanilla wafer crumbs. This change adds fiber and protein. For a lower sugar version, use sugar-free white chocolate chips. You can even replace sweetened condensed milk with a mix of Greek yogurt and honey. Enjoying these treats can be guilt-free!
Storage Info
Proper Refrigeration Techniques
To keep your white chocolate cranberry no-bake bars fresh, store them in the fridge. Place the bars in an airtight container. This helps seal in moisture. If you stack them, add parchment paper between layers. This prevents sticking.
Freezing Instructions
You can also freeze these bars for longer storage. Cut the bars into squares first. Wrap each square in plastic wrap. Then, place them in a freezer-safe bag or container. They can stay in the freezer for up to three months. When you’re ready to enjoy, let them thaw in the fridge overnight.
Shelf Life of No Bake Bars
These bars last about one week in the fridge. Keep an eye on them for any signs of spoilage. If they smell off or look strange, it’s best to toss them. Enjoy these treats while they are fresh for the best taste and texture.
FAQs
Can I use fresh cranberries instead of dried?
No, fresh cranberries are too tart for this recipe. Dried cranberries add sweetness and chew. If you want a twist, try using dried cherries or raisins. They work well too.
How long do these bars need to set?
These bars need at least three hours to set in the fridge. I recommend leaving them overnight for the best firmness. This wait makes them easier to cut and enjoy.
Are there gluten-free options for this recipe?
Yes! You can use gluten-free vanilla wafers. They make a great base for these bars. Check the labels to ensure the other ingredients are also gluten-free.
What is the best way to cut no-bake bars?
Use a sharp knife for clean cuts. First, let the bars set fully. Lift them out using the parchment paper edges. Cut them into squares while they are cold for neat pieces.
This blog post covered everything you need to create delicious no-bake bars. We explored essential ingredients, optional toppings, and key substitutions. I detailed step-by-step instructions, shared helpful tips for the best texture, and avoided common mistakes. We also discussed fun flavor variations and proper storage methods to keep your treats fresh.
Remember, experimenting can lead to exciting new flavors. Try different chocolate types and toppings. Enjoy making your no-bake bars and sharing them with others!