No-Bake Nutella Oreo Cheesecake Cups Delight

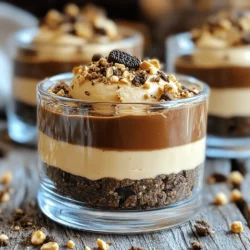
Are you ready to indulge in a sweet treat without turning on the oven? My No-Bake Nutella Oreo Cheesecake Cups are the perfect dessert for chocoholics and Oreo lovers alike. With rich Nutella and a buttery Oreo crust, these cups offer pure delight in every bite. I’ll walk you through the simple steps to create these delicious desserts, as well as tips for making them your own. Let’s get started!

Ingredients

List of Ingredients

To make No-Bake Nutella Oreo Cheesecake Cups, you need:

– 18 Oreo cookies, crushed

– 4 tablespoons unsalted butter, melted

– 8 oz cream cheese, softened

– 1 cup powdered sugar

– 1 cup Nutella

– 1 teaspoon vanilla extract

– 1 cup whipped cream (store-bought or homemade)

– Additional Oreos for topping

– Chopped hazelnuts for garnish (optional)

Suggested Brands & Variants

I recommend using name-brand Oreo cookies for the best flavor. Brands like Philadelphia are great for cream cheese. For Nutella, stick with the classic version. You can also try dark chocolate or salted caramel variants if you want a twist. For whipped cream, a good store-bought option works well, but homemade is even better!

Ingredient Substitutions

If you want to swap ingredients, here are some ideas:

– Use gluten-free Oreos for a gluten-free option.

– You can replace Nutella with any chocolate hazelnut spread.

– For a dairy-free version, try vegan cream cheese and a plant-based whipped cream.

– If you don’t have powdered sugar, regular sugar works but blend it first for a smooth texture.

These options keep your cheesecake cups tasty and fun, no matter your dietary needs!

Step-by-Step Instructions

Preparation of Oreo Crust

Start by crushing 18 Oreo cookies in a bowl. You want the pieces to be small. Next, melt 4 tablespoons of butter in a microwave. Pour the melted butter over the crushed cookies. Mix them well until all the crumbs are coated. Now, take about 2 tablespoons of this Oreo mix and place it in each cup. Press it down firmly to form a crust. Make sure it is even and compact.

Making the Nutella Filling

In a clean bowl, add 8 ounces of softened cream cheese. Beat it with an electric mixer until smooth. Slowly add 1 cup of powdered sugar while mixing at low speed. Once mixed well, add 1 cup of Nutella and 1 teaspoon of vanilla extract. Continue to mix until it is creamy and smooth. Carefully fold in 1 cup of whipped cream until just combined. This keeps the filling light and fluffy.

Assembly of Cheesecake Cups

Spoon the Nutella filling into each cup over the Oreo crust. Use a spatula to smooth the tops. Once filled, place the cups in the fridge for at least 2 hours. This helps the filling set nicely. Before serving, crush some extra Oreos and sprinkle them on top. For a crunchy touch, add chopped hazelnuts if you like. Serve these cups cold for a delicious treat!

Tips & Tricks

Common Mistakes to Avoid

One common mistake is not crushing the Oreos enough. Make sure they are fine crumbs. This helps the crust hold together. Another mistake is overmixing the cream cheese. If you mix too much, the filling can become too soft. Lastly, don’t skip the chilling time. The cups must set in the fridge for at least 2 hours.

How to Achieve the Perfect Texture

To get a smooth filling, start with softened cream cheese. Beat it until creamy before adding other ingredients. When you fold in the whipped cream, do it gently. This keeps the mixture light and fluffy. If you want a richer taste, use less whipped cream. This will give a denser cheesecake.

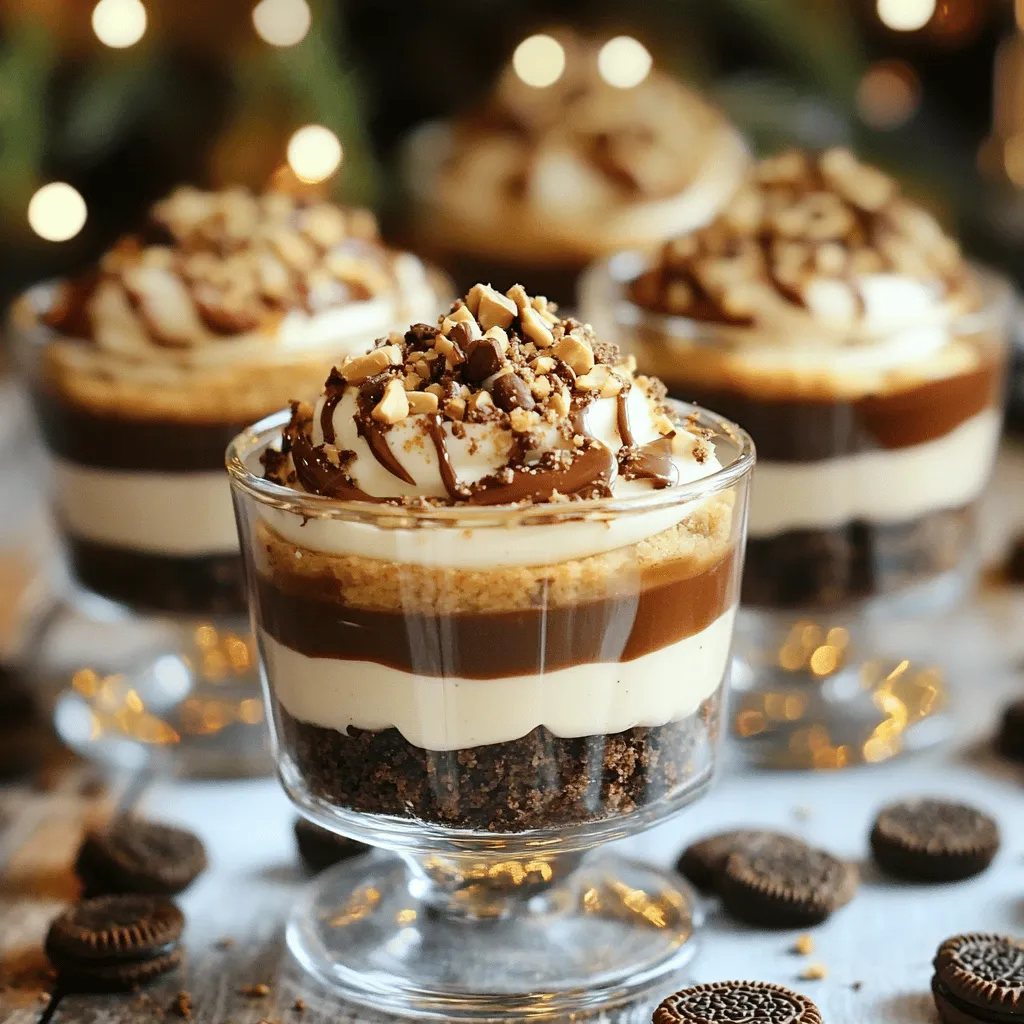
Presentation Tips for Serving

For a stunning presentation, serve the cups on a nice platter. Add a small spoon or fork with each cup. Top each cheesecake cup with crushed Oreos and hazelnuts. This adds extra texture and color. Use clear cups to show off the layers. It makes the dessert look even more inviting.

Variations

Different Flavors to Try

You can mix it up with flavors. Instead of Nutella, use peanut butter. It gives a nice twist. For chocolate lovers, add melted dark chocolate to the cream cheese mix. You can also try fruit flavors. Strawberry or raspberry puree can add a fruity touch. Just mix the puree with the cream cheese. These small changes can create a new dessert experience.

Vegan or Dairy-Free Options

To make this dessert vegan, swap the cream cheese for a dairy-free version. Use cashew cream or coconut cream as a base. For the sweetener, use coconut sugar instead of powdered sugar. Use vegan whipped cream for the topping. Instead of Nutella, try a vegan chocolate spread. This way, everyone can enjoy this treat.

Gluten-Free Adjustments

To make these cheesecake cups gluten-free, choose gluten-free Oreo cookies. They taste just as good! Ensure all other ingredients are gluten-free too. Most cream cheeses and chocolate spreads are safe, but double-check labels. These small changes let gluten-free eaters enjoy the same rich taste.

Storage Info

How to Store Leftovers

To store your leftover cheesecake cups, place them in an airtight container. Make sure to keep them in the fridge. This way, they stay fresh and tasty. Cover each cup with plastic wrap if you have no container. Enjoy them within a few days for the best flavor.

Freezing Instructions

You can freeze these cheesecake cups for later enjoyment. First, let them chill in the fridge for at least two hours. Then, wrap each cup in plastic wrap. After wrapping, place them in a freezer-safe bag. These cups can last about one month in the freezer. Thaw them in the fridge before serving.

Shelf Life of Cheesecake Cups

These cheesecake cups can last in the fridge for about three to five days. The cream cheese and whipped cream will stay fresh during this time. If you see any changes in texture or smell, it is best to throw them away. Always check your food to ensure it is safe to eat.

FAQs

Can I use different cookies for the crust?

Yes, you can use other cookies. Graham crackers or chocolate wafers work well. Just crush them and mix with melted butter. The flavor will change, but it can still be tasty.

How long do these cheesecake cups last in the fridge?

These cheesecake cups last about 3 to 5 days in the fridge. Keep them in an airtight container. This will help keep them fresh and delicious.

Can I make this recipe in advance?

Absolutely! You can make these cups a day or two ahead of time. Just store them in the fridge until you are ready to serve. It saves time and makes for easy entertaining.

What can I use instead of Nutella?

If you want a change, use other spreads. Peanut butter or chocolate spread can be great alternatives. You can also try a fruit spread for a different flavor.

How can I make homemade whipped cream?

Making homemade whipped cream is easy! Just whip heavy cream with a mixer until it forms soft peaks. Add a bit of sugar and vanilla for flavor. It’s easy and tastes fresh!

This blog post has covered the key steps to make delicious cheesecake cups. You learned about the best ingredients and brand options. We also discussed helpful tips for preparing, assembling, and presenting your treats. You can even explore various flavors and dietary adjustments.

In the end, making cheesecake cups can be fun and easy. Follow these steps and enjoy your tasty creation!

To make No-Bake Nutella Oreo Cheesecake Cups, you need: - 18 Oreo cookies, crushed - 4 tablespoons unsalted butter, melted - 8 oz cream cheese, softened - 1 cup powdered sugar - 1 cup Nutella - 1 teaspoon vanilla extract - 1 cup whipped cream (store-bought or homemade) - Additional Oreos for topping - Chopped hazelnuts for garnish (optional) I recommend using name-brand Oreo cookies for the best flavor. Brands like Philadelphia are great for cream cheese. For Nutella, stick with the classic version. You can also try dark chocolate or salted caramel variants if you want a twist. For whipped cream, a good store-bought option works well, but homemade is even better! If you want to swap ingredients, here are some ideas: - Use gluten-free Oreos for a gluten-free option. - You can replace Nutella with any chocolate hazelnut spread. - For a dairy-free version, try vegan cream cheese and a plant-based whipped cream. - If you don’t have powdered sugar, regular sugar works but blend it first for a smooth texture. These options keep your cheesecake cups tasty and fun, no matter your dietary needs! Start by crushing 18 Oreo cookies in a bowl. You want the pieces to be small. Next, melt 4 tablespoons of butter in a microwave. Pour the melted butter over the crushed cookies. Mix them well until all the crumbs are coated. Now, take about 2 tablespoons of this Oreo mix and place it in each cup. Press it down firmly to form a crust. Make sure it is even and compact. In a clean bowl, add 8 ounces of softened cream cheese. Beat it with an electric mixer until smooth. Slowly add 1 cup of powdered sugar while mixing at low speed. Once mixed well, add 1 cup of Nutella and 1 teaspoon of vanilla extract. Continue to mix until it is creamy and smooth. Carefully fold in 1 cup of whipped cream until just combined. This keeps the filling light and fluffy. Spoon the Nutella filling into each cup over the Oreo crust. Use a spatula to smooth the tops. Once filled, place the cups in the fridge for at least 2 hours. This helps the filling set nicely. Before serving, crush some extra Oreos and sprinkle them on top. For a crunchy touch, add chopped hazelnuts if you like. Serve these cups cold for a delicious treat! One common mistake is not crushing the Oreos enough. Make sure they are fine crumbs. This helps the crust hold together. Another mistake is overmixing the cream cheese. If you mix too much, the filling can become too soft. Lastly, don’t skip the chilling time. The cups must set in the fridge for at least 2 hours. To get a smooth filling, start with softened cream cheese. Beat it until creamy before adding other ingredients. When you fold in the whipped cream, do it gently. This keeps the mixture light and fluffy. If you want a richer taste, use less whipped cream. This will give a denser cheesecake. For a stunning presentation, serve the cups on a nice platter. Add a small spoon or fork with each cup. Top each cheesecake cup with crushed Oreos and hazelnuts. This adds extra texture and color. Use clear cups to show off the layers. It makes the dessert look even more inviting. {{image_2}} You can mix it up with flavors. Instead of Nutella, use peanut butter. It gives a nice twist. For chocolate lovers, add melted dark chocolate to the cream cheese mix. You can also try fruit flavors. Strawberry or raspberry puree can add a fruity touch. Just mix the puree with the cream cheese. These small changes can create a new dessert experience. To make this dessert vegan, swap the cream cheese for a dairy-free version. Use cashew cream or coconut cream as a base. For the sweetener, use coconut sugar instead of powdered sugar. Use vegan whipped cream for the topping. Instead of Nutella, try a vegan chocolate spread. This way, everyone can enjoy this treat. To make these cheesecake cups gluten-free, choose gluten-free Oreo cookies. They taste just as good! Ensure all other ingredients are gluten-free too. Most cream cheeses and chocolate spreads are safe, but double-check labels. These small changes let gluten-free eaters enjoy the same rich taste. To store your leftover cheesecake cups, place them in an airtight container. Make sure to keep them in the fridge. This way, they stay fresh and tasty. Cover each cup with plastic wrap if you have no container. Enjoy them within a few days for the best flavor. You can freeze these cheesecake cups for later enjoyment. First, let them chill in the fridge for at least two hours. Then, wrap each cup in plastic wrap. After wrapping, place them in a freezer-safe bag. These cups can last about one month in the freezer. Thaw them in the fridge before serving. These cheesecake cups can last in the fridge for about three to five days. The cream cheese and whipped cream will stay fresh during this time. If you see any changes in texture or smell, it is best to throw them away. Always check your food to ensure it is safe to eat. Yes, you can use other cookies. Graham crackers or chocolate wafers work well. Just crush them and mix with melted butter. The flavor will change, but it can still be tasty. These cheesecake cups last about 3 to 5 days in the fridge. Keep them in an airtight container. This will help keep them fresh and delicious. Absolutely! You can make these cups a day or two ahead of time. Just store them in the fridge until you are ready to serve. It saves time and makes for easy entertaining. If you want a change, use other spreads. Peanut butter or chocolate spread can be great alternatives. You can also try a fruit spread for a different flavor. Making homemade whipped cream is easy! Just whip heavy cream with a mixer until it forms soft peaks. Add a bit of sugar and vanilla for flavor. It’s easy and tastes fresh! This blog post has covered the key steps to make delicious cheesecake cups. You learned about the best ingredients and brand options. We also discussed helpful tips for preparing, assembling, and presenting your treats. You can even explore various flavors and dietary adjustments. In the end, making cheesecake cups can be fun and easy. Follow these steps and enjoy your tasty creation!

No-Bake Nutella Oreo Cheesecake Cups

Indulge in the ultimate dessert treat with these No-Bake Nutella Oreo Cheesecake Cups! With a delicious Oreo crust and a creamy Nutella filling, this quick recipe is perfect for any occasion. Follow our easy steps to whip up these charming cups in just 20 minutes. Plus, they only need a little chill time to set! Click through to explore the full recipe and impress your friends and family with this decadent delight!

Ingredients
  

18 Oreo cookies, crushed

4 tablespoons unsalted butter, melted

8 oz cream cheese, softened

1 cup powdered sugar

1 cup Nutella

1 teaspoon vanilla extract

1 cup whipped cream (store-bought or homemade)

Additional Oreos for topping

Chopped hazelnuts for garnish (optional)

Instructions
 

In a mixing bowl, combine the crushed Oreo cookies and melted butter. Mix until the cookies are evenly coated with butter.

    Spoon about 2 tablespoons of the Oreo mixture into the bottom of each serving cup and press down firmly to create a crust layer.

      In another bowl, beat the softened cream cheese until smooth using an electric mixer.

        Slowly add the powdered sugar, mixing on low speed until fully incorporated.

          Add the Nutella and vanilla extract, then continue to mix until the mixture is creamy and well combined.

            Gently fold in the whipped cream until just combined, taking care not to deflate the mixture.

              Spoon the Nutella cheesecake filling over the Oreo crust in each cup, smoothing the top with a spatula.

                Refrigerate the cheesecake cups for at least 2 hours to set.

                  Before serving, crush some additional Oreos and sprinkle them on top of the cheesecake cups.

                    Optionally, garnish with chopped hazelnuts for added texture and flavor.

                      Prep Time: 20 minutes | Total Time: 2 hours 20 minutes | Servings: 6

                        - Presentation Tips: Serve the cheesecake cups on a platter and garnish each cup with a small spoon or fork for an elegant touch.

                          Leave a Comment

                          Recipe Rating