No-Bake Chocolate Oat Bars Simple and Tasty Treat

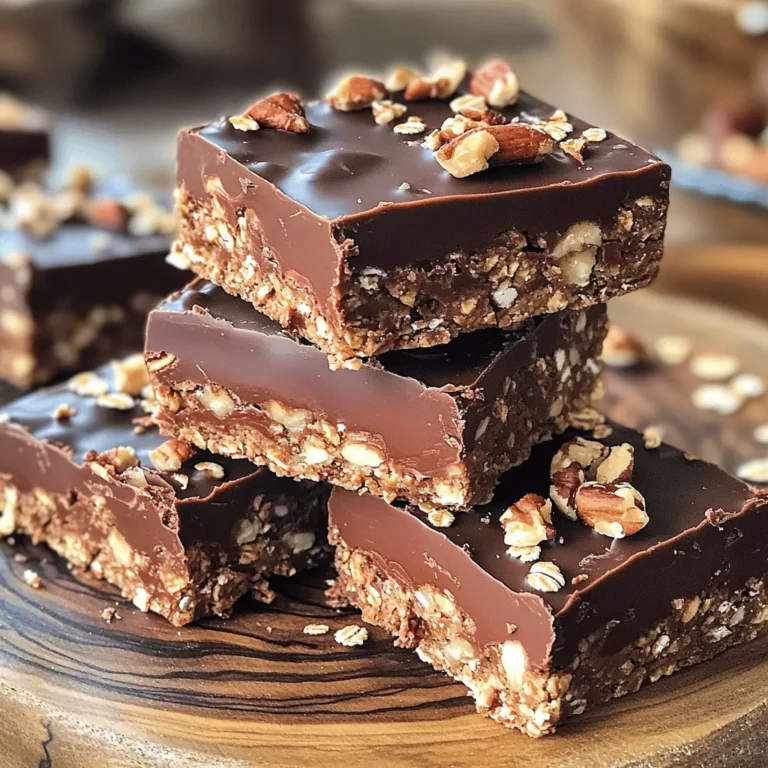
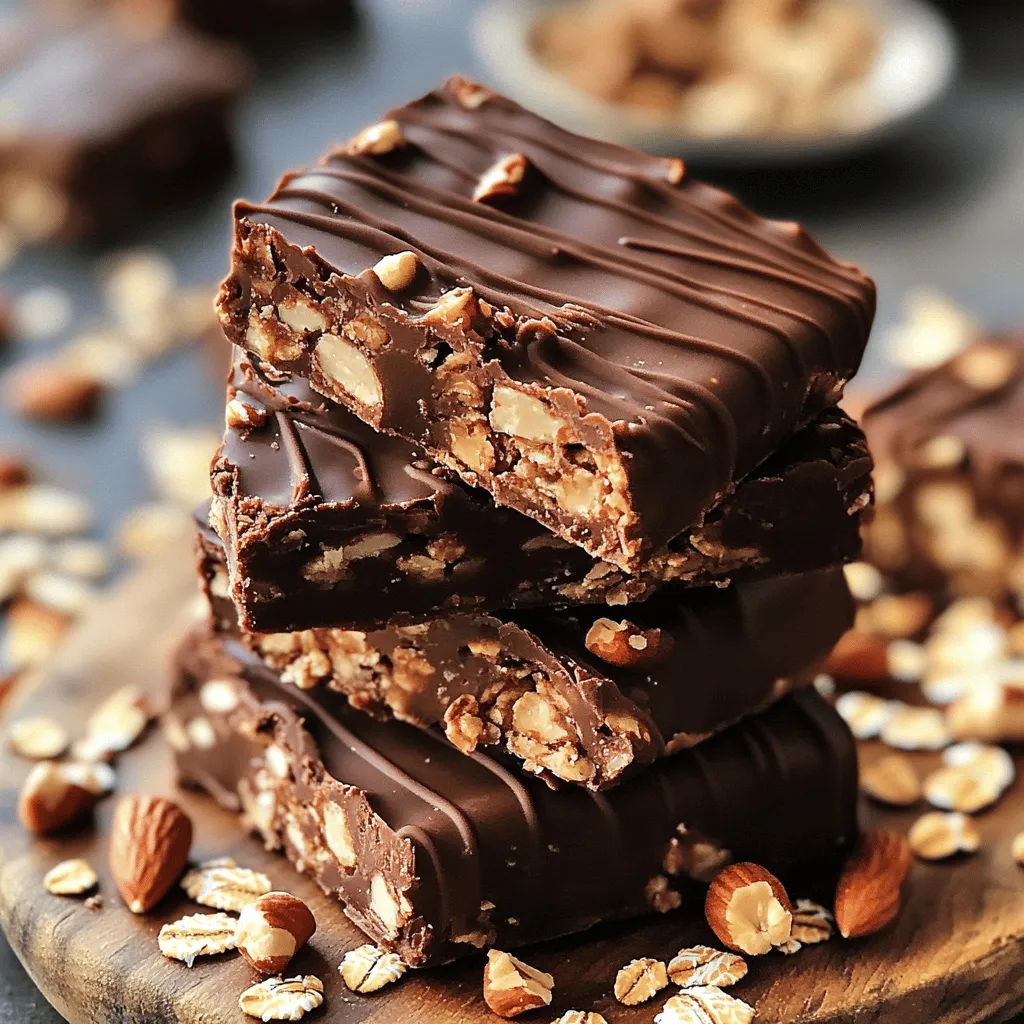
Looking for a quick, tasty treat? You’re in the right place! My No-Bake Chocolate Oat Bars are simple to make and deliciously satisfying. Whether you’re craving something sweet or need a healthy snack, these bars fit the bill. I’ll walk you through easy ingredients, steps, and tips to make them just right. Ready to dive into this no-bake adventure? Let’s get started!

Ingredients

Essential Ingredients for No-Bake Chocolate Oat Bars

To make these delicious bars, you’ll need just a few key ingredients:

– 2 cups rolled oats

– 1 cup almond butter (or peanut butter)

– 1/2 cup honey or maple syrup

– 1/3 cup unsweetened cocoa powder

– 1/2 cup dark chocolate chips

– 1/2 teaspoon vanilla extract

– A pinch of salt

These ingredients come together to give the bars a rich and tasty base. The oats provide a great texture, while the cocoa powder adds a deep chocolate flavor. The nut butter binds everything together and adds creaminess.

Optional Add-ins for Extra Flavor

You can enhance your bars with these optional add-ins:

– 1/4 cup shredded coconut

– 1/4 cup chopped nuts (like walnuts or almonds)

These add-ins bring extra crunch and flavor. Shredded coconut gives a hint of sweetness, while nuts add a nice bite. Feel free to mix and match based on what you love!

Nutritional Information Per Serving

Each bar has about:

– Calories: 150

– Protein: 4g

– Fat: 7g

– Carbohydrates: 19g

These bars are a great snack. They provide energy and nutrition without the need to bake. For more details on how to make these bars, check out the Full Recipe!

Step-by-Step Instructions

Preparation of the Oat Mixture

Start by gathering your ingredients. You need rolled oats, cocoa powder, and a pinch of salt. In a large bowl, mix the rolled oats, cocoa powder, and salt. Stir well until they blend together. This step builds a solid base for your bars.

Combining Wet Ingredients

Now, take a separate bowl. Measure out your almond butter and honey or maple syrup. Microwave this mix for about 30 seconds. It should feel warm and pourable. Stir until smooth and mixed. This warms the nut butter and helps it blend better with the oats.

Final Assembly of the Bars

Pour the warm mixture into your dry ingredients. Add a splash of vanilla extract. Mix well until everything sticks together. The mixture should feel thick and sticky. Next, fold in your dark chocolate chips, coconut, and nuts, if you like. Line an 8×8 inch baking dish with parchment paper. Transfer the mix to the dish. Press it down firmly to form an even layer. Use your hands or a spatula to pack it tight. Finally, chill this in the fridge for at least one hour to set. Once firm, cut into squares or rectangles. Enjoy your tasty no-bake chocolate oat bars! For the full recipe, refer to the earlier section.

Tips & Tricks

How to Achieve the Perfect Texture

To make your chocolate oat bars just right, focus on the mixture’s consistency. You want it thick and sticky but not too dry. If it feels crumbly, add a bit more almond butter or honey. This helps bind everything together. Press the mixture firmly into your baking dish. This step gives you a nice, dense bar. The more you pack it down, the better the final texture.

Storing Leftovers for Freshness

To keep your bars fresh, store them in an airtight container. This helps prevent them from drying out. You can also place parchment paper between the layers to stop them from sticking. Keep the bars in the fridge for the best taste. They will stay fresh for up to a week. If you want to store them longer, consider freezing them. Just wrap each bar in plastic wrap and place them in a freezer-safe bag.

Tricks for Easier Bar Cutting

Cutting these bars can be tricky, but I have a few tips. First, let the bars chill in the fridge for at least one hour. This makes them firmer and easier to cut. Use a sharp knife for clean edges. If the knife sticks, run it under warm water and dry it off. This method helps you get neat, perfect squares. Enjoy your bars as a tasty treat! For the full recipe, check out the complete guide above.

Variations

Different Nut Butters to Use

You can switch up the nut butter for fun. Almond butter is great, but peanut butter adds a nice kick. Cashew butter gives a creamier taste. Sunflower seed butter is perfect for nut-free diets. Each choice brings a new flavor, making your treats unique.

Adding Dried Fruits or Seeds

Dried fruits add sweetness and texture. Raisins or cranberries work well. You might enjoy chopped apricots too. Seeds like chia or flax add crunch and nutrition. Feel free to mix and match to find your favorite combo. These additions make the bars even more exciting.

Making It Vegan or Gluten-Free

To make these bars vegan, use maple syrup instead of honey. Most nut butters are vegan-friendly too. For gluten-free bars, ensure your oats are certified gluten-free. This way, everyone can enjoy them without worry. You get a treat that fits many diets while still being tasty.

Storage Info

Best Ways to Store No-Bake Chocolate Oat Bars

To keep your no-bake chocolate oat bars fresh, store them in an airtight container. Place parchment paper between layers to avoid sticking. This method helps maintain their shape and flavor. Keep the container in the fridge for best results. The cool temperature keeps the bars firm and tasty.

Freezing Instructions

If you want to save some for later, freezing works well. First, cut the bars into squares. Wrap each square in plastic wrap. Then, place the wrapped bars into a freezer-safe bag. Squeeze out any air before sealing. They can last up to three months in the freezer. When you’re ready to eat, just thaw them in the fridge overnight.

Shelf Life of Homemade Bars

Homemade no-bake chocolate oat bars stay good in the fridge for about one week. If stored properly in an airtight container, they remain fresh and delicious. This makes them a great treat to have on hand for snacks or desserts. Enjoy them while they last! For the full recipe, check out the instructions above.

FAQs

Can I use quick oats instead of rolled oats?

Yes, you can use quick oats. They will work in this recipe. Quick oats absorb moisture faster. This may change the texture a bit. The bars might be softer but still tasty. If you want a chewier bar, stick with rolled oats.

How can I make these bars lower in sugar?

To lower the sugar, reduce the honey or syrup amount. You can also use unsweetened cocoa powder. Try adding mashed bananas or applesauce for sweetness. These options add flavor and moisture too. Always taste the mixture before pressing it into the pan.

What can I substitute for almond butter?

You can use peanut butter as a great substitute. Sunflower seed butter works well for nut-free options. This keeps the bars delicious and helps with allergies. Just note that each nut butter has a unique flavor and texture. Adjust your expectations for taste based on your choice.

For more detailed steps, check the Full Recipe to create these delicious treats!

In this post, I shared how to make tasty no-bake chocolate oat bars. We covered key ingredients, easy steps, and helpful tips. You can mix in different flavors or adapt them for diets. Proper storage keeps your bars fresh longer. Whether for snacks or treats, these bars are simple and fun to make. Enjoy your delicious creations and feel good about the choices you make. You’ll love making these homemade treats again and again. Now, go enjoy your bars!

To make these delicious bars, you'll need just a few key ingredients: - 2 cups rolled oats - 1 cup almond butter (or peanut butter) - 1/2 cup honey or maple syrup - 1/3 cup unsweetened cocoa powder - 1/2 cup dark chocolate chips - 1/2 teaspoon vanilla extract - A pinch of salt These ingredients come together to give the bars a rich and tasty base. The oats provide a great texture, while the cocoa powder adds a deep chocolate flavor. The nut butter binds everything together and adds creaminess. You can enhance your bars with these optional add-ins: - 1/4 cup shredded coconut - 1/4 cup chopped nuts (like walnuts or almonds) These add-ins bring extra crunch and flavor. Shredded coconut gives a hint of sweetness, while nuts add a nice bite. Feel free to mix and match based on what you love! Each bar has about: - Calories: 150 - Protein: 4g - Fat: 7g - Carbohydrates: 19g These bars are a great snack. They provide energy and nutrition without the need to bake. For more details on how to make these bars, check out the Full Recipe! Start by gathering your ingredients. You need rolled oats, cocoa powder, and a pinch of salt. In a large bowl, mix the rolled oats, cocoa powder, and salt. Stir well until they blend together. This step builds a solid base for your bars. Now, take a separate bowl. Measure out your almond butter and honey or maple syrup. Microwave this mix for about 30 seconds. It should feel warm and pourable. Stir until smooth and mixed. This warms the nut butter and helps it blend better with the oats. Pour the warm mixture into your dry ingredients. Add a splash of vanilla extract. Mix well until everything sticks together. The mixture should feel thick and sticky. Next, fold in your dark chocolate chips, coconut, and nuts, if you like. Line an 8x8 inch baking dish with parchment paper. Transfer the mix to the dish. Press it down firmly to form an even layer. Use your hands or a spatula to pack it tight. Finally, chill this in the fridge for at least one hour to set. Once firm, cut into squares or rectangles. Enjoy your tasty no-bake chocolate oat bars! For the full recipe, refer to the earlier section. To make your chocolate oat bars just right, focus on the mixture's consistency. You want it thick and sticky but not too dry. If it feels crumbly, add a bit more almond butter or honey. This helps bind everything together. Press the mixture firmly into your baking dish. This step gives you a nice, dense bar. The more you pack it down, the better the final texture. To keep your bars fresh, store them in an airtight container. This helps prevent them from drying out. You can also place parchment paper between the layers to stop them from sticking. Keep the bars in the fridge for the best taste. They will stay fresh for up to a week. If you want to store them longer, consider freezing them. Just wrap each bar in plastic wrap and place them in a freezer-safe bag. Cutting these bars can be tricky, but I have a few tips. First, let the bars chill in the fridge for at least one hour. This makes them firmer and easier to cut. Use a sharp knife for clean edges. If the knife sticks, run it under warm water and dry it off. This method helps you get neat, perfect squares. Enjoy your bars as a tasty treat! For the full recipe, check out the complete guide above. {{image_2}} You can switch up the nut butter for fun. Almond butter is great, but peanut butter adds a nice kick. Cashew butter gives a creamier taste. Sunflower seed butter is perfect for nut-free diets. Each choice brings a new flavor, making your treats unique. Dried fruits add sweetness and texture. Raisins or cranberries work well. You might enjoy chopped apricots too. Seeds like chia or flax add crunch and nutrition. Feel free to mix and match to find your favorite combo. These additions make the bars even more exciting. To make these bars vegan, use maple syrup instead of honey. Most nut butters are vegan-friendly too. For gluten-free bars, ensure your oats are certified gluten-free. This way, everyone can enjoy them without worry. You get a treat that fits many diets while still being tasty. To keep your no-bake chocolate oat bars fresh, store them in an airtight container. Place parchment paper between layers to avoid sticking. This method helps maintain their shape and flavor. Keep the container in the fridge for best results. The cool temperature keeps the bars firm and tasty. If you want to save some for later, freezing works well. First, cut the bars into squares. Wrap each square in plastic wrap. Then, place the wrapped bars into a freezer-safe bag. Squeeze out any air before sealing. They can last up to three months in the freezer. When you're ready to eat, just thaw them in the fridge overnight. Homemade no-bake chocolate oat bars stay good in the fridge for about one week. If stored properly in an airtight container, they remain fresh and delicious. This makes them a great treat to have on hand for snacks or desserts. Enjoy them while they last! For the full recipe, check out the instructions above. Yes, you can use quick oats. They will work in this recipe. Quick oats absorb moisture faster. This may change the texture a bit. The bars might be softer but still tasty. If you want a chewier bar, stick with rolled oats. To lower the sugar, reduce the honey or syrup amount. You can also use unsweetened cocoa powder. Try adding mashed bananas or applesauce for sweetness. These options add flavor and moisture too. Always taste the mixture before pressing it into the pan. You can use peanut butter as a great substitute. Sunflower seed butter works well for nut-free options. This keeps the bars delicious and helps with allergies. Just note that each nut butter has a unique flavor and texture. Adjust your expectations for taste based on your choice. For more detailed steps, check the Full Recipe to create these delicious treats! In this post, I shared how to make tasty no-bake chocolate oat bars. We covered key ingredients, easy steps, and helpful tips. You can mix in different flavors or adapt them for diets. Proper storage keeps your bars fresh longer. Whether for snacks or treats, these bars are simple and fun to make. Enjoy your delicious creations and feel good about the choices you make. You'll love making these homemade treats again and again. Now, go enjoy your bars!

No-Bake Chocolate Oat Bars

Indulge in the rich flavor of Decadent No-Bake Chocolate Oat Bars that are perfect for a quick snack or a sweet treat! Made with wholesome ingredients like oats, almond butter, and dark chocolate, these bars are easy to whip up in just 15 minutes. Find out how to create this delightful recipe that's sure to impress your family and friends. Click through to explore the full recipe and get ready to satisfy your chocolate cravings!

Ingredients
  

2 cups rolled oats
1 cup almond butter (or peanut butter)
1/2 cup honey or maple syrup
1/3 cup unsweetened cocoa powder
1/2 cup dark chocolate chips
1/4 cup shredded coconut (optional)
1/4 cup chopped nuts (such as walnuts or almonds, optional)
1/2 teaspoon vanilla extract
A pinch of salt

Method
 

In a large mixing bowl, combine the rolled oats, cocoa powder, and a pinch of salt. Stir until evenly mixed.
    In a separate microwave-safe bowl, combine the almond butter and honey (or maple syrup). Microwave for about 30 seconds until warm and easily pourable. Stir to combine well.
      Pour the almond butter mixture into the dry ingredients. Add the vanilla extract, and mix until everything is well combined. The mixture should be thick and somewhat sticky.
        Fold in the dark chocolate chips, shredded coconut, and chopped nuts if using, ensuring they are evenly distributed throughout the mixture.
          Line an 8x8 inch square baking dish with parchment paper. Transfer the mixture to the dish and press it down firmly into an even layer. Use a spatula or your hands (dampened slightly to prevent sticking) to pack it tightly.
            Place the dish in the refrigerator for at least 1 hour to set.
              Once set, remove the bars from the dish using the parchment paper and cut them into squares or rectangles.
                Prep Time: 15 minutes | Total Time: 1 hour 15 minutes | Servings: 12 bars
                  - Presentation Tips: Stack a few bars on a charming platter, drizzle with melted chocolate on top, and sprinkle a few oats or nuts around for a rustic look. Serve chilled for a refreshing treat!

                    Leave a Comment

                    Recipe Rating