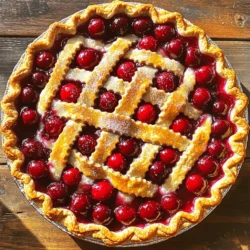
Looking for a quick and tasty dessert? This Easy Cherry Pie will make your taste buds sing! With just a few simple ingredients and easy steps, you’ll create a delightful pie that everyone will love. Whether you choose fresh or frozen cherries, this recipe guarantees a sweet, juicy filling in a flaky crust. Let me guide you through the fun of pie-making in this simple and satisfying recipe.
Ingredients
Here’s what you need for a delightful cherry pie:
– 2 cups fresh or frozen cherries, pitted
– 1 cup granulated sugar
– 2 tablespoons cornstarch
– 1 teaspoon vanilla extract
– 1 tablespoon lemon juice
– 1 tablespoon butter, cut into small pieces
– 1 pre-made pie crust (store-bought or homemade)
– 1 egg, beaten (for egg wash)
– 1 tablespoon coarse sugar (for topping)
Using fresh cherries gives the best flavor. If you use frozen cherries, thaw them first. The sugar helps to sweeten the cherries and balance their tartness. Cornstarch thickens the filling. The vanilla adds warmth. Lemon juice brightens the flavor. Butter makes the filling richer. A good pie crust holds it all together. The egg wash gives your crust a nice shine. Coarse sugar adds a sweet crunch on top.Enjoy your cooking!
Step-by-Step Instructions
Preheat and Prepare
First, preheat your oven to 425°F (220°C). This step is key. A hot oven helps the crust crisp up nicely. While the oven warms up, let’s make the cherry filling.
In a medium saucepan, combine 2 cups of cherries, 1 cup of granulated sugar, 2 tablespoons of cornstarch, 1 teaspoon of vanilla extract, and 1 tablespoon of lemon juice. Stir gently over medium heat. Cook for about 5-7 minutes. You want it to bubble and thicken. Once it thickens, remove it from heat. Let it cool for a few minutes.
Assembling the Pie
Now, let’s prepare the pie crust. If you made your own, roll it out to fit a 9-inch pie dish. If you bought it, just transfer it into the dish. Press it evenly against the bottom and sides.
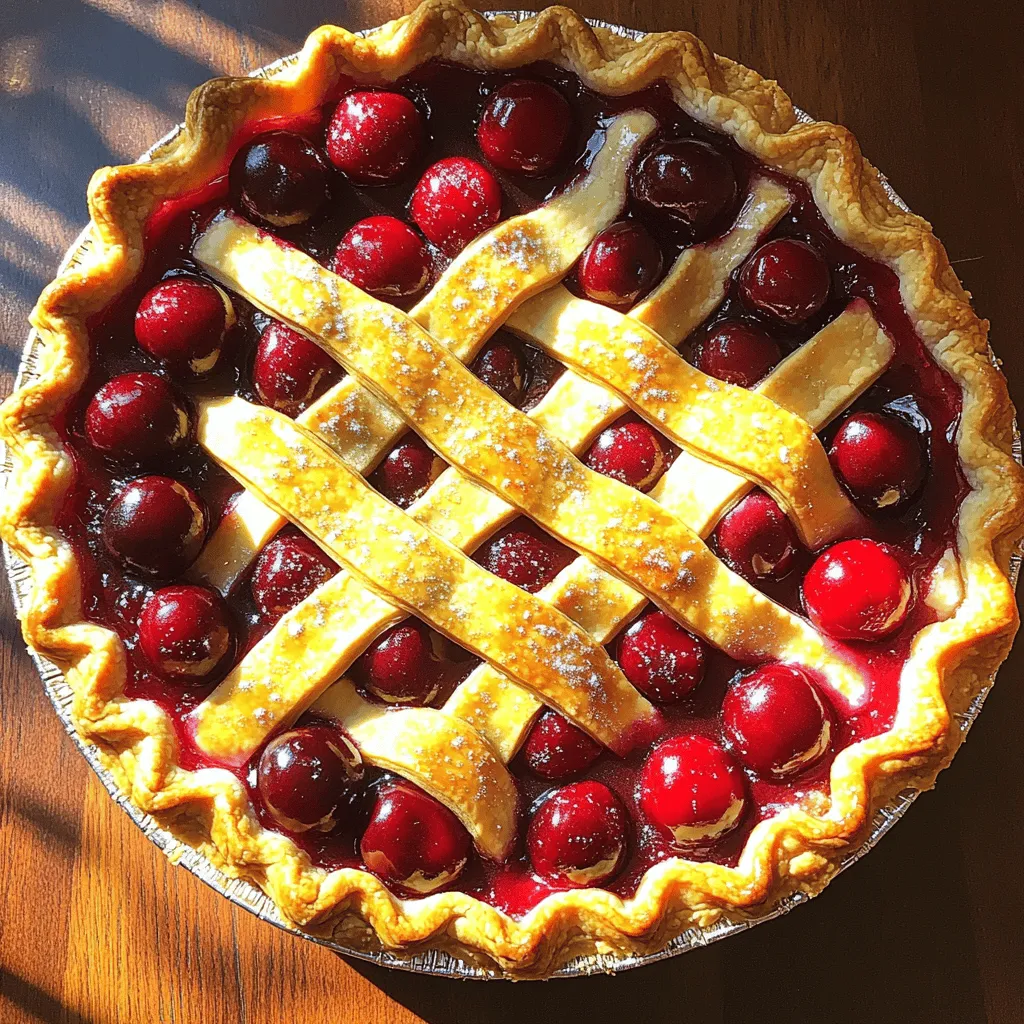
Next, pour the cooled cherry filling into the crust. For extra flavor, dot the filling with small pieces of butter. If you have extra crust, create a lattice top or just cover it with another layer. Seal and crimp the edges tightly. Cut a few slits in the top crust. This lets steam escape while baking.
Baking the Pie
Brush the top crust with a beaten egg. This gives it a lovely golden color. Then, sprinkle 1 tablespoon of coarse sugar on top. This adds sweetness and a nice crunch.
Now, place the pie in the oven. Bake for 25-30 minutes. Look for a golden brown crust and bubbly cherry filling. When it’s done, take it out and let it cool for at least 30 minutes before slicing. This allows the filling to set nicely. Enjoy your cherry pie!
Tips & Tricks
Perfecting the Cherry Filling
To avoid a runny filling, I recommend using cornstarch. This thickener helps the juices from the cherries set up nicely. Mix it well with the sugar before adding it to the cherries. This step ensures that the filling stays firm and does not ooze out when you slice the pie.
When it comes to cherries, fresh is best. They offer a bright flavor that really shines. However, frozen cherries are a great substitute if fresh ones are out of season. Just make sure to thaw them and drain excess juice before cooking.
Crust Techniques
Using a homemade crust gives you more control over texture and taste. But store-bought crusts save time and are often very good. If you choose to make your own, use cold butter and handle the dough gently. This keeps the crust flaky and tender.
For a flaky crust, make sure not to overwork the dough. Roll it out on a lightly floured surface, and don’t forget to chill it before baking. Chilling helps prevent shrinking during baking.
Serving Suggestions
Cherry pie pairs well with vanilla ice cream or whipped cream. These toppings add a nice creaminess that contrasts with the sweet tartness of the cherries.
Before serving, let your pie cool for at least 30 minutes. This cooling time helps the filling set and makes slicing easier. Enjoy your pie warm or at room temperature for the best taste!
Variations
Flavor Variations
Adding almond extract gives your cherry pie a nice twist. Just a few drops can enhance the cherry flavor. It adds a warm, nutty note that pairs well with sweet cherries.
You can also mix in other fruits. Peaches or blueberries work great. Combine them with cherries for a fruity medley. This change makes your pie even more fun and interesting!
Healthier Substitutes
If you want a lighter pie, use alternative sweeteners. Stevia or honey can cut down on sugar. They keep the sweetness but lower the calories. Just adjust the amount based on taste.
Gluten-free pie crust options are available too. Many stores sell gluten-free crusts. You can also make your own using almond flour or oats. It’s easy and gives a great taste!
Creative Serving Ideas
Serving your pie with ice cream or whipped cream makes it special. The creaminess balances the tart cherries. Top each slice with a scoop for a yummy treat.
Making mini cherry pies is another fun idea! Use small ramekins or muffin tins. These bite-sized pies are perfect for parties or picnics. They are easy to grab and eat!
Storage Info
Storing the Pie
To keep your cherry pie fresh, you should store it properly. After it cools, cover it with plastic wrap or foil. Place it in the fridge. This way, it stays moist and tasty. Your pie will last about 3 to 4 days in the fridge. If you want it to last longer, freezing is a great option.
Freezing Tips
Freezing cherry pie is simple and smart. First, let the pie cool completely. Then, wrap it tightly in plastic wrap. You can also use aluminum foil for extra protection. This helps prevent freezer burn. Your pie can stay in the freezer for up to 3 months.
When you are ready to eat it, take the pie out and let it thaw. You can leave it in the fridge overnight. For a warm pie, reheat it in the oven at 350°F (175°C) for about 15 to 20 minutes. This warms it up and keeps the crust crispy. Now you can enjoy your Easy Cherry Pie again!
FAQs
Common Cherry Pie Questions
Can I use frozen cherries for this recipe?
Yes, you can use frozen cherries. Just make sure to thaw them first. Drain excess juice to avoid a watery filling. Frozen cherries can be just as tasty as fresh ones.
How can I tell when the pie is done baking?
Look for a golden brown crust and bubbling filling. The filling should bubble for a few minutes. A knife inserted in the center should come out clean.
Recipe Customizations
Can I use a different fruit in this pie?
Absolutely! You can use blueberries, peaches, or apples. Just adjust the sugar based on the fruit’s sweetness. Each fruit adds its own unique flavor profile.
How do I make the pie dairy-free?
To make it dairy-free, skip the butter and use a dairy-free margarine instead. You can also use coconut oil. The pie will still taste great without dairy.
Pie Baking Essentials
What bakeware works best for cherry pie?
A 9-inch glass or ceramic pie dish works best. These materials help with even baking. Metal pans can also work, but they may bake faster.
Do I need to pre-bake the crust?
No, you do not need to pre-bake the crust for this recipe. The filling will bake the crust while it cooks. Just make sure the crust is pressed firmly into the dish before adding the filling.
In this blog post, we covered the key ingredients, steps, and tips for making a cherry pie. You learned how to prepare the filling and crust, bake the pie perfectly, and store leftovers. My final thoughts? Cherry pie is fun and easy to make, with room for creativity. You can customize flavors and even try healthier options. Enjoy your delicious creation, and happy baking!