No-Bake Chocolate Peanut Butter Bars Simple Treat

Looking for a sweet treat that’s quick and easy? These No-Bake Chocolate Peanut Butter Bars are the answer! With just a few simple ingredients, you can whip up a delicious dessert in no time. Whether you’re craving a snack or need a special treat for friends, this recipe is both satisfying and fun to make. Let’s dive into the ingredients and steps to create your perfect no-bake bars!

Ingredients

Complete List of Ingredients

– 1 cup rolled oats

– 1 cup natural peanut butter

– 1/2 cup honey or maple syrup

– 1/2 cup unsweetened cocoa powder

– 1/4 cup coconut oil, melted

– 1/2 tsp vanilla extract

– Pinch of salt

– 1/2 cup dark chocolate chips (optional dairy-free)

– 1/4 cup chopped nuts (optional, for topping)

To make these no-bake chocolate peanut butter bars, you need simple and tasty ingredients. First, get rolled oats for a hearty base. Then, use natural peanut butter to add that creamy, nutty flavor. Honey or maple syrup will give the bars a sweet touch. Unsweetened cocoa powder adds rich chocolate taste without extra sugar.

Coconut oil is key for binding. It also gives a nice texture. A splash of vanilla extract enhances the flavor. A pinch of salt balances the sweetness. If you love chocolate, add dark chocolate chips on top. They make the bars extra special. For some crunch, sprinkle chopped nuts over the chocolate layer.

Every ingredient plays a role in flavor and texture. Each bite should be a mix of sweet, nutty, and chocolatey. This is why I love this recipe. It is easy, quick, and so satisfying. You can find the full recipe in the article to guide you step by step.

Step-by-Step Instructions

Preparation Steps

– Combine all dry and wet ingredients in a mixing bowl.

– Line the baking pan with parchment paper.

– Press the mixture into the pan.

To start, grab a large mixing bowl. Add rolled oats, peanut butter, honey or maple syrup, cocoa powder, melted coconut oil, vanilla extract, and a pinch of salt. You want to mix these until they blend well and form a thick dough. This dough should be sticky but not too wet.

Next, take an 8×8 inch baking pan and line it with parchment paper. Make sure to leave some overhang on the sides. This will help you lift the bars out later. After that, transfer your mixture into the pan. Press it down firmly with a spatula or your hands. It should be packed tightly and evenly across the bottom.

Melting Chocolate

– Melt dark chocolate chips in the microwave.

– Pour and spread melted chocolate over the bars.

Now, it’s time for the chocolate! Use a microwave-safe bowl to melt the dark chocolate chips. Heat them in 30-second intervals, stirring after each time until smooth. Be careful not to burn the chocolate. Once melted, pour the chocolate over the pressed oat mixture. Use a spatula to spread the chocolate evenly across the top.

Setting the Bars

– Refrigerate until firm.

– Lift and cut into squares or bars.

After spreading the chocolate, place the pan in the refrigerator. Let it chill for about 2 hours. This will help the bars set and become firm. When they are ready, lift the bars out using the parchment paper overhang. Cut them into squares or bars as you like. Enjoy your delicious no-bake chocolate peanut butter bars! For the full recipe, check out the recipe section.

Tips & Tricks

Storing the Bars

To keep your no-bake chocolate peanut butter bars fresh, store them in the fridge. I recommend using an airtight container. This method prevents them from drying out and keeps them tasty. They stay fresh for up to two weeks. If you freeze them, they can last up to three months.

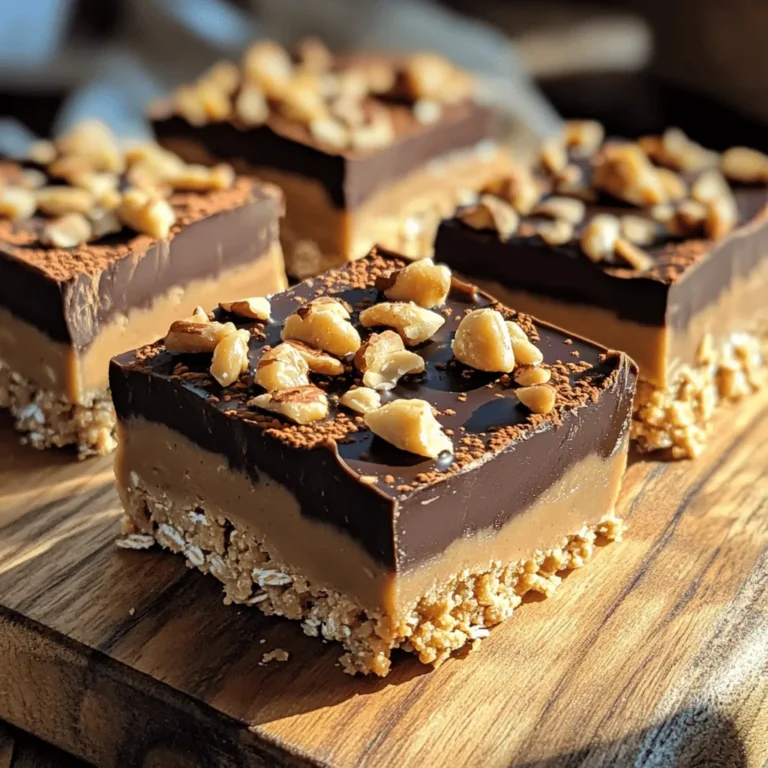
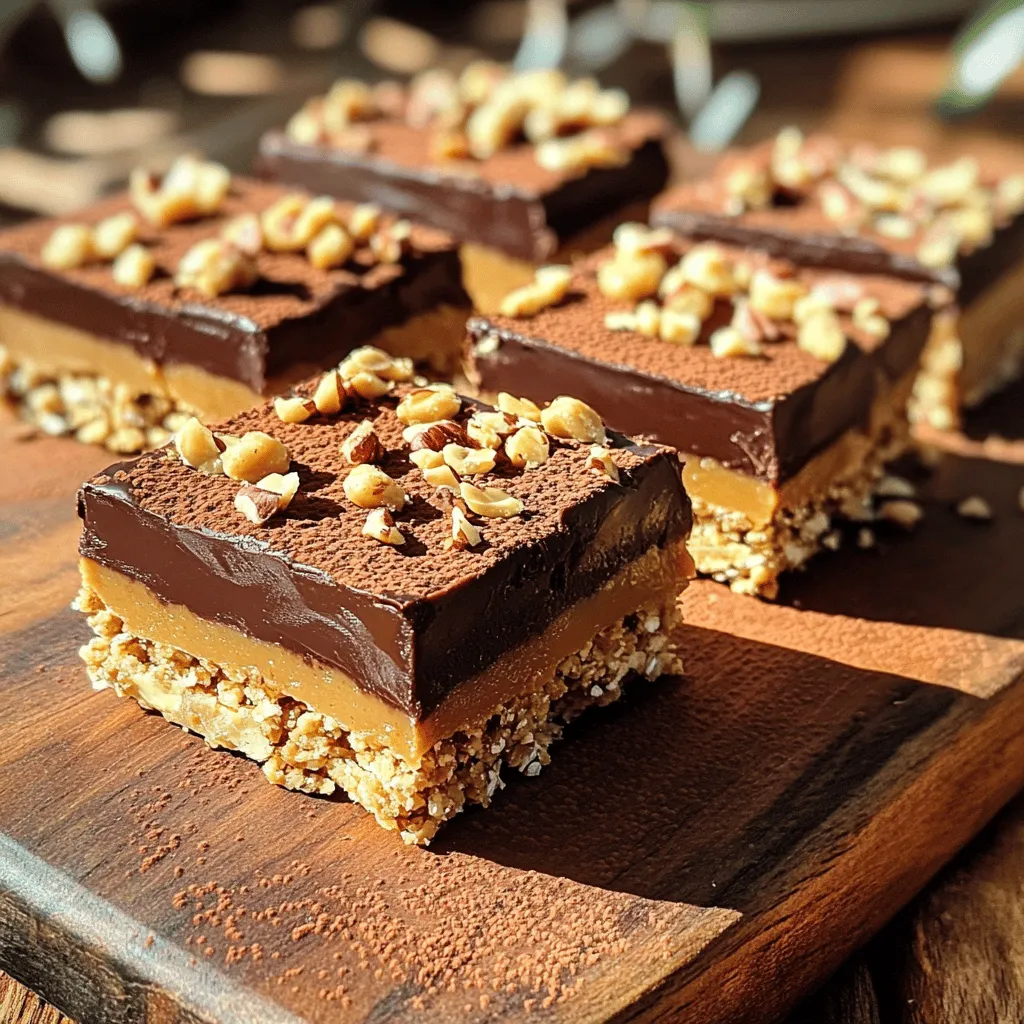
Ideal Serving Suggestions

When serving these bars, presentation matters. Place them on a wooden board. A light dusting of cacao powder adds a nice touch. You can also drizzle extra melted chocolate on top for flair. For a delightful pairing, serve them with a glass of cold almond milk. This combo enhances the rich flavors and makes a perfect treat.

Common Mistakes to Avoid

Be careful not to overmix the ingredients. This can make your bars tough and chewy. Mix just until everything is combined. Another mistake is not pressing the mixture firmly enough into the pan. Make sure to pack it tightly to ensure the bars hold their shape when cut. Following these tips will help you make the best no-bake chocolate peanut butter bars! For the full recipe, refer back to the section above.

Variations

Alternative Sweeteners

You can switch honey for agave syrup. This change keeps the bars sweet and smooth. For those who need sugar-free options, use a sugar substitute like stevia. These swaps make it easy to enjoy the bars without extra sugar.

Flavor Variations

Want to spice things up? Try adding a pinch of cinnamon or nutmeg. These spices give the bars a warm taste that’s hard to resist. You can also mix in shredded coconut or dried fruits. These add texture and a hint of tropical flavor that will surprise your taste buds.

Dietary Substitutions

If you want to make the recipe gluten-free, use gluten-free oats. They work just as well and keep the bars tasty. For a vegan option, choose dairy-free chocolate and a plant-based sweetener. This way, everyone can enjoy these treats.

Storage Info

How to Store No-Bake Chocolate Peanut Butter Bars

To keep your bars fresh, use an airtight container. Glass or plastic containers work well. Place parchment paper between layers to prevent sticking. If you want to store them longer, you can freeze them. Cut the bars into pieces and wrap each in plastic wrap. Then, place them in a freezer bag. They will stay fresh for about three months in the freezer.

Signs of Spoilage

Look for changes in color or texture. If your bars become dry or crumbly, it’s time to toss them. Fresh bars last about one week in the fridge. If you see any mold, that’s a clear sign to discard them. Always check for an off smell, which can mean spoilage.

Reusing Bars

Got leftover bars? Crumble them on top of yogurt for a tasty breakfast. You can also mix them into ice cream for a fun dessert. Another idea is to blend crumbled bars into smoothies for added flavor and energy. They can add a delicious twist to many recipes!

FAQs

Can I use crunchy peanut butter instead of smooth?

Yes, you can use crunchy peanut butter. The bars will have a different texture. Some people love the extra crunch. If you enjoy a bit of texture, go for it! Just keep in mind that it may change the mouthfeel slightly.

How do I make these bars vegan?

To make the bars vegan, replace honey with maple syrup. Use dairy-free chocolate chips. This keeps the bars creamy and sweet without animal products. You can also check for vegan-friendly coconut oil.

Is it possible to use other nut butters?

Absolutely! You can try almond, cashew, or sunflower seed butter. Each nut butter brings a unique taste. Almond butter gives a nutty flavor, while sunflower seed butter is great for nut allergies. Just make sure the texture is similar.

How do I know when the bars are fully set?

The bars should feel firm to the touch. You can also poke them gently with a finger. If they spring back, they are ready. Refrigerate them for about two hours for the best results. Enjoy your delicious creation!

You now have a simple and tasty recipe for no-bake chocolate peanut butter bars. We covered all the key ingredients, preparation steps, and a few tips to make it perfect. Remember, feel free to adjust sweeteners or add flavors that you like. The bars are easy to store and can last long if kept right. Enjoy making them and sharing with friends or family. You’ll impress everyone with your no-bake treats!

- 1 cup rolled oats - 1 cup natural peanut butter - 1/2 cup honey or maple syrup - 1/2 cup unsweetened cocoa powder - 1/4 cup coconut oil, melted - 1/2 tsp vanilla extract - Pinch of salt - 1/2 cup dark chocolate chips (optional dairy-free) - 1/4 cup chopped nuts (optional, for topping) To make these no-bake chocolate peanut butter bars, you need simple and tasty ingredients. First, get rolled oats for a hearty base. Then, use natural peanut butter to add that creamy, nutty flavor. Honey or maple syrup will give the bars a sweet touch. Unsweetened cocoa powder adds rich chocolate taste without extra sugar. Coconut oil is key for binding. It also gives a nice texture. A splash of vanilla extract enhances the flavor. A pinch of salt balances the sweetness. If you love chocolate, add dark chocolate chips on top. They make the bars extra special. For some crunch, sprinkle chopped nuts over the chocolate layer. Every ingredient plays a role in flavor and texture. Each bite should be a mix of sweet, nutty, and chocolatey. This is why I love this recipe. It is easy, quick, and so satisfying. You can find the full recipe in the article to guide you step by step. - Combine all dry and wet ingredients in a mixing bowl. - Line the baking pan with parchment paper. - Press the mixture into the pan. To start, grab a large mixing bowl. Add rolled oats, peanut butter, honey or maple syrup, cocoa powder, melted coconut oil, vanilla extract, and a pinch of salt. You want to mix these until they blend well and form a thick dough. This dough should be sticky but not too wet. Next, take an 8x8 inch baking pan and line it with parchment paper. Make sure to leave some overhang on the sides. This will help you lift the bars out later. After that, transfer your mixture into the pan. Press it down firmly with a spatula or your hands. It should be packed tightly and evenly across the bottom. - Melt dark chocolate chips in the microwave. - Pour and spread melted chocolate over the bars. Now, it’s time for the chocolate! Use a microwave-safe bowl to melt the dark chocolate chips. Heat them in 30-second intervals, stirring after each time until smooth. Be careful not to burn the chocolate. Once melted, pour the chocolate over the pressed oat mixture. Use a spatula to spread the chocolate evenly across the top. - Refrigerate until firm. - Lift and cut into squares or bars. After spreading the chocolate, place the pan in the refrigerator. Let it chill for about 2 hours. This will help the bars set and become firm. When they are ready, lift the bars out using the parchment paper overhang. Cut them into squares or bars as you like. Enjoy your delicious no-bake chocolate peanut butter bars! For the full recipe, check out the recipe section. To keep your no-bake chocolate peanut butter bars fresh, store them in the fridge. I recommend using an airtight container. This method prevents them from drying out and keeps them tasty. They stay fresh for up to two weeks. If you freeze them, they can last up to three months. When serving these bars, presentation matters. Place them on a wooden board. A light dusting of cacao powder adds a nice touch. You can also drizzle extra melted chocolate on top for flair. For a delightful pairing, serve them with a glass of cold almond milk. This combo enhances the rich flavors and makes a perfect treat. Be careful not to overmix the ingredients. This can make your bars tough and chewy. Mix just until everything is combined. Another mistake is not pressing the mixture firmly enough into the pan. Make sure to pack it tightly to ensure the bars hold their shape when cut. Following these tips will help you make the best no-bake chocolate peanut butter bars! For the full recipe, refer back to the section above. {{image_2}} You can switch honey for agave syrup. This change keeps the bars sweet and smooth. For those who need sugar-free options, use a sugar substitute like stevia. These swaps make it easy to enjoy the bars without extra sugar. Want to spice things up? Try adding a pinch of cinnamon or nutmeg. These spices give the bars a warm taste that’s hard to resist. You can also mix in shredded coconut or dried fruits. These add texture and a hint of tropical flavor that will surprise your taste buds. If you want to make the recipe gluten-free, use gluten-free oats. They work just as well and keep the bars tasty. For a vegan option, choose dairy-free chocolate and a plant-based sweetener. This way, everyone can enjoy these treats. To keep your bars fresh, use an airtight container. Glass or plastic containers work well. Place parchment paper between layers to prevent sticking. If you want to store them longer, you can freeze them. Cut the bars into pieces and wrap each in plastic wrap. Then, place them in a freezer bag. They will stay fresh for about three months in the freezer. Look for changes in color or texture. If your bars become dry or crumbly, it’s time to toss them. Fresh bars last about one week in the fridge. If you see any mold, that’s a clear sign to discard them. Always check for an off smell, which can mean spoilage. Got leftover bars? Crumble them on top of yogurt for a tasty breakfast. You can also mix them into ice cream for a fun dessert. Another idea is to blend crumbled bars into smoothies for added flavor and energy. They can add a delicious twist to many recipes! Yes, you can use crunchy peanut butter. The bars will have a different texture. Some people love the extra crunch. If you enjoy a bit of texture, go for it! Just keep in mind that it may change the mouthfeel slightly. To make the bars vegan, replace honey with maple syrup. Use dairy-free chocolate chips. This keeps the bars creamy and sweet without animal products. You can also check for vegan-friendly coconut oil. Absolutely! You can try almond, cashew, or sunflower seed butter. Each nut butter brings a unique taste. Almond butter gives a nutty flavor, while sunflower seed butter is great for nut allergies. Just make sure the texture is similar. The bars should feel firm to the touch. You can also poke them gently with a finger. If they spring back, they are ready. Refrigerate them for about two hours for the best results. Enjoy your delicious creation! You now have a simple and tasty recipe for no-bake chocolate peanut butter bars. We covered all the key ingredients, preparation steps, and a few tips to make it perfect. Remember, feel free to adjust sweeteners or add flavors that you like. The bars are easy to store and can last long if kept right. Enjoy making them and sharing with friends or family. You’ll impress everyone with your no-bake treats!

No-Bake Chocolate Peanut Butter Bars

Indulge in a delicious treat with these no-bake chocolate peanut butter bars! Perfectly made with rolled oats, natural peanut butter, and rich cocoa, this easy recipe only takes 10 minutes of prep time. Just combine the ingredients, chill, and enjoy a guilt-free snack that satisfies your sweet tooth. Want to impress your friends with your baking skills? Click through now to explore the full recipe and step-by-step instructions!

Ingredients
  

1 cup rolled oats
1 cup natural peanut butter
1/2 cup honey or maple syrup
1/2 cup unsweetened cocoa powder
1/4 cup coconut oil, melted
1/2 tsp vanilla extract
Pinch of salt
1/2 cup dark chocolate chips (dairy-free if preferred)
1/4 cup chopped nuts (optional, for topping)

Method
 

In a large mixing bowl, combine the rolled oats, peanut butter, honey or maple syrup, cocoa powder, melted coconut oil, vanilla extract, and salt. Mix until the ingredients are well incorporated and form a thick, sticky dough.
    Line an 8x8 inch (20x20 cm) baking pan with parchment paper, leaving some overhang for easy removal later.
      Transfer the mixture into the lined pan and press it down evenly using the back of a spatula or your hands, ensuring it is packed tightly.
        In a microwave-safe bowl, melt the dark chocolate chips in 30-second intervals, stirring after each interval until smooth.
          Pour the melted chocolate over the pressed oat mixture and spread it evenly with a spatula.
            If desired, sprinkle chopped nuts on top of the melted chocolate for added crunch.
              Refrigerate the bars for about 2 hours or until firm.
                Once set, lift the bars out of the pan using the parchment paper overhang and cut into squares or bars.
                  Prep Time: 10 minutes | Total Time: 2 hours 10 minutes | Servings: 12 bars
                    - Presentation Tips: Serve the bars on a wooden board with a dusting of cacao powder or a drizzle of extra melted chocolate on top for an elegant touch.

                      Leave a Comment

                      Recipe Rating