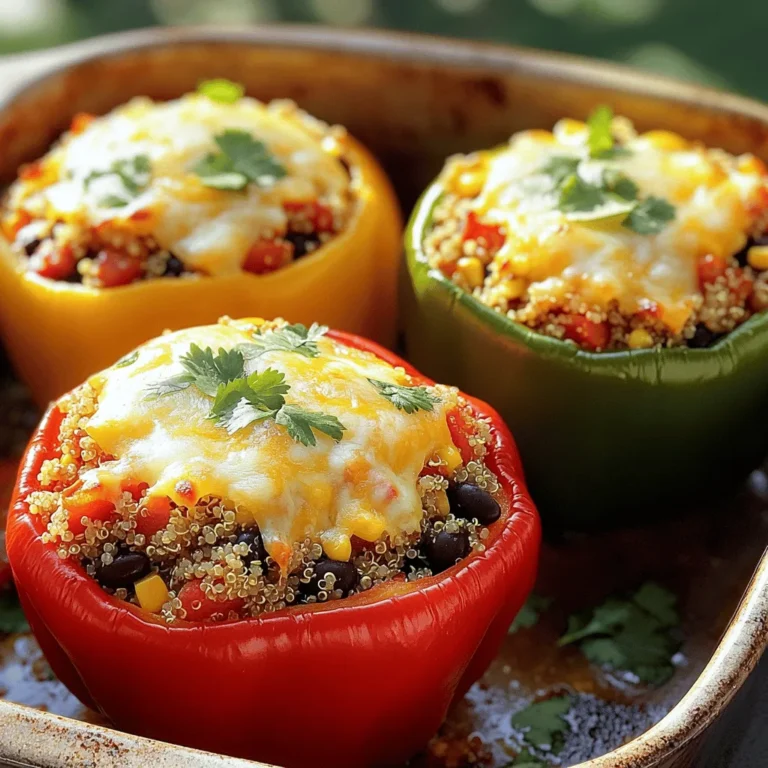
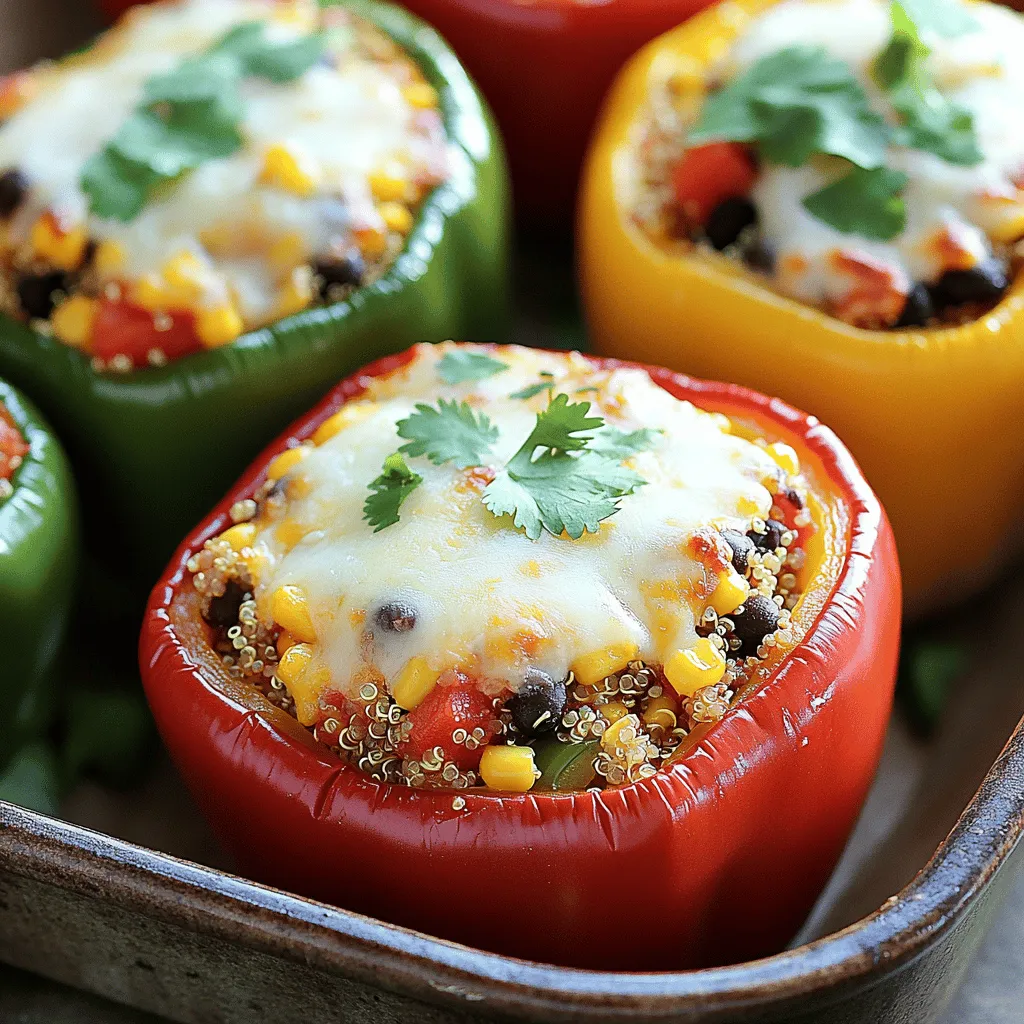
If you’re searching for a quick meal that’s both tasty and healthy, look no further! Savory Veggie Stuffed Peppers are the perfect choice. With fresh veggies and your favorite seasonings, you can whip up these delicious stuffed peppers in no time. Plus, they offer endless options for custom flavors to suit your taste. Let’s dive into the easy steps and tips to make this dish a hit in your kitchen!
Ingredients
List of Required Ingredients
To make savory veggie stuffed peppers, gather these fresh ingredients:
– 4 large bell peppers (any color)
– 1 cup quinoa, rinsed
– 2 cups vegetable broth (or water)
– 1 can (15 oz) black beans, drained and rinsed
– 1 cup corn kernels (fresh, frozen, or canned)
– 1 cup diced tomatoes (fresh or canned)
– 1 small onion, finely chopped
– 2 cloves garlic, minced
– 1 teaspoon cumin
– 1 teaspoon chili powder
– 1 teaspoon oregano
– Salt and pepper to taste
– 1 cup shredded cheese (like cheddar or Mexican blend)
– Fresh cilantro for garnish (optional)
Substitutions and Alternatives
Feel free to swap ingredients based on what you have. For quinoa, rice works well. Use lentils instead of black beans for a different protein. If you want a cheesy flavor without dairy, try nutritional yeast. For a spicy kick, add jalapeños or hot sauce. If you prefer other veggies, consider zucchini or spinach. These swaps keep the dish tasty and fun.
Nutritional Information
These stuffed peppers are not only delicious but also healthy. Each serving packs protein, fiber, and vitamins. Here’s a quick breakdown:
– Calories: About 350
– Protein: 15g
– Carbohydrates: 50g
– Fat: 10g
– Fiber: 12g
These numbers can change based on your ingredient choices. Always check labels for precise info.
Step-by-Step Instructions
Preparation Steps
Start by gathering your ingredients. You will need bell peppers, quinoa, black beans, corn, and diced tomatoes. I love using colorful bell peppers for a vibrant look. Preheat your oven to 375°F (190°C). Cut the tops off the bell peppers and scoop out the seeds. Place them upright in a baking dish.
Next, rinse the quinoa under cold water. In a medium saucepan, combine it with vegetable broth. Bring this to a boil. Once boiling, lower the heat, cover, and let it simmer for about 15 minutes. The quinoa should be fluffy when done.
While the quinoa cooks, chop your onion and garlic. Heat a skillet over medium heat. Add a splash of olive oil and the chopped onion. Cook until it turns soft, about 3-4 minutes. Add the minced garlic and cook for one more minute.
Cooking Process
In a large bowl, mix the cooked quinoa, sautéed onion, and garlic. Add the black beans, corn, diced tomatoes, cumin, chili powder, oregano, salt, and pepper. Stir until everything is well combined.
Now, fill each bell pepper with the veggie mixture. Pack it down gently to make room for more filling. Top with shredded cheese. Cover your baking dish with aluminum foil and bake for 25 minutes. After that, remove the foil and bake for another 10-15 minutes. The peppers should be tender, and the cheese should be bubbly and slightly golden.
Tips for Even Cooking
To ensure even cooking, try to cut the tops of the peppers evenly. Make sure they stand upright in the baking dish. This helps them cook uniformly. If you notice some peppers are larger, cut them to the same height.
Checking the peppers halfway through cooking is a smart move. If they look too firm, cover them again to help steam them. This way, you’ll get tender, delicious stuffed peppers every time!
Tips & Tricks
How to Perfect Your Stuffed Peppers
Start with fresh, firm bell peppers. They hold their shape well. Cut the tops off and remove the seeds. This step is key for easy stuffing. Pre-cook your quinoa in vegetable broth. This adds rich flavor. Mix your filling well, making sure every bite has a bit of everything. Pack the filling snugly into the peppers. This ensures they bake evenly.
Common Mistakes to Avoid
Don’t skip the seasoning. Salt and pepper make a big difference. Avoid overcooking the quinoa. It should be fluffy, not mushy. If your peppers are too soft, they can fall apart. Bake them just long enough to become tender. Using too much cheese can mask the other flavors. A light sprinkle is all you need.
Best Practices for Flavor Enhancement
Add fresh herbs to your filling. Cilantro, parsley, or basil brightens the dish. Consider a splash of lime juice for zing. It balances the richness of the cheese. You can also mix in cooked veggies like zucchini or spinach. They add color and nutrition. For a spicy kick, add jalapeños or hot sauce. These little tweaks make a big impact.
Variations
Ingredient Swaps for Different Flavors
You can easily swap ingredients in your stuffed peppers. If you want a different taste, try brown rice instead of quinoa. You can also add chopped mushrooms for a meaty texture. Swap black beans with kidney beans for a change. Adding olives can give a salty punch too. You can use any cheese you like, such as feta or goat cheese. Each swap brings its own flavor and charm to the dish.
Vegan and Gluten-Free Adaptations
To make the stuffed peppers vegan, skip the cheese or use a plant-based option. You can also replace the vegetable broth with water. For gluten-free options, ensure your quinoa is certified gluten-free. Most beans and veggies are naturally gluten-free, so they fit right in. This way, everyone can enjoy this dish, no matter their diet.
Spicy vs. Mild Stuffing Options
Do you like spice? Add chopped jalapeños or a pinch of cayenne pepper to your stuffing. For a milder flavor, leave out the chili powder. You can also add sweet bell pepper pieces for a touch of sweetness. Adjusting the spice level helps cater to your taste buds. Enjoy experimenting with the heat to find your perfect mix.
Storage Info
How to Store Leftovers
To keep your veggie stuffed peppers fresh, place them in an airtight container. You can store them in the fridge for up to four days. Make sure they cool down to room temperature before sealing. This step helps to keep the peppers from getting soggy. If you want to keep them longer, consider freezing.
Reheating Instructions
Reheating your stuffed peppers is simple. Preheat your oven to 350°F (175°C). Place the peppers in a baking dish, cover them with foil, and heat for about 20 minutes. You can also use a microwave. Just place a pepper on a microwave-safe plate and heat for about 2-3 minutes. Check if it’s warm throughout before serving.
Freezing Tips
To freeze the stuffed peppers, wrap each one tightly in plastic wrap. Then, place the wrapped peppers in a freezer-safe bag. They can stay frozen for up to three months. When you’re ready to eat, thaw them overnight in the fridge. Reheat as mentioned above. This way, you’ll have a quick meal ready anytime!
FAQs
How can I make Veggie Stuffed Peppers ahead of time?
You can prep the filling a day early. Cook the quinoa and mix it with the other ingredients. Store this mixture in the fridge. When you’re ready to eat, stuff the peppers and bake them. This method saves time and keeps your meal fresh.
Can I use other types of peppers?
Yes! You can use any bell pepper color. Green, yellow, or red all work well. You can also try poblano or jalapeño peppers for a twist. They add unique flavors and heat. Just ensure they are large enough to hold the filling.
What can I serve with Veggie Stuffed Peppers?
Veggie stuffed peppers pair well with many sides. A simple green salad adds freshness. You can also serve it with rice or a grain bowl. For a hearty meal, try corn on the cob or garlic bread.We discussed the needed ingredients, their substitutes, and key nutritional facts. You learned step-by-step instructions for prepping and cooking, along with tips for the best results. We explored variations, like vegan options and flavor swaps, as well as proper storage methods.
Using this guide, you can create tasty, healthy meals that fit your needs. Happy cooking!

